mmam issue14 2014
DESCRIPTION
Meet an artist that uses natural materials to create beautiful works of art- you will never look at a banana peel the same. Beth Yazhari shares Part II of her tutorial on including jewelry and vintage textiles into We have hooked up with Golden Paints to explore the uses of GAC 200- a cool thick liquid mixed into acrylics that paints on non-porous, rigid surfaces. A great tool for We also talk with Bridget Benson about her book Creative Conversations. A new breed of art books that stimulates the creative self while posing questions to our process. + a bunch of other cool stuff.TRANSCRIPT

+ MORE ArtistS tUTORIALS AND A LOOK AT CREATIVE CONVERSATIONS
Destination Brooklyn Ins and Outs of
Artistsrsquo Haven
ArtistsTECHNIQUEStools Issue 14
Golden GAC 200 ReviewIdeal Additive
NATURAL BEAUTy Making Art From Nature
Drawing 101 Fresh Faces
itrsquos in the DetailsPart 2 of our Tutorial
MIXED MEDIA
MAG
AZIN
EAr
t
MIXEDMEDIAARTIssue 14
Gold Heart by Anastasiya Kovaleva
MIXEDMEDIAARTIssue 14
Questions Comments Drop us a line at editormixedmediaartmagazinecom
progressing to new platforms
now available on
Look for our upcoming HTML5 version which will play on any device
r e g U l a r s
Letter FROM
THE eDitor
MIXEDMEDIAARTIssue 14
Dear Readers
This issue has been surrounded by a lot of hectic backroom activity for Mixed Media Art Magazine We are almost ready to launch a version that will work on any device as well as our first Print version via Amazon Make sure you sign up for our email newsletter here to catch up on MMAMrsquos evolution We are pretty excited about the big step forward we are making and have a dedicated staff working hard to smooth out all the techy tangles
In the meantime this issue has some great content Our cover artist Anaystyacia Kovaleva is from Belarus and makes banana peels onion skins and cardboard into beautiful works of art
We have Part II of Beth Yazharirsquos tutorial on how she makes her incredibly detailed piecesalong with an article on the Arts and Crafts Movement that has influenced Yazharirsquos work I especially appreciate Bethrsquos creative philosophy of melding her own art into previous generationsrsquo craftwork to create a multi-generational piece I love the idea of blending all those different creative energies into a culminated piece of intense detail and symmetry Full disclosure Beth lives down the street from me and I have had the pleasure of viewing her work up close It is really a sight to see
Susan Walls Beverly shares a three-part tutorial on using PolyShrink- a plastic material that can be shrunk down into a thicker plastic shape Susan has done some really neat small pieces with PolyShrink It is a material that deserves a closer look
Brandy Colins shows us how to incorporate collage and acrylics into a painting
MIXEDMEDIAARTIssue 14
Bonnie Meltzer plays around with GAC200 a GOLDEN Paint product that gives acrylic paint the ability to pretty much coat any surface It is a cool product and launches a new section focused on product explorations Bonnie took offense to the term product review so we have changed the focus to playful explorations I have to admit I like this approach better
If you try out GAC200 or already use it in your artwork drop us a line with high definition images or post to Facebook so we can check it out
Christy Turner shares her ability to intertwine embroidery and obsession with anatomy
Brenda Hoddinott teaches us the ins and outs of learning how to draw faces it is mathematical
We wrap up Issue 14 with Conrado Melato- an interesting Cuban-born artist who has landed in Brooklyn NY His work is raw and quite primal in a way I find him intriguing and hope you do too
Happy Reading
Luisa
You can email the editor for more information
DisclaimerMMAM considers its sources reliable and verifies as much information as possible However reporting inaccuracies can occur consequently readers using this information do so at their own risk Artsy Fartsy Publishing cannot be held responsible for the outcome of any action or decision based on the information contained in this publication andor the website The publishers or authors do not give any warranty for the completeness or accuracy for this publications content explanation or opinion We add links from our articles to other websites to help you find more information related to certain ideas However MMAM cannot be held responsible for the content of any external site linked to from within this document No part of this publication andor website may be reproduced stored in a retrieval system or transmitted in any form without prior written permission of the Publisher Permission is only deemed valid if approval is in writing
copy Copyright 2014MIXED MEDIA ART MAGAZINE619 SW 11th Avenue Suite 250
Portland OR 07205ISSN 2333-4282 (online)
E-mail editormixedmediaartmagazinecomWeb wwwMixedMediaArtMagazinecom
Skopje MacedoniaAleks
Barnabas Kimani
Califonia
Luisa
Nairobi Kenya
Beh Yazhari
Christy Turner
Brandy Collins
Tracey Greer
Australia
Conrado Melato
Brenda Hoddinott
Portland Oregon
Susan Walls Beverly
Southern California
Lexington
Indianapolis
Patti Edmon
Brooklyn
Raleigh
Bonnie Meltzer
Cypress
Nicholas
SerbiaAna Bambic Kostov
ONLINE10x per year wwwMixedMediaArtMagazinecom
Editor and PublisherLuisa Nims
Editorial AssistantAleksandra Mihajlovska
Issue EditorTwin Miracles Editorial Technical Administrator Chris Anderson
Published ByArtsy Fartsy Publishing LLC
Magazine DesignBarn Creative Media Ltd in cooperation with Mixed Media Art Magazine (MMAM)
MIXEDMEDIAARTIssue 14
MIXEDMEDIAARTIssue 14
Beth Yazharirsquos its in the details
- Part II video tutorial
anaystyacia Kovaleva
Making art from natureDifferent kinds of natural
material and their preparation
patti edmon tutorial
Brandy Collins - tutoriallove Birds 2 electric Bugaloo
Diana Darden product review
Christy turner - embroidery Bonnie meltzer - product exploration
Drawing 101 Conrado melato
CONTENTS
polyshrinkMakes Complicated
shapes possible
Have you ever thought about making art from natural materials There are a lot of flowers leaves and
twigs on the ground that you are convinced can create wonderful art Probably your first thought of floral art is using mostly dried pressed flowers and something typically associated with nature like stones sticks bark But the natural the world is much wider For your unique art you should think more globally I will try to push your mindrsquos boundaries to understand this wonderful kind of art
We would like to bring nature into our lives as much as possible There are so many opportunities to learn and explore with natural materials Hunting for really unique and special materials is an integral part of the creative process Most of these items can be found for free right out of your door Woodland fields parks and your kitchen are the sources of your inspiration Art starts with searching and preparing materials The more materials with different colors and textures you have the more interesting work can be made Once you have a wide array of treasures you can put them together in an interesting way for creating a masterpiece
GettinG started
Some natural materials that can be used
bull onionskin bull bananapeel bull fishscales bull seashells bull feathers bull eggshells bull sepals bull seedsandnuts bull woodslices bull moss bull bark bull allkindofplantsflowers
maKing art FInDIng MATErIAls In THE worlD ArounD us
from natUre
MIXEDMEDIAARTIssue 14
These are my favorite kinds of materials that I use intensively in my collages It allows me to create very delicate art but requires a lot of time and accuracy Of course every artist is looking constantly for his own material But floral art isnrsquot only natural colors and smooth lines You can mix anything you like
Save and collect materialsbulllaceribbonwooltextilescraps cord beads bullhandmadepaperrecycledcardboard bullceramicplates(usingbrokenelements) bullglass bullacrylicpaintandvarnishes
Natural materials can be used in a wide range of ways to promote wonder curiosity and enthusiasm for learning It
can be in the form of collages sculptures handmade cards or the decor of any item Look carefully around you and start a collection of natural things
ColleCtinG and dryinG
When yoursquore exploring nature being well-prepared for the elements is the key to your hunt for treasures Take a lot of packages scissors and pruners Every season has its special features but there is never a time when collecting natural material is altogether impossible Ideally you should pick up material in dry weather But if you collect material in rainy weather you should dry it as soon as possible The best way of drying thin material is using old newspapers and books You should check out material at least once a day When you bring newfound materials home leave
MIXEDMEDIAARTIssue 14
them outside for several days This will get rid of unwanted insects and prevent the material from drying out
at the kitChen
Sometimes it is funny to comment on what I used in collages I couldnrsquot bring myself to call my materials such as onion and garlic skin banana peels or eggshells by the name lsquofood wastersquo because they are really cool elements with amazing texture and colors There is not any special preparation Just clean and dry
From the banana skin you can make thin branches of a tree or contours of graphic works First of all you need to put the banana skin on a smooth surface and remove all the flesh with a knife Then put it under the press and make interesting shapes such as a rose The best place to store your materials depends on what kind they are I prefer cardboard boxes and packages
Garlic skin is a great material for imaging flowers glare on the water or glass surfaces
Eggshells have a lot of variations They have different coverage areas direction of material and color that can give so many interesting ideas In the kitchen you can find lots of useful things like tea or different kinds of groats
Floral collage gives you lots of wonderful opportunities You can constantly look for new materials and technologies Art from nature unites natural elements with artistic vision for creating artwork that pushes the boundaries of what art is and how we perceive ourselves in the natural world
Black Garden My natural picture consists of paper recycled cardboard transformed into roses and other shapes onion skin eggshell acacia For some materials I used acrylic paint My mixed media recycled artwork can broaden intellectual understanding and help engender an intuitive appreciation of the environment
Beautiful Bug This work is inspired by nature organic forms and natural colors I used sticks skeleton leaves eggshells and flax Sticks were modified I made them into thin wood slices
MIXEDMEDIAARTIssue 14
Paradise Garden I used cord feathers beads different kinds of flowers and leaves fish scales and melon skin It is the garden which always will be Paradise and it is not the bone of contention but an image of serene happiness
The Last Flowers of Autumn This work is a huge mix of natural elements You can see here only natural colors I havenrsquot used acrylic paints Coffee raffia different kinds of leaves pressed flowers garlic skin beads melon seeds and melon skin
MIXEDMEDIAARTIssue 14
Gold Heart This collage was made in a simpler technique All elements have volume which allows me to glue elements quickly I used seashells dried flowers textile roses raffia skeleton leaves paper and feathers
I have been learning about natural art for seven years since I was a kid when I spent my days making simple artworks in a studio of floral design There is nothing more natural to me than to work with organic material using it to give new life
In 2011 I graduated from Belarusian-Russian University with a degree in commerce After that I worked as an analyst for three years then decided to make art for myself just to see if I could do it Now Irsquom a full-time artist In 2009 I took first place in the 6th International and 6th International Competition
of Contemporary Art in Moscow during Russian Art Week
In 2013 I became a winner of the 10th Competition of Pressed Flower Pictures ldquoExhibition of Creationrdquo in Japan and winner of the International Competition of Pressed Flower Art in South Korea
AnAystyAciA KovAlevA
MIXEDMEDIAARTIssue 14
Beth Yazhari
tap hereTo watch Video
PArt ii tutoriAl
itrsquos in the Details
MIXEDMEDIAARTIssue 14
bull Saran wrap
bull Acrylic paintsmdashI prefer Golden for paints and medium
bull A few brushesmdashinexpensive ones for creating paint washes and for adhering fabrics to canvas with medium or glue
bull A variety of vintage textiles doilies trims beads brooches etc
bull Acrylic matte mediummdashto adhere thin textiles to the canvas
bull Mod Podge or Golden molding pastemdashthese stronger adhesives are useful for adhering heavier textiles to the canvas
bull Canvasmdashthink of your stretched canvas as an embroidery hoop I often like to work on square canvases which lend themselves well to round doilies
bull Jacquard fabric sheets (optional)mdashthese are great for transferring your own photos or other images onto fabric so they can be collaged onto the canvas and sewn into
bull Beading needlesmdasha variety of sharps and other sewing needles can be used but it is nice to have some needles specifically designed for beading for the occasionalbeadswith tinyholes (Ponysize 12 beading needles are good)
bull Beadalon Dandylinemdashsuper-strong bead weaving and stringing thread or Beadalon Wildfire beading thread
Bethrsquos MAteriAls
MIXEDMEDIAARTIssue 14
Beth yAzhAri Bio I make art that celebrates reflection craftsmanship and time-consuming labor in the pursuit of beauty I strive to make spiritually uplifting art to create oases of beauty and wonder in a frenetic society that is increasingly in need of both
Discarded doilies and remnants of embroidered fabrics are a source of inspiration to me by rescuing them and recycling them into my beaded paintings I hope to honor and collaborate with the creative spirit of generations of women who have gone before me whose handiwork has often been ignored because it was not created to be displayed in a gallery
Making my art is truly a sacred act for me I feel that creating artwork in a spirit of service to humanity is a form of worship
MIXEDMEDIAARTIssue 14
By Ana Bambic Kostov
The turn of the 19th century brought the Arts and Crafts Movement from England to America The
ideas and ideals of British intellectuals John Ruskin and William Morris dispersed throughout the United States by the means of journal and newspaper writing Important factors in the Movement were societies that promoted various lectures and programs There was no single center of the Arts and Crafts Movement first it was strong in Boston then in Chicago Minneapolis and New York
Rose Valley Community a social and artistic experiment was founded in 1901 in Pennsylvania with a shop offering hand-made furnishings pottery metalwork and hand-bound books The second community of this sort was Byrdcliffe Arts and Crafts Colony based outside of Woodstock New York
In the cities activities were limited to local communities and often focused on the education of young womenwho were taught to make pottery and work with textiles or metal and jewelery The Arts and Crafts Movement in America was not centered around one philosophical idea rather it represented a large group of creative individuals Traits of the movement differed depending on geography and social status especially as the movement spread from the East Coast through the Midwest to CaliforniaThe result was many new pottery workshops or furniture factories followed by a thriving revival of handiwork as the most natural way of production with beautiful results Although the American Arts and Crafts Movement waned after World War I the influence of this socially engaging action stayed
Its InFLuence cAn stILL Be FeLt tOdAy WIth ARtIsts LIKe Beth yAzhARI tAKIng the ReMnAnts And ReFAshIOnIng
these PIeces IntO neW FORMs
the arts anDCrafts movement
MIXEDMEDIAARTIssue 14
Throughout the 20th century a myriad of women engaged themselves in often necessary sewing knitting embroidery and stitching They were grandmothers and mothers women who gave their best to making beautiful and functional items for their families Their names were largely forgotten but their impact can still be felt and seen
Artist Beth Yazhari is greatly inspired by the handicraft of the women of the past finding her own expression in collecting and recycling items made across the planet Embroidery or crochet from different cultures can be found in her studio right next to precious family heirlooms or old beads and buttons Beth is a schooled artist and painting remains the base of her work while her style is built through recycled materials made of vintage craft By using old handiwork as the key element in her elaborate artwork Beth honors endeavor dedication and creativity of women everywherewho felt the need to design beauty but were never able to realize recognized artistic careers
Creative ProCess of Beth yazhari The hunt for ostentatious art material is where Beth Yazharirsquos creative process begins Art supplies she collects are beautiful fabrics stitching doilies old beads or brooches Vintage items she finds at estate sales coupled with the
Internet Beth usually conducts her searches on eBay or Etsy where she will bid on anything that catches her eye from Dutch needlework to Native American medallions
The materials she works with most are cross-stitched and hand stitched handkerchiefs crochet doilies sari fabric old brooches and appliqueacutes Contemporary materials are not exempted from Bethrsquos creative process as she combines the old with the new including ribbons and fabrics
the PaintinG teChnique
Yazharirsquos underpainting technique is the foundation of her process Beth uses Saran wrap to create a rich base for her detailed work By layering colors the final result is full and velvet-like which serves as a chromatic inspiration to the artist
First she takes a blank stretched canvas which
can be found at any art supply shop Beth wets the canvas with a very light layer of water wetting a brush and applying it over the area intended
She drips several drops of acrylic paint directly onto the canvas without exaggerating If the paint is very liquid she uses matte medium to stabilize it
In the layering process she combines two or three colors to achieve the desired result
Using water alone to dilute acrylic paint
Beth uses a piece of saran
wrap a little bigger than the size of canvas to cover the
paint
MIXEDMEDIAARTIssue 14
may result in chipping when the color dries If the paint is thicker matte medium may not be necessary Itrsquos important to know that too much of the matte medium can create tangible texture on the canvas which is not advised if adhering fabric or beads is planned as the next step
Once she adds the color and medium she spreads it around the canvas evenly with a brush
Beth uses a piece of Saran wrap a little bigger than the size of canvas to cover the paint
Pressing the wrap onto the painted area playing with it she makes creases and wrinkles which will create an interesting pattern when dry
She allows for the paint to dry for about an hour or two Drying can be sped up with a hair dryer or heater
When the paint is completely dry the artist peels the Saran wrap off and the first layer of the underpainting is done
This process can be repeated several times sometimes up to 20 layers to add to intensity of color The final effect is canvas with a surface similar to fabric
When the paint is completely dry the real creation can start
Beth applies fabric cut-outs on the canvas stitching with a strong thread while using adhesive occasionally Her composing process is very similar to collage with less overlapping
If the applied material lacks color but has complex stitching she emphasizes the embroidery by painting around it in contrasting nuance For example
when she applies a handkerchief hand-embroidered elements that are all white she would paint around these elements in dark color to create a more dramatic effect
When the fabric is cut and applied onto the canvas the most intricate elements are added Beth emphasizes the details with beadwork and sews small beads around the edges of decorative patterns to tie the piece together
The central piece of her works is often reserved for the crowning jewel - a vintage brooch or a particularly beautiful decorative ornament always being mindful of color coordination
Beth Yazharirsquos creative process allows a lot of freedom for the artist in choosing from an endless pool of colors materials and patterns while also allowing her to be engaging and playful
The Arts and Crafts Movement emerged during the late Victorian period in England the most industrialized country in the world at that time Anxieties about industrial life fueled a positive revaluation of handcraftsmanship and precapitalist forms of culture and society Arts and crafts designers sought to improve standards of decorative design believed to have been debased by mechanization and to create environments in which beautiful and fine workmanship governed The Arts and Crafts Movement did not promote a particular style but it did advocate reform as part of its philosophy and instigated a critique of industrial labor as modern machines replaced workers Arts and Crafts proponents called for an end to the division of labor and advanced the designer as craftsman
Click here for more information
MIXEDMEDIAARTIssue 14
susAn Beverly WAlls tutoriAl on shrinK PAPer
tap hereTo watch Video
tutoriAl on shrinK PAPer amp Mixed MediA
tap hereTo watch Video
MIXEDMEDIAARTIssue 14
susAn Beverly WAlls tutoriAl on shrinK stAMPinG
tap hereTo watch Video
MIXEDMEDIAARTIssue 14
susAn WAlls Beverly A dozen or more years ago I ended my 20-year era of restaurant management and searched for a way to work from home Loving all kinds of paint I began murals for my kids that blossomed into a word-of-mouth business As my kids grew up I knew I wanted to be more creative and branch out into other artsy things In 2001 I started doing art and craft shows around Southern California and havenrsquot looked back since
My current obsession is designing making and traveling with my line of thematic crazy jewelry Charming Trinkets My designs incorporate a myriad of materials from shrink plastic to resin to a mix of metals It is infused with my belief that life is too short to be too serious and you
need to make some loud laughter while yoursquore here If I can make you smile or touch you emotionally I know Irsquove done my job
Each day my house is infused with family laughter and thoughts of the creative Irsquom pleased as punch to be able to spread it around
MIXEDMEDIAARTIssue 14
Artist Diana Darden made these figures from Lucky Squirrels PolyShrink She found with a small learning curve that the material was versatile enough to recreate versions of her masonite dolls
Find these products at Lucky Squirrel Here
MIXEDMEDIAARTIssue 14
I launched my blog Altered Attic in 2008 It is named for the third floor of our old brick four-square
which had been finished with plenty of light electricity and enough space to accommodate two working artists and storage for the shelving bags bins and boxes of stuff and art supplies
Though my style continues to evolve mixed media collage is my medium of choice If my hands are covered in glue and paint it has been a good day The backgrounds I texture and paint on canvas or board (mostly smaller than 12rdquox12rdquo)light switch plates puzzle pieces and tins are the inspirational beginnings and often my favorite part of the process
My most recent work is a series of seven 12rdquox12rdquocradledcanvasesFind her work here I used the backside to create a shadow-box effect and after completing each textured and painted background I incorporated Frozen Charlottes vintage papers and book covers bits of jewelry twine lettering and other repurposed objects
I used pieces from a childrsquos floor-puzzle book to create a Cloud Poem book Click here to view I altered five puzzle pieces and incorporated a poem I had written after spending an afternoon floating on my back in our favorite lake spot
the Journey
My passion for mixed media art stems from my love for (acrylic) painting and usedvintage or just old stuff that has already had one life Part trash part treasure I find it a creative and meaningful way to repurpose items that others might discard or overlook Discovering that realistic drawing wasnrsquot a requirement for making art was another significant positive While I appreciate most all forms of art I believe that the notion of landscapes and portraits has derailed many a blossoming artist
Painted background with digital photo ndash vase in front of a mirror ndash embellished with wire flowers mesh vintage Swarovski crystals board and small faces peering through the lsquowindowsrsquo in the textured paper background
altereD attiC anD proCess
MIXEDMEDIAARTIssue 14
Pattirsquos ProCess
Typically I start with a background and no clue or vision of the finished piece I donrsquot sketch beforehand and rely totally on the intuitive nature of process Once a canvas or other substrate is prepped and painted I sort through images papers and rummage through my stash for found objects that seem to relate because of texture color or its prior use Based on the materials Irsquove pulled I may modify the color palette and I usually have a mess to clean up when Irsquom finished because the broken earring brooch fork key bottle scrap of wood or rusted wire didnrsquot lend anything to the design I always know when I am finished but truthfully it is a feeling of overdoing or rearranging which helps me put it aside for a day or so then go back tweak and glue
tiP
My biggest hurdle aside from getting enough time in the studio has always been over-thinking The part of the brain that reminds us about unfinished dishes obligations errands and other means of procrastination needs to be shut off Completely Irsquove researched the artistic process and its hindrances extensively Most of the advice boils down to the same core idea We create because of a need or longing not because itrsquos fun convenient or easy The daily challenge is to eliminate the ways we find to sabotage delay and otherwise prevent ourselves from doing what we love
Painted textured background with 1980s photo layered over vintage tobacco paper fabric and mesh finished with rusted wire and sticks
My art has been sold exhibited (infrequently) appeared in e-zines andI participate in swaps and challenges however the love of process is my primary reason for making mixed media art This notion is counterintuitive to most everything we learn growing up particularly those of us raised in a non-creative business-dominated environment where product and profit make more sense than curiosity for the sake of experimentation
The limitations of a chronic illness and raising a family may reduce my art-making time but creativity is a thread woven throughout the fabric of very being
MIXEDMEDIAARTIssue 14
Background painted and tinted with Pan Pastels photograph from the 1980s framed on vintage book covers embellished with mesh and lace trim
MIXEDMEDIAARTIssue 14
C reativity has been woven through my life since childhood In my preteen years I did pencil sketches and wrote poetry which evolved over the years to include essays
narrative nonfiction and fiction In the mid 1980s photography became another passion and for several years before my children were born I shot medium-format film and spent many happy hours in the darkroom Chemicals and pregnancy are not a good matchhoweversoaftermy(nowteenaged)childrenwerebornI switched to digital photography
In 2006 after being diagnosed with a chronic illness that launched me into early retirement art became my new career I have worked in various forms of collage altered objects such as small tins books cigar boxes puzzle pieces and made books from tissue boxes and other scraps along with painting and mixed media art
Last summer I had the idea to create pieces using my history of creative disciplines I chose several photos each the starting point for these mixed media pieces My plan was to use paint found objects and as many art supplies as possible
The process ndash which took several months for each piece ndash began with a heavily textured painted background on an 8x10 canvas using colors to accentuate and complement the chosen photo Finding the rest of the materials was no problem as Irsquove acquired significant stashes of fabric broken jewelry buttons lace trim scrap wood and sticks art paper vintage papers found metal objects mica eyelets brads fibers and on one piece moss that I sprayed with various colors of glitter mist
patti edmon
Artist Profile
Process background painted using stencils and acrylics a black and white photograph from the 1980s ndash tinted with watercolor pencils and layered on an 8x10 canvas with fabric scraps trim buttons and flocked wallpaper
MIXEDMEDIAARTIssue 14
Once I had decided on a rough composition I layered and added elements allowing the piece to come to life complete with a theme and message
One of the most fulfilling aspects of this project was the problem-solving process common to any artist who creates intuitively used to make each layout work Like most artists I have a tool box with the usual hammers knives snips pliers an assortment of wire texturing tools and screwdrivers an eyelet setter and block punches a Dremel heat gun beeswax melting pot all of which were used while working on this series
My husband and I share a dedicated studio in the attic of our house built in 1900 We hired a contractor to finish the space with drywall flooring ample electrical outlets ceiling fans a storage closet lighting and a comfy window seat with cushions and pillows I donrsquot spend much time sitting there but from my table I can look out at the tops of trees through a 3rsquo x 6rsquo original window fitted with Plexiglas for insulation
I work in a sketchbook but donrsquot use it as an art journal When I write itrsquos usually several pages This series is very symbolic a personal integration of my lifersquos creative journey
Background painted over layers of paper digital photo with fabric wings tinted silver stars pearls fabric flowers and tinted moss
MIXEDMEDIAARTIssue 14
PAtti edMon I am a lifelong creative and professional writer and ran a marketingadvertisingdesign business until 2006 when I retired (very) early due to an autoimmune illness My husband and I are raising two teenagers in an old house in downtown Lexington Kentucky with two dogs and a cat
As any artist knows a well-stocked studio is vital to fulfilling creative ideas Working in mixed media explains why Irsquove always collected certain things from small boxes tins and bottles every kind of paper jewelry and books to old puzzles scrap metal and rusty bits
Textured painted background with recycled Sari ribbon and art paper digital photo and an excerpt from my essay on friendship on a vintage book cover A grunged cardboard frame is attached with looped brads and wire over old screen Eyelets with wire wrapped around sticks over three layers of mica to frame the text
MIXEDMEDIAARTIssue 14
love BirDs 2 eleCtriC BUgaloo
BRAndy cOLLIns
step 1 Gathersupplies(Seesupplylist)Rememberinmixed
media nothing is trash Any old papers stamps magazines old book pages scrap book pages painted papers textured paper old
drawings Irsquove done and other media remixed
tutorial
MIXEDMEDIAARTIssue 14
step 2 Sketch a rough
design
step 3 Using watered down
acrylics create the base painting with a color
scheme of your choice
MIXEDMEDIAARTIssue 14
step 4 I tear pages and start assembling shapes and colors that fit in various places either by conundrum shape color or texture I seal them with the matte medium I use matte medium because itrsquos easier to paint and draw on for the detail work I had some French Toile Tissue Paper and tore various scenes out of it to place in the background and using a fine paint brush I carried the scenes into the background and painted shadowing around it In the autumn version of this piece I kept the background mainly torn pages of various greens and drew leaf vein patterns on the diamond-shaped pieces This one I used a blue painted background blue painted torn book and music pages and blotted different shades of paint for clouds and texture
MIXEDMEDIAARTIssue 14
step 5 Detail work Using a fine paintbrush black Micron pen or photo pen I add the detail work I often go back and forth from collaging to detail work My canvas goes from easel to table many times throughout the process My goal is to make things look surreal in my illustrations
Hint Tweaking sometimes means I pull out pieces that Irsquove added but decided they deter from the main design For example in this piece I removed a stamp that took away from the focal point I love ldquobusyrdquowheneverypieceIaddisworkingasateamhellipbutnotonegreat stamp stealing the show which sometimes happens and in that case things can be steamed off with a hot rag or scraped off
MIXEDMEDIAARTIssue 14
step 6 Keep collaging and painting the most important thing to remember is to enjoy the process
before stamp is removed
MIXEDMEDIAARTIssue 14
Brandy CollinsBrandy Collins is a self-taught artist who works in mixed media primarily watercolors acrylics and ink She draws her inspiration from nature art music folk art and anything vintage or Gothic Her abstractrealism paintings and illustrations have been featured in galleries such as the Janette Kennedy Gallery and Kettle in Dallas Texas as well as art festivals and charity auctions in Dallas Austin and Hawaii She is a native of Hampton Virginia but currently resides in Raleigh North Carolina You can reach her here
final signed image
MIXEDMEDIAARTIssue 14
BooK
1Chapter 1 Making This Book Your Own 1Chapter 1 Making This Book Your Own
The Creative ConversationRediscover the Joy of ArtMaking
Approaching creativity as a form of spiritual practice artist and creativity guide Bridget Benton breaks the creative process down into its most basic components and o ers a fresh perspective on developing your creative skills Whether you are creatively blocked burned out or just want to further explore the world of making you can make art and have fun doing it
With 24 hands-on Artful Explorations ndash interesting and varied enough to suit both beginners and professionals ndash this ldquoworkshop in a bookrdquo helps you
bull Make art that re ects your authentic inner voice bull Practice the 12 Actions and A itudes of artmaking that support creative owbull Develop a more consistent practice with your artmaking bull Engage with your art in a meaningful and mindful waybull Move more easily through resistance judgment and other blocksbull Create a more connected intuitive and playful relationship with your artmaking
Author Bridget Benton has worked as a professional artist facilitator and workshop leader for over 20 years helping hundreds of adults rekindle their creative spark She holds a Master of Science in Creative Studies from the International Center for Studies in Creativity at the State University of New York and has taught intuitive creative process at events across the country She currently lives and paints in Portland OR
ldquohellipA breakthrough book It will serve as a beacon for a new generation of creative people as well as deepen the conversation for those already interested in bringing the metaphor of art-as-a-way-of-being more fully into their livesrdquo ndashStewart Cubley co-author of Life Paint amp Passion and director of e Painting Experience
ldquoBridget Bentonrsquos directness and honesty are refreshinghellip is book is a MUST READ for anyone interested in growing both artistically and spirituallyrdquo ndashBee Shay author of Collage Lab
ldquoIf the idea of creativity as a spiritual practice excites you then yoursquoll love this book If that idea scares you this book will take you gently by the hand and help you past those fears Either way yoursquoll soon be making yourself a more vibrant liferdquo ndashDiane Gilleland former editor of CRAFT online and author of Kanzashi in Bloom
Photo by Michael Burton
ArtMaking as Playful PrayerArtMaking as Playful PrayerArtMaking as Playful PrayerArtMaking as Playful PrayerArtMaking as Playful PrayerArtMaking as Playful Prayer Bridget Benton Bridget Benton Bridget Benton
TH
E C
RE
AT
IVE
CO
NV
ER
SA
TIO
N A
rtMakin
g as P
layful P
rayer
Brid
ge
t Be
nto
n
Bridget BentonRevIeW
MIXEDMEDIAARTIssue 14
173Chapter 1 Making This Book Your Own174 The Creative Conversation Artmaking as Playful Prayer
The Creative ConversationRediscover the Joy of ArtMaking
Approaching creativity as a form of spiritual practice artist and creativity guide Bridget Benton breaks the creative process down into its most basic components and o ers a fresh perspective on developing your creative skills Whether you are creatively blocked burned out or just want to further explore the world of making you can make art and have fun doing it
With 24 hands-on Artful Explorations ndash interesting and varied enough to suit both beginners and professionals ndash this ldquoworkshop in a bookrdquo helps you
bull Make art that re ects your authentic inner voice bull Practice the 12 Actions and A itudes of artmaking that support creative owbull Develop a more consistent practice with your artmaking bull Engage with your art in a meaningful and mindful waybull Move more easily through resistance judgment and other blocksbull Create a more connected intuitive and playful relationship with your artmaking
Author Bridget Benton has worked as a professional artist facilitator and workshop leader for over 20 years helping hundreds of adults rekindle their creative spark She holds a Master of Science in Creative Studies from the International Center for Studies in Creativity at the State University of New York and has taught intuitive creative process at events across the country She currently lives and paints in Portland OR
ldquohellipA breakthrough book It will serve as a beacon for a new generation of creative people as well as deepen the conversation for those already interested in bringing the metaphor of art-as-a-way-of-being more fully into their livesrdquo ndashStewart Cubley co-author of Life Paint amp Passion and director of e Painting Experience
ldquoBridget Bentonrsquos directness and honesty are refreshinghellip is book is a MUST READ for anyone interested in growing both artistically and spirituallyrdquo ndashBee Shay author of Collage Lab
ldquoIf the idea of creativity as a spiritual practice excites you then yoursquoll love this book If that idea scares you this book will take you gently by the hand and help you past those fears Either way yoursquoll soon be making yourself a more vibrant liferdquo ndashDiane Gilleland former editor of CRAFT online and author of Kanzashi in Bloom
Photo by Michael Burton
ArtMaking as Playful PrayerArtMaking as Playful PrayerArtMaking as Playful PrayerArtMaking as Playful PrayerArtMaking as Playful PrayerArtMaking as Playful Prayer Bridget Benton Bridget Benton Bridget Benton
TH
E C
RE
AT
IVE
CO
NV
ER
SA
TIO
N A
rtMakin
g as P
layful P
rayer
Brid
ge
t Be
nto
n
MIXEDMEDIAARTIssue 14
What did you discover during the process of writing this book
InwritingldquoTheCreativeConversationArtMakingasPlayfulPrayerrdquoI clarified my thinking about creativity Irsquod always had this idea that creativity and spirituality were connected and Irsquod always believed that anyone could be creative Irsquod done a lot of reading and studying but writing this book was what helped me to really flesh out those ideas Along the way ldquoThe 12 Attitudes and ActionsofArtMakingrdquoemergedndashIfeellike they were my greatest discovery because they are such simple principles Practicing the 12 Attitudes and Actions really builds up your creativity skills
What surprised you
I was surprised by how long it took me to write the book ndash I did the first rough draft over the course of a weekend but it took me five more years to flesh that out I really thought Irsquod have it done in a year It took a lot of patience persistence editing revising and support from my amazing writing group ndash and I think the final book is better for the extra time spent
Author Interview
Bridget Benton
Creative Conversations Is FROM A neW BReed OF ARt technIque BOOKs thAt ARe
shIFtIng the FOcus FROM FInIshed WORKs tO the PROcess OF exPLORAtIOn And MeAnIng In OuR cReAtIve PLAy
Table of Contents
Week One 9 Introduction Where This
Book Came from My Story 13 Chapter 1 Making This Book
Your Own 15 A Note to Members of
Organized Faith Traditions 15 A Note to Professional
Creatives and Caregivers Artful Explorations
Explore 16 Cardboard Camera 18 Discard Collage
Week Two 21 Chapter 2 What Is
ArtMaking as Playful Prayer 26 A Note to Those Who
Say They Canrsquot Draw 28 A Note to the Trained Artist 28 A Note to Everyone on
Process vs Product Artful Explorations
Focus on Process Not Product
30 Blind Drawing 32 Visual Definitions
Week Three 35 Chapter 3 Studio Making
Sacred Space for ArtMaking Artful Explorations
Defer Judgment 41 Glue Doodle 44 Layer It Up 49 A Conversation with Judgment
and Process
Week Four 51 Chapter 4 Materials
What Do I Really Need 53 A Note about Copyrighted
Materials 58 A Note to the Packrat Artful Explorations
Be Like a Novice 60 Materials Play Date 62 Make Your Own Coloring Book
Week Five 67 Chapter 5 Flow Factors
Creativity and the Process of ArtMaking
69 A Note about Following Processes You Read about in Books
Artful Explorations Be in Conversation
70 Talk with the Book 71 Talk with Your Space
Week Six 75 Chapter 6
Getting Clear Intention 76 A Conversation with
Your Intentions Artful Explorations
Be Mindful 80 Deep Observation Drawing 83 Dancing with Matisse Color
Cuts
Week Seven 87 Chapter 7
Getting Inspired Energy 91 A Conversation with Avoidance
and Your Inner Goof-Off 93 A Conversation with an
Overload of Ideas Artful Explorations
Follow the Energy 94 Just Paint Just Draw 97 Get to Work and Get Inspired
Week Eight 99 Chapter 8
Getting Engaged Action 102 A Conversation with Decision-
Making in Art 103 A Conversation with
Letting Go of the Story 104 A Note about Curiosity
and What We Risk Artful Explorations
Let Go of the Outcome 105 The Whatrsquos Next Art Jar 109 Internal Journey Map
Week Nine 113 Chapter 9 Resistance
Judgment and Completion 114 A Conversation with Your Critic 116 A Conversation with Resistance 117 A Conversation with
Completion Artful Explorations
Be Curious 119 Allies and Adversaries 122 Critic Collage
Week Ten 127 Chapter 10
Staying in Touch Intuition 130 A Conversation with
Your Values 133 A Conversation with Your
Intuition Artful Explorations
Tune Up Your Inner Ears 134 Value Collage 137 Matchbox Assemblage
Week Eleven 141 Chapter 11
Giving Back Community 143 A Conversation with
Appreciation Artful Explorations
Cultivate Appreciation and Gratitude
146 Thank You Notes 148 Paper Prayer Beads
Week Twelve 153 Chapter 12 Maintaining
Artmaking as a Spiritual Practice
154 A Conversation with a Commitment to Action
Artful Explorations Hold Clear Intentions
157 Mandala 160 Prayer Candle
165 Bibliography and resources
167 Appendix a Theory and Practice
168 Appendix b A Note on Working with Groups
169 Index
MIXEDMEDIAARTIssue 14
What are 5 ideastechniques you would like any reader to take away after reading this book
First I want people to come away from the book feeling like they CAN make art Second Irsquom hoping a reader accepts that they donrsquot need fancy materials or the perfect studio ndash the whole book is really about breaking down those barriers to making that we all put up while giving you a few tools to make the creative process a little easier
In that spirit Irsquoll share a few of the Actions and Attitudes of ArtMaking ndash the ones that I remind myself of all the time When I make art with these things in mind I have more fun feel more connected and produce more interesting authentic work
1 FocusonProcessNotProduct(beinthe moment and enjoy the making)
2 LetGooftheOutcome(sooftenwehave a picture in our head of what it ldquoshouldrdquolooklikendashletgoofitandwork with whatrsquos there)
3 BeinConversation(payattentiontowhat the piece wants and what your intuition is telling you)
4 DeferJudgment(andpracticediscernment instead ndash while yoursquore making let go of the temptation to labelwhatyourdoingasldquogoodrdquoorldquobadrdquondashjustdiscernthenextbestthingto do)
5 BeCurious(thisistheantidotetojudgment)
Who did you write this book for
I wrote this book for every adult who wants to be creative but feels like they canrsquot be I wrote this book for everyone who had a bad art experience as a kid and stopped even trying to
111Chapter 8 getting engaged action
MaterialsbullJunk mail or old magazines bullBlank paper or sketchbook (larger
and heavier is better bristol board watercolor board or scrap cardboard is ideal)
bullOld mapsbullPermanent marker (at least one
like a Sharpie)bullMod Podge or gel mediumbullAcrylic paintsbullBrushes and water containerbullScissors
optionalbullRub-on or press-on lettersbullGessobullRags or paper towelsbullWax paper or palette
Internal Journey Map
Artful Explorations Let Go of the Outcome
108 The Creative Conversation Artmaking as Playful Prayer
1 Choose at least 24 of the follow-ing phrases or art prompts Write each phrase on its own slip of paper so that you can pull them one at a time out of the jar You can handwrite each prompt or type the prompts into a word processing program and print them out Either way cut them up so that you have only one prompt per slip of paper
2 Fold up each slip of paper and drop all 24 into your container Mix them up Get your art supplies ready and pull out a sheet of sketch paper
3 Now draw a slip of paper from the container and do what it says Then fold the slip back up put it back in the container mix things up again and draw another slip of paper Again follow the instructions Repeat this at least 12 times After the 12th prompt do whatever you need to do to feel complete with the piece
bullFill an area with a solid colorbullAdd a dotted linebullAdd star shapesbullCollage three items onto the
surfacebullAdd textbullAdd a circlebullPut eyes on somethingbullFill an area with a patternbullAdd red orange or yellowbullAdd blue green or purplebullAdd shadingbullAdd at least one collage elementbullAdd at least three straight linesbullDraw or scribble a shape person
or objectbullOutline somethingbullHighlight somethingbullAdd a rectangle
bullAdd a flowing linebullAdd a reference to naturebullAdd a reference to peoplebullAdd blue or orangebullAdd dotsbullAdd green or purplebullUse collage to add a patternbullDo something to unify the spacebullRotate the piece 90deg or 180deg and
choose a new promptbullFind an element in the piece and
repeat itbullAdd egg shapesbullAdd colorbullAdd one collage elementbullUse a wash of gesso over at least 13
of the surfacebullUse a wash of color over at least 13
of the surface
ldquoBy using the term artmaking Irsquom
emphasizing art-as-verb Irsquom focusing
on the actions and attitudes that support artmaking as playful prayer these actions
and attitudes are also what I think
of as the work of artmakingrdquo
MIXEDMEDIAARTIssue 14
make art as a result I wrote this book for every professional creative who feels dried up and washed out after years of producing art for product I wrote this book for every person who wakes up in middle age and says to themselves ldquoWhen am I finally going to givemyselfpermissiontomakethingsrdquo
And in so many ways I wrote this book for myself Itrsquos the book I most needed in my 20s when I was blocked and stuck and
terrifiedofmakingldquobadartrdquoItrsquosmywayofsharingeverythingIlearned in my 30s ndash all the things that got me making art again
What 2 people or things influence your work right now
For the past six years or so Irsquove been working primarily in encaustic The material itself has had a big influence ndash Irsquove been able to take layers and depth further than ever before Lately Irsquove been thinking a lot about remnants - about the things we leave behind about the ways that experiences mark us and the objects that serve as evidence of those experiences That sounds pretty esoteric but it means Irsquom playing a lot with X-rays images of people and things like tea bags food wrappers bottle caps and receipts Therersquos a parallel there to evidence at a crime scene piecing together what happened from whatrsquos left behind Maybe Irsquove been watching too many police procedurals
What are your 4 favorite sources of creative inspiration
Working is my favorite source of inspiration ndash when I get my hands moving and start playing with the materials ideas just start coming and it becomes clear what needs to happen next I try to leave the studio each day knowing what I want to do next so that itrsquos easy to just dive in and get back to work
The materials themselves play a big part ndash Irsquoll ask myself ldquoWhat does this mean What can I do with this How does this workrdquoLikemostmixedmediaartistsIADORElearning new techniques and experimenting with new media I teach at Collage - an art store in Portland Oregon - and I love designing classes around new materials
I also love giving myself challenges ndash what can I do using only the scrap images in this magazine or what can I do with small squares of paper
ldquoAcknowledging that they didnrsquot have to be
in control was liberating for some of the students
Instead they could respond to what was happening within the
artwork itself
ldquoI began to understand that art could be an
action and a process not just a
productrdquo
MIXEDMEDIAARTIssue 14
The limits can actually be really freeing
My students are another huge source of inspiration for me ndash itrsquos as though I absorb a bit of their excitement and sense of experimentation while I teach Sure Irsquom tired at the end of the day but itrsquos as though the students renew my own enthusiasm for whatever Irsquove been teaching I think itrsquos about re-accessing that sense of being a novice
What are 5 tools or supplies you canrsquot be without
bull Scissors bull Gluestick bull Sketchbook bull Pencil bull BlackSharpie
This is the bare minimum that I travel with ndash potential collage papers present themselves for free everywhere and if I can cut paste and sketch out ideas thatrsquoll hold me for at least a week After that I start wanting gesso and some way to add color ndash either gouache or acrylics Gouache is easier to travel with
Whatrsquos next
Right now Irsquom enjoying being in my studio and making art and designing workshops and online classes And the next book is lurking in there but it feels too soon to talk about it
artist noun someone who with their own
level of skill and passion intentionally
makes things in a meaningful and
mindful way a person whose primary work
is to find meaning and express it in concrete or tangible ways an
identity available to all of us as our birthright
art verb to make something with
meaningful mindful intent (adapted from
the everyday Work of Art) noun An action
or process we are all capable of that
serves as evidence of our own divine spark the tangible record of
meaningful mindful creative process
Benson has really cool projects cerebral exercises and techniques to explore Especially the lsquoWhats Next Art Jarrsquo p108 and Internal Map Journey p111I could easily spend a year working through Bentonrsquos book playing exploring reflecting on my creative process This is a book worth your time and money
editorrsquos note
MIXEDMEDIAARTIssue 14
I first learned how to embroider when I was about six or seven With superhuman patience my mother
taught me how to divide the cotton floss thread the blunt wide-eyed needle and follow the pink line of the iron-on pattern shersquod applied for me I wasnrsquot great at it _ my stitches were big and uneven at first and I spent more time trying to pull out misplaced stitches than I did making them But these lessons lovingly given in the living room of my childhood home turned out to be a pivotal influence on my artistic future
Embroidery has a long and beautiful history Even though itrsquos become a fairly uncommon pastime in recent decades itrsquos a craft undeniably rich with tradition Part of the reason Irsquom so drawn to it is that tradition knowing that my motherrsquos mother taught her just as she taught me Women(andoccasionallymen)havebeenpassing on this knowledge for centuries using it for ritual for homemaking for social status and pleasure Therersquos something powerful in that kind of custom and I canrsquot help but be drawn to the craft as a result
The process itself is meditative more pleasure than work It may seem like therersquos not much room for creativity since most embroidery is just stitching a
pattern but really therersquos just as much opportunity for creative control as there is in any other medium Just as a painter carefully places each brushstroke an embroidererhastoplaceeachstitch thedifference is that I can rip out and move a misplaced stitch a lot easier than a painter can move a stroke of paint I can blend colors alter line weight and quality and improvise a pattern just as I could if I were drawing in a sketchbook but when Irsquom finished with a sewn drawing itrsquos soft and textured and tactile in a way that most drawings can never be
That tactile quality is a huge draw for me as an artist _ the feel of the stitching itself as well as whatever I happen to be sewing
emBroiDerY
Anatomia Detail
christy turnerrsquos
MIXEDMEDIAARTIssue 14
on be it fabric or paper Which one I use is generally determined by the nature of the project in question but the main thing I care about is the tactile quality of whatever surface Irsquom working on
I really want the viewer to reach out and touch my artwork to pick it up and hold it to feel the fibers and stitches and structure We have this notion as a society that art is to be looked at from a safe distance never touched or handled and I like my work to be different in that regardThemagicofembroidery(andofthe book form which I often use in my art) is that itrsquos meant to be touched and used That traditional utilitarian quality is just one more reason why Irsquom inexorably drawn to embroidery _ itrsquos art but itrsquos the kind of art thatrsquos meant to be held between your fingers and rubbed against your cheek
theMes in My Work
My artwork uses a variety of different mediums but often references recurring themes of anatomy and interpersonal relationships While these concepts may not seem like they have much in common
the underlying factor that interests me is structure
My anatomical work focuses on physical structure _ primarily skeletal composition a topic that has fascinated me since I was a kid The architecture of the human body _ striking in both its intricacy and simplicity - is something I feel compelled to study and replicate Much of the imagery in my skeletal work is derived from either antique anatomical diagrams (Anatomia amp Ribcage) or firsthand fromhuman cadavers (CadaverHand StudyampCadaver Foot Study) Though the resulting artwork could be portrayed as something gruesome or macabre I prefer to think of it in an architectural sense looking at bones and tendons as structural components of a larger whole
On the opposite side of the spectrum is my work relating to human relationships These pieces in particular one sewn book called Maps seek to illustrate social structure by exploring the emotional bonds we create throughout our lives This area of my work tends be far more conceptual in nature than my anatomical studies but the basic focus on some form of structure remains the same
Anatomia Spread
MIXEDMEDIAARTIssue 14
AnatomiaThe imagery in this carousel book is derived from antique anatomy diagrams The top (black)layerillustratesskeletalanatomythe next layer has the corresponding muscle systems embroidered in red on a fibrous handmade paper
Cadaver StudiesThese embroidered studies are the result of several hours spent sketching dissected cadavers in the Oregon State University cadaver lab I sketched directly onto the muslin then embroidered the drawings trying to preserve their hasty line quality
Family PhotosUsing silhouettes derived from antique family photographs I embroidered these incomplete portraits in an attempt to illustrate the fluid quality of familial relationships The portraits themselves aresewnon100cottonragpaper(RivesBFK) and coptic bound with a letterpress introduction and colophon
Fish SkeletonThis skeletal study was initially drawn in a sketchbook then transferred onto muslin and stitched As with many of my embroidered studies I tried to keep the sketchy quality of my line work as similar as I could to the original drawing by using long dense stitching
Cadaver Foot Study
Family Photos Detail
Fish Skeleton
MIXEDMEDIAARTIssue 14
MapsOne of my more conceptual books ldquoMapsrdquo uses simpleembroidered diagrams to literally map out complex social hierarchies The author is represented in each map by a red French knot family friends and other social connections are represented by blue French knots connected by family tree style stitched linework
Maps
Phrenology StudiesThis book was made using intaglio printing embroidery letterpress printing and an accordion binding with butterfly cut walnut covers The heads and faces are drypoint intaglio prints on tea-stained cotton rag paper These prints are backed with red lotka paper and stitched with red cotton thread to emphasize the phrenology map design
Phrenology Studies
MIXEDMEDIAARTIssue 14
Christy turnerChristy Turner was born in Walla Walla Washington where she was instilled from a young age with a love for the Pacific Northwest and traditional handicrafts After learning to sew and embroider as a child Turner went on to earn her BFA from Oregon State University in 2012 Though her degree is primarily rooted in relief printmaking Turner also independently studied artist books and embroidery experimenting with various combinations of the three separate mediums In 2013 she was awarded a scholarship to attend the Focus on Book Arts Conference in Forest Grove Oregon She has exhibited photography embroidery artist books and relief prints in juried shows across the country and is currently preparing for a two-person embroidery exhibit to be held in her hometown of Corvallis Oregon
love to Createlove to see other artists teChniQUesanD tools
sUBsCriBenow
Cadaver Hand Study
MIXEDMEDIAARTIssue 14
The problem and the joy of making mixed-media artworks is that there are so many kinds of materials to
be painted GOLDEN Acrylics offers help in getting paint to stick to a wide variety of surfaces with the aid of the GAC series of polymers I am not going to talk about painting canvas just the weird things we mixed-media artists use
All nine GACs are formulated based on 100 acrylic dispersion polymers with only a minimum amount of thickeners freezethaw stabilizers defoamers and preservatives The GACs are fluid and thin and are typically used in conjunction with something else GACs are blended with paints to extend the paint regulate transparency create glazes increase gloss reduce viscosity or improve adhesion and film integrity They are thin and reduce the thickness of most paints Each one has a specialized use
The two products that help the most in my studio for painting on found objects are GAC 100 and GAC 200 Both stretch the color making them an economical consideration but they each have specific jobs Which one do I use and when To determine which product to use I ask
bull What is the object made of
bull Is it flexible or rigid
bull Is it porous or non-porous
If the answer is rigid and non-porous the solution is GAC 200 In this issue I will share my series of experiments with GAC 200 on a variety of rigid and non-porous objects I used mixtures of GAC 200 with either Fluid or Heavy Body Acrylics It is the hardest and least flexible of all the GOLDEN Acrylics and reduces tack These last attributes that make it so good for rigid substrates make it not very good for flexible surfaces GAC 100 is wonderful additive for painting on flexible and porous objects but you will have to wait until next issue to learn about it
Product exploration of gAc 200
WhIch One On WhAtgAC 200
Bonnie Meltzer
Items to paint
QUestions the artist mUst asK themselves
MIXEDMEDIAARTIssue 14
There are more questions to answer once the decision is made to use GAC 200
1 What proportion of GAC 200 should I use
2 How little can I use so the paint makes a good bond What percentage is too much
3 HowshinydoIwantit(GAC200isveryshiny)
4 Howtransparent(themoreGAC200themoretransparent)
5 How will it flow from my brush Will the brush marks show
The pictures and captions will give you insight to these questions but as a general rule I have found that if you want full coverage heavy body with 25 GAC 200 works best if you have something to hide The more GAC 200 in the mix the more transparent and shiny it becomes A 50 mix worked well when I wanted the substrate to show through I tried it up to 75 which Golden suggests is
the maximum That application could make wonderful texture of opaque ridges next to transparent swirls especially on smooth surfaces I mixed small batches of GAC 200 with heavy body paint and fluid acrylics using 14 tsp and 1 tsp measuring spoons Some objects were merely painted to test coverage Other times I experimented with brush stokes and layers Post your experiments with GAC 200 to Facebook
Copper sheet with gray stripes made with heavy body paint and 25 and 50 GAC 200 just brushed on normally Upper left dabbed
MIXEDMEDIAARTIssue 14
Surfaces to Paint with GAC 200 I have had good results with metal of all types acrylic and other rigid plastics and heavily varnished wood
tiPs
Clean No matter how good the paint is you have to prepare the substrate You want the paint to stick to the material not a layer of dust or grime Wipe with a damp cloth or wash with soap and water if it is really dirty Dry well I always wipe an object with alcohol even alcohol from the drug store Sand shiny and slick surfaces to help the paint stick Donrsquot forget to wipe the sanding dust off with a damp cloth
GAC 200 makes paint stick to your palette as well as your painting I use disposable soft plastic yogurt tops instead of my regular rigid plastic palette with little wells A side benefit of the yogurt top is that by bending it you can peel off the paint and use the sheet in a project
The blue hair was made with a mixture of 75 GAC 200 and fluid acrylic Notice the ridges I need to use that more
Various dilutions of paint on textured factory primed aluminum In progress The texture reacted differently to the various mixtures of GAC 200 The white is the unpainted material
MIXEDMEDIAARTIssue 14
A finished and installed exterior artwork on smooth aluminum painted with GOLDEN Acrylics heavy body and fluid acrylics and GAC 200 Sprayed with clear spraypaint Hose nozzle is also painted Mixed with crocheted wire and found objects The paint had to have a good bond not only on the base but also so it would not get scratched from the crochet
Donrsquot shake the paint There are minimal antifoaming agents in GACs so donrsquot shake them You will get tiny bubbles in the paint A foam brush also will encourage tiny bubbles
All but one of the photos are not finished pieces but experiments and samples made for this article Usually a piece is made up of many found objects not all of them are rigid andor non-porous Some of the samples from this article could grow into a finished artwork utilizing GAC 100 GAC 100 has many uses and is indispensable in my studio for preparing substrates extending paint and for painting on flexible and porous surfaces So stay tuned and come back for Part 2 with an examination of GAC 100 in the next issue
Bonnie and I love this product for multiple reasons the main one being that the GAC series gets paint to stick on just about anything Other attributes
Great hard edge when using tape to mask off an area Tried on glass metal and natural material (seed pods from my auntrsquos tree) - worked great Painted on an old pair of my daughterrsquos clogs left brushstrokes but used a coarse bristle brushPaint pigment did not dilute however it does make the paint more transparent Works great on plastic
editorrsquos notes
MIXEDMEDIAARTIssue 14
MIXEDMEDIAARTIssue 14
drawing 101
horizontal faCial proportions of aDUlts
Before you attempt to draw adult faces it helps to know how to plan a place for everything sort of
like a blueprint Even though the heads and faces of adults come in many shapes and sizes the same basic guidelines for proportions apply to almost everyone
In this lesson set up simple easy to remember guidelines for drawing horizontal adult facial proportions and then draw proportionally correct ears eyes and a nose and mouth within your outline
Suggested drawing supplies include white drawing paper a ruler graphite pencils and erasers
You also need basic math skills (or acalculator) for measuring and dividing various distances
this ProJeCt is divided into three Parts
DRAW THE OUTLINE OF THE HEAD Draw a circular shape to represent an adult human head with the top half wider than
the bottom
ADD HORIZONTAL LINES TO THE OUTLINE Divide the length of the head into two halves and the lower half into three equal distances
DRAWING EARS AND FACIAL FEATURES Beginners to drawing portraits tend to draw eyes too high on the head
Now add ears eyes and a nose and mouth to your head shape using the three distances in the lower half of your drawing Itrsquos not important that you draw the ears and features well The goal is to draw everything in its proper place
Brenda hoddinott
MIXEDMEDIAARTIssue 14
eXaMininG adult heads and faCes
The most common mistake is to draw the eyes too high on the head However if you look closely at an adult head you can see two halves with the eyes positioned on the halfway point where the two halves meet Below are four simple variations of the top and bottom halves of a human head Any of the skull shapes can be matched with any one of the facial shapes thereby providing many possibilities for the shapes of human heads
The shapes of human heads and the sizes and placements of peoplersquos facial features are very different
Sketch them joined together to make an outline of a complete head
Itrsquos perfectlyOK to draw your skull shape (or facial shape) slightly differentthan in the illustrations such as wider narrower shorter or even longer
However donrsquot wander too far away from the basic shape or your drawing may be too far outside the parameters of what is considered normal human anatomy
Turn your outline of a head-shape into an original person by adding some facial features and hair
Have fun creating different people by mixing and matching other skulls and faces and then adding facial features
MIXEDMEDIAARTIssue 14
draW the outline of the head
Use a ruler to draw a rectangular drawing format on your drawing paper
Drawingformat(sometimescalledadrawingspace)refersto the area of a drawing surface within a specific perimeter outlined by a shape of any size such as a square rectangle orcircleSuggestedsizesinclude5rdquox7rdquo6rdquox8rdquoor7rdquox9rdquo
Draw a very light line of symmetry down the center of the rectangle Measure and mark a small dot at the halfway point of the top and bottom sides of your rectangle Use a ruler to connect the two dots This line helps keep your head shape symmetrical and is a guide for measuring the placement of facial features
Symmetry in drawing is a balanced arrangement of lines and shapes on opposite sides of an often-imaginary centerline In the scans of my drawing throughout this project the line of symmetry is too light to see
Draw a circular shape to represent an adult human head with the top half wider than the bottom
The basic outline of an adult head is similar in shape to an egg
The line of symmetry you drew down the center of your rectangle is helpful for measuring distances on either side to make sure the head in your drawing is symmetrical
MIXEDMEDIAARTIssue 14
add horizontal lines to the outline
In this section you divide the length of the head into two halves Then the lower half will be divided into three equal distances
TIP In time you will be able to judge all proportions visually but for now please use a ruler
Draw a horizontal line that touches the edge of the very top of the head
This line is parallel to the top and bottom of the rectangular drawing surface (and verticalto its sides)
Mark this line IJ
Draw a second horizontal line touching the lower edge of the chin
Mark this line GH
Measure the total vertical distance along the center vertical line (too light to see in my drawing) from the top of the head to the bottom of the chin
Divide this total measurement in half and mark it with a small dot Feel free to use a calculator
Draw a horizontal line (AB) through this dot dividing the head into two halves (as in Illustration 01-08)
Most peoplersquos eyes and the top sections of their ears are somewhere along this line halfway between thetopoftheskull (notthetopofthe hair) and the bottom edge of the chin
MIXEDMEDIAARTIssue 14
Measure the vertical distance between lines AB and GH
Divide this distance by three and lightly mark the two points with dots on the center vertical line (too light to see in my drawing)
Add a fourth horizontal line through the upper point (closer to AB) This line is parallel to each of the other three lines IJ AB and GH
Mark this line CD
The lower part of the nose and the lower sections of the ears touch this line
Add a fifth horizontal line through the lower point (closer to GH)
This line is parallel to each of the other four lines
Mark this line EF
The lower edge of the bottom lip will be close to or touch this line Now the vertical distance between lines AB and GH is divided into three equal sections
MIXEDMEDIAARTIssue 14
draWinG ears and faCial features
Your blueprint is complete and itrsquos time to add a face In this section you draw ears eyes and a nose and mouth on your head shape using the three distances in the lower half of your drawing
It is not important that you draw the ears and features well The goal is to simply place everything in its proper place You may even choose to draw completely different features
Remember itrsquos more important to draw the ears and facial features in their correct places rather than fuss about the intricate details
Draw the outlines of the ears with the tops above AB and the bottoms below CD
Erase the vertical lines (indicating the outline of the head) between lines AB and CD (on both sides of your drawing)
Re-draw the outline on each side (between lines AB and CD) leaving an opening for the tops of the ears to extend inward
Extend the outlines of the tops of the ears inward toward the center of the face
Draw short curved lines on the upper section of each ear (touching AB) to indicate the outer rims of the ears
MIXEDMEDIAARTIssue 14
Add more detailed lines to each ear to represent its various parts
Even though fine details are not important in this lesson try your best and you may be pleasantly surprised
The only important factor to achieve a realistic human face is to put every thing in its correct place according to the facial guidelines
Copyright to all articles images text projects lessons and exercises within this drawing class belong to Brenda Hoddinott and may not be reproduced or used for any commercial purposes whatsoever without the written permission of Brenda Hoddinott
E-mail bhoddinotthoddinottcom Web sites httpwwwfinearteducationcom and httpwwwdrawspacecom
- 9 -
27) Add more detailed lines to each ear to represent its various parts Even though fine details are not important in this lesson try your best and you may be pleasantly surprised
ILLUSTRATION 01-14
Each individual face is physically unique due to inherent variations in the sizes and shapes of heads faces and features You can complete the facial features on your drawing however you wish The only important factor to achieve a realistic human face is to put everything in its correct place according to the facial guidelines
MIXEDMEDIAARTIssue 14
Draw the eyes along AB
To help you decide how wide to draw each eye refer to Illustration 01-15 and observe the following
bull The widest section of the head is ldquofive-eyeswiderdquo
bull The width of an eye is equal to one of these distances
bull The distance between the eyes is equal to the width of one eye
Copyright to all articles images text projects lessons and exercises within this drawing class belong to Brenda Hoddinott and may not be reproduced or used for any commercial purposes whatsoever without the written permission of Brenda Hoddinott
E-mail bhoddinotthoddinottcom Web sites httpwwwfinearteducationcom and httpwwwdrawspacecom
- 10 -
28) Draw the eyes along AB To help you decide how wide to draw each eye refer to Illustration 01-15 and observe the following
The widest section of the head is ldquofive-eyes widerdquo
The width of an eye is equal to one of these distances
The distance between the eyes is equal to the width of one eye
ILLUSTRATION 01-15
Draw some eyebrows above AB
You can draw eyebrows
bull Light or dark
bull Thick or thin
bull Very curved slightly curved or fairly straight
bull Very close to the eyes or a little higher on the forehead
Copyright to all articles images text projects lessons and exercises within this drawing class belong to Brenda Hoddinott and may not be reproduced or used for any commercial purposes whatsoever without the written permission of Brenda Hoddinott
E-mail bhoddinotthoddinottcom Web sites httpwwwfinearteducationcom and httpwwwdrawspacecom
- 11 -
29) Draw some eyebrows above AB You can draw eyebrows
Light or dark
Thick or thin
Very curved slightly curved or fairly straight
Very close to the eyes or a little higher on the forehead
ILLUSTRATION 01-16
MIXEDMEDIAARTIssue 14
Draw the nose
The following guidelines apply to most adult faces
bull The lower section of the nose touches the horizontal line CD
bull The very bottom edges of the nostrils are often below CD
bull The nose is approximately the width of the distance between the eyes
bull The base of each cheekbone usually aligns with the bottom section of the nose
bull The lower parts of the ears horizontally align with the bottom section of the nose
Copyright to all articles images text projects lessons and exercises within this drawing class belong to Brenda Hoddinott and may not be reproduced or used for any commercial purposes whatsoever without the written permission of Brenda Hoddinott
E-mail bhoddinotthoddinottcom Web sites httpwwwfinearteducationcom and httpwwwdrawspacecom
- 12 -
30) Draw the nose The following guidelines apply to most adult faces
The lower section of the nose touches the horizontal line CD
The very bottom edges of the nostrils are often below CD
The nose is approximately the width of the distance between the eyes
The base of each cheekbone usually aligns with the bottom section of the nose
The lower parts of the ears horizontally align with the bottom section of the nose
ILLUSTRATION 01-17
Draw the mouth
The following guidelines generally apply to adult faces
bull The lower lip is usually touching or slightly above line EF
bull The mouth is generally wider than the nose
bull The lower lip is approximately halfway between the lower section of the nose and the bottom of the chin
bull The outer corners of the mouth are usually directly under the irises of the eyes
Copyright to all articles images text projects lessons and exercises within this drawing class belong to Brenda Hoddinott and may not be reproduced or used for any commercial purposes whatsoever without the written permission of Brenda Hoddinott
E-mail bhoddinotthoddinottcom Web sites httpwwwfinearteducationcom and httpwwwdrawspacecom
- 13 -
31) Draw the mouth The following guidelines generally apply to adult faces
The lower lip is usually touching or slightly above line EF
The mouth is generally wider than the nose
The lower lip is approximately halfway between the lower section of the nose and the bottom of the chin
The outer corners of the mouth are usually directly under the irises of the eyes
ILLUSTRATION 01-18
Use your kneaded eraser to lighten the outline of the top of the head until itrsquos almost invisible and then add hair
MIXEDMEDIAARTIssue 14
dRAWIng eYelashes
E yelashes are fine hairs that grow from the outer edges of the upper and lower eyelids The upper eyelid is the larger movable fold of skin above the eyeball that opens and closes to protect the upper and center sections of the eye The
lower eyelid is a smaller less movable fold of skin protecting the lower eyeball Many artists have difficulty drawing natural looking eyelashes Even if every other aspect of your drawing of a face is perfect incorrectly drawn eyelashes can ruin it
Eyelashes though tiny are the most challenging parts of human anatomy to draw realistically In Illustration 1 you see unnatural looking individual eyelashes that are the same value and thickness from root to tip Eyelashes drawn with this type of line canrsquot possibly look correct Illustration 2 shows the correct way to draw individual eyelashes Each eyelash is thick at the bottom and gradually becomes lighter and thinner closer to the tip
Illustration 1 Illustration 2
In this illustration of three eyes have a peek at some common mistakes made when drawing eyelashes such as making them too thick too straight or too long
Illustration 3
MIXEDMEDIAARTIssue 14
Correctly drawn eyelashes look natural and lifelike A simple little drawing technique provides a realistic looking eyelash every time - in simple terms never draw eyelashes from the tip down toward the eyelid Always draw them in the direction in which they grow from theeyelid(orroot)outwardGrabsomepaperanda2BpencilReferto the next close-up drawing and try your hand at drawing realistic looking individual lashes
1 Begin at the base of the eyelash and press firmly with your pencilRemember always draw eyelashes in the direction they grow from the eyelid outward
2 Slowly release the pressure you apply as your curved line extends toward the tip Realistic eyelashes look like inverted commas ndash thick at the bottom and thin at the top
3 Gently lift your pencil from the paper when the tip of the line is very thin and light in value
The following criteria provide insights into various aspects of drawing realistic eyelashes Refer to the previous two illustrations and the next Take note that correctly drawn eyelashes
bull Grow in many different directions mostly outward from the eyelids
bull Are rendered with thin lines of different lengths
bull Are curved and unevenly spaced
bull Appear thicker closer to the eyelids
bull Grow from the outer edges of the upper and lower eyelids and not the white of the eye
bull Are drawn in groups rather than single lines
bull Gradually become longer and thicker toward the outer corners of the eye
Illustration 4
Illustration 5
MIXEDMEDIAARTIssue 14
Warm up your drawing hand and draw an eyeful of eyelashes
1) Lightly sketch the almond shape of an eye with a double line at the top and bottom to represent the thickness of the flesh of the eyelids
2) Use 2H and HB pencils to draw an average quantity of eyelashes on the outer edges of the upper and lower eyelids
Illustration 6
Illustration 7
MIXEDMEDIAARTIssue 14
Brenda hoddinottAs a self-educated teacher visual artist portraitist forensic artist (retired) and illustrator Brenda Hoddinott utilizes diverse art media including her favorites graphite and paint
Brenda is the author of Drawing for Dummies (Wiley Publishing Inc New York NY) and The Complete Idiotrsquos Guide to Drawing People (Winner of the Alpha-Penguin Book of the Year Award 2004 Alpha - Pearson Education ndash Macmillan Indianapolis IN) She is currently writing two books on classical drawing
Donrsquot expect to master drawing eyelashes right away Take lots of time to practice before you try adding them to your drawings of people With lots of practice you can draw natural eyelashes that are thick and bold close to the base and thin and light at the tip
Illustration 8
Illustration 9
In order to understand the body of works created by the Cuban artist Conrado Maleta it is necessary to
move a few steps back to his childhood in Cuba With the end of Soviet Union the island was in a long process of economic and social degradation called
PeriodoEspecial(specialtime)Inthattime the teenager who is today the artist helped family members in the production of popular jewelry and decoration artifacts Almost all the work was done with recycled materials or morphologies coming directly from nature such as shells and stones He also sold the products door to door earning just a little but absolutely happy about it In those times he learned how to do crafts and how to re-use things in his own environment Many years later the artist started to work in what today is his most beloved group of art pieces Neo-Byzantine Madness and Boxes of Beauty
Neo-Byzantine Madness The concepts behind these works are deeply anchored with the human historic background The first group of works is developed from personal experiences and learning in the Middle East and hours of walking and listening to religious services in orthodox churches and Catholic monasteries of Israel It is all about a mistake
Work-01 Fancy pedestal for the allegory of Beauty 2013Coins silicon glue glass balls pearls a plastic rose some acrylic paint and glossy varnish Box made with American coins and objects I found in the streets of New York City I did it thinking in the concept of beauty I also think it has something to do with the salty foam of the sea
MIXEDMEDIAARTIssue 14
Artist Profile
ConraDomelato
The artistrsquos mistake and misunderstanding of how others see and trust in their beliefs It is also about reinterpretation of aesthetics that have millennia of development but suddenly in the eyes of a Western post-postmodern man they appear to be antiques In the works of this set there is a special intention for creating a contemporary version of Middle East religious imagery Christian Jewish Islamic or even Baharsquoi Sometimes the lecture is clear at first glimpse but for others it is necessary to go inside
the concept in order to understand the meaning Every work has a powerful sense of humor by itself without being frivolous are a must because they are the verbal key used by the artist to lead the public into a correct road
Boxes of Beauty After moving to New York City one of the first things I noticed was the presence of hundreds of pennies in the streets The idea of having as material something that others donrsquot want or need and also keeping clear that there is a possibility for these coins which the government is thinking about not printing anymore to be in the near future a rare collectible had been the starting point for the project
Work-03 Shut on the TV Sex language for adults and violence 2013Coins silicon glue plastic toy glass balls acrylic paint glossy varnish steel nails A TV set in Cuba is of the old style with long skinny legs And at beginning of each film you have a text with the category This is an adult series of films The violence is represented by the red color and drops the sex is just the cavities the dark inner spaces and the adult language are represented by a dinosaur
Work-02 Goat who has broken a drum with its skin pays 2013 Coins silicon glue thread plastic goat sleighbells acrylic paint glossy varnish All the objects I found in the streets of New York City The title is from a traditional Cuban song It is an irony for me because finding a goat in Manhattan was the last thing I ever expected OK it was plastic but thatrsquos just an irrelevant detail
MIXEDMEDIAARTIssue 14
The presence of the TV is also a conceptual idea in this new work The TV is the new Pandorarsquos Box The good and bad inside the TV - the aggressive behavior especially verbally from some New Yorkers is expressed through the use of the dinosaur like something big bigger than life Colorful dinosaurs appear as vulgar slang the artist has heard in the street The use of boxes as containers is also a product of a direct influence from the artistrsquos present life The need of a home the search for a homey building or space The house as a warm and protective uterine refuge New York as a cave New York as a home
The act of material recycling has two basic meanings adding information in an anthropological way and supporting the artistrsquos eco-conscious way of life
Work-04 Open this box of wisdom and you will learn about a human sin Open this heart and blue clouds will come out of my body 2012A Tefillin box that I found in a Genizah - a sacred storage area - in the streets of Tel Aviv (it is a big sin but I couldnrsquot resist) cotton thread a plastic butterfly silicon glue acrylic paint steel wires inside two cut-off illustrations from old books of art It is about hope and beauty Holy actions desire and sin
Work-05 Double game with sensibility 2012Wood iron plate thread plastic net Italian silver wire pearl steel nails used matches two cut-off illustrations from a very old book of art silicon glue acrylic paint and glossy varnish Man vs woman Power vs spirituality Red vs blue It is a piece talking about dichotomy as a game It is also created for being used as jewelry avant-garde jewelry work
MIXEDMEDIAARTIssue 14
aBout My studio
My studio is located in Crown Heights South Brooklyn It is open only by previously scheduled appointments You can email Conrad for more information
Work-07 Muhammad and Jesus Christ doing scatological questions to Yahveh the God of the Jews 2012Metal plate silicon glue wire acrylic paint and glossy varnish This little work was done in Jerusalem I was traveling there and it is about what I saw listened to and enjoyed there It is easy to imagine all the different interpretations of God talking and making noise and fighting to keep their own relevant considerations
Work-06 Dialectical exchange of two unborn kids that happens in the intrauterine space 2012Metal plate silicon glue thread acrylic paint and glossy varnish This very small piece was done in a hard moment My wife and i were struggling to get pregnant and it wasnrsquot easy I had weird feelings and one night I had a dream in which I was talking to a my twin (I donrsquot have in real life) I did this work and still think it is so full of energy
MIXEDMEDIAARTIssue 14
Maletarsquos Studio Space
MIXEDMEDIAARTIssue 14
Conrado r MaletaConrado R Maleta is a Cuban artist who was born in Santiago de Cuba 1979 He has traveled for a long time around the world Europe the Middle East and America Today he is based in Brooklyn He is has a bachelorrsquos degree in Architecture and URBAN PLANNING his career has mainly been as an artist studying with private professors and taking on internships He has been a painter sculptor and photographer His whole work is dedicated to the analysis of the human expressions in religiosity and spirituality It is correct to consider his body of works as a visual road opened by a naive anthropologist
He can be found here or Click here for more information
MIXEDMEDIAARTIssue 14

MIXEDMEDIAARTIssue 14
Questions Comments Drop us a line at editormixedmediaartmagazinecom
progressing to new platforms
now available on
Look for our upcoming HTML5 version which will play on any device
r e g U l a r s
Letter FROM
THE eDitor
MIXEDMEDIAARTIssue 14
Dear Readers
This issue has been surrounded by a lot of hectic backroom activity for Mixed Media Art Magazine We are almost ready to launch a version that will work on any device as well as our first Print version via Amazon Make sure you sign up for our email newsletter here to catch up on MMAMrsquos evolution We are pretty excited about the big step forward we are making and have a dedicated staff working hard to smooth out all the techy tangles
In the meantime this issue has some great content Our cover artist Anaystyacia Kovaleva is from Belarus and makes banana peels onion skins and cardboard into beautiful works of art
We have Part II of Beth Yazharirsquos tutorial on how she makes her incredibly detailed piecesalong with an article on the Arts and Crafts Movement that has influenced Yazharirsquos work I especially appreciate Bethrsquos creative philosophy of melding her own art into previous generationsrsquo craftwork to create a multi-generational piece I love the idea of blending all those different creative energies into a culminated piece of intense detail and symmetry Full disclosure Beth lives down the street from me and I have had the pleasure of viewing her work up close It is really a sight to see
Susan Walls Beverly shares a three-part tutorial on using PolyShrink- a plastic material that can be shrunk down into a thicker plastic shape Susan has done some really neat small pieces with PolyShrink It is a material that deserves a closer look
Brandy Colins shows us how to incorporate collage and acrylics into a painting
MIXEDMEDIAARTIssue 14
Bonnie Meltzer plays around with GAC200 a GOLDEN Paint product that gives acrylic paint the ability to pretty much coat any surface It is a cool product and launches a new section focused on product explorations Bonnie took offense to the term product review so we have changed the focus to playful explorations I have to admit I like this approach better
If you try out GAC200 or already use it in your artwork drop us a line with high definition images or post to Facebook so we can check it out
Christy Turner shares her ability to intertwine embroidery and obsession with anatomy
Brenda Hoddinott teaches us the ins and outs of learning how to draw faces it is mathematical
We wrap up Issue 14 with Conrado Melato- an interesting Cuban-born artist who has landed in Brooklyn NY His work is raw and quite primal in a way I find him intriguing and hope you do too
Happy Reading
Luisa
You can email the editor for more information
DisclaimerMMAM considers its sources reliable and verifies as much information as possible However reporting inaccuracies can occur consequently readers using this information do so at their own risk Artsy Fartsy Publishing cannot be held responsible for the outcome of any action or decision based on the information contained in this publication andor the website The publishers or authors do not give any warranty for the completeness or accuracy for this publications content explanation or opinion We add links from our articles to other websites to help you find more information related to certain ideas However MMAM cannot be held responsible for the content of any external site linked to from within this document No part of this publication andor website may be reproduced stored in a retrieval system or transmitted in any form without prior written permission of the Publisher Permission is only deemed valid if approval is in writing
copy Copyright 2014MIXED MEDIA ART MAGAZINE619 SW 11th Avenue Suite 250
Portland OR 07205ISSN 2333-4282 (online)
E-mail editormixedmediaartmagazinecomWeb wwwMixedMediaArtMagazinecom
Skopje MacedoniaAleks
Barnabas Kimani
Califonia
Luisa
Nairobi Kenya
Beh Yazhari
Christy Turner
Brandy Collins
Tracey Greer
Australia
Conrado Melato
Brenda Hoddinott
Portland Oregon
Susan Walls Beverly
Southern California
Lexington
Indianapolis
Patti Edmon
Brooklyn
Raleigh
Bonnie Meltzer
Cypress
Nicholas
SerbiaAna Bambic Kostov
ONLINE10x per year wwwMixedMediaArtMagazinecom
Editor and PublisherLuisa Nims
Editorial AssistantAleksandra Mihajlovska
Issue EditorTwin Miracles Editorial Technical Administrator Chris Anderson
Published ByArtsy Fartsy Publishing LLC
Magazine DesignBarn Creative Media Ltd in cooperation with Mixed Media Art Magazine (MMAM)
MIXEDMEDIAARTIssue 14
MIXEDMEDIAARTIssue 14
Beth Yazharirsquos its in the details
- Part II video tutorial
anaystyacia Kovaleva
Making art from natureDifferent kinds of natural
material and their preparation
patti edmon tutorial
Brandy Collins - tutoriallove Birds 2 electric Bugaloo
Diana Darden product review
Christy turner - embroidery Bonnie meltzer - product exploration
Drawing 101 Conrado melato
CONTENTS
polyshrinkMakes Complicated
shapes possible
Have you ever thought about making art from natural materials There are a lot of flowers leaves and
twigs on the ground that you are convinced can create wonderful art Probably your first thought of floral art is using mostly dried pressed flowers and something typically associated with nature like stones sticks bark But the natural the world is much wider For your unique art you should think more globally I will try to push your mindrsquos boundaries to understand this wonderful kind of art
We would like to bring nature into our lives as much as possible There are so many opportunities to learn and explore with natural materials Hunting for really unique and special materials is an integral part of the creative process Most of these items can be found for free right out of your door Woodland fields parks and your kitchen are the sources of your inspiration Art starts with searching and preparing materials The more materials with different colors and textures you have the more interesting work can be made Once you have a wide array of treasures you can put them together in an interesting way for creating a masterpiece
GettinG started
Some natural materials that can be used
bull onionskin bull bananapeel bull fishscales bull seashells bull feathers bull eggshells bull sepals bull seedsandnuts bull woodslices bull moss bull bark bull allkindofplantsflowers
maKing art FInDIng MATErIAls In THE worlD ArounD us
from natUre
MIXEDMEDIAARTIssue 14
These are my favorite kinds of materials that I use intensively in my collages It allows me to create very delicate art but requires a lot of time and accuracy Of course every artist is looking constantly for his own material But floral art isnrsquot only natural colors and smooth lines You can mix anything you like
Save and collect materialsbulllaceribbonwooltextilescraps cord beads bullhandmadepaperrecycledcardboard bullceramicplates(usingbrokenelements) bullglass bullacrylicpaintandvarnishes
Natural materials can be used in a wide range of ways to promote wonder curiosity and enthusiasm for learning It
can be in the form of collages sculptures handmade cards or the decor of any item Look carefully around you and start a collection of natural things
ColleCtinG and dryinG
When yoursquore exploring nature being well-prepared for the elements is the key to your hunt for treasures Take a lot of packages scissors and pruners Every season has its special features but there is never a time when collecting natural material is altogether impossible Ideally you should pick up material in dry weather But if you collect material in rainy weather you should dry it as soon as possible The best way of drying thin material is using old newspapers and books You should check out material at least once a day When you bring newfound materials home leave
MIXEDMEDIAARTIssue 14
them outside for several days This will get rid of unwanted insects and prevent the material from drying out
at the kitChen
Sometimes it is funny to comment on what I used in collages I couldnrsquot bring myself to call my materials such as onion and garlic skin banana peels or eggshells by the name lsquofood wastersquo because they are really cool elements with amazing texture and colors There is not any special preparation Just clean and dry
From the banana skin you can make thin branches of a tree or contours of graphic works First of all you need to put the banana skin on a smooth surface and remove all the flesh with a knife Then put it under the press and make interesting shapes such as a rose The best place to store your materials depends on what kind they are I prefer cardboard boxes and packages
Garlic skin is a great material for imaging flowers glare on the water or glass surfaces
Eggshells have a lot of variations They have different coverage areas direction of material and color that can give so many interesting ideas In the kitchen you can find lots of useful things like tea or different kinds of groats
Floral collage gives you lots of wonderful opportunities You can constantly look for new materials and technologies Art from nature unites natural elements with artistic vision for creating artwork that pushes the boundaries of what art is and how we perceive ourselves in the natural world
Black Garden My natural picture consists of paper recycled cardboard transformed into roses and other shapes onion skin eggshell acacia For some materials I used acrylic paint My mixed media recycled artwork can broaden intellectual understanding and help engender an intuitive appreciation of the environment
Beautiful Bug This work is inspired by nature organic forms and natural colors I used sticks skeleton leaves eggshells and flax Sticks were modified I made them into thin wood slices
MIXEDMEDIAARTIssue 14
Paradise Garden I used cord feathers beads different kinds of flowers and leaves fish scales and melon skin It is the garden which always will be Paradise and it is not the bone of contention but an image of serene happiness
The Last Flowers of Autumn This work is a huge mix of natural elements You can see here only natural colors I havenrsquot used acrylic paints Coffee raffia different kinds of leaves pressed flowers garlic skin beads melon seeds and melon skin
MIXEDMEDIAARTIssue 14
Gold Heart This collage was made in a simpler technique All elements have volume which allows me to glue elements quickly I used seashells dried flowers textile roses raffia skeleton leaves paper and feathers
I have been learning about natural art for seven years since I was a kid when I spent my days making simple artworks in a studio of floral design There is nothing more natural to me than to work with organic material using it to give new life
In 2011 I graduated from Belarusian-Russian University with a degree in commerce After that I worked as an analyst for three years then decided to make art for myself just to see if I could do it Now Irsquom a full-time artist In 2009 I took first place in the 6th International and 6th International Competition
of Contemporary Art in Moscow during Russian Art Week
In 2013 I became a winner of the 10th Competition of Pressed Flower Pictures ldquoExhibition of Creationrdquo in Japan and winner of the International Competition of Pressed Flower Art in South Korea
AnAystyAciA KovAlevA
MIXEDMEDIAARTIssue 14
Beth Yazhari
tap hereTo watch Video
PArt ii tutoriAl
itrsquos in the Details
MIXEDMEDIAARTIssue 14
bull Saran wrap
bull Acrylic paintsmdashI prefer Golden for paints and medium
bull A few brushesmdashinexpensive ones for creating paint washes and for adhering fabrics to canvas with medium or glue
bull A variety of vintage textiles doilies trims beads brooches etc
bull Acrylic matte mediummdashto adhere thin textiles to the canvas
bull Mod Podge or Golden molding pastemdashthese stronger adhesives are useful for adhering heavier textiles to the canvas
bull Canvasmdashthink of your stretched canvas as an embroidery hoop I often like to work on square canvases which lend themselves well to round doilies
bull Jacquard fabric sheets (optional)mdashthese are great for transferring your own photos or other images onto fabric so they can be collaged onto the canvas and sewn into
bull Beading needlesmdasha variety of sharps and other sewing needles can be used but it is nice to have some needles specifically designed for beading for the occasionalbeadswith tinyholes (Ponysize 12 beading needles are good)
bull Beadalon Dandylinemdashsuper-strong bead weaving and stringing thread or Beadalon Wildfire beading thread
Bethrsquos MAteriAls
MIXEDMEDIAARTIssue 14
Beth yAzhAri Bio I make art that celebrates reflection craftsmanship and time-consuming labor in the pursuit of beauty I strive to make spiritually uplifting art to create oases of beauty and wonder in a frenetic society that is increasingly in need of both
Discarded doilies and remnants of embroidered fabrics are a source of inspiration to me by rescuing them and recycling them into my beaded paintings I hope to honor and collaborate with the creative spirit of generations of women who have gone before me whose handiwork has often been ignored because it was not created to be displayed in a gallery
Making my art is truly a sacred act for me I feel that creating artwork in a spirit of service to humanity is a form of worship
MIXEDMEDIAARTIssue 14
By Ana Bambic Kostov
The turn of the 19th century brought the Arts and Crafts Movement from England to America The
ideas and ideals of British intellectuals John Ruskin and William Morris dispersed throughout the United States by the means of journal and newspaper writing Important factors in the Movement were societies that promoted various lectures and programs There was no single center of the Arts and Crafts Movement first it was strong in Boston then in Chicago Minneapolis and New York
Rose Valley Community a social and artistic experiment was founded in 1901 in Pennsylvania with a shop offering hand-made furnishings pottery metalwork and hand-bound books The second community of this sort was Byrdcliffe Arts and Crafts Colony based outside of Woodstock New York
In the cities activities were limited to local communities and often focused on the education of young womenwho were taught to make pottery and work with textiles or metal and jewelery The Arts and Crafts Movement in America was not centered around one philosophical idea rather it represented a large group of creative individuals Traits of the movement differed depending on geography and social status especially as the movement spread from the East Coast through the Midwest to CaliforniaThe result was many new pottery workshops or furniture factories followed by a thriving revival of handiwork as the most natural way of production with beautiful results Although the American Arts and Crafts Movement waned after World War I the influence of this socially engaging action stayed
Its InFLuence cAn stILL Be FeLt tOdAy WIth ARtIsts LIKe Beth yAzhARI tAKIng the ReMnAnts And ReFAshIOnIng
these PIeces IntO neW FORMs
the arts anDCrafts movement
MIXEDMEDIAARTIssue 14
Throughout the 20th century a myriad of women engaged themselves in often necessary sewing knitting embroidery and stitching They were grandmothers and mothers women who gave their best to making beautiful and functional items for their families Their names were largely forgotten but their impact can still be felt and seen
Artist Beth Yazhari is greatly inspired by the handicraft of the women of the past finding her own expression in collecting and recycling items made across the planet Embroidery or crochet from different cultures can be found in her studio right next to precious family heirlooms or old beads and buttons Beth is a schooled artist and painting remains the base of her work while her style is built through recycled materials made of vintage craft By using old handiwork as the key element in her elaborate artwork Beth honors endeavor dedication and creativity of women everywherewho felt the need to design beauty but were never able to realize recognized artistic careers
Creative ProCess of Beth yazhari The hunt for ostentatious art material is where Beth Yazharirsquos creative process begins Art supplies she collects are beautiful fabrics stitching doilies old beads or brooches Vintage items she finds at estate sales coupled with the
Internet Beth usually conducts her searches on eBay or Etsy where she will bid on anything that catches her eye from Dutch needlework to Native American medallions
The materials she works with most are cross-stitched and hand stitched handkerchiefs crochet doilies sari fabric old brooches and appliqueacutes Contemporary materials are not exempted from Bethrsquos creative process as she combines the old with the new including ribbons and fabrics
the PaintinG teChnique
Yazharirsquos underpainting technique is the foundation of her process Beth uses Saran wrap to create a rich base for her detailed work By layering colors the final result is full and velvet-like which serves as a chromatic inspiration to the artist
First she takes a blank stretched canvas which
can be found at any art supply shop Beth wets the canvas with a very light layer of water wetting a brush and applying it over the area intended
She drips several drops of acrylic paint directly onto the canvas without exaggerating If the paint is very liquid she uses matte medium to stabilize it
In the layering process she combines two or three colors to achieve the desired result
Using water alone to dilute acrylic paint
Beth uses a piece of saran
wrap a little bigger than the size of canvas to cover the
paint
MIXEDMEDIAARTIssue 14
may result in chipping when the color dries If the paint is thicker matte medium may not be necessary Itrsquos important to know that too much of the matte medium can create tangible texture on the canvas which is not advised if adhering fabric or beads is planned as the next step
Once she adds the color and medium she spreads it around the canvas evenly with a brush
Beth uses a piece of Saran wrap a little bigger than the size of canvas to cover the paint
Pressing the wrap onto the painted area playing with it she makes creases and wrinkles which will create an interesting pattern when dry
She allows for the paint to dry for about an hour or two Drying can be sped up with a hair dryer or heater
When the paint is completely dry the artist peels the Saran wrap off and the first layer of the underpainting is done
This process can be repeated several times sometimes up to 20 layers to add to intensity of color The final effect is canvas with a surface similar to fabric
When the paint is completely dry the real creation can start
Beth applies fabric cut-outs on the canvas stitching with a strong thread while using adhesive occasionally Her composing process is very similar to collage with less overlapping
If the applied material lacks color but has complex stitching she emphasizes the embroidery by painting around it in contrasting nuance For example
when she applies a handkerchief hand-embroidered elements that are all white she would paint around these elements in dark color to create a more dramatic effect
When the fabric is cut and applied onto the canvas the most intricate elements are added Beth emphasizes the details with beadwork and sews small beads around the edges of decorative patterns to tie the piece together
The central piece of her works is often reserved for the crowning jewel - a vintage brooch or a particularly beautiful decorative ornament always being mindful of color coordination
Beth Yazharirsquos creative process allows a lot of freedom for the artist in choosing from an endless pool of colors materials and patterns while also allowing her to be engaging and playful
The Arts and Crafts Movement emerged during the late Victorian period in England the most industrialized country in the world at that time Anxieties about industrial life fueled a positive revaluation of handcraftsmanship and precapitalist forms of culture and society Arts and crafts designers sought to improve standards of decorative design believed to have been debased by mechanization and to create environments in which beautiful and fine workmanship governed The Arts and Crafts Movement did not promote a particular style but it did advocate reform as part of its philosophy and instigated a critique of industrial labor as modern machines replaced workers Arts and Crafts proponents called for an end to the division of labor and advanced the designer as craftsman
Click here for more information
MIXEDMEDIAARTIssue 14
susAn Beverly WAlls tutoriAl on shrinK PAPer
tap hereTo watch Video
tutoriAl on shrinK PAPer amp Mixed MediA
tap hereTo watch Video
MIXEDMEDIAARTIssue 14
susAn Beverly WAlls tutoriAl on shrinK stAMPinG
tap hereTo watch Video
MIXEDMEDIAARTIssue 14
susAn WAlls Beverly A dozen or more years ago I ended my 20-year era of restaurant management and searched for a way to work from home Loving all kinds of paint I began murals for my kids that blossomed into a word-of-mouth business As my kids grew up I knew I wanted to be more creative and branch out into other artsy things In 2001 I started doing art and craft shows around Southern California and havenrsquot looked back since
My current obsession is designing making and traveling with my line of thematic crazy jewelry Charming Trinkets My designs incorporate a myriad of materials from shrink plastic to resin to a mix of metals It is infused with my belief that life is too short to be too serious and you
need to make some loud laughter while yoursquore here If I can make you smile or touch you emotionally I know Irsquove done my job
Each day my house is infused with family laughter and thoughts of the creative Irsquom pleased as punch to be able to spread it around
MIXEDMEDIAARTIssue 14
Artist Diana Darden made these figures from Lucky Squirrels PolyShrink She found with a small learning curve that the material was versatile enough to recreate versions of her masonite dolls
Find these products at Lucky Squirrel Here
MIXEDMEDIAARTIssue 14
I launched my blog Altered Attic in 2008 It is named for the third floor of our old brick four-square
which had been finished with plenty of light electricity and enough space to accommodate two working artists and storage for the shelving bags bins and boxes of stuff and art supplies
Though my style continues to evolve mixed media collage is my medium of choice If my hands are covered in glue and paint it has been a good day The backgrounds I texture and paint on canvas or board (mostly smaller than 12rdquox12rdquo)light switch plates puzzle pieces and tins are the inspirational beginnings and often my favorite part of the process
My most recent work is a series of seven 12rdquox12rdquocradledcanvasesFind her work here I used the backside to create a shadow-box effect and after completing each textured and painted background I incorporated Frozen Charlottes vintage papers and book covers bits of jewelry twine lettering and other repurposed objects
I used pieces from a childrsquos floor-puzzle book to create a Cloud Poem book Click here to view I altered five puzzle pieces and incorporated a poem I had written after spending an afternoon floating on my back in our favorite lake spot
the Journey
My passion for mixed media art stems from my love for (acrylic) painting and usedvintage or just old stuff that has already had one life Part trash part treasure I find it a creative and meaningful way to repurpose items that others might discard or overlook Discovering that realistic drawing wasnrsquot a requirement for making art was another significant positive While I appreciate most all forms of art I believe that the notion of landscapes and portraits has derailed many a blossoming artist
Painted background with digital photo ndash vase in front of a mirror ndash embellished with wire flowers mesh vintage Swarovski crystals board and small faces peering through the lsquowindowsrsquo in the textured paper background
altereD attiC anD proCess
MIXEDMEDIAARTIssue 14
Pattirsquos ProCess
Typically I start with a background and no clue or vision of the finished piece I donrsquot sketch beforehand and rely totally on the intuitive nature of process Once a canvas or other substrate is prepped and painted I sort through images papers and rummage through my stash for found objects that seem to relate because of texture color or its prior use Based on the materials Irsquove pulled I may modify the color palette and I usually have a mess to clean up when Irsquom finished because the broken earring brooch fork key bottle scrap of wood or rusted wire didnrsquot lend anything to the design I always know when I am finished but truthfully it is a feeling of overdoing or rearranging which helps me put it aside for a day or so then go back tweak and glue
tiP
My biggest hurdle aside from getting enough time in the studio has always been over-thinking The part of the brain that reminds us about unfinished dishes obligations errands and other means of procrastination needs to be shut off Completely Irsquove researched the artistic process and its hindrances extensively Most of the advice boils down to the same core idea We create because of a need or longing not because itrsquos fun convenient or easy The daily challenge is to eliminate the ways we find to sabotage delay and otherwise prevent ourselves from doing what we love
Painted textured background with 1980s photo layered over vintage tobacco paper fabric and mesh finished with rusted wire and sticks
My art has been sold exhibited (infrequently) appeared in e-zines andI participate in swaps and challenges however the love of process is my primary reason for making mixed media art This notion is counterintuitive to most everything we learn growing up particularly those of us raised in a non-creative business-dominated environment where product and profit make more sense than curiosity for the sake of experimentation
The limitations of a chronic illness and raising a family may reduce my art-making time but creativity is a thread woven throughout the fabric of very being
MIXEDMEDIAARTIssue 14
Background painted and tinted with Pan Pastels photograph from the 1980s framed on vintage book covers embellished with mesh and lace trim
MIXEDMEDIAARTIssue 14
C reativity has been woven through my life since childhood In my preteen years I did pencil sketches and wrote poetry which evolved over the years to include essays
narrative nonfiction and fiction In the mid 1980s photography became another passion and for several years before my children were born I shot medium-format film and spent many happy hours in the darkroom Chemicals and pregnancy are not a good matchhoweversoaftermy(nowteenaged)childrenwerebornI switched to digital photography
In 2006 after being diagnosed with a chronic illness that launched me into early retirement art became my new career I have worked in various forms of collage altered objects such as small tins books cigar boxes puzzle pieces and made books from tissue boxes and other scraps along with painting and mixed media art
Last summer I had the idea to create pieces using my history of creative disciplines I chose several photos each the starting point for these mixed media pieces My plan was to use paint found objects and as many art supplies as possible
The process ndash which took several months for each piece ndash began with a heavily textured painted background on an 8x10 canvas using colors to accentuate and complement the chosen photo Finding the rest of the materials was no problem as Irsquove acquired significant stashes of fabric broken jewelry buttons lace trim scrap wood and sticks art paper vintage papers found metal objects mica eyelets brads fibers and on one piece moss that I sprayed with various colors of glitter mist
patti edmon
Artist Profile
Process background painted using stencils and acrylics a black and white photograph from the 1980s ndash tinted with watercolor pencils and layered on an 8x10 canvas with fabric scraps trim buttons and flocked wallpaper
MIXEDMEDIAARTIssue 14
Once I had decided on a rough composition I layered and added elements allowing the piece to come to life complete with a theme and message
One of the most fulfilling aspects of this project was the problem-solving process common to any artist who creates intuitively used to make each layout work Like most artists I have a tool box with the usual hammers knives snips pliers an assortment of wire texturing tools and screwdrivers an eyelet setter and block punches a Dremel heat gun beeswax melting pot all of which were used while working on this series
My husband and I share a dedicated studio in the attic of our house built in 1900 We hired a contractor to finish the space with drywall flooring ample electrical outlets ceiling fans a storage closet lighting and a comfy window seat with cushions and pillows I donrsquot spend much time sitting there but from my table I can look out at the tops of trees through a 3rsquo x 6rsquo original window fitted with Plexiglas for insulation
I work in a sketchbook but donrsquot use it as an art journal When I write itrsquos usually several pages This series is very symbolic a personal integration of my lifersquos creative journey
Background painted over layers of paper digital photo with fabric wings tinted silver stars pearls fabric flowers and tinted moss
MIXEDMEDIAARTIssue 14
PAtti edMon I am a lifelong creative and professional writer and ran a marketingadvertisingdesign business until 2006 when I retired (very) early due to an autoimmune illness My husband and I are raising two teenagers in an old house in downtown Lexington Kentucky with two dogs and a cat
As any artist knows a well-stocked studio is vital to fulfilling creative ideas Working in mixed media explains why Irsquove always collected certain things from small boxes tins and bottles every kind of paper jewelry and books to old puzzles scrap metal and rusty bits
Textured painted background with recycled Sari ribbon and art paper digital photo and an excerpt from my essay on friendship on a vintage book cover A grunged cardboard frame is attached with looped brads and wire over old screen Eyelets with wire wrapped around sticks over three layers of mica to frame the text
MIXEDMEDIAARTIssue 14
love BirDs 2 eleCtriC BUgaloo
BRAndy cOLLIns
step 1 Gathersupplies(Seesupplylist)Rememberinmixed
media nothing is trash Any old papers stamps magazines old book pages scrap book pages painted papers textured paper old
drawings Irsquove done and other media remixed
tutorial
MIXEDMEDIAARTIssue 14
step 2 Sketch a rough
design
step 3 Using watered down
acrylics create the base painting with a color
scheme of your choice
MIXEDMEDIAARTIssue 14
step 4 I tear pages and start assembling shapes and colors that fit in various places either by conundrum shape color or texture I seal them with the matte medium I use matte medium because itrsquos easier to paint and draw on for the detail work I had some French Toile Tissue Paper and tore various scenes out of it to place in the background and using a fine paint brush I carried the scenes into the background and painted shadowing around it In the autumn version of this piece I kept the background mainly torn pages of various greens and drew leaf vein patterns on the diamond-shaped pieces This one I used a blue painted background blue painted torn book and music pages and blotted different shades of paint for clouds and texture
MIXEDMEDIAARTIssue 14
step 5 Detail work Using a fine paintbrush black Micron pen or photo pen I add the detail work I often go back and forth from collaging to detail work My canvas goes from easel to table many times throughout the process My goal is to make things look surreal in my illustrations
Hint Tweaking sometimes means I pull out pieces that Irsquove added but decided they deter from the main design For example in this piece I removed a stamp that took away from the focal point I love ldquobusyrdquowheneverypieceIaddisworkingasateamhellipbutnotonegreat stamp stealing the show which sometimes happens and in that case things can be steamed off with a hot rag or scraped off
MIXEDMEDIAARTIssue 14
step 6 Keep collaging and painting the most important thing to remember is to enjoy the process
before stamp is removed
MIXEDMEDIAARTIssue 14
Brandy CollinsBrandy Collins is a self-taught artist who works in mixed media primarily watercolors acrylics and ink She draws her inspiration from nature art music folk art and anything vintage or Gothic Her abstractrealism paintings and illustrations have been featured in galleries such as the Janette Kennedy Gallery and Kettle in Dallas Texas as well as art festivals and charity auctions in Dallas Austin and Hawaii She is a native of Hampton Virginia but currently resides in Raleigh North Carolina You can reach her here
final signed image
MIXEDMEDIAARTIssue 14
BooK
1Chapter 1 Making This Book Your Own 1Chapter 1 Making This Book Your Own
The Creative ConversationRediscover the Joy of ArtMaking
Approaching creativity as a form of spiritual practice artist and creativity guide Bridget Benton breaks the creative process down into its most basic components and o ers a fresh perspective on developing your creative skills Whether you are creatively blocked burned out or just want to further explore the world of making you can make art and have fun doing it
With 24 hands-on Artful Explorations ndash interesting and varied enough to suit both beginners and professionals ndash this ldquoworkshop in a bookrdquo helps you
bull Make art that re ects your authentic inner voice bull Practice the 12 Actions and A itudes of artmaking that support creative owbull Develop a more consistent practice with your artmaking bull Engage with your art in a meaningful and mindful waybull Move more easily through resistance judgment and other blocksbull Create a more connected intuitive and playful relationship with your artmaking
Author Bridget Benton has worked as a professional artist facilitator and workshop leader for over 20 years helping hundreds of adults rekindle their creative spark She holds a Master of Science in Creative Studies from the International Center for Studies in Creativity at the State University of New York and has taught intuitive creative process at events across the country She currently lives and paints in Portland OR
ldquohellipA breakthrough book It will serve as a beacon for a new generation of creative people as well as deepen the conversation for those already interested in bringing the metaphor of art-as-a-way-of-being more fully into their livesrdquo ndashStewart Cubley co-author of Life Paint amp Passion and director of e Painting Experience
ldquoBridget Bentonrsquos directness and honesty are refreshinghellip is book is a MUST READ for anyone interested in growing both artistically and spirituallyrdquo ndashBee Shay author of Collage Lab
ldquoIf the idea of creativity as a spiritual practice excites you then yoursquoll love this book If that idea scares you this book will take you gently by the hand and help you past those fears Either way yoursquoll soon be making yourself a more vibrant liferdquo ndashDiane Gilleland former editor of CRAFT online and author of Kanzashi in Bloom
Photo by Michael Burton
ArtMaking as Playful PrayerArtMaking as Playful PrayerArtMaking as Playful PrayerArtMaking as Playful PrayerArtMaking as Playful PrayerArtMaking as Playful Prayer Bridget Benton Bridget Benton Bridget Benton
TH
E C
RE
AT
IVE
CO
NV
ER
SA
TIO
N A
rtMakin
g as P
layful P
rayer
Brid
ge
t Be
nto
n
Bridget BentonRevIeW
MIXEDMEDIAARTIssue 14
173Chapter 1 Making This Book Your Own174 The Creative Conversation Artmaking as Playful Prayer
The Creative ConversationRediscover the Joy of ArtMaking
Approaching creativity as a form of spiritual practice artist and creativity guide Bridget Benton breaks the creative process down into its most basic components and o ers a fresh perspective on developing your creative skills Whether you are creatively blocked burned out or just want to further explore the world of making you can make art and have fun doing it
With 24 hands-on Artful Explorations ndash interesting and varied enough to suit both beginners and professionals ndash this ldquoworkshop in a bookrdquo helps you
bull Make art that re ects your authentic inner voice bull Practice the 12 Actions and A itudes of artmaking that support creative owbull Develop a more consistent practice with your artmaking bull Engage with your art in a meaningful and mindful waybull Move more easily through resistance judgment and other blocksbull Create a more connected intuitive and playful relationship with your artmaking
Author Bridget Benton has worked as a professional artist facilitator and workshop leader for over 20 years helping hundreds of adults rekindle their creative spark She holds a Master of Science in Creative Studies from the International Center for Studies in Creativity at the State University of New York and has taught intuitive creative process at events across the country She currently lives and paints in Portland OR
ldquohellipA breakthrough book It will serve as a beacon for a new generation of creative people as well as deepen the conversation for those already interested in bringing the metaphor of art-as-a-way-of-being more fully into their livesrdquo ndashStewart Cubley co-author of Life Paint amp Passion and director of e Painting Experience
ldquoBridget Bentonrsquos directness and honesty are refreshinghellip is book is a MUST READ for anyone interested in growing both artistically and spirituallyrdquo ndashBee Shay author of Collage Lab
ldquoIf the idea of creativity as a spiritual practice excites you then yoursquoll love this book If that idea scares you this book will take you gently by the hand and help you past those fears Either way yoursquoll soon be making yourself a more vibrant liferdquo ndashDiane Gilleland former editor of CRAFT online and author of Kanzashi in Bloom
Photo by Michael Burton
ArtMaking as Playful PrayerArtMaking as Playful PrayerArtMaking as Playful PrayerArtMaking as Playful PrayerArtMaking as Playful PrayerArtMaking as Playful Prayer Bridget Benton Bridget Benton Bridget Benton
TH
E C
RE
AT
IVE
CO
NV
ER
SA
TIO
N A
rtMakin
g as P
layful P
rayer
Brid
ge
t Be
nto
n
MIXEDMEDIAARTIssue 14
What did you discover during the process of writing this book
InwritingldquoTheCreativeConversationArtMakingasPlayfulPrayerrdquoI clarified my thinking about creativity Irsquod always had this idea that creativity and spirituality were connected and Irsquod always believed that anyone could be creative Irsquod done a lot of reading and studying but writing this book was what helped me to really flesh out those ideas Along the way ldquoThe 12 Attitudes and ActionsofArtMakingrdquoemergedndashIfeellike they were my greatest discovery because they are such simple principles Practicing the 12 Attitudes and Actions really builds up your creativity skills
What surprised you
I was surprised by how long it took me to write the book ndash I did the first rough draft over the course of a weekend but it took me five more years to flesh that out I really thought Irsquod have it done in a year It took a lot of patience persistence editing revising and support from my amazing writing group ndash and I think the final book is better for the extra time spent
Author Interview
Bridget Benton
Creative Conversations Is FROM A neW BReed OF ARt technIque BOOKs thAt ARe
shIFtIng the FOcus FROM FInIshed WORKs tO the PROcess OF exPLORAtIOn And MeAnIng In OuR cReAtIve PLAy
Table of Contents
Week One 9 Introduction Where This
Book Came from My Story 13 Chapter 1 Making This Book
Your Own 15 A Note to Members of
Organized Faith Traditions 15 A Note to Professional
Creatives and Caregivers Artful Explorations
Explore 16 Cardboard Camera 18 Discard Collage
Week Two 21 Chapter 2 What Is
ArtMaking as Playful Prayer 26 A Note to Those Who
Say They Canrsquot Draw 28 A Note to the Trained Artist 28 A Note to Everyone on
Process vs Product Artful Explorations
Focus on Process Not Product
30 Blind Drawing 32 Visual Definitions
Week Three 35 Chapter 3 Studio Making
Sacred Space for ArtMaking Artful Explorations
Defer Judgment 41 Glue Doodle 44 Layer It Up 49 A Conversation with Judgment
and Process
Week Four 51 Chapter 4 Materials
What Do I Really Need 53 A Note about Copyrighted
Materials 58 A Note to the Packrat Artful Explorations
Be Like a Novice 60 Materials Play Date 62 Make Your Own Coloring Book
Table of Contents
Week One 9 Introduction Where This
Book Came from My Story 13 Chapter 1 Making This Book
Your Own 15 A Note to Members of
Organized Faith Traditions 15 A Note to Professional
Creatives and Caregivers Artful Explorations
Explore 16 Cardboard Camera 18 Discard Collage
Week Two 21 Chapter 2 What Is
ArtMaking as Playful Prayer 26 A Note to Those Who
Say They Canrsquot Draw 28 A Note to the Trained Artist 28 A Note to Everyone on
Process vs Product Artful Explorations
Focus on Process Not Product
30 Blind Drawing 32 Visual Definitions
Week Three 35 Chapter 3 Studio Making
Sacred Space for ArtMaking Artful Explorations
Defer Judgment 41 Glue Doodle 44 Layer It Up 49 A Conversation with Judgment
and Process
Week Four 51 Chapter 4 Materials
What Do I Really Need 53 A Note about Copyrighted
Materials 58 A Note to the Packrat Artful Explorations
Be Like a Novice 60 Materials Play Date 62 Make Your Own Coloring Book
Week Five 67 Chapter 5 Flow Factors
Creativity and the Process of ArtMaking
69 A Note about Following Processes You Read about in Books
Artful Explorations Be in Conversation
70 Talk with the Book 71 Talk with Your Space
Week Six 75 Chapter 6
Getting Clear Intention 76 A Conversation with
Your Intentions Artful Explorations
Be Mindful 80 Deep Observation Drawing 83 Dancing with Matisse Color
Cuts
Week Seven 87 Chapter 7
Getting Inspired Energy 91 A Conversation with Avoidance
and Your Inner Goof-Off 93 A Conversation with an
Overload of Ideas Artful Explorations
Follow the Energy 94 Just Paint Just Draw 97 Get to Work and Get Inspired
Week Eight 99 Chapter 8
Getting Engaged Action 102 A Conversation with Decision-
Making in Art 103 A Conversation with
Letting Go of the Story 104 A Note about Curiosity
and What We Risk Artful Explorations
Let Go of the Outcome 105 The Whatrsquos Next Art Jar 109 Internal Journey Map
Week Nine 113 Chapter 9 Resistance
Judgment and Completion 114 A Conversation with Your Critic 116 A Conversation with Resistance 117 A Conversation with
Completion Artful Explorations
Be Curious 119 Allies and Adversaries 122 Critic Collage
Week Ten 127 Chapter 10
Staying in Touch Intuition 130 A Conversation with
Your Values 133 A Conversation with Your
Intuition Artful Explorations
Tune Up Your Inner Ears 134 Value Collage 137 Matchbox Assemblage
Week Eleven 141 Chapter 11
Giving Back Community 143 A Conversation with
Appreciation Artful Explorations
Cultivate Appreciation and Gratitude
146 Thank You Notes 148 Paper Prayer Beads
Week Twelve 153 Chapter 12 Maintaining
Artmaking as a Spiritual Practice
154 A Conversation with a Commitment to Action
Artful Explorations Hold Clear Intentions
157 Mandala 160 Prayer Candle
165 Bibliography and resources
167 Appendix a Theory and Practice
168 Appendix b A Note on Working with Groups
169 Index
MIXEDMEDIAARTIssue 14
What are 5 ideastechniques you would like any reader to take away after reading this book
First I want people to come away from the book feeling like they CAN make art Second Irsquom hoping a reader accepts that they donrsquot need fancy materials or the perfect studio ndash the whole book is really about breaking down those barriers to making that we all put up while giving you a few tools to make the creative process a little easier
In that spirit Irsquoll share a few of the Actions and Attitudes of ArtMaking ndash the ones that I remind myself of all the time When I make art with these things in mind I have more fun feel more connected and produce more interesting authentic work
1 FocusonProcessNotProduct(beinthe moment and enjoy the making)
2 LetGooftheOutcome(sooftenwehave a picture in our head of what it ldquoshouldrdquolooklikendashletgoofitandwork with whatrsquos there)
3 BeinConversation(payattentiontowhat the piece wants and what your intuition is telling you)
4 DeferJudgment(andpracticediscernment instead ndash while yoursquore making let go of the temptation to labelwhatyourdoingasldquogoodrdquoorldquobadrdquondashjustdiscernthenextbestthingto do)
5 BeCurious(thisistheantidotetojudgment)
Who did you write this book for
I wrote this book for every adult who wants to be creative but feels like they canrsquot be I wrote this book for everyone who had a bad art experience as a kid and stopped even trying to
111Chapter 8 getting engaged action
MaterialsbullJunk mail or old magazines bullBlank paper or sketchbook (larger
and heavier is better bristol board watercolor board or scrap cardboard is ideal)
bullOld mapsbullPermanent marker (at least one
like a Sharpie)bullMod Podge or gel mediumbullAcrylic paintsbullBrushes and water containerbullScissors
optionalbullRub-on or press-on lettersbullGessobullRags or paper towelsbullWax paper or palette
Internal Journey Map
Artful Explorations Let Go of the Outcome
108 The Creative Conversation Artmaking as Playful Prayer
1 Choose at least 24 of the follow-ing phrases or art prompts Write each phrase on its own slip of paper so that you can pull them one at a time out of the jar You can handwrite each prompt or type the prompts into a word processing program and print them out Either way cut them up so that you have only one prompt per slip of paper
2 Fold up each slip of paper and drop all 24 into your container Mix them up Get your art supplies ready and pull out a sheet of sketch paper
3 Now draw a slip of paper from the container and do what it says Then fold the slip back up put it back in the container mix things up again and draw another slip of paper Again follow the instructions Repeat this at least 12 times After the 12th prompt do whatever you need to do to feel complete with the piece
bullFill an area with a solid colorbullAdd a dotted linebullAdd star shapesbullCollage three items onto the
surfacebullAdd textbullAdd a circlebullPut eyes on somethingbullFill an area with a patternbullAdd red orange or yellowbullAdd blue green or purplebullAdd shadingbullAdd at least one collage elementbullAdd at least three straight linesbullDraw or scribble a shape person
or objectbullOutline somethingbullHighlight somethingbullAdd a rectangle
bullAdd a flowing linebullAdd a reference to naturebullAdd a reference to peoplebullAdd blue or orangebullAdd dotsbullAdd green or purplebullUse collage to add a patternbullDo something to unify the spacebullRotate the piece 90deg or 180deg and
choose a new promptbullFind an element in the piece and
repeat itbullAdd egg shapesbullAdd colorbullAdd one collage elementbullUse a wash of gesso over at least 13
of the surfacebullUse a wash of color over at least 13
of the surface
ldquoBy using the term artmaking Irsquom
emphasizing art-as-verb Irsquom focusing
on the actions and attitudes that support artmaking as playful prayer these actions
and attitudes are also what I think
of as the work of artmakingrdquo
MIXEDMEDIAARTIssue 14
make art as a result I wrote this book for every professional creative who feels dried up and washed out after years of producing art for product I wrote this book for every person who wakes up in middle age and says to themselves ldquoWhen am I finally going to givemyselfpermissiontomakethingsrdquo
And in so many ways I wrote this book for myself Itrsquos the book I most needed in my 20s when I was blocked and stuck and
terrifiedofmakingldquobadartrdquoItrsquosmywayofsharingeverythingIlearned in my 30s ndash all the things that got me making art again
What 2 people or things influence your work right now
For the past six years or so Irsquove been working primarily in encaustic The material itself has had a big influence ndash Irsquove been able to take layers and depth further than ever before Lately Irsquove been thinking a lot about remnants - about the things we leave behind about the ways that experiences mark us and the objects that serve as evidence of those experiences That sounds pretty esoteric but it means Irsquom playing a lot with X-rays images of people and things like tea bags food wrappers bottle caps and receipts Therersquos a parallel there to evidence at a crime scene piecing together what happened from whatrsquos left behind Maybe Irsquove been watching too many police procedurals
What are your 4 favorite sources of creative inspiration
Working is my favorite source of inspiration ndash when I get my hands moving and start playing with the materials ideas just start coming and it becomes clear what needs to happen next I try to leave the studio each day knowing what I want to do next so that itrsquos easy to just dive in and get back to work
The materials themselves play a big part ndash Irsquoll ask myself ldquoWhat does this mean What can I do with this How does this workrdquoLikemostmixedmediaartistsIADORElearning new techniques and experimenting with new media I teach at Collage - an art store in Portland Oregon - and I love designing classes around new materials
I also love giving myself challenges ndash what can I do using only the scrap images in this magazine or what can I do with small squares of paper
ldquoAcknowledging that they didnrsquot have to be
in control was liberating for some of the students
Instead they could respond to what was happening within the
artwork itself
ldquoI began to understand that art could be an
action and a process not just a
productrdquo
MIXEDMEDIAARTIssue 14
The limits can actually be really freeing
My students are another huge source of inspiration for me ndash itrsquos as though I absorb a bit of their excitement and sense of experimentation while I teach Sure Irsquom tired at the end of the day but itrsquos as though the students renew my own enthusiasm for whatever Irsquove been teaching I think itrsquos about re-accessing that sense of being a novice
What are 5 tools or supplies you canrsquot be without
bull Scissors bull Gluestick bull Sketchbook bull Pencil bull BlackSharpie
This is the bare minimum that I travel with ndash potential collage papers present themselves for free everywhere and if I can cut paste and sketch out ideas thatrsquoll hold me for at least a week After that I start wanting gesso and some way to add color ndash either gouache or acrylics Gouache is easier to travel with
Whatrsquos next
Right now Irsquom enjoying being in my studio and making art and designing workshops and online classes And the next book is lurking in there but it feels too soon to talk about it
artist noun someone who with their own
level of skill and passion intentionally
makes things in a meaningful and
mindful way a person whose primary work
is to find meaning and express it in concrete or tangible ways an
identity available to all of us as our birthright
art verb to make something with
meaningful mindful intent (adapted from
the everyday Work of Art) noun An action
or process we are all capable of that
serves as evidence of our own divine spark the tangible record of
meaningful mindful creative process
Benson has really cool projects cerebral exercises and techniques to explore Especially the lsquoWhats Next Art Jarrsquo p108 and Internal Map Journey p111I could easily spend a year working through Bentonrsquos book playing exploring reflecting on my creative process This is a book worth your time and money
editorrsquos note
MIXEDMEDIAARTIssue 14
I first learned how to embroider when I was about six or seven With superhuman patience my mother
taught me how to divide the cotton floss thread the blunt wide-eyed needle and follow the pink line of the iron-on pattern shersquod applied for me I wasnrsquot great at it _ my stitches were big and uneven at first and I spent more time trying to pull out misplaced stitches than I did making them But these lessons lovingly given in the living room of my childhood home turned out to be a pivotal influence on my artistic future
Embroidery has a long and beautiful history Even though itrsquos become a fairly uncommon pastime in recent decades itrsquos a craft undeniably rich with tradition Part of the reason Irsquom so drawn to it is that tradition knowing that my motherrsquos mother taught her just as she taught me Women(andoccasionallymen)havebeenpassing on this knowledge for centuries using it for ritual for homemaking for social status and pleasure Therersquos something powerful in that kind of custom and I canrsquot help but be drawn to the craft as a result
The process itself is meditative more pleasure than work It may seem like therersquos not much room for creativity since most embroidery is just stitching a
pattern but really therersquos just as much opportunity for creative control as there is in any other medium Just as a painter carefully places each brushstroke an embroidererhastoplaceeachstitch thedifference is that I can rip out and move a misplaced stitch a lot easier than a painter can move a stroke of paint I can blend colors alter line weight and quality and improvise a pattern just as I could if I were drawing in a sketchbook but when Irsquom finished with a sewn drawing itrsquos soft and textured and tactile in a way that most drawings can never be
That tactile quality is a huge draw for me as an artist _ the feel of the stitching itself as well as whatever I happen to be sewing
emBroiDerY
Anatomia Detail
christy turnerrsquos
MIXEDMEDIAARTIssue 14
on be it fabric or paper Which one I use is generally determined by the nature of the project in question but the main thing I care about is the tactile quality of whatever surface Irsquom working on
I really want the viewer to reach out and touch my artwork to pick it up and hold it to feel the fibers and stitches and structure We have this notion as a society that art is to be looked at from a safe distance never touched or handled and I like my work to be different in that regardThemagicofembroidery(andofthe book form which I often use in my art) is that itrsquos meant to be touched and used That traditional utilitarian quality is just one more reason why Irsquom inexorably drawn to embroidery _ itrsquos art but itrsquos the kind of art thatrsquos meant to be held between your fingers and rubbed against your cheek
theMes in My Work
My artwork uses a variety of different mediums but often references recurring themes of anatomy and interpersonal relationships While these concepts may not seem like they have much in common
the underlying factor that interests me is structure
My anatomical work focuses on physical structure _ primarily skeletal composition a topic that has fascinated me since I was a kid The architecture of the human body _ striking in both its intricacy and simplicity - is something I feel compelled to study and replicate Much of the imagery in my skeletal work is derived from either antique anatomical diagrams (Anatomia amp Ribcage) or firsthand fromhuman cadavers (CadaverHand StudyampCadaver Foot Study) Though the resulting artwork could be portrayed as something gruesome or macabre I prefer to think of it in an architectural sense looking at bones and tendons as structural components of a larger whole
On the opposite side of the spectrum is my work relating to human relationships These pieces in particular one sewn book called Maps seek to illustrate social structure by exploring the emotional bonds we create throughout our lives This area of my work tends be far more conceptual in nature than my anatomical studies but the basic focus on some form of structure remains the same
Anatomia Spread
MIXEDMEDIAARTIssue 14
AnatomiaThe imagery in this carousel book is derived from antique anatomy diagrams The top (black)layerillustratesskeletalanatomythe next layer has the corresponding muscle systems embroidered in red on a fibrous handmade paper
Cadaver StudiesThese embroidered studies are the result of several hours spent sketching dissected cadavers in the Oregon State University cadaver lab I sketched directly onto the muslin then embroidered the drawings trying to preserve their hasty line quality
Family PhotosUsing silhouettes derived from antique family photographs I embroidered these incomplete portraits in an attempt to illustrate the fluid quality of familial relationships The portraits themselves aresewnon100cottonragpaper(RivesBFK) and coptic bound with a letterpress introduction and colophon
Fish SkeletonThis skeletal study was initially drawn in a sketchbook then transferred onto muslin and stitched As with many of my embroidered studies I tried to keep the sketchy quality of my line work as similar as I could to the original drawing by using long dense stitching
Cadaver Foot Study
Family Photos Detail
Fish Skeleton
MIXEDMEDIAARTIssue 14
MapsOne of my more conceptual books ldquoMapsrdquo uses simpleembroidered diagrams to literally map out complex social hierarchies The author is represented in each map by a red French knot family friends and other social connections are represented by blue French knots connected by family tree style stitched linework
Maps
Phrenology StudiesThis book was made using intaglio printing embroidery letterpress printing and an accordion binding with butterfly cut walnut covers The heads and faces are drypoint intaglio prints on tea-stained cotton rag paper These prints are backed with red lotka paper and stitched with red cotton thread to emphasize the phrenology map design
Phrenology Studies
MIXEDMEDIAARTIssue 14
Christy turnerChristy Turner was born in Walla Walla Washington where she was instilled from a young age with a love for the Pacific Northwest and traditional handicrafts After learning to sew and embroider as a child Turner went on to earn her BFA from Oregon State University in 2012 Though her degree is primarily rooted in relief printmaking Turner also independently studied artist books and embroidery experimenting with various combinations of the three separate mediums In 2013 she was awarded a scholarship to attend the Focus on Book Arts Conference in Forest Grove Oregon She has exhibited photography embroidery artist books and relief prints in juried shows across the country and is currently preparing for a two-person embroidery exhibit to be held in her hometown of Corvallis Oregon
love to Createlove to see other artists teChniQUesanD tools
sUBsCriBenow
Cadaver Hand Study
MIXEDMEDIAARTIssue 14
The problem and the joy of making mixed-media artworks is that there are so many kinds of materials to
be painted GOLDEN Acrylics offers help in getting paint to stick to a wide variety of surfaces with the aid of the GAC series of polymers I am not going to talk about painting canvas just the weird things we mixed-media artists use
All nine GACs are formulated based on 100 acrylic dispersion polymers with only a minimum amount of thickeners freezethaw stabilizers defoamers and preservatives The GACs are fluid and thin and are typically used in conjunction with something else GACs are blended with paints to extend the paint regulate transparency create glazes increase gloss reduce viscosity or improve adhesion and film integrity They are thin and reduce the thickness of most paints Each one has a specialized use
The two products that help the most in my studio for painting on found objects are GAC 100 and GAC 200 Both stretch the color making them an economical consideration but they each have specific jobs Which one do I use and when To determine which product to use I ask
bull What is the object made of
bull Is it flexible or rigid
bull Is it porous or non-porous
If the answer is rigid and non-porous the solution is GAC 200 In this issue I will share my series of experiments with GAC 200 on a variety of rigid and non-porous objects I used mixtures of GAC 200 with either Fluid or Heavy Body Acrylics It is the hardest and least flexible of all the GOLDEN Acrylics and reduces tack These last attributes that make it so good for rigid substrates make it not very good for flexible surfaces GAC 100 is wonderful additive for painting on flexible and porous objects but you will have to wait until next issue to learn about it
Product exploration of gAc 200
WhIch One On WhAtgAC 200
Bonnie Meltzer
Items to paint
QUestions the artist mUst asK themselves
MIXEDMEDIAARTIssue 14
There are more questions to answer once the decision is made to use GAC 200
1 What proportion of GAC 200 should I use
2 How little can I use so the paint makes a good bond What percentage is too much
3 HowshinydoIwantit(GAC200isveryshiny)
4 Howtransparent(themoreGAC200themoretransparent)
5 How will it flow from my brush Will the brush marks show
The pictures and captions will give you insight to these questions but as a general rule I have found that if you want full coverage heavy body with 25 GAC 200 works best if you have something to hide The more GAC 200 in the mix the more transparent and shiny it becomes A 50 mix worked well when I wanted the substrate to show through I tried it up to 75 which Golden suggests is
the maximum That application could make wonderful texture of opaque ridges next to transparent swirls especially on smooth surfaces I mixed small batches of GAC 200 with heavy body paint and fluid acrylics using 14 tsp and 1 tsp measuring spoons Some objects were merely painted to test coverage Other times I experimented with brush stokes and layers Post your experiments with GAC 200 to Facebook
Copper sheet with gray stripes made with heavy body paint and 25 and 50 GAC 200 just brushed on normally Upper left dabbed
MIXEDMEDIAARTIssue 14
Surfaces to Paint with GAC 200 I have had good results with metal of all types acrylic and other rigid plastics and heavily varnished wood
tiPs
Clean No matter how good the paint is you have to prepare the substrate You want the paint to stick to the material not a layer of dust or grime Wipe with a damp cloth or wash with soap and water if it is really dirty Dry well I always wipe an object with alcohol even alcohol from the drug store Sand shiny and slick surfaces to help the paint stick Donrsquot forget to wipe the sanding dust off with a damp cloth
GAC 200 makes paint stick to your palette as well as your painting I use disposable soft plastic yogurt tops instead of my regular rigid plastic palette with little wells A side benefit of the yogurt top is that by bending it you can peel off the paint and use the sheet in a project
The blue hair was made with a mixture of 75 GAC 200 and fluid acrylic Notice the ridges I need to use that more
Various dilutions of paint on textured factory primed aluminum In progress The texture reacted differently to the various mixtures of GAC 200 The white is the unpainted material
MIXEDMEDIAARTIssue 14
A finished and installed exterior artwork on smooth aluminum painted with GOLDEN Acrylics heavy body and fluid acrylics and GAC 200 Sprayed with clear spraypaint Hose nozzle is also painted Mixed with crocheted wire and found objects The paint had to have a good bond not only on the base but also so it would not get scratched from the crochet
Donrsquot shake the paint There are minimal antifoaming agents in GACs so donrsquot shake them You will get tiny bubbles in the paint A foam brush also will encourage tiny bubbles
All but one of the photos are not finished pieces but experiments and samples made for this article Usually a piece is made up of many found objects not all of them are rigid andor non-porous Some of the samples from this article could grow into a finished artwork utilizing GAC 100 GAC 100 has many uses and is indispensable in my studio for preparing substrates extending paint and for painting on flexible and porous surfaces So stay tuned and come back for Part 2 with an examination of GAC 100 in the next issue
Bonnie and I love this product for multiple reasons the main one being that the GAC series gets paint to stick on just about anything Other attributes
Great hard edge when using tape to mask off an area Tried on glass metal and natural material (seed pods from my auntrsquos tree) - worked great Painted on an old pair of my daughterrsquos clogs left brushstrokes but used a coarse bristle brushPaint pigment did not dilute however it does make the paint more transparent Works great on plastic
editorrsquos notes
MIXEDMEDIAARTIssue 14
MIXEDMEDIAARTIssue 14
drawing 101
horizontal faCial proportions of aDUlts
Before you attempt to draw adult faces it helps to know how to plan a place for everything sort of
like a blueprint Even though the heads and faces of adults come in many shapes and sizes the same basic guidelines for proportions apply to almost everyone
In this lesson set up simple easy to remember guidelines for drawing horizontal adult facial proportions and then draw proportionally correct ears eyes and a nose and mouth within your outline
Suggested drawing supplies include white drawing paper a ruler graphite pencils and erasers
You also need basic math skills (or acalculator) for measuring and dividing various distances
this ProJeCt is divided into three Parts
DRAW THE OUTLINE OF THE HEAD Draw a circular shape to represent an adult human head with the top half wider than
the bottom
ADD HORIZONTAL LINES TO THE OUTLINE Divide the length of the head into two halves and the lower half into three equal distances
DRAWING EARS AND FACIAL FEATURES Beginners to drawing portraits tend to draw eyes too high on the head
Now add ears eyes and a nose and mouth to your head shape using the three distances in the lower half of your drawing Itrsquos not important that you draw the ears and features well The goal is to draw everything in its proper place
Brenda hoddinott
MIXEDMEDIAARTIssue 14
eXaMininG adult heads and faCes
The most common mistake is to draw the eyes too high on the head However if you look closely at an adult head you can see two halves with the eyes positioned on the halfway point where the two halves meet Below are four simple variations of the top and bottom halves of a human head Any of the skull shapes can be matched with any one of the facial shapes thereby providing many possibilities for the shapes of human heads
The shapes of human heads and the sizes and placements of peoplersquos facial features are very different
Sketch them joined together to make an outline of a complete head
Itrsquos perfectlyOK to draw your skull shape (or facial shape) slightly differentthan in the illustrations such as wider narrower shorter or even longer
However donrsquot wander too far away from the basic shape or your drawing may be too far outside the parameters of what is considered normal human anatomy
Turn your outline of a head-shape into an original person by adding some facial features and hair
Have fun creating different people by mixing and matching other skulls and faces and then adding facial features
MIXEDMEDIAARTIssue 14
draW the outline of the head
Use a ruler to draw a rectangular drawing format on your drawing paper
Drawingformat(sometimescalledadrawingspace)refersto the area of a drawing surface within a specific perimeter outlined by a shape of any size such as a square rectangle orcircleSuggestedsizesinclude5rdquox7rdquo6rdquox8rdquoor7rdquox9rdquo
Draw a very light line of symmetry down the center of the rectangle Measure and mark a small dot at the halfway point of the top and bottom sides of your rectangle Use a ruler to connect the two dots This line helps keep your head shape symmetrical and is a guide for measuring the placement of facial features
Symmetry in drawing is a balanced arrangement of lines and shapes on opposite sides of an often-imaginary centerline In the scans of my drawing throughout this project the line of symmetry is too light to see
Draw a circular shape to represent an adult human head with the top half wider than the bottom
The basic outline of an adult head is similar in shape to an egg
The line of symmetry you drew down the center of your rectangle is helpful for measuring distances on either side to make sure the head in your drawing is symmetrical
MIXEDMEDIAARTIssue 14
add horizontal lines to the outline
In this section you divide the length of the head into two halves Then the lower half will be divided into three equal distances
TIP In time you will be able to judge all proportions visually but for now please use a ruler
Draw a horizontal line that touches the edge of the very top of the head
This line is parallel to the top and bottom of the rectangular drawing surface (and verticalto its sides)
Mark this line IJ
Draw a second horizontal line touching the lower edge of the chin
Mark this line GH
Measure the total vertical distance along the center vertical line (too light to see in my drawing) from the top of the head to the bottom of the chin
Divide this total measurement in half and mark it with a small dot Feel free to use a calculator
Draw a horizontal line (AB) through this dot dividing the head into two halves (as in Illustration 01-08)
Most peoplersquos eyes and the top sections of their ears are somewhere along this line halfway between thetopoftheskull (notthetopofthe hair) and the bottom edge of the chin
MIXEDMEDIAARTIssue 14
Measure the vertical distance between lines AB and GH
Divide this distance by three and lightly mark the two points with dots on the center vertical line (too light to see in my drawing)
Add a fourth horizontal line through the upper point (closer to AB) This line is parallel to each of the other three lines IJ AB and GH
Mark this line CD
The lower part of the nose and the lower sections of the ears touch this line
Add a fifth horizontal line through the lower point (closer to GH)
This line is parallel to each of the other four lines
Mark this line EF
The lower edge of the bottom lip will be close to or touch this line Now the vertical distance between lines AB and GH is divided into three equal sections
MIXEDMEDIAARTIssue 14
draWinG ears and faCial features
Your blueprint is complete and itrsquos time to add a face In this section you draw ears eyes and a nose and mouth on your head shape using the three distances in the lower half of your drawing
It is not important that you draw the ears and features well The goal is to simply place everything in its proper place You may even choose to draw completely different features
Remember itrsquos more important to draw the ears and facial features in their correct places rather than fuss about the intricate details
Draw the outlines of the ears with the tops above AB and the bottoms below CD
Erase the vertical lines (indicating the outline of the head) between lines AB and CD (on both sides of your drawing)
Re-draw the outline on each side (between lines AB and CD) leaving an opening for the tops of the ears to extend inward
Extend the outlines of the tops of the ears inward toward the center of the face
Draw short curved lines on the upper section of each ear (touching AB) to indicate the outer rims of the ears
MIXEDMEDIAARTIssue 14
Add more detailed lines to each ear to represent its various parts
Even though fine details are not important in this lesson try your best and you may be pleasantly surprised
The only important factor to achieve a realistic human face is to put every thing in its correct place according to the facial guidelines
Copyright to all articles images text projects lessons and exercises within this drawing class belong to Brenda Hoddinott and may not be reproduced or used for any commercial purposes whatsoever without the written permission of Brenda Hoddinott
E-mail bhoddinotthoddinottcom Web sites httpwwwfinearteducationcom and httpwwwdrawspacecom
- 9 -
27) Add more detailed lines to each ear to represent its various parts Even though fine details are not important in this lesson try your best and you may be pleasantly surprised
ILLUSTRATION 01-14
Each individual face is physically unique due to inherent variations in the sizes and shapes of heads faces and features You can complete the facial features on your drawing however you wish The only important factor to achieve a realistic human face is to put everything in its correct place according to the facial guidelines
MIXEDMEDIAARTIssue 14
Draw the eyes along AB
To help you decide how wide to draw each eye refer to Illustration 01-15 and observe the following
bull The widest section of the head is ldquofive-eyeswiderdquo
bull The width of an eye is equal to one of these distances
bull The distance between the eyes is equal to the width of one eye
Copyright to all articles images text projects lessons and exercises within this drawing class belong to Brenda Hoddinott and may not be reproduced or used for any commercial purposes whatsoever without the written permission of Brenda Hoddinott
E-mail bhoddinotthoddinottcom Web sites httpwwwfinearteducationcom and httpwwwdrawspacecom
- 10 -
28) Draw the eyes along AB To help you decide how wide to draw each eye refer to Illustration 01-15 and observe the following
The widest section of the head is ldquofive-eyes widerdquo
The width of an eye is equal to one of these distances
The distance between the eyes is equal to the width of one eye
ILLUSTRATION 01-15
Draw some eyebrows above AB
You can draw eyebrows
bull Light or dark
bull Thick or thin
bull Very curved slightly curved or fairly straight
bull Very close to the eyes or a little higher on the forehead
Copyright to all articles images text projects lessons and exercises within this drawing class belong to Brenda Hoddinott and may not be reproduced or used for any commercial purposes whatsoever without the written permission of Brenda Hoddinott
E-mail bhoddinotthoddinottcom Web sites httpwwwfinearteducationcom and httpwwwdrawspacecom
- 11 -
29) Draw some eyebrows above AB You can draw eyebrows
Light or dark
Thick or thin
Very curved slightly curved or fairly straight
Very close to the eyes or a little higher on the forehead
ILLUSTRATION 01-16
MIXEDMEDIAARTIssue 14
Draw the nose
The following guidelines apply to most adult faces
bull The lower section of the nose touches the horizontal line CD
bull The very bottom edges of the nostrils are often below CD
bull The nose is approximately the width of the distance between the eyes
bull The base of each cheekbone usually aligns with the bottom section of the nose
bull The lower parts of the ears horizontally align with the bottom section of the nose
Copyright to all articles images text projects lessons and exercises within this drawing class belong to Brenda Hoddinott and may not be reproduced or used for any commercial purposes whatsoever without the written permission of Brenda Hoddinott
E-mail bhoddinotthoddinottcom Web sites httpwwwfinearteducationcom and httpwwwdrawspacecom
- 12 -
30) Draw the nose The following guidelines apply to most adult faces
The lower section of the nose touches the horizontal line CD
The very bottom edges of the nostrils are often below CD
The nose is approximately the width of the distance between the eyes
The base of each cheekbone usually aligns with the bottom section of the nose
The lower parts of the ears horizontally align with the bottom section of the nose
ILLUSTRATION 01-17
Draw the mouth
The following guidelines generally apply to adult faces
bull The lower lip is usually touching or slightly above line EF
bull The mouth is generally wider than the nose
bull The lower lip is approximately halfway between the lower section of the nose and the bottom of the chin
bull The outer corners of the mouth are usually directly under the irises of the eyes
Copyright to all articles images text projects lessons and exercises within this drawing class belong to Brenda Hoddinott and may not be reproduced or used for any commercial purposes whatsoever without the written permission of Brenda Hoddinott
E-mail bhoddinotthoddinottcom Web sites httpwwwfinearteducationcom and httpwwwdrawspacecom
- 13 -
31) Draw the mouth The following guidelines generally apply to adult faces
The lower lip is usually touching or slightly above line EF
The mouth is generally wider than the nose
The lower lip is approximately halfway between the lower section of the nose and the bottom of the chin
The outer corners of the mouth are usually directly under the irises of the eyes
ILLUSTRATION 01-18
Use your kneaded eraser to lighten the outline of the top of the head until itrsquos almost invisible and then add hair
MIXEDMEDIAARTIssue 14
dRAWIng eYelashes
E yelashes are fine hairs that grow from the outer edges of the upper and lower eyelids The upper eyelid is the larger movable fold of skin above the eyeball that opens and closes to protect the upper and center sections of the eye The
lower eyelid is a smaller less movable fold of skin protecting the lower eyeball Many artists have difficulty drawing natural looking eyelashes Even if every other aspect of your drawing of a face is perfect incorrectly drawn eyelashes can ruin it
Eyelashes though tiny are the most challenging parts of human anatomy to draw realistically In Illustration 1 you see unnatural looking individual eyelashes that are the same value and thickness from root to tip Eyelashes drawn with this type of line canrsquot possibly look correct Illustration 2 shows the correct way to draw individual eyelashes Each eyelash is thick at the bottom and gradually becomes lighter and thinner closer to the tip
Illustration 1 Illustration 2
In this illustration of three eyes have a peek at some common mistakes made when drawing eyelashes such as making them too thick too straight or too long
Illustration 3
MIXEDMEDIAARTIssue 14
Correctly drawn eyelashes look natural and lifelike A simple little drawing technique provides a realistic looking eyelash every time - in simple terms never draw eyelashes from the tip down toward the eyelid Always draw them in the direction in which they grow from theeyelid(orroot)outwardGrabsomepaperanda2BpencilReferto the next close-up drawing and try your hand at drawing realistic looking individual lashes
1 Begin at the base of the eyelash and press firmly with your pencilRemember always draw eyelashes in the direction they grow from the eyelid outward
2 Slowly release the pressure you apply as your curved line extends toward the tip Realistic eyelashes look like inverted commas ndash thick at the bottom and thin at the top
3 Gently lift your pencil from the paper when the tip of the line is very thin and light in value
The following criteria provide insights into various aspects of drawing realistic eyelashes Refer to the previous two illustrations and the next Take note that correctly drawn eyelashes
bull Grow in many different directions mostly outward from the eyelids
bull Are rendered with thin lines of different lengths
bull Are curved and unevenly spaced
bull Appear thicker closer to the eyelids
bull Grow from the outer edges of the upper and lower eyelids and not the white of the eye
bull Are drawn in groups rather than single lines
bull Gradually become longer and thicker toward the outer corners of the eye
Illustration 4
Illustration 5
MIXEDMEDIAARTIssue 14
Warm up your drawing hand and draw an eyeful of eyelashes
1) Lightly sketch the almond shape of an eye with a double line at the top and bottom to represent the thickness of the flesh of the eyelids
2) Use 2H and HB pencils to draw an average quantity of eyelashes on the outer edges of the upper and lower eyelids
Illustration 6
Illustration 7
MIXEDMEDIAARTIssue 14
Brenda hoddinottAs a self-educated teacher visual artist portraitist forensic artist (retired) and illustrator Brenda Hoddinott utilizes diverse art media including her favorites graphite and paint
Brenda is the author of Drawing for Dummies (Wiley Publishing Inc New York NY) and The Complete Idiotrsquos Guide to Drawing People (Winner of the Alpha-Penguin Book of the Year Award 2004 Alpha - Pearson Education ndash Macmillan Indianapolis IN) She is currently writing two books on classical drawing
Donrsquot expect to master drawing eyelashes right away Take lots of time to practice before you try adding them to your drawings of people With lots of practice you can draw natural eyelashes that are thick and bold close to the base and thin and light at the tip
Illustration 8
Illustration 9
In order to understand the body of works created by the Cuban artist Conrado Maleta it is necessary to
move a few steps back to his childhood in Cuba With the end of Soviet Union the island was in a long process of economic and social degradation called
PeriodoEspecial(specialtime)Inthattime the teenager who is today the artist helped family members in the production of popular jewelry and decoration artifacts Almost all the work was done with recycled materials or morphologies coming directly from nature such as shells and stones He also sold the products door to door earning just a little but absolutely happy about it In those times he learned how to do crafts and how to re-use things in his own environment Many years later the artist started to work in what today is his most beloved group of art pieces Neo-Byzantine Madness and Boxes of Beauty
Neo-Byzantine Madness The concepts behind these works are deeply anchored with the human historic background The first group of works is developed from personal experiences and learning in the Middle East and hours of walking and listening to religious services in orthodox churches and Catholic monasteries of Israel It is all about a mistake
Work-01 Fancy pedestal for the allegory of Beauty 2013Coins silicon glue glass balls pearls a plastic rose some acrylic paint and glossy varnish Box made with American coins and objects I found in the streets of New York City I did it thinking in the concept of beauty I also think it has something to do with the salty foam of the sea
MIXEDMEDIAARTIssue 14
Artist Profile
ConraDomelato
The artistrsquos mistake and misunderstanding of how others see and trust in their beliefs It is also about reinterpretation of aesthetics that have millennia of development but suddenly in the eyes of a Western post-postmodern man they appear to be antiques In the works of this set there is a special intention for creating a contemporary version of Middle East religious imagery Christian Jewish Islamic or even Baharsquoi Sometimes the lecture is clear at first glimpse but for others it is necessary to go inside
the concept in order to understand the meaning Every work has a powerful sense of humor by itself without being frivolous are a must because they are the verbal key used by the artist to lead the public into a correct road
Boxes of Beauty After moving to New York City one of the first things I noticed was the presence of hundreds of pennies in the streets The idea of having as material something that others donrsquot want or need and also keeping clear that there is a possibility for these coins which the government is thinking about not printing anymore to be in the near future a rare collectible had been the starting point for the project
Work-03 Shut on the TV Sex language for adults and violence 2013Coins silicon glue plastic toy glass balls acrylic paint glossy varnish steel nails A TV set in Cuba is of the old style with long skinny legs And at beginning of each film you have a text with the category This is an adult series of films The violence is represented by the red color and drops the sex is just the cavities the dark inner spaces and the adult language are represented by a dinosaur
Work-02 Goat who has broken a drum with its skin pays 2013 Coins silicon glue thread plastic goat sleighbells acrylic paint glossy varnish All the objects I found in the streets of New York City The title is from a traditional Cuban song It is an irony for me because finding a goat in Manhattan was the last thing I ever expected OK it was plastic but thatrsquos just an irrelevant detail
MIXEDMEDIAARTIssue 14
The presence of the TV is also a conceptual idea in this new work The TV is the new Pandorarsquos Box The good and bad inside the TV - the aggressive behavior especially verbally from some New Yorkers is expressed through the use of the dinosaur like something big bigger than life Colorful dinosaurs appear as vulgar slang the artist has heard in the street The use of boxes as containers is also a product of a direct influence from the artistrsquos present life The need of a home the search for a homey building or space The house as a warm and protective uterine refuge New York as a cave New York as a home
The act of material recycling has two basic meanings adding information in an anthropological way and supporting the artistrsquos eco-conscious way of life
Work-04 Open this box of wisdom and you will learn about a human sin Open this heart and blue clouds will come out of my body 2012A Tefillin box that I found in a Genizah - a sacred storage area - in the streets of Tel Aviv (it is a big sin but I couldnrsquot resist) cotton thread a plastic butterfly silicon glue acrylic paint steel wires inside two cut-off illustrations from old books of art It is about hope and beauty Holy actions desire and sin
Work-05 Double game with sensibility 2012Wood iron plate thread plastic net Italian silver wire pearl steel nails used matches two cut-off illustrations from a very old book of art silicon glue acrylic paint and glossy varnish Man vs woman Power vs spirituality Red vs blue It is a piece talking about dichotomy as a game It is also created for being used as jewelry avant-garde jewelry work
MIXEDMEDIAARTIssue 14
aBout My studio
My studio is located in Crown Heights South Brooklyn It is open only by previously scheduled appointments You can email Conrad for more information
Work-07 Muhammad and Jesus Christ doing scatological questions to Yahveh the God of the Jews 2012Metal plate silicon glue wire acrylic paint and glossy varnish This little work was done in Jerusalem I was traveling there and it is about what I saw listened to and enjoyed there It is easy to imagine all the different interpretations of God talking and making noise and fighting to keep their own relevant considerations
Work-06 Dialectical exchange of two unborn kids that happens in the intrauterine space 2012Metal plate silicon glue thread acrylic paint and glossy varnish This very small piece was done in a hard moment My wife and i were struggling to get pregnant and it wasnrsquot easy I had weird feelings and one night I had a dream in which I was talking to a my twin (I donrsquot have in real life) I did this work and still think it is so full of energy
MIXEDMEDIAARTIssue 14
Maletarsquos Studio Space
MIXEDMEDIAARTIssue 14
Conrado r MaletaConrado R Maleta is a Cuban artist who was born in Santiago de Cuba 1979 He has traveled for a long time around the world Europe the Middle East and America Today he is based in Brooklyn He is has a bachelorrsquos degree in Architecture and URBAN PLANNING his career has mainly been as an artist studying with private professors and taking on internships He has been a painter sculptor and photographer His whole work is dedicated to the analysis of the human expressions in religiosity and spirituality It is correct to consider his body of works as a visual road opened by a naive anthropologist
He can be found here or Click here for more information
MIXEDMEDIAARTIssue 14

MIXEDMEDIAARTIssue 14
Bonnie Meltzer plays around with GAC200 a GOLDEN Paint product that gives acrylic paint the ability to pretty much coat any surface It is a cool product and launches a new section focused on product explorations Bonnie took offense to the term product review so we have changed the focus to playful explorations I have to admit I like this approach better
If you try out GAC200 or already use it in your artwork drop us a line with high definition images or post to Facebook so we can check it out
Christy Turner shares her ability to intertwine embroidery and obsession with anatomy
Brenda Hoddinott teaches us the ins and outs of learning how to draw faces it is mathematical
We wrap up Issue 14 with Conrado Melato- an interesting Cuban-born artist who has landed in Brooklyn NY His work is raw and quite primal in a way I find him intriguing and hope you do too
Happy Reading
Luisa
You can email the editor for more information
DisclaimerMMAM considers its sources reliable and verifies as much information as possible However reporting inaccuracies can occur consequently readers using this information do so at their own risk Artsy Fartsy Publishing cannot be held responsible for the outcome of any action or decision based on the information contained in this publication andor the website The publishers or authors do not give any warranty for the completeness or accuracy for this publications content explanation or opinion We add links from our articles to other websites to help you find more information related to certain ideas However MMAM cannot be held responsible for the content of any external site linked to from within this document No part of this publication andor website may be reproduced stored in a retrieval system or transmitted in any form without prior written permission of the Publisher Permission is only deemed valid if approval is in writing
copy Copyright 2014MIXED MEDIA ART MAGAZINE619 SW 11th Avenue Suite 250
Portland OR 07205ISSN 2333-4282 (online)
E-mail editormixedmediaartmagazinecomWeb wwwMixedMediaArtMagazinecom
Skopje MacedoniaAleks
Barnabas Kimani
Califonia
Luisa
Nairobi Kenya
Beh Yazhari
Christy Turner
Brandy Collins
Tracey Greer
Australia
Conrado Melato
Brenda Hoddinott
Portland Oregon
Susan Walls Beverly
Southern California
Lexington
Indianapolis
Patti Edmon
Brooklyn
Raleigh
Bonnie Meltzer
Cypress
Nicholas
SerbiaAna Bambic Kostov
ONLINE10x per year wwwMixedMediaArtMagazinecom
Editor and PublisherLuisa Nims
Editorial AssistantAleksandra Mihajlovska
Issue EditorTwin Miracles Editorial Technical Administrator Chris Anderson
Published ByArtsy Fartsy Publishing LLC
Magazine DesignBarn Creative Media Ltd in cooperation with Mixed Media Art Magazine (MMAM)
MIXEDMEDIAARTIssue 14
MIXEDMEDIAARTIssue 14
Beth Yazharirsquos its in the details
- Part II video tutorial
anaystyacia Kovaleva
Making art from natureDifferent kinds of natural
material and their preparation
patti edmon tutorial
Brandy Collins - tutoriallove Birds 2 electric Bugaloo
Diana Darden product review
Christy turner - embroidery Bonnie meltzer - product exploration
Drawing 101 Conrado melato
CONTENTS
polyshrinkMakes Complicated
shapes possible
Have you ever thought about making art from natural materials There are a lot of flowers leaves and
twigs on the ground that you are convinced can create wonderful art Probably your first thought of floral art is using mostly dried pressed flowers and something typically associated with nature like stones sticks bark But the natural the world is much wider For your unique art you should think more globally I will try to push your mindrsquos boundaries to understand this wonderful kind of art
We would like to bring nature into our lives as much as possible There are so many opportunities to learn and explore with natural materials Hunting for really unique and special materials is an integral part of the creative process Most of these items can be found for free right out of your door Woodland fields parks and your kitchen are the sources of your inspiration Art starts with searching and preparing materials The more materials with different colors and textures you have the more interesting work can be made Once you have a wide array of treasures you can put them together in an interesting way for creating a masterpiece
GettinG started
Some natural materials that can be used
bull onionskin bull bananapeel bull fishscales bull seashells bull feathers bull eggshells bull sepals bull seedsandnuts bull woodslices bull moss bull bark bull allkindofplantsflowers
maKing art FInDIng MATErIAls In THE worlD ArounD us
from natUre
MIXEDMEDIAARTIssue 14
These are my favorite kinds of materials that I use intensively in my collages It allows me to create very delicate art but requires a lot of time and accuracy Of course every artist is looking constantly for his own material But floral art isnrsquot only natural colors and smooth lines You can mix anything you like
Save and collect materialsbulllaceribbonwooltextilescraps cord beads bullhandmadepaperrecycledcardboard bullceramicplates(usingbrokenelements) bullglass bullacrylicpaintandvarnishes
Natural materials can be used in a wide range of ways to promote wonder curiosity and enthusiasm for learning It
can be in the form of collages sculptures handmade cards or the decor of any item Look carefully around you and start a collection of natural things
ColleCtinG and dryinG
When yoursquore exploring nature being well-prepared for the elements is the key to your hunt for treasures Take a lot of packages scissors and pruners Every season has its special features but there is never a time when collecting natural material is altogether impossible Ideally you should pick up material in dry weather But if you collect material in rainy weather you should dry it as soon as possible The best way of drying thin material is using old newspapers and books You should check out material at least once a day When you bring newfound materials home leave
MIXEDMEDIAARTIssue 14
them outside for several days This will get rid of unwanted insects and prevent the material from drying out
at the kitChen
Sometimes it is funny to comment on what I used in collages I couldnrsquot bring myself to call my materials such as onion and garlic skin banana peels or eggshells by the name lsquofood wastersquo because they are really cool elements with amazing texture and colors There is not any special preparation Just clean and dry
From the banana skin you can make thin branches of a tree or contours of graphic works First of all you need to put the banana skin on a smooth surface and remove all the flesh with a knife Then put it under the press and make interesting shapes such as a rose The best place to store your materials depends on what kind they are I prefer cardboard boxes and packages
Garlic skin is a great material for imaging flowers glare on the water or glass surfaces
Eggshells have a lot of variations They have different coverage areas direction of material and color that can give so many interesting ideas In the kitchen you can find lots of useful things like tea or different kinds of groats
Floral collage gives you lots of wonderful opportunities You can constantly look for new materials and technologies Art from nature unites natural elements with artistic vision for creating artwork that pushes the boundaries of what art is and how we perceive ourselves in the natural world
Black Garden My natural picture consists of paper recycled cardboard transformed into roses and other shapes onion skin eggshell acacia For some materials I used acrylic paint My mixed media recycled artwork can broaden intellectual understanding and help engender an intuitive appreciation of the environment
Beautiful Bug This work is inspired by nature organic forms and natural colors I used sticks skeleton leaves eggshells and flax Sticks were modified I made them into thin wood slices
MIXEDMEDIAARTIssue 14
Paradise Garden I used cord feathers beads different kinds of flowers and leaves fish scales and melon skin It is the garden which always will be Paradise and it is not the bone of contention but an image of serene happiness
The Last Flowers of Autumn This work is a huge mix of natural elements You can see here only natural colors I havenrsquot used acrylic paints Coffee raffia different kinds of leaves pressed flowers garlic skin beads melon seeds and melon skin
MIXEDMEDIAARTIssue 14
Gold Heart This collage was made in a simpler technique All elements have volume which allows me to glue elements quickly I used seashells dried flowers textile roses raffia skeleton leaves paper and feathers
I have been learning about natural art for seven years since I was a kid when I spent my days making simple artworks in a studio of floral design There is nothing more natural to me than to work with organic material using it to give new life
In 2011 I graduated from Belarusian-Russian University with a degree in commerce After that I worked as an analyst for three years then decided to make art for myself just to see if I could do it Now Irsquom a full-time artist In 2009 I took first place in the 6th International and 6th International Competition
of Contemporary Art in Moscow during Russian Art Week
In 2013 I became a winner of the 10th Competition of Pressed Flower Pictures ldquoExhibition of Creationrdquo in Japan and winner of the International Competition of Pressed Flower Art in South Korea
AnAystyAciA KovAlevA
MIXEDMEDIAARTIssue 14
Beth Yazhari
tap hereTo watch Video
PArt ii tutoriAl
itrsquos in the Details
MIXEDMEDIAARTIssue 14
bull Saran wrap
bull Acrylic paintsmdashI prefer Golden for paints and medium
bull A few brushesmdashinexpensive ones for creating paint washes and for adhering fabrics to canvas with medium or glue
bull A variety of vintage textiles doilies trims beads brooches etc
bull Acrylic matte mediummdashto adhere thin textiles to the canvas
bull Mod Podge or Golden molding pastemdashthese stronger adhesives are useful for adhering heavier textiles to the canvas
bull Canvasmdashthink of your stretched canvas as an embroidery hoop I often like to work on square canvases which lend themselves well to round doilies
bull Jacquard fabric sheets (optional)mdashthese are great for transferring your own photos or other images onto fabric so they can be collaged onto the canvas and sewn into
bull Beading needlesmdasha variety of sharps and other sewing needles can be used but it is nice to have some needles specifically designed for beading for the occasionalbeadswith tinyholes (Ponysize 12 beading needles are good)
bull Beadalon Dandylinemdashsuper-strong bead weaving and stringing thread or Beadalon Wildfire beading thread
Bethrsquos MAteriAls
MIXEDMEDIAARTIssue 14
Beth yAzhAri Bio I make art that celebrates reflection craftsmanship and time-consuming labor in the pursuit of beauty I strive to make spiritually uplifting art to create oases of beauty and wonder in a frenetic society that is increasingly in need of both
Discarded doilies and remnants of embroidered fabrics are a source of inspiration to me by rescuing them and recycling them into my beaded paintings I hope to honor and collaborate with the creative spirit of generations of women who have gone before me whose handiwork has often been ignored because it was not created to be displayed in a gallery
Making my art is truly a sacred act for me I feel that creating artwork in a spirit of service to humanity is a form of worship
MIXEDMEDIAARTIssue 14
By Ana Bambic Kostov
The turn of the 19th century brought the Arts and Crafts Movement from England to America The
ideas and ideals of British intellectuals John Ruskin and William Morris dispersed throughout the United States by the means of journal and newspaper writing Important factors in the Movement were societies that promoted various lectures and programs There was no single center of the Arts and Crafts Movement first it was strong in Boston then in Chicago Minneapolis and New York
Rose Valley Community a social and artistic experiment was founded in 1901 in Pennsylvania with a shop offering hand-made furnishings pottery metalwork and hand-bound books The second community of this sort was Byrdcliffe Arts and Crafts Colony based outside of Woodstock New York
In the cities activities were limited to local communities and often focused on the education of young womenwho were taught to make pottery and work with textiles or metal and jewelery The Arts and Crafts Movement in America was not centered around one philosophical idea rather it represented a large group of creative individuals Traits of the movement differed depending on geography and social status especially as the movement spread from the East Coast through the Midwest to CaliforniaThe result was many new pottery workshops or furniture factories followed by a thriving revival of handiwork as the most natural way of production with beautiful results Although the American Arts and Crafts Movement waned after World War I the influence of this socially engaging action stayed
Its InFLuence cAn stILL Be FeLt tOdAy WIth ARtIsts LIKe Beth yAzhARI tAKIng the ReMnAnts And ReFAshIOnIng
these PIeces IntO neW FORMs
the arts anDCrafts movement
MIXEDMEDIAARTIssue 14
Throughout the 20th century a myriad of women engaged themselves in often necessary sewing knitting embroidery and stitching They were grandmothers and mothers women who gave their best to making beautiful and functional items for their families Their names were largely forgotten but their impact can still be felt and seen
Artist Beth Yazhari is greatly inspired by the handicraft of the women of the past finding her own expression in collecting and recycling items made across the planet Embroidery or crochet from different cultures can be found in her studio right next to precious family heirlooms or old beads and buttons Beth is a schooled artist and painting remains the base of her work while her style is built through recycled materials made of vintage craft By using old handiwork as the key element in her elaborate artwork Beth honors endeavor dedication and creativity of women everywherewho felt the need to design beauty but were never able to realize recognized artistic careers
Creative ProCess of Beth yazhari The hunt for ostentatious art material is where Beth Yazharirsquos creative process begins Art supplies she collects are beautiful fabrics stitching doilies old beads or brooches Vintage items she finds at estate sales coupled with the
Internet Beth usually conducts her searches on eBay or Etsy where she will bid on anything that catches her eye from Dutch needlework to Native American medallions
The materials she works with most are cross-stitched and hand stitched handkerchiefs crochet doilies sari fabric old brooches and appliqueacutes Contemporary materials are not exempted from Bethrsquos creative process as she combines the old with the new including ribbons and fabrics
the PaintinG teChnique
Yazharirsquos underpainting technique is the foundation of her process Beth uses Saran wrap to create a rich base for her detailed work By layering colors the final result is full and velvet-like which serves as a chromatic inspiration to the artist
First she takes a blank stretched canvas which
can be found at any art supply shop Beth wets the canvas with a very light layer of water wetting a brush and applying it over the area intended
She drips several drops of acrylic paint directly onto the canvas without exaggerating If the paint is very liquid she uses matte medium to stabilize it
In the layering process she combines two or three colors to achieve the desired result
Using water alone to dilute acrylic paint
Beth uses a piece of saran
wrap a little bigger than the size of canvas to cover the
paint
MIXEDMEDIAARTIssue 14
may result in chipping when the color dries If the paint is thicker matte medium may not be necessary Itrsquos important to know that too much of the matte medium can create tangible texture on the canvas which is not advised if adhering fabric or beads is planned as the next step
Once she adds the color and medium she spreads it around the canvas evenly with a brush
Beth uses a piece of Saran wrap a little bigger than the size of canvas to cover the paint
Pressing the wrap onto the painted area playing with it she makes creases and wrinkles which will create an interesting pattern when dry
She allows for the paint to dry for about an hour or two Drying can be sped up with a hair dryer or heater
When the paint is completely dry the artist peels the Saran wrap off and the first layer of the underpainting is done
This process can be repeated several times sometimes up to 20 layers to add to intensity of color The final effect is canvas with a surface similar to fabric
When the paint is completely dry the real creation can start
Beth applies fabric cut-outs on the canvas stitching with a strong thread while using adhesive occasionally Her composing process is very similar to collage with less overlapping
If the applied material lacks color but has complex stitching she emphasizes the embroidery by painting around it in contrasting nuance For example
when she applies a handkerchief hand-embroidered elements that are all white she would paint around these elements in dark color to create a more dramatic effect
When the fabric is cut and applied onto the canvas the most intricate elements are added Beth emphasizes the details with beadwork and sews small beads around the edges of decorative patterns to tie the piece together
The central piece of her works is often reserved for the crowning jewel - a vintage brooch or a particularly beautiful decorative ornament always being mindful of color coordination
Beth Yazharirsquos creative process allows a lot of freedom for the artist in choosing from an endless pool of colors materials and patterns while also allowing her to be engaging and playful
The Arts and Crafts Movement emerged during the late Victorian period in England the most industrialized country in the world at that time Anxieties about industrial life fueled a positive revaluation of handcraftsmanship and precapitalist forms of culture and society Arts and crafts designers sought to improve standards of decorative design believed to have been debased by mechanization and to create environments in which beautiful and fine workmanship governed The Arts and Crafts Movement did not promote a particular style but it did advocate reform as part of its philosophy and instigated a critique of industrial labor as modern machines replaced workers Arts and Crafts proponents called for an end to the division of labor and advanced the designer as craftsman
Click here for more information
MIXEDMEDIAARTIssue 14
susAn Beverly WAlls tutoriAl on shrinK PAPer
tap hereTo watch Video
tutoriAl on shrinK PAPer amp Mixed MediA
tap hereTo watch Video
MIXEDMEDIAARTIssue 14
susAn Beverly WAlls tutoriAl on shrinK stAMPinG
tap hereTo watch Video
MIXEDMEDIAARTIssue 14
susAn WAlls Beverly A dozen or more years ago I ended my 20-year era of restaurant management and searched for a way to work from home Loving all kinds of paint I began murals for my kids that blossomed into a word-of-mouth business As my kids grew up I knew I wanted to be more creative and branch out into other artsy things In 2001 I started doing art and craft shows around Southern California and havenrsquot looked back since
My current obsession is designing making and traveling with my line of thematic crazy jewelry Charming Trinkets My designs incorporate a myriad of materials from shrink plastic to resin to a mix of metals It is infused with my belief that life is too short to be too serious and you
need to make some loud laughter while yoursquore here If I can make you smile or touch you emotionally I know Irsquove done my job
Each day my house is infused with family laughter and thoughts of the creative Irsquom pleased as punch to be able to spread it around
MIXEDMEDIAARTIssue 14
Artist Diana Darden made these figures from Lucky Squirrels PolyShrink She found with a small learning curve that the material was versatile enough to recreate versions of her masonite dolls
Find these products at Lucky Squirrel Here
MIXEDMEDIAARTIssue 14
I launched my blog Altered Attic in 2008 It is named for the third floor of our old brick four-square
which had been finished with plenty of light electricity and enough space to accommodate two working artists and storage for the shelving bags bins and boxes of stuff and art supplies
Though my style continues to evolve mixed media collage is my medium of choice If my hands are covered in glue and paint it has been a good day The backgrounds I texture and paint on canvas or board (mostly smaller than 12rdquox12rdquo)light switch plates puzzle pieces and tins are the inspirational beginnings and often my favorite part of the process
My most recent work is a series of seven 12rdquox12rdquocradledcanvasesFind her work here I used the backside to create a shadow-box effect and after completing each textured and painted background I incorporated Frozen Charlottes vintage papers and book covers bits of jewelry twine lettering and other repurposed objects
I used pieces from a childrsquos floor-puzzle book to create a Cloud Poem book Click here to view I altered five puzzle pieces and incorporated a poem I had written after spending an afternoon floating on my back in our favorite lake spot
the Journey
My passion for mixed media art stems from my love for (acrylic) painting and usedvintage or just old stuff that has already had one life Part trash part treasure I find it a creative and meaningful way to repurpose items that others might discard or overlook Discovering that realistic drawing wasnrsquot a requirement for making art was another significant positive While I appreciate most all forms of art I believe that the notion of landscapes and portraits has derailed many a blossoming artist
Painted background with digital photo ndash vase in front of a mirror ndash embellished with wire flowers mesh vintage Swarovski crystals board and small faces peering through the lsquowindowsrsquo in the textured paper background
altereD attiC anD proCess
MIXEDMEDIAARTIssue 14
Pattirsquos ProCess
Typically I start with a background and no clue or vision of the finished piece I donrsquot sketch beforehand and rely totally on the intuitive nature of process Once a canvas or other substrate is prepped and painted I sort through images papers and rummage through my stash for found objects that seem to relate because of texture color or its prior use Based on the materials Irsquove pulled I may modify the color palette and I usually have a mess to clean up when Irsquom finished because the broken earring brooch fork key bottle scrap of wood or rusted wire didnrsquot lend anything to the design I always know when I am finished but truthfully it is a feeling of overdoing or rearranging which helps me put it aside for a day or so then go back tweak and glue
tiP
My biggest hurdle aside from getting enough time in the studio has always been over-thinking The part of the brain that reminds us about unfinished dishes obligations errands and other means of procrastination needs to be shut off Completely Irsquove researched the artistic process and its hindrances extensively Most of the advice boils down to the same core idea We create because of a need or longing not because itrsquos fun convenient or easy The daily challenge is to eliminate the ways we find to sabotage delay and otherwise prevent ourselves from doing what we love
Painted textured background with 1980s photo layered over vintage tobacco paper fabric and mesh finished with rusted wire and sticks
My art has been sold exhibited (infrequently) appeared in e-zines andI participate in swaps and challenges however the love of process is my primary reason for making mixed media art This notion is counterintuitive to most everything we learn growing up particularly those of us raised in a non-creative business-dominated environment where product and profit make more sense than curiosity for the sake of experimentation
The limitations of a chronic illness and raising a family may reduce my art-making time but creativity is a thread woven throughout the fabric of very being
MIXEDMEDIAARTIssue 14
Background painted and tinted with Pan Pastels photograph from the 1980s framed on vintage book covers embellished with mesh and lace trim
MIXEDMEDIAARTIssue 14
C reativity has been woven through my life since childhood In my preteen years I did pencil sketches and wrote poetry which evolved over the years to include essays
narrative nonfiction and fiction In the mid 1980s photography became another passion and for several years before my children were born I shot medium-format film and spent many happy hours in the darkroom Chemicals and pregnancy are not a good matchhoweversoaftermy(nowteenaged)childrenwerebornI switched to digital photography
In 2006 after being diagnosed with a chronic illness that launched me into early retirement art became my new career I have worked in various forms of collage altered objects such as small tins books cigar boxes puzzle pieces and made books from tissue boxes and other scraps along with painting and mixed media art
Last summer I had the idea to create pieces using my history of creative disciplines I chose several photos each the starting point for these mixed media pieces My plan was to use paint found objects and as many art supplies as possible
The process ndash which took several months for each piece ndash began with a heavily textured painted background on an 8x10 canvas using colors to accentuate and complement the chosen photo Finding the rest of the materials was no problem as Irsquove acquired significant stashes of fabric broken jewelry buttons lace trim scrap wood and sticks art paper vintage papers found metal objects mica eyelets brads fibers and on one piece moss that I sprayed with various colors of glitter mist
patti edmon
Artist Profile
Process background painted using stencils and acrylics a black and white photograph from the 1980s ndash tinted with watercolor pencils and layered on an 8x10 canvas with fabric scraps trim buttons and flocked wallpaper
MIXEDMEDIAARTIssue 14
Once I had decided on a rough composition I layered and added elements allowing the piece to come to life complete with a theme and message
One of the most fulfilling aspects of this project was the problem-solving process common to any artist who creates intuitively used to make each layout work Like most artists I have a tool box with the usual hammers knives snips pliers an assortment of wire texturing tools and screwdrivers an eyelet setter and block punches a Dremel heat gun beeswax melting pot all of which were used while working on this series
My husband and I share a dedicated studio in the attic of our house built in 1900 We hired a contractor to finish the space with drywall flooring ample electrical outlets ceiling fans a storage closet lighting and a comfy window seat with cushions and pillows I donrsquot spend much time sitting there but from my table I can look out at the tops of trees through a 3rsquo x 6rsquo original window fitted with Plexiglas for insulation
I work in a sketchbook but donrsquot use it as an art journal When I write itrsquos usually several pages This series is very symbolic a personal integration of my lifersquos creative journey
Background painted over layers of paper digital photo with fabric wings tinted silver stars pearls fabric flowers and tinted moss
MIXEDMEDIAARTIssue 14
PAtti edMon I am a lifelong creative and professional writer and ran a marketingadvertisingdesign business until 2006 when I retired (very) early due to an autoimmune illness My husband and I are raising two teenagers in an old house in downtown Lexington Kentucky with two dogs and a cat
As any artist knows a well-stocked studio is vital to fulfilling creative ideas Working in mixed media explains why Irsquove always collected certain things from small boxes tins and bottles every kind of paper jewelry and books to old puzzles scrap metal and rusty bits
Textured painted background with recycled Sari ribbon and art paper digital photo and an excerpt from my essay on friendship on a vintage book cover A grunged cardboard frame is attached with looped brads and wire over old screen Eyelets with wire wrapped around sticks over three layers of mica to frame the text
MIXEDMEDIAARTIssue 14
love BirDs 2 eleCtriC BUgaloo
BRAndy cOLLIns
step 1 Gathersupplies(Seesupplylist)Rememberinmixed
media nothing is trash Any old papers stamps magazines old book pages scrap book pages painted papers textured paper old
drawings Irsquove done and other media remixed
tutorial
MIXEDMEDIAARTIssue 14
step 2 Sketch a rough
design
step 3 Using watered down
acrylics create the base painting with a color
scheme of your choice
MIXEDMEDIAARTIssue 14
step 4 I tear pages and start assembling shapes and colors that fit in various places either by conundrum shape color or texture I seal them with the matte medium I use matte medium because itrsquos easier to paint and draw on for the detail work I had some French Toile Tissue Paper and tore various scenes out of it to place in the background and using a fine paint brush I carried the scenes into the background and painted shadowing around it In the autumn version of this piece I kept the background mainly torn pages of various greens and drew leaf vein patterns on the diamond-shaped pieces This one I used a blue painted background blue painted torn book and music pages and blotted different shades of paint for clouds and texture
MIXEDMEDIAARTIssue 14
step 5 Detail work Using a fine paintbrush black Micron pen or photo pen I add the detail work I often go back and forth from collaging to detail work My canvas goes from easel to table many times throughout the process My goal is to make things look surreal in my illustrations
Hint Tweaking sometimes means I pull out pieces that Irsquove added but decided they deter from the main design For example in this piece I removed a stamp that took away from the focal point I love ldquobusyrdquowheneverypieceIaddisworkingasateamhellipbutnotonegreat stamp stealing the show which sometimes happens and in that case things can be steamed off with a hot rag or scraped off
MIXEDMEDIAARTIssue 14
step 6 Keep collaging and painting the most important thing to remember is to enjoy the process
before stamp is removed
MIXEDMEDIAARTIssue 14
Brandy CollinsBrandy Collins is a self-taught artist who works in mixed media primarily watercolors acrylics and ink She draws her inspiration from nature art music folk art and anything vintage or Gothic Her abstractrealism paintings and illustrations have been featured in galleries such as the Janette Kennedy Gallery and Kettle in Dallas Texas as well as art festivals and charity auctions in Dallas Austin and Hawaii She is a native of Hampton Virginia but currently resides in Raleigh North Carolina You can reach her here
final signed image
MIXEDMEDIAARTIssue 14
BooK
1Chapter 1 Making This Book Your Own 1Chapter 1 Making This Book Your Own
The Creative ConversationRediscover the Joy of ArtMaking
Approaching creativity as a form of spiritual practice artist and creativity guide Bridget Benton breaks the creative process down into its most basic components and o ers a fresh perspective on developing your creative skills Whether you are creatively blocked burned out or just want to further explore the world of making you can make art and have fun doing it
With 24 hands-on Artful Explorations ndash interesting and varied enough to suit both beginners and professionals ndash this ldquoworkshop in a bookrdquo helps you
bull Make art that re ects your authentic inner voice bull Practice the 12 Actions and A itudes of artmaking that support creative owbull Develop a more consistent practice with your artmaking bull Engage with your art in a meaningful and mindful waybull Move more easily through resistance judgment and other blocksbull Create a more connected intuitive and playful relationship with your artmaking
Author Bridget Benton has worked as a professional artist facilitator and workshop leader for over 20 years helping hundreds of adults rekindle their creative spark She holds a Master of Science in Creative Studies from the International Center for Studies in Creativity at the State University of New York and has taught intuitive creative process at events across the country She currently lives and paints in Portland OR
ldquohellipA breakthrough book It will serve as a beacon for a new generation of creative people as well as deepen the conversation for those already interested in bringing the metaphor of art-as-a-way-of-being more fully into their livesrdquo ndashStewart Cubley co-author of Life Paint amp Passion and director of e Painting Experience
ldquoBridget Bentonrsquos directness and honesty are refreshinghellip is book is a MUST READ for anyone interested in growing both artistically and spirituallyrdquo ndashBee Shay author of Collage Lab
ldquoIf the idea of creativity as a spiritual practice excites you then yoursquoll love this book If that idea scares you this book will take you gently by the hand and help you past those fears Either way yoursquoll soon be making yourself a more vibrant liferdquo ndashDiane Gilleland former editor of CRAFT online and author of Kanzashi in Bloom
Photo by Michael Burton
ArtMaking as Playful PrayerArtMaking as Playful PrayerArtMaking as Playful PrayerArtMaking as Playful PrayerArtMaking as Playful PrayerArtMaking as Playful Prayer Bridget Benton Bridget Benton Bridget Benton
TH
E C
RE
AT
IVE
CO
NV
ER
SA
TIO
N A
rtMakin
g as P
layful P
rayer
Brid
ge
t Be
nto
n
Bridget BentonRevIeW
MIXEDMEDIAARTIssue 14
173Chapter 1 Making This Book Your Own174 The Creative Conversation Artmaking as Playful Prayer
The Creative ConversationRediscover the Joy of ArtMaking
Approaching creativity as a form of spiritual practice artist and creativity guide Bridget Benton breaks the creative process down into its most basic components and o ers a fresh perspective on developing your creative skills Whether you are creatively blocked burned out or just want to further explore the world of making you can make art and have fun doing it
With 24 hands-on Artful Explorations ndash interesting and varied enough to suit both beginners and professionals ndash this ldquoworkshop in a bookrdquo helps you
bull Make art that re ects your authentic inner voice bull Practice the 12 Actions and A itudes of artmaking that support creative owbull Develop a more consistent practice with your artmaking bull Engage with your art in a meaningful and mindful waybull Move more easily through resistance judgment and other blocksbull Create a more connected intuitive and playful relationship with your artmaking
Author Bridget Benton has worked as a professional artist facilitator and workshop leader for over 20 years helping hundreds of adults rekindle their creative spark She holds a Master of Science in Creative Studies from the International Center for Studies in Creativity at the State University of New York and has taught intuitive creative process at events across the country She currently lives and paints in Portland OR
ldquohellipA breakthrough book It will serve as a beacon for a new generation of creative people as well as deepen the conversation for those already interested in bringing the metaphor of art-as-a-way-of-being more fully into their livesrdquo ndashStewart Cubley co-author of Life Paint amp Passion and director of e Painting Experience
ldquoBridget Bentonrsquos directness and honesty are refreshinghellip is book is a MUST READ for anyone interested in growing both artistically and spirituallyrdquo ndashBee Shay author of Collage Lab
ldquoIf the idea of creativity as a spiritual practice excites you then yoursquoll love this book If that idea scares you this book will take you gently by the hand and help you past those fears Either way yoursquoll soon be making yourself a more vibrant liferdquo ndashDiane Gilleland former editor of CRAFT online and author of Kanzashi in Bloom
Photo by Michael Burton
ArtMaking as Playful PrayerArtMaking as Playful PrayerArtMaking as Playful PrayerArtMaking as Playful PrayerArtMaking as Playful PrayerArtMaking as Playful Prayer Bridget Benton Bridget Benton Bridget Benton
TH
E C
RE
AT
IVE
CO
NV
ER
SA
TIO
N A
rtMakin
g as P
layful P
rayer
Brid
ge
t Be
nto
n
MIXEDMEDIAARTIssue 14
What did you discover during the process of writing this book
InwritingldquoTheCreativeConversationArtMakingasPlayfulPrayerrdquoI clarified my thinking about creativity Irsquod always had this idea that creativity and spirituality were connected and Irsquod always believed that anyone could be creative Irsquod done a lot of reading and studying but writing this book was what helped me to really flesh out those ideas Along the way ldquoThe 12 Attitudes and ActionsofArtMakingrdquoemergedndashIfeellike they were my greatest discovery because they are such simple principles Practicing the 12 Attitudes and Actions really builds up your creativity skills
What surprised you
I was surprised by how long it took me to write the book ndash I did the first rough draft over the course of a weekend but it took me five more years to flesh that out I really thought Irsquod have it done in a year It took a lot of patience persistence editing revising and support from my amazing writing group ndash and I think the final book is better for the extra time spent
Author Interview
Bridget Benton
Creative Conversations Is FROM A neW BReed OF ARt technIque BOOKs thAt ARe
shIFtIng the FOcus FROM FInIshed WORKs tO the PROcess OF exPLORAtIOn And MeAnIng In OuR cReAtIve PLAy
Table of Contents
Week One 9 Introduction Where This
Book Came from My Story 13 Chapter 1 Making This Book
Your Own 15 A Note to Members of
Organized Faith Traditions 15 A Note to Professional
Creatives and Caregivers Artful Explorations
Explore 16 Cardboard Camera 18 Discard Collage
Week Two 21 Chapter 2 What Is
ArtMaking as Playful Prayer 26 A Note to Those Who
Say They Canrsquot Draw 28 A Note to the Trained Artist 28 A Note to Everyone on
Process vs Product Artful Explorations
Focus on Process Not Product
30 Blind Drawing 32 Visual Definitions
Week Three 35 Chapter 3 Studio Making
Sacred Space for ArtMaking Artful Explorations
Defer Judgment 41 Glue Doodle 44 Layer It Up 49 A Conversation with Judgment
and Process
Week Four 51 Chapter 4 Materials
What Do I Really Need 53 A Note about Copyrighted
Materials 58 A Note to the Packrat Artful Explorations
Be Like a Novice 60 Materials Play Date 62 Make Your Own Coloring Book
Table of Contents
Week One 9 Introduction Where This
Book Came from My Story 13 Chapter 1 Making This Book
Your Own 15 A Note to Members of
Organized Faith Traditions 15 A Note to Professional
Creatives and Caregivers Artful Explorations
Explore 16 Cardboard Camera 18 Discard Collage
Week Two 21 Chapter 2 What Is
ArtMaking as Playful Prayer 26 A Note to Those Who
Say They Canrsquot Draw 28 A Note to the Trained Artist 28 A Note to Everyone on
Process vs Product Artful Explorations
Focus on Process Not Product
30 Blind Drawing 32 Visual Definitions
Week Three 35 Chapter 3 Studio Making
Sacred Space for ArtMaking Artful Explorations
Defer Judgment 41 Glue Doodle 44 Layer It Up 49 A Conversation with Judgment
and Process
Week Four 51 Chapter 4 Materials
What Do I Really Need 53 A Note about Copyrighted
Materials 58 A Note to the Packrat Artful Explorations
Be Like a Novice 60 Materials Play Date 62 Make Your Own Coloring Book
Week Five 67 Chapter 5 Flow Factors
Creativity and the Process of ArtMaking
69 A Note about Following Processes You Read about in Books
Artful Explorations Be in Conversation
70 Talk with the Book 71 Talk with Your Space
Week Six 75 Chapter 6
Getting Clear Intention 76 A Conversation with
Your Intentions Artful Explorations
Be Mindful 80 Deep Observation Drawing 83 Dancing with Matisse Color
Cuts
Week Seven 87 Chapter 7
Getting Inspired Energy 91 A Conversation with Avoidance
and Your Inner Goof-Off 93 A Conversation with an
Overload of Ideas Artful Explorations
Follow the Energy 94 Just Paint Just Draw 97 Get to Work and Get Inspired
Week Eight 99 Chapter 8
Getting Engaged Action 102 A Conversation with Decision-
Making in Art 103 A Conversation with
Letting Go of the Story 104 A Note about Curiosity
and What We Risk Artful Explorations
Let Go of the Outcome 105 The Whatrsquos Next Art Jar 109 Internal Journey Map
Week Nine 113 Chapter 9 Resistance
Judgment and Completion 114 A Conversation with Your Critic 116 A Conversation with Resistance 117 A Conversation with
Completion Artful Explorations
Be Curious 119 Allies and Adversaries 122 Critic Collage
Week Ten 127 Chapter 10
Staying in Touch Intuition 130 A Conversation with
Your Values 133 A Conversation with Your
Intuition Artful Explorations
Tune Up Your Inner Ears 134 Value Collage 137 Matchbox Assemblage
Week Eleven 141 Chapter 11
Giving Back Community 143 A Conversation with
Appreciation Artful Explorations
Cultivate Appreciation and Gratitude
146 Thank You Notes 148 Paper Prayer Beads
Week Twelve 153 Chapter 12 Maintaining
Artmaking as a Spiritual Practice
154 A Conversation with a Commitment to Action
Artful Explorations Hold Clear Intentions
157 Mandala 160 Prayer Candle
165 Bibliography and resources
167 Appendix a Theory and Practice
168 Appendix b A Note on Working with Groups
169 Index
MIXEDMEDIAARTIssue 14
What are 5 ideastechniques you would like any reader to take away after reading this book
First I want people to come away from the book feeling like they CAN make art Second Irsquom hoping a reader accepts that they donrsquot need fancy materials or the perfect studio ndash the whole book is really about breaking down those barriers to making that we all put up while giving you a few tools to make the creative process a little easier
In that spirit Irsquoll share a few of the Actions and Attitudes of ArtMaking ndash the ones that I remind myself of all the time When I make art with these things in mind I have more fun feel more connected and produce more interesting authentic work
1 FocusonProcessNotProduct(beinthe moment and enjoy the making)
2 LetGooftheOutcome(sooftenwehave a picture in our head of what it ldquoshouldrdquolooklikendashletgoofitandwork with whatrsquos there)
3 BeinConversation(payattentiontowhat the piece wants and what your intuition is telling you)
4 DeferJudgment(andpracticediscernment instead ndash while yoursquore making let go of the temptation to labelwhatyourdoingasldquogoodrdquoorldquobadrdquondashjustdiscernthenextbestthingto do)
5 BeCurious(thisistheantidotetojudgment)
Who did you write this book for
I wrote this book for every adult who wants to be creative but feels like they canrsquot be I wrote this book for everyone who had a bad art experience as a kid and stopped even trying to
111Chapter 8 getting engaged action
MaterialsbullJunk mail or old magazines bullBlank paper or sketchbook (larger
and heavier is better bristol board watercolor board or scrap cardboard is ideal)
bullOld mapsbullPermanent marker (at least one
like a Sharpie)bullMod Podge or gel mediumbullAcrylic paintsbullBrushes and water containerbullScissors
optionalbullRub-on or press-on lettersbullGessobullRags or paper towelsbullWax paper or palette
Internal Journey Map
Artful Explorations Let Go of the Outcome
108 The Creative Conversation Artmaking as Playful Prayer
1 Choose at least 24 of the follow-ing phrases or art prompts Write each phrase on its own slip of paper so that you can pull them one at a time out of the jar You can handwrite each prompt or type the prompts into a word processing program and print them out Either way cut them up so that you have only one prompt per slip of paper
2 Fold up each slip of paper and drop all 24 into your container Mix them up Get your art supplies ready and pull out a sheet of sketch paper
3 Now draw a slip of paper from the container and do what it says Then fold the slip back up put it back in the container mix things up again and draw another slip of paper Again follow the instructions Repeat this at least 12 times After the 12th prompt do whatever you need to do to feel complete with the piece
bullFill an area with a solid colorbullAdd a dotted linebullAdd star shapesbullCollage three items onto the
surfacebullAdd textbullAdd a circlebullPut eyes on somethingbullFill an area with a patternbullAdd red orange or yellowbullAdd blue green or purplebullAdd shadingbullAdd at least one collage elementbullAdd at least three straight linesbullDraw or scribble a shape person
or objectbullOutline somethingbullHighlight somethingbullAdd a rectangle
bullAdd a flowing linebullAdd a reference to naturebullAdd a reference to peoplebullAdd blue or orangebullAdd dotsbullAdd green or purplebullUse collage to add a patternbullDo something to unify the spacebullRotate the piece 90deg or 180deg and
choose a new promptbullFind an element in the piece and
repeat itbullAdd egg shapesbullAdd colorbullAdd one collage elementbullUse a wash of gesso over at least 13
of the surfacebullUse a wash of color over at least 13
of the surface
ldquoBy using the term artmaking Irsquom
emphasizing art-as-verb Irsquom focusing
on the actions and attitudes that support artmaking as playful prayer these actions
and attitudes are also what I think
of as the work of artmakingrdquo
MIXEDMEDIAARTIssue 14
make art as a result I wrote this book for every professional creative who feels dried up and washed out after years of producing art for product I wrote this book for every person who wakes up in middle age and says to themselves ldquoWhen am I finally going to givemyselfpermissiontomakethingsrdquo
And in so many ways I wrote this book for myself Itrsquos the book I most needed in my 20s when I was blocked and stuck and
terrifiedofmakingldquobadartrdquoItrsquosmywayofsharingeverythingIlearned in my 30s ndash all the things that got me making art again
What 2 people or things influence your work right now
For the past six years or so Irsquove been working primarily in encaustic The material itself has had a big influence ndash Irsquove been able to take layers and depth further than ever before Lately Irsquove been thinking a lot about remnants - about the things we leave behind about the ways that experiences mark us and the objects that serve as evidence of those experiences That sounds pretty esoteric but it means Irsquom playing a lot with X-rays images of people and things like tea bags food wrappers bottle caps and receipts Therersquos a parallel there to evidence at a crime scene piecing together what happened from whatrsquos left behind Maybe Irsquove been watching too many police procedurals
What are your 4 favorite sources of creative inspiration
Working is my favorite source of inspiration ndash when I get my hands moving and start playing with the materials ideas just start coming and it becomes clear what needs to happen next I try to leave the studio each day knowing what I want to do next so that itrsquos easy to just dive in and get back to work
The materials themselves play a big part ndash Irsquoll ask myself ldquoWhat does this mean What can I do with this How does this workrdquoLikemostmixedmediaartistsIADORElearning new techniques and experimenting with new media I teach at Collage - an art store in Portland Oregon - and I love designing classes around new materials
I also love giving myself challenges ndash what can I do using only the scrap images in this magazine or what can I do with small squares of paper
ldquoAcknowledging that they didnrsquot have to be
in control was liberating for some of the students
Instead they could respond to what was happening within the
artwork itself
ldquoI began to understand that art could be an
action and a process not just a
productrdquo
MIXEDMEDIAARTIssue 14
The limits can actually be really freeing
My students are another huge source of inspiration for me ndash itrsquos as though I absorb a bit of their excitement and sense of experimentation while I teach Sure Irsquom tired at the end of the day but itrsquos as though the students renew my own enthusiasm for whatever Irsquove been teaching I think itrsquos about re-accessing that sense of being a novice
What are 5 tools or supplies you canrsquot be without
bull Scissors bull Gluestick bull Sketchbook bull Pencil bull BlackSharpie
This is the bare minimum that I travel with ndash potential collage papers present themselves for free everywhere and if I can cut paste and sketch out ideas thatrsquoll hold me for at least a week After that I start wanting gesso and some way to add color ndash either gouache or acrylics Gouache is easier to travel with
Whatrsquos next
Right now Irsquom enjoying being in my studio and making art and designing workshops and online classes And the next book is lurking in there but it feels too soon to talk about it
artist noun someone who with their own
level of skill and passion intentionally
makes things in a meaningful and
mindful way a person whose primary work
is to find meaning and express it in concrete or tangible ways an
identity available to all of us as our birthright
art verb to make something with
meaningful mindful intent (adapted from
the everyday Work of Art) noun An action
or process we are all capable of that
serves as evidence of our own divine spark the tangible record of
meaningful mindful creative process
Benson has really cool projects cerebral exercises and techniques to explore Especially the lsquoWhats Next Art Jarrsquo p108 and Internal Map Journey p111I could easily spend a year working through Bentonrsquos book playing exploring reflecting on my creative process This is a book worth your time and money
editorrsquos note
MIXEDMEDIAARTIssue 14
I first learned how to embroider when I was about six or seven With superhuman patience my mother
taught me how to divide the cotton floss thread the blunt wide-eyed needle and follow the pink line of the iron-on pattern shersquod applied for me I wasnrsquot great at it _ my stitches were big and uneven at first and I spent more time trying to pull out misplaced stitches than I did making them But these lessons lovingly given in the living room of my childhood home turned out to be a pivotal influence on my artistic future
Embroidery has a long and beautiful history Even though itrsquos become a fairly uncommon pastime in recent decades itrsquos a craft undeniably rich with tradition Part of the reason Irsquom so drawn to it is that tradition knowing that my motherrsquos mother taught her just as she taught me Women(andoccasionallymen)havebeenpassing on this knowledge for centuries using it for ritual for homemaking for social status and pleasure Therersquos something powerful in that kind of custom and I canrsquot help but be drawn to the craft as a result
The process itself is meditative more pleasure than work It may seem like therersquos not much room for creativity since most embroidery is just stitching a
pattern but really therersquos just as much opportunity for creative control as there is in any other medium Just as a painter carefully places each brushstroke an embroidererhastoplaceeachstitch thedifference is that I can rip out and move a misplaced stitch a lot easier than a painter can move a stroke of paint I can blend colors alter line weight and quality and improvise a pattern just as I could if I were drawing in a sketchbook but when Irsquom finished with a sewn drawing itrsquos soft and textured and tactile in a way that most drawings can never be
That tactile quality is a huge draw for me as an artist _ the feel of the stitching itself as well as whatever I happen to be sewing
emBroiDerY
Anatomia Detail
christy turnerrsquos
MIXEDMEDIAARTIssue 14
on be it fabric or paper Which one I use is generally determined by the nature of the project in question but the main thing I care about is the tactile quality of whatever surface Irsquom working on
I really want the viewer to reach out and touch my artwork to pick it up and hold it to feel the fibers and stitches and structure We have this notion as a society that art is to be looked at from a safe distance never touched or handled and I like my work to be different in that regardThemagicofembroidery(andofthe book form which I often use in my art) is that itrsquos meant to be touched and used That traditional utilitarian quality is just one more reason why Irsquom inexorably drawn to embroidery _ itrsquos art but itrsquos the kind of art thatrsquos meant to be held between your fingers and rubbed against your cheek
theMes in My Work
My artwork uses a variety of different mediums but often references recurring themes of anatomy and interpersonal relationships While these concepts may not seem like they have much in common
the underlying factor that interests me is structure
My anatomical work focuses on physical structure _ primarily skeletal composition a topic that has fascinated me since I was a kid The architecture of the human body _ striking in both its intricacy and simplicity - is something I feel compelled to study and replicate Much of the imagery in my skeletal work is derived from either antique anatomical diagrams (Anatomia amp Ribcage) or firsthand fromhuman cadavers (CadaverHand StudyampCadaver Foot Study) Though the resulting artwork could be portrayed as something gruesome or macabre I prefer to think of it in an architectural sense looking at bones and tendons as structural components of a larger whole
On the opposite side of the spectrum is my work relating to human relationships These pieces in particular one sewn book called Maps seek to illustrate social structure by exploring the emotional bonds we create throughout our lives This area of my work tends be far more conceptual in nature than my anatomical studies but the basic focus on some form of structure remains the same
Anatomia Spread
MIXEDMEDIAARTIssue 14
AnatomiaThe imagery in this carousel book is derived from antique anatomy diagrams The top (black)layerillustratesskeletalanatomythe next layer has the corresponding muscle systems embroidered in red on a fibrous handmade paper
Cadaver StudiesThese embroidered studies are the result of several hours spent sketching dissected cadavers in the Oregon State University cadaver lab I sketched directly onto the muslin then embroidered the drawings trying to preserve their hasty line quality
Family PhotosUsing silhouettes derived from antique family photographs I embroidered these incomplete portraits in an attempt to illustrate the fluid quality of familial relationships The portraits themselves aresewnon100cottonragpaper(RivesBFK) and coptic bound with a letterpress introduction and colophon
Fish SkeletonThis skeletal study was initially drawn in a sketchbook then transferred onto muslin and stitched As with many of my embroidered studies I tried to keep the sketchy quality of my line work as similar as I could to the original drawing by using long dense stitching
Cadaver Foot Study
Family Photos Detail
Fish Skeleton
MIXEDMEDIAARTIssue 14
MapsOne of my more conceptual books ldquoMapsrdquo uses simpleembroidered diagrams to literally map out complex social hierarchies The author is represented in each map by a red French knot family friends and other social connections are represented by blue French knots connected by family tree style stitched linework
Maps
Phrenology StudiesThis book was made using intaglio printing embroidery letterpress printing and an accordion binding with butterfly cut walnut covers The heads and faces are drypoint intaglio prints on tea-stained cotton rag paper These prints are backed with red lotka paper and stitched with red cotton thread to emphasize the phrenology map design
Phrenology Studies
MIXEDMEDIAARTIssue 14
Christy turnerChristy Turner was born in Walla Walla Washington where she was instilled from a young age with a love for the Pacific Northwest and traditional handicrafts After learning to sew and embroider as a child Turner went on to earn her BFA from Oregon State University in 2012 Though her degree is primarily rooted in relief printmaking Turner also independently studied artist books and embroidery experimenting with various combinations of the three separate mediums In 2013 she was awarded a scholarship to attend the Focus on Book Arts Conference in Forest Grove Oregon She has exhibited photography embroidery artist books and relief prints in juried shows across the country and is currently preparing for a two-person embroidery exhibit to be held in her hometown of Corvallis Oregon
love to Createlove to see other artists teChniQUesanD tools
sUBsCriBenow
Cadaver Hand Study
MIXEDMEDIAARTIssue 14
The problem and the joy of making mixed-media artworks is that there are so many kinds of materials to
be painted GOLDEN Acrylics offers help in getting paint to stick to a wide variety of surfaces with the aid of the GAC series of polymers I am not going to talk about painting canvas just the weird things we mixed-media artists use
All nine GACs are formulated based on 100 acrylic dispersion polymers with only a minimum amount of thickeners freezethaw stabilizers defoamers and preservatives The GACs are fluid and thin and are typically used in conjunction with something else GACs are blended with paints to extend the paint regulate transparency create glazes increase gloss reduce viscosity or improve adhesion and film integrity They are thin and reduce the thickness of most paints Each one has a specialized use
The two products that help the most in my studio for painting on found objects are GAC 100 and GAC 200 Both stretch the color making them an economical consideration but they each have specific jobs Which one do I use and when To determine which product to use I ask
bull What is the object made of
bull Is it flexible or rigid
bull Is it porous or non-porous
If the answer is rigid and non-porous the solution is GAC 200 In this issue I will share my series of experiments with GAC 200 on a variety of rigid and non-porous objects I used mixtures of GAC 200 with either Fluid or Heavy Body Acrylics It is the hardest and least flexible of all the GOLDEN Acrylics and reduces tack These last attributes that make it so good for rigid substrates make it not very good for flexible surfaces GAC 100 is wonderful additive for painting on flexible and porous objects but you will have to wait until next issue to learn about it
Product exploration of gAc 200
WhIch One On WhAtgAC 200
Bonnie Meltzer
Items to paint
QUestions the artist mUst asK themselves
MIXEDMEDIAARTIssue 14
There are more questions to answer once the decision is made to use GAC 200
1 What proportion of GAC 200 should I use
2 How little can I use so the paint makes a good bond What percentage is too much
3 HowshinydoIwantit(GAC200isveryshiny)
4 Howtransparent(themoreGAC200themoretransparent)
5 How will it flow from my brush Will the brush marks show
The pictures and captions will give you insight to these questions but as a general rule I have found that if you want full coverage heavy body with 25 GAC 200 works best if you have something to hide The more GAC 200 in the mix the more transparent and shiny it becomes A 50 mix worked well when I wanted the substrate to show through I tried it up to 75 which Golden suggests is
the maximum That application could make wonderful texture of opaque ridges next to transparent swirls especially on smooth surfaces I mixed small batches of GAC 200 with heavy body paint and fluid acrylics using 14 tsp and 1 tsp measuring spoons Some objects were merely painted to test coverage Other times I experimented with brush stokes and layers Post your experiments with GAC 200 to Facebook
Copper sheet with gray stripes made with heavy body paint and 25 and 50 GAC 200 just brushed on normally Upper left dabbed
MIXEDMEDIAARTIssue 14
Surfaces to Paint with GAC 200 I have had good results with metal of all types acrylic and other rigid plastics and heavily varnished wood
tiPs
Clean No matter how good the paint is you have to prepare the substrate You want the paint to stick to the material not a layer of dust or grime Wipe with a damp cloth or wash with soap and water if it is really dirty Dry well I always wipe an object with alcohol even alcohol from the drug store Sand shiny and slick surfaces to help the paint stick Donrsquot forget to wipe the sanding dust off with a damp cloth
GAC 200 makes paint stick to your palette as well as your painting I use disposable soft plastic yogurt tops instead of my regular rigid plastic palette with little wells A side benefit of the yogurt top is that by bending it you can peel off the paint and use the sheet in a project
The blue hair was made with a mixture of 75 GAC 200 and fluid acrylic Notice the ridges I need to use that more
Various dilutions of paint on textured factory primed aluminum In progress The texture reacted differently to the various mixtures of GAC 200 The white is the unpainted material
MIXEDMEDIAARTIssue 14
A finished and installed exterior artwork on smooth aluminum painted with GOLDEN Acrylics heavy body and fluid acrylics and GAC 200 Sprayed with clear spraypaint Hose nozzle is also painted Mixed with crocheted wire and found objects The paint had to have a good bond not only on the base but also so it would not get scratched from the crochet
Donrsquot shake the paint There are minimal antifoaming agents in GACs so donrsquot shake them You will get tiny bubbles in the paint A foam brush also will encourage tiny bubbles
All but one of the photos are not finished pieces but experiments and samples made for this article Usually a piece is made up of many found objects not all of them are rigid andor non-porous Some of the samples from this article could grow into a finished artwork utilizing GAC 100 GAC 100 has many uses and is indispensable in my studio for preparing substrates extending paint and for painting on flexible and porous surfaces So stay tuned and come back for Part 2 with an examination of GAC 100 in the next issue
Bonnie and I love this product for multiple reasons the main one being that the GAC series gets paint to stick on just about anything Other attributes
Great hard edge when using tape to mask off an area Tried on glass metal and natural material (seed pods from my auntrsquos tree) - worked great Painted on an old pair of my daughterrsquos clogs left brushstrokes but used a coarse bristle brushPaint pigment did not dilute however it does make the paint more transparent Works great on plastic
editorrsquos notes
MIXEDMEDIAARTIssue 14
MIXEDMEDIAARTIssue 14
drawing 101
horizontal faCial proportions of aDUlts
Before you attempt to draw adult faces it helps to know how to plan a place for everything sort of
like a blueprint Even though the heads and faces of adults come in many shapes and sizes the same basic guidelines for proportions apply to almost everyone
In this lesson set up simple easy to remember guidelines for drawing horizontal adult facial proportions and then draw proportionally correct ears eyes and a nose and mouth within your outline
Suggested drawing supplies include white drawing paper a ruler graphite pencils and erasers
You also need basic math skills (or acalculator) for measuring and dividing various distances
this ProJeCt is divided into three Parts
DRAW THE OUTLINE OF THE HEAD Draw a circular shape to represent an adult human head with the top half wider than
the bottom
ADD HORIZONTAL LINES TO THE OUTLINE Divide the length of the head into two halves and the lower half into three equal distances
DRAWING EARS AND FACIAL FEATURES Beginners to drawing portraits tend to draw eyes too high on the head
Now add ears eyes and a nose and mouth to your head shape using the three distances in the lower half of your drawing Itrsquos not important that you draw the ears and features well The goal is to draw everything in its proper place
Brenda hoddinott
MIXEDMEDIAARTIssue 14
eXaMininG adult heads and faCes
The most common mistake is to draw the eyes too high on the head However if you look closely at an adult head you can see two halves with the eyes positioned on the halfway point where the two halves meet Below are four simple variations of the top and bottom halves of a human head Any of the skull shapes can be matched with any one of the facial shapes thereby providing many possibilities for the shapes of human heads
The shapes of human heads and the sizes and placements of peoplersquos facial features are very different
Sketch them joined together to make an outline of a complete head
Itrsquos perfectlyOK to draw your skull shape (or facial shape) slightly differentthan in the illustrations such as wider narrower shorter or even longer
However donrsquot wander too far away from the basic shape or your drawing may be too far outside the parameters of what is considered normal human anatomy
Turn your outline of a head-shape into an original person by adding some facial features and hair
Have fun creating different people by mixing and matching other skulls and faces and then adding facial features
MIXEDMEDIAARTIssue 14
draW the outline of the head
Use a ruler to draw a rectangular drawing format on your drawing paper
Drawingformat(sometimescalledadrawingspace)refersto the area of a drawing surface within a specific perimeter outlined by a shape of any size such as a square rectangle orcircleSuggestedsizesinclude5rdquox7rdquo6rdquox8rdquoor7rdquox9rdquo
Draw a very light line of symmetry down the center of the rectangle Measure and mark a small dot at the halfway point of the top and bottom sides of your rectangle Use a ruler to connect the two dots This line helps keep your head shape symmetrical and is a guide for measuring the placement of facial features
Symmetry in drawing is a balanced arrangement of lines and shapes on opposite sides of an often-imaginary centerline In the scans of my drawing throughout this project the line of symmetry is too light to see
Draw a circular shape to represent an adult human head with the top half wider than the bottom
The basic outline of an adult head is similar in shape to an egg
The line of symmetry you drew down the center of your rectangle is helpful for measuring distances on either side to make sure the head in your drawing is symmetrical
MIXEDMEDIAARTIssue 14
add horizontal lines to the outline
In this section you divide the length of the head into two halves Then the lower half will be divided into three equal distances
TIP In time you will be able to judge all proportions visually but for now please use a ruler
Draw a horizontal line that touches the edge of the very top of the head
This line is parallel to the top and bottom of the rectangular drawing surface (and verticalto its sides)
Mark this line IJ
Draw a second horizontal line touching the lower edge of the chin
Mark this line GH
Measure the total vertical distance along the center vertical line (too light to see in my drawing) from the top of the head to the bottom of the chin
Divide this total measurement in half and mark it with a small dot Feel free to use a calculator
Draw a horizontal line (AB) through this dot dividing the head into two halves (as in Illustration 01-08)
Most peoplersquos eyes and the top sections of their ears are somewhere along this line halfway between thetopoftheskull (notthetopofthe hair) and the bottom edge of the chin
MIXEDMEDIAARTIssue 14
Measure the vertical distance between lines AB and GH
Divide this distance by three and lightly mark the two points with dots on the center vertical line (too light to see in my drawing)
Add a fourth horizontal line through the upper point (closer to AB) This line is parallel to each of the other three lines IJ AB and GH
Mark this line CD
The lower part of the nose and the lower sections of the ears touch this line
Add a fifth horizontal line through the lower point (closer to GH)
This line is parallel to each of the other four lines
Mark this line EF
The lower edge of the bottom lip will be close to or touch this line Now the vertical distance between lines AB and GH is divided into three equal sections
MIXEDMEDIAARTIssue 14
draWinG ears and faCial features
Your blueprint is complete and itrsquos time to add a face In this section you draw ears eyes and a nose and mouth on your head shape using the three distances in the lower half of your drawing
It is not important that you draw the ears and features well The goal is to simply place everything in its proper place You may even choose to draw completely different features
Remember itrsquos more important to draw the ears and facial features in their correct places rather than fuss about the intricate details
Draw the outlines of the ears with the tops above AB and the bottoms below CD
Erase the vertical lines (indicating the outline of the head) between lines AB and CD (on both sides of your drawing)
Re-draw the outline on each side (between lines AB and CD) leaving an opening for the tops of the ears to extend inward
Extend the outlines of the tops of the ears inward toward the center of the face
Draw short curved lines on the upper section of each ear (touching AB) to indicate the outer rims of the ears
MIXEDMEDIAARTIssue 14
Add more detailed lines to each ear to represent its various parts
Even though fine details are not important in this lesson try your best and you may be pleasantly surprised
The only important factor to achieve a realistic human face is to put every thing in its correct place according to the facial guidelines
Copyright to all articles images text projects lessons and exercises within this drawing class belong to Brenda Hoddinott and may not be reproduced or used for any commercial purposes whatsoever without the written permission of Brenda Hoddinott
E-mail bhoddinotthoddinottcom Web sites httpwwwfinearteducationcom and httpwwwdrawspacecom
- 9 -
27) Add more detailed lines to each ear to represent its various parts Even though fine details are not important in this lesson try your best and you may be pleasantly surprised
ILLUSTRATION 01-14
Each individual face is physically unique due to inherent variations in the sizes and shapes of heads faces and features You can complete the facial features on your drawing however you wish The only important factor to achieve a realistic human face is to put everything in its correct place according to the facial guidelines
MIXEDMEDIAARTIssue 14
Draw the eyes along AB
To help you decide how wide to draw each eye refer to Illustration 01-15 and observe the following
bull The widest section of the head is ldquofive-eyeswiderdquo
bull The width of an eye is equal to one of these distances
bull The distance between the eyes is equal to the width of one eye
Copyright to all articles images text projects lessons and exercises within this drawing class belong to Brenda Hoddinott and may not be reproduced or used for any commercial purposes whatsoever without the written permission of Brenda Hoddinott
E-mail bhoddinotthoddinottcom Web sites httpwwwfinearteducationcom and httpwwwdrawspacecom
- 10 -
28) Draw the eyes along AB To help you decide how wide to draw each eye refer to Illustration 01-15 and observe the following
The widest section of the head is ldquofive-eyes widerdquo
The width of an eye is equal to one of these distances
The distance between the eyes is equal to the width of one eye
ILLUSTRATION 01-15
Draw some eyebrows above AB
You can draw eyebrows
bull Light or dark
bull Thick or thin
bull Very curved slightly curved or fairly straight
bull Very close to the eyes or a little higher on the forehead
Copyright to all articles images text projects lessons and exercises within this drawing class belong to Brenda Hoddinott and may not be reproduced or used for any commercial purposes whatsoever without the written permission of Brenda Hoddinott
E-mail bhoddinotthoddinottcom Web sites httpwwwfinearteducationcom and httpwwwdrawspacecom
- 11 -
29) Draw some eyebrows above AB You can draw eyebrows
Light or dark
Thick or thin
Very curved slightly curved or fairly straight
Very close to the eyes or a little higher on the forehead
ILLUSTRATION 01-16
MIXEDMEDIAARTIssue 14
Draw the nose
The following guidelines apply to most adult faces
bull The lower section of the nose touches the horizontal line CD
bull The very bottom edges of the nostrils are often below CD
bull The nose is approximately the width of the distance between the eyes
bull The base of each cheekbone usually aligns with the bottom section of the nose
bull The lower parts of the ears horizontally align with the bottom section of the nose
Copyright to all articles images text projects lessons and exercises within this drawing class belong to Brenda Hoddinott and may not be reproduced or used for any commercial purposes whatsoever without the written permission of Brenda Hoddinott
E-mail bhoddinotthoddinottcom Web sites httpwwwfinearteducationcom and httpwwwdrawspacecom
- 12 -
30) Draw the nose The following guidelines apply to most adult faces
The lower section of the nose touches the horizontal line CD
The very bottom edges of the nostrils are often below CD
The nose is approximately the width of the distance between the eyes
The base of each cheekbone usually aligns with the bottom section of the nose
The lower parts of the ears horizontally align with the bottom section of the nose
ILLUSTRATION 01-17
Draw the mouth
The following guidelines generally apply to adult faces
bull The lower lip is usually touching or slightly above line EF
bull The mouth is generally wider than the nose
bull The lower lip is approximately halfway between the lower section of the nose and the bottom of the chin
bull The outer corners of the mouth are usually directly under the irises of the eyes
Copyright to all articles images text projects lessons and exercises within this drawing class belong to Brenda Hoddinott and may not be reproduced or used for any commercial purposes whatsoever without the written permission of Brenda Hoddinott
E-mail bhoddinotthoddinottcom Web sites httpwwwfinearteducationcom and httpwwwdrawspacecom
- 13 -
31) Draw the mouth The following guidelines generally apply to adult faces
The lower lip is usually touching or slightly above line EF
The mouth is generally wider than the nose
The lower lip is approximately halfway between the lower section of the nose and the bottom of the chin
The outer corners of the mouth are usually directly under the irises of the eyes
ILLUSTRATION 01-18
Use your kneaded eraser to lighten the outline of the top of the head until itrsquos almost invisible and then add hair
MIXEDMEDIAARTIssue 14
dRAWIng eYelashes
E yelashes are fine hairs that grow from the outer edges of the upper and lower eyelids The upper eyelid is the larger movable fold of skin above the eyeball that opens and closes to protect the upper and center sections of the eye The
lower eyelid is a smaller less movable fold of skin protecting the lower eyeball Many artists have difficulty drawing natural looking eyelashes Even if every other aspect of your drawing of a face is perfect incorrectly drawn eyelashes can ruin it
Eyelashes though tiny are the most challenging parts of human anatomy to draw realistically In Illustration 1 you see unnatural looking individual eyelashes that are the same value and thickness from root to tip Eyelashes drawn with this type of line canrsquot possibly look correct Illustration 2 shows the correct way to draw individual eyelashes Each eyelash is thick at the bottom and gradually becomes lighter and thinner closer to the tip
Illustration 1 Illustration 2
In this illustration of three eyes have a peek at some common mistakes made when drawing eyelashes such as making them too thick too straight or too long
Illustration 3
MIXEDMEDIAARTIssue 14
Correctly drawn eyelashes look natural and lifelike A simple little drawing technique provides a realistic looking eyelash every time - in simple terms never draw eyelashes from the tip down toward the eyelid Always draw them in the direction in which they grow from theeyelid(orroot)outwardGrabsomepaperanda2BpencilReferto the next close-up drawing and try your hand at drawing realistic looking individual lashes
1 Begin at the base of the eyelash and press firmly with your pencilRemember always draw eyelashes in the direction they grow from the eyelid outward
2 Slowly release the pressure you apply as your curved line extends toward the tip Realistic eyelashes look like inverted commas ndash thick at the bottom and thin at the top
3 Gently lift your pencil from the paper when the tip of the line is very thin and light in value
The following criteria provide insights into various aspects of drawing realistic eyelashes Refer to the previous two illustrations and the next Take note that correctly drawn eyelashes
bull Grow in many different directions mostly outward from the eyelids
bull Are rendered with thin lines of different lengths
bull Are curved and unevenly spaced
bull Appear thicker closer to the eyelids
bull Grow from the outer edges of the upper and lower eyelids and not the white of the eye
bull Are drawn in groups rather than single lines
bull Gradually become longer and thicker toward the outer corners of the eye
Illustration 4
Illustration 5
MIXEDMEDIAARTIssue 14
Warm up your drawing hand and draw an eyeful of eyelashes
1) Lightly sketch the almond shape of an eye with a double line at the top and bottom to represent the thickness of the flesh of the eyelids
2) Use 2H and HB pencils to draw an average quantity of eyelashes on the outer edges of the upper and lower eyelids
Illustration 6
Illustration 7
MIXEDMEDIAARTIssue 14
Brenda hoddinottAs a self-educated teacher visual artist portraitist forensic artist (retired) and illustrator Brenda Hoddinott utilizes diverse art media including her favorites graphite and paint
Brenda is the author of Drawing for Dummies (Wiley Publishing Inc New York NY) and The Complete Idiotrsquos Guide to Drawing People (Winner of the Alpha-Penguin Book of the Year Award 2004 Alpha - Pearson Education ndash Macmillan Indianapolis IN) She is currently writing two books on classical drawing
Donrsquot expect to master drawing eyelashes right away Take lots of time to practice before you try adding them to your drawings of people With lots of practice you can draw natural eyelashes that are thick and bold close to the base and thin and light at the tip
Illustration 8
Illustration 9
In order to understand the body of works created by the Cuban artist Conrado Maleta it is necessary to
move a few steps back to his childhood in Cuba With the end of Soviet Union the island was in a long process of economic and social degradation called
PeriodoEspecial(specialtime)Inthattime the teenager who is today the artist helped family members in the production of popular jewelry and decoration artifacts Almost all the work was done with recycled materials or morphologies coming directly from nature such as shells and stones He also sold the products door to door earning just a little but absolutely happy about it In those times he learned how to do crafts and how to re-use things in his own environment Many years later the artist started to work in what today is his most beloved group of art pieces Neo-Byzantine Madness and Boxes of Beauty
Neo-Byzantine Madness The concepts behind these works are deeply anchored with the human historic background The first group of works is developed from personal experiences and learning in the Middle East and hours of walking and listening to religious services in orthodox churches and Catholic monasteries of Israel It is all about a mistake
Work-01 Fancy pedestal for the allegory of Beauty 2013Coins silicon glue glass balls pearls a plastic rose some acrylic paint and glossy varnish Box made with American coins and objects I found in the streets of New York City I did it thinking in the concept of beauty I also think it has something to do with the salty foam of the sea
MIXEDMEDIAARTIssue 14
Artist Profile
ConraDomelato
The artistrsquos mistake and misunderstanding of how others see and trust in their beliefs It is also about reinterpretation of aesthetics that have millennia of development but suddenly in the eyes of a Western post-postmodern man they appear to be antiques In the works of this set there is a special intention for creating a contemporary version of Middle East religious imagery Christian Jewish Islamic or even Baharsquoi Sometimes the lecture is clear at first glimpse but for others it is necessary to go inside
the concept in order to understand the meaning Every work has a powerful sense of humor by itself without being frivolous are a must because they are the verbal key used by the artist to lead the public into a correct road
Boxes of Beauty After moving to New York City one of the first things I noticed was the presence of hundreds of pennies in the streets The idea of having as material something that others donrsquot want or need and also keeping clear that there is a possibility for these coins which the government is thinking about not printing anymore to be in the near future a rare collectible had been the starting point for the project
Work-03 Shut on the TV Sex language for adults and violence 2013Coins silicon glue plastic toy glass balls acrylic paint glossy varnish steel nails A TV set in Cuba is of the old style with long skinny legs And at beginning of each film you have a text with the category This is an adult series of films The violence is represented by the red color and drops the sex is just the cavities the dark inner spaces and the adult language are represented by a dinosaur
Work-02 Goat who has broken a drum with its skin pays 2013 Coins silicon glue thread plastic goat sleighbells acrylic paint glossy varnish All the objects I found in the streets of New York City The title is from a traditional Cuban song It is an irony for me because finding a goat in Manhattan was the last thing I ever expected OK it was plastic but thatrsquos just an irrelevant detail
MIXEDMEDIAARTIssue 14
The presence of the TV is also a conceptual idea in this new work The TV is the new Pandorarsquos Box The good and bad inside the TV - the aggressive behavior especially verbally from some New Yorkers is expressed through the use of the dinosaur like something big bigger than life Colorful dinosaurs appear as vulgar slang the artist has heard in the street The use of boxes as containers is also a product of a direct influence from the artistrsquos present life The need of a home the search for a homey building or space The house as a warm and protective uterine refuge New York as a cave New York as a home
The act of material recycling has two basic meanings adding information in an anthropological way and supporting the artistrsquos eco-conscious way of life
Work-04 Open this box of wisdom and you will learn about a human sin Open this heart and blue clouds will come out of my body 2012A Tefillin box that I found in a Genizah - a sacred storage area - in the streets of Tel Aviv (it is a big sin but I couldnrsquot resist) cotton thread a plastic butterfly silicon glue acrylic paint steel wires inside two cut-off illustrations from old books of art It is about hope and beauty Holy actions desire and sin
Work-05 Double game with sensibility 2012Wood iron plate thread plastic net Italian silver wire pearl steel nails used matches two cut-off illustrations from a very old book of art silicon glue acrylic paint and glossy varnish Man vs woman Power vs spirituality Red vs blue It is a piece talking about dichotomy as a game It is also created for being used as jewelry avant-garde jewelry work
MIXEDMEDIAARTIssue 14
aBout My studio
My studio is located in Crown Heights South Brooklyn It is open only by previously scheduled appointments You can email Conrad for more information
Work-07 Muhammad and Jesus Christ doing scatological questions to Yahveh the God of the Jews 2012Metal plate silicon glue wire acrylic paint and glossy varnish This little work was done in Jerusalem I was traveling there and it is about what I saw listened to and enjoyed there It is easy to imagine all the different interpretations of God talking and making noise and fighting to keep their own relevant considerations
Work-06 Dialectical exchange of two unborn kids that happens in the intrauterine space 2012Metal plate silicon glue thread acrylic paint and glossy varnish This very small piece was done in a hard moment My wife and i were struggling to get pregnant and it wasnrsquot easy I had weird feelings and one night I had a dream in which I was talking to a my twin (I donrsquot have in real life) I did this work and still think it is so full of energy
MIXEDMEDIAARTIssue 14
Maletarsquos Studio Space
MIXEDMEDIAARTIssue 14
Conrado r MaletaConrado R Maleta is a Cuban artist who was born in Santiago de Cuba 1979 He has traveled for a long time around the world Europe the Middle East and America Today he is based in Brooklyn He is has a bachelorrsquos degree in Architecture and URBAN PLANNING his career has mainly been as an artist studying with private professors and taking on internships He has been a painter sculptor and photographer His whole work is dedicated to the analysis of the human expressions in religiosity and spirituality It is correct to consider his body of works as a visual road opened by a naive anthropologist
He can be found here or Click here for more information
MIXEDMEDIAARTIssue 14
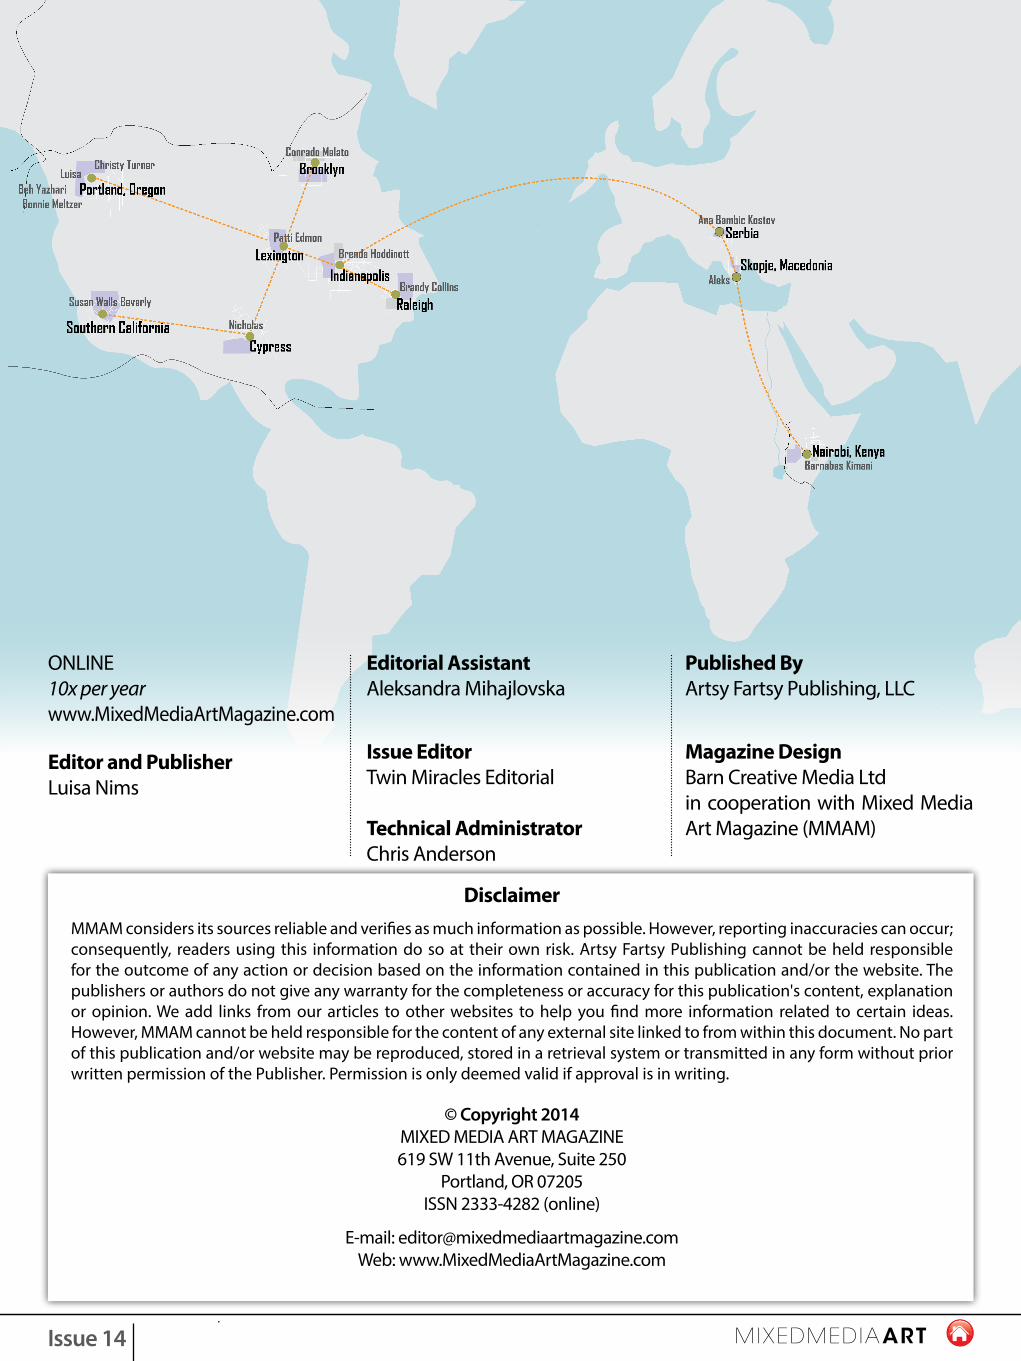
MIXEDMEDIAARTIssue 14
Beth Yazharirsquos its in the details
- Part II video tutorial
anaystyacia Kovaleva
Making art from natureDifferent kinds of natural
material and their preparation
patti edmon tutorial
Brandy Collins - tutoriallove Birds 2 electric Bugaloo
Diana Darden product review
Christy turner - embroidery Bonnie meltzer - product exploration
Drawing 101 Conrado melato
CONTENTS
polyshrinkMakes Complicated
shapes possible
Have you ever thought about making art from natural materials There are a lot of flowers leaves and
twigs on the ground that you are convinced can create wonderful art Probably your first thought of floral art is using mostly dried pressed flowers and something typically associated with nature like stones sticks bark But the natural the world is much wider For your unique art you should think more globally I will try to push your mindrsquos boundaries to understand this wonderful kind of art
We would like to bring nature into our lives as much as possible There are so many opportunities to learn and explore with natural materials Hunting for really unique and special materials is an integral part of the creative process Most of these items can be found for free right out of your door Woodland fields parks and your kitchen are the sources of your inspiration Art starts with searching and preparing materials The more materials with different colors and textures you have the more interesting work can be made Once you have a wide array of treasures you can put them together in an interesting way for creating a masterpiece
GettinG started
Some natural materials that can be used
bull onionskin bull bananapeel bull fishscales bull seashells bull feathers bull eggshells bull sepals bull seedsandnuts bull woodslices bull moss bull bark bull allkindofplantsflowers
maKing art FInDIng MATErIAls In THE worlD ArounD us
from natUre
MIXEDMEDIAARTIssue 14
These are my favorite kinds of materials that I use intensively in my collages It allows me to create very delicate art but requires a lot of time and accuracy Of course every artist is looking constantly for his own material But floral art isnrsquot only natural colors and smooth lines You can mix anything you like
Save and collect materialsbulllaceribbonwooltextilescraps cord beads bullhandmadepaperrecycledcardboard bullceramicplates(usingbrokenelements) bullglass bullacrylicpaintandvarnishes
Natural materials can be used in a wide range of ways to promote wonder curiosity and enthusiasm for learning It
can be in the form of collages sculptures handmade cards or the decor of any item Look carefully around you and start a collection of natural things
ColleCtinG and dryinG
When yoursquore exploring nature being well-prepared for the elements is the key to your hunt for treasures Take a lot of packages scissors and pruners Every season has its special features but there is never a time when collecting natural material is altogether impossible Ideally you should pick up material in dry weather But if you collect material in rainy weather you should dry it as soon as possible The best way of drying thin material is using old newspapers and books You should check out material at least once a day When you bring newfound materials home leave
MIXEDMEDIAARTIssue 14
them outside for several days This will get rid of unwanted insects and prevent the material from drying out
at the kitChen
Sometimes it is funny to comment on what I used in collages I couldnrsquot bring myself to call my materials such as onion and garlic skin banana peels or eggshells by the name lsquofood wastersquo because they are really cool elements with amazing texture and colors There is not any special preparation Just clean and dry
From the banana skin you can make thin branches of a tree or contours of graphic works First of all you need to put the banana skin on a smooth surface and remove all the flesh with a knife Then put it under the press and make interesting shapes such as a rose The best place to store your materials depends on what kind they are I prefer cardboard boxes and packages
Garlic skin is a great material for imaging flowers glare on the water or glass surfaces
Eggshells have a lot of variations They have different coverage areas direction of material and color that can give so many interesting ideas In the kitchen you can find lots of useful things like tea or different kinds of groats
Floral collage gives you lots of wonderful opportunities You can constantly look for new materials and technologies Art from nature unites natural elements with artistic vision for creating artwork that pushes the boundaries of what art is and how we perceive ourselves in the natural world
Black Garden My natural picture consists of paper recycled cardboard transformed into roses and other shapes onion skin eggshell acacia For some materials I used acrylic paint My mixed media recycled artwork can broaden intellectual understanding and help engender an intuitive appreciation of the environment
Beautiful Bug This work is inspired by nature organic forms and natural colors I used sticks skeleton leaves eggshells and flax Sticks were modified I made them into thin wood slices
MIXEDMEDIAARTIssue 14
Paradise Garden I used cord feathers beads different kinds of flowers and leaves fish scales and melon skin It is the garden which always will be Paradise and it is not the bone of contention but an image of serene happiness
The Last Flowers of Autumn This work is a huge mix of natural elements You can see here only natural colors I havenrsquot used acrylic paints Coffee raffia different kinds of leaves pressed flowers garlic skin beads melon seeds and melon skin
MIXEDMEDIAARTIssue 14
Gold Heart This collage was made in a simpler technique All elements have volume which allows me to glue elements quickly I used seashells dried flowers textile roses raffia skeleton leaves paper and feathers
I have been learning about natural art for seven years since I was a kid when I spent my days making simple artworks in a studio of floral design There is nothing more natural to me than to work with organic material using it to give new life
In 2011 I graduated from Belarusian-Russian University with a degree in commerce After that I worked as an analyst for three years then decided to make art for myself just to see if I could do it Now Irsquom a full-time artist In 2009 I took first place in the 6th International and 6th International Competition
of Contemporary Art in Moscow during Russian Art Week
In 2013 I became a winner of the 10th Competition of Pressed Flower Pictures ldquoExhibition of Creationrdquo in Japan and winner of the International Competition of Pressed Flower Art in South Korea
AnAystyAciA KovAlevA
MIXEDMEDIAARTIssue 14
Beth Yazhari
tap hereTo watch Video
PArt ii tutoriAl
itrsquos in the Details
MIXEDMEDIAARTIssue 14
bull Saran wrap
bull Acrylic paintsmdashI prefer Golden for paints and medium
bull A few brushesmdashinexpensive ones for creating paint washes and for adhering fabrics to canvas with medium or glue
bull A variety of vintage textiles doilies trims beads brooches etc
bull Acrylic matte mediummdashto adhere thin textiles to the canvas
bull Mod Podge or Golden molding pastemdashthese stronger adhesives are useful for adhering heavier textiles to the canvas
bull Canvasmdashthink of your stretched canvas as an embroidery hoop I often like to work on square canvases which lend themselves well to round doilies
bull Jacquard fabric sheets (optional)mdashthese are great for transferring your own photos or other images onto fabric so they can be collaged onto the canvas and sewn into
bull Beading needlesmdasha variety of sharps and other sewing needles can be used but it is nice to have some needles specifically designed for beading for the occasionalbeadswith tinyholes (Ponysize 12 beading needles are good)
bull Beadalon Dandylinemdashsuper-strong bead weaving and stringing thread or Beadalon Wildfire beading thread
Bethrsquos MAteriAls
MIXEDMEDIAARTIssue 14
Beth yAzhAri Bio I make art that celebrates reflection craftsmanship and time-consuming labor in the pursuit of beauty I strive to make spiritually uplifting art to create oases of beauty and wonder in a frenetic society that is increasingly in need of both
Discarded doilies and remnants of embroidered fabrics are a source of inspiration to me by rescuing them and recycling them into my beaded paintings I hope to honor and collaborate with the creative spirit of generations of women who have gone before me whose handiwork has often been ignored because it was not created to be displayed in a gallery
Making my art is truly a sacred act for me I feel that creating artwork in a spirit of service to humanity is a form of worship
MIXEDMEDIAARTIssue 14
By Ana Bambic Kostov
The turn of the 19th century brought the Arts and Crafts Movement from England to America The
ideas and ideals of British intellectuals John Ruskin and William Morris dispersed throughout the United States by the means of journal and newspaper writing Important factors in the Movement were societies that promoted various lectures and programs There was no single center of the Arts and Crafts Movement first it was strong in Boston then in Chicago Minneapolis and New York
Rose Valley Community a social and artistic experiment was founded in 1901 in Pennsylvania with a shop offering hand-made furnishings pottery metalwork and hand-bound books The second community of this sort was Byrdcliffe Arts and Crafts Colony based outside of Woodstock New York
In the cities activities were limited to local communities and often focused on the education of young womenwho were taught to make pottery and work with textiles or metal and jewelery The Arts and Crafts Movement in America was not centered around one philosophical idea rather it represented a large group of creative individuals Traits of the movement differed depending on geography and social status especially as the movement spread from the East Coast through the Midwest to CaliforniaThe result was many new pottery workshops or furniture factories followed by a thriving revival of handiwork as the most natural way of production with beautiful results Although the American Arts and Crafts Movement waned after World War I the influence of this socially engaging action stayed
Its InFLuence cAn stILL Be FeLt tOdAy WIth ARtIsts LIKe Beth yAzhARI tAKIng the ReMnAnts And ReFAshIOnIng
these PIeces IntO neW FORMs
the arts anDCrafts movement
MIXEDMEDIAARTIssue 14
Throughout the 20th century a myriad of women engaged themselves in often necessary sewing knitting embroidery and stitching They were grandmothers and mothers women who gave their best to making beautiful and functional items for their families Their names were largely forgotten but their impact can still be felt and seen
Artist Beth Yazhari is greatly inspired by the handicraft of the women of the past finding her own expression in collecting and recycling items made across the planet Embroidery or crochet from different cultures can be found in her studio right next to precious family heirlooms or old beads and buttons Beth is a schooled artist and painting remains the base of her work while her style is built through recycled materials made of vintage craft By using old handiwork as the key element in her elaborate artwork Beth honors endeavor dedication and creativity of women everywherewho felt the need to design beauty but were never able to realize recognized artistic careers
Creative ProCess of Beth yazhari The hunt for ostentatious art material is where Beth Yazharirsquos creative process begins Art supplies she collects are beautiful fabrics stitching doilies old beads or brooches Vintage items she finds at estate sales coupled with the
Internet Beth usually conducts her searches on eBay or Etsy where she will bid on anything that catches her eye from Dutch needlework to Native American medallions
The materials she works with most are cross-stitched and hand stitched handkerchiefs crochet doilies sari fabric old brooches and appliqueacutes Contemporary materials are not exempted from Bethrsquos creative process as she combines the old with the new including ribbons and fabrics
the PaintinG teChnique
Yazharirsquos underpainting technique is the foundation of her process Beth uses Saran wrap to create a rich base for her detailed work By layering colors the final result is full and velvet-like which serves as a chromatic inspiration to the artist
First she takes a blank stretched canvas which
can be found at any art supply shop Beth wets the canvas with a very light layer of water wetting a brush and applying it over the area intended
She drips several drops of acrylic paint directly onto the canvas without exaggerating If the paint is very liquid she uses matte medium to stabilize it
In the layering process she combines two or three colors to achieve the desired result
Using water alone to dilute acrylic paint
Beth uses a piece of saran
wrap a little bigger than the size of canvas to cover the
paint
MIXEDMEDIAARTIssue 14
may result in chipping when the color dries If the paint is thicker matte medium may not be necessary Itrsquos important to know that too much of the matte medium can create tangible texture on the canvas which is not advised if adhering fabric or beads is planned as the next step
Once she adds the color and medium she spreads it around the canvas evenly with a brush
Beth uses a piece of Saran wrap a little bigger than the size of canvas to cover the paint
Pressing the wrap onto the painted area playing with it she makes creases and wrinkles which will create an interesting pattern when dry
She allows for the paint to dry for about an hour or two Drying can be sped up with a hair dryer or heater
When the paint is completely dry the artist peels the Saran wrap off and the first layer of the underpainting is done
This process can be repeated several times sometimes up to 20 layers to add to intensity of color The final effect is canvas with a surface similar to fabric
When the paint is completely dry the real creation can start
Beth applies fabric cut-outs on the canvas stitching with a strong thread while using adhesive occasionally Her composing process is very similar to collage with less overlapping
If the applied material lacks color but has complex stitching she emphasizes the embroidery by painting around it in contrasting nuance For example
when she applies a handkerchief hand-embroidered elements that are all white she would paint around these elements in dark color to create a more dramatic effect
When the fabric is cut and applied onto the canvas the most intricate elements are added Beth emphasizes the details with beadwork and sews small beads around the edges of decorative patterns to tie the piece together
The central piece of her works is often reserved for the crowning jewel - a vintage brooch or a particularly beautiful decorative ornament always being mindful of color coordination
Beth Yazharirsquos creative process allows a lot of freedom for the artist in choosing from an endless pool of colors materials and patterns while also allowing her to be engaging and playful
The Arts and Crafts Movement emerged during the late Victorian period in England the most industrialized country in the world at that time Anxieties about industrial life fueled a positive revaluation of handcraftsmanship and precapitalist forms of culture and society Arts and crafts designers sought to improve standards of decorative design believed to have been debased by mechanization and to create environments in which beautiful and fine workmanship governed The Arts and Crafts Movement did not promote a particular style but it did advocate reform as part of its philosophy and instigated a critique of industrial labor as modern machines replaced workers Arts and Crafts proponents called for an end to the division of labor and advanced the designer as craftsman
Click here for more information
MIXEDMEDIAARTIssue 14
susAn Beverly WAlls tutoriAl on shrinK PAPer
tap hereTo watch Video
tutoriAl on shrinK PAPer amp Mixed MediA
tap hereTo watch Video
MIXEDMEDIAARTIssue 14
susAn Beverly WAlls tutoriAl on shrinK stAMPinG
tap hereTo watch Video
MIXEDMEDIAARTIssue 14
susAn WAlls Beverly A dozen or more years ago I ended my 20-year era of restaurant management and searched for a way to work from home Loving all kinds of paint I began murals for my kids that blossomed into a word-of-mouth business As my kids grew up I knew I wanted to be more creative and branch out into other artsy things In 2001 I started doing art and craft shows around Southern California and havenrsquot looked back since
My current obsession is designing making and traveling with my line of thematic crazy jewelry Charming Trinkets My designs incorporate a myriad of materials from shrink plastic to resin to a mix of metals It is infused with my belief that life is too short to be too serious and you
need to make some loud laughter while yoursquore here If I can make you smile or touch you emotionally I know Irsquove done my job
Each day my house is infused with family laughter and thoughts of the creative Irsquom pleased as punch to be able to spread it around
MIXEDMEDIAARTIssue 14
Artist Diana Darden made these figures from Lucky Squirrels PolyShrink She found with a small learning curve that the material was versatile enough to recreate versions of her masonite dolls
Find these products at Lucky Squirrel Here
MIXEDMEDIAARTIssue 14
I launched my blog Altered Attic in 2008 It is named for the third floor of our old brick four-square
which had been finished with plenty of light electricity and enough space to accommodate two working artists and storage for the shelving bags bins and boxes of stuff and art supplies
Though my style continues to evolve mixed media collage is my medium of choice If my hands are covered in glue and paint it has been a good day The backgrounds I texture and paint on canvas or board (mostly smaller than 12rdquox12rdquo)light switch plates puzzle pieces and tins are the inspirational beginnings and often my favorite part of the process
My most recent work is a series of seven 12rdquox12rdquocradledcanvasesFind her work here I used the backside to create a shadow-box effect and after completing each textured and painted background I incorporated Frozen Charlottes vintage papers and book covers bits of jewelry twine lettering and other repurposed objects
I used pieces from a childrsquos floor-puzzle book to create a Cloud Poem book Click here to view I altered five puzzle pieces and incorporated a poem I had written after spending an afternoon floating on my back in our favorite lake spot
the Journey
My passion for mixed media art stems from my love for (acrylic) painting and usedvintage or just old stuff that has already had one life Part trash part treasure I find it a creative and meaningful way to repurpose items that others might discard or overlook Discovering that realistic drawing wasnrsquot a requirement for making art was another significant positive While I appreciate most all forms of art I believe that the notion of landscapes and portraits has derailed many a blossoming artist
Painted background with digital photo ndash vase in front of a mirror ndash embellished with wire flowers mesh vintage Swarovski crystals board and small faces peering through the lsquowindowsrsquo in the textured paper background
altereD attiC anD proCess
MIXEDMEDIAARTIssue 14
Pattirsquos ProCess
Typically I start with a background and no clue or vision of the finished piece I donrsquot sketch beforehand and rely totally on the intuitive nature of process Once a canvas or other substrate is prepped and painted I sort through images papers and rummage through my stash for found objects that seem to relate because of texture color or its prior use Based on the materials Irsquove pulled I may modify the color palette and I usually have a mess to clean up when Irsquom finished because the broken earring brooch fork key bottle scrap of wood or rusted wire didnrsquot lend anything to the design I always know when I am finished but truthfully it is a feeling of overdoing or rearranging which helps me put it aside for a day or so then go back tweak and glue
tiP
My biggest hurdle aside from getting enough time in the studio has always been over-thinking The part of the brain that reminds us about unfinished dishes obligations errands and other means of procrastination needs to be shut off Completely Irsquove researched the artistic process and its hindrances extensively Most of the advice boils down to the same core idea We create because of a need or longing not because itrsquos fun convenient or easy The daily challenge is to eliminate the ways we find to sabotage delay and otherwise prevent ourselves from doing what we love
Painted textured background with 1980s photo layered over vintage tobacco paper fabric and mesh finished with rusted wire and sticks
My art has been sold exhibited (infrequently) appeared in e-zines andI participate in swaps and challenges however the love of process is my primary reason for making mixed media art This notion is counterintuitive to most everything we learn growing up particularly those of us raised in a non-creative business-dominated environment where product and profit make more sense than curiosity for the sake of experimentation
The limitations of a chronic illness and raising a family may reduce my art-making time but creativity is a thread woven throughout the fabric of very being
MIXEDMEDIAARTIssue 14
Background painted and tinted with Pan Pastels photograph from the 1980s framed on vintage book covers embellished with mesh and lace trim
MIXEDMEDIAARTIssue 14
C reativity has been woven through my life since childhood In my preteen years I did pencil sketches and wrote poetry which evolved over the years to include essays
narrative nonfiction and fiction In the mid 1980s photography became another passion and for several years before my children were born I shot medium-format film and spent many happy hours in the darkroom Chemicals and pregnancy are not a good matchhoweversoaftermy(nowteenaged)childrenwerebornI switched to digital photography
In 2006 after being diagnosed with a chronic illness that launched me into early retirement art became my new career I have worked in various forms of collage altered objects such as small tins books cigar boxes puzzle pieces and made books from tissue boxes and other scraps along with painting and mixed media art
Last summer I had the idea to create pieces using my history of creative disciplines I chose several photos each the starting point for these mixed media pieces My plan was to use paint found objects and as many art supplies as possible
The process ndash which took several months for each piece ndash began with a heavily textured painted background on an 8x10 canvas using colors to accentuate and complement the chosen photo Finding the rest of the materials was no problem as Irsquove acquired significant stashes of fabric broken jewelry buttons lace trim scrap wood and sticks art paper vintage papers found metal objects mica eyelets brads fibers and on one piece moss that I sprayed with various colors of glitter mist
patti edmon
Artist Profile
Process background painted using stencils and acrylics a black and white photograph from the 1980s ndash tinted with watercolor pencils and layered on an 8x10 canvas with fabric scraps trim buttons and flocked wallpaper
MIXEDMEDIAARTIssue 14
Once I had decided on a rough composition I layered and added elements allowing the piece to come to life complete with a theme and message
One of the most fulfilling aspects of this project was the problem-solving process common to any artist who creates intuitively used to make each layout work Like most artists I have a tool box with the usual hammers knives snips pliers an assortment of wire texturing tools and screwdrivers an eyelet setter and block punches a Dremel heat gun beeswax melting pot all of which were used while working on this series
My husband and I share a dedicated studio in the attic of our house built in 1900 We hired a contractor to finish the space with drywall flooring ample electrical outlets ceiling fans a storage closet lighting and a comfy window seat with cushions and pillows I donrsquot spend much time sitting there but from my table I can look out at the tops of trees through a 3rsquo x 6rsquo original window fitted with Plexiglas for insulation
I work in a sketchbook but donrsquot use it as an art journal When I write itrsquos usually several pages This series is very symbolic a personal integration of my lifersquos creative journey
Background painted over layers of paper digital photo with fabric wings tinted silver stars pearls fabric flowers and tinted moss
MIXEDMEDIAARTIssue 14
PAtti edMon I am a lifelong creative and professional writer and ran a marketingadvertisingdesign business until 2006 when I retired (very) early due to an autoimmune illness My husband and I are raising two teenagers in an old house in downtown Lexington Kentucky with two dogs and a cat
As any artist knows a well-stocked studio is vital to fulfilling creative ideas Working in mixed media explains why Irsquove always collected certain things from small boxes tins and bottles every kind of paper jewelry and books to old puzzles scrap metal and rusty bits
Textured painted background with recycled Sari ribbon and art paper digital photo and an excerpt from my essay on friendship on a vintage book cover A grunged cardboard frame is attached with looped brads and wire over old screen Eyelets with wire wrapped around sticks over three layers of mica to frame the text
MIXEDMEDIAARTIssue 14
love BirDs 2 eleCtriC BUgaloo
BRAndy cOLLIns
step 1 Gathersupplies(Seesupplylist)Rememberinmixed
media nothing is trash Any old papers stamps magazines old book pages scrap book pages painted papers textured paper old
drawings Irsquove done and other media remixed
tutorial
MIXEDMEDIAARTIssue 14
step 2 Sketch a rough
design
step 3 Using watered down
acrylics create the base painting with a color
scheme of your choice
MIXEDMEDIAARTIssue 14
step 4 I tear pages and start assembling shapes and colors that fit in various places either by conundrum shape color or texture I seal them with the matte medium I use matte medium because itrsquos easier to paint and draw on for the detail work I had some French Toile Tissue Paper and tore various scenes out of it to place in the background and using a fine paint brush I carried the scenes into the background and painted shadowing around it In the autumn version of this piece I kept the background mainly torn pages of various greens and drew leaf vein patterns on the diamond-shaped pieces This one I used a blue painted background blue painted torn book and music pages and blotted different shades of paint for clouds and texture
MIXEDMEDIAARTIssue 14
step 5 Detail work Using a fine paintbrush black Micron pen or photo pen I add the detail work I often go back and forth from collaging to detail work My canvas goes from easel to table many times throughout the process My goal is to make things look surreal in my illustrations
Hint Tweaking sometimes means I pull out pieces that Irsquove added but decided they deter from the main design For example in this piece I removed a stamp that took away from the focal point I love ldquobusyrdquowheneverypieceIaddisworkingasateamhellipbutnotonegreat stamp stealing the show which sometimes happens and in that case things can be steamed off with a hot rag or scraped off
MIXEDMEDIAARTIssue 14
step 6 Keep collaging and painting the most important thing to remember is to enjoy the process
before stamp is removed
MIXEDMEDIAARTIssue 14
Brandy CollinsBrandy Collins is a self-taught artist who works in mixed media primarily watercolors acrylics and ink She draws her inspiration from nature art music folk art and anything vintage or Gothic Her abstractrealism paintings and illustrations have been featured in galleries such as the Janette Kennedy Gallery and Kettle in Dallas Texas as well as art festivals and charity auctions in Dallas Austin and Hawaii She is a native of Hampton Virginia but currently resides in Raleigh North Carolina You can reach her here
final signed image
MIXEDMEDIAARTIssue 14
BooK
1Chapter 1 Making This Book Your Own 1Chapter 1 Making This Book Your Own
The Creative ConversationRediscover the Joy of ArtMaking
Approaching creativity as a form of spiritual practice artist and creativity guide Bridget Benton breaks the creative process down into its most basic components and o ers a fresh perspective on developing your creative skills Whether you are creatively blocked burned out or just want to further explore the world of making you can make art and have fun doing it
With 24 hands-on Artful Explorations ndash interesting and varied enough to suit both beginners and professionals ndash this ldquoworkshop in a bookrdquo helps you
bull Make art that re ects your authentic inner voice bull Practice the 12 Actions and A itudes of artmaking that support creative owbull Develop a more consistent practice with your artmaking bull Engage with your art in a meaningful and mindful waybull Move more easily through resistance judgment and other blocksbull Create a more connected intuitive and playful relationship with your artmaking
Author Bridget Benton has worked as a professional artist facilitator and workshop leader for over 20 years helping hundreds of adults rekindle their creative spark She holds a Master of Science in Creative Studies from the International Center for Studies in Creativity at the State University of New York and has taught intuitive creative process at events across the country She currently lives and paints in Portland OR
ldquohellipA breakthrough book It will serve as a beacon for a new generation of creative people as well as deepen the conversation for those already interested in bringing the metaphor of art-as-a-way-of-being more fully into their livesrdquo ndashStewart Cubley co-author of Life Paint amp Passion and director of e Painting Experience
ldquoBridget Bentonrsquos directness and honesty are refreshinghellip is book is a MUST READ for anyone interested in growing both artistically and spirituallyrdquo ndashBee Shay author of Collage Lab
ldquoIf the idea of creativity as a spiritual practice excites you then yoursquoll love this book If that idea scares you this book will take you gently by the hand and help you past those fears Either way yoursquoll soon be making yourself a more vibrant liferdquo ndashDiane Gilleland former editor of CRAFT online and author of Kanzashi in Bloom
Photo by Michael Burton
ArtMaking as Playful PrayerArtMaking as Playful PrayerArtMaking as Playful PrayerArtMaking as Playful PrayerArtMaking as Playful PrayerArtMaking as Playful Prayer Bridget Benton Bridget Benton Bridget Benton
TH
E C
RE
AT
IVE
CO
NV
ER
SA
TIO
N A
rtMakin
g as P
layful P
rayer
Brid
ge
t Be
nto
n
Bridget BentonRevIeW
MIXEDMEDIAARTIssue 14
173Chapter 1 Making This Book Your Own174 The Creative Conversation Artmaking as Playful Prayer
The Creative ConversationRediscover the Joy of ArtMaking
Approaching creativity as a form of spiritual practice artist and creativity guide Bridget Benton breaks the creative process down into its most basic components and o ers a fresh perspective on developing your creative skills Whether you are creatively blocked burned out or just want to further explore the world of making you can make art and have fun doing it
With 24 hands-on Artful Explorations ndash interesting and varied enough to suit both beginners and professionals ndash this ldquoworkshop in a bookrdquo helps you
bull Make art that re ects your authentic inner voice bull Practice the 12 Actions and A itudes of artmaking that support creative owbull Develop a more consistent practice with your artmaking bull Engage with your art in a meaningful and mindful waybull Move more easily through resistance judgment and other blocksbull Create a more connected intuitive and playful relationship with your artmaking
Author Bridget Benton has worked as a professional artist facilitator and workshop leader for over 20 years helping hundreds of adults rekindle their creative spark She holds a Master of Science in Creative Studies from the International Center for Studies in Creativity at the State University of New York and has taught intuitive creative process at events across the country She currently lives and paints in Portland OR
ldquohellipA breakthrough book It will serve as a beacon for a new generation of creative people as well as deepen the conversation for those already interested in bringing the metaphor of art-as-a-way-of-being more fully into their livesrdquo ndashStewart Cubley co-author of Life Paint amp Passion and director of e Painting Experience
ldquoBridget Bentonrsquos directness and honesty are refreshinghellip is book is a MUST READ for anyone interested in growing both artistically and spirituallyrdquo ndashBee Shay author of Collage Lab
ldquoIf the idea of creativity as a spiritual practice excites you then yoursquoll love this book If that idea scares you this book will take you gently by the hand and help you past those fears Either way yoursquoll soon be making yourself a more vibrant liferdquo ndashDiane Gilleland former editor of CRAFT online and author of Kanzashi in Bloom
Photo by Michael Burton
ArtMaking as Playful PrayerArtMaking as Playful PrayerArtMaking as Playful PrayerArtMaking as Playful PrayerArtMaking as Playful PrayerArtMaking as Playful Prayer Bridget Benton Bridget Benton Bridget Benton
TH
E C
RE
AT
IVE
CO
NV
ER
SA
TIO
N A
rtMakin
g as P
layful P
rayer
Brid
ge
t Be
nto
n
MIXEDMEDIAARTIssue 14
What did you discover during the process of writing this book
InwritingldquoTheCreativeConversationArtMakingasPlayfulPrayerrdquoI clarified my thinking about creativity Irsquod always had this idea that creativity and spirituality were connected and Irsquod always believed that anyone could be creative Irsquod done a lot of reading and studying but writing this book was what helped me to really flesh out those ideas Along the way ldquoThe 12 Attitudes and ActionsofArtMakingrdquoemergedndashIfeellike they were my greatest discovery because they are such simple principles Practicing the 12 Attitudes and Actions really builds up your creativity skills
What surprised you
I was surprised by how long it took me to write the book ndash I did the first rough draft over the course of a weekend but it took me five more years to flesh that out I really thought Irsquod have it done in a year It took a lot of patience persistence editing revising and support from my amazing writing group ndash and I think the final book is better for the extra time spent
Author Interview
Bridget Benton
Creative Conversations Is FROM A neW BReed OF ARt technIque BOOKs thAt ARe
shIFtIng the FOcus FROM FInIshed WORKs tO the PROcess OF exPLORAtIOn And MeAnIng In OuR cReAtIve PLAy
Table of Contents
Week One 9 Introduction Where This
Book Came from My Story 13 Chapter 1 Making This Book
Your Own 15 A Note to Members of
Organized Faith Traditions 15 A Note to Professional
Creatives and Caregivers Artful Explorations
Explore 16 Cardboard Camera 18 Discard Collage
Week Two 21 Chapter 2 What Is
ArtMaking as Playful Prayer 26 A Note to Those Who
Say They Canrsquot Draw 28 A Note to the Trained Artist 28 A Note to Everyone on
Process vs Product Artful Explorations
Focus on Process Not Product
30 Blind Drawing 32 Visual Definitions
Week Three 35 Chapter 3 Studio Making
Sacred Space for ArtMaking Artful Explorations
Defer Judgment 41 Glue Doodle 44 Layer It Up 49 A Conversation with Judgment
and Process
Week Four 51 Chapter 4 Materials
What Do I Really Need 53 A Note about Copyrighted
Materials 58 A Note to the Packrat Artful Explorations
Be Like a Novice 60 Materials Play Date 62 Make Your Own Coloring Book
Table of Contents
Week One 9 Introduction Where This
Book Came from My Story 13 Chapter 1 Making This Book
Your Own 15 A Note to Members of
Organized Faith Traditions 15 A Note to Professional
Creatives and Caregivers Artful Explorations
Explore 16 Cardboard Camera 18 Discard Collage
Week Two 21 Chapter 2 What Is
ArtMaking as Playful Prayer 26 A Note to Those Who
Say They Canrsquot Draw 28 A Note to the Trained Artist 28 A Note to Everyone on
Process vs Product Artful Explorations
Focus on Process Not Product
30 Blind Drawing 32 Visual Definitions
Week Three 35 Chapter 3 Studio Making
Sacred Space for ArtMaking Artful Explorations
Defer Judgment 41 Glue Doodle 44 Layer It Up 49 A Conversation with Judgment
and Process
Week Four 51 Chapter 4 Materials
What Do I Really Need 53 A Note about Copyrighted
Materials 58 A Note to the Packrat Artful Explorations
Be Like a Novice 60 Materials Play Date 62 Make Your Own Coloring Book
Week Five 67 Chapter 5 Flow Factors
Creativity and the Process of ArtMaking
69 A Note about Following Processes You Read about in Books
Artful Explorations Be in Conversation
70 Talk with the Book 71 Talk with Your Space
Week Six 75 Chapter 6
Getting Clear Intention 76 A Conversation with
Your Intentions Artful Explorations
Be Mindful 80 Deep Observation Drawing 83 Dancing with Matisse Color
Cuts
Week Seven 87 Chapter 7
Getting Inspired Energy 91 A Conversation with Avoidance
and Your Inner Goof-Off 93 A Conversation with an
Overload of Ideas Artful Explorations
Follow the Energy 94 Just Paint Just Draw 97 Get to Work and Get Inspired
Week Eight 99 Chapter 8
Getting Engaged Action 102 A Conversation with Decision-
Making in Art 103 A Conversation with
Letting Go of the Story 104 A Note about Curiosity
and What We Risk Artful Explorations
Let Go of the Outcome 105 The Whatrsquos Next Art Jar 109 Internal Journey Map
Week Nine 113 Chapter 9 Resistance
Judgment and Completion 114 A Conversation with Your Critic 116 A Conversation with Resistance 117 A Conversation with
Completion Artful Explorations
Be Curious 119 Allies and Adversaries 122 Critic Collage
Week Ten 127 Chapter 10
Staying in Touch Intuition 130 A Conversation with
Your Values 133 A Conversation with Your
Intuition Artful Explorations
Tune Up Your Inner Ears 134 Value Collage 137 Matchbox Assemblage
Week Eleven 141 Chapter 11
Giving Back Community 143 A Conversation with
Appreciation Artful Explorations
Cultivate Appreciation and Gratitude
146 Thank You Notes 148 Paper Prayer Beads
Week Twelve 153 Chapter 12 Maintaining
Artmaking as a Spiritual Practice
154 A Conversation with a Commitment to Action
Artful Explorations Hold Clear Intentions
157 Mandala 160 Prayer Candle
165 Bibliography and resources
167 Appendix a Theory and Practice
168 Appendix b A Note on Working with Groups
169 Index
MIXEDMEDIAARTIssue 14
What are 5 ideastechniques you would like any reader to take away after reading this book
First I want people to come away from the book feeling like they CAN make art Second Irsquom hoping a reader accepts that they donrsquot need fancy materials or the perfect studio ndash the whole book is really about breaking down those barriers to making that we all put up while giving you a few tools to make the creative process a little easier
In that spirit Irsquoll share a few of the Actions and Attitudes of ArtMaking ndash the ones that I remind myself of all the time When I make art with these things in mind I have more fun feel more connected and produce more interesting authentic work
1 FocusonProcessNotProduct(beinthe moment and enjoy the making)
2 LetGooftheOutcome(sooftenwehave a picture in our head of what it ldquoshouldrdquolooklikendashletgoofitandwork with whatrsquos there)
3 BeinConversation(payattentiontowhat the piece wants and what your intuition is telling you)
4 DeferJudgment(andpracticediscernment instead ndash while yoursquore making let go of the temptation to labelwhatyourdoingasldquogoodrdquoorldquobadrdquondashjustdiscernthenextbestthingto do)
5 BeCurious(thisistheantidotetojudgment)
Who did you write this book for
I wrote this book for every adult who wants to be creative but feels like they canrsquot be I wrote this book for everyone who had a bad art experience as a kid and stopped even trying to
111Chapter 8 getting engaged action
MaterialsbullJunk mail or old magazines bullBlank paper or sketchbook (larger
and heavier is better bristol board watercolor board or scrap cardboard is ideal)
bullOld mapsbullPermanent marker (at least one
like a Sharpie)bullMod Podge or gel mediumbullAcrylic paintsbullBrushes and water containerbullScissors
optionalbullRub-on or press-on lettersbullGessobullRags or paper towelsbullWax paper or palette
Internal Journey Map
Artful Explorations Let Go of the Outcome
108 The Creative Conversation Artmaking as Playful Prayer
1 Choose at least 24 of the follow-ing phrases or art prompts Write each phrase on its own slip of paper so that you can pull them one at a time out of the jar You can handwrite each prompt or type the prompts into a word processing program and print them out Either way cut them up so that you have only one prompt per slip of paper
2 Fold up each slip of paper and drop all 24 into your container Mix them up Get your art supplies ready and pull out a sheet of sketch paper
3 Now draw a slip of paper from the container and do what it says Then fold the slip back up put it back in the container mix things up again and draw another slip of paper Again follow the instructions Repeat this at least 12 times After the 12th prompt do whatever you need to do to feel complete with the piece
bullFill an area with a solid colorbullAdd a dotted linebullAdd star shapesbullCollage three items onto the
surfacebullAdd textbullAdd a circlebullPut eyes on somethingbullFill an area with a patternbullAdd red orange or yellowbullAdd blue green or purplebullAdd shadingbullAdd at least one collage elementbullAdd at least three straight linesbullDraw or scribble a shape person
or objectbullOutline somethingbullHighlight somethingbullAdd a rectangle
bullAdd a flowing linebullAdd a reference to naturebullAdd a reference to peoplebullAdd blue or orangebullAdd dotsbullAdd green or purplebullUse collage to add a patternbullDo something to unify the spacebullRotate the piece 90deg or 180deg and
choose a new promptbullFind an element in the piece and
repeat itbullAdd egg shapesbullAdd colorbullAdd one collage elementbullUse a wash of gesso over at least 13
of the surfacebullUse a wash of color over at least 13
of the surface
ldquoBy using the term artmaking Irsquom
emphasizing art-as-verb Irsquom focusing
on the actions and attitudes that support artmaking as playful prayer these actions
and attitudes are also what I think
of as the work of artmakingrdquo
MIXEDMEDIAARTIssue 14
make art as a result I wrote this book for every professional creative who feels dried up and washed out after years of producing art for product I wrote this book for every person who wakes up in middle age and says to themselves ldquoWhen am I finally going to givemyselfpermissiontomakethingsrdquo
And in so many ways I wrote this book for myself Itrsquos the book I most needed in my 20s when I was blocked and stuck and
terrifiedofmakingldquobadartrdquoItrsquosmywayofsharingeverythingIlearned in my 30s ndash all the things that got me making art again
What 2 people or things influence your work right now
For the past six years or so Irsquove been working primarily in encaustic The material itself has had a big influence ndash Irsquove been able to take layers and depth further than ever before Lately Irsquove been thinking a lot about remnants - about the things we leave behind about the ways that experiences mark us and the objects that serve as evidence of those experiences That sounds pretty esoteric but it means Irsquom playing a lot with X-rays images of people and things like tea bags food wrappers bottle caps and receipts Therersquos a parallel there to evidence at a crime scene piecing together what happened from whatrsquos left behind Maybe Irsquove been watching too many police procedurals
What are your 4 favorite sources of creative inspiration
Working is my favorite source of inspiration ndash when I get my hands moving and start playing with the materials ideas just start coming and it becomes clear what needs to happen next I try to leave the studio each day knowing what I want to do next so that itrsquos easy to just dive in and get back to work
The materials themselves play a big part ndash Irsquoll ask myself ldquoWhat does this mean What can I do with this How does this workrdquoLikemostmixedmediaartistsIADORElearning new techniques and experimenting with new media I teach at Collage - an art store in Portland Oregon - and I love designing classes around new materials
I also love giving myself challenges ndash what can I do using only the scrap images in this magazine or what can I do with small squares of paper
ldquoAcknowledging that they didnrsquot have to be
in control was liberating for some of the students
Instead they could respond to what was happening within the
artwork itself
ldquoI began to understand that art could be an
action and a process not just a
productrdquo
MIXEDMEDIAARTIssue 14
The limits can actually be really freeing
My students are another huge source of inspiration for me ndash itrsquos as though I absorb a bit of their excitement and sense of experimentation while I teach Sure Irsquom tired at the end of the day but itrsquos as though the students renew my own enthusiasm for whatever Irsquove been teaching I think itrsquos about re-accessing that sense of being a novice
What are 5 tools or supplies you canrsquot be without
bull Scissors bull Gluestick bull Sketchbook bull Pencil bull BlackSharpie
This is the bare minimum that I travel with ndash potential collage papers present themselves for free everywhere and if I can cut paste and sketch out ideas thatrsquoll hold me for at least a week After that I start wanting gesso and some way to add color ndash either gouache or acrylics Gouache is easier to travel with
Whatrsquos next
Right now Irsquom enjoying being in my studio and making art and designing workshops and online classes And the next book is lurking in there but it feels too soon to talk about it
artist noun someone who with their own
level of skill and passion intentionally
makes things in a meaningful and
mindful way a person whose primary work
is to find meaning and express it in concrete or tangible ways an
identity available to all of us as our birthright
art verb to make something with
meaningful mindful intent (adapted from
the everyday Work of Art) noun An action
or process we are all capable of that
serves as evidence of our own divine spark the tangible record of
meaningful mindful creative process
Benson has really cool projects cerebral exercises and techniques to explore Especially the lsquoWhats Next Art Jarrsquo p108 and Internal Map Journey p111I could easily spend a year working through Bentonrsquos book playing exploring reflecting on my creative process This is a book worth your time and money
editorrsquos note
MIXEDMEDIAARTIssue 14
I first learned how to embroider when I was about six or seven With superhuman patience my mother
taught me how to divide the cotton floss thread the blunt wide-eyed needle and follow the pink line of the iron-on pattern shersquod applied for me I wasnrsquot great at it _ my stitches were big and uneven at first and I spent more time trying to pull out misplaced stitches than I did making them But these lessons lovingly given in the living room of my childhood home turned out to be a pivotal influence on my artistic future
Embroidery has a long and beautiful history Even though itrsquos become a fairly uncommon pastime in recent decades itrsquos a craft undeniably rich with tradition Part of the reason Irsquom so drawn to it is that tradition knowing that my motherrsquos mother taught her just as she taught me Women(andoccasionallymen)havebeenpassing on this knowledge for centuries using it for ritual for homemaking for social status and pleasure Therersquos something powerful in that kind of custom and I canrsquot help but be drawn to the craft as a result
The process itself is meditative more pleasure than work It may seem like therersquos not much room for creativity since most embroidery is just stitching a
pattern but really therersquos just as much opportunity for creative control as there is in any other medium Just as a painter carefully places each brushstroke an embroidererhastoplaceeachstitch thedifference is that I can rip out and move a misplaced stitch a lot easier than a painter can move a stroke of paint I can blend colors alter line weight and quality and improvise a pattern just as I could if I were drawing in a sketchbook but when Irsquom finished with a sewn drawing itrsquos soft and textured and tactile in a way that most drawings can never be
That tactile quality is a huge draw for me as an artist _ the feel of the stitching itself as well as whatever I happen to be sewing
emBroiDerY
Anatomia Detail
christy turnerrsquos
MIXEDMEDIAARTIssue 14
on be it fabric or paper Which one I use is generally determined by the nature of the project in question but the main thing I care about is the tactile quality of whatever surface Irsquom working on
I really want the viewer to reach out and touch my artwork to pick it up and hold it to feel the fibers and stitches and structure We have this notion as a society that art is to be looked at from a safe distance never touched or handled and I like my work to be different in that regardThemagicofembroidery(andofthe book form which I often use in my art) is that itrsquos meant to be touched and used That traditional utilitarian quality is just one more reason why Irsquom inexorably drawn to embroidery _ itrsquos art but itrsquos the kind of art thatrsquos meant to be held between your fingers and rubbed against your cheek
theMes in My Work
My artwork uses a variety of different mediums but often references recurring themes of anatomy and interpersonal relationships While these concepts may not seem like they have much in common
the underlying factor that interests me is structure
My anatomical work focuses on physical structure _ primarily skeletal composition a topic that has fascinated me since I was a kid The architecture of the human body _ striking in both its intricacy and simplicity - is something I feel compelled to study and replicate Much of the imagery in my skeletal work is derived from either antique anatomical diagrams (Anatomia amp Ribcage) or firsthand fromhuman cadavers (CadaverHand StudyampCadaver Foot Study) Though the resulting artwork could be portrayed as something gruesome or macabre I prefer to think of it in an architectural sense looking at bones and tendons as structural components of a larger whole
On the opposite side of the spectrum is my work relating to human relationships These pieces in particular one sewn book called Maps seek to illustrate social structure by exploring the emotional bonds we create throughout our lives This area of my work tends be far more conceptual in nature than my anatomical studies but the basic focus on some form of structure remains the same
Anatomia Spread
MIXEDMEDIAARTIssue 14
AnatomiaThe imagery in this carousel book is derived from antique anatomy diagrams The top (black)layerillustratesskeletalanatomythe next layer has the corresponding muscle systems embroidered in red on a fibrous handmade paper
Cadaver StudiesThese embroidered studies are the result of several hours spent sketching dissected cadavers in the Oregon State University cadaver lab I sketched directly onto the muslin then embroidered the drawings trying to preserve their hasty line quality
Family PhotosUsing silhouettes derived from antique family photographs I embroidered these incomplete portraits in an attempt to illustrate the fluid quality of familial relationships The portraits themselves aresewnon100cottonragpaper(RivesBFK) and coptic bound with a letterpress introduction and colophon
Fish SkeletonThis skeletal study was initially drawn in a sketchbook then transferred onto muslin and stitched As with many of my embroidered studies I tried to keep the sketchy quality of my line work as similar as I could to the original drawing by using long dense stitching
Cadaver Foot Study
Family Photos Detail
Fish Skeleton
MIXEDMEDIAARTIssue 14
MapsOne of my more conceptual books ldquoMapsrdquo uses simpleembroidered diagrams to literally map out complex social hierarchies The author is represented in each map by a red French knot family friends and other social connections are represented by blue French knots connected by family tree style stitched linework
Maps
Phrenology StudiesThis book was made using intaglio printing embroidery letterpress printing and an accordion binding with butterfly cut walnut covers The heads and faces are drypoint intaglio prints on tea-stained cotton rag paper These prints are backed with red lotka paper and stitched with red cotton thread to emphasize the phrenology map design
Phrenology Studies
MIXEDMEDIAARTIssue 14
Christy turnerChristy Turner was born in Walla Walla Washington where she was instilled from a young age with a love for the Pacific Northwest and traditional handicrafts After learning to sew and embroider as a child Turner went on to earn her BFA from Oregon State University in 2012 Though her degree is primarily rooted in relief printmaking Turner also independently studied artist books and embroidery experimenting with various combinations of the three separate mediums In 2013 she was awarded a scholarship to attend the Focus on Book Arts Conference in Forest Grove Oregon She has exhibited photography embroidery artist books and relief prints in juried shows across the country and is currently preparing for a two-person embroidery exhibit to be held in her hometown of Corvallis Oregon
love to Createlove to see other artists teChniQUesanD tools
sUBsCriBenow
Cadaver Hand Study
MIXEDMEDIAARTIssue 14
The problem and the joy of making mixed-media artworks is that there are so many kinds of materials to
be painted GOLDEN Acrylics offers help in getting paint to stick to a wide variety of surfaces with the aid of the GAC series of polymers I am not going to talk about painting canvas just the weird things we mixed-media artists use
All nine GACs are formulated based on 100 acrylic dispersion polymers with only a minimum amount of thickeners freezethaw stabilizers defoamers and preservatives The GACs are fluid and thin and are typically used in conjunction with something else GACs are blended with paints to extend the paint regulate transparency create glazes increase gloss reduce viscosity or improve adhesion and film integrity They are thin and reduce the thickness of most paints Each one has a specialized use
The two products that help the most in my studio for painting on found objects are GAC 100 and GAC 200 Both stretch the color making them an economical consideration but they each have specific jobs Which one do I use and when To determine which product to use I ask
bull What is the object made of
bull Is it flexible or rigid
bull Is it porous or non-porous
If the answer is rigid and non-porous the solution is GAC 200 In this issue I will share my series of experiments with GAC 200 on a variety of rigid and non-porous objects I used mixtures of GAC 200 with either Fluid or Heavy Body Acrylics It is the hardest and least flexible of all the GOLDEN Acrylics and reduces tack These last attributes that make it so good for rigid substrates make it not very good for flexible surfaces GAC 100 is wonderful additive for painting on flexible and porous objects but you will have to wait until next issue to learn about it
Product exploration of gAc 200
WhIch One On WhAtgAC 200
Bonnie Meltzer
Items to paint
QUestions the artist mUst asK themselves
MIXEDMEDIAARTIssue 14
There are more questions to answer once the decision is made to use GAC 200
1 What proportion of GAC 200 should I use
2 How little can I use so the paint makes a good bond What percentage is too much
3 HowshinydoIwantit(GAC200isveryshiny)
4 Howtransparent(themoreGAC200themoretransparent)
5 How will it flow from my brush Will the brush marks show
The pictures and captions will give you insight to these questions but as a general rule I have found that if you want full coverage heavy body with 25 GAC 200 works best if you have something to hide The more GAC 200 in the mix the more transparent and shiny it becomes A 50 mix worked well when I wanted the substrate to show through I tried it up to 75 which Golden suggests is
the maximum That application could make wonderful texture of opaque ridges next to transparent swirls especially on smooth surfaces I mixed small batches of GAC 200 with heavy body paint and fluid acrylics using 14 tsp and 1 tsp measuring spoons Some objects were merely painted to test coverage Other times I experimented with brush stokes and layers Post your experiments with GAC 200 to Facebook
Copper sheet with gray stripes made with heavy body paint and 25 and 50 GAC 200 just brushed on normally Upper left dabbed
MIXEDMEDIAARTIssue 14
Surfaces to Paint with GAC 200 I have had good results with metal of all types acrylic and other rigid plastics and heavily varnished wood
tiPs
Clean No matter how good the paint is you have to prepare the substrate You want the paint to stick to the material not a layer of dust or grime Wipe with a damp cloth or wash with soap and water if it is really dirty Dry well I always wipe an object with alcohol even alcohol from the drug store Sand shiny and slick surfaces to help the paint stick Donrsquot forget to wipe the sanding dust off with a damp cloth
GAC 200 makes paint stick to your palette as well as your painting I use disposable soft plastic yogurt tops instead of my regular rigid plastic palette with little wells A side benefit of the yogurt top is that by bending it you can peel off the paint and use the sheet in a project
The blue hair was made with a mixture of 75 GAC 200 and fluid acrylic Notice the ridges I need to use that more
Various dilutions of paint on textured factory primed aluminum In progress The texture reacted differently to the various mixtures of GAC 200 The white is the unpainted material
MIXEDMEDIAARTIssue 14
A finished and installed exterior artwork on smooth aluminum painted with GOLDEN Acrylics heavy body and fluid acrylics and GAC 200 Sprayed with clear spraypaint Hose nozzle is also painted Mixed with crocheted wire and found objects The paint had to have a good bond not only on the base but also so it would not get scratched from the crochet
Donrsquot shake the paint There are minimal antifoaming agents in GACs so donrsquot shake them You will get tiny bubbles in the paint A foam brush also will encourage tiny bubbles
All but one of the photos are not finished pieces but experiments and samples made for this article Usually a piece is made up of many found objects not all of them are rigid andor non-porous Some of the samples from this article could grow into a finished artwork utilizing GAC 100 GAC 100 has many uses and is indispensable in my studio for preparing substrates extending paint and for painting on flexible and porous surfaces So stay tuned and come back for Part 2 with an examination of GAC 100 in the next issue
Bonnie and I love this product for multiple reasons the main one being that the GAC series gets paint to stick on just about anything Other attributes
Great hard edge when using tape to mask off an area Tried on glass metal and natural material (seed pods from my auntrsquos tree) - worked great Painted on an old pair of my daughterrsquos clogs left brushstrokes but used a coarse bristle brushPaint pigment did not dilute however it does make the paint more transparent Works great on plastic
editorrsquos notes
MIXEDMEDIAARTIssue 14
MIXEDMEDIAARTIssue 14
drawing 101
horizontal faCial proportions of aDUlts
Before you attempt to draw adult faces it helps to know how to plan a place for everything sort of
like a blueprint Even though the heads and faces of adults come in many shapes and sizes the same basic guidelines for proportions apply to almost everyone
In this lesson set up simple easy to remember guidelines for drawing horizontal adult facial proportions and then draw proportionally correct ears eyes and a nose and mouth within your outline
Suggested drawing supplies include white drawing paper a ruler graphite pencils and erasers
You also need basic math skills (or acalculator) for measuring and dividing various distances
this ProJeCt is divided into three Parts
DRAW THE OUTLINE OF THE HEAD Draw a circular shape to represent an adult human head with the top half wider than
the bottom
ADD HORIZONTAL LINES TO THE OUTLINE Divide the length of the head into two halves and the lower half into three equal distances
DRAWING EARS AND FACIAL FEATURES Beginners to drawing portraits tend to draw eyes too high on the head
Now add ears eyes and a nose and mouth to your head shape using the three distances in the lower half of your drawing Itrsquos not important that you draw the ears and features well The goal is to draw everything in its proper place
Brenda hoddinott
MIXEDMEDIAARTIssue 14
eXaMininG adult heads and faCes
The most common mistake is to draw the eyes too high on the head However if you look closely at an adult head you can see two halves with the eyes positioned on the halfway point where the two halves meet Below are four simple variations of the top and bottom halves of a human head Any of the skull shapes can be matched with any one of the facial shapes thereby providing many possibilities for the shapes of human heads
The shapes of human heads and the sizes and placements of peoplersquos facial features are very different
Sketch them joined together to make an outline of a complete head
Itrsquos perfectlyOK to draw your skull shape (or facial shape) slightly differentthan in the illustrations such as wider narrower shorter or even longer
However donrsquot wander too far away from the basic shape or your drawing may be too far outside the parameters of what is considered normal human anatomy
Turn your outline of a head-shape into an original person by adding some facial features and hair
Have fun creating different people by mixing and matching other skulls and faces and then adding facial features
MIXEDMEDIAARTIssue 14
draW the outline of the head
Use a ruler to draw a rectangular drawing format on your drawing paper
Drawingformat(sometimescalledadrawingspace)refersto the area of a drawing surface within a specific perimeter outlined by a shape of any size such as a square rectangle orcircleSuggestedsizesinclude5rdquox7rdquo6rdquox8rdquoor7rdquox9rdquo
Draw a very light line of symmetry down the center of the rectangle Measure and mark a small dot at the halfway point of the top and bottom sides of your rectangle Use a ruler to connect the two dots This line helps keep your head shape symmetrical and is a guide for measuring the placement of facial features
Symmetry in drawing is a balanced arrangement of lines and shapes on opposite sides of an often-imaginary centerline In the scans of my drawing throughout this project the line of symmetry is too light to see
Draw a circular shape to represent an adult human head with the top half wider than the bottom
The basic outline of an adult head is similar in shape to an egg
The line of symmetry you drew down the center of your rectangle is helpful for measuring distances on either side to make sure the head in your drawing is symmetrical
MIXEDMEDIAARTIssue 14
add horizontal lines to the outline
In this section you divide the length of the head into two halves Then the lower half will be divided into three equal distances
TIP In time you will be able to judge all proportions visually but for now please use a ruler
Draw a horizontal line that touches the edge of the very top of the head
This line is parallel to the top and bottom of the rectangular drawing surface (and verticalto its sides)
Mark this line IJ
Draw a second horizontal line touching the lower edge of the chin
Mark this line GH
Measure the total vertical distance along the center vertical line (too light to see in my drawing) from the top of the head to the bottom of the chin
Divide this total measurement in half and mark it with a small dot Feel free to use a calculator
Draw a horizontal line (AB) through this dot dividing the head into two halves (as in Illustration 01-08)
Most peoplersquos eyes and the top sections of their ears are somewhere along this line halfway between thetopoftheskull (notthetopofthe hair) and the bottom edge of the chin
MIXEDMEDIAARTIssue 14
Measure the vertical distance between lines AB and GH
Divide this distance by three and lightly mark the two points with dots on the center vertical line (too light to see in my drawing)
Add a fourth horizontal line through the upper point (closer to AB) This line is parallel to each of the other three lines IJ AB and GH
Mark this line CD
The lower part of the nose and the lower sections of the ears touch this line
Add a fifth horizontal line through the lower point (closer to GH)
This line is parallel to each of the other four lines
Mark this line EF
The lower edge of the bottom lip will be close to or touch this line Now the vertical distance between lines AB and GH is divided into three equal sections
MIXEDMEDIAARTIssue 14
draWinG ears and faCial features
Your blueprint is complete and itrsquos time to add a face In this section you draw ears eyes and a nose and mouth on your head shape using the three distances in the lower half of your drawing
It is not important that you draw the ears and features well The goal is to simply place everything in its proper place You may even choose to draw completely different features
Remember itrsquos more important to draw the ears and facial features in their correct places rather than fuss about the intricate details
Draw the outlines of the ears with the tops above AB and the bottoms below CD
Erase the vertical lines (indicating the outline of the head) between lines AB and CD (on both sides of your drawing)
Re-draw the outline on each side (between lines AB and CD) leaving an opening for the tops of the ears to extend inward
Extend the outlines of the tops of the ears inward toward the center of the face
Draw short curved lines on the upper section of each ear (touching AB) to indicate the outer rims of the ears
MIXEDMEDIAARTIssue 14
Add more detailed lines to each ear to represent its various parts
Even though fine details are not important in this lesson try your best and you may be pleasantly surprised
The only important factor to achieve a realistic human face is to put every thing in its correct place according to the facial guidelines
Copyright to all articles images text projects lessons and exercises within this drawing class belong to Brenda Hoddinott and may not be reproduced or used for any commercial purposes whatsoever without the written permission of Brenda Hoddinott
E-mail bhoddinotthoddinottcom Web sites httpwwwfinearteducationcom and httpwwwdrawspacecom
- 9 -
27) Add more detailed lines to each ear to represent its various parts Even though fine details are not important in this lesson try your best and you may be pleasantly surprised
ILLUSTRATION 01-14
Each individual face is physically unique due to inherent variations in the sizes and shapes of heads faces and features You can complete the facial features on your drawing however you wish The only important factor to achieve a realistic human face is to put everything in its correct place according to the facial guidelines
MIXEDMEDIAARTIssue 14
Draw the eyes along AB
To help you decide how wide to draw each eye refer to Illustration 01-15 and observe the following
bull The widest section of the head is ldquofive-eyeswiderdquo
bull The width of an eye is equal to one of these distances
bull The distance between the eyes is equal to the width of one eye
Copyright to all articles images text projects lessons and exercises within this drawing class belong to Brenda Hoddinott and may not be reproduced or used for any commercial purposes whatsoever without the written permission of Brenda Hoddinott
E-mail bhoddinotthoddinottcom Web sites httpwwwfinearteducationcom and httpwwwdrawspacecom
- 10 -
28) Draw the eyes along AB To help you decide how wide to draw each eye refer to Illustration 01-15 and observe the following
The widest section of the head is ldquofive-eyes widerdquo
The width of an eye is equal to one of these distances
The distance between the eyes is equal to the width of one eye
ILLUSTRATION 01-15
Draw some eyebrows above AB
You can draw eyebrows
bull Light or dark
bull Thick or thin
bull Very curved slightly curved or fairly straight
bull Very close to the eyes or a little higher on the forehead
Copyright to all articles images text projects lessons and exercises within this drawing class belong to Brenda Hoddinott and may not be reproduced or used for any commercial purposes whatsoever without the written permission of Brenda Hoddinott
E-mail bhoddinotthoddinottcom Web sites httpwwwfinearteducationcom and httpwwwdrawspacecom
- 11 -
29) Draw some eyebrows above AB You can draw eyebrows
Light or dark
Thick or thin
Very curved slightly curved or fairly straight
Very close to the eyes or a little higher on the forehead
ILLUSTRATION 01-16
MIXEDMEDIAARTIssue 14
Draw the nose
The following guidelines apply to most adult faces
bull The lower section of the nose touches the horizontal line CD
bull The very bottom edges of the nostrils are often below CD
bull The nose is approximately the width of the distance between the eyes
bull The base of each cheekbone usually aligns with the bottom section of the nose
bull The lower parts of the ears horizontally align with the bottom section of the nose
Copyright to all articles images text projects lessons and exercises within this drawing class belong to Brenda Hoddinott and may not be reproduced or used for any commercial purposes whatsoever without the written permission of Brenda Hoddinott
E-mail bhoddinotthoddinottcom Web sites httpwwwfinearteducationcom and httpwwwdrawspacecom
- 12 -
30) Draw the nose The following guidelines apply to most adult faces
The lower section of the nose touches the horizontal line CD
The very bottom edges of the nostrils are often below CD
The nose is approximately the width of the distance between the eyes
The base of each cheekbone usually aligns with the bottom section of the nose
The lower parts of the ears horizontally align with the bottom section of the nose
ILLUSTRATION 01-17
Draw the mouth
The following guidelines generally apply to adult faces
bull The lower lip is usually touching or slightly above line EF
bull The mouth is generally wider than the nose
bull The lower lip is approximately halfway between the lower section of the nose and the bottom of the chin
bull The outer corners of the mouth are usually directly under the irises of the eyes
Copyright to all articles images text projects lessons and exercises within this drawing class belong to Brenda Hoddinott and may not be reproduced or used for any commercial purposes whatsoever without the written permission of Brenda Hoddinott
E-mail bhoddinotthoddinottcom Web sites httpwwwfinearteducationcom and httpwwwdrawspacecom
- 13 -
31) Draw the mouth The following guidelines generally apply to adult faces
The lower lip is usually touching or slightly above line EF
The mouth is generally wider than the nose
The lower lip is approximately halfway between the lower section of the nose and the bottom of the chin
The outer corners of the mouth are usually directly under the irises of the eyes
ILLUSTRATION 01-18
Use your kneaded eraser to lighten the outline of the top of the head until itrsquos almost invisible and then add hair
MIXEDMEDIAARTIssue 14
dRAWIng eYelashes
E yelashes are fine hairs that grow from the outer edges of the upper and lower eyelids The upper eyelid is the larger movable fold of skin above the eyeball that opens and closes to protect the upper and center sections of the eye The
lower eyelid is a smaller less movable fold of skin protecting the lower eyeball Many artists have difficulty drawing natural looking eyelashes Even if every other aspect of your drawing of a face is perfect incorrectly drawn eyelashes can ruin it
Eyelashes though tiny are the most challenging parts of human anatomy to draw realistically In Illustration 1 you see unnatural looking individual eyelashes that are the same value and thickness from root to tip Eyelashes drawn with this type of line canrsquot possibly look correct Illustration 2 shows the correct way to draw individual eyelashes Each eyelash is thick at the bottom and gradually becomes lighter and thinner closer to the tip
Illustration 1 Illustration 2
In this illustration of three eyes have a peek at some common mistakes made when drawing eyelashes such as making them too thick too straight or too long
Illustration 3
MIXEDMEDIAARTIssue 14
Correctly drawn eyelashes look natural and lifelike A simple little drawing technique provides a realistic looking eyelash every time - in simple terms never draw eyelashes from the tip down toward the eyelid Always draw them in the direction in which they grow from theeyelid(orroot)outwardGrabsomepaperanda2BpencilReferto the next close-up drawing and try your hand at drawing realistic looking individual lashes
1 Begin at the base of the eyelash and press firmly with your pencilRemember always draw eyelashes in the direction they grow from the eyelid outward
2 Slowly release the pressure you apply as your curved line extends toward the tip Realistic eyelashes look like inverted commas ndash thick at the bottom and thin at the top
3 Gently lift your pencil from the paper when the tip of the line is very thin and light in value
The following criteria provide insights into various aspects of drawing realistic eyelashes Refer to the previous two illustrations and the next Take note that correctly drawn eyelashes
bull Grow in many different directions mostly outward from the eyelids
bull Are rendered with thin lines of different lengths
bull Are curved and unevenly spaced
bull Appear thicker closer to the eyelids
bull Grow from the outer edges of the upper and lower eyelids and not the white of the eye
bull Are drawn in groups rather than single lines
bull Gradually become longer and thicker toward the outer corners of the eye
Illustration 4
Illustration 5
MIXEDMEDIAARTIssue 14
Warm up your drawing hand and draw an eyeful of eyelashes
1) Lightly sketch the almond shape of an eye with a double line at the top and bottom to represent the thickness of the flesh of the eyelids
2) Use 2H and HB pencils to draw an average quantity of eyelashes on the outer edges of the upper and lower eyelids
Illustration 6
Illustration 7
MIXEDMEDIAARTIssue 14
Brenda hoddinottAs a self-educated teacher visual artist portraitist forensic artist (retired) and illustrator Brenda Hoddinott utilizes diverse art media including her favorites graphite and paint
Brenda is the author of Drawing for Dummies (Wiley Publishing Inc New York NY) and The Complete Idiotrsquos Guide to Drawing People (Winner of the Alpha-Penguin Book of the Year Award 2004 Alpha - Pearson Education ndash Macmillan Indianapolis IN) She is currently writing two books on classical drawing
Donrsquot expect to master drawing eyelashes right away Take lots of time to practice before you try adding them to your drawings of people With lots of practice you can draw natural eyelashes that are thick and bold close to the base and thin and light at the tip
Illustration 8
Illustration 9
In order to understand the body of works created by the Cuban artist Conrado Maleta it is necessary to
move a few steps back to his childhood in Cuba With the end of Soviet Union the island was in a long process of economic and social degradation called
PeriodoEspecial(specialtime)Inthattime the teenager who is today the artist helped family members in the production of popular jewelry and decoration artifacts Almost all the work was done with recycled materials or morphologies coming directly from nature such as shells and stones He also sold the products door to door earning just a little but absolutely happy about it In those times he learned how to do crafts and how to re-use things in his own environment Many years later the artist started to work in what today is his most beloved group of art pieces Neo-Byzantine Madness and Boxes of Beauty
Neo-Byzantine Madness The concepts behind these works are deeply anchored with the human historic background The first group of works is developed from personal experiences and learning in the Middle East and hours of walking and listening to religious services in orthodox churches and Catholic monasteries of Israel It is all about a mistake
Work-01 Fancy pedestal for the allegory of Beauty 2013Coins silicon glue glass balls pearls a plastic rose some acrylic paint and glossy varnish Box made with American coins and objects I found in the streets of New York City I did it thinking in the concept of beauty I also think it has something to do with the salty foam of the sea
MIXEDMEDIAARTIssue 14
Artist Profile
ConraDomelato
The artistrsquos mistake and misunderstanding of how others see and trust in their beliefs It is also about reinterpretation of aesthetics that have millennia of development but suddenly in the eyes of a Western post-postmodern man they appear to be antiques In the works of this set there is a special intention for creating a contemporary version of Middle East religious imagery Christian Jewish Islamic or even Baharsquoi Sometimes the lecture is clear at first glimpse but for others it is necessary to go inside
the concept in order to understand the meaning Every work has a powerful sense of humor by itself without being frivolous are a must because they are the verbal key used by the artist to lead the public into a correct road
Boxes of Beauty After moving to New York City one of the first things I noticed was the presence of hundreds of pennies in the streets The idea of having as material something that others donrsquot want or need and also keeping clear that there is a possibility for these coins which the government is thinking about not printing anymore to be in the near future a rare collectible had been the starting point for the project
Work-03 Shut on the TV Sex language for adults and violence 2013Coins silicon glue plastic toy glass balls acrylic paint glossy varnish steel nails A TV set in Cuba is of the old style with long skinny legs And at beginning of each film you have a text with the category This is an adult series of films The violence is represented by the red color and drops the sex is just the cavities the dark inner spaces and the adult language are represented by a dinosaur
Work-02 Goat who has broken a drum with its skin pays 2013 Coins silicon glue thread plastic goat sleighbells acrylic paint glossy varnish All the objects I found in the streets of New York City The title is from a traditional Cuban song It is an irony for me because finding a goat in Manhattan was the last thing I ever expected OK it was plastic but thatrsquos just an irrelevant detail
MIXEDMEDIAARTIssue 14
The presence of the TV is also a conceptual idea in this new work The TV is the new Pandorarsquos Box The good and bad inside the TV - the aggressive behavior especially verbally from some New Yorkers is expressed through the use of the dinosaur like something big bigger than life Colorful dinosaurs appear as vulgar slang the artist has heard in the street The use of boxes as containers is also a product of a direct influence from the artistrsquos present life The need of a home the search for a homey building or space The house as a warm and protective uterine refuge New York as a cave New York as a home
The act of material recycling has two basic meanings adding information in an anthropological way and supporting the artistrsquos eco-conscious way of life
Work-04 Open this box of wisdom and you will learn about a human sin Open this heart and blue clouds will come out of my body 2012A Tefillin box that I found in a Genizah - a sacred storage area - in the streets of Tel Aviv (it is a big sin but I couldnrsquot resist) cotton thread a plastic butterfly silicon glue acrylic paint steel wires inside two cut-off illustrations from old books of art It is about hope and beauty Holy actions desire and sin
Work-05 Double game with sensibility 2012Wood iron plate thread plastic net Italian silver wire pearl steel nails used matches two cut-off illustrations from a very old book of art silicon glue acrylic paint and glossy varnish Man vs woman Power vs spirituality Red vs blue It is a piece talking about dichotomy as a game It is also created for being used as jewelry avant-garde jewelry work
MIXEDMEDIAARTIssue 14
aBout My studio
My studio is located in Crown Heights South Brooklyn It is open only by previously scheduled appointments You can email Conrad for more information
Work-07 Muhammad and Jesus Christ doing scatological questions to Yahveh the God of the Jews 2012Metal plate silicon glue wire acrylic paint and glossy varnish This little work was done in Jerusalem I was traveling there and it is about what I saw listened to and enjoyed there It is easy to imagine all the different interpretations of God talking and making noise and fighting to keep their own relevant considerations
Work-06 Dialectical exchange of two unborn kids that happens in the intrauterine space 2012Metal plate silicon glue thread acrylic paint and glossy varnish This very small piece was done in a hard moment My wife and i were struggling to get pregnant and it wasnrsquot easy I had weird feelings and one night I had a dream in which I was talking to a my twin (I donrsquot have in real life) I did this work and still think it is so full of energy
MIXEDMEDIAARTIssue 14
Maletarsquos Studio Space
MIXEDMEDIAARTIssue 14
Conrado r MaletaConrado R Maleta is a Cuban artist who was born in Santiago de Cuba 1979 He has traveled for a long time around the world Europe the Middle East and America Today he is based in Brooklyn He is has a bachelorrsquos degree in Architecture and URBAN PLANNING his career has mainly been as an artist studying with private professors and taking on internships He has been a painter sculptor and photographer His whole work is dedicated to the analysis of the human expressions in religiosity and spirituality It is correct to consider his body of works as a visual road opened by a naive anthropologist
He can be found here or Click here for more information
MIXEDMEDIAARTIssue 14

MIXEDMEDIAARTIssue 14
Brenda hoddinottAs a self-educated teacher visual artist portraitist forensic artist (retired) and illustrator Brenda Hoddinott utilizes diverse art media including her favorites graphite and paint
Brenda is the author of Drawing for Dummies (Wiley Publishing Inc New York NY) and The Complete Idiotrsquos Guide to Drawing People (Winner of the Alpha-Penguin Book of the Year Award 2004 Alpha - Pearson Education ndash Macmillan Indianapolis IN) She is currently writing two books on classical drawing
Donrsquot expect to master drawing eyelashes right away Take lots of time to practice before you try adding them to your drawings of people With lots of practice you can draw natural eyelashes that are thick and bold close to the base and thin and light at the tip
Illustration 8
Illustration 9
In order to understand the body of works created by the Cuban artist Conrado Maleta it is necessary to
move a few steps back to his childhood in Cuba With the end of Soviet Union the island was in a long process of economic and social degradation called
PeriodoEspecial(specialtime)Inthattime the teenager who is today the artist helped family members in the production of popular jewelry and decoration artifacts Almost all the work was done with recycled materials or morphologies coming directly from nature such as shells and stones He also sold the products door to door earning just a little but absolutely happy about it In those times he learned how to do crafts and how to re-use things in his own environment Many years later the artist started to work in what today is his most beloved group of art pieces Neo-Byzantine Madness and Boxes of Beauty
Neo-Byzantine Madness The concepts behind these works are deeply anchored with the human historic background The first group of works is developed from personal experiences and learning in the Middle East and hours of walking and listening to religious services in orthodox churches and Catholic monasteries of Israel It is all about a mistake
Work-01 Fancy pedestal for the allegory of Beauty 2013Coins silicon glue glass balls pearls a plastic rose some acrylic paint and glossy varnish Box made with American coins and objects I found in the streets of New York City I did it thinking in the concept of beauty I also think it has something to do with the salty foam of the sea
MIXEDMEDIAARTIssue 14
Artist Profile
ConraDomelato
The artistrsquos mistake and misunderstanding of how others see and trust in their beliefs It is also about reinterpretation of aesthetics that have millennia of development but suddenly in the eyes of a Western post-postmodern man they appear to be antiques In the works of this set there is a special intention for creating a contemporary version of Middle East religious imagery Christian Jewish Islamic or even Baharsquoi Sometimes the lecture is clear at first glimpse but for others it is necessary to go inside
the concept in order to understand the meaning Every work has a powerful sense of humor by itself without being frivolous are a must because they are the verbal key used by the artist to lead the public into a correct road
Boxes of Beauty After moving to New York City one of the first things I noticed was the presence of hundreds of pennies in the streets The idea of having as material something that others donrsquot want or need and also keeping clear that there is a possibility for these coins which the government is thinking about not printing anymore to be in the near future a rare collectible had been the starting point for the project
Work-03 Shut on the TV Sex language for adults and violence 2013Coins silicon glue plastic toy glass balls acrylic paint glossy varnish steel nails A TV set in Cuba is of the old style with long skinny legs And at beginning of each film you have a text with the category This is an adult series of films The violence is represented by the red color and drops the sex is just the cavities the dark inner spaces and the adult language are represented by a dinosaur
Work-02 Goat who has broken a drum with its skin pays 2013 Coins silicon glue thread plastic goat sleighbells acrylic paint glossy varnish All the objects I found in the streets of New York City The title is from a traditional Cuban song It is an irony for me because finding a goat in Manhattan was the last thing I ever expected OK it was plastic but thatrsquos just an irrelevant detail
MIXEDMEDIAARTIssue 14
The presence of the TV is also a conceptual idea in this new work The TV is the new Pandorarsquos Box The good and bad inside the TV - the aggressive behavior especially verbally from some New Yorkers is expressed through the use of the dinosaur like something big bigger than life Colorful dinosaurs appear as vulgar slang the artist has heard in the street The use of boxes as containers is also a product of a direct influence from the artistrsquos present life The need of a home the search for a homey building or space The house as a warm and protective uterine refuge New York as a cave New York as a home
The act of material recycling has two basic meanings adding information in an anthropological way and supporting the artistrsquos eco-conscious way of life
Work-04 Open this box of wisdom and you will learn about a human sin Open this heart and blue clouds will come out of my body 2012A Tefillin box that I found in a Genizah - a sacred storage area - in the streets of Tel Aviv (it is a big sin but I couldnrsquot resist) cotton thread a plastic butterfly silicon glue acrylic paint steel wires inside two cut-off illustrations from old books of art It is about hope and beauty Holy actions desire and sin
Work-05 Double game with sensibility 2012Wood iron plate thread plastic net Italian silver wire pearl steel nails used matches two cut-off illustrations from a very old book of art silicon glue acrylic paint and glossy varnish Man vs woman Power vs spirituality Red vs blue It is a piece talking about dichotomy as a game It is also created for being used as jewelry avant-garde jewelry work
MIXEDMEDIAARTIssue 14
aBout My studio
My studio is located in Crown Heights South Brooklyn It is open only by previously scheduled appointments You can email Conrad for more information
Work-07 Muhammad and Jesus Christ doing scatological questions to Yahveh the God of the Jews 2012Metal plate silicon glue wire acrylic paint and glossy varnish This little work was done in Jerusalem I was traveling there and it is about what I saw listened to and enjoyed there It is easy to imagine all the different interpretations of God talking and making noise and fighting to keep their own relevant considerations
Work-06 Dialectical exchange of two unborn kids that happens in the intrauterine space 2012Metal plate silicon glue thread acrylic paint and glossy varnish This very small piece was done in a hard moment My wife and i were struggling to get pregnant and it wasnrsquot easy I had weird feelings and one night I had a dream in which I was talking to a my twin (I donrsquot have in real life) I did this work and still think it is so full of energy
MIXEDMEDIAARTIssue 14
Maletarsquos Studio Space
MIXEDMEDIAARTIssue 14
Conrado r MaletaConrado R Maleta is a Cuban artist who was born in Santiago de Cuba 1979 He has traveled for a long time around the world Europe the Middle East and America Today he is based in Brooklyn He is has a bachelorrsquos degree in Architecture and URBAN PLANNING his career has mainly been as an artist studying with private professors and taking on internships He has been a painter sculptor and photographer His whole work is dedicated to the analysis of the human expressions in religiosity and spirituality It is correct to consider his body of works as a visual road opened by a naive anthropologist
He can be found here or Click here for more information
MIXEDMEDIAARTIssue 14

MIXEDMEDIAARTIssue 14
