multibrush de betriebsanleitung
TRANSCRIPT

www.gloriagarten.de
Geräte für Haus und Garten
Betriebsanleitung . . . . . 6 - 18Originalbetriebsanleitung
User manual . . . . . . . . . 19 - 30Translation of the German user manual
Mode d’emploi . . . . . . . 31 - 43Traduction des instructions d‘emploi
Gebruiksaanwijzing . . . 44 - 55Vertaling van de gebruiksaanwijzing
DE
GB
N
FR
G
NL
MULTIBRUSHSpeedControl
978 4
10 -
02
2006
17
RZ_MULTIBRUSH_DE_GB_FR_NL_978410-2_MultiBrush_SC 22.06.17 14:44 Seite 1

1
7
B
5
2 3
4
90°
45°
1.
1.2.
G
0° 1.2.
1.G
6
EE
A
A
2.
1.
1.
2.
RZ_MULTIBRUSH_DE_GB_FR_NL_978410-1_Umschlag1 10.11.16 15:44 Seite 3

1.
2.
15
1.
2.
9
12 13
1.
2.
14
11
M
I
M
OL
P
K
KK
K
O
8
10
4
RZ_MULTIBRUSH_DE_GB_FR_NL_978410-1_Umschlag2 10.11.16 15:45 Seite 3

21
2322
20
18 1.
2.
19L
M M
M
K
H
H
1.
16
2.
L
K1.
2.K17 L
O
P
RZ_MULTIBRUSH_DE_GB_FR_NL_978410-1_Umschlag3 10.11.16 15:45 Seite 3

26
1.
2-3x
28
27 Q
1.
24
2.
KH
180°2.
3.H
1.
25
2.
KH
30
24
29 Q
RZ_MULTIBRUSH_DE_GB_FR_NL_978410-1_Umschlag4 10.11.16 15:45 Seite 3

6
DE
INHALTSVERZEICHNIS 1 Allgemeine Informationen zu dieser Betriebsanleitung . . . . . . . . . . . . . . 6 1.1 Symbolik auf dem Gerät sowie in der Betriebsanleitung . . . . . . . . . . . . . . . . . . . 6 1.2 Warnhinweise . . . . . . . . . . . . . . . . . . . . . . . . . . . . . . . . . . . . . . . . . . . . . . . . . . . . . . . . . . . . 7 1.3 Bestimmungsgemäße Verwendung. . . . . . . . . . . . . . . . . . . . . . . . . . . . . . . . . . . . . . . 7 1.4 Vernünftigerweise vorhersehbare Fehlanwendung. . . . . . . . . . . . . . . . . . . . . . . . 8 1.5 Restgefahren. . . . . . . . . . . . . . . . . . . . . . . . . . . . . . . . . . . . . . . . . . . . . . . . . . . . . . . . . . . . . 8 1.6 Haftungsbeschränkung. . . . . . . . . . . . . . . . . . . . . . . . . . . . . . . . . . . . . . . . . . . . . . . . . . . 8 2 Zu Ihrer Sicherheit . . . . . . . . . . . . . . . . . . . . . . . . . . . . . . . . . . . . . . . . . . . . . . . . . 8 2.1 Grundlegende Sicherheitshinweise . . . . . . . . . . . . . . . . . . . . . . . . . . . . . . . . . . . . . . . 8 2.2 Sicherheitshinweise beim Anschluß des Gerätes . . . . . . . . . . . . . . . . . . . . . . . . . . 9 2.3 Sicherheitshinweise bei der Bedienung des Gerätes . . . . . . . . . . . . . . . . . . . . . . . 9 3 Bevor das Gerät benutzt werden kann . . . . . . . . . . . . . . . . . . . . . . . . . . . . 11 3.1 Anlieferungszustand . . . . . . . . . . . . . . . . . . . . . . . . . . . . . . . . . . . . . . . . . . . . . . . . . . . . 11 3.2 Geräteelemente. . . . . . . . . . . . . . . . . . . . . . . . . . . . . . . . . . . . . . . . . . . . . . . . . . . . . . . . . 11 4 Technische Daten . . . . . . . . . . . . . . . . . . . . . . . . . . . . . . . . . . . . . . . . . . . . . . . 12 5 Montage. . . . . . . . . . . . . . . . . . . . . . . . . . . . . . . . . . . . . . . . . . . . . . . . . . . . . . . . 12 6 Inbetriebnahme. . . . . . . . . . . . . . . . . . . . . . . . . . . . . . . . . . . . . . . . . . . . . . . . . 12 6.1 Betrieb . . . . . . . . . . . . . . . . . . . . . . . . . . . . . . . . . . . . . . . . . . . . . . . . . . . . . . . . . . . . . . . . . 12 6.1.2 Montage der Bürstenwerkzeuge. . . . . . . . . . . . . . . . . . . . . . . . . . . . . . . . . . . . . . . . . 13 6.1.3 Anwendung mit Flächenbürste auf groben Oberflächenstrukturen . . . . . . . . 15 6.1.4 Anwendung mit Flächenbürste auf Holzbelägen. . . . . . . . . . . . . . . . . . . . . . . . . . 15 6.1.5 Anwendung und Auswechslung der Fugenbürste. . . . . . . . . . . . . . . . . . . . . . . . . 16 6.2 Benutzerhinweise . . . . . . . . . . . . . . . . . . . . . . . . . . . . . . . . . . . . . . . . . . . . . . . . . . . . . . . 16 6.3 Fugenbürste auswechseln. . . . . . . . . . . . . . . . . . . . . . . . . . . . . . . . . . . . . . . . . . . . . . . 16 7 Außerbetriebnahme & Lagerung . . . . . . . . . . . . . . . . . . . . . . . . . . . . . . . . . 17 7.1 Außerbetriebnahme . . . . . . . . . . . . . . . . . . . . . . . . . . . . . . . . . . . . . . . . . . . . . . . . . . . . 17 7.2 Lagerung . . . . . . . . . . . . . . . . . . . . . . . . . . . . . . . . . . . . . . . . . . . . . . . . . . . . . . . . . . . . . . . 17 8 Wartung & Reinigung . . . . . . . . . . . . . . . . . . . . . . . . . . . . . . . . . . . . . . . . . . . 17 8.1 Reinigung . . . . . . . . . . . . . . . . . . . . . . . . . . . . . . . . . . . . . . . . . . . . . . . . . . . . . . . . . . . . . . 17 8.2 Verschleiß der Bürsten . . . . . . . . . . . . . . . . . . . . . . . . . . . . . . . . . . . . . . . . . . . . . . . . . . 18 9 Entsorgung & Rechtliches. . . . . . . . . . . . . . . . . . . . . . . . . . . . . . . . . . . . . . . . 18 9.1 Umweltschutz & Geräteentsorgung . . . . . . . . . . . . . . . . . . . . . . . . . . . . . . . . . . . . 18 9.2 Entsorgung der Verpackung . . . . . . . . . . . . . . . . . . . . . . . . . . . . . . . . . . . . . . . . . . . 18
1 Allgemeine Informationen zu dieser BetriebssanleitungDiese Betriebsanleitung ist Bestandteil des GLORIA Gerätes und muss ständig amoder in der Nähe des Gerätes verfügbar sein. Die Betriebsanleitung vermittelt Ihnen wichtige Hinweise und Informationen, die zur sicheren Benutzung des Gerätes erforderlich sind! Die Betriebsanleitung muss von jeder Person, die mit der Bedienung / Nutzung / Wartung des Gerätes beauftragt ist, vollständig gelesen werden. Die Betriebsanleitung aufbewahren und an Nachbesitzer weitergeben!Alle Warnhinweise dienen stets auch Ihrer persönlichen Sicherheit!
1.1 Symbolik auf dem Gerät sowie in der Betriebsanleitung
VORSICHT!Nicht berühren! Verbrennungsgefahrdurch heiße Oberflächen!
Vor Regen undNässe schützen!
Einzugs-gefahr!
RZ_MULTIBRUSH_DE_GB_FR_NL_978410-1_Text_DE 10.11.16 15:46 Seite 6
7
DE
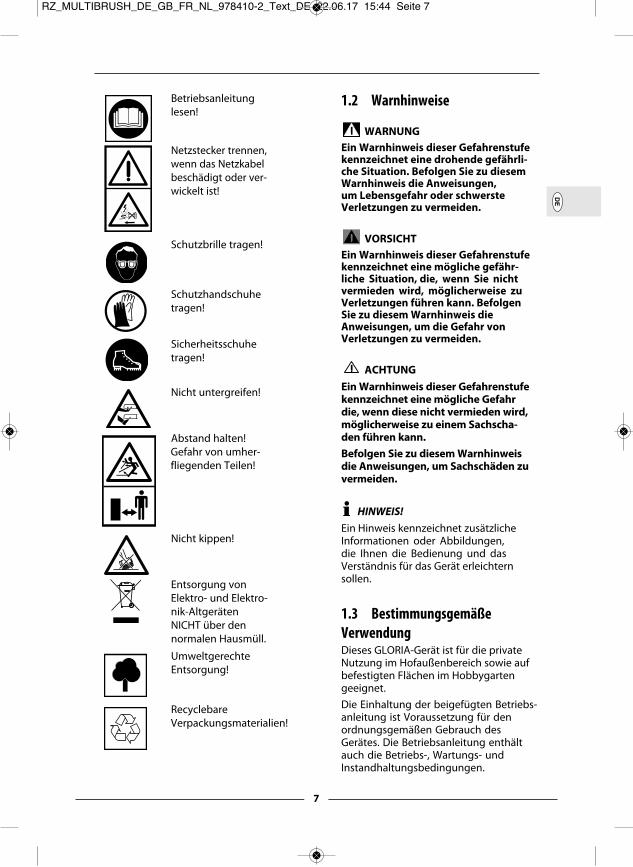
Betriebsanleitunglesen!
Netzstecker trennen,wenn das Netzkabelbeschädigt oder ver-wickelt ist!
Schutzbrille tragen!
Schutzhandschuhetragen!
Sicherheitsschuhetragen!
Nicht untergreifen!
Abstand halten!Gefahr von umher-fliegenden Teilen!
Nicht kippen!
Entsorgung vonElektro- und Elektro-nik-AltgerätenNICHT über den normalen Hausmüll.
Umweltgerechte Entsorgung!
Recyclebare Verpackungsmaterialien!
1.2 Warnhinweise
WARNUNGEin Warnhinweis dieser Gefahrenstufekennzeichnet eine drohende gefährli-che Situation. Befolgen Sie zu diesemWarnhinweis die Anweisungen, um Lebensgefahr oder schwerste Verletzungen zu vermeiden.
VORSICHTEin Warnhinweis dieser Gefahrenstufekennzeichnet eine mögliche gefähr-liche Situation, die, wenn Sie nichtvermieden wird, möglicherweise zuVerletzungen führen kann. BefolgenSie zu diesem Warnhinweis dieAnweisungen, um die Gefahr von Verletzungen zu vermeiden.
ACHTUNGEin Warnhinweis dieser Gefahrenstufekennzeichnet eine mögliche Gefahrdie, wenn diese nicht vermieden wird,möglicherweise zu einem Sachscha-den führen kann.Befolgen Sie zu diesem Warnhinweisdie Anweisungen, um Sachschäden zuvermeiden.
HINWEIS!Ein Hinweis kennzeichnet zusätzlicheInformationen oder Abbildungen,die Ihnen die Bedienung und dasVerständnis für das Gerät erleichternsollen.
1.3 Bestimmungsgemäße VerwendungDieses GLORIA-Gerät ist für die privateNutzung im Hofaußenbereich sowie aufbefestigten Flächen im Hobbygartengeeignet.Die Einhaltung der beigefügten Betriebs-anleitung ist Voraussetzung für denordnungsgemäßen Gebrauch desGerätes. Die Betriebsanleitung enthältauch die Betriebs-, Wartungs- undInstandhaltungs bedingungen.
RZ_MULTIBRUSH_DE_GB_FR_NL_978410-2_Text_DE 22.06.17 15:44 Seite 7

8
DE
Das Gerät dient ausschließlich als hand-geführtes Reinigungs- und Pflegegerätfür Fugen und Flächenreinigung an undzwischen Belägen im Aussenbereich wiez. B. Steinplatten, Fliesen, Pflastersteine,Holzbeläge.
VORSICHT! GEFAHR DURCHNICHT BESTIMMUNGS-GEMÄSSE VERWENDUNG!
Von dem Gerät können bei nichtbestimmungsgemäßer VerwendungGefahren ausgehen.Beachten Sie daher nachfolgendeSicherheitshinweise:! Verwenden Sie das Gerät aus-
schließlich bestimmungsgemäß.! Beachten Sie alle Hinweise
und Informationen in derBetriebsanleitung.
1.4 Vernünftigerweisevorhersehbare FehlanwendungDas Gerät ist nicht geeignet für die hori-zontale Benutzung (Hauswände), Über-kopfarbeit (Decken), für ungeeigneteBoden-oder Fugenmaterialien oder fürandere, als die angegebenenVerwendungs bereiche. Das Gerät ist nichtbei nasser Witterung, Regen sowie nichtim/unter Wasser zu verwenden.Eigenmächtige Veränderungen am Gerätoder nicht bestimmungsgemäßeVerwendung schließen eine Haftungdes Herstellers für daraus resultierendeSchäden aus.
1.5 RestgefahrenDieses Gerät entspricht den anerkanntenRegeln der Technik und den einschlägi-gen Sicherheits bestimmung en! Dennochkönnen bei der Benutzung des Gerätes:! Gefahr für Leib und Leben des Bedie-
ners oder anderer Personen entstehen.! Beeinträchtigungen an dem Gerät
entstehen.! Beeinträchtigungen an anderen
Sachwerten entstehen.
1.6 HaftungsbeschränkungWir weisen ausdrücklich darauf hin, dasswir nach dem Produkthaftungsgesetznicht für durch unser Gerät hervorgerufe-ne Schäden einzustehen haben, soferndiese durch Nichtbeachtung derBetriebs-anleitung, nicht bestimmungs-gemäße Verwendung, unsachgemäßeReparatur verursacht oder bei einemTeileaustausch nicht Original-Teileverwendet werden und die Reparaturnicht vom Kundenservice oder dem auto-risierten Fachmann durchgeführt wordensind. Dieses gilt auch für Zubehörteile.
2 Zu Ihrer SicherheitIn diesem Kapitel erhalten Sie wichtigeWarn- und Sicherheitshinweise, die Siebeim Umgang und der Nutzung desGerätes zwingend beachten müssen.
2.1 Grundlegende Sicher-heitshinweiseBeachten Sie die nachfolgendengrundlegenden Sicherheitshinweisefür einen sicheren Umgang sowie einesichere Nutzung des Gerätes:
! Reparaturen an Geräten für Hausund Garten sind nur durch dieServicestellen durchzuführen.Ersatzteile sollten Sie bei IhremFachhändler bestellen. Soweitnicht vorrätig, besorgt er dieseschnellstens.
! Dieses Gerät entspricht den aner-kannten Regeln der Technik sowieden einschlägigen Sicherheitsbe-stimmungen!
! Dieses Gerät kann von Kindern ab16 Jahren und darüber sowie vonPersonen mit verringerten physi-schen, sensorischen oder mentalenFähigkeiten oder Mangel an Erfah-rung und Wissen benutzt werden,wenn sie beaufsichtigt oder bezüglich des sicheren Gebrauchs
RZ_MULTIBRUSH_DE_GB_FR_NL_978410-1_Text_DE 10.11.16 15:46 Seite 8

9
DE
des Gerätes unterwiesen wurdenund die daraus resultierendenGefahren verstehen. Kinder dürfennicht mit dem Gerät spielen. Reini-gung und Benutzer-Wartung dür-fen nicht von Kindern ohne Beauf-sichtigung durchgeführt werden.
! Dieses Gerät darf bei Müdigkeit,Krankheit oder unter Einfluss vonAlkohol oder anderen Drogen oderMedikamenten nicht benutzt werden.
! Das Gerät nicht unbeaufsichtigtlassen, solange es in Betrieb ist.
! Gerät vor langer Sonneneinstrah-lung und Frost schützen.
! Um Schäden und Gefahren durchnicht ordnungsgemäßen Gebrauchzu ver meiden, müssen Sie dieBetriebsanleitung beachten undsorgfältig aufbewahren!
! Tragen Sie während des Reinigensgeeignete Arbeitskleidung wiefestes Schuhwerk, Schutzbrille,lange Hosen und ggf. Handschuhe.Arbeiten Sie nicht barfuß oder inleichten Sandalen.
! Bei Weitergabe des Gerätes anandere Personen ist auch dieBetriebsanleitung mit zuübergeben!
! Verwenden Sie für das Gerät nur dieGLORIA Original-Ersatz- und Zube-hörteile. Verwenden Sie niemalsabgenutzte, veränderte oder defekteErsatz-/ Zubehörteile!
2.2 Sicherheitshinweisebeim Anschluss des Gerätes
WARNUNG! LEBENSGEFAHRDURCH STROMSCHLAG!
Beim Kontakt mit unter Spannungstehenden Leitungen oder Bauteilenbesteht Lebensgefahr! Beachten Sie daher nachfolgendeSicherheitshinweise:! Bei Beschädigung des Netzkabels
darf dieses nur durch eine vomHersteller benannte Reparatur-werkstatt ersetzt werden, um eineGefährdung zu ver meiden!
Bitte wenden Sie sich an den Her-steller oder seinen Kundendienst.
! Die Netzspannung muss mit derSpannungsangabe (V) auf dem Gerät über einstimmen!
! Das Gerät nur an Wechselstrom, an eine Schutzkontaktsteckdoseanschließen.
! Bei Verwendung eines Verlänge-rungskabels nur ein geerdetesKabel für den Außenbereich miteinem Leiterquerschnitt von mind.1,5 mm2 benutzen!
! Das Gerät sollte über eine Fehler-stromschutzeinrichtung (RCD) miteinem Auslösestrom von nicht mehrals 30 mA betrieben werden. Fra-gen Sie Ihren Elektroinstallateur!
! Der Netzstecker ist zu ziehen: - bei Störungen während des Betriebes - vor jeder Reinigung - nach dem Gebrauch
2.3 Sicherheitshinweise beider Bedienung des Gerätes
WARNUNG! LEBENSGEFAHRDURCH STROMSCHLAG!
Kommt das unter Spannungstehende Gerät mit Wasser inKontakt besteht Lebensgefahr!Beachten Sie daher nachfol-gende Sicherheitshinweise:! Das Gerät nicht mit nassen Händen
benutzen.! Das Gerät nicht in Wasser tauchen
oder mit Wasser abspritzen bzw.reinigen. Das Gerät muss vor über-mässiger Nässe geschützt werden.Sollte das Gerät dennoch einmal insWasser fallen, sofort den Netzste-cker ziehen. Keinesfalls ins Wassergreifen, wenn das Gerät noch ange-schlossen ist!
! NIEMALS mit dem Gerät über dasVerlängerungskabel fahren!
RZ_MULTIBRUSH_DE_GB_FR_NL_978410-1_Text_DE 10.11.16 15:46 Seite 9
10
DE
VORSICHT! VERBRENNUNGS-GEFAHR DURCH HEISSE GERÄTETEILE!
Teile des Gerätes können während des Gebrauchs heiß werden und zumöglichen Verbrennungen führen.Beachten Sie daher den nachfolgen-den Sicherheitshin weis:! Tragen Sie Schutzhandschuhe bei
Montage- und Reinigungsarbeiten!Beachten Sie die nachfolgendenSicherheitsvorkehrungen, um Verlet-zungen und Sachschäden durchMissbrauch und unsicheren Umgangmit dem Produkt zu vermeiden. EinMissbrauch kann VERLETZUNGENzur Folge haben.
VORSICHT! VERLETZUNGSGE-FAHR BEI DER BEDIENUNG!
! Verwenden Sie das Gerät bestim-mungsgemäß! Arbeiten Sie nur imangegebenen Leistungsbereich.
! Vor jeder Inbetriebnahme dasGerät auf einwandfreien Zustandkontrollieren, es darf nicht inBetrieb genommen werden, wenn:
- die Sicherheitsvorrichtungen (Einschalttaster, Sicherheitsabde-ckungen) und / oder die Bürstenbeschädigt oder abgenutzt sind.
- das Gerät sichtbare Schäden aufweist.
- das Gerät einmal heruntergefal-len sein sollte.
- wenn sich Fremdkörper um dieAntriebswelle gewickel haben.
Setzen Sie niemals Sicherheitsvor- richtungen außer Kraft.! Gehen Sie die Fläche, die Sie reinigen
wollen vorher ab, um Schäden amGerät oder an Lebewesen/Gegen-ständen zu vermeiden. Steine, Holz-stücke, Drähte oder ähnliches sowieandere Fremdkörper sind zu entfer-nen. Gegenstände, die das Bürsten-werkzeug erfasst, können unkontrol-liert herausgeschleudert werden.Halten Sie Dritte aus dem Gefahren-bereich fern. Um Verletzungen zuvermeiden, achten Sie auf dieSicherheit im Arbeitsbereich.
! Das Gerät niemals an Hauswändenoder ähnlichem benutzen sondernimmer nur vertikal arbeiten, so dassdie Bürsten auf den Boden zeigen.
! Achten Sie darauf, dass die Lüf-tungsschlitze frei von Schmutzsind.
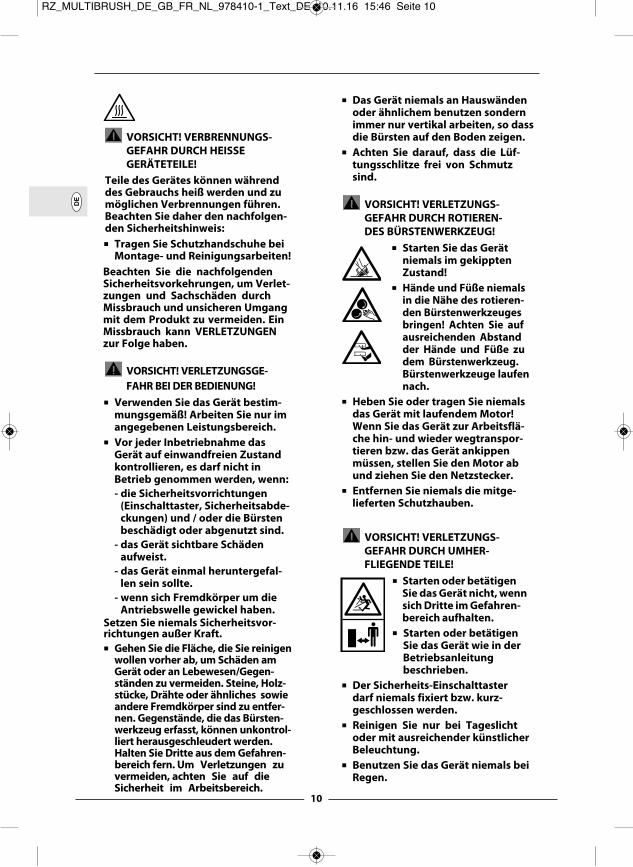
VORSICHT! VERLETZUNGS-GEFAHR DURCH ROTIEREN-DES BÜRSTENWERKZEUG!
! Starten Sie das Gerät niemals im gekippten Zustand!
! Hände und Füße niemalsin die Nähe des rotieren-den Bürstenwerkzeugesbringen! Achten Sie aufausreichenden Abstandder Hände und Füße zudem Bürstenwerkzeug.Bürstenwerkzeuge laufennach.
! Heben Sie oder tragen Sie niemalsdas Gerät mit laufendem Motor!Wenn Sie das Gerät zur Arbeitsflä-che hin- und wieder wegtranspor-tieren bzw. das Gerät ankippenmüssen, stellen Sie den Motor abund ziehen Sie den Netzstecker.
! Entfernen Sie niemals die mitge-lieferten Schutzhauben.
VORSICHT! VERLETZUNGS-GEFAHR DURCH UMHER-FLIEGENDE TEILE!
! Starten oder betätigenSie das Gerät nicht, wennsich Dritte im Gefahren-bereich aufhalten.
! Starten oder betätigenSie das Gerät wie in derBetriebsanleitungbeschrieben.
! Der Sicherheits-Einschalttasterdarf niemals fixiert bzw. kurz-geschlossen werden.
! Reinigen Sie nur bei Tageslichtoder mit ausreichender künstlicherBeleuchtung.
! Benutzen Sie das Gerät niemals beiRegen.
RZ_MULTIBRUSH_DE_GB_FR_NL_978410-1_Text_DE 10.11.16 15:46 Seite 10
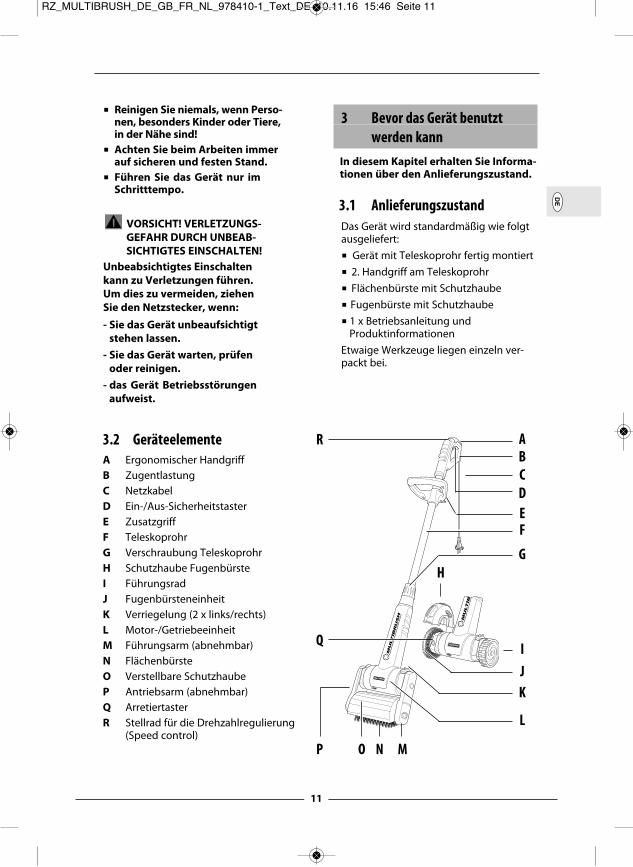
3.2 GeräteelementeA Ergonomischer HandgriffB ZugentlastungC NetzkabelD Ein-/Aus-SicherheitstasterE ZusatzgriffF TeleskoprohrG Verschraubung TeleskoprohrH Schutzhaube FugenbürsteI Führungsrad J Fugenbürsteneinheit K Verriegelung (2 x links/rechts)L Motor-/Getriebeeinheit M Führungsarm (abnehmbar)N FlächenbürsteO Verstellbare SchutzhaubeP Antriebsarm (abnehmbar)Q ArretiertasterR Stellrad für die Drehzahlregulierung (Speed control)
11
DE
! Reinigen Sie niemals, wenn Perso-nen, besonders Kinder oder Tiere,in der Nähe sind!
! Achten Sie beim Arbeiten immerauf sicheren und festen Stand.
! Führen Sie das Gerät nur imSchritttempo.
VORSICHT! VERLETZUNGS-GEFAHR DURCH UNBEAB-SICHTIGTES EINSCHALTEN!
Unbeabsichtigtes Einschaltenkann zu Verletzungen führen.Um dies zu vermeiden, ziehenSie den Netzstecker, wenn:- Sie das Gerät unbeaufsichtigt
stehen lassen.- Sie das Gerät warten, prüfen
oder reinigen.- das Gerät Betriebsstörungen
aufweist.
3 Bevor das Gerät benutzt werden kannIn diesem Kapitel erhalten Sie Informa-tionen über den Anlieferungszustand.
3.1 AnlieferungszustandDas Gerät wird standardmäßig wie folgtausgeliefert:! Gerät mit Teleskoprohr fertig montiert! 2. Handgriff am Teleskoprohr ! Flächenbürste mit Schutzhaube! Fugenbürste mit Schutzhaube! 1 x Betriebsanleitung und
ProduktinformationenEtwaige Werkzeuge liegen einzeln ver-packt bei.
A
CD
JK
MNP
Q
B
EFG
I
L
O
H
R
RZ_MULTIBRUSH_DE_GB_FR_NL_978410-1_Text_DE 10.11.16 15:46 Seite 11

12
DE
5 Montage
Abbildungen 1 - 6
HINWEIS!
Ihr Gerät wird mit der Flächenbürstefertig montiert angeliefert. Lose bei-gelegte Teile müssen beim Arbeitenmit der Fugenbürste entsprechendmontiert werden.
Nach der Entnahme aus der Verpackung,Verschraubung (G) lösen . Anschlie-
ßend Handgriff (A)wie in Abbildungum 45° drehen und gemäß den Abbil-
dungen die Länge des Teleskoprohrs (F)entsprechend Ihre Arbeitshöhe einstel-
len. Es sind 5 arretierbare Stufen möglich.
In der gewählten Stufe Handgriff (A)um weitere 45° drehen und Höhe desTeleskoprohr (F) mit der Verschrau-bung (G) handfest anziehen.
Da das Gerät immer mit 2 Händengeführt und betrieben werden sollte,montieren Sie den Zusatzgriff (E)gemäß der Abbildung , stellendiesen in der Höhe ein und schrau-ben den Zusatzgriff (E) fest .
6 Inbetriebnahme
WARNUNG! BEACHTEN SIE VORDER INBETRIEBNAHME KAPITEL 2“ZU IHRER SICHERHEIT“.
! Beachten Sie daher nachfolgendeSicherheitshinweise:
Reinigen Sie die Walzen- /Fugen-bürste (N/J) vor jedem Reinigungs-vorgang.
Die Luftansaugöffnungen an derMotor-/Getriebeeinheit (L) dürfennicht verstopft oder abgedeckt sein.
Prüfen Sie an einer kleinen, wennmöglich nicht gut sichtbaren Stelle,ob Ihr zu reinigender Boden durchdie Bürstentätigkeit nicht beschä-digt wird.
Das Gerät nicht zu lange an einerStelle benutzen, immer im Schritt-tempo führen.
6.1 BetriebAbbildungen 7 - 11
Schieben Sie die Schlaufe des Verlänge-rungskabels in die dafür vorgeseheneZug entlastung (B) im Handgriff (A) undfixieren Sie diese in dem dafür vorgese-henen Steg.
2
3
4
1
5
7
6
12
4 Technische DatenMultiBrushSpannung: 230 VAC / 50 HzLeistung: 500 WattDrehzahl an der Fugenbürste: 650 min-1 bis 1600 min-1
Drehzahl an der Flächenbürste: 450 min-1 bis 1100 min-1
Maße Gerätebreite: Flächenbürste 24,0 cm // Fugenbürste 28 cmGerätehöhe (min): Flächenbürste 1,15 m // Fugenbürste 1,04 mGerätehöhe (max): Flächenbürste 1,35 m // Fugenbürste 1,24 mGerätegewicht mit Fugenbürste: 2,9 kgGerätegewicht mit Flächenbürste: 3,6 kgHand-Arm Vibrationswert: < 3,1 m/s2 (+/- 1,5 m/s2)Schalldruckpegel LPA: 71 dB(A)Schallleistungspegel LWA: 92 dB(A)Schutzklasse: II
RZ_MULTIBRUSH_DE_GB_FR_NL_978410-2_Text_DE 22.06.17 14:45 Seite 12

13
DE
HINWEIS!! Die Leistung des Gerätes kann sich
verschlechtern, wenn unnötig langeVerlängerungskabel (> 25 m) einge-setzt werden.
! Bei der Benutzung von Kabeltrom-meln, Kabel ganz abrollen.
! Der Leitungsquerschnitt der verwen-deten Kabel muss 1,5 mm2 betragen.
Setzen Sie das Gerät immer parallel aufden zu reinigenden Boden auf. StellenSie den für sich angenehmsten aberauch effektivsten Arbeitswinkel fest undstellen Sie danach die in 5 Stufen rast-bare Schutzhaube (O) so ein, dass dieGummilippe knapp über dem Boden ist.
! Vergewissern Sie sich, dass die zureinigende Fläche frei von Gegen-ständen wie z. B. Steine, Schraubenetc. ist, die hochgeschleudert werdenkönnten.
Schließen Sie das Gerät mit einemVerlängerungskabel an eine Steckdose(230 V Wechselstrom) an.
VORSICHT! VERLETZUNGS-GEFAHR DURCH ROTIERENDESBÜRSTENWERKZEUG!
! Starten Sie das Gerät niemals imgekippten Zustand!
! Starten oder betätigen Sie dasGerät nicht, wenn sich Dritte imGefahrenbereich aufhalten.
! Hände und Füße niemals in dieNähe des rotierenden Bürstenwerk-zeuges bringen!
! Reinigen Sie niemals, wenn Perso-nen, besonders Kinder, oder Tierein der Nähe sind!
! Benutzen Sie das Gerät nie beiRegen.
Sie können die Drehzahl der Bürsteregeln, indem Sie die Drehzahlregulie-rung am Stellrad (R) betätigen.
Halten Sie das Gerät am Handgriff (A)sowie am Zusatzgriff (E) gut fest und
schalten Sie das Gerät ein, indem Sie den Ein-/Aus-Sicherheitstaster (D) im Hand- griff (A) betätigen und halten.! Bei Arbeitsunterbrechungen oder
Gefahr, Ein-/Aus-Sicherheitstaster (D)sofort loslassen.
6.1.2 Montage der BürstenwerkzeugeAbbildungen 12 - 20
VORSICHT! VERBRENNUNGS-GEFAHR DURCH HEISSE GERÄTETEILE!
Bei der Montage oder Umbauarbeitenkönnen die Antriebsteile des Gerätesoder Komponenten noch sehr heißsein und zu möglichen Verbrennun-gen führen. Beachten Sie daher den nachfolgen-den Sicherheitshin weis:! Tragen Sie Schutzhandschuhe bei
der Montage!
Demontage der Flächenbürste mitanschließender Montage der Fugenbürste
! Schalten Sie das Gerät aus und trennenSie das Netzkabel (C) vom Strom.
Öffnen Sie die Verriegelung (K)vom Führungsarm (M), wie in derAbbildung gezeigt.
8
9
10
11
12
Drehzahlempfehlungen für GLORIA Bürsten
Position 1-2 Weiche Bürsten (Holzbürste)
Position 3-4 Härtere Bürsten (Steinbürste)
Position 5-6 Fugenbürste (Metallbürste)
RZ_MULTIBRUSH_DE_GB_FR_NL_978410-1_Text_DE 10.11.16 15:46 Seite 13

14
DE
Entnehmen Sie bei betätigter Verriege-lung (K) den Führungssarm (M) undanschliessend die Flächenbürste (N).
Öffnen Sie nun die Verriegelung (K)vom Antriebsarm (P), wie in der
Abbildung gezeigt und entnehmenSie bei betätigter Verriegelung (K) denAntriebsarm (P) mit der Schutzhaube(O).
! Die Flächenbürste ist nun erfolgreichdemontiert.
Stecken Sie das Führungsrad (I), wie inder Abbildung gezeigt, auf die Füh-rungsseite der Motor-/Getriebeeinheit(L). Schieben Sie nun die Verriegelung(K) in die geöffnete Stellung , hal-ten Sie diese und drücken Sie das Füh-rungsrad (I) weiter auf die Aufnahme-welle bis zum Anschlag. Lassen Sie diefederunterstützte Verriegelung (K)los. Das Führungsrad (I) ist arretiertwenn die Verriegelung selbstständigin die Ausgangslage zurückkehrt .
Stecken Sie die fertig montierteFugenbürsteneinheit wie in der Abbil-dung gezeigt auf die Antriebsseite derMotor-/Getriebeeinheit (L). SchiebenSie die Verriegelung (K) in die geöff-nete Stellung , halten Sie dieseund drücken Sie die Fugenbürsten-einheit weiter bis zum Anschlag in dieAntriebswelle. Lassen Sie die feder-unterstützte Verriegelung (K) los, dieFugenbürsteneinheit ist arretiert wenndie Verriegelung selbstständig in dieAusgangslage zurückkehrt .
Demontage der Fugenbürste mitanschließender Montage der Flächen-bürste
! Demontieren Sie die Fugenbürstegemäß zuvor beschriebener Hand-habung und Funktion.
Öffnen Sie die Verriegelung (K)vom Antriebsarm (P) und stecken Siebei betätigter Verriegelung (K) denAntriebsarm (P) mit der Schutzhaube(O), wie in der Abbildung gezeigt, aufdie Antriebsseite der Motor-/Getriebe-einheit (L). Lassen Sie die federunter-stützte Verriegelung (K) los, derAntriebsarm ist arretiert wenn dieVerriegelung selbstständig in dieAusgangslage zurückkehrt .
HINWEIS!
Sollte sich die Antriebseinheit (P) nicht aufdie Antriebswelle schieben lassen, greifenSie unter die Schutzhaube (O) und drehenSie den Antriebssechskant, bis sich dieAntriebseinheit (P) leicht und ohne Gewaltauf die Antriebswelle schieben lässt.
Stecken Sie die Flächenbürste (N) aufden Antriebssechskant und anschlie-ßend den Führungssarm (M), wie in derAbbildung gezeigt, auf die Führungs-seite der Motor-/Getriebeeinheit (L).
Schieben Sie nun die Verriegelung (K)in die geöffnete Stellung , haltenSie diese und drücken Sie den Füh-rungssarm (M) weiter auf die Aufnah-mewelle bis zum Anschlag. Lassen Siedie federunterstützte Verriegelung (K)los. Der Führungssarm (M) ist arretiert,wenn die Verriegelung selbstständigin die Ausgangslage zurückkehrt .
15
16
17
17
18
19
13
14
RZ_MULTIBRUSH_DE_GB_FR_NL_978410-1_Text_DE 10.11.16 15:46 Seite 14

15
DE
HINWEIS!
Achten Sie bei der Montage der Flä-chenbürste darauf, dass das Seitenteilder Schutzhaube am Führungsarm (M)formschlüssig mit der Schutzhaubeverbunden ist und korrekt abdichtet.
6.1.3 Anwendung mitFlächenbürste auf grobenOberflächenstrukturen wie z. B.Fliesen, Gehwegplatten,Waschbeton, Steinzeug etc.Abbildung 21
Setzen Sie das eingeschaltete Gerätparallel auf die zu bearbeitende Flächeauf. Halten Sie das Gerät im Arbeitswin-kel und achten Sie darauf das die Gum-milippe an der Schutzhaube knapp überdem Boden ist. Gehen Sie im gleichmäßi-gen Schritttempo und schieben Sie dasGerät vor sich her. Üben Sie je nach Grad der Verschmut-zung leichten bis mittleren Druck auf dieFlächenbürste aus, passen Sie Ihr Arbeits-tempo dem Verschmutzungsgrad an.
HINWEIS!
! Arbeiten Sie immer parallel und hal-ten Sie das Gerät vom Körper fern.
! Bei randnahem Arbeiten sollte die schmalere Seite des Gerätes zur Wand zeigen.! Bei hartnäckiger Verschmutzung
können Sie das Gerät an dieser Stellevorwärts- und rückwärts bewegen(wie ein Schrubber), bis dasgewünschte Ergebnis erzielt ist.
! Bei einem hohen Verschmutzungs-grad ist eine Feuchtreinigung ebensomöglich. Benetzen Sie mit einemSprühgerät die zu reinigende Flächemit Wasser oder einem Reinigungs-mittel, hierzu eignet sie sehr gut einGLORIA Sprühgerät. Spülen Sie nachder Feuchtreinigung die Oberflächemit Wasser ab.
VORSICHT! VERLETZUNGSGE-FAHR DURCH NACHLAUFENDESBÜRSTENWERKZEUG!
! Heben Sie das Gerät beim Arbeitenim eingeschalteten Zustand nichtvom Boden ab, da dadurch Ein-zugsgefahr besteht!
6.1.4 Anwendung mitFlächenbürste auf Holzbelägen(Optional als Zubehör erhältlich)
ACHTUNG! Durch unsachgemäßenGebrauch des Gerätes könnenSachschäden entstehen.Beachten Sie daher den nachfol-genden Sicherheitshinweis:
! Verwenden Sie niemals die harteFlächenbürste mit den schwarzenBorsten für das Reinigen von Holz-belägen, da die harten Borsten dieOberfläche des Holzes angreifenund dadurch das Holz schädigenkönnen.
HINWEIS!
! Für das Reinigen von Holzbelägenverwenden Sie die weiche Flächen-bürste mit den gelb/schwarzenBorsten. Diese ist im GLORIA Zubehörerhältlich und nicht im Lieferumfangenthalten.
! Montage- und Anwendungshinweisefinden Sie in den Produktinformationender “Flächenbürste für Holzbeläge“.
21
20
RZ_MULTIBRUSH_DE_GB_FR_NL_978410-1_Text_DE 10.11.16 15:46 Seite 15

16
DE
6.1.5 Anwendung und Auswechslung der FugenbürsteAbbildungen 22 - 24
Montieren Sie die Fugenbürste wie inKapitel 6.1.2 beschrieben. Setzen Siedas Gerät parallel mit Führungsradund Fugenbürste auf die zu bearbei-tende Fuge auf. Halten Sie das Gerätim Arbeitswinkel und achten Sie dar-auf das die Gummilippe an der Schutz-haube (H) knapp über dem Boden ist.
HINWEIS!
Zum Einstellen der Schutzhaube (H)drehen Sie die in 7 Stufen rastbareSchutzhaube in die Position wie imoberen Punkt “22“ beschrieben.
Richten Sie die Fugenbürste mittig zurFuge aus, gehen Sie im gleichmäßigenSchritttempo und schieben Sie dasGerät vor sich her. Passen Sie Ihr Arbeitstempo demVerschmutzungsgrad an.
HINWEIS!
! Arbeiten Sie immer entlang der Fugeund halten Sie das Gerät vom Körperfern.
! Bei hartnäckiger Verschmutzung kön-nen Sie das Gerät an dieser Stelle vor-wärts- und rückwärts bewegen (wieein Schrubber), bis das gewünschteErgebnis erzielt ist.
VORSICHT! VERLETZUNGSGEFAHRDURCH NACHLAUFENDESBÜRSTENWERKZEUG!
! Heben Sie das Gerät beim Arbeitenim eingeschalteten Zustand nichtvom Boden ab, da dadurch Ein-zugsgefahr besteht!
6.2 Benutzerhinweise! Entfernen Sie mit dem Gerät kein
nasses Unkraut.! Reinigen Sie niemals Holzdecks oder
Holzterrassen mit der Fugenbürste.! Reinigen Sie nur Fugen die intakt
sind. Beschädigte Fugen bzw. Fugendie Risse aufweisen oder ausgebrö-kelt sind sollten nicht mit dem Gerätgereinigt werden.
! Spülen Sie nach der Reinigung diegereinigten Flächen gründlich ab.
! Abgenutzte Bürsten bzw. ausgefran-ste Borsten sollten frühzeitig ersetztwerden.
! Schalten Sie das Gerät aus, bevor Siemit der nächsten Reinigungsbahn(z.B. Holzdecks) beginnen.
6.3 Fugenbürste auswechselnAbbildungen 25 - 29
! Schalten Sie das Gerät aus und tren-nen Sie das Netzkabel (C) vom Strom.
Öffnen Sie die Verriegelung (K)von der Fugenbürsteneinheit (J), wiein der Abbildung gezeigt, und entneh-men Sie die Fugenbürsteneinheit.
Schrauben Sie die Innensechskant-schraube 2-3 Umdrehungen soweitaus dem Fugenbürstengehäuse, bissich die Schutzhaube (H) problemlosverdrehen und abziehen lässt.
Drücken Sie nun den Arretiertaster (Q)der die Antriebswelle blockiert undschrauben Sie die Innensechskant-schraube, die die Fugenbürste (J)fixiert, aus der Anriebswelle ( ).Nehmen Sie die Scheibe von derFugenbürste.
23
24
25
26
27
22
RZ_MULTIBRUSH_DE_GB_FR_NL_978410-1_Text_DE 10.11.16 15:46 Seite 16

17
DE
ACHTUNG! Durch unsachgemäßenGebrauch des Gerätes können Sachschäden entstehen! Beachten Sie daher den nachfolgen-den Sicherheitshinweis:
! Arretiertaster (Q) niemals beilaufender Fugenbürste betätigen.
Ziehen Sie die Fugenbürste (J) vondem Flansch auf der Welle und tau-schen Sie diese gegen eine Neue.
Die Montage erfolgt in umgekehrterReihenfolge ( ).
! Achten Sie nach der Wartung oder Reinigung darauf, dass alle Schrauben,Bolzen, Muttern und Sicherheits-einrichtungen festsitzen bzw.montiert sind.
7 Außerbetriebnahme & Lagerung
7.1 AußerbetriebnahmeAbbildung 30
! Gerät außer Betrieb nehmen, indemSie den Ein-/Aus-Sicherheitstaster (D)im Handgriff loslassen.
! Gerät vom Netz trennen.
VORSICHT! VERLETZUNGSGE-FAHR DURCH NACHLAUFENDESBÜRSTENWERKZEUG!
! Heben Sie das Gerät beim Aus-schalten nicht vom Boden ab, dadadurch Einzugsgefahr besteht!
Stellen Sie das Gerät in Arbeitspausen oder nach dem Gebrauch nicht auf dieBürste ab, da dadurch die BorstenSchaden nehmen. Gerät immer hän-gend oder liegend, wie in der Abbil-dung gezeigt, abstellen.
7.2 LagerungVORSICHT! Beim Umgang mit demGerät können Gefahren auftretendie Sie möglicherweise verletzten.Bewahren Sie daher das Gerätunzugänglich von Kindern auf.
! Gerät von Verschmutzung und Fremd-körpern befreien.
! Gerät hängend, trocken und frost-sicher lagern.
8 Wartung & Reinigung
VORSICHT! VERBRENNUNGS-GEFAHR DURCH HEISSE GERÄTETEILE!
Bei der Montage oder Umbauarbeitenkönnen die Antriebsteile des Gerätesoder Komponenten noch sehr heißsein und zu möglichen Verbrennun-gen führen. Beachten Sie daher dennachfolgenden Sicherheits hin weis:! Tragen Sie Schutzhandschuhe bei
der Wartung & Reinigung!
8.1 Reinigung
WARNUNG! LEBENSGEFAHRDURCH STROMSCHLAG!
Kommt das unter Spannung stehendeGerät mit Wasser in Kontakt bestehtLebensgefahr! Beachten Sie dahernachfolgende Sicherheitshinweise:! Schalten Sie das Gerät aus und tren-
nen Sie das Netzkabel (C) vom Strom.! Das Gerät nicht in Wasser tauchen
oder mit Wasser abspritzen bzw. rei-nigen. Das Gerät muss vor Nässegeschützt werden. Sollte das Gerätdennoch einmal ins Wasser fallen,sofort den Netzstecker ziehen. Keinesfalls ins Wasser greifen, wenndas Gerät noch angeschlossen ist!
30
28
29
RZ_MULTIBRUSH_DE_GB_FR_NL_978410-1_Text_DE 10.11.16 15:46 Seite 17

18
DEDE
! Reinigen Sie das Gerät von aussen miteinem feuchten Tuch oder einer wei-chen Bürste. Verwenden Sie keinescharfen oder scheuernden Putzmittel.
! Achten Sie darauf, dass die Lüftungs-schlitze frei von Schmutz sind.
! Bei stärkerer Verschmutzung derWalzen-und /oder der Fugenbürste-neinheit demontieren Sie diese zurgründlichen Reinigung (siehe Monta-ge/Demontage wie in Kapitel 6.1.2beschrieben). Reinigen Sie die Bürsten in Wasseroder mit einem harten Wasserstrahlsowie einer harten Bürste.
! Bei Reparaturen nur Original GLORlAErsatzteile verwenden.
! Reparaturen nur durch GLORlAServicestationen durchführen lassen.
8.2 Verschleiß der Bürsten
HINWEIS!! Wenn die Flächenbürste durch
Verschleiß einen Durchmesser von ø ca. 90 mm erreicht hat, müssen Siediese austauschen.
! Wenn die Fugenbürste durchVerschleiß einen Durchmesser von ø ca. 90 mm erreicht hat, müssen Siediese austauschen.
9 Entsorgung & Rechtliches
9.1 Umweltschutz & Geräteentsorgung! Dieses Symbol auf dem Produkt,
der Betriebsanleitung oder der Ver-packung weist darauf hin, dass diesesProdukt am Ende seiner Lebensdauernicht über den normalen Haushalts-abfall entsorgt werden darf.
! Das Gerät inklusive Zubehör wie z. B.Flächenbürste, Fugenbürste etc. musseiner Sammelstelle für das Recyclingzugeführt werden. Die Werkstoffe sindgemäß ihrer Kennzeichnung wiederver-wertbar. Mit der ordnungsgemäßen Zuführungdes Altproduktes zur Wiederverwertung,der stofflichen Verwertung oder ande-ren Formen der Verwertung leisten Sieeinen wichtigen Beitrag zum Schutzunserer Umwelt.
HINWEIS!! Bitte erfragen Sie bei der Gemeinde-
verwaltung die zuständigeEntsorgungsstelle.
9.2 Entsorgung der Verpackung! Die Verpackungsmaterialien sind
nach umweltverträglichen und entsorgungstechnischen Gesichts-punkten ausgewählt und deshalbrecyclebar. Die Rückführung der Verpackung inden Materialkreislauf spart Rohstoffeund verringert das Abfallaufkommen.
! Entsorgen Sie nicht mehr benötigteVerpackungsmaterialien gemäß denörtlich geltenden Vorschriften.
Technische Änderungen vorbehalten!
RZ_MULTIBRUSH_DE_GB_FR_NL_978410-1_Text_DE 10.11.16 15:46 Seite 18

19
GB
TABLE OF CONTENTS 1 General information about this user manual . . . . . . . . . . . . . . . . . . . . . . . 19 1.1 Symbols on the device and in the user manual. . . . . . . . . . . . . . . . . . . . . . . . . . . 19 1.2 Warnings notices . . . . . . . . . . . . . . . . . . . . . . . . . . . . . . . . . . . . . . . . . . . . . . . . . . . . . . . 20 1.3 Intended use. . . . . . . . . . . . . . . . . . . . . . . . . . . . . . . . . . . . . . . . . . . . . . . . . . . . . . . . . . . . 20 1.4 Reasonably foreseeable misuse. . . . . . . . . . . . . . . . . . . . . . . . . . . . . . . . . . . . . . . . . . 21 1.5 Residual hazards . . . . . . . . . . . . . . . . . . . . . . . . . . . . . . . . . . . . . . . . . . . . . . . . . . . . . . . . 21 1.6 Limitation of liability . . . . . . . . . . . . . . . . . . . . . . . . . . . . . . . . . . . . . . . . . . . . . . . . . . . . 21 2 For your safety . . . . . . . . . . . . . . . . . . . . . . . . . . . . . . . . . . . . . . . . . . . . . . . . . . . 21 2.1 Basic safety instructions . . . . . . . . . . . . . . . . . . . . . . . . . . . . . . . . . . . . . . . . . . . . . . . . . 21 2.2 Safety instructions for connecting the device . . . . . . . . . . . . . . . . . . . . . . . . . . . . 22 2.3 Safety instructions for operating the device. . . . . . . . . . . . . . . . . . . . . . . . . . . . . . 22 3 Before using the device . . . . . . . . . . . . . . . . . . . . . . . . . . . . . . . . . . . . . . . . . . . 23 3.1 Delivery status . . . . . . . . . . . . . . . . . . . . . . . . . . . . . . . . . . . . . . . . . . . . . . . . . . . . . . . . . . 23 3.2 Elements of the device . . . . . . . . . . . . . . . . . . . . . . . . . . . . . . . . . . . . . . . . . . . . . . . . . . 24 4 Technical data. . . . . . . . . . . . . . . . . . . . . . . . . . . . . . . . . . . . . . . . . . . . . . . . . . . . 24 5 Assembly . . . . . . . . . . . . . . . . . . . . . . . . . . . . . . . . . . . . . . . . . . . . . . . . . . . . . . . . 25 6 Commissioning. . . . . . . . . . . . . . . . . . . . . . . . . . . . . . . . . . . . . . . . . . . . . . . . . . . 25 6.1 Operation. . . . . . . . . . . . . . . . . . . . . . . . . . . . . . . . . . . . . . . . . . . . . . . . . . . . . . . . . . . . . . . 25 6.1.2 Assembly of the brushing tools. . . . . . . . . . . . . . . . . . . . . . . . . . . . . . . . . . . . . . . . . . 26 6.1.3 Using the surface brush on rough surface structures.. . . . . . . . . . . . . . . . . . . . . 27 6.1.4 Using the surface brush on wood surfaces. . . . . . . . . . . . . . . . . . . . . . . . . . . . . . . 28 6.1.5 Using and replacing the joint brush. . . . . . . . . . . . . . . . . . . . . . . . . . . . . . . . . . . . . . 28 6.2 User information . . . . . . . . . . . . . . . . . . . . . . . . . . . . . . . . . . . . . . . . . . . . . . . . . . . . . . . . 28 6.3 Replacing the joint brush. . . . . . . . . . . . . . . . . . . . . . . . . . . . . . . . . . . . . . . . . . . . . . . . 28 7 Decommissioning and storage . . . . . . . . . . . . . . . . . . . . . . . . . . . . . . . . . . . . 29 7.1 Decommissioning. . . . . . . . . . . . . . . . . . . . . . . . . . . . . . . . . . . . . . . . . . . . . . . . . . . . . . . 29 7.2 Storage . . . . . . . . . . . . . . . . . . . . . . . . . . . . . . . . . . . . . . . . . . . . . . . . . . . . . . . . . . . . . . . . . 29 8 Maintenance & cleaning . . . . . . . . . . . . . . . . . . . . . . . . . . . . . . . . . . . . . . . . . . 29 8.1 Cleaning . . . . . . . . . . . . . . . . . . . . . . . . . . . . . . . . . . . . . . . . . . . . . . . . . . . . . . . . . . . . . . . . 29 8.2 Wear of the brushes. . . . . . . . . . . . . . . . . . . . . . . . . . . . . . . . . . . . . . . . . . . . . . . . . . . . . 30 9 Disposal and legal information . . . . . . . . . . . . . . . . . . . . . . . . . . . . . . . . . . . . 30 9.1 Environmental protection and device disposal . . . . . . . . . . . . . . . . . . . . . . . . . . . 30 9.2 Disposing of the packaging . . . . . . . . . . . . . . . . . . . . . . . . . . . . . . . . . . . . . . . . . . . . . 30
1 General information about this user manualThis user manual is an integral part of the GLORIA device and must be continuallyavailable on or near the device. This user manual contains important instructions and information required forensuring the safe use of the device! This user manual must be read in full by any person assigned withoperating/using/maintaining the unit. This user manual must be kept safe and passed on to any new owner!All warning notices are there to protect your personal safety!
1.1 Symbols on the device an in the user manual
CAUTION!
Do not touch! Risk of burns caused by hot surfaces!
Protect againstrain and moisture!
Entanglementhazard!
RZ_MULTIBRUSH_DE_GB_FR_NL_978410-1_Text_GB 10.11.16 15:55 Seite 19

20
GB
Read the user manual!
Disconnect themains plug when thepower cable isdamaged or twisted!
Wear safety goggles!
Wear protective gloves!
Wear safety shoes!
Do not reachunderneath!
Keep your distance!
Danger from flyingparts!
Do not tilt!
Do NOT dispose ofold electrical andelectronic equip-ment as normal domestic waste.
Environmentallyappropriate dis posal!
Recyclablepackaging materials!
1.2 Warning notices
WARNINGThis level of warning notice indicates apotentially hazardous situation. Follow the instructions accompanyingthis warning notice in order to avoidserious injury or death.
CAUTIONThis level of warning notice indicates apotentially hazardous situation which,if not avoided, may result in seriousinjury. Follow the instructions accompanyingthis warning notice in order to avoidserious injury.
ATTENTIONThis level of warning notice indicates apotentially hazardous situation which,if not avoided, may result in materialdamage.Follow the instructions accompanyingthis warning notice in order to avoidmaterial damage.
NOTE!A note indicates additional informationor illustrations that help you operateand facilitate the understanding of thedevice.
1.3 Intended useThis GLORIA device is intended for pri-vate use in the outdoor yard area and onhard surfaces.Compliance with the accompanyinginstructions is a prerequisite for the prop-er use of the device. The user manualalso contains the operating, maintenanceand servicing conditions. The device is solely intended as a hand-held cleaning and maintenance devicefor cleaning joints and surfaces on andbetween surfaces outdoors e.g. stoneslabs, tiles, paving stones and woodsurfaces.
RZ_MULTIBRUSH_DE_GB_FR_NL_978410-2_Text_GB 22.06.17 15:43 Seite 20

21
GB
CAUTION! Danger caused byimproper use!
This device can be dangerous if notused for its intended purpose. You should therefore observe thefollowing safety instructions:! Use the device for its intended
purpose only.! Note all instructions and informa-
tion in the user manual.
1.4 Reasonably foreseeablemisuseThe device is not suitable for horizontaluse (house walls), overhead work (ceilings), for unsuitable floor or jointmaterials or for other application areas asthose described . The device must not beused in wet weather conditions, rain andin/under water. The manufacturer doesnot accept liability for any damage orinjury resulting from unauthorisedmodifications to the device or itsimproper use.
1.5 Residual hazardsThis device complies with the acceptedrules of technology and the relevant safety requirements ! However, use of the device may present:! Danger to life and limb of the operator
or other persons.! Damage to the device.! Damage to the other items of
property.
1.6 Limitation of liabilityWe expressly point out that according toproduct liability law we do not accept li ability for damage caused by our device,insofar as this has been caused by non-compliance with the operating instruc-tions, improper use, improper repair orreplacement of parts with non-genuineparts, or if repairs have not been carriedout by the customer service team or anauthorised expert. This also applies to accessories.
2 For your safetyThis chapter contains importantwarning and safety instructionswhich must be observed when hand -ling and using the device.
2.1 Basic safety instructionsObserve the following basic safetyinstructions to ensure the safe hand -ling and use of the device:
! Repairs to devices for the home andgarden must only to be carried outby the service centres. Spare parts should be ordered fromyour dealer. If the parts are not instock, the dealer will procure themas soon as possible.
! This device complies with theaccepted rules of technology andthe relevant safety requirements!
! This device may be used by child renfrom 16 years and above and bypersons with diminished phys ical,sensorial or mental capacities orlack of experience and know ledge if supervised or if they have beeninstructed with respect to safe useof the device and understand therisks that result from using it.Children must not play with thedevice. Cleaning and user maintenancemust not be performed by childrenwithout supervision.
! This device must not be used if theoperator is tired, ill or under theinfluence of alcohol or other drugsor medicines.
! Do not leave the device unatten dedwhile it is in operation.
! Protect the device against longexposure to the sun and frost.
! In order to prevent damage andhazards resulting from improperuse , you must observe the user manual and store it in a safe place!
RZ_MULTIBRUSH_DE_GB_FR_NL_978410-1_Text_GB 10.11.16 15:55 Seite 21

22
GB
! Wear suitable work clothing such assturdy shoes, safety goggles, longtrousers and, if necessary, glovesduring cleaning. Do not workbarefoot or in light sandals.
! If the device is passed on to otherpersons, they must also be given theuser manual!
! Only use GLORIA original spares andaccessories for the device. Never use worn, modified or defec-tive replacement parts / accessories!
2.2 Safety instructions forconnecting the device
WARNING! Danger of electric shock!
Contact with energised cables/wires or components may result in seriousinjury or death! You should therefore observe thefollowing safety instructions:! If the power cable is damaged,
it must only be replaced by a repairshop designated by the manufactur-er in order to prevent a hazard !Please contact the manufacturer orthe customer service department.
! Ensure that the supply voltagecorresponds with the voltage (V) of the device !
! Only connect the device to an ACgrounded power outlet.
! When using an extension lead, onlyuse a grounded cable for outdooruse with a conductor cross-sectionof at least 1.5 mm2!
! The device should be operatedusing a residual-current-operatedprotective device (RCD) with arelease current of no more than30 mA. Ask your elec trical installer!
! The mains plug must be removed: - In the event of faults during
operation - Prior to any cleaning - After use
2.3 Safety instructions foroperating the device
WARNING! Danger of electric shock!
If the energised device comes intocontact with water, there is a risk ofserious injury or death! You should therefore observe thefollowing safety instructions:! Do not use the device with wet hands.! Do not immerse the device in water
or spray or clean it with water. Thedevice must be protec ted againstmoisture. However, if the devicedoes fall into water, immediatelyunplug the mains plug. Never reach into the water if thedevice is still connected!
! NEVER drive over the extensioncable with the device!
CAUTION! RISK OF BURNSCAUSED BY HOT PARTS!
Parts of the device can become hotduring use and may cause burns. It is therefore important to observethe following safety instructions:! Wear protective gloves during
assembly and cleaning work!
Observe the following safetyprecautions to prevent injuriesand material damage due to misuseand unsafe handling of the product.Misuse can result in INJURIES.
CAUTION! RISK OF INJURYDURING OPERATION!
! Use the device as intended! Work only within the specifiedperform ance range.
! Before each use, make sure that thedevice is in perfect condition; operation is prohibited if:
- the safety devices (start switch,protective covers) and/or brushesare damaged or worn.
- the device shows visible signs ofdamage.
RZ_MULTIBRUSH_DE_GB_FR_NL_978410-1_Text_GB 10.11.16 15:55 Seite 22

- the device may have beendropped before.
- foreign objects have wrappedaround the drive shaft.
Never disable any safety devices.! Check area to be cleaned
beforehand to avoid damage todevice / objects or injuries to livingbeings. Stones, pieces of wood,wires or the like, as well as otherforeign objects must be removed.Objects that are caught by thebrushing equipment can be flungout uncontrollably. Keep bystandersaway from the danger zone. In orderto prevent injuries, pay attention tosafety in the work area.
! Never use the device on house wallsor similar, always work vertic ally sothat the brushes are pointed at theground.
! Ensure that the ventilation slots arefree of dirt.
CAUTION! RISK OF INJURY FROMROTATING BRUSHING TOOL!
! Never start the device ina tilted position!
! Never put your hands orfeet near to the rotat ingbrushing equipment!Ensure that sufficientdistance is kept betweenhands, feet and brushingequipment. Brushing toolscontinue to turn.
! Never lift or carry the device withrunning motor! Switch motor offand disconnect mains plug whenmoving device to and from workarea, or tilting device.
! Never remove the supplied safetyguards.
CAUTION! RISK OF INJURYFROM FLYING PARTS!
! Do not start or operate thedevice if bystanders are inthe danger zone.
! Start or operate the device as described in theoperating instructions.
! The safety start switch must neverbe fixed or short-circuited.
! Only clean during daylight or withadequate artificial lighting.
! Never use the device during rain.! Never clean if others, in particular
children or animals, are in the area!! During cleaning, pay attention to
safe and solid position.! Guide device only at walking
pace.
CAUTION! RISK OF INJURY FROMUNINTENTIONAL SWITCH ON!
Accidental activation can causeinjuries. To prevent this, unplugmains plug when:
– leaving device unsupervised. – maintaining, checking or cleaning
device. – device shows signs of
malfunction.
3 Before using the deviceThis chapter contains information aboutthe delivery status.
3.1 Delivery statusThe device is shipped as standard asfollows:! Device pre-assembled with telescopic
tube! Second handle on telescopic tube ! Surface brush with safety guard! Joint brush with safety guard! 1 x user manual and product inform a -
tion
Any tools are individually packed.
23
GB
RZ_MULTIBRUSH_DE_GB_FR_NL_978410-1_Text_GB 10.11.16 15:55 Seite 23

24
GB
A
CD
JK
MNP
Q
B
EF
G
I
L
O
H
3.2 Elements of the deviceA Ergonomic handleB Cable strain reliefC Power cordD ON/OFF safety switchE Additional handleF Telescopic tubeG Screw connection telescopic tubeH Safety guard for joint brushI Guiding wheel J Joint brush unit K Locking device (2 x left/right)L Motor/gear unit M Guide arm (removable)N Surface brushO Adjustable safety guardP Drive arm (removable)Q Lock buttonR Adjustment wheel for speed control (Speed control)
4 Technical dataMultiBrushVoltage: 230 VAC / 50 HzOutput: 500 WattRotational speed of joint brush: 650 rpm to 1600 rpmRotational speed of surface brush: 450 rpm to 1100 rpmDimensions Device width: Surface brush 24.0 cm // Joint brush 28 cmDevice height (min): Surface brush 1.15 m // Joint brush 1.04 mDevice height (max): Surface brush 1.35 m // Joint brush 1.24 mDevice weight with joint brush: 2.9 kgDevice weight with surface brush: 3.6 kgHand-Arm vibration value: < 3.1 m/s2 (+/- 1.5 m/s2)Sound pressure level LPA: 71 dB(A)Sound power level LWA: 92 dB(A)Protection class: II
R
RZ_MULTIBRUSH_DE_GB_FR_NL_978410-2_Text_GB 22.06.17 14:46 Seite 24

25
GB
5 Assembly
Figures 1 - 6
NOTE!
Your device is supplied with thesurface brush pre-assembled.Loose parts supplied must be as sembled accordingly whenworking with the joint brush.
! After removing from the packaging,loosen screw connection (G) .Next, turn handle (A) 45° as shown infig ure and adjust the length ofthe telescopic tube (F) according toyour body height, as illustrated. 5 locking positions are available.
In the selected position, turn handle(A) a further 45° and tighten theheight of the telescopic tube (F) withthe screw connection (G) by hand.
! As the device should always beguided and operated with twohands, fit the additional handle (E) asshown in the figure , adjust theheight and screw the additionalhandle (E) tightly into place .
6 Commissioning
WARNING! BEFORE USE OBSERVECHAPTER 2 “FOR YOUR SAFETY”.
ATTENTION! Improper use of thedevice poses a risk of damage toproperty! You should therefore observe thefollowing safety instructions:
! Clean the roller/joint brush (N/J)before each cleaning operation.
! The air inlet openings on themotor/gear unit (L) must not beblocked or covered.
! Check on a small, if possible hiddenarea, that the ground to be cleanedwill not be damaged by the brush-ing action.
! Never use the device too long onone spot, always guide at walkingpace.
6.1 OperationFigures 7 - 11
Slide the loop of the extension cableinto the designated cable strain relief(B) in the handle (A) and fix it in thedesignated clip.
NOTE!
! The performance of the equipmentmay decrease if unnecessarily longextension cables (>25 m) are used.
! If cable reels are used, unroll the en tire cable.
! The cross-section of the cable usedmust be 1.5 mm2.
Always place the device parallel onthe ground which is to be cleaned.Identify the most comfortable but alsomost effective working angle for your-self and then adjust the 5 click-stopsafety guard (O) so that the rubber lipis just above the ground.
! Make sure that the surface to becleaned is free from debris e.g. stones,screws etc., which could be flung up.
Use an extension cable to connect thedevice to a power outlet (230 V AC).
CAUTION! RISK OF INJURY FROMROTATING BRUSHING TOOL!
! Never start the device in a tiltedposition!
1
2
3
4
5
6
7
8
9
25
RZ_MULTIBRUSH_DE_GB_FR_NL_978410-1_Text_GB 10.11.16 15:55 Seite 25

26
GB
! Do not start or operate device ifbystanders are in the danger zone.
! Never put your hands or feet near tothe rotating brushing equipment!
! Never clean if others, in particularchildren or animals, are in the area!
! Never use the device in the rain.
You can regulate the speed of thebrush by pressing the speed controlon the adjustment wheel (R).
Hold the device securely by thehandle (A) and additional handle (E)and switch on the device by pressingand holding the ON/OFF safety switch (D) in handle (A).
! In case of work interruptions or danger, release the ON/OFF safetyswitch (D) immediately.
6.1.2 Assembly of the brushingtoolsFigures 12 - 20
CAUTION! RISK OF BURNSCAUSED BY HOT PARTS!
During assembly or conversion workthe drive parts of the device orcomponents can still be very hotand may cause burns. It is therefore important to observethe following safety instructions:! Wear protective gloves during
assembly!
Disassembly of surface brush followed byassembly of the joint brush
! Switch off the device and disconnectthe power cord (C) from the powersupply.
Open the locking device (K) of the guide arm (M), as shown in theillustration.
With the lock applied (K) remove theguide arm (M) and then the surfacebrush (N).
Now open the locking device (K)of the drive arm (P), as shown in theillustration and remove, with the lockapplied, (K) the drive arm (P) withsafety guard (O).
! The surface brush is now successfullydismantled.
Put the guiding wheel (I), as shown inthe illustration, on the steering side ofthe motor/gear unit (L). Now slide thelock (K) into open position , holdthis and press the guiding wheel (I)further onto the coupling shaft up tothe stop. Release the spring-loaded lockingdevice (K). The guiding wheel (I) islocked when the locking deviceindependently returns to its originalposition .
Put the pre-assembled joint brushunit, as illustrated, on the drive side ofthe motor/gear unit (L). Slide the lock(K) into open position , hold thisand press the joint brush unit furtherinto the drive shaft up to the stop.Release the spring-loaded lockingdevice (K), the joint brush unit is
10
11
12
13
14
15
16
Speed recommendations for GLORIA brushes
Position 1-2 soft brushes (wood brush)
Position 3-4 harder brushes (stone brush)
Position 5-6 joint brush (wire brush)
RZ_MULTIBRUSH_DE_GB_FR_NL_978410-1_Text_GB 10.11.16 15:55 Seite 26

27
GB
locked when the locking deviceindependently returns to its originalposi tion .
Disassembly of joint brush followedby assembly of the surface brush
! Dismantle the joint brush according tohandling and function described above.
Open the locking device (K) of thedrive arm (P) and, with the lockapplied, (K) put the drive arm (P) withsafety guard (O), onto the drive side ofthe motor/gear unit (L), as illustrated.Release the spring-loaded lock (K),the drive arm is locked when thelocking device independently returnsto its original position .
NOTE!
If the drive unit (P) cannot be pushedonto the drive shaft, reach under thesafety guard (O) and turn the hexago-nal drive until the drive unit (P) slidesonto the drive shaft easily and withoutforce.
Put the surface brush (N) onto thehexagonal drive and then the guidearm (M), as illustrated, on the steeringside of the motor/gear unit (L).
Now slide the lock (K) into open posi-tion , hold this and press the guidearm (M) further onto the couplingshaft up to the stop. Release thespring-loaded locking device (K). The guide arm (M) is locked when thelocking device independently returnsto its original position .
NOTE!
Whilst assembling the surface brush,make sure that the side part of thesafety guard on guide arm (M) isfirmly connected to the safety guardand is correctly sealed.
6.1.3 Using the surface brush onrough surface structures e.g. tiles,paving slabs, exposed aggregateconcrete, stoneware etc.Figure 21
Place the switched-on device parallelon the surface to be treated. Hold thedevice at working angle and makesure that the rubber lip on the safetyguard is just above the ground. Walk at an even steady pace and pushthe device in front of you. Depending on the degree of soiling,apply light to medium pressure on thesurface brush, adapt your pace ofwork to the degree of soiling.
NOTE!
! Always work parallel and hold thedevice away from your body.
! When working close to edges, thenarrower side of the device shouldpoint towards the wall.
! In cases of stubborn dirt you can movethe device backwards and forwards onthe spot (like a scrubber), until therequired result is achieved.
! Moist cleaning is also possible in casesof heavy soiling. Use a sprayer to moist the surface tobe cleaned with water or a cleaningagent, a GLORIA sprayer is ideal for thispurpose. After moit cleaning rinse the surfacewith water.
17
17
18
19
20
21
RZ_MULTIBRUSH_DE_GB_FR_NL_978410-1_Text_GB 10.11.16 15:55 Seite 27

28
GB
CAUTION! RISK OF INJURY FROMRUNNING BRUSHING TOOL!
! Never lift the device off the groundwhilst switched on during work asthere is danger of entanglement!
6.1.4 Using the surface brushon wood surfaces (optionallyavailable as an accessory)
ATTENTION! Improper use of thedevice poses a risk of damage toproperty! You should thereforeobserve the following safetyinstructions:
! Never use the hard surface brushwith the black bristles for cleaningwood surfaces, as the hard bristlesattack the surface of the wood,thereby damaging it.
NOTE!
! For cleaning wood surfaces use thesoft surface brush with the yellow /black bristles. This is available as a GLORIA accesso-ry and is not in cluded in the scope ofdelivery.
! Assembly and operating instructionscan be found in the product informa-tion “Surface brush for wood surfaces”.
6.1.5 Using and replacing thejoint brushFigures 22 - 24
Assemble the joint brush as describedin Chapter 6.1.2. Place the deviceparallel with guiding wheel and jointbrush on the joint to be treated. Holdthe device at working angle and makesure that the rubber lip on the safetyguard (H) is just above the ground.
NOTE!
To adjust the safety guard (H), turn the7 click-stop safety guard to the posi-tion described under point “22”.
Align the joint brush with the centre ofthe joint, walk at an even steady pace andpush the device in front of you. Adaptyour pace of work to the degree of soiling.
NOTE!
! Always work along the joint and holdthe device away from your body.
! In cases of stubborn dirt you canmove the device backwards andforwards on the spot (like a scrubber),until the required result is achieved.
CAUTION! RISK OF INJURY FROMRUNNING BRUSHING TOOL!
! Never lift the device off the groundwhilst switched on during work asthere is danger of entanglement!
6.2 User information! Do not remove any wet weeds with
the device.! Never clean wood decks or wood
terraces with the joint brush.! Only clean joints that are intact.
Damaged or crumbling joints or jointswith cracks should not be cleanedwith the device.
! Rinse the cleaned surfaces thoroughlyafter cleaning.
! Worn brushes i.e. frayed bristlesshould be replaced in good time.
! Switch off the device, before startingwith the next cleaning course (e.g.wood decks).
6.3 Replacing the joint brushFigures 25 - 29
! Switch off the device and disconnect thepower cord (C) from the power supply.
22
23
24
RZ_MULTIBRUSH_DE_GB_FR_NL_978410-1_Text_GB 10.11.16 15:55 Seite 28

29
GB
Open the locking device (K) ofthe joint brush unit (J), as shown inthe illustration, and remove the jointbrush unit.
Unscrew the hexagon socket screw 2-3 turns so far out of the joint brushhousing, until safety guard (H) caneasily be twisted and pulled off.
Now press lock button (Q) whichblocks the drive shaft and unscrew thehexagon socket screw, which fixes thejoint brush (J), from the drive shaft( ). Remove the disc from the joint brush.
ATTENTION! Improper use of thedevice poses a risk of damage toproperty! You should therefore observe thefollowing safety instruction:
! Never activate the lock button (Q)when the joint brush is running.
Pull the joint brush (J) from the flangeon the shaft and exchange it for a newone.
Assembly is carried out in reverseorder ( ).
! After maintenance or cleaning ensurethat all screws, bolts, nuts and safetydevices are secure and assembled.
7 Decommissioning & Storage
7.1 DecommissioningFigure 30
! Take the device out of operation byreleasing the ON/OFF safety switch (D)in the handle.
! Disconnect the device from the powersupply.
CAUTION! RISK OF INJURY FROMRUNNING BRUSHING TOOL!
! Never lift the device off the groundwhilst switching it off as there isdanger of entanglement!
Do not put the device down on thebrush during work breaks or after useas this will damage the bristles. Always hang the device up or lie itdown as shown in the illustration.
7.2 StorageCAUTION! You may be exposed tohazards that could injure youwhen handling the device. You must therefore store thedevice away from children.
! Remove any dirt and debris.! Store the device hung up, dry and
protected from frost.
8 Maintenance & Cleaning
CAUTION! RISK OF BURNS CAUSED BY HOT PARTS!
During assembly or conversion workthe drive parts of the device orcomponents can still be very hot andmay cause burns. It is thereforeimportant to observe the followingsafety instruction:! Wear protective gloves during
maintenance and cleaning!
8.1 Cleaning
WARNING! RISK OF DEATHDUE TO ELECTRIC SHOCK!
If the energised device comes intocontact with water, there is a risk ofseri ous injury or death!
25
26
27
28
29
30
RZ_MULTIBRUSH_DE_GB_FR_NL_978410-1_Text_GB 10.11.16 15:55 Seite 29

30
GB
You should therefore observe thefollowing safety instructions:! Switch off the device and disconnect
the power cord (C) from the powersupply.
! Do not immerse the device in wateror spray or clean it with water. The device must be protectedagainst moisture. However, if the device does fall intowater, immediately unplug themains plug. Never reach into thewater if the device is still connected!
! Clean the outside of the device with adamp cloth or soft brush. Do not useabrasives or harsh cleaning agents.
! Ensure that the ventilation slots arefree of dirt.
! In cases of heavier soiling of the rollerbrush and/or joint brush units,dismantle for thorough cleaning (seeAssembly/Disassembly as described inChapter 6.1.2). Clean the brushes in water or with astrong water jet and a hard brush.
! Only use original GLORIA spare partsfor repairs.
! Repairs must be carried out by a GLORIA service point.
8.2 Wear of the brushesNOTE!
! If the surface brush wears down to adiameter of ø approx. 90 mm, it mustbe replaced.
! If the joint brush wears down to adiameter of ø approx. 90 mm, it mustbe replaced.
9 Disposal & Legislation
9.1 Environmental protection &disposal of the device! This symbol on the product, user man-
ual or packaging indicates that thisproduct must not be disposed of inregular household waste at the end ofits service life.
! The device including accessories e.g.surface brush, joint brush etc. must bedisposed off at a recycling collectionpoint. The materials can be recycled accord-ing to their designations. You willmake an important contribution to theprotection of our environment by thecorrect end-of-life product recycling,material recycling or other form of re-use.
NOTE!! Please check with your local govern-
ment to find the appropriate disposalpoint.
9.2 Disposal of packaging! The packaging materials have been
selected according to environment ally-suitable and disposal-related aspectsand are therefore recyclable. Returning the packaging to the materi-al circulation saves raw materials andreduces the level of waste.
! Please dispose of unwanted pack agingmaterials according to applicable localregulations.
Technical changes reserved!
RZ_MULTIBRUSH_DE_GB_FR_NL_978410-1_Text_GB 10.11.16 15:55 Seite 30

31
FR
SOMMAIRE 1 Informations générales concernant le présent mode d’emploi. . . . . . . 31 1.1 Symboles figurant sur l’appareil ainsi que dans le mode d’emploi . . . . . . . . 31 1.2 Mises en garde. . . . . . . . . . . . . . . . . . . . . . . . . . . . . . . . . . . . . . . . . . . . . . . . . . . . . . . . . . 32 1.3 Utilisation conforme . . . . . . . . . . . . . . . . . . . . . . . . . . . . . . . . . . . . . . . . . . . . . . . . . . . . 32 1.4 Mauvais usage raisonnablement prévisible . . . . . . . . . . . . . . . . . . . . . . . . . . . . . . 33 1.5 Risques résiduels. . . . . . . . . . . . . . . . . . . . . . . . . . . . . . . . . . . . . . . . . . . . . . . . . . . . . . . . 33 1.6 Limites de responsabilité . . . . . . . . . . . . . . . . . . . . . . . . . . . . . . . . . . . . . . . . . . . . . . . . 33 2 Pour votre sécurité . . . . . . . . . . . . . . . . . . . . . . . . . . . . . . . . . . . . . . . . . . . . . . . 33 2.1 Consignes élémentaires de sécurité . . . . . . . . . . . . . . . . . . . . . . . . . . . . . . . . . . . . . 33 2.2 Consignes de sécurité lors duraccordement de l’appareil. . . . . . . . . . . . . . . . . 34 2.3 Consignes de sécurité relatives à l’utilisation de l’appareil . . . . . . . . . . . . . . . . 34 3 Avant de pouvoir utiliser l’appareil . . . . . . . . . . . . . . . . . . . . . . . . . . . . . . . . 36 3.1 Etat à la livraison . . . . . . . . . . . . . . . . . . . . . . . . . . . . . . . . . . . . . . . . . . . . . . . . . . . . . . . . 36 3.2 Parties constituantes de l’appareil . . . . . . . . . . . . . . . . . . . . . . . . . . . . . . . . . . . . . . . 36 4 Caractéristiques techniques . . . . . . . . . . . . . . . . . . . . . . . . . . . . . . . . . . . . . . . 37 5 Montage . . . . . . . . . . . . . . . . . . . . . . . . . . . . . . . . . . . . . . . . . . . . . . . . . . . . . . . . . 37 6 Mise en service . . . . . . . . . . . . . . . . . . . . . . . . . . . . . . . . . . . . . . . . . . . . . . . . . . . 37 6.1 Fonctionnement . . . . . . . . . . . . . . . . . . . . . . . . . . . . . . . . . . . . . . . . . . . . . . . . . . . . . . . . 38 6.1.2 Montage des outils de brosse . . . . . . . . . . . . . . . . . . . . . . . . . . . . . . . . . . . . . . . . . . . 38 6.1.3 Utilisation avec brosse pour surfaces sur structures de surface grossières. .40 6.1.4 Utilisation avec brosse pour surfaces sur revêtements en bois.. . . . . . . . . . . . 40 6.1.5 Utilisation et remplacement de la brosse à joints. . . . . . . . . . . . . . . . . . . . . . . . . 41 6.2 Instructions d’utilisation. . . . . . . . . . . . . . . . . . . . . . . . . . . . . . . . . . . . . . . . . . . . . . . . . 41 6.3 Remplacement de la brosse à joints . . . . . . . . . . . . . . . . . . . . . . . . . . . . . . . . . . . . . 41 7 Mise hors service et entreposage . . . . . . . . . . . . . . . . . . . . . . . . . . . . . . . . . . 42 7.1 Mise hors service. . . . . . . . . . . . . . . . . . . . . . . . . . . . . . . . . . . . . . . . . . . . . . . . . . . . . . . . 42 7.2 Entreposage . . . . . . . . . . . . . . . . . . . . . . . . . . . . . . . . . . . . . . . . . . . . . . . . . . . . . . . . . . . . 42 8 Maintenance & Nettoyage. . . . . . . . . . . . . . . . . . . . . . . . . . . . . . . . . . . . . . . . . 42 8.1 Nettoyage . . . . . . . . . . . . . . . . . . . . . . . . . . . . . . . . . . . . . . . . . . . . . . . . . . . . . . . . . . . . . . 42 8.2 Usure des brosses . . . . . . . . . . . . . . . . . . . . . . . . . . . . . . . . . . . . . . . . . . . . . . . . . . . . . . . 43 9 Elimination des déchets et législation. . . . . . . . . . . . . . . . . . . . . . . . . . . . . . 43 9.1 Protection de l’environnement et élimination de l’appareil . . . . . . . . . . . . . . . 43 9.2 Elimination de l’emballage . . . . . . . . . . . . . . . . . . . . . . . . . . . . . . . . . . . . . . . . . . . . . . 43
1 Informations générales concernant le présent mode d’emploiLe présent mode d’emploi est partie constituante de l’appareil GLORIA et doit êtreconstamment disponible sur ou à proximité de l’appareil. Le mode d’emploi fournit d’importantes remarques et informations nécessaires à lasécurité d’utilisation de l’appareil ! Toute personne chargée de la manipulation / l’utilisation / la maintenance del’appareil doit avoir lu le mode d’emploi dans sa totalité. Conserver le mode d’emploi et le transmettre au propriétaire suivant !Toutes les mises en garde contribuent aussi à votre sécurité personnelle !
1.1 Symboles figurant sur l’appareil ainsi que dans le mode d’emploi
PRUDENCE !
Ne pas toucher ! Risque de brûlure sur les surfaces chaudes !
A protéger de la pluie et del’humidité !
Danger de happement !
RZ_MULTIBRUSH_DE_GB_FR_NL_978410-1_Text_FR 10.11.16 15:47 Seite 31

32
FR
Lire le moded'emploi !
Retirer la fiche si lecâble réseau estendommagé ouenchevêtré !
Porter des lunettes
de protection !
Porter des gants deprotection !
Porter des chaussuresde sécurité !
Ne pas saisir par
dessous !
Rester à distance !Risque de projec-tions de pièces !
Ne pas basculer !
NE PAS éliminer les appa-reils électriques et électro-niques usagés avec lesordures ménagères.
Éliminationconforme àl'environnement !
Matériaux d'emballagerecyclables !
1.2 Avertissements
MISE EN GARDE !Un avertissement de ce niveau de dan-ger signale une situation dangereusemenaçante. Suivre les instructions decet avertissement afin d’éviter degraves blessures ou le danger de mort.
PRUDENCEUn avertissement de ce niveau de dan-ger signale une situation potentielle-ment dangereuse qui, si elle n’est pasévitée, est susceptible de provoquerdes blessures. Suivre les instructionsde cet avertissement afin d’éviter lerisque de blessures.
ATTENTIONUn avertissement de ce niveau de dan-ger signale un risque potentiel qui, s’iln’est pas évité, est susceptible de pro-voquer un dommage matériel.Suivre les instructions de cet avertis-sement afin d’éviter des dommagesmatériels.
REMARQUE !Une remarque signale des informationssupplémentaires ou des illustrationscensées vous faciliter la manipulation etla compréhension de l’appareil.
1.3 Utilisation conformeCet appareil GLORIA est prévu pour uneutilisation privée à l’intérieur dans unecour extérieure ainsi que sur des surfacespavées d'un jardin d'agrément.Le bon usage de l’appareil implique lerespect du mode d’emploi joint. Le mode d’emploi contient égalementles conditions de fonctionnement,d’entretien et de maintenance. L’appareil sert exclusivement d’appareilde nettoyage et d’entretien commandéà la main pour nettoyer des joints et dessurfaces, sur et entre des revêtements àl’extérieur, p. ex. dalles de pierre,carrelages, pavés, revêtements en bois.
RZ_MULTIBRUSH_DE_GB_FR_NL_978410-2_Text_FR 22.06.17 15:43 Seite 32

33
FR
PRUDENCE ! RISQUE INHÉRENT ÀL’UTILISATION NON CONFORMEÀ L’USAGE PRÉVU !
L’appareil recèle des risques lorsqu’iln’est pas utilisé de façon conforme.Aussi, respecter les consignes desécurité ci-après :! Utiliser l’appareil uniquement
conformément à l’usage prévu !! Respecter toutes les remarques et
informations figurant dans lemode d’emploi.
1.4 Mauvais usage raisonnablement prévisibleL’appareil ne convient pas pour une utili-sation à l’horizontale (façades), travail enhauteur (plafonds), pour matériaux nonappropriés de sol ou de joints ou pourd’autres domaines d’utilisation que ceuxindiqués. Ne pas utiliser l’appareil partemps humide, pluie, ni dans/sous l’eau.Les modifications effectuées de votrepropre chef sur l’appareil ou tout utilisa-tion non conforme exclue toute garantiedu constructeur pour les dommagespouvant en résulter.
1.5 Risques résiduelsCet appareil répond aux règles de l’art etsatisfait toutes les dispositions de sécu-rité applicables ! Cependant, l’utilisationde l’appareil peut engendrer :! des dangers pour la vie et l’intégrité
corporelle de l’utilisateur ou d’autrespersonnes.
! des nuisances sur l’appareil.! des nuisances sur d’autres biens
matériels.
1.6 Limites de responsabilitéNous vous signalons expressément quenous ne sommes pas responsables desdommages causés par notre appareil,dans la mesure où ces dommagesseraient causés par le non respect dumode d’emploi, une utilisation nonconforme à l’usage prévu, une réparationnon conforme, dans la mesure où, lorsd’un échange de pièces, les pièces
d’origine du fabricant n’auraient pas étéutilisées, ou si la réparation n’a pas étéeffectuée par le Service Après-Vente oupar un professionnel agréé. Ceci est éga-lement valable pour les accessoires.
2 Pour votre sécuritéCe chapitre contient des avertisse-ments et des consignes de sécuritéimportantes que vous devez absolu-ment respecter lors de la manipulationet l’utilisation de l’appareil.
2.1 Consignes élémentairesde sécuritéRespecter les consignes élémentairesde sécurité ci-après afin de manipuleret utiliser l’appareil en toute sécurité :
! Confier les réparations d’appareilspour usage domestique et le jardinuniquement aux ateliers de service.Veuillez commander les pièces derechange auprès de votre conces-sionnaire. S’il n’a pas ces pièces en stock, ilvous les procurera dans les plusbrefs délais.
! Cet appareil répond aux règles del’art et satisfait toutes les disposi-tions de sécurité !
! Des enfants à partir de 16 ans ainsique des personnes dont les capaci-tés physiques, sensorielles ou men-tales sont réduites ou qui ne possè-dent pas d'expérience ou deconnaissances de l'appareil peuventutiliser celui-ci sous surveillance ouaprès avoir été avisés de l'utilisationsûre de l'appareil et après avoircompris les risques susceptibles d'enrésulter. Les enfants ne peuvent pas joueravec l'appareil. Le nettoyage et lamaintenance par l'utilisateur nepeuvent pas être réalisés par desenfants sans surveillance.
RZ_MULTIBRUSH_DE_GB_FR_NL_978410-1_Text_FR 10.11.16 15:47 Seite 33

34
FR
! En cas de fatigue, de maladie ousous l’emprise de l’alcool ou autredrogues ou médicaments, cetappareil ne doit pas être utilisé.
! Ne pas laisser l'appareil sanssurveillance tant qu'il fonctionne.
! Protéger l’appareil contre touteexposition prolongée au soleil etcontre le gel.
! Afin d’éviter des dommages etrisques découlant d’une utilisationnon conforme, vous devez respecterle mode d’emploi et le conserversoigneusement !
! Pendant le nettoyage, porter desvêtements de travail appropriés, tels que chaussures robustes,lunettes de protection, pantalonslongs et éventuellement des gants.Ne pas travailler à pieds nus ou avecdes sandales légères.
! En cas de cession de l’appareil à uneautre personne, lui transmettreaussi le mode d’emploi !
! Utiliser pour l’appareil uniquementdes pièces de rechange et desaccessoires GLORIA d’origine.N’utiliser jamais de pièces derechange / d’accessoires usés,modifiés ou défectueux !
2.2 Consignes de sécurité lorsdu raccordement de l’appareil
MISE EN GARDE ! Danger de mortpar choc électrique !
Danger de mort en cas de contact avecdes câbles ou des pièces sous tension !Aussi, respecter les consignes desécurité ci-après :! Si le câble d’alimentation secteur est
endommagé, celui-ci ne doit êtreremplacé que par un atelier de répa-ration désigné par le constructeurafin d’éviter toute mise en danger !Veuillez vous adresser au construc-teur ou à son service après-vente.
! La tension du secteur doitcorrespondre à la tension (V~)indiquée sur la plaque signalétiquede l’appareil !
! Ne brancher l’appareil que surcourant alternatif, sur une prise decourant avec contact de terre.
! En cas d’utilisation d’une rallongeélectrique, utiliser uniquement uncâble mis à la terre pour utilisationextérieure, d’une section de conduc-teur d’au moins 1,5 mm2 !
! L'appareil doit être utilisé avec undispositif différentiel résiduel (DDR)dont le courant de déclenchementne peut pas dépasser 30 mA.Demandez à votre installateur élec-tricien !
! Débrancher la prise secteur dans lescas suivants :
- en cas de défaut lors dufonctionnement
- avant chaque nettoyage - après l’utilisation
2.3 Consignes de sécurité rela-tives à l’utilisation de l’appareil
MISE EN GARDE ! Danger de mortpar choc électrique !
Danger de mort si l’appareil soustension entre en contact avec de l’eau !Aussi, respecter les consignes desécurité ci-après :! Ne pas utiliser l’appareil les mains
mouillées.! Ne pas plonger l’appareil dans l’eau ni
le nettoyer à l’eau ou l’asperger. L’ap-pareil doit être protégé de l’humidité.Si l’appareil devait tomber dans l’eau,débrancher immédiatement la ficheélectrique. Ne toucher l’eau en aucuncas si l’appareil est encore branché !
! NE JAMAIS rouler avec l’appareilsur la rallonge !
PRUDENCE ! RISQUE DE BRÛLURESUR LES PIÈCES CHAUDES DEL’APPAREIL !
Pendant l’utilisation, des pièces del’appareil risquent de chauffer etd’entraîner des brûlures.
RZ_MULTIBRUSH_DE_GB_FR_NL_978410-1_Text_FR 10.11.16 15:47 Seite 34

35
FR
Aussi, respecter les consignes desécurité ci-après :! Portez des gants de protection lors
d'opérations de montage et denettoyage !
Respectez les mesures de sécuritésuivantes afin d’éviter des blessureset des dommages matériels par unmauvaise usage et une manipulationnon sécurisée de l’appareil.Un mauvais usage peut entraîner desBLESSURES.
PRUDENCE ! RISQUE DE BLESSURELORS DE L’UTILISATION !
! Utilisez l’appareil conformément àl’usage prévu ! Ne travaillez quedans la plage de puissance indiquée.
! Vérifiez avant chaque mise en ser-vice que l’appareil est en bon état. Il ne doit pas être mis en service si :
- les dispositifs de sécurité (interrup-teur de démarrage, caches de pro-tection) et/ou les brosses sontendommagés ou usés.
- l‘appareil présente des dommagesvisibles.
- l’appareil a fait une chute. - des corps étrangers se sont
enroulés autour de l'arbred'entraînement.
Ne désactivez jamais les dispositifs desécurité.! Avant de commencer le nettoyage,
parcourez la surface que vous sou-haitez nettoyer afin d’éviter toutdommage au niveau de l’appareil oud’autres objets et tout danger pourles êtres vivants. Les pierres, mor-ceaux de bois, fils de fer et autrescorps étrangers doivent être retirés.Les objets saisis par l’outil de brosserisquent d’être projetés de manièreincontrôlée. Tenez les tiers à l’écartde la zone dangereuse. Afin d’éviter des blessures, veillez àla sécurité dans la zone de travail.
! Ne jamais utiliser l’appareil sur desfaçades ou autres surfaces similairesmais toujours travailler à la verticalede sorte que les brosses pointent endirection du sol.
! Veillez à ce que les fentes d’aérationsoient libres de toute saleté.
PRUDENCE ! RISQUE DE BLESSURESUITE À LA ROTATION DE L’OUTILDE BROSSE !
! Ne démarrez jamais l’appa-reil en position basculée !
! Ne placez jamais les mainset les pieds à proximité del’outil de brosse en rota-tion ! Gardez une distancesuffisante des mains et despieds par rapport àl’outilde brosse.Les outils de brosse tour-nent par inertie.
! Ne soulevez ou ne portez jamaisl’appareil pendant que le moteurtourne ! Si vous devez transporterl’appareil vers la zone de travail oul’en éloigner ou si vous devez incli-ner l’appareil, arrêtez le moteur etdébranchez la fiche électrique.
! N’enlevez jamais les capots deprotection fournis.
PRUDENCE ! RISQUE DE BLESSUREPAR PROJECTION DE CORPS !
! Ne démarrez ou n’action-nez pas l’appareil, si destiers se trouvent dans lazone de danger.
! Démarrez ou actionnezl’appareil comme décritdans le mode d’emploi.
! L’interrupteur de démarrage desécurité ne peut jamais être fixé nimis en court-circuit.
! Nettoyez uniquement à la lumièredu jour ou avec un éclairage artifi-ciel suffisant.
! N’utilisez jamais l’appareil partemps de pluie.
! N’effectuez jamais de nettoyagelorsque des personnes, en particu-lier des enfants ou des animaux,se trouvent à proximité !
! Veillez à toujours avoir une positionstable et sûre.
! N’avancez l’appareil qu’au pas.
RZ_MULTIBRUSH_DE_GB_FR_NL_978410-1_Text_FR 10.11.16 15:47 Seite 35

36
FR
PRUDENCE ! RISQUE DEBLESSURE PAR MISE ENMARCHE INVOLONTAIRE !
Une mise en marche involontairepeut entraîner des blessures. Pour éviter ce risque, débranchezla fiche électrique si :- vous laissez l’appareil sans
surveillance.- vous effectuez l’entretien,
le contrôle ou le nettoyage de l’appareil.
- l’appareil présente des défautsde fonctionnement.
3 Avant de pouvoir utiliser l’appareil
Ce chapitre vous fournit des informa-tions concernant l’état à la livraison.
3.1 Etat à la livraisonL’appareil est livré en standard commesuit :! Appareil monté avec tube
télescopique! 2. Poignée sur le tube télescopique ! Brosse pour surfaces avec capot de
protection! Brosse à joints avec capot de
protection! 1 x mode d’emploi et informations sur
le produitDes outils éventuels sont joints séparé-ment dans l’emballage.
A
CD
JK
MNP
Q
B
EFG
I
L
O
H
3.2 Parties constituantes de l’appareilA Poignée ergonomiqueB Décharge de tractionC Câble secteurD Interrupteur Marche/Arrêt de sécuritéE Poignée supplémentaireF Tube télescopiqueG Vissage du tube télescopiqueH Capot de protection brosse à jointsI Roue de guidage J Unité de brosse à joints K Verrouillage (2 x à gauche/à droite)L Unité moteur/engrenage M Bras de guidage (amovible)N Brosse pour surfacesO Capot de protection réglableP Bras d’entraînement (amovible)Q Bouton de blocageR Roue de réglage pour la régulation de la vitesse (Speed control)
R
RZ_MULTIBRUSH_DE_GB_FR_NL_978410-1_Text_FR 10.11.16 15:47 Seite 36

37
FR
5 MontageFigures 1 - 6
REMARQUE !
Votre appareil est livré avec la brossepour surfaces montée prête à l’em-ploi. Pour travailler avec la brosse àjoints, les éléments fournis séparémentdoivent être montés en conséquence.
Après avoir sorti l’appareil de l’embal-lage, desserrer la vis (G) . Ensuite,tourner la poignée (A) comme décritdans la figure d'encore 45° etrégler la longueur du tube télesco-pique (F) à votre hauteur de travailconformément aux figures. 5 niveaux de blocage sont possibles.
Au niveau choisi, tourner la poignée(A) d'encore 45° et caler fermement lahauteur du tube télescopique (F) avecle vissage (G).
Étant donné que l’appareil doit tou-jours être guidé et utilisé à 2 mains,monter la poignée supplémentaire (E)comme l’indique la figure , larégler en hauteur et la visser ferme-ment .
6 Mise en service
MISE EN GARDE ! AVANT LA MISEEN SERVICE, LISEZ LE CHAPITRE 2« POUR VOTRE SÉCURITÉ ».
ATTENTION ! Une utilisation nonconforme de l’appareil peutentraîner des dégâts matériels !Aussi, respectez les consignes desécurité ci-après :
Nettoyez la brosse circulaire/à joints(N/J) avant chaque opération denettoyage.
Les « ouïes d’aspiration d’air » surl’unité moteur/engrenage (L) nepeuvent pas être bouchées nirecouvertes.
Vérifiez sur une petite surface, si possible non visible, si le sol quevous désirez nettoyer n’est pasendommagé par l’activité desbrosses.
Ne pas utiliser l’appareil troplongtemps sur la même surface,toujours le faire avancer au pas.
1
2
3
4
5
6
37
4 Caractéristiques techniquesMultiBrushTension : 230 V AC / 50 HzPuissance : 500 wattsVitesse sur la brosse à joints : 650 min-1 à 1600 min-1
Vitesse sur la brosse pour surfaces : 450 min-1 à 1100 min-1
Dimensions Largeur de l'appareil : Brosse pour surfaces 24,0 cm // Brosse à joints 28 cmHauteur de l'appareil (min.) : Brosse pour surfaces 1,15 m // Brosse à joints 1,04 mHauteur de l'appareil (max.) : Brosse pour surfaces 1,35 m // Brosse à joints 1,24 mPoids de l'appareil avec brosse à joints : 2,9 kgPoids de l'appareil avec brosse pour surfaces : 3,6 kgValeur de vibration main-bras : < 3,1 m/s2 (+/- 1,5 m/s2)Niveau de pression acoustique LPA : 71 dB(A)Niveau de puissance acoustique LWA : 92 dB(A)Classe de protection : II
RZ_MULTIBRUSH_DE_GB_FR_NL_978410-2_Text_FR 22.06.17 14:46 Seite 37

38
FR
6.1 FonctionnementFigures 7 - 11
Enfilez la boucle de la rallonge dans ladécharge de traction (B) prévue à ceteffet dans la poignée (A) et fixez-ladans la nervure prévue à cet effet.
REMARQUE !! La puissance de l’appareil peut se
dégrader en cas d’utilisation d’une ral-longe inutilement trop longue (> 25 m).
! En cas d’utilisation de tourets decâbles, dévider entièrement le câble.
! La section des conducteurs du câbleutilisé doit être de 1,5 mm2.
Placez l’appareil toujours en parallèleau sol qui doit être nettoyé. Détermi-nez l’angle de travail le plus agréablepour vous mais aussi le plus efficace etréglez ensuite le capot de protection(O) à 5 crans de blocage de telle sorteque la lèvre en caoutchouc se trouvejuste au-dessus du sol.
! Assurez-vous que les surfaces ànettoyer soient libres de tout objet, telque pierres, vis, etc. susceptibles d’être projetés en hauteur.
Raccordez l’ appareil à uneprise de courant (courant alternatif230 V) à l’aide d’une rallonge.
PRUDENCE ! RISQUE DE BLESSURESUITE À LA ROTATION DE L’OUTILDE BROSSE !
! Ne démarrez jamais l’appareil enposition basculée !
! Ne démarrez ou n’actionnez pasl’appareil si des tiers se trouventdans la zone de danger.
! Ne placez jamais les mains et lespieds à proximité de l’outil debrosse en rotation !
! N’effectuez jamais de nettoyagelorsque des personnes, en particu-lier des enfants ou des animaux, se trouvent à proximité !
! N’utilisez jamais l’appareil en cas depluie.
Vous pouvez régler la vitesse de labrosse en actionnant la régulation dela vitesse sur la roue de réglage (R).
Tenez fermement l’appareil par la poignée (A) ainsi que par la poignéesupplémentaire (E) et allumez l’appa-reil en actionnant et maintenant l’interrupteur Marche / Arrêt de sécurité (D) situé dans la poignée (A).
! Si vous interrompez le travail ou encas de danger, relâchez immédiate-ment l’interrupteur Marche / Arrêt desécurité (D).
6.1.2 Montage des outils de brosseFigures 12 - 20
PRUDENCE ! RISQUE DE BRÛLURESUR LES PIÈCES CHAUDES DEL’APPAREIL !
Lors du montage ou de modifications,les éléments d’entraînement del’appareil ou certains composantsrisquent d’être encore très chauds etpeuvent provoquer d’éventuellesbrûlures. Aussi, respectez les consignes desécurité ci-après :! Portez des gants de protection lors
du montage !
8
9
11
7
10
Recommandations de vitesse pour les brosses GLORIA
Position 1-2 brosse douce (brosse en bois)
Position 3-4 brosse dure (brosse en pierre)
Position 5-6 joint brosse (brosse métallique)
RZ_MULTIBRUSH_DE_GB_FR_NL_978410-1_Text_FR 10.11.16 15:48 Seite 38

39
FR
Démontage de la brosse pour surfaces etmontage consécutif de la brosse à joints
! Éteignez l’appareil et débranchez lecâble secteur (C) de la prise.
Ouvrez le verrouillage (K) du bras deguidage (M), comme l’indique la figure.
Tout en actionnant le verrouillage (K)enlevez le bras de guidage (M) etensuite la brosse pour surfaces (N).
Ouvrez à présent le verrouillage (K)du bras d’entraînement (P),
comme indiqué dans la figure, et enle-vez tout en actionnant le verrouillage(K) le bras d’entraînement (P) avec lecapot de protection (O).
! La brosse pour surfaces est maintenantdémontée.
Enfoncez la roue de guidage (I), commeindiqué dans la figure, du côté guidagede l’unité moteur/engrenage (L). Pous-sez à présent le verrouillage (K) en posi-tion ouverte , maintenez celui-ci etpoussez la roue de guidage (I) plus loinsur le bras d’appui jusqu’à la butée.Relâchez le verrouillage à ressort (K).La roue de guidage (I) est bloquéelorsque le verrouillage retourne spon-tanément en position initiale .
Enfoncez l’ unité de brosse à jointsmontée du côté entraînement del’unité moteur/engrenage (L), commeindiqué dans la figure. Poussez le verrouillage (K) en positionouverte , maintenez-le et poussez l’unité de brosse à joints plus loin dansl’arbre d’entraînement jusqu’à la butée.Relâchez le verrouillage à ressort (K),l’unité de brosse à joints est bloquée
lorsque le verrouillage retourne spon-tanément en position initiale .
Démontage de la brosse à joints et mon-tage consécutif de la brosse pour surfaces
! Démontez la brosse à joints conformé-ment à la manipulation et le fonction-nement décrits ci-dessus.
Ouvrez le verrouillage (K) du brasd’entraînement (P) et enfoncez touten actionnant le verrouillage (K) lebras d’entraînement (P) avec le capotde protection (O) du côté entraîne-ment de l’unité moteur/engrenage (L),comme indiqué dans la figure. Relâchez le verrouillage à ressort (K),le bras d’entraînement est bloquélorsque le verrouillage retournespontanément en position initiale .
REMARQUE !
S’il est impossible de pousser l’unitéd’entraînement (P) sur l’arbre d’entraî-nement, accédez au-dessous du capotde protection (O) et tournez l’emboutd’entraînement à six pans jusqu’à pou-voir pousser l’unité d’entraînement (P)légèrement et sans forcer sur l’arbred’entraînement.
Enfoncez la brosse pour surfaces (N)sur l’embout d’entraînement à sixpans et ensuite le bras de guidage(M), comme l’indique la figure, ducôté guidage de l’unité moteur /engrenage (L).
Poussez à présent le verrouillage (K)en position ouverte , maintenez-leet poussez le bras de guidage (M) plusloin sur le bras d’appui jusqu’à labutée. Relâchez le verrouillage àressort (K). Le bras de guidage (M) estbloqué lorsque le verrouillage retournespontanément en position initiale .
15
16
17
17
18
14
13
12
19
RZ_MULTIBRUSH_DE_GB_FR_NL_978410-1_Text_FR 10.11.16 15:48 Seite 39

40
FR
REMARQUE !
Lors du montage de la brosse poursurfaces, veillez à ce que la piècelatérale du capot de protection sur lebras de guidage (M) soit reliée defaçon solidaire et bien hermétiqueavec le capot de protection.
6.1.3 Utilisation de la brosse poursurfaces sur structures de surfacegrossières, telles que carrelages,dalles de trottoir, béton lavé,cailloux, etc.Figure 21
Placez l’appareil en marche parallèle-ment à la surface à traiter. Tenez l’appareil dans l’angle de travailet veillez à ce que la lèvre en caout-chouc sur le capot de protection setrouve juste au-dessus du sol. Adoptez une vitesse au pas régulièreet poussez l’appareil devant vous. En fonction du degré de saleté, exercez une pression légère àmoyenne sur la brosse pour surfaces,adaptez votre rythme de travail audegré de saleté.
REMARQUE !
! Travaillez toujours en parallèle etmaintenez l’appareil éloigné du corps.
! Pour des travaux en bordure, le côtéplus étroit de l’appareil doit pointervers le mur.
! En cas de saleté tenace, vous pouvezdéplacer l’appareil en avant et enarrière sur cet endroit (comme unbalai-brosse), jusqu’à obtenir lerésultat souhaité.
! En cas de degré important de saleté,un nettoyage humide est égalementpossible. À l’aide d’un pulvérisateur,humectez la surface à nettoyer avecde l’eau ou un produit de nettoyage.Un pulvérisateur GLORIA convient iciparfaitement. Après le nettoyage humide, rincez lasurface avec de l'eau.
PRUDENCE ! RISQUE DE BLESSUREPAR L’OUTIL DE BROSSE ENROTATION PAR INERTIE !
! En cours de travail, ne soulevez pasl’appareil en marche du sol souspeine d’engendrer un risque dehappement !
6.1.4 Utilisation de la brosse poursurfaces sur des revêtements enbois (disponible en option en tantqu’accessoire)
ATTENTION ! Danger de dommages matérielsen cas d’utilisation incorrecte del’appareil ! Aussi, respectez laconsigne de sécurité suivante :
! N’utilisez jamais la brosse durepour surfaces avec les poils noirspour nettoyer des revêtements enbois, car les poils durs risquentd’attaquer la surface en bois etdonc endommager le bois.
REMARQUE !
! Pour nettoyer des revêtements enbois, utilisez la brosse douce poursurfaces avec les poils jaunes/noirs.Celle-ci est disponible en tantqu’accessoire GLORIA et n’est pascomprise dans les fournitures.
! Vous trouverez les consignes demontage et d’utilisation dans lesinformations de produit de la « brosse pour surfaces pourrevêtements en bois ».
20
21
RZ_MULTIBRUSH_DE_GB_FR_NL_978410-1_Text_FR 10.11.16 15:48 Seite 40

41
FR
6.1.5 Utilisation et remplacementde la brosse à jointsFigures 22 - 24
Installez la brosse à joints commedécrit au chapitre 6.1.2. Placez l’appareil avec la roue de gui-dage et la brosse à joints en parallèlesur le joint à traiter. Tenez l’appareil dans l’angle de travailet veillez à ce que la lèvre en caout-chouc sur le capot de protection (H)se trouve juste au-dessus du sol.
REMARQUE !
Pour régler le capot de protection (H), tournez le capot de protection à7 crans de blocage dans la positioncomme décrit au point « 22 ».
Alignez la brosse à joints de façon cen-trale par rapport au joint, adoptez unevitesse au pas régulière et poussezl’appareil devant vous. Adaptez votre rythme de travail audegré de saleté.
REMARQUE !
! Travaillez toujours le long du joint etmaintenez l’appareil éloigné du corps.
! En cas de saleté tenace, vous pouvezdéplacer l’appareil en avant et enarrière sur cet endroit (comme unbalai-brosse) jusqu’à obtenir le résultatsouhaité.
PRUDENCE ! RISQUE DE BLESSUREPAR L’OUTIL DE BROSSE ENROTATION PAR INERTIE !
! En cours de travail, ne soulevez pasl’appareil en marche du sol souspeine d’engendrer un risque dehappement !
6.2 Instructions d’utilisation! N’utilisez pas l’appareil pour éliminer
des mauvaises herbes humides.! N’utilisez jamais la brosse à joints pour
nettoyer des planchers ou des ter-rasses en bois.
! Nettoyez uniquement des joints quisont intacts. N’utilisez pas l’appareilpour nettoyer des joints endommagés,effrités ou qui présentent des fissures.
! Après le nettoyage, rincez minutieuse-ment les surfaces nettoyées.
! Remplacez dès que possible desbrosses usées et des poils effilochés.
! Éteignez l’appareil avant de commen-cer la bande de nettoyage suivante(planchers en bois).
6.3 Remplacement de la brosseà jointsFigures 25 - 29
! Éteignez l’appareil et débranchez lecâble secteur (C) de la prise.
Ouvrez le verrouillage (K) de l’unitéde brosse à joints (J), comme indiquédans la figure, et retirez l’unité debrosse à joints.
Dévissez la vis à six pans creux de 2-3 rotations hors du boîtier de labrosse à joints jusqu’à ce que le capotde protection (H) tourne et s'enlèvesans difficulté.
Poussez à présent sur bouton de blo-cage (Q) qui bloque l’arbre d’entraîne-ment et dévissez la vis à six pans creuxqui bloque la brosse à joints (J) horsde l’arbre d’entraînement ( ). Enlevez le disque de la brosse à joints.
ATTENTION ! Une utilisation nonconforme de l’appareil peutentraîner des dégâts matériels !Aussi, respectez les consignes desécurité suivantes :
22
24
25
26
27
23
RZ_MULTIBRUSH_DE_GB_FR_NL_978410-1_Text_FR 10.11.16 15:48 Seite 41

42
FR
! Ne jamais actionner le bouton deblocage (Q) pendant que la brosseà joints tourne.
Tirer la brosse à joints (J) depuis labride sur l'arbre et la remplacer parune nouvelle.
Le montage s’effectue dans l’ordreinverse ( ).
! Vérifiez après chaque entretien ou nettoyage si tous les vis, boulons,écrous et dispositifs de sécurité sontbien serrés et fixés.
7 Mise hors service & Entreposage
7.1 Mise hors serviceFigure 30
! Mettre l’appareil hors service en relâ-
chant l’« interrupteur marche/arrêt »(D) situé dans la poignée.
! Débrancher l’appareil du secteur.
PRUDENCE ! RISQUE DE BLESSUREPAR L’OUTIL DE BROSSE ENROTATION PAR INERTIE !
! En éteignant l’appareil, ne le soule-vez pas sous peine d’engendrer unrisque de happement !
Pour les pauses de travail ou aprèsutilisation de l’appareil, ne déposezpas celui-ci sur la brosse car les poilsrisquent d’être endommagés. Toujoursdéposer l’appareil suspendu oucouché, comme indiqué dans la figure.
7.2 Entreposage
PRUDENCE ! La manipulation del’appareil peut engendrer desrisques avec des blessures pourconséquence.
Conservez donc l’appareil hors de por-tée des enfants. ! Libérer l’appareil de toute saleté et
corps étrangers.! Entreposer l’appareil suspendu, sec et
à l’abri du gel.
8 Maintenance & Nettoyage
PRUDENCE ! RISQUE DE BRÛLURESUR LES PIÈCES CHAUDES DEL’APPAREIL !
Lors du montage ou de modifications,les éléments d’entraînement del’appareil ou certains composantsrisquent d’être encore très chauds etpeuvent provoquer d’éventuellesbrûlures. Aussi, respecter lesconsignes de sécurité suivantes :! Portez des gants de protection lors
de la maintenance & du nettoyage !
8.1 Nettoyage
MISE EN GARDE ! DANGER DEMORT PAR CHOC ÉLECTRIQUE !
Danger de mort si l’appareil soustension entre en contact avec de l’eau !Aussi, respecter les consignes desécurité ci-après :! Éteignez l’appareil et débranchez
le câble secteur (C) de la prise.! Ne pas plonger l’appareil dans
l’eau ni le nettoyer à l’eau oul’asperger. L’appareil doit êtreprotégé de l’humidité.
Si l’appareil tombe dans l’eau,débrancher immédiatement lafiche électrique.Ne toucher l’eau en aucun cas sil’appareil est encore branché !
! Nettoyez l’appareil de l’extérieur avecun chiffon humide ou une brossedouce.
30
28
29
RZ_MULTIBRUSH_DE_GB_FR_NL_978410-1_Text_FR 10.11.16 15:48 Seite 42

43
FR
N’utilisez aucun agent de nettoyage durou abrasif.! Veillez à ce que les fentes d’aération
soient libres de toute saleté.! En cas de saleté tenace sur l’unité des
rouleaux et/ou de brosse à joints,démontez celle-ci pour la nettoyer soi-gneusement (voir montage / démon-tage comme décrit au chapitre 6.1.2).Nettoyez les brosses dans l’eau ouavec un jet d’eau dur ainsi qu’avec une brosse dure.
! Utiliser uniquement des pièces derechange GLORIA d’origine poureffectuer des réparations.
! Confier les réparations uniquementaux ateliers de service GLORIA.
8.2 Usure des brossesREMARQUE !
! Remplacez la brosse pour surfaceslorsqu’elle est usée et que sondiamètre n’est plus que d’environ ø 90 mm.
! Remplacez la brosse à joints lorsqu’elleest usée et que son diamètre n’est plusque d’environ ø 90 mm.
9 Elimination des déchets & législation
9.1 Protection de l'environne-ment & élimination d'appareils
! Ce symbole inscrit sur le produit, lemode d'emploi ou l'emballage indiquequ'à la fin de sa durée de vie, ce pro-duit ne doit pas être mis à la poubelleavec les déchets ménagers.
! Apporter l'appareil y compris les acces-soires, brosse pour surfaces, brosse àjoints, etc. à un centre de collecte pourle recyclage. Les matières sont récupé-rables conformément à leur marquage.Par le recyclage réglementaire d'unvieux produit, la réutilisation de matériaux ou d'autres formes de réutilisation, vous contribuez de façonimportante à la protection de notreenvironnement.
REMARQUE !! Pour connaître l'adresse d'un point
de collecte, adressez-vous à votremunicipalité.
9.2 Elimination de l'emballage! Les matériaux d'emballage sont sélec-
tionnés dans un souci de non pollutionet en vue du traitement des déchets etsont donc recyclables. Le retour de l'emballage dans le circuitdes matériaux permet d'économiserdes matières premières et de réduire la quantité des déchets.
! Eliminez les matériaux d'emballagedont vous n'avez plus besoin selon lesprescriptions locales en vigueur.
Sous réserve de modifications techniques !
RZ_MULTIBRUSH_DE_GB_FR_NL_978410-1_Text_FR 10.11.16 15:48 Seite 43

44
NL
INHOUDSOPGAVE 1 Algemene informatie over deze gebruiksaanwijzing . . . . . . . . . . . . . . . . . 44 1.1 Symbolen op het apparaat en in de gebruiksaanwijzing . . . . . . . . . . . . . . . . . . . 44 1.2 Waarschuwingsaanwijzingen . . . . . . . . . . . . . . . . . . . . . . . . . . . . . . . . . . . . . . . . . . . . . 45 1.3 Gebruik overeenkomstig de bestemming . . . . . . . . . . . . . . . . . . . . . . . . . . . . . . . . . 45 1.4 Redelijkerwijs voorzienbaar verkeerd gebruik . . . . . . . . . . . . . . . . . . . . . . . . . . . . . 46 1.5 Restgevaren . . . . . . . . . . . . . . . . . . . . . . . . . . . . . . . . . . . . . . . . . . . . . . . . . . . . . . . . . . . . . . 46 1.6 Aansprakelijkheidsbeperking . . . . . . . . . . . . . . . . . . . . . . . . . . . . . . . . . . . . . . . . . . . . . 46 2 Voor uw veiligheid . . . . . . . . . . . . . . . . . . . . . . . . . . . . . . . . . . . . . . . . . . . . . . . . . 46 2.1 Fundamentele veiligheidsaanwijzingen . . . . . . . . . . . . . . . . . . . . . . . . . . . . . . . . . . . 46 2.2 Veiligheidsaanwijzingen voor de aansluitingvan het apparaat . . . . . . . . . . . . . 47 2.3 Veiligheidsaanwijzingen voor de bediening van het apparaat. . . . . . . . . . . . . . 47 3 Alvorens het apparaat te gebruiken. . . . . . . . . . . . . . . . . . . . . . . . . . . . . . . . . 49 3.1 Aangeleverde staat . . . . . . . . . . . . . . . . . . . . . . . . . . . . . . . . . . . . . . . . . . . . . . . . . . . . . . . 49 3.2 Apparaatelementen . . . . . . . . . . . . . . . . . . . . . . . . . . . . . . . . . . . . . . . . . . . . . . . . . . . . . . 49 4 Technische gegevens. . . . . . . . . . . . . . . . . . . . . . . . . . . . . . . . . . . . . . . . . . . . . . . 50 5 Montage . . . . . . . . . . . . . . . . . . . . . . . . . . . . . . . . . . . . . . . . . . . . . . . . . . . . . . . . . . 50 6 Ingebruikneming . . . . . . . . . . . . . . . . . . . . . . . . . . . . . . . . . . . . . . . . . . . . . . . . . . 50 6.1 Gebruik . . . . . . . . . . . . . . . . . . . . . . . . . . . . . . . . . . . . . . . . . . . . . . . . . . . . . . . . . . . . . . . . . . 50 6.1.2 Montage van borstelgereedschap. . . . . . . . . . . . . . . . . . . . . . . . . . . . . . . . . . . . . . . . . 51 6.1.3 Gebruik van oppervlakteborstel op ruwe oppervlakken .. . . . . . . . . . . . . . . . . . . 52 6.1.4 Gebruik van oppervlakteborstel op houten buitenoppervlakken. . . . . . . . . . . 53 6.1.5 Gebruik en uitwisseling van voegenborstels. . . . . . . . . . . . . . . . . . . . . . . . . . . . . . . 53 6.2 Gebruikersinstructies . . . . . . . . . . . . . . . . . . . . . . . . . . . . . . . . . . . . . . . . . . . . . . . . . . . . . 53 6.3 Voegenborstel verwisselen . . . . . . . . . . . . . . . . . . . . . . . . . . . . . . . . . . . . . . . . . . . . . . . 54 7 Buitenbedrijfstelling en opslag . . . . . . . . . . . . . . . . . . . . . . . . . . . . . . . . . . . . . 54 7.1 Buitenbedrijfstelling . . . . . . . . . . . . . . . . . . . . . . . . . . . . . . . . . . . . . . . . . . . . . . . . . . . . . . 54 7.2 Opslag . . . . . . . . . . . . . . . . . . . . . . . . . . . . . . . . . . . . . . . . . . . . . . . . . . . . . . . . . . . . . . . . . . . 54 8 Onderhoud en reiniging . . . . . . . . . . . . . . . . . . . . . . . . . . . . . . . . . . . . . . . . . . . . 54 8.1 Reiniging. . . . . . . . . . . . . . . . . . . . . . . . . . . . . . . . . . . . . . . . . . . . . . . . . . . . . . . . . . . . . . . . . 55 8.2 Slijtage van borstels . . . . . . . . . . . . . . . . . . . . . . . . . . . . . . . . . . . . . . . . . . . . . . . . . . . . . . 55 9 Afvalverwerking en wettelijke informatie . . . . . . . . . . . . . . . . . . . . . . . . . . . 55 9.1 Milieubescherming en afvalverwerking van het apparaat . . . . . . . . . . . . . . . . . . 55 9.2 Afvalverwerking van de verpakking . . . . . . . . . . . . . . . . . . . . . . . . . . . . . . . . . . . . . . . 55
1 Algemene informatie over deze gebruiksaanwijzingDeze gebruiksaanwijzing is een onderdeel van het GLORIA-apparaat en moet altijd inde nabijheid van het apparaat beschikbaar zijn. De gebruiksaanwijzing geeft u belangrijke aanwijzingen en informatie voor een veiliggebruik van het apparaat! De gebruiksaanwijzing moet volledig worden gelezen door iedereen die met bedie-ning, gebruik of onderhoud van het apparaat is belast. De gebruiksaanwijzing bewaren en aan nieuwe eigenaren overhandigen!Alle waarschuwingsaanwijzingen zijn bedoeld voor uw persoonlijke veiligheid!
1.1 Symbolen op het apparaat en in de gebruiksaanwijzing
LET OP!
Niet aanraken! Verbrandingsgevaar door hete oppervlakken!
Beschermentegen regen en vocht!
Intrekgevaar!
RZ_MULTIBRUSH_DE_GB_FR_NL_978410-1_Text_NL 10.11.16 15:48 Seite 44

45
NL
Lees de bedieningshandleiding!
Haal de kabelstekker uit hetstopcontact in geval vaneen beschadigde stroom-kabel of wanneer de kabelin de knoop zit!
Veiligheidsbril verplicht!
Veiligheidshandschoenenverplicht!
Veiligheidsschoenenverplicht!
Niet onder de machi-
ne grijpen!
Afstand houden!Gevaar voorrondvliegendedelen!
Niet kantelen!
Oude elektrische enelektronische apparatenNIET via het gangbarehuisvuil afvoeren.
Milieuvriendelijkeafvoer!
Recycleerbareverpakkingsmaterialen!
1.2 Waarschuwings aanwijzingen
WAARSCHUWINGEen waarschuwingsaanwijzing van ditgevarenniveau wijst op een dreigendegevaarlijke situatie. Volg deze waarschuwingsaanwijzingenop om dodelijke ongelukken of zeerzwaar letsel te vermijden.
LET OPEen waarschuwingsaanwijzing van dezegevarenklasse verwijst naar een moge-lijke gevaarlijke situatie die, indien zeniet wordt vermeden, persoonlijk letselkan veroorzaken. Volg de waarschu-wingsaanwijzingen om risico op per-soonlijk letsel te vermijden.
ATTENTIEEen waarschuwingsaanwijzing vandeze gevarenklasse verwijst naarmogelijk gevaar dat, indien het nietwordt vermeden, materiële schadekan veroorzaken.Volg de waarschuwingsaanwijzingenom risico op materiële schade tevermijden.
AANWIJZING!Een aanwijzing geeft extra informatieof toont afbeeldingen die de bedie-ning en de werking van het apparaatvergemakkelijken.
1.3 Gebruik overeenkomstigde bestemmingDit GLORIA-apparaat is bedoeld voorparticulier gebruik buitenshuis, operven en bevestigde oppervlakken intuinconstructies.Het naleven van de meegeleverdegebruiksaanwijzing is een voorwaardevoor het correcte gebruik van het appa-raat. De gebruiksaanwijzingen bevat ookbedienings-, onderhouds- en reparatie -aanwijzingen. Het apparaat moet uitsluitend handmatigworden gebruikt als reinigings- enschoonmaakapparaat voor voegen- enoppervlaktereiniging van buitenopper-vlakken zoals vloertegels, plavuizen, klinkers en houten vlonders.
RZ_MULTIBRUSH_DE_GB_FR_NL_978410-2_Text_NL 22.06.17 15:43 Seite 45

46
NL
LET OP! GEVAAR DOOR NIETCORRECT GEBRUIK VAN HETAPPARAAT!
Niet correct gebruik van het apparaatkan gevaren meebrengen. Volg daaromde volgende veiligheidsaanwijzingen:! Gebruik het apparaat uitsluitend
overeenkomstig het correcte gebruikvan het apparaat.
! Volg alle aanwijzingen en informa-tie in de gebruiksaanwijzing.
1.4 Redelijkerwijs voorzienbaarverkeerd gebruikHet apparaat is niet geschikt voor horizon-taal gebruik (muren), werkzaamhedenboven het hoofd (plafonds), ongeschiktevloer- of voegmaterialen of voor anderetoepassingen dan het aangegeven gebruik .Het apparaat mag niet worden gebruikt bijnat weer, regen en onder water. De fabri-kant is niet aansprakelijk voor schade alsgevolg van onjuist gebruik of eigenmachti-ge wijzigingen van het apparaat.
1.5 RestgevarenDit apparaat voldoet aan de erkende tech-nische voorschriften en de desbetreffendeveiligheids bepaling en! Desondanks kun-nen bij het gebruik van het apparaat:! Gevaar voor het leven van de bediener
of andere personen ontstaan.! Beschadigingen van het apparaat ont-
staan.! Beschadigingen en andere materiële
schade ontstaan.
1.6 AansprakelijkheidsbeperkingWij wijzen er nadrukkelijk op dat wij vol-gens de wet betreffende productaanspra-kelijkheid niet aansprakelijk zijn voor dedoor onze apparaten veroorzaakte scha-de, in zoverre deze worden veroorzaaktdoor het niet naleven van de gebruiksaan-wijzing, door onjuist gebruik, door onvak-kundige reparaties, door gebruik van nietoriginele reserveonderdelen of door repa-raties die niet door onze klantendienst ofeen bevoegde specialist zijn uitgevoerd.Dit geldt ook voor accessoires.
2 Voor uw veiligheidIn dit hoofdstuk vindt u belangrijkewaarschuwings- en veiligheidsaanwij-zingen die gevolgd moeten worden bijgebruik van het apparaat.
2.1 Fundamentele veilig-heidsaanwijzingenVolg de onderstaande fundamenteleveiligheidsaanwijzingen voor veiligeomgang met en gebruik van hetapparaat:
! Reparaties van apparaten voor huisen tuin mogen uitsluitend door deservicepunten worden uitgevoerd.Vervangingsonderdelen moet u bijuw specialist aanschaffen. Indien niet op voorraad, zorgt despecialist voor een snelle bestellingen levering.
! Dit apparaat voldoet aan de erkendetechnische voorschriften en de des-betreffende veiligheidsbepalingen!
! Dit apparaat kan door kinderenvanaf 16 jaar en door personen metverminderde fysische, sensorischeof mentale vaardigheden of gebrekaan ervaring en kennis wordengebruikt, wanneer ze onder toe-zicht staan of ten aanzien van hetveilig gebruik van het apparaat zijnonderwezen en de daaruit resulte-rende gevaren begrijpen. Kinderen mogen niet met het appa-raat spelen. Reiniging en door de gebruiker ver-richt onderhoud mogen niet wor-den verricht door kinderen die nietonder toezicht staan.
! Dit apparaat mag niet wordengebruikt bij vermoeidheid of ingeval van ziekte, of onder invloedvan alcohol, verdovende middelenof geneesmiddelen.
! Houd altijd toezicht op een inbedrijf zijnd apparaat.
RZ_MULTIBRUSH_DE_GB_FR_NL_978410-1_Text_NL 10.11.16 15:48 Seite 46

47
NL
! Bescherm het apparaat tegen lang-durige blootstelling aan directe zon-nestralen of vorst.
! Om schade en gevaren als gevolgvan oneigenlijk gebruik te voor -komen, dient men zich aan degebruiks aanwijzing te houden endeze zorgvuldig te bewaren!
! Draag tijdens het reinigen geschiktewerkkleding, zoals stevige schoenen,veiligheidsbril, lange broek en even-tueel handschoenen. Werk niet metblote voeten of lichte sandalen.
! Wordt uw apparaat door een anderepersoon gebruikt, dan hoeft u degebruiks aanwijzing met het appa-raat te overhandigen!
! Gebruik voor het apparaat uitslui-tend de originele GLORIA vervan-gings- en reserveonderdelen.Gebruik nooit versleten, veranderdeof defecte reserveonderdelen / accessoires!
2.2 Veiligheidsaanwijzingen voorde aansluiting van het apparaat
WAARSCHUWING! LEVENSGEVAARDOOR ELEKTRISCHE SCHOKKEN!
Levensgevaar bij contact met onderspanning staande kabels en onderde-len! Volg daarom de volgende veiligheidsaanwijzingen:! Om gevaarlijke situaties te voorko-
men, mogen beschadigde stroom-kabels uitsluitend door erkendereparatiebedrijven van de fabrikantworden gerepareerd ! Neem hiervoor contact op met deklantendienst van de fabrikant.
! De stroomspanning moet met destroomgegevens (V) op het appa-raat over eenkomen!
! Sluit het apparaat alleen op wissel-stroom en op een geaard stopcon-tact aan.
! Gebruik voor de verlenging van destroomkabel uitsluitend een geaar-de verlengkabel met een minimalekabeldiameter van 1,5 mm2 !
! Voor het apparaat moet een aardlek-schakelaar (ALS) met een activerings-stroom van maximaal 30 mA worden
gebruikt. Neem hiervoor contact opmet uw elektro- installateur!
! Haal de stekker van de stroomkabeluit het stopcontact:
- in geval van storingen tijdensgebruik
- voor elke reiniging - na gebruik
2.3 Veiligheidsaanwijzingen voorde bediening van het apparaat
WAARSCHUWING! LEVENSGEVAARDOOR ELEKTRISCHE SCHOKKEN!
Er bestaat levensgevaar als hetonder spanning staande appa-raat in contact komt met water!Volg daarom de volgende veilig-heidsaanwijzingen:! Gebruik het apparaat niet met
natte handen. ! Het apparaat niet in water onder-
dompelen of met water besproeienof reinigen. Het apparaat moettegen elke vorm van vocht wordenbeschermd. Haal onmiddellijk destekker van de stroomkabel uit hetstopcontact als het apparaat perongeluk in het water valt. Grijp niet in het water als het appa-raat nog is aangesloten!
! NOOIT met het apparaat over deverlengkabel gaan!
LET OP! VERBRANDINGSGEVAAR DOORHETE APPARAATONDERDELEN!
Delen van het apparaat kunnen tijdensgebruik heet worden en brandwondenveroorzaken. Respecteer daarom devolgende veiligheids aanwijzingen:! Draag veiligheidshandschoenen bij
montage en reiniging!Respecteer de volgende veiligheids-voorzorgsmaatregelen om verwon-dingen en materiële schade doormisbruik of onvakkundige omgangmet het product te vermijden.Misbruik kan VERWONDINGENveroorzaken.
RZ_MULTIBRUSH_DE_GB_FR_NL_978410-1_Text_NL 10.11.16 15:48 Seite 47

48
NL
LET OP! VERWONDINGSGEVAARBIJ BEDIENING!
! Gebruik het apparaat uitsluitendovereenkomstig het correctegebruik! Gebruik het apparaatuitsluitend binnen het aangegevenvermogenbereik.
! Vóór elk gebruik van het apparaatmoet u de perfecte staat van hetapparaat controleren. U mag hetapparaat niet gebruiken wanneer:
– deveiligheidsinrichtingen (inschakelknop, veiligheidsafdek-kingen) en/of borstels beschadigdof versleten zijn;
– het apparaat zichtbare schade vertoont;
– het apparaat gevallen is; – er zich vreemde bestanddelen om
de aandrijfas hebben gewikkeld. Zet de veiligheidsinrichtingen nooit
buiten gebruik.! Controleer eerst het te reinigen
oppervlak om beschadiging van hetapparaat of letsel van levendewezens of beschadiging van voor-werpen te voorkomen. Hierbij moe-ten stenen, stukken hout, draden envergelijkbare andere vreemdebestanddelen worden verwijderd. De door het borstelgereedschapgegrepen voorwerpen kunnen opongecontroleerde wijze uit het appa-raat worden geslingerd. Houd derden buiten de gevaarzone.Let op de veiligheid van de werk-plaats om letsel te voorkomen.
! Gebruik het apparaat nooit voormuren of gelijkaardige toepassin-gen, maar alleen voor verticalewerkzaamheden waarbij borstelsnaar de grond zijn gericht.
! Let erop dat de ventilatieopenin-gen altijd vuilvrij zijn.
LET OP! VERWONDINGSGEVAARDOOR ROTEREND BORSTEL-GEREEDSCHAP!
! Start het apparaat nooit inliggende positie!
! Houd handen en voeten uitde buurt van het roterendeborstelgereedschap!Houd uw handen en voetenaltijd uit de buurt van hetborstelgereedschap. Na uitschakeling blijvenonderdelen van het bor-stelgereedschap nalopen.
! Transporteer of til het apparaatnooit op met draaiende motor! Schakel de motor uit en haal de stekker uit het stopcontact als u hetapparaat naar en van het werkop-pervlak moet transporteren of als uhet moet kantelen.
! Verwijder nooit de meegeleverdebeschermkap.
LET OP! VERWONDINGSGEVAARDOOR RONDVLIEGENDE DELEN!
! Start of activeer het apparaat nietwanneer er zich derden binnen degevarenzone bevinden.
! Start of activeer het appa-raat zoals beschreven in degebruiksaanwijzing.
! De veiligheidsinschakel-knop mag nooit wordengeblokkeerd of kortgesloten.
! Reinig uitsluitend bij daglicht ofbij voldoende kunstlicht.
! Gebruik het apparaat nooit in deregen.
! Gebruik het borstelgereedschapnooit wanneer er personen, vooralkinderen of dieren, in de buurt zijn!
! Houd bij het reinigen altijd een veili-ge en vaste houding aan.
! Duw het apparaat uitsluitend inlooptempo.
RZ_MULTIBRUSH_DE_GB_FR_NL_978410-1_Text_NL 10.11.16 15:48 Seite 48

49
NL
LET OP! VERWONDINGSGEVAAR DOORONBEDOELDE INSCHAKELING!
Onbedoelde inschakeling kan letselveroorzaken. Om dit te vermijden,haalt u altijd de stekker uit hetstopcontact wanneer:
- u het apparaat zonder toezicht laatstaan;
- bij onderhoud, controle of reinigingvan het apparaat;
- als het apparaat bedrijfsstoringenvertoont.
3 Alvorens het apparaat te gebruikenIn dit hoofdstuk vindt u informatieover de aangeleverde staat van hetapparaat.
3.1 Aangeleverde staatHet apparaat wordt standaard als volgtgeleverd:! Apparaat met gemonteerde
telescoopbuis! 2e handvat aan telescoopbuis ! Oppervlakteborstel met beschermkap! Voegenborstel met beschermkap! 1 x gebruiksaanwijzing en
productinformatieOverig gereedschap wordt afzonderlijkverpakt meegeleverd.
A
CD
JK
MNP
Q
B
EFG
I
L
O
H
3.2 ApparaatelementenA Ergonomisch handvatB TrekontlastingC StroomkabelD Aan-/uit-veiligheidsknopE Extra handgreepF TelescoopbuisG Schroefverbinding telescoopbuisH Beschermkap voegenborstelI Geleidewiel J Voegenborsteleenheid K Vergrendeling (2 x links/rechts)L Motor-/overbrengingseenheid M Geleidingsarm (afneembaar)N OppervlakteborstelO Verstelbare beschermkapP Aandrijfarm (afneembaar)Q VergrendelingsknopR Instelwiel voor toerentalregeling (Speed control)
R
RZ_MULTIBRUSH_DE_GB_FR_NL_978410-1_Text_NL 10.11.16 15:48 Seite 49

50
NL
5 MontageAfbeeldingen 1 - 6
AANWIJZING!
Uw apparaat wordt met gemonteerdeoppervlakteborstel gebruiksklaargeleverd. De meegeleverde losseonderdelen dienen voor de montagevan de voegenborstel.
Draai na verwijdering uit de verpakkingde schroefverbinding (G) los .
Draai vervolgens het handvat (A) zoalsafgebeeld 45° en pas de lengte van
de telescoopbuis (F) aan uw werkhoog-te aan. Er zijn 5 vergrendelingsstanden
mogelijk.
Draai in de gewenste stand het
handvat (A) nog eens 45° en draai dehoogte van de telescoopbuis (F)handvast met schroefverbinding (G).
Aangezien het apparaat altijd met 2
handen moet worden bediend, moet
u de extra handgreep (E) zoals afge-beeld in de afbeelding monte-
ren: stel de hoogte in en schroef de
extra handgreep (E) vast .
6 Inbedrijfstelling
WAARSCHUWING! LEES HOOFDSTUK 2 “VOOR UWVEILIGHEID” VOOR U HET APPARAAT IN GEBRUIK NEEMT.
ATTENTIE! Onjuist gebruik van hetapparaat kan materiële schade ver-oorzaken! Respecteer daarom devolgende veiligheidsaanwijzingen:
Reinig de wals- /voegenborstel (N/J)voor elke reinigingsbeurt.
De luchtaanzuigopeningen van demotor-/overbrengingseenheid (L)mogen niet verstopt raken of wordenbedekt.
Test op een klein stuk van het opper-vlak, liefst op een onzichtbare plek,of de te reinigen vloer niet door deborstelactiviteit wordt beschadigd.
Gebruik het apparaat niet te lang opdezelfde plek en houd altijd eenlooptempo aan.
6.1 GebruikAfbeeldingen 7 - 11
Schuif de lus van de verlengkabel in dedaarvoor bestemde trekontlasting (B)in handvat (A) en bevestig ze in hetdaarvoor bestemde verbindingsstuk.
4
3
2
1
7
5
6
50
4 Technische gegevensMultiBrushSpanning: 230 VAC / 50 Hz Vermogen: 500 WattToerental voegenborstel: 650 min-1 tot 1600 min-1
Toerental oppervlakteborstel: 450 min-1 tot 1100 min-1
Afmetingen Apparaatbreedte: Oppervlakteborstel 24,0 cm//voegenborstel 28 cmApparaathoogte (min.): Oppervlakteborstel 1,15 m//voegenborstel 1,04 mApparaathoogte (max.): vlakke borstel 1,35 m//voegenborstel 1,24 mApparaatgewicht met voegenborstel: 2,9 kg Apparaatgewicht met oppervlakteborstel: 3,6 kg Hand-arm trillingswaarde: < 3,1 m/s2 (+/- 1,5 m/s2)Geluidsdrukniveau LPA: 71 db(A)Geluidsvermogeniveau LWA: 92 db(A)Beschermingsklasse: II
RZ_MULTIBRUSH_DE_GB_FR_NL_978410-2_Text_NL 22.06.17 14:47 Seite 50

51
NL
AANWIJZING!
! Bij het gebruik van een te lange verleng-kabel (> 25 m) kan het vermogen vanhet apparaat negatief worden beïnvloed.
! Bij het gebruik van een kabelhaspelmoet u de kabel volledig uitrollen.
! De kabeldiameter van de gebruiktekabel moet 1,5 mm2 bedragen.
Plaats het apparaat altijd parallel op dete reinigen vloer. Bepaal de voor u aan-genaamste en doeltreffendste werk-hoek en stel vervolgens de in 5 stan-den vergrendelbare beschermkap (O)in zodat de rubberen omranding netboven de vloer ligt.
! Vergewis u ervan dat het te reinigenoppervlak vrij is van voorwerpen zoalsstenen, schroeven enz. die omhoogkunnen worden geslingerd.
Sluit het apparaat met de verlengkabel aan op een stopcontact (230 Vwisselstroom).
LET OP! VERWONDINGSGEVAARDOOR ROTEREND BORSTEL-GEREEDSCHAP!
! Start het apparaat nooit in gekantel-de positie!
! Start of activeer het apparaat nietwanneer er zich derden in het geva-rengebied bevinden.
! Houd handen en voeten uit de buurt van het roterende borstel-gereedschap!
! Gebruik het borstelgereedschapnooit wanneer er personen, vooralkinderen of dieren in de buurt zijn!
! Gebruik het apparaat nooit in deregen.U kunt het toerental van de borstelregelen door het toerental met instel-wiel (R) in te stellen.
Houd het apparaat goed vast aan hethandvat (A) en de extra handgreep (E),en schakel het apparaat in door de aan-/uit-veiligheidsknop (D) in hethandvat (A) in te drukken en ingedruktte houden.
! Laat de aan-/uit-veiligheidsknop (D)onmiddellijk los bij werkonderbrekin-gen of gevaar.
6.1.2 Montage van borstelgereed-schapAfbeeldingen 12 - 20
LET OP! VERBRANDINGSGEVAAR DOORHETE APPARAATONDERDELEN!
Bij montage of ombouwwerkzaamhe-den kunnen de aandrijfonderdelen vanhet apparaat of componenten nog ergheet zijn en brandwonden veroorzaken. Respecteer daarom de volgendeveiligheids aanwijzingen:! Draag veiligheidshandschoenen bij
de montage!
Demontage van oppervlakteborstel met aansluitende montage van de voegenborstel
! Schakel het apparaat uit en haal destekker van stroomkabel (C) uit hetstopcontact.
Open de vergrendeling (K) van degeleidingsarm (M), zoals afgebeeld.
Haal de geactiveerde vergrendeling (K)van de geleidingsarm (M) en vervol-gens de oppervlakteborstel (N).
Open nu de vergrendeling (K) vanaandrijfarm (P), zoals afgebeeld, en ver-wijder bij geactiveerde vergrendeling (K)de aandrijfarm (P) met beschermkap (O).
! De oppervlakteborstel is nu met succesgedemonteerd.
8
9
10
11
12
13
14
Aanbevelingen snelheid voor GLORIA borstelsPositie 1-2 zachte borstel (wood borstel)Positie 3-4 harde borstel (stone borstel)Positie 5-6 Voegenborstel (staalborstel)
RZ_MULTIBRUSH_DE_GB_FR_NL_978410-1_Text_NL 10.11.16 15:48 Seite 51

52
NL
Steek het geleidewiel (I), zoals afge-beeld, op de geleidingszijde van demotor-/overbrengingseenheid(L).Schuif nu de vergrendeling (K) in degeopende stand , houd deze vast endruk het geleidewiel (I) verder op deopname-as tot aan de aanslag. Laat deveerondersteunde vergrendeling (K)los. Het geleidewiel (I) is geblokkeerdzodra de vergrendeling zelfstandig inuitgangsstand terugkeert .
Steek de gebruiksklaar gemonteerdevoegenborsteleenheid op de aandrijfzij-de van de motor-/overbrengingseen-heid (L), zoals afgebeeld. Schuif de ver-grendeling (K) in de geopende stand ,houd deze vast en druk de voegen-borsteleenheid verder op de aandrijfastot de aanslag. Laat de veeronder-steunde vergrendeling (K) los. De voegenborsteleenheid is geblok-keerd zodra de vergrendeling zelfstan-dig in de uitgangsstand terugkeert .
Demontage van de voegenborstel met aan-sluitende montage van de oppervlakteborstel! Demonteer de voegenborstel volgens
eerder beschreven instructies.
Open de vergrendeling (K) van deaandrijfarm (P) en steek bij geactiveer-de vergrendeling (K) de aandrijfarm (P)met beschermkap (O)op de aandrijfzij-de van de motor-/overbrengingseen-heid (L), zoals afgebeeld. Laat de veer-ondersteunde vergrendeling (K) los.De aandrijfarm is geblokkeerd zodrade vergrendeling zelfstandig inuitgangsstand terugkeert .
AANWIJZING!Lukt het u niet om de aandrijfeenheid(P) op de aandrijfas te schuiven, grijpdan onder de beschermkap (O) endraai de aandrijfzeskant tot de aandrijf-eenheid (P) gemakkelijk en zondergeweld op de aandrijfas kan wordenverschoven.
Steek de oppervlakteborstel (N) op deaandrijfzeskant en vervolgens de gelei-dingsarm (M) op de geleidingszijdevan de motor-/overbrengingseenheid(L), zoals afgebeeld.
Schuif nu de vergrendeling (K) in degeopende stand , houd deze vast endruk de geleidingsarm (M) verder opde opname-as tot aan de aanslag. Laatde veerondersteunde vergrendeling(K) los. De geleidingsarm (M) is geblok-keerd zodra de vergrendeling zelfstan-dig in uitgangsstand terugkeert .
AANWIJZING!
Let er bij de montage van de opper-vlakteborstel op dat het zijstuk van debeschermkap nauw aansluit op degeleidingsarm (M).
6.1.3 Gebruik van de oppervlakte-borstel op ruwe oppervlakken zoalsplavuizen, voetpaden, gepolierdbeton, steengoed enz.
Afbeelding 21
Plaats het uitgeschakelde apparaatparallel op de te bewerken ondergrond.Houd het apparaat in de werkhoek enkijk of de rubberen omranding van debeschermkap net boven de vloer ligt.Loop in regelmatig tempo en schuif hetapparaat voor u uit. Afhankelijk van devervuilingsgraad oefent u een gemid-delde druk op de oppervlakteborstel uiten past u uw werktempo aan.
AANWIJZING!
! Werk altijd parallel en houd het appa-raat uit de buurt van uw lichaam.
! Bij werkzaamheden langs randenmoet de smalle rand van het apparaatnaar de wand wijzen.
! Bij hardnekkig vuil kunt u het appa-raat voor- en achterwaarts bewegen(zoals een bezem) tot u het gewensteresultaat heeft bereikt.
16
17
15
17
18
19
20
21
RZ_MULTIBRUSH_DE_GB_FR_NL_978410-1_Text_NL 10.11.16 15:49 Seite 52

53
NL
! Bij een hoge vervuilingsgraad is ookeen vochtreiniging mogelijk. Gebruikeen sproeier om het te reinigen opper-vlak te bevochtigen met water of eenreinigingsmiddel. Hiervoor is een GLORIA-sproeier ideaal.Spoel na de vochtreiniging het opper-vlak met water.
LET OP! VERWONDINGSGEVAARDOOR NALOPEND BORSTEL-GEREEDSCHAP!
! Til een ingeschakeld apparaat nietvan de vloer. Hierdoor ontstaatintrekgevaar!
6.1.4 Gebruik van oppervlakteborstelop houten buitenoppervlakken (optio-neel als accessoires verkrijgbaar)
ATTENTIE! Door onjuist gebruikvan het apparaat bestaat risico opmateriële schade! Respecteer daarom de volgendeveiligheidsaanwijzingen:
! Gebruik nooit de harde oppervlak-teborstel met de zwarte haren voorde reiniging van houten buiten-vloeren aangezien deze borstel eenagressieve uitwerking heeft endaardoorhet hout kan beschadigen.
AANWIJZING!! Gebruik voor reiniging van houten
buitenvloeren de zachte oppervlakte-borstel met de gele/zwarte haren.Deze is als GLORIA accessoire verkrijg-baar en wordt niet meegeleverd.
! Montage- en gebruiksaanwijzingenvindt u in de productinformatie“Oppervlakteborstel voor houten buitenvloeren“.
6.1.5 Gebruik en uitwisseling vanvoegenborstelsAfbeeldingen 22 - 24
Monteer de voegenborstel zoalsbeschreven in hoofdstuk 6.1.2. Plaats het apparaat parallel met geleidewiel en voegenborstel op de te
bewerken voegen. Houd het apparaatin de werkhoek en kijk of de rubberenomranding van de beschermkap (H)net boven de vloer ligt.
AANWIJZING!
Om de beschermkap (H) in te stellen, draait u de in 7 standen vergrendelba-re beschermkap in de positie, zoalshierboven beschreven bij punt “22”.
Richt de voegenborstel centraal op devoegen, ga met een gelijkmatig loop-tempo te werk en schuif het apparaatvoor u uit. Pas uw werktempo aan devervuilingsgraad aan.
AANWIJZING!! Werk altijd langs de voegen en houd
het apparaat uit de buurt van uwlichaam.
! Bij hardnekkig vuil kunt u het apparaatvoor- en achterwaarts bewegen (zoalseen bezem) tot u het gewenste resul-taat heeft bereikt.
LET OP! VERWONDINGSGEVAARDOOR NALOPEND BORSTEL-GEREEDSCHAP!
! Til een ingeschakeld apparaat nietvan de vloer. Hierdoor ontstaatintrekgevaar!
6.2 Gebruikersinstructies! Verwijder met het apparaat geen nat
onkruid.! Reinig nooit houten oppervlakken of
terrassen met de voegenborstel.! Reinig alleen onbeschadigde voegen.
Beschadigde of gescheurde voegenmogen niet met het apparaat wordengereinigd.
! Spoel na reiniging de gereinigdeoppervlakken grondig af.
! Versleten of uitgerafelde borstelsmoeten tijdig worden vervangen.
! Schakel het apparaat uit alvorens metde volgende reinigingsbaan (bijv.houten terrassen) te beginnen.
22
23
24
RZ_MULTIBRUSH_DE_GB_FR_NL_978410-1_Text_NL 10.11.16 15:49 Seite 53
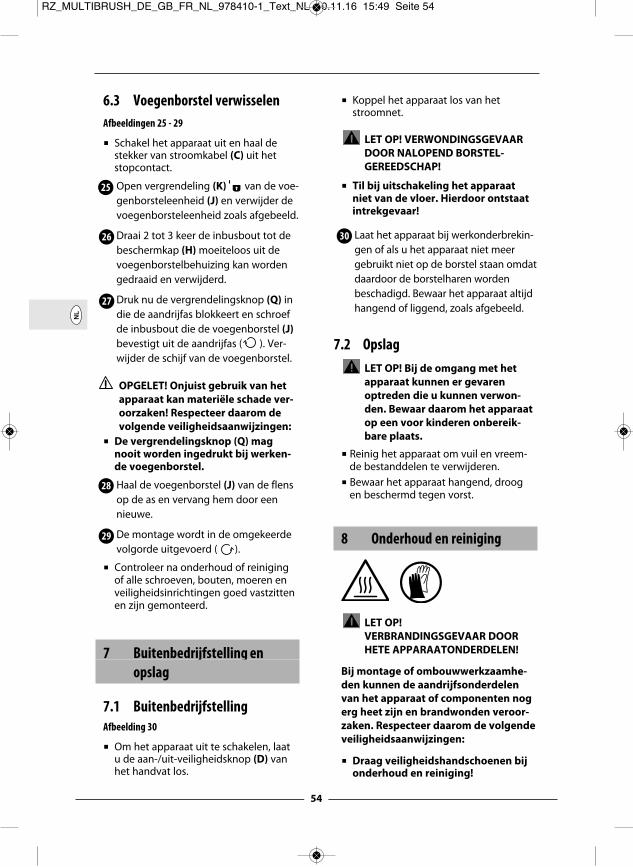
54
NL
6.3 Voegenborstel verwisselenAfbeeldingen 25 - 29
! Schakel het apparaat uit en haal destekker van stroomkabel (C) uit hetstopcontact.
Open vergrendeling (K) van de voe-genborsteleenheid (J) en verwijder devoegenborsteleenheid zoals afgebeeld.
Draai 2 tot 3 keer de inbusbout tot debeschermkap (H) moeiteloos uit devoegenborstelbehuizing kan wordengedraaid en verwijderd.
Druk nu de vergrendelingsknop (Q) indie de aandrijfas blokkeert en schroefde inbusbout die de voegenborstel (J)bevestigt uit de aandrijfas ( ). Ver-wijder de schijf van de voegenborstel.
OPGELET! Onjuist gebruik van hetapparaat kan materiële schade ver-oorzaken! Respecteer daarom devolgende veiligheidsaanwijzingen:
! De vergrendelingsknop (Q) magnooit worden ingedrukt bij werken-de voegenborstel.
Haal de voegenborstel (J) van de flensop de as en vervang hem door eennieuwe.
De montage wordt in de omgekeerdevolgorde uitgevoerd ( ).
! Controleer na onderhoud of reinigingof alle schroeven, bouten, moeren enveiligheidsinrichtingen goed vastzittenen zijn gemonteerd.
7 Buitenbedrijfstelling en opslag
7.1 BuitenbedrijfstellingAfbeelding 30
! Om het apparaat uit te schakelen, laatu de aan-/uit-veiligheidsknop (D) vanhet handvat los.
! Koppel het apparaat los van hetstroomnet.
LET OP! VERWONDINGSGEVAARDOOR NALOPEND BORSTEL-GEREEDSCHAP!
! Til bij uitschakeling het apparaatniet van de vloer. Hierdoor ontstaatintrekgevaar!
Laat het apparaat bij werkonderbrekin-gen of als u het apparaat niet meergebruikt niet op de borstel staan omdatdaardoor de borstelharen wordenbeschadigd. Bewaar het apparaat altijdhangend of liggend, zoals afgebeeld.
7.2 OpslagLET OP! Bij de omgang met hetapparaat kunnen er gevarenoptreden die u kunnen verwon-den. Bewaar daarom het apparaatop een voor kinderen onbereik-bare plaats.
! Reinig het apparaat om vuil en vreem-de bestanddelen te verwijderen.
! Bewaar het apparaat hangend, droogen beschermd tegen vorst.
8 Onderhoud en reiniging
LET OP! VERBRANDINGSGEVAAR DOORHETE APPARAATONDERDELEN!
Bij montage of ombouwwerkzaamhe-den kunnen de aandrijfsonderdelenvan het apparaat of componenten nogerg heet zijn en brandwonden veroor-zaken. Respecteer daarom de volgendeveiligheidsaanwijzingen :
! Draag veiligheidshandschoenen bijonderhoud en reiniging!
25
26
27
30
28
29
RZ_MULTIBRUSH_DE_GB_FR_NL_978410-1_Text_NL 10.11.16 15:49 Seite 54

55
NL
8.1 ReinigingWAARSCHUWING! LEVENSGEVAARDOOR ELEKTRISCHE SCHOKKEN!
Er bestaat levensgevaar als het onderspanning staande apparaat in contactkomt met water! Respecteer daarom devolgende veiligheidsaanwijzingen:! Schakel het apparaat uit en haal de
stekker van stroomkabel (C) uit hetstopcontact.
! Het apparaat niet in water onder-dompelen of met water besproeienof reinigen. Het apparaat moet tegenelke vorm van vocht wordenbeschermd. Haal onmiddellijk destekker van de stroomkabel uit hetstopcontact als het apparaat perongeluk in het water valt. Grijp niet in het water als het appa-raat nog is aangesloten!
! Reinig de buitenkant van het apparaatmet een vochtige doek of zachte bor-stel. Gebruik geen agressieve of schu-rende reinigingsmiddelen.
! Let erop dat de ventilatieopeningenaltijd vuilvrij zijn.
! Bij sterk vervuiling demonteert u dewals- en/of voegenborsteleenheid envoert u een grondige reiniging uit (ziemontage/demontage zoals beschrevenin hoofdstuk 6.1.2). Reinig de borstel-haren in water, met een harde water-straal en een harde borstel.
! Gebruik bij reparaties uitsluitend origi-nele GLORIA-vervangingsonderdelen.
! Laat reparaties uitsluitend doorGLORlA-servicepunten uitvoeren.
8.2 Slijtage van borstels
AANWIJZING!! Zodra de oppervlakteborstel door slij-
tage een diameter van ø ong. 90 mmbereikt, moet hij worden vervangen.
! Zodra de voegenborstel door slijtageeen diameter van ø ong. 90 mmbereikt, moet hij worden vervangen.
9 Afvalverwerking en wettelijke informatie
9.1 Milieubescherming en afvalverwerking van het apparaat! Dit symbool op het product, de
gebruiksaanwijzing of de verpakkinggeeft aan dat het apparaat op het eindevan de technische levensduur niet alsnormaal huishoudelijk huisvuil magworden verwerkt.
! Het apparaat en accessoires, zoalsoppervlakteborstel en voegenborsteletc., moeten voor recycling bij een inza-melpunt worden ingeleverd. De werkstoffen kunnen, in overeen-stemming met hun classificatie,opnieuw worden gebruikt. Met het inleveren van het oude appa-raat voor recycling, het hergebruik vanmaterialen of correcte recycling openige andere wijze draagt u bij tot debescherming van het milieu.
AANWIJZING!! Vraag aan uw gemeente waar u het
apparaat voor recycling kunt inleveren.
9.2 Afvalverwerking van de verpakking! Het verpakkingsmateriaal is op milieu-
vriendelijke wijze en afvalverwerkings-technisch perspectief te scheiden endaarom recyclebaar. Het opnieuw introduceren van de ver-pakking in de materiaalkringloop spaartgrondstoffen en verminder de afval-stroom.
! Laat niet meer gebruikt verpakkings-materiaal volgens de plaatselijke voor-schriften als afval verwerken.
Technische wijzigingen voorbehouden!
RZ_MULTIBRUSH_DE_GB_FR_NL_978410-1_Text_NL 10.11.16 15:49 Seite 55

GLORIA Haus-und Gartengeräte GmbHDärmannsbusch 7 58456 Witten l GERMANYTel.: ++49 (0) 2302-700 0Fax: ++49 (0) 2302-700 46
Geräte für Haus und Garten 978 4
10 -
02
2006
17
SERVICE-HOTLINE& +49 (0) 180 / 55 899 09*(* 14 Cent/min. für Anrufe aus dem deutschen Festnetz)
e-mail: [email protected]: www.gloriagarten.de
RZ_MULTIBRUSH_DE_GB_FR_NL_978410-2_Ruecken 22.06.17 14:43 Seite 1