operations & maintenance preventive maintenancespace.cofc.edu/documents/aim o and...
TRANSCRIPT

ASSETWORKS, INC.
Operations & Maintenance Preventive Maintenance
REV NOV15
AiM™ Work Management Training Guide
2
Table of Contents Navigation ............................................................................................................................................................................... 3
Logging into AiM ................................................................................................................................................................. 3
Preventative Maintenance ...................................................................................................................................................... 4
PM Standards Creation ....................................................................................................................................................... 4
PM Template Creation ...................................................................................................................................................... 13
Template Projection Date Generation .............................................................................................................................. 23
PM Generation .................................................................................................................................................................. 25
AiM™ Work Management Training Guide
3
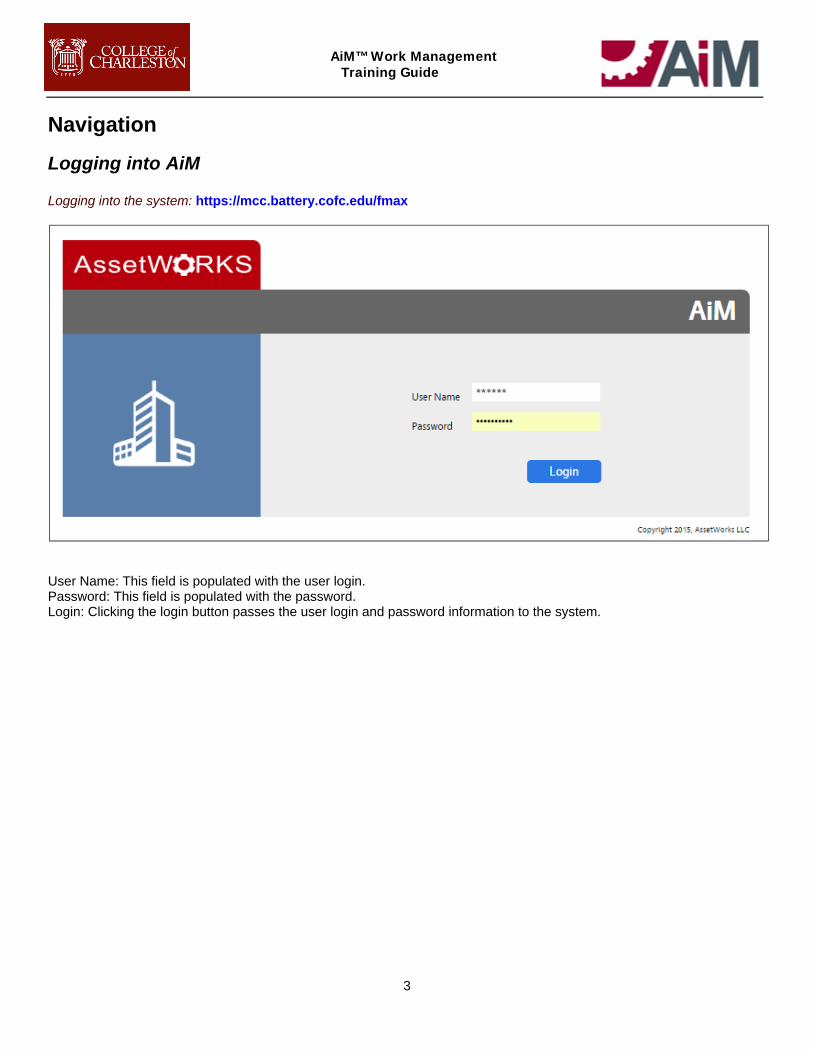
Navigation
Logging into AiM
Logging into the system: https://mcc.battery.cofc.edu/fmax
User Name: This field is populated with the user login. Password: This field is populated with the password. Login: Clicking the login button passes the user login and password information to the system.
AiM™ Work Management Training Guide
4
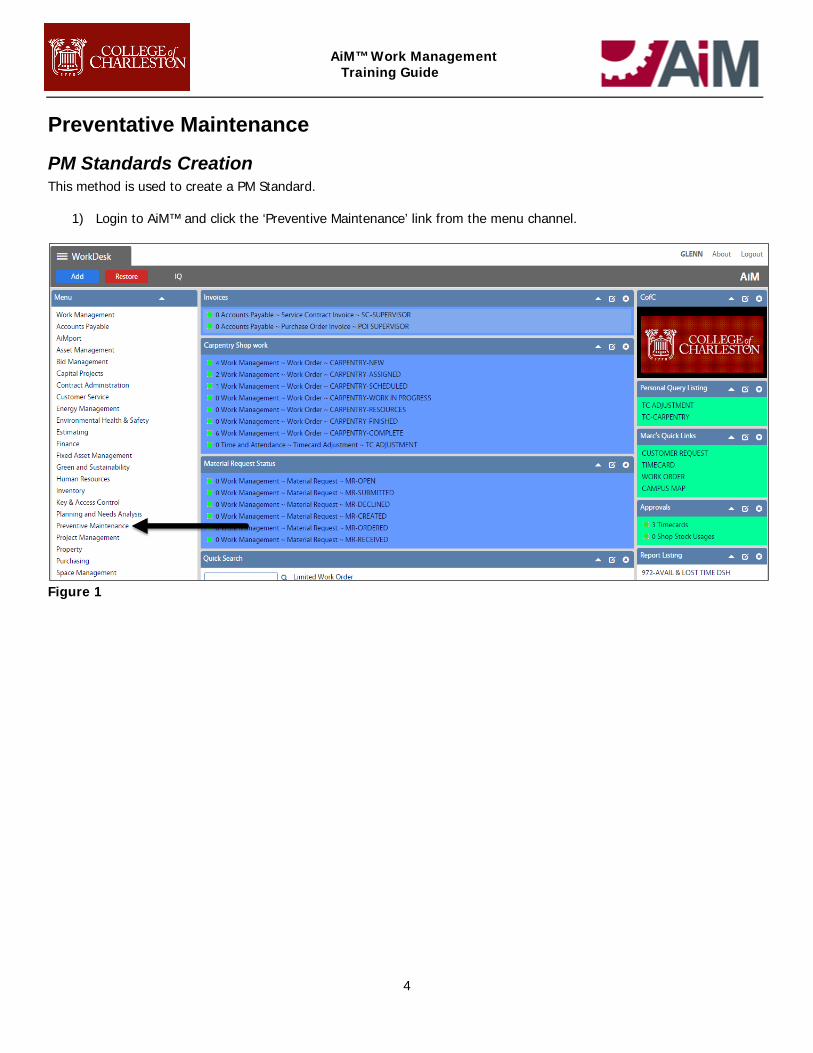
Preventative Maintenance
PM Standards Creation This method is used to create a PM Standard.
1) Login to AiM™ and click the ‘Preventive Maintenance’ link from the menu channel.
Figure 1

AiM™ Work Management Training Guide
5
2) From the ‘Preventive Maintenance’ menu channel, click the ‘PM Standards' link.
Figure 2
3) Click the ‘New’ button.
Figure 3
AiM™ Work Management Training Guide
6
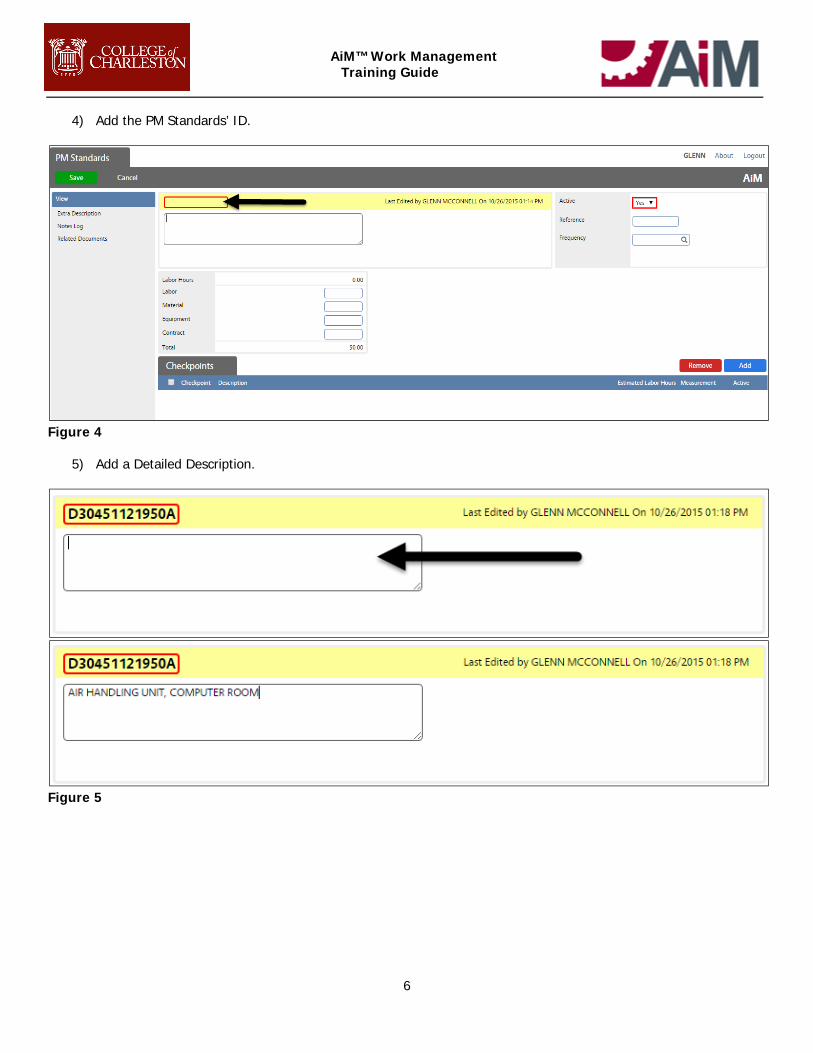
4) Add the PM Standards’ ID.
Figure 4
5) Add a Detailed Description.
Figure 5

AiM™ Work Management Training Guide
7
6) Click the ‘Frequency’ Zoom icon.
Figure 6
7) Select the appropriate Frequency. Click the Frequency link.
Figure 7
8) Optional: All Labor, Material, Equipment, and/or Contract estimated dollars amounts.
Figure 8
AiM™ Work Management Training Guide
8
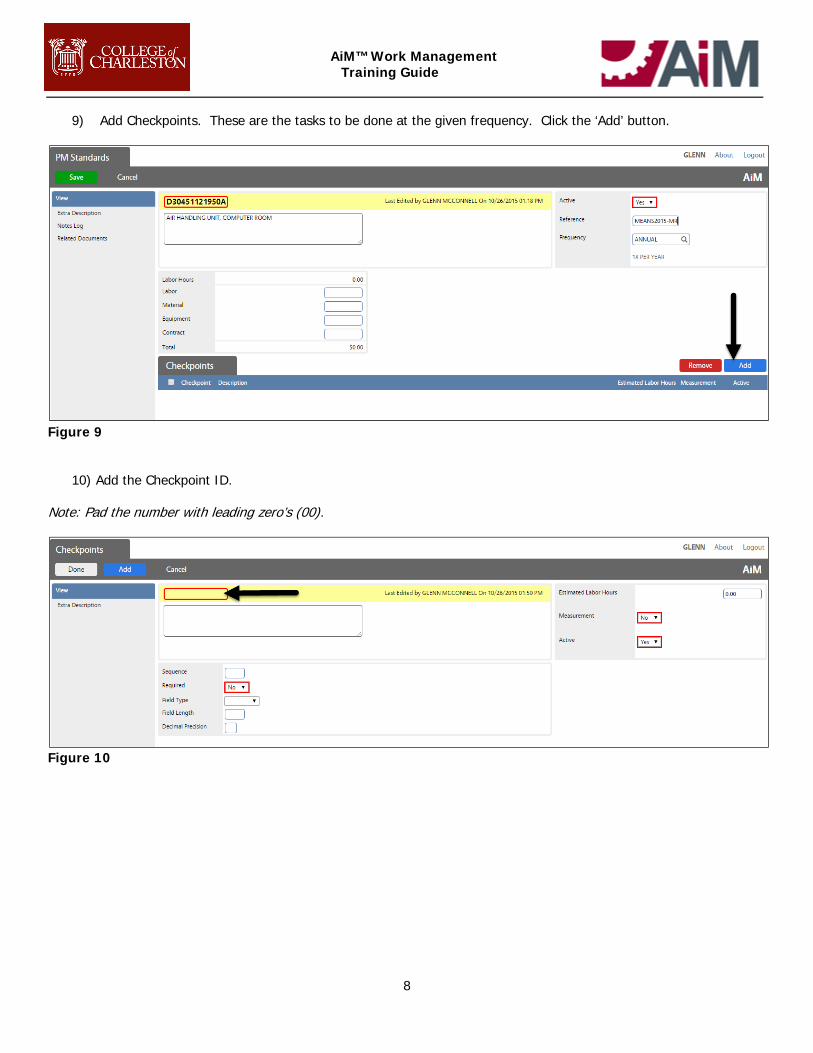
9) Add Checkpoints. These are the tasks to be done at the given frequency. Click the ‘Add’ button.
Figure 9
10) Add the Checkpoint ID. Note: Pad the number with leading zero’s (00).
Figure 10

AiM™ Work Management Training Guide
9
11) Add Checkpoint instructions.
Figure 11
12) Add Checkpoints Hours. Note: These are fractional, in tenths of 1 hour. For example, .06 is ten minutes.
Figure 12
AiM™ Work Management Training Guide
10
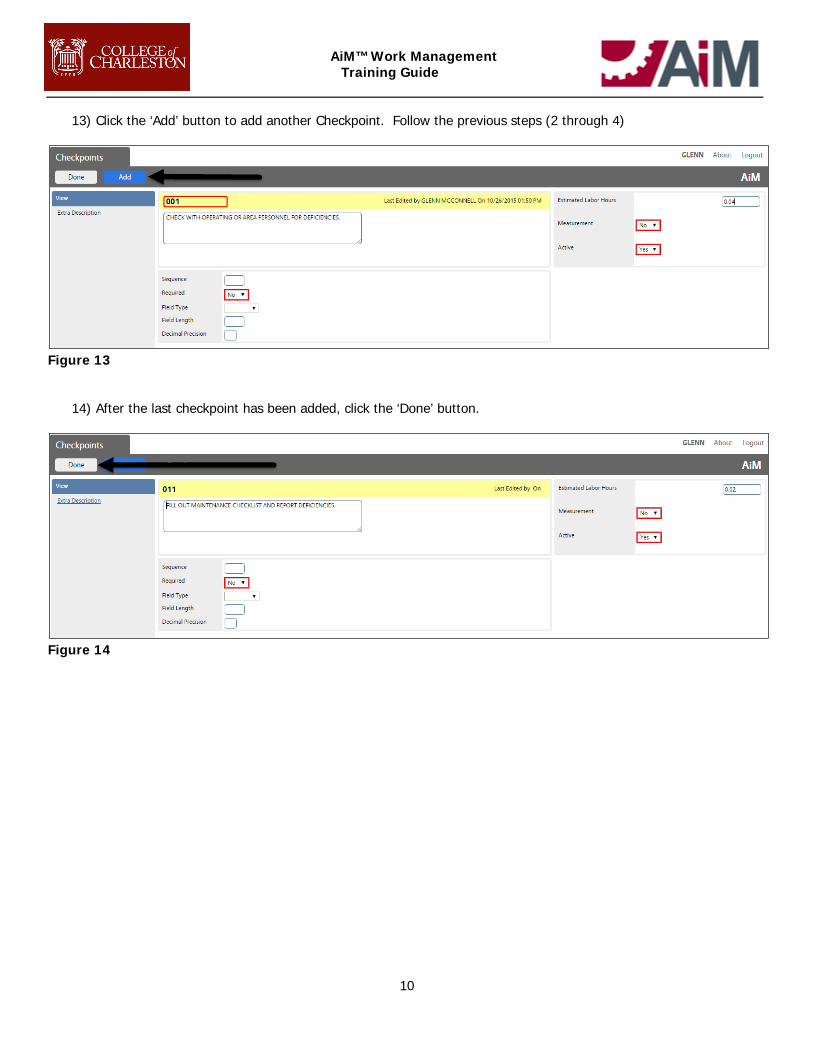
13) Click the ‘Add’ button to add another Checkpoint. Follow the previous steps (2 through 4)
Figure 13
14) After the last checkpoint has been added, click the ‘Done’ button.
Figure 14

AiM™ Work Management Training Guide
11
15) Click the ‘Save’ button.
Figure 15
16) Click the AiM™ logo to return to the main Work Desk.
Figure 16
AiM™ Work Management Training Guide
12
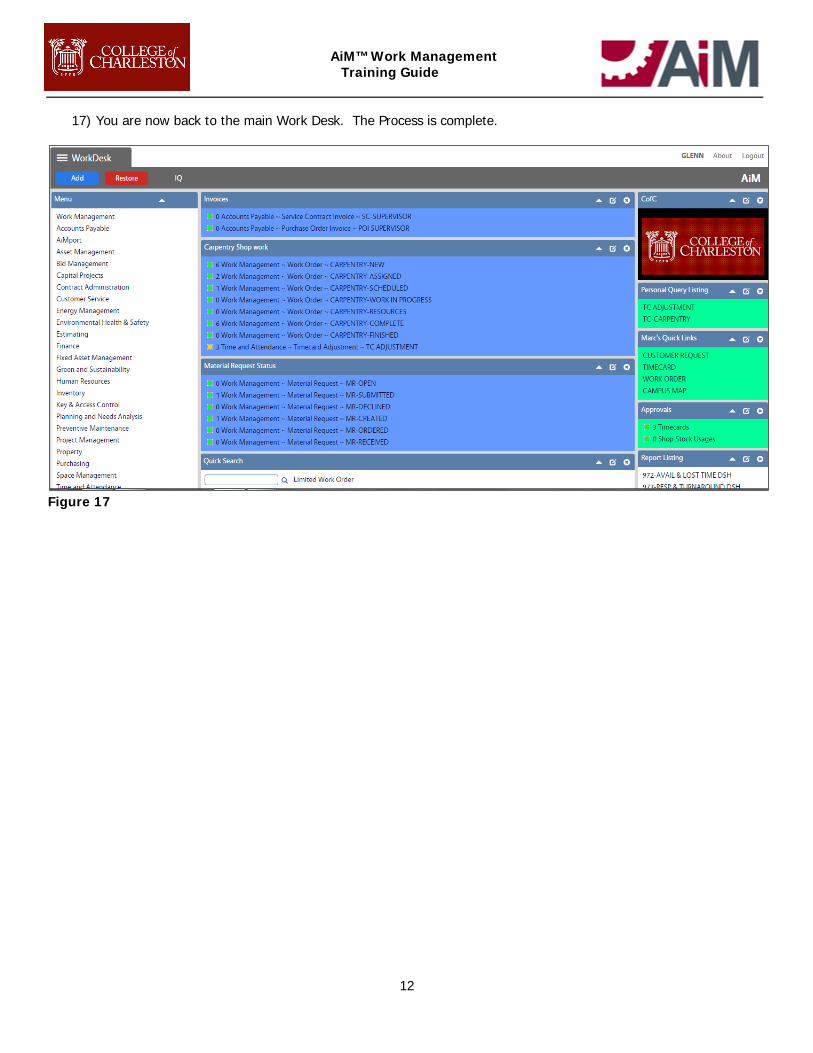
17) You are now back to the main Work Desk. The Process is complete.
Figure 17
AiM™ Work Management Training Guide
13
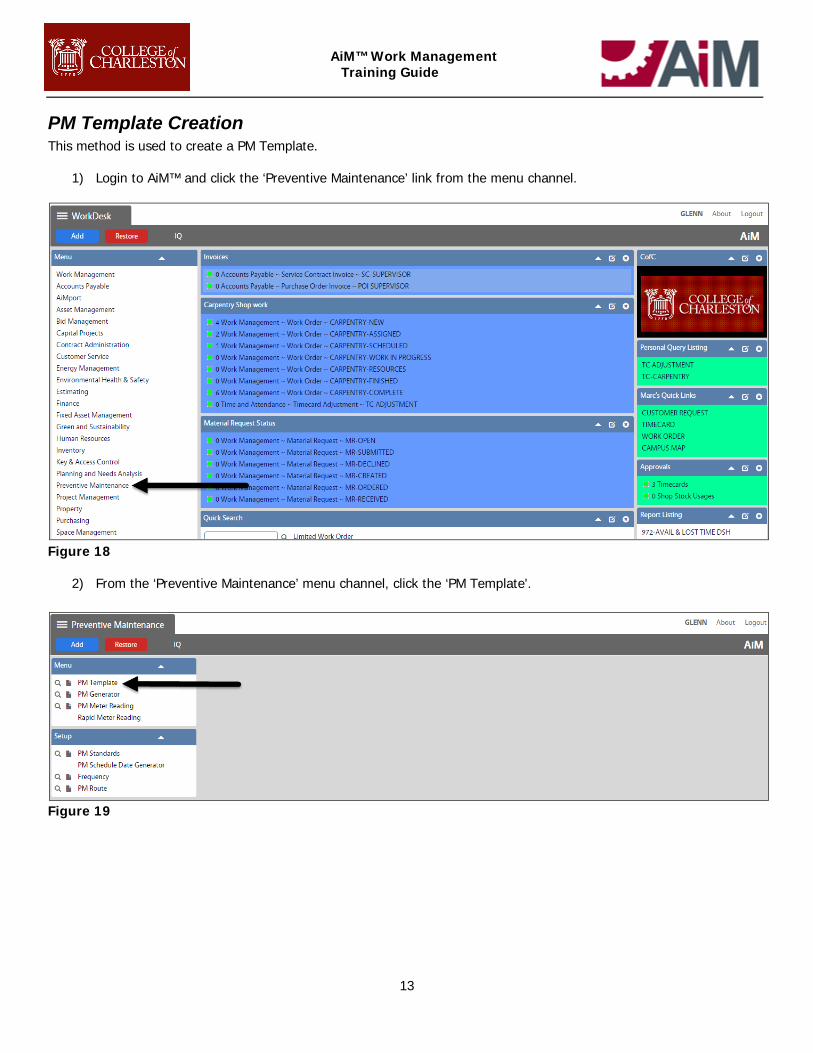
PM Template Creation This method is used to create a PM Template.
1) Login to AiM™ and click the ‘Preventive Maintenance’ link from the menu channel.
Figure 18
2) From the ‘Preventive Maintenance’ menu channel, click the ‘PM Template'.
Figure 19

AiM™ Work Management Training Guide
14
1) Click the ‘New’ button.
Figure 20 Complete the form as outlined below:
Figure 21

AiM™ Work Management Training Guide
15
1) Add a detailed template description. Note: This description will appear in the Work Order Description.
Figure 22
2) Optional: Click the ‘Organization’ Zoom icon. Follow the prompts and add the Organization Information.
Figure 23
AiM™ Work Management Training Guide
16
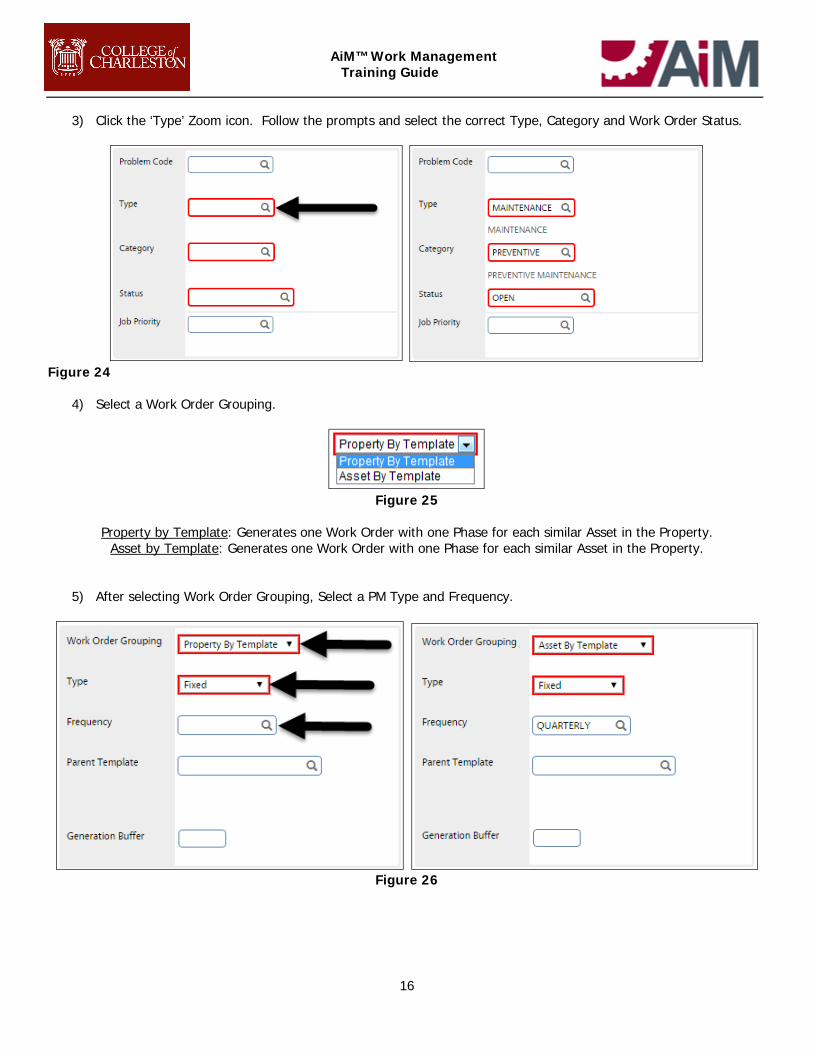
3) Click the ‘Type’ Zoom icon. Follow the prompts and select the correct Type, Category and Work Order Status.
Figure 24
4) Select a Work Order Grouping.
Figure 25
Property by Template: Generates one Work Order with one Phase for each similar Asset in the Property.
Asset by Template: Generates one Work Order with one Phase for each similar Asset in the Property.
5) After selecting Work Order Grouping, Select a PM Type and Frequency.
Figure 26

AiM™ Work Management Training Guide
17
6) Click the Template Phase Add button.
Figure 27

AiM™ Work Management Training Guide
18
7) Add Detailed Phase Description. Note: This will appear on the Work Order Phase description.
Figure 28
8) Select the Priority, Work Code, and Status values. Click each Zoom icon and select the appropriate value.
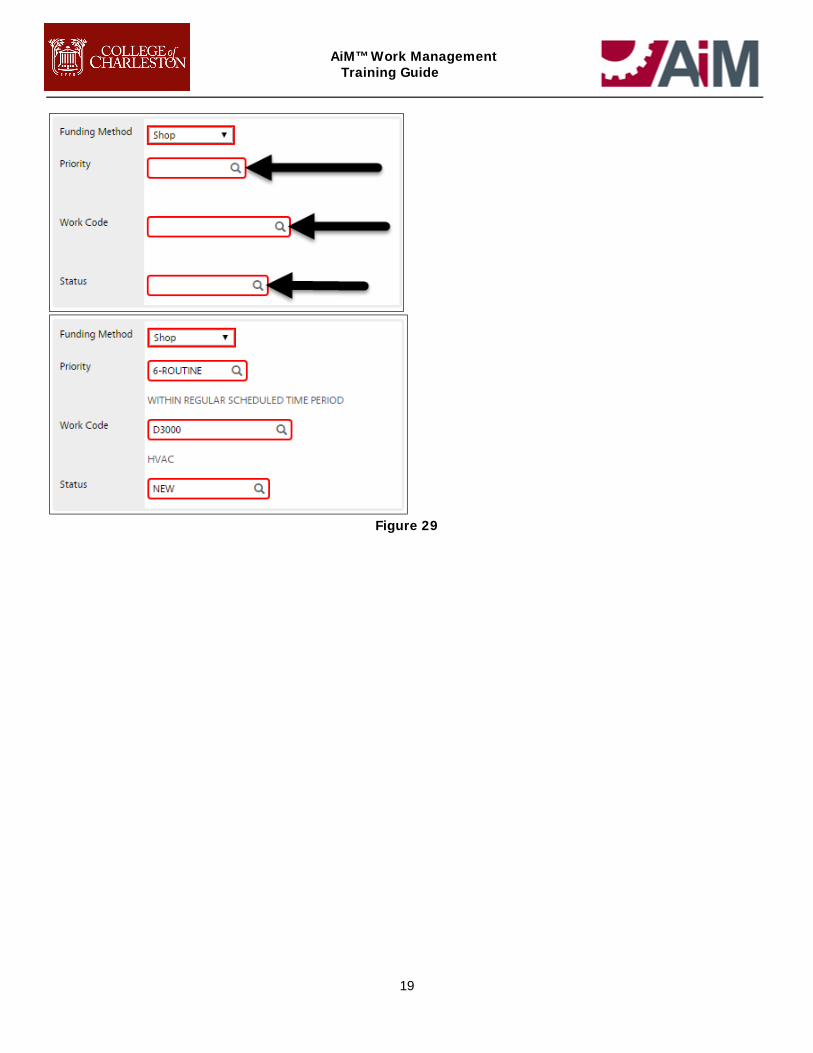
AiM™ Work Management Training Guide
19
Figure 29
AiM™ Work Management Training Guide
20
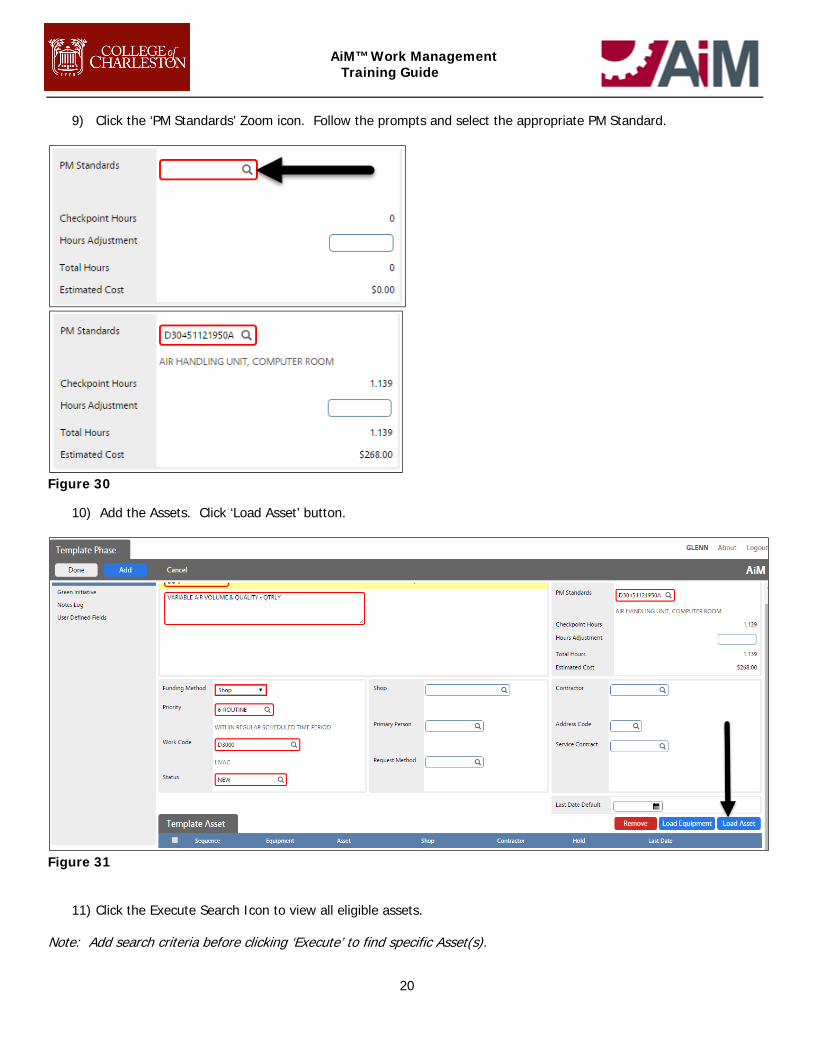
9) Click the ‘PM Standards’ Zoom icon. Follow the prompts and select the appropriate PM Standard.
Figure 30
10) Add the Assets. Click ‘Load Asset’ button.
Figure 31
11) Click the Execute Search Icon to view all eligible assets. Note: Add search criteria before clicking ‘Execute’ to find specific Asset(s).

AiM™ Work Management Training Guide
21
Figure 32
12) Select the desired Assets by clicking the box next to the Asset ID.
Figure 33
13) Click the ‘Done’ button.
AiM™ Work Management Training Guide
22
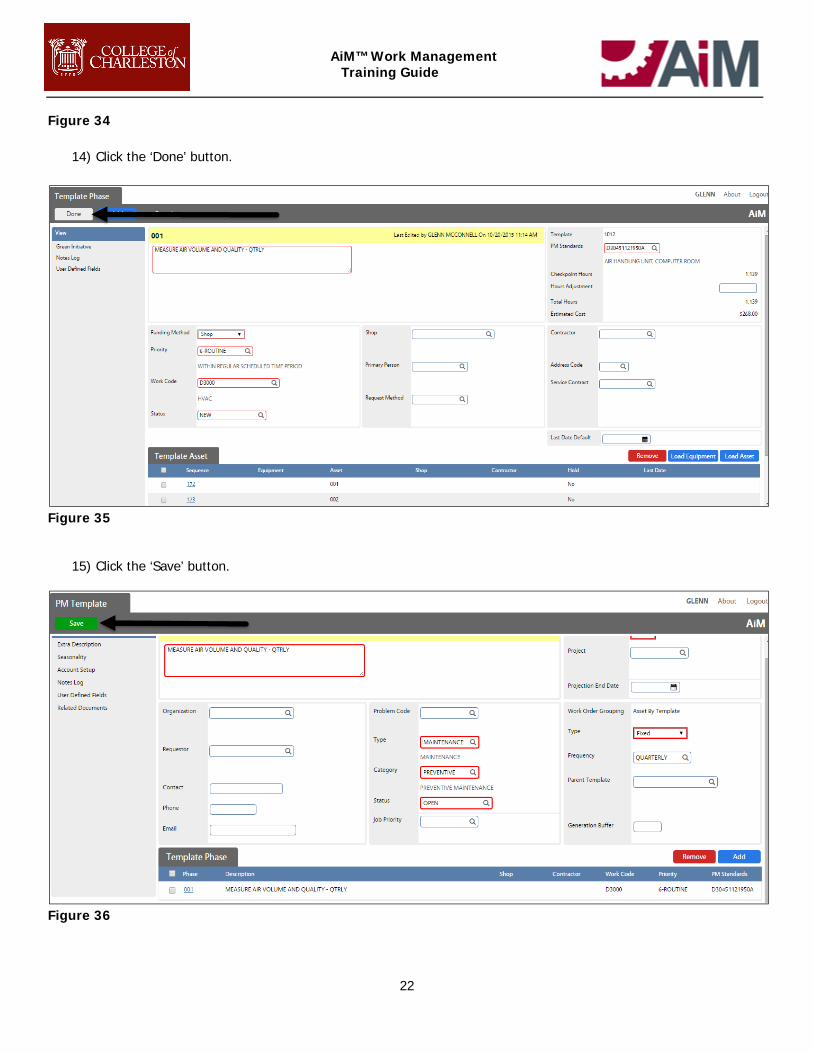
Figure 34
14) Click the ‘Done’ button.
Figure 35
15) Click the ‘Save’ button.
Figure 36

AiM™ Work Management Training Guide
23
Template Projection Date Generation
16) Click the ‘Edit’ button.
Figure 37
17) Add the Project End Date. Click the Calendar icon. Select a future date to project too. Note: The system limits the future date to 5 years from today’s date.
Figure 38
AiM™ Work Management Training Guide
24
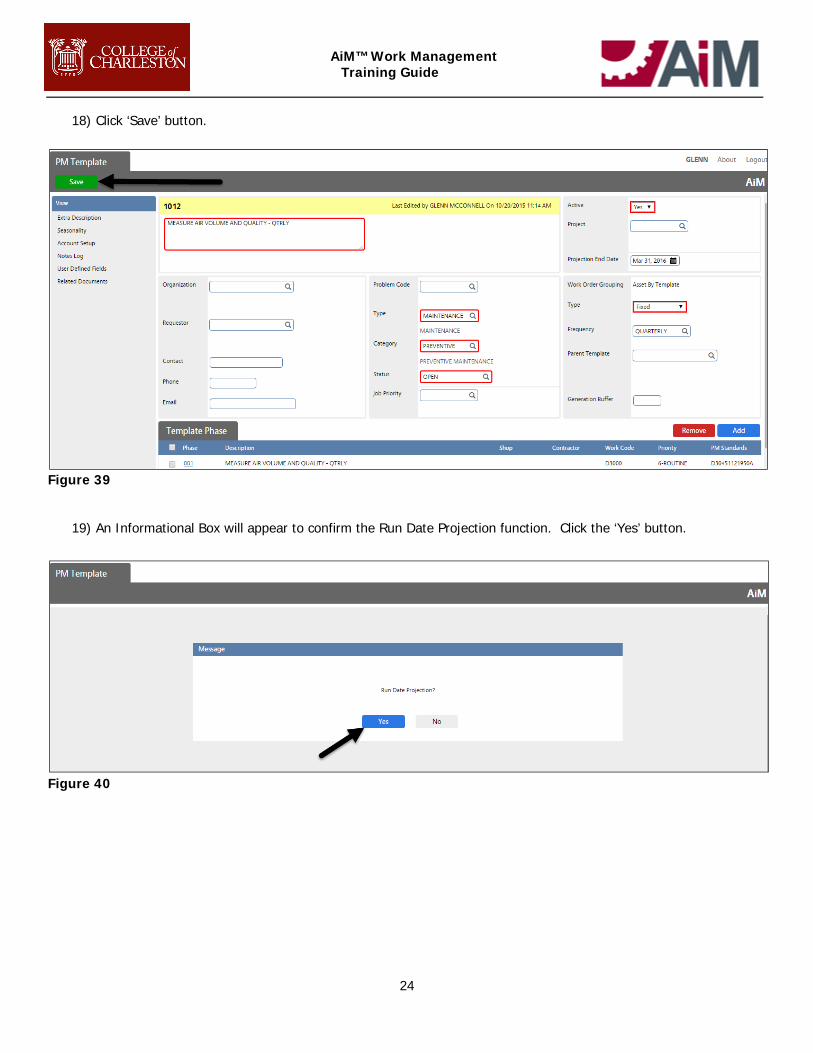
18) Click ‘Save’ button.
Figure 39
19) An Informational Box will appear to confirm the Run Date Projection function. Click the ‘Yes’ button.
Figure 40

AiM™ Work Management Training Guide
25
20) Click the AiM™ logo to return to the main Work Desk.
Figure 41
21) You are now back to the main Work Desk. The process is complete.
Figure 42
PM Generation This method is used to Generate Preventive Maintenance. This step is done on a regular schedule.
AiM™ Work Management Training Guide
26
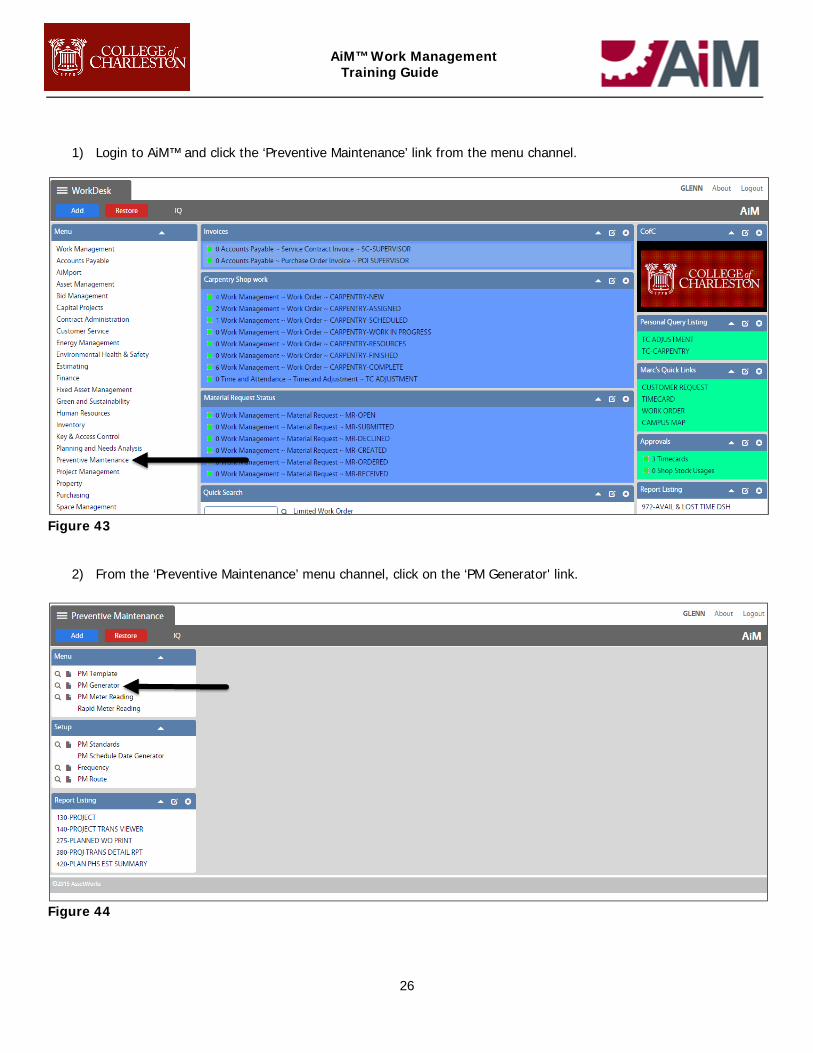
1) Login to AiM™ and click the ‘Preventive Maintenance’ link from the menu channel.
Figure 43
2) From the ‘Preventive Maintenance’ menu channel, click on the ‘PM Generator' link.
Figure 44

AiM™ Work Management Training Guide
27
3) Click the ‘New’ button.
Figure 45 Complete the form as described below.
Figure 46

AiM™ Work Management Training Guide
28
4) Add a detailed Description.
Figure 47
5) Add the End Date. Click the Calendar icon. This date should be in the future.
Figure 48
6) Select a Work Order Grouping. Note: This selection must be the same as the value selected on the PM Template(s). If both methods are used, the PM Generation task must be repeated for both types.
Figure 49

AiM™ Work Management Training Guide
29
Property By Template: Generates One Work Order With A Phase For Each Similar Asset On The Property. Asset By Template: Generates One Work Order With One Phase For Each Similar Asset On The Property.
7) Click the ‘Filter PM’ drop down menu. Select the ‘Asset’ option.
Figure 50
8) Click ‘Save’ button.
Figure 51
AiM™ Work Management Training Guide
30
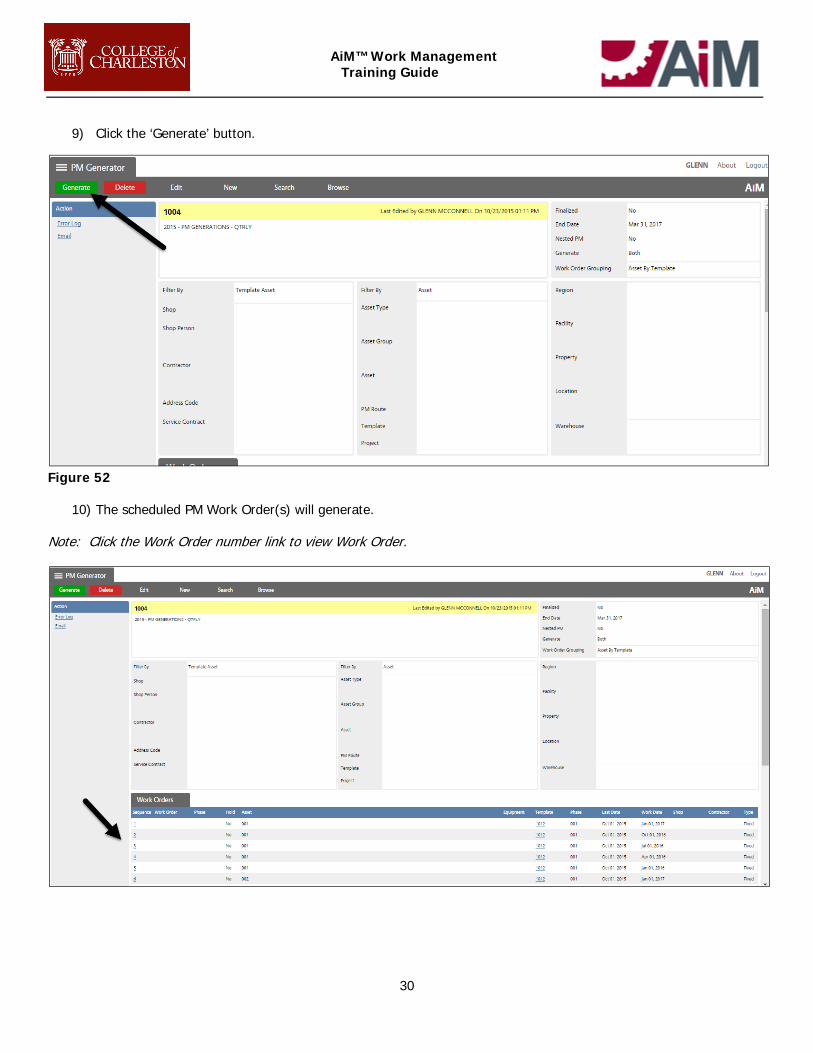
9) Click the ‘Generate’ button.
Figure 52
10) The scheduled PM Work Order(s) will generate.
Note: Click the Work Order number link to view Work Order.

AiM™ Work Management Training Guide
31
11) Click the AiM™ logo to return to the main Work Desk.
Figure 53
12) You are now back to the main Work Desk. The process is complete.
Figure 54