pastel landscape easy version - how to homeschool · pastel landscape (beginner version) drawing...
TRANSCRIPT

Beginner Version

Pastel Landscape (Beginner Version)
Drawing with pastels is fun for all ages, but detailed drawings can be difficult for younger children. This
is simpler, beginner version of the pastel landscape drawing. The version below is an easy way for early
elementary age children to begin drawing with pastels. The demo photos are deliberately kept basic, not
only to make the picture easy to draw, but also so your children can feel the satisfaction of having their
drawing look like the demo.
1. Start with a smaller size. The size of each of these squares is about 9”x12”.

2. Use light blue chalk for the sky. Draw with the side of the chalk.
3. Use your fingers or a blending tool to smooth out the chalk.

4. Use white or light gray chalk to draw the outline of a mountain. This should be a simple “upside-down
V” shape.
5. Fill in the mountain with gray chalk.

6. Use your fingers or a blending tool to smooth out the chalk. (I’m using a foam rubber eraser.)
7. Use white to highlight one side of the mountains.

8. Color the other side of the mountain with gray.
9. Use your finger or a blending tool to smooth out the chalk. [Note: If you prefer to leave the mountains
unblended so that they have sharper edges, that’s okay.]

10. Using medium or dark green, draw in a line of distant trees. [See the next photo for how to do this.]
11. Distant trees can be drawn using an overhand looping motion as in the photo below. Just make sure
that you add some variety in size and height to the loops, and then fill them in. This same technique can
be used to draw clouds.
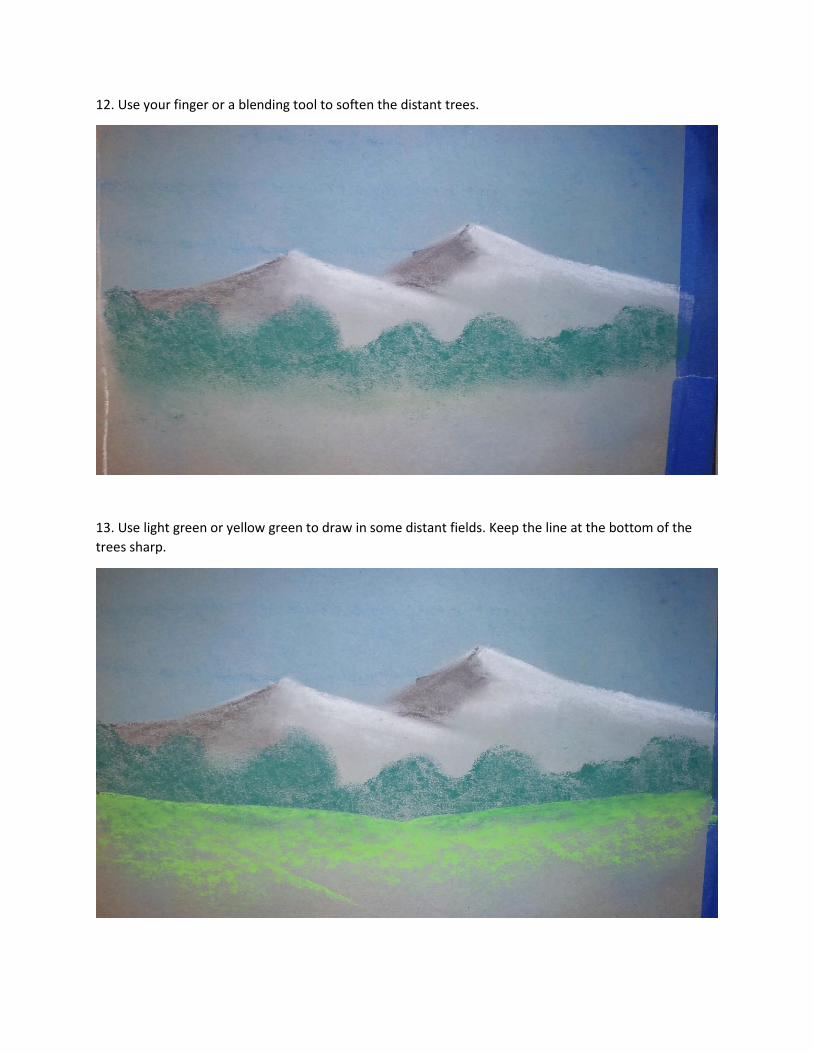
12. Use your finger or a blending tool to soften the distant trees.
13. Use light green or yellow green to draw in some distant fields. Keep the line at the bottom of the
trees sharp.

14. Use yellow to add some closer fields. [If you used light green for the distant fields, you can use
yellow green for the foreground fields.]
15. Use a dark green or brown to draw some foreground pine trees. [See the photo below for how to
draw these.]

16. You can draw an evergreen tree by using a saw-tooth motion. Start at the top of the tree and work
downward, with each branch pointing more sideways until you get to the bottom. It’s good to practice
some of these before you try doing them on your picture.
17. Congratulations, you’ve finished your first pastel landscape. -