pdm
TRANSCRIPT

Note!
Before using this information and the product it supports, be sure to read the general information under“Notices” on page vii.
First Edition (September 1994)
This edition applies to Version 3, Release 1, Modification Level 0, of IBM Application Development ToolSet/400,(Program 5763-PW1) and to all subsequent releases and modifications until otherwise indicated in new editions.Make sure you are using the correct edition for the level of the product.
Order publications through your IBM representative or the IBM branch office serving your locality. Publications are notstocked at the address given below.
A form for readers’ comments is provided at the back of this publication. If the form has been removed, address yourcomments to:
IBM Canada Ltd. LaboratoryInformation Development2G/345/1150/TOR1150 Eglinton Avenue EastNorth York, Ontario, Canada. M3C 1H7
You can also send your comments by facsimile (attention: RCF Coordinator), or you can send your comments elec-tronically to IBM. See “Communicating Your Comments to IBM” for a description of the methods. This page imme-diately precedes the Readers’ Comment Form at the back of this publication.
When you send information to IBM, you grant IBM a nonexclusive right to use or distribute the information in any wayit believes appropriate without incurring any obligation to you.
Copyright International Business Machines Corporation 1994. All rights reserved.Note to U.S. Government Users — Documentation related to restricted rights — Use, duplication or disclosure issubject to restrictions set forth in GSA ADP Schedule Contract with IBM Corp.IBM is a registered trademark of International Business Machines Corporation, Armonk, N.Y.

Contents
Notices . . . . . . . . . . . . . . . . . . . . . . . . . . . . . . . . . . . . . . . . . viiTrademarks and Service Marks . . . . . . . . . . . . . . . . . . . . . . . . . . . vii
About This Book . . . . . . . . . . . . . . . . . . . . . . . . . . . . . . . . . . . . ixWho Should Use This Book . . . . . . . . . . . . . . . . . . . . . . . . . . . . . . . ixSummary of Changes . . . . . . . . . . . . . . . . . . . . . . . . . . . . . . . . . . x
Chapter 1. Programming Development Manager Overview . . . . . . . . . . 1Objects, Libraries, Files, and Members in the AS/400 System . . . . . . . . . . . 1Special Features of PDM . . . . . . . . . . . . . . . . . . . . . . . . . . . . . . . . 2Sequence in Which PDM Options Are Processed . . . . . . . . . . . . . . . . . . 4Entering Commands Using the Command Line . . . . . . . . . . . . . . . . . . . 5
Entering Commands on List Displays . . . . . . . . . . . . . . . . . . . . . . . 5Retrieving Commands . . . . . . . . . . . . . . . . . . . . . . . . . . . . . . . . 5
Chapter 2. Starting the Programming Development Manager . . . . . . . . . 7Starting PDM from the AS/400 Main Menu . . . . . . . . . . . . . . . . . . . . . . 7Starting PDM by Using the STRPDM Command . . . . . . . . . . . . . . . . . . . 7Starting PDM by Using the WRKLIBPDM Command . . . . . . . . . . . . . . . . 7Starting PDM by Using the WRKOBJPDM Command . . . . . . . . . . . . . . . . 8Starting PDM by Using the WRKMBRPDM Command . . . . . . . . . . . . . . . 8
Chapter 3. Working with Libraries . . . . . . . . . . . . . . . . . . . . . . . . . 9Differences between a Library List and a List of Libraries . . . . . . . . . . . . . 9
Library List Portions . . . . . . . . . . . . . . . . . . . . . . . . . . . . . . . . . . 9Viewing a Library List . . . . . . . . . . . . . . . . . . . . . . . . . . . . . . . . 10Viewing a List of Libraries . . . . . . . . . . . . . . . . . . . . . . . . . . . . . 10Displaying an Alphabetical List of Libraries . . . . . . . . . . . . . . . . . . . 11
Creating a Library . . . . . . . . . . . . . . . . . . . . . . . . . . . . . . . . . . . 12Deleting a Library . . . . . . . . . . . . . . . . . . . . . . . . . . . . . . . . . . . . 13Renaming a Library . . . . . . . . . . . . . . . . . . . . . . . . . . . . . . . . . . 13Changing the Type and Text Description of a Library . . . . . . . . . . . . . . . 14Working with Objects in a Library . . . . . . . . . . . . . . . . . . . . . . . . . . 14Copying a Library . . . . . . . . . . . . . . . . . . . . . . . . . . . . . . . . . . . . 15Copying a Library to an Existing Library . . . . . . . . . . . . . . . . . . . . . . . 16Displaying the Description of a Library . . . . . . . . . . . . . . . . . . . . . . . 16Subset of a List of Libraries . . . . . . . . . . . . . . . . . . . . . . . . . . . . . . 17
Creating a Subset List with the Library Name and Type Prompts . . . . . . 17Creating a Subset List with the Text Prompt . . . . . . . . . . . . . . . . . . 17
Changing a Library List . . . . . . . . . . . . . . . . . . . . . . . . . . . . . . . . 18Adding a Library to a Library List . . . . . . . . . . . . . . . . . . . . . . . . . 18Moving a User Library to the User Portion of a Library List . . . . . . . . . . 19Removing a User Library from the User Portion of a Library List . . . . . . . 20
Copyright IBM Corp. 1994 iii

Chapter 4. Working with Objects . . . . . . . . . . . . . . . . . . . . . . . . . 21Creating Objects . . . . . . . . . . . . . . . . . . . . . . . . . . . . . . . . . . . . 21Deleting Objects . . . . . . . . . . . . . . . . . . . . . . . . . . . . . . . . . . . . 22Renaming Objects . . . . . . . . . . . . . . . . . . . . . . . . . . . . . . . . . . . 23Moving Objects to Another Library . . . . . . . . . . . . . . . . . . . . . . . . . . 23Copying Objects . . . . . . . . . . . . . . . . . . . . . . . . . . . . . . . . . . . . 24Copying an Object to an Existing Object . . . . . . . . . . . . . . . . . . . . . . 25Displaying the Description of Objects . . . . . . . . . . . . . . . . . . . . . . . . 25Displaying a Detailed Description of Objects . . . . . . . . . . . . . . . . . . . . 26Changing Objects Using DFU . . . . . . . . . . . . . . . . . . . . . . . . . . . . 26Creating a Program . . . . . . . . . . . . . . . . . . . . . . . . . . . . . . . . . . 27
Creating a Service Program . . . . . . . . . . . . . . . . . . . . . . . . . . . . 28Debugging a Program . . . . . . . . . . . . . . . . . . . . . . . . . . . . . . . 28
Comparing File Members . . . . . . . . . . . . . . . . . . . . . . . . . . . . . . . 28Running Objects . . . . . . . . . . . . . . . . . . . . . . . . . . . . . . . . . . . . 29Working with Members in a Physical File . . . . . . . . . . . . . . . . . . . . . . 30Creating a Subset of a List of Objects . . . . . . . . . . . . . . . . . . . . . . . . 31
Refreshing the Subset of a List of Objects . . . . . . . . . . . . . . . . . . . . 32
Chapter 5. Working with Members . . . . . . . . . . . . . . . . . . . . . . . . 33Copying Members . . . . . . . . . . . . . . . . . . . . . . . . . . . . . . . . . . . 33Changing the Type and Text Description of a Member . . . . . . . . . . . . . . 34Editing Members . . . . . . . . . . . . . . . . . . . . . . . . . . . . . . . . . . . . 35Compiling Members . . . . . . . . . . . . . . . . . . . . . . . . . . . . . . . . . . 35Creating an Integrated Language Environment Module . . . . . . . . . . . . . . 36Running Source Member Procedures . . . . . . . . . . . . . . . . . . . . . . . . 37Deleting Members . . . . . . . . . . . . . . . . . . . . . . . . . . . . . . . . . . . 37Displaying the Description of a Member . . . . . . . . . . . . . . . . . . . . . . . 38Changing Members Using Screen Design Aid . . . . . . . . . . . . . . . . . . . 39Changing Members Using Report Layout Utility . . . . . . . . . . . . . . . . . . 40Changing Members Using Data File Utility . . . . . . . . . . . . . . . . . . . . . 40Sorting and Positioning a List of Members by Date . . . . . . . . . . . . . . . . 41Showing a Subset of a List of Members . . . . . . . . . . . . . . . . . . . . . . . 42Comparing File Members . . . . . . . . . . . . . . . . . . . . . . . . . . . . . . . 42Merging File Members . . . . . . . . . . . . . . . . . . . . . . . . . . . . . . . . . 43
Chapter 6. Searching for a Character String or a Numeric String . . . . . 45Searching for a String within a File . . . . . . . . . . . . . . . . . . . . . . . . . 46
Resetting Prompts to Their Original Values . . . . . . . . . . . . . . . . . . . 47Searching for a String in More Than One File . . . . . . . . . . . . . . . . . . . 47Searching for a Character String Enclosed in Quotation Marks . . . . . . . . . 47Printing Records or a List of Members That Contain the Find String Match . . 48Searching for a String by Using the FNDSTRPDM Command . . . . . . . . . . 48Find String Options Available in Batch Mode . . . . . . . . . . . . . . . . . . . . 48
Processing Other Options in Batch Mode . . . . . . . . . . . . . . . . . . . . 49Find String Compile Option in Batch Mode . . . . . . . . . . . . . . . . . . . 49
Changing a String of Characters Globally . . . . . . . . . . . . . . . . . . . . . . 50Scanning Members for Hexadecimal Numbers . . . . . . . . . . . . . . . . . . . 51Searching for a String Using the Report Layout Utility . . . . . . . . . . . . . . 51Searching for a String Using the Screen Design Aid . . . . . . . . . . . . . . . 52Searching for a String Using the Source Entry Utility . . . . . . . . . . . . . . . 52Canceling the String Search . . . . . . . . . . . . . . . . . . . . . . . . . . . . . 53
Restrictions on Canceling the String Search . . . . . . . . . . . . . . . . . . . 53
iv Programming Development Manager (PDM)

Chapter 7. Working with User-Defined Options . . . . . . . . . . . . . . . . 55Sample User-Defined Options . . . . . . . . . . . . . . . . . . . . . . . . . . . . 55
Accessing the Work with User-Defined Options Display . . . . . . . . . . . . 57Choosing a Command to Correspond to a User-Defined Option . . . . . . . 57
Creating User-Defined Options . . . . . . . . . . . . . . . . . . . . . . . . . . . . 57Creating a User-Defined Option for Backup Purposes . . . . . . . . . . . . . . 58Valid Substitution Variables for User-Defined Options . . . . . . . . . . . . . . . 58Changing User-Defined Options . . . . . . . . . . . . . . . . . . . . . . . . . . . 60Copying User-Defined Options . . . . . . . . . . . . . . . . . . . . . . . . . . . . 60Copying the User-Defined Options File for Storage in Other Files . . . . . . . . 61Displaying User-Defined Options . . . . . . . . . . . . . . . . . . . . . . . . . . . 62Installing the User-Defined Window Program Tool . . . . . . . . . . . . . . . . . 62
Calling the User-Defined Option Window Program . . . . . . . . . . . . . . . 63Deleting User-Defined Options . . . . . . . . . . . . . . . . . . . . . . . . . . . . 63
Retrieving Deleted User-Defined Options . . . . . . . . . . . . . . . . . . . . 63
Chapter 8. Selecting Default Values . . . . . . . . . . . . . . . . . . . . . . . 65Accessing the Change Defaults Display . . . . . . . . . . . . . . . . . . . . . . . 65
Overriding Default Values on the Change Defaults Display . . . . . . . . . . 65Storing Compiled Members in a Library for Compiled Programs . . . . . . . . . 66Replacing Existing Compiled Members . . . . . . . . . . . . . . . . . . . . . . . 66Changing the Compile and Run Modes . . . . . . . . . . . . . . . . . . . . . . . 66Saving Session Defaults . . . . . . . . . . . . . . . . . . . . . . . . . . . . . . . . 67Saving and Restoring Objects . . . . . . . . . . . . . . . . . . . . . . . . . . . . 67Changing the Job Description . . . . . . . . . . . . . . . . . . . . . . . . . . . . 68Restricting Changes to the Member Type and Text Description . . . . . . . . . 68Changing the Active Default User-Defined Options File . . . . . . . . . . . . . . 69Changing List Displays to Full Screen Mode . . . . . . . . . . . . . . . . . . . . 69Logging Option Commands . . . . . . . . . . . . . . . . . . . . . . . . . . . . . . 70Changing the Default Value of the Enter Key . . . . . . . . . . . . . . . . . . . . 70
Appendix A. Command Reference . . . . . . . . . . . . . . . . . . . . . . . . 71Command Reference for Objects . . . . . . . . . . . . . . . . . . . . . . . . . . 71
Commands Called for the Change Option . . . . . . . . . . . . . . . . . . . . 71Commands Called for the Copy Option . . . . . . . . . . . . . . . . . . . . . 72Commands Called for the Delete Option . . . . . . . . . . . . . . . . . . . . . 72Commands Called for the Display Option . . . . . . . . . . . . . . . . . . . . 74Command Called for the Rename Option . . . . . . . . . . . . . . . . . . . . 75Command Called for the Display Description Option . . . . . . . . . . . . . . 76Commands Called for the Save Option . . . . . . . . . . . . . . . . . . . . . 76Commands Called for the Restore Option . . . . . . . . . . . . . . . . . . . . 78Command Called for the Move Option . . . . . . . . . . . . . . . . . . . . . . 78Commands Called for the Work With Option . . . . . . . . . . . . . . . . . . 79Command Called for the Change Text Option . . . . . . . . . . . . . . . . . 80Commands Called for the Copy File Option . . . . . . . . . . . . . . . . . . . 80Commands Called for the Run Option . . . . . . . . . . . . . . . . . . . . . . 81Commands Called for the Change Using DFU Option . . . . . . . . . . . . . 81Commands Called for the Find String Option . . . . . . . . . . . . . . . . . . 81
Command Reference for Libraries . . . . . . . . . . . . . . . . . . . . . . . . . . 81Command Reference for Members . . . . . . . . . . . . . . . . . . . . . . . . . 82Compile Commands for Members . . . . . . . . . . . . . . . . . . . . . . . . . . 83
Contents v

Appendix B. Control Language Commands . . . . . . . . . . . . . . . . . . 85Start Programming Development Manager (STRPDM) Command . . . . . . . . 85Work with Libraries Using PDM (WRKLIBPDM) Command . . . . . . . . . . . . 85Work with Members Using PDM (WRKMBRPDM) Command . . . . . . . . . . 86Work with Objects Using PDM (WRKOBJPDM) Command . . . . . . . . . . . . 88Find String Using PDM (FNDSTRPDM) Command . . . . . . . . . . . . . . . . 91
Bibliography . . . . . . . . . . . . . . . . . . . . . . . . . . . . . . . . . . . . . . 95
Index . . . . . . . . . . . . . . . . . . . . . . . . . . . . . . . . . . . . . . . . . . . 97
vi Programming Development Manager (PDM)

Notices
References in this publication to IBM products, programs, or services do not implythat IBM intends to make these available in all countries in which IBM operates.Any reference to an IBM licensed program in this publication is not intended tostate or imply that only IBM’s licensed program may be used. Any functionallyequivalent product, program or service that does not infringe any of IBM’s intellec-tual property rights may be used instead of the IBM product, program, or service.Evaluation and verification of operation in conjunction with other products, exceptthose expressly designated by IBM, is the user’s responsibility.
IBM may have patents or pending patent applications covering subject matter inthis document. The furnishing of this document does not give you any license tothese patents. You can send license inquiries, in writing, to the IBM Director ofLicensing, IBM Corporation, 208 Harbor Drive, Stamford, Connecticut, USA06904-2501
At the time of printing, this book contains references to products that areannounced, but may not yet be available. These products will be available later inthis release.
Trademarks and Service MarksThe following terms, denoted by an asterisk (*), used in this publication, are trade-marks or service marks of International Business Machines Corporation in theUnited States or other countries:
The following terms, denoted by a double asterisk (**), used in this publication, aretrademarks of other companies as follows:
RM/COBOL-85 Ryan McFarland Corporation
AD/Cycle IBMApplication Development IBMLinkApplication System/400 ILEAS/400 Integrated Language EnvironmentC/400 Operating System/400CICS OS/400COBOL/400 PROFSFORTRAN/400 400
Copyright IBM Corp. 1994 vii

viii Programming Development Manager (PDM)

About This Book
The programming development manager (PDM), which is part of the ApplicationDevelopment* ToolSet/400, helps you perform useful operations on libraries,objects, and members in a quick and efficient way to enhance your productivity.The programming development manager is referred to as PDM throughout thisbook. This book contains exercises and reference material to help you learn to usePDM. Only the most commonly used options and function keys are explained indetail.
Note: This book contains examples to help you do common tasks. The contentsof the displays illustrated in the examples may differ from the ones you seeon your system, because the names of your libraries, objects, files, andmembers may be different from the ones used in the examples. You shouldalso note that, although the text that you are asked to type in the examplesthroughout this book is shown in uppercase, you can type it in uppercase,lowercase, or mixed case.
You may need to refer to other IBM publications for more specific information abouta topic. The Publications Reference, SC41-3003 provides information on all thepublications in the AS/400 library.
For a list of related publications, see the “Bibliography” on page 95.
Who Should Use This BookThis book is intended for application programmers or analysts working in an IBMApplication System/400* (AS/400*) environment. To use this book effectively, youmust know how to use your workstation, understand and use messages, and havea general knowledge of the AS/400 system.
If you are unfamiliar with your workstation, refer to the specific manual for yourworkstation.
Copyright IBM Corp. 1994 ix

Summary of ChangesThe following enhancements were made to PDM:
� PDM now supports the following new object types for generic functions:
– *CRQD – *DIR – *NTBD – *NWSD – *SVRSTG
You can view objects of type *DIR from a list only.
� PDM now supports the Integrated Language Environment* (ILE*) RPG andCOBOL compilers. You can start these compilers from option 14 (Compile)and option 15 (Create module) on the PDM member list.
� The Work with Objects Using PDM display has two new options, option 34(Interactive Source Debugger) and option 54 (Compare file member). You canuse option 34 on all objects of type *PGM and type *SRVPGM to debug aprogram file and then call a program. You can use option 54 on all objects oftype *FILE with attributes of PF-SRC or PF-DTA and you can compare two ormore file members. Option 54 also enables the Work with Members UsingPDM display.
� The Work with Members Using PDM display has two new options, option 54(Compare file member) and option 55 (Merge file member). You can useoption 54 on all member types and you can compare two or more file members.You can use option 55 on all objects of type *FILE with attributes of PF-SRCand you can merge two file members.
� The Change Defaults display has the following two new prompts:
– Refresh part list– Display source parts only
x Programming Development Manager (PDM)

Chapter 1. Programming Development Manager Overview
With the programming development manager (PDM), you can perform the followingfunctions:
� Work with libraries� Work with objects� Work with members� Search for a character string or a numeric string� Work with user-defined options� Change system default values
Each of these functions and the tasks you can perform within it are explained indetail in the chapters that follow. If you have the Application DevelopmentManager/400 orderable feature installed, you also have access to the followingfunctions:
� Work with projects� Work with groups� Work with parts� Search for character and hexadecimal strings in parts
For a complete discussion of these functions, refer to the Application DevelopmentManager/400 library which consists of ADTS/400: Application DevelopmentManager/400 Introduction and Planning Guide, GC09-1807, and ADTS/400: Appli-cation Development Manager/400 User’s Guide, SC09-1808.
PDM also gives you access to other objects on the AS/400* system so that you canuse the following utilities in the Application Development ToolSet/400 licensedprogram:
� Source entry utility (SEU)� Data file utility (DFU)� Screen design aid (SDA)� Report layout utility (RLU)� File compare and merge utility (FCMU)� Interactive source debugger (ISDB)
Objects, Libraries, Files, and Members in the AS/400 System� Objects are the basic unit with which commands perform operations in the
AS/400 system.
An object is a named unit that consists of a set of features that describes theobject, and a value. The features of an object include its name, type, size, thedate it was created, and a text description. The value of an object is the col-lection of information stored in the object. The value of a program, forexample, is the executable code that makes up the program. The value of afile is the collection of records that make up the file.
There are many types of objects. For example, the object type of a library is*LIB, the object type of a file is *FILE, and the object type of a program is*PGM.
Copyright IBM Corp. 1994 1

Objects can also have subtypes known as attributes , which are the character-istics of the objects. For example, the attribute of an object of type *PGM couldbe RPG, to indicate that the program is created using RPG source code. Theattribute of an object of type *FILE could be DSPF, to indicate that the file is adisplay file.
� A library is a special type of object (object of type *LIB) that is used to grouprelated objects. A library, therefore, is a directory to a group of objects. Thereare only two types of libraries: *PROD (Production) and *TEST (Test).
Every AS/400 system has a system library named QSYS that is provided in theOS/400* operating system to contain system-oriented objects. QSYS is a largelibrary that points to all the system-oriented objects.
� A file is an object of type *FILE that has an attribute that describes the type ofthe file. For example, a source physical file has an attribute of PF-SRC, a datafile has an attribute of PF-DTA, and a printer file has an attribute of PRTF.Physical files and logical files both contain members.
� A member is a subset of records in a physical file (PF-SRC or PF-DTA). Eachmember conforms to the characteristics of the file. You can define the type ofa member, or select a type used with PDM commands.
Special Features of PDMPDM has many special features that make it easy to use. Some of these featuresare listed below.
List InterfacePDM has displays that list libraries, objects, members, and user-definedoptions. On these displays, you can perform operations on the items in the listby typing an option in the Opt column of the display. You can select differentoperations, or the same operation, on more than one item in a list at a time.
Selection ListsYou can press F4 in some displays to show a list of items from which you canmake your selection. You then select an item and return to the previousdisplay with the prompt filled in with the item of your choice.
User-Defined OptionsUsing PDM, you can create your own options and use them on list displays inthe same way that system options are used. You can create options from com-mands you use frequently, which saves you from having to type the commandeach time you want to use it.
Work with OptionOption 12 (Work with) on library and object list displays allows you to work withall the objects in a library or all the members in a file. Simply type 12 next to alibrary or file on a list display. This option lets you move between differentlevels of PDM quickly and easily. By pressing F4 (Prompt), you can create asubset of the list of members or objects that you want to work with.
2 Programming Development Manager (PDM)

Window ProgramThere is a user-defined option window program that, when called, creates awindow in the upper right corner of the display listing all active PDM user-defined options. The source programs for this tool are in library QUSRTOOL,and all information regarding this program is in member TPSINFO in the fileQUSRTOOL/QATTINFO.
Changing DefaultsPDM allows you to change defaults such as the run and compile mode (batchor interactive) and the list display mode (full screen mode or not). You can alsochange the active user-defined options file name, and specify whether you wantto be able to change the type and description of members on the Work withMembers Using PDM display. You can change the PDM defaults by pressingF18 (Change defaults) to access the Change Defaults display and making theappropriate changes.
Grouping DisplaysMany options in PDM have grouping displays. Grouping displays list all theitems for which you selected an option on the previous list display. This allowsyou to perform the same operation on more than one item at a time. Forexample, to copy a number of members to a different file or library, you onlychange the file or library name once on the grouping display. This saves you aconsiderable amount of typing.
You can choose to perform all the operations on a grouping display interac-tively, or you can submit them to batch processing by using F19 (Submit tobatch).
More Options and More KeysSome of PDM’s list displays have more options and function keys availablethan can be shown on the display. You can press F23 (More options) and F24(More keys) to see the next set of available options and function keys.
Remember Previous Values for CommandsIn PDM, the values you enter for certain prompts and for the parameters ofcertain commands are saved in the user profile, even if you exit from PDM andsign off the system. When working with any of the WRKxxxPDM commands,you can specify that you want to use these saved values by using the *PRV(previous) value. This means that if you want to work with the same list youwere working with the last time you used PDM, you just type *PRV for all theparameters. You do not have to remember the values you entered.
For example, to work with the same list of objects, type the following on thecommand line:
WRKOBJPDM LIB(\PRV) OBJ(\PRV) OBJTYPE(\PRV) OBJATR(\PRV)
Press Enter, and the object list you last worked with appears.
The LIB parameter on all WRKxxxPDM commands defaults to *PRV, as doesthe FILE parameter on the WRKMBRPDM command. All other parameters onWRKxxxPDM commands default to *ALL.
For more information on accessing PDM using the WRKxxxPDM commands,see Chapter 2, “Starting the Programming Development Manager” on page 7.
You can also use the *PRV value when you are working with the ApplicationDevelopment Manager/400 commands, WRKPRJPDM, WRKGRPPDM, andWRKPARTPDM.
Chapter 1. Programming Development Manager Overview 3

Find StringPDM allows you to search for a character or numeric string in a source or dataphysical file or member. You can choose to edit, compile or perform any validoption on the members that contain the string. You can also print a list of themembers containing the string or print the individual records that contain thestring.
Sequence in Which PDM Options Are ProcessedIf you select more than one PDM option on a list display, the options are processedsequentially, starting with the first option selected.
When you select an option and press Enter, PDM first determines whether it is agrouping option. The Copy option, the Rename option, the Delete option, and theMove option are grouping options. If it is a grouping option, a grouping display isshown, listing all the items for which a particular option was chosen and requestingconfirmation (and, possibly, additional input).
You can choose to perform all the operations on grouping displays interactively, oryou can submit them to batch. To submit them to batch, press F19 (Submit tobatch). When you submit options to batch, each occurrence of the option results ina command that is submitted to batch processing; therefore one batch job is sub-mitted for each item on the grouping screen.
If you want to perform all the operations on the grouping display interactively, pressEnter. The operation is performed for the first item on the grouping display but isnot necessarily performed on the remaining items on the grouping display rightaway. Options selected on list displays are processed sequentially, so the optionselected for the second item on the list display is now processed.
4 Programming Development Manager (PDM)

Entering Commands Using the Command LineYou can type any valid command or parameter on the command line. You canalso type commands with parameters on the command line. If you do not type anyoptions in the Opt column of a list display, PDM checks whether or not you typed acommand on the command line, and if you have, runs it. If you type any options inthe Opt column of the list, PDM checks to see whether or not the command linecontains parameters for the options.
Notes:
1. You cannot type parameters on the AS/400 Programming DevelopmentManager (PDM) menu. You can only type selections or commands on thecommand line of this menu.
2. The PDM command line does not issue an RCLRSC after receiving an escapemessage.
Entering Commands on List DisplaysTo enter commands on list displays:
1. Press F10 (Command entry). The Command Entry display appears.
2. Type commands on the Command Entry display. To view any other commandsyou typed during the session, press the Page Up key.
3. To return to the display on which you pressed F10 (Command entry), press F3(Exit) on the Command Entry display.
Retrieving CommandsTo retrieve a command on the Command Entry display:
1. Press F9 (Retrieve).
2. Continue to press F9 (Retrieve) until the command you want is displayed onthe command line. You can add parameter values to the command or modifyparameters values for the command. You can also press F4 (Prompt) toprompt the display for the command.
3. Press Enter to process the command.
Chapter 1. Programming Development Manager Overview 5

6 Programming Development Manager (PDM)

Chapter 2. Starting the Programming Development Manager
You can start the programming development manager (PDM) from the AS/400 MainMenu or by typing the STRPDM command on the command line. You can alsostart PDM by typing any of the following commands on the command line:
� WRKLIBPDM � WRKOBJPDM � WRKMBRPDM
If you have the Application Development Manager/400 orderable feature installed,you can also start PDM by typing the following commands on the command line:
� WRKPRJPDM � WRKGRPPDM � WRKPARTPDM
Refer to ADTS/400: Application Development Manager/400 User’s Guide for infor-mation on these commands.
Starting PDM from the AS/400 Main MenuTo start PDM from the AS/400 Main Menu:
1. Select option 5 (Programming) from the AS/400 Main Menu, and press Enter.The Programming menu is displayed.
2. Select option 2 (Programming Development Manager (PDM)), and press Enter.The AS/400 Programming Development Manager (PDM) menu appears. Youcan select one of the options from this menu to work with libraries, objects,members, or user-defined options.
Starting PDM by Using the STRPDM CommandTo start PDM by using the STRPDM command, type STRPDM on any command lineand press Enter. The AS/400 Programming Development Manager (PDM) menu isdisplayed.
Starting PDM by Using the WRKLIBPDM CommandTo start PDM and work with the list of libraries from your previous PDM session,type WRKLIBPDM on the command line without specifying any parameters, and pressEnter. The Work with Libraries Using PDM display appears.
To display a specific list of libraries, specify parameters after the WRKLIBPDMcommand. For example, to display a list of all libraries starting with BA, type thefollowing command on any command line, and press Enter:
WRKLIBPDM LIB(BA\)
The Work with Libraries Using PDM display appears.
Copyright IBM Corp. 1994 7

Starting PDM by Using the WRKOBJPDM CommandTo start PDM and work with all the objects in a library from your previous PDMsession, type WRKOBJPDM on the command line without specifying any parameters,and press Enter. The Work with Objects Using PDM display appears.
To display a specific object in a library, specify parameters after the WRKOBJPDMcommand. For example, for a list of all the CLP programs in the ATEST library thatstart with CHG, type the following command on any command line, and pressEnter:
WRKOBJPDM LIB(ATEST) OBJ(CHG\) OBJTYPE(\PGM) OBJATR(CLP)
The Work with Objects Using PDM display appears.
Starting PDM by Using the WRKMBRPDM CommandTo start PDM and work with all the members in the file and library from your pre-vious PDM session, type WRKMBRPDM on the command line without specifying anyparameters, and press Enter. The Work with Members Using PDM displayappears.
To work with a specific list of members, specify parameters after theWRKMBRPDM command. For example, for a list of all members in the CMDSRCfile in the ATEST library with a type of CMD that start with C, type the followingcommand on any command line, and press Enter:
WRKMBRPDM FILE(ATEST/CMDSRC) MBR(C\) MBRTYPE(CMD)
The Work with Members Using PDM display appears.
8 Programming Development Manager (PDM)

Chapter 3. Working with Libraries
You can perform the following tasks when working with libraries:
� View a library list� View a list of libraries� Work with an alphabetical list of libraries� Create a library� Delete a library� Rename a library� Change the type and text description of a library� Work with objects in a library� Copy a library� Copy to an existing library� Display the description of a library� Create a subset of a list of libraries� Add an existing library to a library list� Move a user library to the user portion of a library list� Remove a user library from the user portion of a library list
Differences between a Library List and a List of LibrariesA library list is an ordered list of library names. It identifies the libraries that aresearched and the order of the search. A list of libraries, however, is an alphabeticlist of all the libraries, or a subset list of all the libraries, on the system.
For example, the type of list you work with depends on your entry for the Libraryprompt on the Specify Libraries to Work With display, or for the LIB parameter ofthe WRKLIBPDM command. Some of the function keys and options available onthe Work with Libraries Using PDM display differ depending on the type of list withwhich you are working.
A library list makes it easier for you to work with objects. If the object you aresearching for is in one of the libraries on the library list, you do not have to specifythe library name when searching for the object.
Library List PortionsThe portions of a library list are:
System PortionThe system portion of the library list contains objects used by the system. Themaximum number of libraries here is 15.
Product LibrariesProduct libraries may be included in the library list. The product libraries areused to support languages and utilities that are dependent on libraries otherthan the system library, QSYS, to process their commands.
Current LibraryThe current library can be, but does not have to be, a duplicate of any library inthe user portion of the library list. The current library value, *CURLIB, can beused on most commands as a library name to represent whatever library hasbeen specified as the current library for the job.
Copyright IBM Corp. 1994 9

User PortionThe user portion of the library list contains those objects referred to by thesystem’s users and applications. The user portion, and the product and currentlibraries, may be different for each job on the system. The maximum numberof libraries in the user portion of the library list is 25.
Viewing a Library ListTo view a library list:
1. Select option 1 (Work with libraries) from the AS/400 Programming Develop-ment Manager (PDM) menu, and press Enter. The Specify Libraries to WorkWith display appears.
2. Type one of the following values in the Library prompt, and press Enter:
*LIBLDisplays a list of all libraries in your library list
*USRLIBLDisplays a list of all libraries in the user portion of your library list
Note: You can also specify these values for the LIB parameter of theWRKLIBPDM command.
3. Press F3 (Exit) to return to the AS/400 Programming Development Manager(PDM) menu.
You can add libraries to, or remove them from, the library list. When you remove alibrary from the library list, you are only taking the library off the library list tempo-rarily. The library is not deleted from the system. You can also change the searchorder by changing the position of libraries in your library list.
Viewing a List of LibrariesTo view a list of libraries:
1. Select option 1 (Work with libraries) from the AS/400 Programming Develop-ment Manager (PDM) menu, and press Enter. The Specify Libraries to WorkWith display appears.
2. Type one of the following values in the Library prompt, and press Enter.
*ALLDisplays a list of all libraries in the system.
*ALLUSRDisplays a list of all nonsystem libraries, including a list of all user-definedlibraries.
*CURLIBDisplays a list containing only the current library.
Library nameDisplays a list containing only the library you specify.
10 Programming Development Manager (PDM)

Generic nameDisplays a list containing libraries that meet specific criteria. The genericname can be in one of the following formats:
ABC*Displays a list of all items that begin with the characters ABC forexample, ABC, ABCD, or ABCTEST.
*ABCDisplays a list of all items ending with the characters ABC, for example,ABC, DABC, or TESTABC.
*B*Displays a list of all items that have the character B anywhere in thename, for example, B, BALL, or ABCD.
A*CDisplays a list of all items that begin with the character A and end withthe character C, for example, AC, ABC, or AZZZC.
“a*”Displays a list of all items within quotation marks that start with thecharacter a, for example, “a,” “aB,” or “aD.”
**ALLDisplays a list of all items ending with ALL, for example, ALL, BALL, orTESTALL. The double asterisk is needed in this case because ALL isdefined as the value to display a list of all libraries.
Note: You can also specify these values for the LIB parameter of theWRKLIBPDM command.
3. Press F3 (Exit) to return to the AS/400 Programming Development Manager(PDM) menu.
Displaying an Alphabetical List of LibrariesTo display an alphabetical list of libraries, for example, a list of all the libraries thatstart with an A, do the following:
1. Select option 1 (Work with libraries) from the AS/400 Programming Develop-ment Manager (PDM) menu, and press Enter. The Specify Libraries to WorkWith display appears.
2. Type A\ in the Library prompt to work with a list of libraries beginning with theletter A, and press Enter. The Work with Libraries Using PDM display appears.
The default value of the List type prompt is *ALL, which indicates that you areworking with a list of libraries. This prompt defaults to *ALL on the Work withLibraries Using PDM display if you specify *ALL, *CURLIB, a library name, or ageneric name for the Library prompt on the Specify Libraries to Work Withdisplay. When you work with lists of libraries, the List type prompt can alsohave the value *ALLUSR.
Chapter 3. Working with Libraries 11

You can use the Position to prompt on the Work with Libraries Using PDMdisplay to display a specific library name in the list of libraries. You can createa subset of a list of libraries using F17 (Subset function) on the Work withLibraries Using PDM display. You can also create a library when you areworking with lists of libraries.
3. Press F3 (Exit) to return to the AS/400 Programming Development Manager(PDM) menu.
Note: You must have authority in the library with which you are working to use theoptions on the Work with Libraries Using PDM display.
Creating a LibraryYou can create a library if you are working with a list of libraries (list type *ALL or*ALLUSR). To create a library called ANEXAMP:
1. Select option 1 (Work with libraries) from the AS/400 Programming Develop-ment Manager (PDM) menu, and press Enter. The Specify Libraries to WorkWith display appears.
2. Type A\ in the Library prompt to work with a list of libraries beginning with theletter A, and press Enter. The Work with Libraries Using PDM display appears.
3. Press F6 (Create) on the Work with Libraries Using PDM display. The CreateLibrary (CRTLIB) display appears.
4. Type ANEXAMP in the Library prompt, \PROD or \TEST in the Library type prompt,and a description of the library in the Text ‘text description’ prompt, and pressEnter. This example creates library ANEXAMP.
A message at the bottom of the display indicates that the library was created.Library ANEXAMP is now in the list. You may have to page down the list oflibraries to find it.
Note: If you create a library with a name that does not match the values youspecified on the Specify Libraries to Work With display, it is not shownin the list. For this example, library ANEXAMP conforms to the valuesyou selected (it starts with an A), so it is shown in the list after it iscreated.
5. Press F3 (Exit) to return to the AS/400 Programming Development Manager(PDM) menu.
12 Programming Development Manager (PDM)

Deleting a LibraryUsing PDM, you can delete libraries you no longer need by selecting the Deleteoption. You can delete more than one library in a list at a time. PDM has a confir-mation display where you verify that you have chosen the correct libraries to delete.
Note: You can only delete libraries from a list of libraries and not from a librarylist.
To delete library ANEXAMP and library AOLD:
1. Select option 1 (Work with libraries) from the AS/400 Programming Develop-ment Manager (PDM) menu, and press Enter. The Specify Libraries to WorkWith display appears.
2. Type A\ in the Library prompt to work with a list of libraries beginning with theletter A, and press Enter. The Work with Libraries Using PDM display appears.
3. Type 4 (Delete) in the Opt prompt next to library ANEXAMP and library AOLD,and press Enter. The Confirm Delete of Libraries display appears and listseach of the libraries you chose to delete.
4. To delete all of the libraries listed, press Enter or press F19 (Submit to batch)to delete the libraries in batch mode. When the libraries are deleted, the Workwith Libraries Using PDM display appears.
To change the libraries that you want to delete, press F12 (Cancel) to return tothe previous display. Then change your selections.
A message at the bottom of the display indicates that library ANEXAMP isdeleted. If you delete more than one library, a + sign at the far right side of thedisplay indicates there is another message waiting for the next library youdeleted.
5. Press F3 (Exit) to return to the AS/400 Programming Development Manager(PDM) menu.
Renaming a LibraryTo rename library ANEW:
1. Select option 1 (Work with libraries) from the AS/400 Programming Develop-ment Manager (PDM) menu, and press Enter. The Specify Libraries to WorkWith display appears.
2. Type A\ in the Library prompt to work with a list of libraries beginning with theletter A, and press Enter. The Work with Libraries Using PDM display appears.
3. Type 7 (Rename) in the Opt prompt next to library ANEW, and press Enter.The Rename Libraries display appears and lists each library you chose torename on the previous display. The library names in the New Name columnare initially the same as the ones in the Library column, so that you do nothave to retype the entire name if you only want to change a few characters.
4. Type the new name of the library under the New Name column for each librarylisted, and press Enter. A message at the bottom of the display indicates thatthe library is renamed.
Chapter 3. Working with Libraries 13

5. Check the list for the library you renamed. The library you renamed may havechanged position in the list because a list of libraries is sorted alphabetically. Ifyou rename the library to a name that does not match the selection values youentered on the Specify Libraries to Work With display (for example, if yourenamed the library BNEW), it does not appear in the list. If you are workingwith a library list, the library that is renamed does not change position becausea library list is not sorted alphabetically.
Note: You cannot rename library QSYS or library QTEMP, and you cannotrename libraries on your library list in batch mode.
6. Press F3 (Exit) to return to the AS/400 Programming Development Manager(PDM) menu.
Changing the Type and Text Description of a LibraryTo change the type and text description of library AOLD:
1. Select option 1 (Work with libraries) from the AS/400 Programming Develop-ment Manager (PDM) menu, and press Enter. The Specify Libraries to WorkWith display appears.
2. Type A\ in the Library prompt to work with a list of libraries beginning with theletter A, and press Enter. The Work with Libraries Using PDM display appears.
3. Type 2 (Change) next to library AOLD, and press Enter. The Change Library(CHGLIB) display appears.
4. Type \TEST in the Library type prompt.
5. Type the following description in the Text ‘description’ prompt, and press Enter:
Old backup copy of Dept. 642 library
The Work with Libraries Using PDM display reappears after the system hasprocessed your request.
A message appears at the bottom of the display indicating that the library ischanged. The type and text description of library AOLD are now different.
6. Press F3 (Exit) to return to the AS/400 Programming Development Manager(PDM) menu.
Working with Objects in a LibraryYou can work with all the objects in one or more libraries by using option 12 (Workwith). To create a subset of the list of objects that you want to work with, press F4(Prompt) to go to the Specify Objects to Work With display.
To work with all the objects starting with an A in library APROD and library ATEST:
1. Select option 1 (Work with libraries) from the AS/400 Programming Develop-ment Manager (PDM) menu, and press Enter. The Specify Libraries to WorkWith display appears
2. Type A\ in the Library prompt to work with a list of libraries beginning with theletter A, and press Enter. The Work with Libraries Using PDM display appears.
3. Press F23 (More options). The Work with Libraries Using PDM display reap-pears, which shows the remaining set of available options.
14 Programming Development Manager (PDM)

Note: You do not have to display the additional function keys and optionswhen you use them. Step 3 is not required, but you should use it untilyou are familiar with PDM.
4. Type 12 (Work with) next to all the objects starting with an A in library APRODand library ATEST.
5. Press F4 (Prompt). The Specify Objects to Work With display appears, onwhich you can create a subset of the list of objects to work with.
6. Press Enter, and the Work with Objects Using PDM display appears. You canselect any of the options shown for objects in the list.
7. When you finish working with all the objects that start with an A in libraryAPROD, press Enter. Any options that are typed in the Opt column, com-mands that are typed on the command line, or changes that are made to inputprompts are processed before PDM proceeds to the next library. The SpecifyObjects to Work With display appears for the second library ATEST in theLibrary prompt.
8. Press Enter, and the Work With Objects Using PDM display appears.
9. When you finish working with the objects in the second library, press Enter.The Work with Libraries Using PDM display reappears.
10. Press F3 (Exit) to return to the AS/400 Programming Development Manager(PDM) menu.
Copying a LibraryTo copy library AOLD and library APROD:
1. Select option 1 (Work with libraries) from the AS/400 Programming Develop-ment Manager (PDM) menu, and press Enter. The Specify Libraries to WorkWith display appears.
2. Type A\ in the Library prompt to work with a list of libraries beginning with theletter A, and press Enter. The Work with Libraries Using PDM display appears.
3. Type 3 (Copy) next to library AOLD and next to library APROD, and pressEnter. The Copy Libraries display appears.
This display lists each library you chose to copy in the previous display. Youmay have to page down the list to see all the libraries. The library namesunder New Name are initially the same as the ones under Library, so that youdo not have to retype the entire name if you only want to change a few charac-ters in the name of the target library.
4. Type BOLD under New Name to copy AOLD to BOLD and type BPROD underNew Name to copy APROD to BPROD, and press Enter. The Work withLibraries Using PDM display reappears. Because BOLD and BPROD do notbegin with an A, they are not included in the list.
To check that BOLD and BPROD were created, press F12 (Cancel). TheSpecify Libraries to Work With display reappears. To work with libraries thatstart with B, type B\ in the Library prompt, and press Enter. The Work withLibraries Using PDM display reappears, listing the libraries that start with B.Press Page Down until you find library BOLD and library BPROD.
Chapter 3. Working with Libraries 15

If you are working with a library list, the libraries you copied are not included inthe list. If you want to include them on the library list, you must add them. Forinformation on adding libraries to a library list, see “Adding a Library to aLibrary List” on page 18.
5. Press F3 (Exit) to return to the AS/400 Programming Development Manager(PDM) menu.
Copying a Library to an Existing LibraryIf you try to copy a library to a library that already exists, a message at the top ofthe Confirm Copy of Library display appears, indicating that the library alreadyexists. To copy library APROD to library BPROD:
1. Select option 1 (Work with libraries) from the AS/400 Programming Develop-ment Manager (PDM) menu, and press Enter. The Specify Libraries to WorkWith display appears.
2. Type A\ in the Library prompt to work with a list of libraries beginning with theletter A, and press Enter. The Work with Libraries Using PDM display appears.
3. Type 3 (Copy) beside library APROD, and press Enter.
4. Type BPROD under New Name, and press Enter. The Confirm Copy of Librarydisplay appears.
5. Type Y (Yes) in the Delete existing library prompt, and press Enter. Amessage at the bottom of the display indicates that library BPROD is deleted.
Displaying the Description of a LibraryWhen using PDM, you can display the following information about a library:
� Library size� Time and date the library was created� Time and date the library was changed� Time and date the library was last saved� Time and date the library was last restored
To display the description of library APROD:
1. Select option 1 (Work with libraries) from the AS/400 Programming Develop-ment Manager (PDM) menu, and press Enter. The Specify Libraries to WorkWith display appears.
2. Type A\ in the Library prompt to work with a list of libraries beginning with theletter A, and press Enter. The Work with Libraries Using PDM display appears.
3. Type 8 (Display description) next to library APROD, and press Enter. TheDisplay Object Description - Full display appears.
4. Press F3 (Exit) to return to the Work with Libraries Using PDM display.
5. Press F3 (Exit) to return to the AS/400 Programming Development Manager(PDM) menu.
16 Programming Development Manager (PDM)

Subset of a List of LibrariesWhen working with a list of libraries, you can show a subset of a list of libraries byusing the following prompts on the Subset Library List display:
� Library � Library type � Text
You can use these prompts in any combination or by themselves to create a subsetof a list of libraries. The next two sections show examples of creating a subset of alist of libraries using F17 (Subset function).
Creating a Subset List with the Library Name and Type PromptsYou can create a subset of a list of libraries using the Library prompt and theLibrary type prompt on the Subset Library List display. To create a subset of a listof all the libraries of type *PROD that start with an A:
1. Select option 1 (Work with libraries) from the AS/400 Programming Develop-ment Manager (PDM) menu, and press Enter. The Specify Libraries to WorkWith display appears.
2. Type \ALL in the Library prompt, and press Enter. The Work with LibrariesUsing PDM display appears.
3. Press F24 (More keys).
Note: You do not have to display the additional function keys and optionswhen you use them. Step 3 is not required, but you should use it untilyou are familiar with PDM.
4. On the Work with Libraries Using PDM display, press F17 (Subset) to create asubset of the list. The Subset Library List display appears.
5. In the Library prompt, type in the generic name to show a subset of the list.You can use any one of the formats for the generic name listed on page 11.For this example, type A\ in the Library prompt, \PROD in the Library typeprompt, and leave the Text prompt at *ALL for a list of all the libraries that startwith an A and that are of type *PROD, and press Enter. The Work withLibraries Using PDM display appears, which shows a subset of the list oflibraries. Only libraries whose names start with an A and are of type *PRODare shown in the subset of the list.
The List type prompt is still *ALL. The List type prompt indicates the type of listthat is displayed, a library list, or a list of libraries.
6. Press F3 (Exit) to return to the AS/400 Programming Development Manager(PDM) menu.
Creating a Subset List with the Text PromptTo create a subset of a list of libraries for Department 642 using only the Textprompt:
1. Select option 1 (Work with libraries) from the AS/400 Programming Develop-ment Manager (PDM) menu, and press Enter. The Specify Libraries to WorkWith display appears.
2. Type \ALL in the Library prompt, and press Enter. The Work with LibrariesUsing PDM display appears.
Chapter 3. Working with Libraries 17

3. Press F24 (More keys) twice. The Work with Libraries Using PDM displayreappears, showing the third set of available function keys.
Note: You do not have to display the additional function keys and optionswhen you use them. Step 3 is not required, but you should use it untilyou are familiar with PDM.
4. On the Work with Libraries Using PDM display, press F17 (Subset) to create asubset of the list. The Subset Library List display appears.
5. Type 642 in the Text prompt to indicate that you want to display a subset of thelist that includes all items with 642 in their text field, and press Enter. Leavethe Library and Library type prompts at *ALL. The Work with Libraries UsingPDM display appears, which shows a subset of the list of libraries that lists allDepartment 642 libraries.
6. Press F3 (Exit) to return to the AS/400 Programming Development Manager(PDM) menu.
Changing a Library ListYou can make changes to library type *LIBL and library type *USRLIBL only. Allchanges you make to a library list are temporary. When you sign off and sign backonto PDM, the library list does not display the changes you made in your previoussession. For information on making permanent changes to the library list, refer tothe CL Reference book.
To change the library list temporarily, do one of the following tasks:
� Add a library to a library list� Move a user library to the user portion of a library list� Remove a user library from the user portion of a library list
Adding a Library to a Library ListWhen working with libraries in PDM, you can add a library to a library list. To addlibrary APROD to the library list:
1. Select option 1 (Work with libraries) from the AS/400 Programming Develop-ment Manager (PDM) menu, and press Enter. The Specify Libraries to WorkWith display appears.
2. Type \LIBL in the Library prompt, and press Enter. The Work with LibrariesUsing PDM display appears.
3. Press F6 (Add to list) on the Work with Libraries Using PDM display. The AddLibrary List Entry (ADDLIBLE) display appears.
18 Programming Development Manager (PDM)

4. Type APROD in the Library prompt, and press Enter. If you are not sure of whatto type for the prompt, press F1 (Help). The Work with Libraries Using PDMdisplay reappears.
Library APROD is now included in the library list. You may have to page downthe list to find the library you added if you chose to add the library to the end ofthe list using *LAST as the positional parameter. In this example, libraryAPROD is added to the top of the user portion of the library list, fourth in thelist. QSYS, QGPL, and QPDA are before APROD, because APROD is a userlibrary, and user libraries are listed after any system library, the current library,and product libraries.
5. Press F3 (Exit) to return to the AS/400 Programming Development Manager(PDM) menu.
Moving a User Library to the User Portion of a Library ListIf you are working with a library list, you can move user libraries anywhere in theuser portion of the library list. If you do not specify the library name when you aresearching for an object in a library, the position of a library in the library list deter-mines the order in which that library is searched. For example, if you have a librarythat contains test code, you can place it at the top of the library list so that testcode is searched first. To move library APROD to the user portion of the librarylist:
1. Select option 1 (Work with libraries) from the AS/400 Programming Develop-ment Manager (PDM) menu, and press Enter. The Specify Libraries to WorkWith display appears.
2. Type \LIBL in the Library prompt, and press Enter. The Work with LibrariesUsing PDM display appears.
3. On the Work with Libraries Using PDM display, press F23 (More options).
The Work with Libraries Using PDM display reappears, showing the remainingset of available options for a library list.
Note: You do not have to display the additional function keys and optionswhen you use them. Step 3 is not required, but you should use it untilyou are familiar with PDM.
4. Select option 20 (Move within list) next to library APROD. Type either option21 (Move before) or option 22 (Move after) in the position to which you want tomove the library. For this example, type 22 (Move after) beside library PAYLIBto move library APROD to a position after library PAYLIB.
5. Press Enter, and the Work with Libraries Using PDM display appears againwith the library APROD in its new position.
A message at the bottom of the display indicates that the library list is changed.
6. Press F3 (Exit) to return to the AS/400 Programming Development Manager(PDM) menu.
Chapter 3. Working with Libraries 19

Removing a User Library from the User Portion of a Library ListWhen working with libraries in PDM, you can remove a library from your library list.This does not delete the library from the system: it just removes it from your librarylist.
To remove library APROD from the user portion of the library list:
1. Select option 1 (Work with libraries) from the AS/400 Programming Develop-ment Manager (PDM) menu, and press Enter. The Specify Libraries to WorkWith display appears.
2. Type \LIBL in the Library prompt, and press Enter. The Work with LibrariesUsing PDM display appears.
3. On the Work with Libraries Using PDM display, press F23 (More options).
The Work with Libraries Using PDM display reappears, showing the remainingoptions available.
Note: You do not have to display the additional function keys and optionswhen you use them. Step 3 is not required, but you should use it untilyou are familiar with PDM.
4. Select option 23 (Remove from list) next to library APROD, and press Enter.The Work with Libraries Using PDM display reappears.
The list no longer contains library APROD. The message at the bottom of thedisplay indicates that the library list is changed.
5. Press F3 (Exit) to return to the AS/400 Programming Development Manager(PDM) menu.
20 Programming Development Manager (PDM)

Chapter 4. Working with Objects
You can perform the following tasks when working with objects:
� Create objects � Delete objects � Rename objects� Move objects to another library� Copy to an existing object� Display the description of objects� Display a detailed description of objects� Change objects using the data file utility (DFU)� Create a program� Create a service program
� Debug programs� Compare file members
� Run objects� Work with members in a physical file� Create a subset of a list of objects� Refresh the subset of a list of objects
Using PDM, you can work with all objects in a library, or with specific objects in alibrary. This chapter shows you how to perform operations on objects using theavailable options and function keys. Some of the options can only be used withcertain object types. Refer to Appendix A, “Command Reference” on page 71 forinformation on the commands that can be performed on specific object types.
Library ATEST and library APROD are used for the examples that follow in thischapter.
Creating ObjectsTo create object PRODDATA of type *DTAARA:
1. Select option 2 (Work with objects) from the AS/400 Programming DevelopmentManager (PDM) menu, and press Enter. The Specify Objects to Work withdisplay appears.
2. Press Enter to bypass this display. The Work with Objects Using PDM displayappears.
3. Press F6 (Create) to create an object. The Create Commands menu appearsthat lists all the create commands.
4. Type 59 on the command line to create an object of type *DTAARRA, andpress Enter. The Create Data Area (CRTDTAARA) display appears.
5. Type PRODDATA in the Data area prompt, and ATEST in the Library prompt. If youare unsure of what to enter for any of the prompts on this display, press F1(Help) to display the online help information for that prompt.
Copyright IBM Corp. 1994 21

6. Press Enter, and the Create Commands display reappears. A message at thebottom of the display indicates that object PRODDATA is created.
7. Press F3 (Exit). The Work with Objects Using PDM display reappears. ObjectPRODDATA of type *DTAARA in library ATEST now appears in the list. Youmay have to page through the list to find it if there are a lot of objects in thelist.
8. Press F3 (Exit) to return to the AS/400 Programming Development Manager(PDM) menu.
Deleting ObjectsYou can delete objects you no longer need by selecting the Delete option. You candelete more than one object in a list at a time. PDM has a confirmation display sothat you can verify that the objects you chose are the ones you want to delete.
To delete object BACKTEST in library ATEST:
1. Select option 2 (Work with objects) from the AS/400 Programming DevelopmentManager (PDM) menu, and press Enter. The Specify Objects to Work withdisplay appears.
2. Press Enter to bypass this display. The Work with Objects Using PDM displayappears.
3. Type 4 (Delete) next to the object BACKTEST, and press Enter. The ConfirmDelete of Objects display appears.
This display lists each of the objects you chose to delete on the previousdisplay, in this example, the object BACKTEST. If you chose a large numberof objects, you may have to page down the list to see them all.
4. Press Enter to delete all of the objects listed, or press F19 (Submit to batch) todelete the objects in batch mode. If you do not want to delete all of theobjects, press F12 (Cancel) to return to the previous display and change yourselections.
Note: If you choose a large number of objects to delete, there may be morethan can be listed on one page. When you press Enter or F19 (Submitto batch), the objects on every page of the Confirm Delete of Objectsdisplay are deleted, not just the ones on the page that is currently dis-played.
After the system processes your requests, the Work with Objects Using PDMdisplay reappears. The object BACKTEST is no longer in the list. A messageat the bottom of the display indicates that the object is deleted.
5. Press F3 (Exit) to return to the AS/400 Programming Development Manager(PDM) menu.
22 Programming Development Manager (PDM)

Renaming ObjectsYou can rename objects using the Rename option on the Work with Objects UsingPDM display. You can choose to rename more than one object in the list at a time.
To rename object ADMBACK and object BACKUP in library ATEST:
1. Select option 2 (Work with objects) from the AS/400 Programming DevelopmentManager (PDM) menu, and press Enter. The Specify Objects to Work withdisplay appears.
2. Type ATEST in the Library prompt, \ALL in the Object name prompt, \ALL in theObject type prompt, and \ALL in the Object attribute prompt, and press Enter.The Work with Objects Using PDM display appears.
3. Type 7 (Rename) next to object ADMBACK and object BACKUP, and pressEnter. The Rename Objects display appears.
This display lists each of the objects you selected to rename on the previousdisplay. The object names under New Name are initially the same as thenames under Object. This saves retyping if you only want to change one ortwo characters in the name of the object. If you choose a large number ofobjects to rename, you may have to page down the list to see them all.
4. Type ABACK next to object ADMBACK and BBACK next to object BACKUP underNew Name, and press Enter. The Work with Objects Using PDM display reap-pears.
A message at the bottom of the display indicates that the first object youselected has been renamed. The + at the far right of the message indicatesthat another message is waiting. To view this message, place the cursor onthe message line and press the Page Down key. The next message displayedindicates that the second object you chose is renamed.
5. Check the list for the renamed objects. The objects now have the new nameyou assigned them.
6. Press F3 (Exit) to return to the AS/400 Programming Development Manager(PDM) menu.
Moving Objects to Another LibraryUsing PDM, you can move objects from one library to another. You can moveobjects in groups, if you are moving them to the same library. You can also moveindividual objects to different libraries.
To move object ABACK and object BBACK from library ATEST to library APROD:
1. Select option 2 (Work with objects) from the AS/400 Programming DevelopmentManager (PDM) menu, and press Enter. The Specify Objects to Work Withdisplay appears.
2. Type ATEST in the Library prompt, \ALL in the Object name prompt, \ALL in theObject type prompt, and \ALL in the Object attribute prompt, and press Enter.The Work with Objects Using PDM display appears.
3. Type 11 (Move) next to object ABACK and object BBACK, and press Enter.The Move Objects display appears.
Chapter 4. Working with Objects 23

This display lists each object you selected to move on the previous display. Ifyou choose many objects, you may have to page through the list to see themall. The From library prompt already has the name of the library that containsthe objects you want to move. For this example, the From library prompt isATEST.
4. Type the name of the library to which you want to move the objects in the Tolibrary prompt.
5. Make sure the objects selected are the ones you want to move, and pressEnter. The Work with Objects Using PDM display appears. The objects youchose to move are no longer in library ATEST.
A message at the bottom of the display indicates that object ABACK wasmoved to library APROD. The + at the far right of the display indicates thatanother message is waiting. To view the message, place the cursor on themessage line and press the Page Down key. Another message indicates thatobject BBACK was moved to library APROD.
6. To display the objects you moved to the library APROD, type APROD in theLibrary prompt, and press Enter.
The Work with Objects Using PDM display reappears. The list now containsobjects in library APROD, including object ABACK and object BBACK. Youcan page through the list to find the objects.
7. Press F3 (Exit) to return to the AS/400 Programming Development Manager(PDM) menu.
Copying ObjectsTo copy object ABACK and object BBACK to library ATEST:
1. Select option 2 (Work with objects) from the AS/400 Programming DevelopmentManager (PDM) menu, and press Enter. The Specify Objects to Work Withdisplay appears.
2. Type APROD in the Library prompt, \ALL in the Object name prompt, \ALL in theObject type prompt, and \ALL in the Object attribute prompt, and press Enter.The Work with Objects Using PDM display appears.
3. Type 3 (Copy) next to object ABACK and object BBACK, and press Enter. TheCopy Objects display appears.
This display lists each object you chose to copy on the previous display. Youmay have to page through the list to see all the objects you chose to copy.The To library prompt initially contains the same library name as the Fromlibrary prompt, and the Object names under New Name are initially the sameas the ones under Object. This is to save retyping if you only want to change afew characters in the name of the library or object you are copying to.
4. Type ATEST in the To library prompt.
5. Type ABACK2 next to object ABACK and BBACK2 next to object BBACK, andpress Enter. The Work with Objects Using PDM display reappears.
Note: If you are copying objects to a different library, you do not have tochange the object names, unless the object already exists in anotherlibrary.
24 Programming Development Manager (PDM)

6. To display library ATEST to see the objects you copied to it, type ATEST in theLibrary prompt, and press Enter. The Work with Objects Using PDM displayreappears, listing all the objects in library ATEST. Object ABACK2 and objectBBACK2 are included in the list.
7. Press F3 (Exit) to return to the AS/400 Programming Development Manager(PDM) menu.
Copying an Object to an Existing ObjectIf you try to copy an object to an object that already exists, a message at the top ofthe Confirm Copy of Object display appears, indicating that the object alreadyexists. To copy object ABACK2 to object BBACK2:
1. Select option 2 (Work with objects) from the AS/400 Programming DevelopmentManager (PDM) menu, and press Enter. The Specify Objects to Work Withdisplay appears.
2. Type APROD in the Library prompt, \ALL in the Object name prompt, \ALL in theObject type prompt, \ALL in the Object attribute prompt, and press Enter. TheWork with Objects Using PDM display appears.
3. Type 3 (Copy) beside object ABACK2, and press Enter.
4. Type BBACK2 under New Name, and press Enter. The Confirm Copy of Objectsdisplay appears.
5. Type Y (Yes) in the Delete existing object prompt, and press Enter. Amessage at the bottom of the display indicates that object BBACK2 is deleted.
Displaying the Description of ObjectsWhen working with PDM, you can display the following information about an object:
� Object size� Time and date the object was created� Time and date the object was changed� Time and date the object was last saved� Time and date the object was last restored
To display the description of object ABACK2 in library ATEST:
1. Select option 2 (Work with objects) from the AS/400 Programming DevelopmentManager (PDM) menu, and press Enter. The Specify Objects to Work Withdisplay appears.
2. Type ATEST in the Library prompt, \ALL in the Object name prompt, \ALL in theObject type prompt, and \ALL in the Object attribute prompt, and press Enter.The Work with Objects Using PDM display appears.
3. Type 8 (Display description) next to object ABACK2, and press Enter. TheDisplay Object Description - Full display appears, which shows informationabout object ABACK2, including the time the object was last changed.
4. To return to the Work with Objects Using PDM display, press Enter.
5. Press F3 (Exit) to return to the AS/400 Programming Development Manager(PDM) menu.
Chapter 4. Working with Objects 25

Displaying a Detailed Description of ObjectsYou can display detailed information about objects by using the Display option onthe Work with Objects Using PDM display. The type of information that appearsdepends on the object type you are displaying.
Note: If you choose the Display option for certain objects (for example, objects oftype *LIB), the contents of the object are displayed. If you choose todisplay a display file (*FILE DSPF), the Test display option in SDA is called.
To display the detailed description of object ABACK2 in library ATEST:
1. Select option 2 (Work with objects) from the AS/400 Programming DevelopmentManager (PDM) menu, and press Enter. The Specify Objects to Work Withdisplay appears.
2. Type ATEST in the Library prompt, \ALL in the Object name prompt, \ALL in theObject type prompt, and \ALL in the Object attribute prompt, and press Enter.The Work with Objects Using PDM display appears.
3. Type 5 (Display) next to object ABACK2, and press Enter.
The display that appears depends on the type of object you choose to display.For this example, because you chose to display an object of type *PGM, theprompt display for the DSPPGM command appears showing information suchas the program creation date and time. For a list of the commands called forthe different object types, refer to “Command Reference for Objects” onpage 71.
You may have to page through the information on the display to find what youare looking for.
4. When you finish looking through the information for the chosen object, press F3(Exit) to return to the Work with Objects Using PDM display.
5. Press F3 (Exit) to return to the AS/400 Programming Development Manager(PDM) menu.
Changing Objects Using DFUIn PDM, you can change objects in a library by using the data file utility (DFU).You can change files of type PF-DTA, LF, and DDMF, and DFU programs (*PGMDFU). For more information on using DFU, refer to the ADTS/400: Data File Utilitybook.
To change object DDATA in library ATEST using DFU:
1. Select option 2 (Work with objects) from the AS/400 Programming DevelopmentManager (PDM) menu, and press Enter. The Specify Objects to Work Withdisplay appears.
2. Type ATEST in the Library prompt, \ALL in the Object name prompt, \ALL in theObject type prompt, and \ALL in the Object attribute prompt, and press Enter.The Work with Objects Using PDM display appears.
3. Page down the list until you reach the object that you want to change usingDFU. For this example, page down the list until you reach object DDATA.
26 Programming Development Manager (PDM)

4. Type 18 (Change using DFU) next to object DDATA, and press Enter. A DFUdisplay appears on which you can change the object. If you are not sure howto change an object in DFU, press Help for more information on the DFUdisplay.
5. After making your changes, exit from DFU. The Work with Objects Using PDMdisplay reappears.
6. Press F3 (Exit) to return to the AS/400 Programming Development Manager(PDM) menu.
Creating a ProgramYou can bind one or more *MODULE, *SRVPGM, and *BNDDIR objects to createone program object (*PGM). You can create the program object in batch or inter-actively, depending on the value you enter in the Run in batch prompt on theChange Defaults display. For more information on this prompt and on job modes,see “Changing the Compile and Run Modes” on page 66.
When you create a program object from several object types, you must include atleast one object of type *MODULE.
To create a program by binding several object types:
1. Select option 2 (Work with objects) from the AS/400 Programming DevelopmentManager (PDM) menu, and press Enter. The Specify Objects to Work Withdisplay appears.
2. Type ATEST in the Library prompt, \ALL in the Object name prompt, \ALL in theObject type prompt, and \ALL in the Object attribute prompt, and press Enter.The Work with Objects Using PDM display appears.
3. Press F23 (More options) twice. The third set of options available for the Workwith Objects Using PDM display appears.
Note: You do not have to display the additional function keys and optionswhen you use them. Step 2 is not required, but you should use it untilyou are familiar with PDM.
4. Page down the list until you see the objects that you want to bind on the Workwith Objects Using PDM display.
5. Type 26 (Create program) next to object CMOD, object CMOD1, and objectCMOD2, and press Enter. The objects you selected are bound into a singleprogram object.
6. Press F3 (Exit) to return to the AS/400 Programming Development Manager(PDM) menu.
Chapter 4. Working with Objects 27

Creating a Service ProgramTo create a service program (*SRVPGM) from several objects, specify 27 (Createservice program) for the objects you want to bind. This option does not create anexecutable object.
To create a program, bind the service program and other *MODULE, *SRVPGM, or*BNDDIR objects. The steps for creating a service program are the same as thosefor creating a program.
You must specify at least one *MODULE object when creating a service program.
Debugging a ProgramYou debug a program by using option 34 (Interactive Source Debugger). You canuse this option on all objects of type *PGM and type *SRVPGM.
To debug a program:
1. Select option 2 (Work with objects) from the AS/400 Programming DevelopmentManager (PDM) menu, and press Enter. The Specify Objects to Work Withdisplay appears.
2. Type a library name in the Library prompt, \ALL in the Object name prompt,\PGM or \SRVPGM in the Object type prompt, \ALL in the Object attribute prompt,and press Enter. The Work with Objects Using PDM display appears.
3. Press F23 (More options) twice to show the additional options available for thisdisplay.
Note: You do not have to display the additional function keys and optionswhen you use them. Step 3 is not required, but you should use it untilyou are familiar with PDM.
4. Type 34 (Interactive Source Debugger) beside the program that you want todebug, and press Enter. The Start ISDB/400 (STRISDB) display appears.
Refer to ADTS/400: Interactive Source Debugger, SC09-1897, for more informationon debugging programs.
Comparing File MembersYou can compare file members by using option 54 (Compare file member). Youcan use this option only on objects of type *FILE with attribute PF-SRC or attributePF-DTA.
To compare file members:
1. Select option 2 (Work with objects) from the AS/400 Programming DevelopmentManager (PDM) menu, and press Enter. The Specify Objects to Work Withdisplay appears.
2. Type a library name in the Library prompt, \ALL in the Object name prompt,\FILE in the Object type prompt, PF-DTA or PF-SRC in the Object attributeprompt, and press Enter. The Work with Objects Using PDM display appears.
28 Programming Development Manager (PDM)

3. Press F23 (More options) twice to show the additional options available for thisdisplay.
Note: You do not have to display the additional function keys and optionswhen you use them. Step 3 is not required, but you should use it untilyou are familiar with PDM.
4. Type 54 (Compare file member) beside the object you want to compare, andpress Enter. The Compare Physical File Member (CMPPFM) display appears.
Refer to ADTS/400: File Compare and Merge Utility, SC09-1772, for more informa-tion on comparing file members.
Running ObjectsPDM allows you to run objects in either batch mode or interactively, depending onthe value you enter in the Run in batch prompt on the Change Defaults display.For more information on this prompt and on job modes, see “Changing the Compileand Run Modes” on page 66.
To run object DISAJOB in library ATEST:
1. Select option 2 (Work with objects) from the AS/400 Programming DevelopmentManager (PDM) menu, and press Enter. The Specify Objects to Work Withdisplay appears.
2. Type ATEST in the Library prompt, \ALL in the Object name prompt, \ALL in theObject type prompt, and \ALL in the Object attribute prompt, and press Enter.The Work with Objects Using PDM display appears.
3. Press F23 (More options). The second set of options available for the Workwith Objects Using PDM display appears.
Note: You do not have to display the additional function keys and optionswhen you use them. Step 2 is not required, but you should use it untilyou are familiar with PDM.
4. Page down the list until you reach the object you want to run on the Work withObjects Using PDM display.
5. Type 16 (Run) next to object DISAJOB, and press Enter. If you type parame-ters on the command line for use with option 16 (Run), they are changed touppercase.
If you run the object in batch mode, a message indicates that a batch job hasbeen submitted. The message waiting light, if not already on, comes on whenthe object is finished running. You can type DSPMSG on the command line tosee any system messages and then press Enter to return to the Work withObjects Using PDM display.
6. Press F3 (Exit) to return to the AS/400 Programming Development Manager(PDM) menu.
Note: Parameters entered on the command line for use with option 16 (Run) arechanged to uppercase.
Chapter 4. Working with Objects 29

Working with Members in a Physical FileYou can work with members in a physical file using either option 12 (Work with) oroption 25 (Find string) on the Work with Objects Using PDM display. For furtherinformation on the Find string option, see Chapter 6, “Searching for a CharacterString or a Numeric String” on page 45.
When you select an object to work with, if the object type is *FILE and the attributeis PF-SRC or PF-DTA, the Work with Members Using PDM display appearsallowing you to perform operations on members. If the object type is *LIB, theWork with Objects Using PDM display appears allowing you to perform operationson objects in the library. In general, PDM displays items within an object for you towork with, and only if operations cannot be performed on the constituent parts ofthe object does it display the object itself for you to work with.
If the Work with option is used on an object with a type other than *FILE and *LIB,a display that does not originate from PDM may appear. For a list of the objectsthat are valid for the Work with option, refer to “Commands Called for the WorkWith Option” on page 79.
PDM also allows you to press F4 and prompt the Work with option. The SpecifyMembers to Work With display appears. You can choose the members with whichyou want to work. The system does not process commands entered on thecommand line when you select the Work with option.
To work with all members that start with an A in the CMDSRC physical file in libraryATEST:
1. Select option 2 (Work with objects) from the AS/400 Programming DevelopmentManager (PDM) menu, and press Enter. The Specify Objects to Work Withdisplay appears.
2. Type ATEST in the Library prompt, CMDSRC in the Object name prompt, \ALL inthe Object type prompt, and \ALL in the Object attribute prompt, and pressEnter. The Work with Objects Using PDM display appears.
3. Press F23 (More options) to show the additional options available for thedisplay.
Note: You do not have to display the additional function keys and optionswhen you use them. Step 3 is not required, but you should use it untilyou are familiar with PDM.
4. Type 12 (Work with) next to file CMDSRC, and press Enter.
5. Press F4 (Prompt) to choose the members you want to work with, or pressEnter to work with all the members in the specified file. For this example, pressF4 (Prompt). The Specify Members to Work With display appears.
6. Type A\ in the Name prompt, and press Enter. The Work with Members UsingPDM display appears showing all the members in the file you chose to workwith.
30 Programming Development Manager (PDM)

You can select any of the options available for this display for the memberslisted. For more information on working with members in a file, refer toChapter 5, “Working with Members” on page 33.
7. Press Enter or F12 (Cancel) to return to the Work with Objects Using PDMdisplay.
8. Press F3 (Exit) to return to the AS/400 Programming Development Manager(PDM) menu.
Creating a Subset of a List of ObjectsTo create a subset of a list of all CLP programs with the characters BACK any-where in their names in library ATEST:
1. Select option 2 (Work with objects) from the AS/400 Programming DevelopmentManager (PDM) menu, and press Enter. The Specify Objects to Work Withdisplay appears.
2. Type ATEST in the Library prompt, \ALL in the Object name prompt, \ALL in theObject type prompt, and \ALL in the Object attribute prompt, and press Enter.The Work with Objects Using PDM display appears.
3. Press F24 (More keys) twice. The Work with Objects Using PDM display reap-pears, which shows the second set of function keys for the display.
Note: You do not have to display the additional function keys and optionswhen you use them. Step 3 is not required, but you should use it untilyou are familiar with PDM.
4. Press F17 (Subset) to create a subset of the list on the Work with ObjectsUsing PDM display. The Subset Object List display appears.
5. Type \BACK\ in the Object prompt, \PGM in the Object type prompt, and CLP inthe Object attribute prompt, and press Enter.
The generic name can be in one of the formats listed on page 11.
You can also specify a range of object sizes in the From and To prompts to listobjects within the range. For this example, use the default values. The Workwith Objects Using PDM display appears with a list of all the objects thatinclude the characters BACK anywhere in their name, that have a type of*PGM, and that have the attribute CLP.
Note: When working with a subset of a list, if you change the Library prompt onthe Work with Objects Using PDM display to view the objects in a differentlibrary, the new list that appears is also a subset list.
Chapter 4. Working with Objects 31

Refreshing the Subset of a List of ObjectsAfter creating a subset of a list of objects, you can redisplay the list in its originalformat using F5 (Refresh) on the subset display.
To refresh a subset of a list:
1. Press F17 (Subset) on the Work with Objects Using PDM display. The SubsetObject List display appears.
2. Press F5 (Refresh). The prompts are refreshed to *ALL.
3. Press Enter. The Work with Objects Using PDM display appears, which dis-plays all libraries on the system, or all objects in the current library, or allmembers in the current object.
32 Programming Development Manager (PDM)

Chapter 5. Working with Members
You can perform the following tasks with members in data physical files (*FILEPF-DTA) and source physical files (*FILE PF-SRC):
� Copy members� Change the type and text description of members
� Edit members � Compile members� Create Integrated Language Environment modules� Run source member procedures
� Delete members� Display the description of members� Change members using the screen design aid� Change members using the report layout utility� Change members using the data file utility� Sort and position a list of members by date� Show a subset of a list of members� Compare file members� Merge file members
Copying MembersYou can copy members in groups or individually. If you copy a group, all membersin the group are copied to the same file and library. To copy member ADDLIB andmember ADMPRT to other members in the same file:
1. Select option 3 (Work with members) from the AS/400 Programming Develop-ment Manager (PDM) menu, and press Enter. The Specify Members to WorkWith display appears.
2. Type CMDSRC in the File prompt, ATEST in the Library prompt, \ALL in theMember name prompt, and \ALL in the Member type prompt, and press Enter.The Work with Members Using PDM display appears.
3. Type 3 (Copy) beside member ADDLIB and member ADMPRT, and pressEnter. The Copy Members display appears.
This display lists each of the members you chose to copy on the previousdisplay. You may have to page through the list to see all the members youchose. The To file prompt and the To library prompt initially have the samevalues as the From file and From library prompts, and the member namesunder New Name are initially the same as those under Member. This is tosave retyping if you only want to change a few characters.
4. To view a list of the source or data physical files in the specified library that youcan copy to, position your cursor on the To file prompt, and press F4 (Prompt).The Select File Using PDM display appears. To view a subset of a list, type ageneric name in the prompt before pressing F4 (Prompt). For a list of validgeneric names, see page 11.
Copyright IBM Corp. 1994 33

This display provides you with a list of all the valid source physical files forwhich you have authority to copy members. While you are copying from asource physical file, only source physical files are shown on the list. To copy amember, type 1 (Select) next to the file of your choice, and press Enter. TheCopy Members display reappears, and the To file prompt is filled in with yourchoice.
5. If you are making a copy of a member within the same file and library, do notchange the To file prompt and the To library prompt. For this example, typeCMDTYP in the To file prompt and ATEST in the To library prompt.
6. Type ADDL under New Name beside member ADDLIB, ADMP under New Namebeside member ADMPRT, and press Enter, or press F19 (Submit to batch) tocopy the members in batch mode.
When you are copying the members to a different file, you do not have to use anew name unless the new file already contains a member of that name. If themember already exists, the Confirm Copy of Member display appears. For thisexample, the members do not already exist. For an interactive job, a briefmessage flashes on your display as each member is copied. When all themembers are copied, the Work with Members Using PDM display reappears.
A message appears at the bottom of the display indicating that the first memberyou chose to copy is added to the CMDTYP file. The + at the far right of themessage indicates another message is waiting. Place the cursor on themessage line and press the Page down key. The next message displayed indi-cates that the second member you chose to copy is added to the CMDTYP file.
7. Press F3 (Exit) to return to the AS/400 Programming Development Manager(PDM) menu.
Changing the Type and Text Description of a MemberYou must have authority to change the type and text description of a member onthe Work with Members Using PDM display. To change the type and textdescription of a member:
1. Select option 3 (Work with members) from the AS/400 Programming Develop-ment Manager (PDM) menu, and press Enter. The Specify Members to WorkWith display appears.
2. Type the file name in the File prompt, the library name in the Library prompt,the member name in the Member name prompt, and the member type in theMember type prompt, and press Enter. The Work with Members Using PDMdisplay appears.
3. Type 13 (Change text) next to the member you want to change, and pressEnter. The Change Physical File Member (CHGPFM) display appears.
4. Type the new type in the Source type prompt. If you change the type of amember, it must contain the correct source for the type; for example, a memberof type CMD must contain CMD source code.
5. Type the new text description in the Text ‘description’ prompt, and press Enter.The Work with Members Using PDM display reappears.
34 Programming Development Manager (PDM)

Editing MembersYou can edit a member only in a file that is a source physical file. PDM calls thesource entry utility (SEU), which you can use to edit the member. For more infor-mation on editing members in a file, refer to the ADTS/400: Source Entry Utilitybook.
To edit a member:
1. Select option 3 (Work with members) from the AS/400 Programming Develop-ment Manager (PDM) menu, and press Enter. The Specify Members to WorkWith display appears.
2. Type 2 (Edit) next to the member you want to edit.
3. Press F3 (Exit) to return to the AS/400 Programming Development Manager(PDM) menu.
Compiling MembersYou can compile a member only if the member is in a source physical file. Themember type must match the source code contained in the member. When youcompile a member, the appropriate create command is called for the member type.For more information on the compile commands called for different member types,see “Command Reference for Members” on page 82.
You can compile a member in batch mode or interactively. The Compile in batchprompt on the Change Defaults display allows you to choose your preferred methodof compiling. For more information on changing the compilation mode, see“Changing the Compile and Run Modes” on page 66.
For example, when you submit RPG38 and RPG to batch, you are submitting withdifferent versions of the Submit Job command. The resulting jobs, therefore, havedifferent job run characteristics. This may result in compilations that are not suc-cessful in batch but are successful when they are run interactively.
To compile these types of jobs in batch, change the initial library list and outputqueue parameter values for the job description value specified on the ChangeDefaults display to reflect the values of your interactive session.
To compile member ADDL in file CMDSRC in library ATEST:
1. Select option 3 (Work with members) from the AS/400 Programming Develop-ment Manager (PDM) menu, and press Enter. The Specify Members to WorkWith display appears.
2. Type CMDSRC in the File prompt, ATEST in the Library prompt, \ALL in theMember name prompt, CMD in the Member type prompt, and press Enter. TheWork with Members Using PDM display appears.
3. Press F23 (More options) to see the additional options available for the Workwith Members Using PDM display.
4. Select option 14 (Compile) next to member ADDL, and press Enter. Theappropriate create command is called to compile the member. For thisexample, the CRTCMD command is called.
Chapter 5. Working with Members 35

5. If the member is compiled in batch mode, the message waiting light comes onwhen the compilation is completed. Type DSPMSG on the command line to checkyour messages to see if the compilation is successful.
The object created as a result of compiling is put in the library specified in theObject library prompt on the Change Defaults display. If an object with thesame name as the object to be created as a result of the compilation alreadyexists in the library, you can specify that the existing object should be deletedbefore compiling, in one of the following ways:
� On the Change Defaults display, type Y (Yes) for the Replace objectprompt to specify that if an object with the same name as the object to becreated as a result of the compile already exists, the existing object is to bereplaced. If the command called for the compilation has a REPLACEparameter, its value defaults to the value that is in the Replace objectprompt on the Change Defaults display. For additional information on theReplace object prompt, refer to “Storing Compiled Members in a Library forCompiled Programs” on page 66.
� If the object already exists, and you did not type Y (Yes) for the Replaceobject prompt on the Change Defaults display, the Confirm Compile ofMember display appears after PDM determines that the object alreadyexists.
Creating an Integrated Language Environment ModuleYou can create a module for an Integrated Language Environment (ILE) sourcetype by using option 15 (Create module). The Create module option works thesame as option 14 (Compile) and uses the same options, but creates a *MODULEobject type.
When you create a module, the appropriate create command for the ILE membertype is called. The resulting modules can be bound into a program object using theWork with Objects Using PDM display and option 26 (Create program). For moreinformation on creating a program from one or more modules, see “Creating aProgram” on page 27. For more information on the commands called for ILEmember types, see “Command Reference for Members” on page 82.
You can create a module in batch mode or interactively. Use the Compile in batchprompt on the Change Defaults display to select the method. For more informationon changing the compilation mode, see “Changing the Compile and Run Modes” onpage 66.
36 Programming Development Manager (PDM)

To create an Integrated Language Environment module:
1. Select option 3 (Work with members) from the AS/400 Programming Develop-ment Manager (PDM) menu, and press Enter. The Specify Members to WorkWith display appears.
2. Type the file name in the File prompt, the library name in the Library prompt,the member name in the Member name prompt, the member type in theMember type prompt, and press Enter. The Work with Members Using PDMdisplay appears.
3. Press F23 (More options) to see the additional options available for the Workwith Members Using PDM display.
4. Select option 15 (Create module) next to the member for which you want tocreate an Integrated Language Environment module, and press Enter.
Running Source Member ProceduresYou can run a source member procedure by using option 16 (Run procedure) formembers of type REXX, OCL36, BASP, and BASP38. You can do this interactivelyor in batch, depending on what you specify on the Change Defaults display.
Note: The member must be of type REXX, OCL36, BASP, or BASP38. Memberswith type OCL36 can only be run in the source file QS36PRC.
To run a source member procedure:
1. Select option 3 (Work with members) from the AS/400 Programming Develop-ment Manager (PDM) menu, and press Enter. The Specify Members to WorkWith display appears.
2. Type the file name in the File prompt, the library name in the Library prompt,the member name in the Member name prompt, the member type in theMember type prompt, and press Enter. The Work with Members Using PDMdisplay appears.
3. Press F23 (More options) to see the additional options available for the Workwith Members Using PDM display.
4. Select option 16 (Run procedure) next to the member on which you want to runa source member procedure, and press Enter.
Deleting MembersUsing PDM, you can delete members you no longer need, either in groups or indi-vidually. PDM has a confirmation display on which you can verify that you havechosen the correct members to delete.
To delete member ADMP in file CMDSRC in library ATEST:
1. Select option 3 (Work with members) from the AS/400 Programming Develop-ment Manager (PDM) menu, and press Enter. The Specify Members to WorkWith display appears.
2. Type CMDSRC in the File prompt, ATEST in the Library prompt, \ALL in theMember name prompt, CMD in the Member type prompt, and press Enter. TheWork with Members Using PDM display appears.
Chapter 5. Working with Members 37

3. Select option 4 (Delete) next to member ADMP, and press Enter. The ConfirmDelete of Members display appears.
This display lists each member you chose to delete on the previous display.You may have to page through the list to see all the members you chose.
Note: Make sure you want to delete all the members listed on the ConfirmDelete of Members display. If you decide not to delete all of themembers listed, press F12 (Cancel) to return to the previous displayand select new members.
4. Press Enter to delete the members listed or press F19 (Submit to batch) todelete the members in batch mode.
If you choose a large number of members to delete, there may be more thanone page of members listed on the Confirm Delete of Members display. Whenyou press Enter or F19 (Submit to batch), all the members on all pages of theConfirm Delete of Members display are deleted, not just those on the page cur-rently displayed. The Work with Members Using PDM display appears after themembers are deleted.
The member you chose to delete, in this example ADMP, is no longer includedin the list. A message at the bottom of the display indicates that the memberhas been removed.
5. Press F3 (Exit) to return to the AS/400 Programming Development Manager(PDM) menu.
Displaying the Description of a MemberWhen working with PDM, you can display the following information for a member:
� Time and date the member was created� Time and date the member was last changed� Time and date the member was last saved� Time and date the member was last restored� Number of records in a member� Number of records deleted from a member
For a source physical file member, the Change date is the date of the most recentchange to the contents of the member. For a data physical file member, theChange date refers to the last date that any part of the member was changed, evenif it was only a rename or a text change. To see an explanation for each prompt,press F1 (Help).
To display the description of member CHGSYSL in library ATEST:
1. Select option 3 (Work with members) from the AS/400 Programming Develop-ment Manager (PDM) menu, and press Enter. The Specify Members to WorkWith display appears.
2. Type CMDSRC in the File prompt, ATEST in the Library prompt, \ALL in theMember name prompt, \ALL in the Member type prompt, and press Enter. TheWork with Members Using PDM display appears.
3. Select option 8 (Display description) next to member CHGSYSL, and pressEnter. The Display Member Description display appears. This display containsinformation about the member, such as the time and date the member wascreated, last changed, last saved, and restored.
38 Programming Development Manager (PDM)

4. Press F12 (Cancel) to return to the Work with Members Using PDM displaywhen you finish viewing the description for the member. You can also pressEnter to continue processing options if you chose more than one option on theWork with Members Using PDM display.
5. Press F3 (Exit) to return to the AS/400 Programming Development Manager(PDM) menu.
Changing Members Using Screen Design AidYou can use SDA to change members if you are working with members in a sourcephysical file by using option 17 (Change using SDA) on the Work with MembersUsing PDM display.
Note: If you want to create a member using SDA, you can do so using either theCS (create a display using SDA), or the CM (create a menu using SDA)sample user-defined options shipped with PDM. For further information onthe sample user-defined options, see “Sample User-Defined Options” onpage 55.
The Change using SDA option allows you to work with members in your file thatare the source code for displays (members of type DSPF, DSPF36, or DSPF38)and menus (members of type MNUDDS, MNUCMD, MNU36, or MNU). If the filetype ends in 36, SDA is called in the System/36 environment. If the file type endsin 38, SDA is called in the System/38 environment.
If you use this option with a member of type MNU, SDA converts it to a member oftype MNUDDS or MNUCMD.
To change member ACCSCR in library ATEST using SDA:
1. Select option 3 (Work with members) from the AS/400 Programming Develop-ment Manager (PDM) menu, and press Enter. The Specify Members to WorkWith display appears.
2. Type DDSSRC in the File prompt, ATEST in the Library prompt, \ALL in theMember name prompt, DSPF in the Member type prompt, and press Enter. TheWork with Members Using PDM display appears.
3. Select option 17 (Change using SDA) next to member ACCSCR, and pressEnter. PDM calls the STRSDA command to start the SDA utility, and an SDAdisplay appears allowing you to change the member. For more information onthis and the other functions available in SDA, refer to ADTS/400: ScreenDesign Aid, SC09-1768.
Chapter 5. Working with Members 39

Changing Members Using Report Layout UtilityYou can use RLU to change members if you are working with members in a sourcephysical file by using option 19 (Change using RLU) on the Work with MembersUsing PDM display. The Change using RLU option allows you to work withmembers in your file (of type PRTF) that are the source code for report images.You can either create a new report member or change an existing one.
To change member SMPREP in library ATEST using the report layout utility:
1. Select option 3 (Work with members) from the AS/400 Programming Develop-ment Manager (PDM) menu, and press Enter. The Specify Members to WorkWith display appears.
2. Type CMDSRC in the File prompt, ATEST in the Library prompt, \ALL in theMember name prompt, \ALL in the Member type prompt, and press Enter. TheWork with Members Using PDM display appears.
3. Type 19 (Change using RLU) next to member SMPREP, and press Enter.Make sure the member contains the source code for a report image. PDMcalls the STRRLU command to start RLU, and an RLU display appearsallowing you to change the member. For more information on this and theother functions available in RLU, refer to ADTS/400: Report Layout Utility,SC09-1767.
4. When you finish changing the member, exit from RLU. The Work withMembers Using PDM display reappears.
5. Press F3 (Exit) to return to the AS/400 Programming Development Manager(PDM) menu.
Changing Members Using Data File UtilityYou can use DFU to change members by specifying option 18 (Change using DFU)on the Work with Members Using PDM display if you are working with members ina data physical file only.
Note: You can create members using DFU by using the CD sample user-definedoption shipped with PDM. For further information on the sample user-defined options, see “Sample User-Defined Options” on page 55.
To change member ACCDTA using the data file utility:
1. Select option 3 (Work with members) from the AS/400 Programming Develop-ment Manager (PDM) menu, and press Enter. The Specify Members to WorkWith display appears.
2. Type DTAFILE in the File prompt, ATEST in the Library prompt, \ALL in theMember name prompt, \ALL in the Member type prompt, and press Enter. TheWork with Members Using PDM display appears.
40 Programming Development Manager (PDM)

3. Type 18 (Change using DFU) next to member ACCDTA, and press Enter.PDM calls DFU, which then creates and runs a temporary program allowingyou to change the member. For more information on these and the other func-tions available in DFU, refer to ADTS/400: Data File Utility, SC09-1773.
4. When you finish changing the member, exit from DFU. The Work withMembers Using PDM display reappears.
5. Press F3 (Exit) to return to the AS/400 Programming Development Manager(PDM) menu.
Sorting and Positioning a List of Members by DateYou can sort the members on a list by date instead of by name and then positionthe list to a member that you updated previously. When working with members insource physical files, you can also display the date on which the contents of themembers were last updated instead of the member type for the members on thedisplay.
For a source physical file, the last date changed is the date that the content lastchanged. For a data physical file, the last date changed is the date that themember was last edited, such as, for a rename or change in description.
To display the date instead of the member type for members in the source physicalfile DDCCRC, sort the list by date, and then position the list to a date:
1. Select option 3 (Work with members) from the AS/400 Programming Develop-ment Manager (PDM) display, and press Enter. The Specify Members to WorkWith display appears.
2. Type DDSSRC in the File prompt, ATEST in the Library prompt, \ALL in theMember name prompt, DSPF in the Member type prompt, and press Enter. TheWork with Members Using PDM display appears.
3. Press F14 (Display date) to display the date on which the contents of themembers in the list were last updated instead of the member type. The formatof the date is MM/DD/YY.
The dates the members were last updated are now shown in the list areawhere member types were displayed. Notice also that F14 (Display date) ischanged to F14 (Display type).
4. Press F15 (Sort date) to sort the list by the date on which the members werelast updated instead of in alphabetical order of member name.
The list is now sorted by the date on which the members were last updated.Notice also that F15 (Sort date) has changed to F15 (Sort name).
5. To position the list to a member you updated previously, type the date to whichyou want to position the list in the Position to date prompt. The date youspecify must be in the same format as the date in the Date list area. For thisexample, type PAYHLP in the Position to prompt to position the list to thePAYHLP member that was last updated on 03/15/94, and press Enter. TheWork with Members Using PDM display reappears. The list is now positionedto the PAYHLP member, which was last updated on 03/15/94.
6. Press F3 (Exit) to return to the AS/400 Programming Development Manager(PDM) menu.
Chapter 5. Working with Members 41

Showing a Subset of a List of MembersYou can create a list of members within a range of members you specify by usingF17 (Subset).
When working with a subset of a list, if you change the Library prompt on the Workwith Members Using PDM display to show the members in a different library, thenew list you see is also a subset of a list.
To create a subset of a list of members that includes only the display files in theCMDSRC file in library ATEST:
1. Select option 3 (Work with members) from the AS/400 Programming Develop-ment Manager (PDM) menu, and press Enter. The Specify Members to WorkWith display appears.
2. Type CMDSRC in the File prompt, ATEST in the Library prompt, \ALL in theMember name prompt, \ALL in the Member type prompt, and press Enter. TheWork with Members Using PDM display appears.
3. Press F17 (Subset) to create a subset of the list. The Subset Member Listdisplay appears, on which you can specify the selection values for the subsetlist.
4. Type the generic name to show a subset of the list in the Member or Membertype prompt. The generic name can be in one of the formats listedon page 11.
Leave the default settings for the Member prompt, the From date prompt, Todate prompt, and the Text prompt to include all members in the subset listwhose type begins with the letters DSPF.
5. Press Enter. The Work with Members Using PDM display appears with a list ofall the members with types beginning with DSPF in the CMDSRC file in thelibrary ATEST.
6. Press F3 (Exit) to return to the AS/400 Programming Development Manager(PDM) menu.
Comparing File MembersYou can compare file members by using option 54 (Compare file member). Thisoption is valid for all member types.
To compare file members:
1. Select option 3 (Work with members) from the AS/400 Programming Develop-ment Manager (PDM) menu, and press Enter. The Specify Members to WorkWith display appears.
2. Type the file name that you want to compare in the File prompt, the libraryname in the Library prompt, the member name in the Member name prompt,and the member type in the Member type prompt, and press Enter. The Workwith Members Using PDM display appears.
42 Programming Development Manager (PDM)

3. Press F23 (More options) to show the additional options available for thisdisplay.
Note: You do not have to display the additional function keys and optionswhen you use them. Step 3 is not required, but you should use it untilyou are familiar with PDM.
4. Type 54 (Compare file member) beside the member you want to compare, andpress Enter. The Compare Physical File Member (CMPPFM) display appears.
Refer to ADTS/400: File Compare and Merge Utility for more information on com-paring file members.
Merging File MembersYou can merge file members by using option 55 (Merge file member). You canonly use this option on members of type *FILE with attributes of PF-SRC.
To merge file members:
1. Select option 3 (Work with members) from the AS/400 Programming Develop-ment Manager (PDM) menu, and press Enter. The Specify Members to WorkWith display appears.
2. Type the file name that you want to merge in the File prompt, the library namein the Library prompt, the name of the target member in the Member nameprompt, \FILE in the Member type prompt, and press Enter. The Work withMembers Using PDM display appears.
3. Press F23 (More options) to show the additional options available for thisdisplay.
Note: You do not have to display the additional function keys and optionswhen you use them. Step 3 is not required, but you should use it untilyou are familiar with PDM.
4. Type 55 (Merge file member) beside the member you want to be the targetmember, and press Enter. The Merge Source (MRGSRC) display appears.
Refer to ADTS/400: File Compare and Merge Utility for more information onmerging file members.
Chapter 5. Working with Members 43

44 Programming Development Manager (PDM)

Chapter 6. Searching for a Character String or a NumericString
With the Find String function, you can search for a character or numeric string in asource or data physical file, and perform any valid option or user-defined option onmembers that contain a match for the string.
You can perform the following tasks:
� Search for a string within a file� Search for a string in more than one file� Search for a character string enclosed in double quotation marks� Print a list of members and records that contain the Find String match� Search for a string using the FNDSTRPDM command� Change a string of characters globally� Scan members for hexadecimal numbers� Search for a string using the report layout utility� Search for a string using the screen design aid� Search for a string using the source entry utility
You can perform Find String searches from the following displays:
� Work with Members Using PDM� Work with Object Using PDM� Find String Using PDM (FNDSTRPDM)
If you have the Application Development Manager/400 orderable feature installed,you can use the Find string part function in one of the following ways:
� Using the Work with Parts Using PDM display� Using the Work with Groups Using PDM display� Using the Find String Part (FNDSTRPART) command
For a complete discussion of this function, refer to ADTS/400: Application Develop-ment Manager/400 User’s Guide.
Copyright IBM Corp. 1994 45

Searching for a String within a FileYou can search members in a list, or a subset of a list, for a character string byusing option 25 (Find string) on the Work with Members Using PDM display. Youcan also specify an option for each member that contains a match for the characterstring. The Find string option is available on the PDM member list for both sourceand data physical files.
To search for a string from the Work with Members Using PDM display:
1. Select option 3 (Work with members) from the AS/400 Programming Develop-ment Manager (PDM) menu, and press Enter. The Specify Members to WorkWith display appears.
2. Type the file name in which you want to find the string in the File prompt, thelibrary name in the Library prompt, and press Enter. The Work with MembersUsing PDM display appears.
3. Select option 25 (Find string) beside the member you want to search for a par-ticular string, and press Enter. The Find String display appears that allows youto specify search values.
If you choose more than one member to search on the previous display, all themembers selected are searched, but the Find String display is only shownonce.
4. Type the string of characters you want to search for in the Find prompt, andpress Enter.
Each member for which you selected the Find string option is searched for amatch of the string. When a match for the Find string is found in a record, therecord is printed. When all the records in the selected members are searched,the option in the Option prompt on the Find String display is performed for themember. The next member is then searched.
Notes:
a. PDM searches all the members for which you selected the Find stringoption if the option selected in the Option prompt is a grouping option (thatis, Rename, Delete, or Copy), and if you type N (No) for the Prompt field.The option you selected in the Option prompt is performed for all themembers containing a match for the Find string.
b. You must type Y (Yes) for the Prompt field if you select a grouping option,and you want PDM to stop each time it finds a member that contains amatch for the Find string.
c. If you enter Y (Yes) for the Print list prompt, or the Print records prompt,and if you cancel the Find string option, only the members processedbefore you cancel the option are printed.
The Work with Members Using PDM display appears again.
5. Press F3 (Exit) to return to the AS/400 Programming Development Manager(PDM) menu.
46 Programming Development Manager (PDM)

Resetting Prompts to Their Original ValuesThe values you enter for prompts on the Find String display are saved in the userprofile. These values become the defaults. To reset the prompts to their originaldefault values for the next time you select the Find string option, pressF5 (Refresh).
Searching for a String in More Than One FileYou can use the Find string option from the Work with Objects Using PDM displayto search for a character string in members in more than one file.
To search for a string from the Work with Objects Using PDM display:
1. Select option 2 (Work with objects) from the AS/400 Programming DevelopmentManager (PDM) menu, and press Enter. The Specify Objects to Work Withdisplay appears.
2. Type the library name in the Library prompt, the file name you want to searchin the File prompt, and press Enter. The Work with Objects Using PDM displayappears.
3. Press F23 (More options) to view the list of other available options.
4. Type 25 (Find string) beside each file whose members you want to search, andpress Enter. You can select the Find string option for files of type PF-SRC ortype PF-DTA only. The Find String display appears.
Note: PDM allows you to select the Find string option for both source anddata files at one time. If you select an option in the Option prompt onthe Find String display that is not valid for members in both source anddata physical files, you may receive an error message.
For example, if you choose the Find string option for a source file and adata file, and if you select option 2 (Edit) for the Option prompt on theFind String display, an error occurs if a match for the Find string isfound for a member in the data file. This is because option 2 (Edit) isnot allowed for data files, only for source files.
5. Type the character string for which you are searching in the Find prompt, andpress Enter.
All the members in the first file for which you selected the Find string option aresearched. If you selected an option in the Option prompt on the Find Stringdisplay, it is processed for each member in the file that contains a match forthe Find string.
The members in the second file for which you selected the Find string optionare then searched. After all the files for which you selected the Find stringoption are searched, the Work with Objects Using PDM display appears again.
Searching for a Character String Enclosed in Quotation MarksSurrounding quotation marks are not used unless the string is preceded by aspace. The space then becomes part of the string for which PDM is searching.
To search members for a character string that is enclosed in quotation marks, addan additional set of quotation marks at the start and end of the character string.
Chapter 6. Searching for a Character String or a Numeric String 47

Printing Records or a List of Members That Contain the Find StringMatch
To print all the records that contain the string, type Y (Yes) for the Print recordsprompt on the Find String display.
To print a list of all members in the file containing a match for the Find string, typeY (Yes) for the Print list prompt on the Find String display.
Searching for a String by Using the FNDSTRPDM CommandBy using the FNDSTRPDM command, you can bypass the Work with MembersUsing PDM display and the Work with Objects Using PDM display and proceeddirectly with the search.
To search for the character string Invoice in library ATEST in file DDSSRC from theFind String Using PDM (FNDSTRPDM) display:
1. Type FNDSTRPDM on any command line.
2. Press F4 (Prompt). The Find String Using PDM display appears.
3. Type the string of characters, surrounded by quotation marks, that you wantPDM to search for in the Find 'string' prompt. For this example, type 'Invoice'in the Find 'string' prompt.
4. Type the library, file, and member to be searched. To search for additionalmembers, type + on the line beneath the member line, and spaces for addi-tional members appear. For this example, search for *ALL members in the fileDDSSRC in library ATEST.
5. Type the option of the function that you want to perform on the members con-taining the string in the Option prompt. To display the description,type \DSPD in this prompt.
6. Type \PROMPT in the Prompt field to show an entry display for the commandchosen in the Option prompt every time a match is found for the Find string.
7. Press F10 (Additional parameters) to see the remaining Find string prompts.
8. Type 1 in the From column prompt, \RCDLEN in the To column prompt, and\IGNORE in the Kind of match prompt.
Press Page Down (Roll Up) to enter all the remaining values, and press Enter.
When a match is found, the appropriate display for the option chosen appears.For this example, when the string Invoice is found, the Display MemberDescription display appears.
Find String Options Available in Batch ModeWith the Find string in batch prompt, you can submit a Find string operation tobatch processing, rather than using the Find String Using PDM (FNDSTRPDM)display.
If you submit a Find string operation to batch processing, you can specify the fol-lowing options for the Option prompt on the Find String display.
48 Programming Development Manager (PDM)

� User-defined options � Compile option � Print option � Run option
Processing Other Options in Batch ModeTo process other options in batch mode from the Find String display:
1. Create a user-defined option that calls the appropriate command to perform theoption.
2. Select this user-defined option for the Option prompt on the Find String displayand submit the user-defined option to batch processing.
Find String Compile Option in Batch ModeIf you choose to submit a Find string operation to batch processing, and if you alsoselect the Compile option for the Option prompt, note the following considerations:
� Replace object prompt.
Normally in PDM, if you type N (No) for the Replace object prompt on theChange Defaults display, and an object with the same name as the object to becreated as a result of compiling already exists, the compile operation isstopped. Before this happens, however, a warning display appears allowingyou to choose whether or not you want to proceed with the compile operation.
When you select the Compile option on the Find String display and then submitthe Find string operation to batch processing, a warning display does notappear if the object resulting from the compile already exists. Instead, PDMstops the compile operation for that member and continues with the Find stringoperation.
To replace existing objects before a compile, type Y for the Replace objectprompt on the Change Defaults display. Alternatively, you can type REPLACE(*YES) in the Parameters prompt on the Find String display if you are compilingmembers in batch. Then if the object to be compiled already exists, it isreplaced, and the compile is processed.
Note: The REPLACE parameter is not used on compile commands for whichit is not valid. If you use REPLACE on the command line for acommand for which it is not valid, you receive an error message.
� Compile in batch prompt.
The Compile in batch prompt on the Change Defaults display allows you tochoose whether you want to compile members in batch mode or interactively.
If you submit a Find string operation to batch processing, and if you select theCompile option for the Option prompt on the Find String display, members arealways compiled in batch mode, regardless of your entry in the Compile inbatch prompt on the Change Defaults display.
If, however, your entry for the Compile in batch prompt is Y (Yes), two batchjobs are submitted, one for the Find string operation and one for the compileoperation. You receive a message indicating a batch job has been submitted.If your entry for the Compile in batch prompt is N (No), the compile and Findstring operations are submitted to one batch job. You receive a message indi-cating whether or not the compile operation was successful.
Chapter 6. Searching for a Character String or a Numeric String 49

If you process the Find string operation interactively, the compile is processedaccording to your entry in the Compile in batch prompt on the Change Defaultsdisplay.
Changing a String of Characters GloballyYou can use the Find string option to change a string of characters in a number ofmembers to a different string of characters. To change a string of charactersglobally:
1. Type the string of characters you want to change in the Find prompt and type 2(Edit) in the Option prompt on the Find String display.
2. Type the appropriate information for the remaining prompts on the Find Stringdisplay, and press Enter. All the members for which you selected the Findstring option are searched, and when a member is found that contains the Findstring, an SEU display appears allowing you to edit that member.
3. On the SEU display, press F14 (Find/change options).
4. Type the new character string that is to replace the search string in the Changeprompt.
Note: If you do not want to change all occurrences of the Find string in themember, you can specify which occurrences to change in the Occur-rences to process prompt. You can choose to change only the nextoccurrence of the string, only the previous occurrence of the string, orall occurrences of the string in the member.
5. Press F17 (Change) to process the change. The Find string is changed to thecharacters you specified in the Change prompt.
6. Exit from SEU and continue processing the Find string operation. See“Searching for a String Using the Source Entry Utility” on page 52 for furtherdetails.
When another member is found that contains the Find string, the SEU editscreen again appears, allowing you to edit the member.
7. To change the Find string search to the same characters you specified for theprevious member, press F17 (Change). You do not have to enter values forthe Change or Occurrences prompts again. The values you enter for theseprompts when you edit the first member become the defaults for the duration ofthis Find string operation. After the Find string operation is finished, thedefaults are refreshed.
Continue changing each member in turn. When you have changed allmembers containing the Find string, the display on which you originallyselected the Find string option reappears.
50 Programming Development Manager (PDM)

Scanning Members for Hexadecimal NumbersYou can search members for hexadecimal numbers in source physical files anddata physical files. You cannot search members in source files for hexadecimalnumbers. If you select the Find string option for a member in a source file and ifyou type X'nn' in the Find prompt (where nn are the hexadecimal numbers forwhich you want to search), members in source physical files are searched for thisexact string.
To search members for hexadecimal numbers in source and data physical files:
1. On the Find String display, type the string of hexadecimal numbers you want tosearch for in the Find prompt using the following format:
X'nn'
where nn are the numbers for which you want to search.
Make sure you begin typing the Find string search in column 1 of the Findprompt because PDM searches for the character string exactly as you enter it.Thus, if there is a space before the string, only members containing the actualcharacters X'nn' preceded by a space are considered to contain the string.
2. Type the appropriate information for the remaining prompts, and press Enter.To display help for the prompts on the Find String display, position the cursor inthe prompt, and press F1. All the members for which you selected the Findstring option are searched. When a member is found that contains thehexadecimal number you specified, the option you selected in the Optionprompt, if any, is performed for the member. The next member for which youselected the Find string option is then searched.
Data files default to hexadecimal over/under style format. After printing recordsof a sequential file, you can use the data file utility to change the records byreferring to the RCDNBR field in the spooled file. After printing records of akeyed file, the records are still referred to by record number.
To use DFU, create a sequential logical file over the keyed physical file, anduse the logical file with DFU to access the required records by the recordnumber that is referred to in the spooled file. The DDS for the logical file doesnot have any key fields specified, so DFU accesses the record by the recordnumber instead of the key. This means that you can change the records usingDFU.
When all the members you specified for the Find string option are searched,you return to the display on which you originally selected the Find string option.
Searching for a String Using the Report Layout UtilityTo search for a string using the report layout utility:
1. Type 19 in the Option prompt on the Find String display. An RLU display isshown when a match is found for the Find string search that allows you tochange the code for an existing report image.
2. When you finish changing the report, press F3 (Exit). The Exit RLU displayappears.
3. Type your choices on the Exit RLU display, and press Enter.
Chapter 6. Searching for a Character String or a Numeric String 51

Note: If you want to cancel the Find string operation from RLU, type CANCELon the Design Report display command line. This brings you back tothe Work with Members Using PDM or Work with Objects Using PDMdisplay and cancels the Find string operation.
If you are using the FNDSTRPDM command, type \RLU for the Optionparameter to use RLU when a match is found. When you type CANCELon the Design Report display command line, the display where youstarted the FNDSTRPDM command appears again.
Searching for a String Using the Screen Design AidTo search for a string using the screen design aid:
1. Type 17 in the Option prompt on the Find String display. An SDA display isshown when a member is found that contains a match for the Find stringsearch through which you can change the member.
2. When you finish changing the member, the Design Screen or Exit Menusdisplay appears again, depending on whether the member contains sourcecode for menus or displays. On the Design Screen or the Exit Menus display,you have a number of choices:
� Press F3 (Exit) or F12 (Cancel) if you do not want to save the changes youhave made to the member and if you want to cancel the Find string option.The display on which you selected the Find string option reappears.
If you chose to print a list of members containing the Find string, only themembers processed before you cancel the option are printed.
� Select option 6 (Save DDS source) if you want to save the changes youhave made to the member. The Save DDS-Create Display File displayappears. Press Enter on this display to continue processing the Find stringoperation.
Searching for a String Using the Source Entry UtilityTo search for a string using the source entry utility:
1. Type 2 in the Option prompt on the Find String display. An SEU display thatallows you to edit the member is shown when a member is found that containsa match for the Find string search.
2. When you finish editing the member, press F3 (Exit) to display the SEU exitdisplay.
52 Programming Development Manager (PDM)

3. On the SEU exit display, you have a number of choices:
� Press F3 (Exit) if you do not want to save the changes you have made tothe member and if you want to cancel the Find string option. The displayon which you selected the Find string option appears again.
If you chose to print a list of members containing the Find string, only themembers processed before you cancel the option are printed.
� Type Y (Yes) for the Change/create member prompt if you want to save thechanges you made to the member. Type N (No) if you do not want to savethe editing changes.
� Type Y (Yes) for the Cancel PDM Find String prompt if you want to exitfrom the Find string option. Type N (No) if you do not want to cancel theFind string option.
Canceling the String SearchTo cancel the string search, press F3 (Exit) or F12 (Cancel) before all the membersfor which you selected the option have been processed.
Restrictions on Canceling the String SearchYou cannot cancel the Find String option in the following instances:
� When you enter N (No) for the Prompt prompt and do either of the following:
– Select option 6 (Print) for the Option prompt.
– Select the Compile option for the Option prompt. You cannot cancel theFind string option unless the Confirm Compile of Member display appearsbecause the object already exists. You can press F12 (Cancel) on theConfirm Compile of Member display to cancel the Find string option.
� When you select a grouping option for the Option prompt. You cannot cancelthe Find string option until all the members for which you selected the Findstring option are searched. When all the members have been searched, themembers containing the Find string are listed on the appropriate groupingdisplay for the option.
You can press F12 (Cancel) on the grouping display to cancel the Find stringoption. Or you can press Enter to process the option for all members con-taining the Find string. After you press Enter, the Find string option cannot becanceled. (If you select the Copy option, however, you can cancel the Findstring option if the Confirm Copy of Member display appears because themember to copy to already exists.)
� When you select a user-defined option that calls a user program for the Optionprompt.
� When you submit the Find string operation to batch processing.
After you cancel the Find string option, the display on which you originally selectedthe Find string option appears again. Any pending options are not processed butare still shown in the list.
Chapter 6. Searching for a Character String or a Numeric String 53

54 Programming Development Manager (PDM)

Chapter 7. Working with User-Defined Options
With user-defined options, you can call your own commands from any PDM listdisplay. These options make it easier for you to do frequent operations, becauseyou can type an option on a list display instead of retyping an entire command.
You can perform the following tasks:
� Create user-defined options� Change user-defined options� Copy user-defined options� Copy a user-defined options file� Display user-defined options� Install the user-defined window program� Call the user-defined window program� Delete user-defined options
User-defined options are stored in a data physical file. You can store different setsof user-defined options in different members in this file. You can then specifyactive user-defined options by typing the file name, the library name, and themember name in the Option file, Library, and Member prompts on the ChangeDefaults display. If you want to use user-defined options in a different member, file,or library, you must change the appropriate prompts on the Change Defaultsdisplay. For more information on changing these prompts, see “Changing theActive Default User-Defined Options File” on page 69.
Note: The defaults for the Option file, Library, and Member prompts on theChange Defaults display are QAUOOPT, *LIBL, and QAUOOPT. If youchange these prompts, the new member, file, and library you specifybecome the new defaults each time you sign on to the system.
If you want your user-defined options in a file other than the default file provided,you can either copy the default file or create another one. For more information,see “Copying the User-Defined Options File for Storage in Other Files” on page 61.
Note: Special characters defined for user-defined options cannot be used acrosssystems with different languages.
Sample User-Defined OptionsThe following sample user-defined options are shipped with PDM:
OptionName
CommandCalled
Explanation
C CALL &O/&N Allows you to run a program on the Work with MembersUsing PDM display.
CC CHGCURLIB CURLIB(&L) Changes the library on the Work with Objects UsingPDM display or the Work with Members Using PDMdisplay to the current library in the library list.
CD STRDFU OPTION(2) Allows you to create a DFU program.
CL CHGCURLIB CURLIB(&N) Changes selected library on the Work with LibrariesUsing PDM display to the current library in the library list.
Copyright IBM Corp. 1994 55

OptionName
CommandCalled
Explanation
CM STRSDA OPTION(2) SRCFILE(&L/&F)??SRCMBR()
Allows you to create a member (menu) using SDA.
CS STRSDA OPTION(1) SRCFILE(&L/&F)??SRCMBR()
Allows you to create a member (display) using SDA.
DM DSPMSG Allows you to display messages.
EA EDTOBJAUT OBJ(&L/&N) OBJTYPE(&T) Allows you to edit the authority to an object on the Workwith Objects Using PDM display.
GO GO &L/&N Allows you to display the menu for a menu object.
JL DSPJOBLOG Allows you to display the job log.
SL SBMJOB ??CMD(SAVLIB LIB(&N)) Saves library in batch on the Work With Libraries UsingPDM display.
SM SBMJOB ??CMD(SAVOBJ OBJ(&F)LIB(&L) OBJTYPE(*FILE)FILEMBR((&F(&N))))
Save member in batch on the Work With MembersUsing PDM display.
SO SBMJOB ??CMD(SAVOBJ OBJ(&N)LIB(&L))
Save object in batch on the Work With Objects UsingPDM display.
This option is an example using conditional prompting.This means that the prompt for the SBMJOB commandcomes up automatically when the user-defined option isused. This is specified by the ?? at the beginning of theCMD parameter.
SP WRKSPLF Allows you to work with spooled files.
WS WRKSBMJOB Allows you to work with jobs submitted to batch.
Note: The following options have been added for the Application Development Manager orderable feature:
AP ADDPRJLIBL Allows you to add project libraries from the AS/400library list when you are testing a part.
IM ?IMPART OBJ(&L/&F) OBJTYPE(&FILE)MBR(&N) PART(&N) LANG(&S) TEXT(&X)
Allows you to import a member into the project hierarchyfrom the Work with Members display.
IO ?IMPART OBJ(&L/&N) OBJTYPE(&T)TYPE(&S) PART(&N) TEXT(&X)
Allows you to import an object into the project hierarchyfrom the Work with Objects display.
PL WRKPARTPDM PRJ(&ZP) GRP(&ZG)TYPE(*ALL) PART(*ALL) LANG(*ALL)LIST(&N)
Allows you to display a list of part-list parts.
RP RMVPRJLIBL Allows you to remove project libraries from the AS/400library list when you are testing a part.
You can choose to use the sample user-defined options or you can delete, change,or display them using options on the Work with User-Defined Options display.
56 Programming Development Manager (PDM)

Accessing the Work with User-Defined Options DisplayTo access the Work with User-Defined Options display using the AS/400 Program-ming Development Manager (PDM) menu:
1. Select option 9 (Work with user-defined options) from the AS/400 ProgrammingDevelopment Manager (PDM) menu, and press Enter. The Specify Option Fileto Work With display appears. The prompts for this display always default tothe active user-defined options file.
2. Type the name of the file containing the user-defined options with which youwant to work in the File prompt. The file you choose to work with does nothave to be the active user-defined options file, and choosing an option file towork with does not make it the active user-defined options file.
The active user-defined options file is the file specified in the Option file prompton the Change Defaults display. For more information on changing the activeuser-defined options file, refer to “Changing the Active Default User-DefinedOptions File” on page 69. For this example, leave the prompts at theirdefaults.
3. Press Enter, and the Work with User-Defined Options display appears.
In this example, the CS sample user-defined option exists in the fileQAUOOPT.
4. Press F3 (Exit) to return to the AS/400 Programming Development Manager(PDM) menu.
Note: You can also access the Work with User-Defined Options display bypressing F16 (User options).
Choosing a Command to Correspond to a User-Defined OptionYou can choose any AS/400 system or user command to correspond to a user-defined option. The command can contain parameter variables so that it can beperformed on an item in a list.
For example, you may need to save a file with a particular file name daily. You cancreate a user-defined option to correspond to the command to do this, which savesyou from having to type the command each day.
Note: You can use substitution variables when working with parts, groups, orprojects. Refer to the online help information for more information about thevalid Application Development Manager/400 substitution variables and thevalues returned for each list type.
Creating User-Defined OptionsTo create a user-defined option:
1. Select option 9 from the AS/400 Programming Development Manager (PDM)menu, and press Enter. The Specify Option File to Work With display appears.
2. Press Enter. The Work with User-Defined Options display appears.
3. Press F6 (Create) on the Work with User-Defined Options display. The CreateUser-Defined Option display appears.
Chapter 7. Working with User-Defined Options 57

4. Type the characters you want to use to represent the command in the Optionprompt. The first character of the option name must be a letter, but the secondcharacter can be any alphanumeric.
For this example, type CF in the Option prompt.
5. Type the command you want called when you select the CF option in theCommand prompt, and press Enter. The Work with User-Defined Optionsdisplay reappears. If you cannot remember the correct format of the commandor its parameters, press F4 (Prompt) for assistance. Either type in thecommand and press F4 (Prompt) to see the prompt display for the command,or just press F4 (Prompt) to display a menu where you can choose to displayall system commands or specific types of commands.
You see a message at the bottom of the display indicating that the CF optionwas created. If you have a large number of user-defined options in thismember, you may have to page down the list to find the user-defined optionyou created. The entire command for the option may not fit on the display.
6. Press F3 (Exit) to return to the AS/400 Programming Development Manager(PDM) menu. The new option is now saved in the file QAUOOPT.
Creating a User-Defined Option for Backup PurposesTo create a user-defined option to copy all the members in a file for backup pur-poses, type the following command in the Command prompt:
CPYF FROMFILE(&L/&N) TOFILE(BACKLIB/BACKFILE) FROMMBR(\ALL) TOMBR(\FROMMBR) MBROPT(\REPLACE)
In this command, BACKLIB is the library name and BACKFILE is the file namewhere you want the backups to be stored. To use this option, file BACKFILE mustexist in library BACKLIB, and the contents of BACKFILE are replaced with the newmembers.
Note: The substitution variables &L and &N can be used on any library and file.PDM replaces these values with the library name and file name of theselected members on the list display. A complete list of all valid substitutionvariables is also available in the online help information. To view the listfrom this display, press F1 (Help) and then press F2 (Extended help).
Valid Substitution Variables for User-Defined OptionsThe following figure describes the valid parameter variables you can use for user-defined options and the values returned for each list type:
Parm Meaning Description
&A Objectattribute
If you are working with objects, &A is replaced by the object attribute from the list.
If you are working with libraries or members, &A is replaced by *NULL.
&B List type If you are working with a library list (*LIBL, *USRLIBL), &B is replaced by X.
If you are working with a list of libraries (*ALL, *ALLUSR), &B is replaced by L. If you areworking with a list of objects, &B is replaced by O. If you are working with a list ofmembers, &B is replaced by M.
&C Option &C is replaced by the user-defined option code.
58 Programming Development Manager (PDM)

Parm Meaning Description
&D Memberchangedate
If you are working with members, &D is replaced by the date the member was lastchanged.
The value returned is the system format with separator characters. Otherwise, &D isreplaced by *NULL. You must use this variable in single quotation marks (that is, ‘&D’)because the date may contain a slash (/), which is used as an operator.
&E Run inbatch
&E is replaced by *YES if Y is specified in the Run in batch prompt on the ChangeDefaults display and *NO if N is specified.
&F File name If you are working with members, &F is replaced by the name of the file that containsthese members.
For all other conditions, &F is replaced by *NULL.
&G Jobdescriptionlibrary
&G is replaced by the job description library value from the Change Defaults display.
&H Jobdescriptionname
&H is replaced by the job description value from the Change Defaults display.
&J Jobdescription
&J is replaced by the job description value from the Change Defaults display in the formatlibrary/job description.
&L Libraryname
If you are working with libraries, &L is replaced by QSYS.
If you are working with objects or members, &L is replaced by the name of the library thatcontains the objects or members.
&N Item name &N is replaced by the name of the item in the list beside which the option was typed.
&O Objectlibrary
If you are working with libraries, objects, or members, &O is replaced by the object libraryfrom the Change Defaults display.
&P Compile inbatch
&P is replaced by *YES if Y is specified in the Compile in batch prompt on the ChangeDefaults display and *NO of N is specified.
&R Replaceobject
&R is replaced by *YES if Y is specified in the Replace object prompt on the ChangeDefaults display and *NO if N is specified.
&S Item typewithout '*'
If you are working with libraries, &S is replaced by LIB.
If you are working with objects, &S is replaced by the object type without the asterisk '*'.
If you are working with members, &S is replaced by the member type as is.
&T Item typewith '*'
If you are working with libraries, &T is replaced by *LIB.
If you are working with objects or members, &T is replaced by the object or member typeas is.
&U User-DefinedOption File
&U is replaced by the user-defined option file name from the Change Defaults display.
&V User-DefinedOptionLibrary
&V is replaced by the user-defined option library name from the Change Defaults display.
&W User-DefinedOption FileMember
&W is replaced by the user-defined option file member name from the Change Defaultsdisplay.
&X Item text &X is replaced by the text (in single quotation marks) of the item beside which the optionwas typed.
Chapter 7. Working with User-Defined Options 59

Changing User-Defined OptionsYou can change user-defined options by using option 2 (Change) on the Work withUser-Defined Options display. When you use this option, you cannot type anythingon the command line.
To change the CF user-defined option:
1. Select option 9 from the AS/400 Programming Development Manager (PDM)menu, and press Enter. The Specify Option File to Work With display appears.
2. Press Enter. The Work with User-Defined Options display appears.
3. Type option 2 (Change) beside the CF user-defined option, and press Enter.The Change User-Defined Option display appears.
4. Type over the existing values in the Option and Command prompts, and pressEnter. If you want to change the Command prompt, you can press F4 (Prompt)for assistance in entering the new command. For this example, type C1 in theOption prompt, and without changing the Command prompt, press Enter. TheWork with User-Defined Options display reappears with your changes.
A message at the bottom of the display indicates that the CF user-definedoption is changed. The new option name you assigned the user-defined optionis shown in the list.
5. Press F3 (Exit) to return to the AS/400 Programming Development Manager(PDM) menu. The changes to the user-defined option are now saved in fileQAUOOPT.
Copying User-Defined OptionsYou can copy any user-defined option from the current member to the same user-defined option member, or to another user-defined option member in the samelibrary or file or in a different library and file, by using Option 3 (Copy) on the Workwith User-Defined Options display.
Note: If you are copying to a different member, file or library, the To file prompt isupdated as soon as all the options on the list have been completed. TheCopy option is not a grouping option when selected on the Work with User-Defined Options display. Even if you press F15 (Exit without savingchanges), the copy is made. If you are copying to the same member, file,or library, the file is updated when you exit from the Work with User-DefinedOptions display by pressing the F3 key, the F12 key, or Enter. PressingF15 (Exit without saving changes) cancels any changes to existingmembers.
To copy the DM user-defined option:
1. Select option 9 from the AS/400 Programming Development Manager (PDM)menu, and press Enter. The Specify Option File to Work With display appears.
2. Press Enter. The Work with User-Defined Options display appears.
3. Type 3 (Copy) beside the DM user-defined option, and press Enter. The CopyUser-Defined Option display appears.
60 Programming Development Manager (PDM)

4. Type over the existing values in the To file, To library, and To memberprompts. If you are copying to the same member, file, and library, you mustspecify a new name for the option. If the option name already exists, theConfirm Copy of User-Defined Option display appears.
5. In this example, the option already exists, so type Y (Yes) in the Replaceexisting option prompt, and press Enter. The Work with User-Defined Optionsdisplay reappears.
A message at the bottom of the display indicates that the DM user-definedoption is copied.
6. Press F3 (Exit) to return to the AS/400 Programming Development Manager(PDM) menu.
Copying the User-Defined Options File for Storage in Other FilesYou may want to store some of your user-defined options in a file other thanQAUOOPT. You can either create another user-defined options file or copy thePDM supplied user-defined options file.
The user-defined options file must be a physical file with a record length of 252characters. The record format is as follows:
To copy the system user-defined options file to a file named UDO in library ATEST:
1. Select option 9 from the AS/400 Programming Development Manager (PDM)menu, and press Enter. The Specify Option File to Work With display appears.
2. Press Enter. The Work with User-Defined Options display appears.
3. Type 3 (Copy) beside member QAUOOPT, and press Enter. The Copy Objectsdisplay appears.
4. Type ATEST in the To library prompt, UDO in the New name list area next to theQAUOOPT object, and press Enter. The Work with Objects Using PDM displayreappears.
You now have another user-defined options file in which to store your user-defined options.
5. Press F3 (Exit) to return to the AS/400 Programming Development Manager(PDM) menu.
Position Contents1-2 The user-defined option, right justified
3-252 The command called for the option
Chapter 7. Working with User-Defined Options 61

Displaying User-Defined OptionsSome of the commands you use in a user-defined option may be too long to bedisplayed in full on the Work with User-Defined Options display. You can useoption 5 (Display) to view the entire command. When using the display option, youcannot type anything on the command line.
To display the full command for the C1 user-defined option:
1. Select option 9 from the AS/400 Programming Development Manager (PDM)menu, and press Enter. The Specify Option File to Work With display appears.
2. Press Enter. The Work with User-Defined Options display appears.
3. Type 5 (Display) beside the C1 user-defined option, and press Enter. TheDisplay User-Defined Option display appears, which shows the entire commandfor the user-defined option you chose to view.
4. Press Enter. If you chose more than one user-defined option to display, thenext user-defined option selected is displayed. Otherwise, you return to theWork with User-Defined Options display.
5. Press F3 (Exit) to return to the AS/400 Programming Development Manager(PDM) menu.
Installing the User-Defined Window Program ToolThe user-defined option window program creates a window in the upper rightcorner of the display listing the PDM user-defined options. To view the windows,you must compile the program code using a BASIC compiler and call the programsneeded for this tool.
All the source programs reside in library QUSRTOOL and all the information aboutthe tool is found in member TPSINFO in QUSRTOOL/QATTINFO. To install thetool for the user-defined window program:
1. Type 14 (Compile) next to the member TPSINST in QUSRTOOL/QATTCL onthe Work with Members Using PDM display.
The compile is done interactively or in batch mode, depending on what youhave specified in the Change Defaults display. The compile creates an objectTPSINST.
2. Type 16 (Run) next to the object TPSINST, and press F4 (Prompt) on the Workwith Objects Using PDM display.
3. Specify QUSRTOOL in the Parameters prompt, and press Enter.
This program compiles all the members needed to run the window program.
62 Programming Development Manager (PDM)
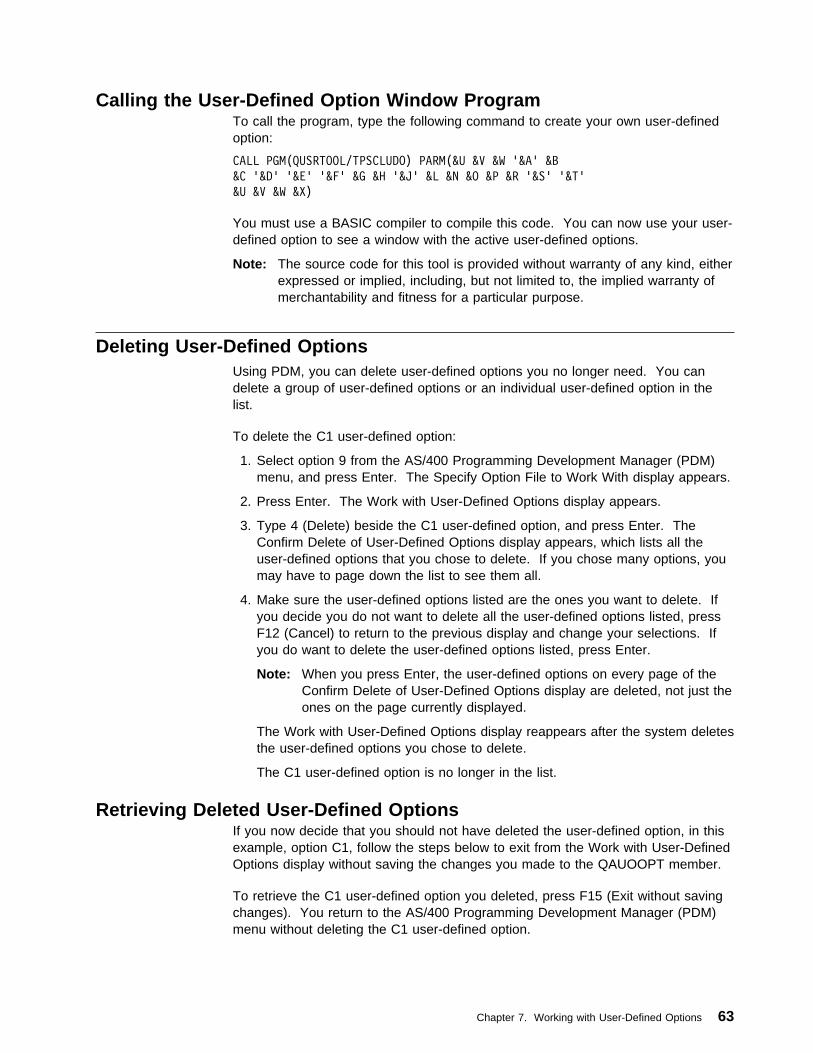
Calling the User-Defined Option Window ProgramTo call the program, type the following command to create your own user-definedoption:
CALL PGM(QUSRTOOL/TPSCLUDO) PARM(&U &V &W '&A' &B&C '&D' '&E' '&F' &G &H '&J' &L &N &O &P &R '&S' '&T'&U &V &W &X)
You must use a BASIC compiler to compile this code. You can now use your user-defined option to see a window with the active user-defined options.
Note: The source code for this tool is provided without warranty of any kind, eitherexpressed or implied, including, but not limited to, the implied warranty ofmerchantability and fitness for a particular purpose.
Deleting User-Defined OptionsUsing PDM, you can delete user-defined options you no longer need. You candelete a group of user-defined options or an individual user-defined option in thelist.
To delete the C1 user-defined option:
1. Select option 9 from the AS/400 Programming Development Manager (PDM)menu, and press Enter. The Specify Option File to Work With display appears.
2. Press Enter. The Work with User-Defined Options display appears.
3. Type 4 (Delete) beside the C1 user-defined option, and press Enter. TheConfirm Delete of User-Defined Options display appears, which lists all theuser-defined options that you chose to delete. If you chose many options, youmay have to page down the list to see them all.
4. Make sure the user-defined options listed are the ones you want to delete. Ifyou decide you do not want to delete all the user-defined options listed, pressF12 (Cancel) to return to the previous display and change your selections. Ifyou do want to delete the user-defined options listed, press Enter.
Note: When you press Enter, the user-defined options on every page of theConfirm Delete of User-Defined Options display are deleted, not just theones on the page currently displayed.
The Work with User-Defined Options display reappears after the system deletesthe user-defined options you chose to delete.
The C1 user-defined option is no longer in the list.
Retrieving Deleted User-Defined OptionsIf you now decide that you should not have deleted the user-defined option, in thisexample, option C1, follow the steps below to exit from the Work with User-DefinedOptions display without saving the changes you made to the QAUOOPT member.
To retrieve the C1 user-defined option you deleted, press F15 (Exit without savingchanges). You return to the AS/400 Programming Development Manager (PDM)menu without deleting the C1 user-defined option.
Chapter 7. Working with User-Defined Options 63

64 Programming Development Manager (PDM)

Chapter 8. Selecting Default Values
You can select the default values for certain operations in PDM by using theChange Defaults display. You can access the Change Defaults display by pressingF18 (Change defaults) on the AS/400 Programming Development Manager (PDM)menu or when using any of the following displays:
� Specify Libraries to Work With� Specify Objects to Work With� Specify Members to Work With
You can perform the following tasks by changing the prompts on the ChangeDefaults display:
� Store compiled members in a different library� Replace existing compiled members� Change the compile and run modes� Save session defaults� Save and restore objects� Change the job description� Restrict the ability to change member type and description� Change the default user-defined options file� Change list displays to full screen mode� Log option commands� Change the default value of the Enter key
If you have the Application Development Manager/400 orderable feature installed,you can also access the Change Defaults display when using any of the followingdisplays:
� Specify Projects to Work With� Specify Groups to Work With� Specify Parts to Work With
Accessing the Change Defaults DisplayTo access the Change Defaults display:
1. Type STRPDM on any command line, and press Enter. The AS/400 Program-ming Development Manager (PDM) menu appears.
2. Press F18 (Change defaults) on the AS/400 Programming DevelopmentManager (PDM) menu. The Change Defaults display appears.
The prompts on the Change Defaults display are filled with their original defaultvalues, unless you changed them previously.
Overriding Default Values on the Change Defaults DisplayTo override defaults on this display for the Object library prompt, the Replace objectprompt, the Compile in batch prompt, and the Job description prompt, type akeyword parameter and its value on the command line.
Copyright IBM Corp. 1994 65

Storing Compiled Members in a Library for Compiled ProgramsYou can change the Object library prompt to specify that objects created bycompile operations are stored in a special library set up for compiled programs.When you compile a member, an object is created. The library in which this objectis stored is determined by the Object library prompt on the Change Defaultsdisplay. The default of this prompt is *SRCLIB, which indicates that objects createdas a result of compiling are stored in the source library.
To store compiled members in a different library, type a new library name in theObject library prompt on the Change Defaults display. For example, type COMPLIBin the Object library to indicate that you want all objects created as a result of com-piling to be put in the library COMPLIB. When you compile a member using PDM,the object is stored in library COMPLIB.
Replacing Existing Compiled MembersIf an object to be created as the result of compiling already exists, you can specifythat the existing object is replaced with the new object by changing the Replaceobject prompt on the Change Defaults display. The new object created as a resultof the compile is then placed in the library specified in the Object library prompt.
Note: You can also use the REPLACE parameter on the create command that iscalled for compiling the member type.
To replace existing compiled members, type Y (Yes) in the Replace object promptto indicate that you want PDM to delete the existing object, and replace it with thenew object, before the create command for the member is called. If the object tobe created as a result of compiling already exists, it is replaced before the createcommand is called.
Changing the Compile and Run ModesYou can change the mode in which a member is compiled or an object is run tobatch or interactive by using the Compile in batch and Run in batch prompts on theChange Defaults display. The default value for the Compile in batch prompt is Y(Yes); the default for the Run in batch prompt is N (No).
To change the default values of these prompts so that members are compiled inter-actively and objects are run in batch mode:
1. Press F18 (Change defaults), on the AS/400 Programming DevelopmentManager (PDM) menu. The Change Defaults display appears.
2. Type N in the Compile in batch prompt, and type Y in the Run in batch prompt,and press Enter. The AS/400 Programming Development Manager (PDM)menu reappears.
Until you change the Compile in batch and Run in batch prompts again, whenyou compile a member it is compiled interactively, and when you run a programit is run in batch.
66 Programming Development Manager (PDM)

Note: When you compile a member in batch, the library list used differs accordingto whether the member is a System/38 or an AS/400 member. WhenSystem/38 members are compiled in batch, the System/38 SBMJOBcommand is called to submit the job to batch processing. When AS/400members are compiled in batch, the AS/400 SBMJOB command is called tosubmit the job to batch processing.
The default values of the INLLIBL parameter on the System/38 and AS/400SBMJOB commands differ. As a result, the library list specified as part ofthe job description is used when you compile a System/38 member inbatch, and the current library list for the job is used when you compile anAS/400 member in batch.
If you want to change the default library list used when compiling System/38or AS/400 members in batch, create a user-defined option to compilemembers, and specify the default library list you want to use in theSBMJOB INLLIBL parameter. Then, when you want to compile a member,specify the option code for the option you created, instead of using option14 (Compile) on the Work with Members Using PDM display. For informa-tion on creating user-defined options, see “Choosing a Command to Corre-spond to a User-Defined Option” on page 57.
Saving Session DefaultsTo save the default values from your current session, use the Change sessiondefaults prompt as follows:
1. Press F18 (Change defaults), on the AS/400 Programming DevelopmentManager (PDM) menu. The Change Defaults display appears.
2. Type Y on the Save session defaults prompt to save changes to the defaultvalues in your user profile, and press Enter. The AS/400 Programming Devel-opment Manager (PDM) menu reappears.
If you leave this prompt set at the default N (No), any changes to the defaultvalues are effective for your current session only.
Note: If you want batch jobs to use the same default values as your currentsession, you must type Y in the Save session defaults prompt before thejob is submitted to batch. You must run these batch jobs with the sameuser profile you used to submit the job.
Saving and Restoring ObjectsYou can save or restore selected objects and members individually, or save andrestore all selected objects and members at the same time, by using theSave/restore option prompt.
1. Press F18 (Change defaults) on the AS/400 Programming DevelopmentManager (PDM) menu. The Change Defaults display appears.
2. Type 1 in the Save/Restore option prompt to save or restore selected objectsor members all at the same time with one command, and press Enter. TheAS/400 Programming Development Manager (PDM) menu reappears.
Chapter 8. Selecting Default Values 67

Changing the Job DescriptionYou can change your job description by changing the Job description prompt on theChange Defaults display. You can choose from a list of all valid job descriptions inthe specified library to which you have authority by pressing F4 when your cursor ison the Job description prompt.
You can create a subset of the list by typing a generic name on the Job descriptionprompt before pressing F4. This selection list is similar to the Select File UsingPDM display when you are copying members or specifying the members to workwith.
1. Press F18 (Change defaults), on the AS/400 Programming DevelopmentManager (PDM) menu. The Change Defaults display appears.
2. To display a list of all job descriptions starting with J, type J\ in the Jobdescription prompt before pressing F4 to display the list.
3. Position the cursor on the Job description prompt and press F4.
4. Type 1 in the Opt prompt next to the job description that you want to work with,and press Enter. The Change Defaults display reappears with the Jobdescription prompt filled in with your choice.
5. Press Enter, and the AS/400 Programming Development Manager (PDM) menureappears.
Restricting Changes to the Member Type and Text DescriptionWhen you work with members on the Work with Members Using PDM display, youcan change the type and text of a member specified in the Type and Text column.
The type of member determines the command that is called when you select anoption. The member type must match the source code in the member for theoption to be performed successfully. Allowing inexperienced users to change themember type could, therefore, lead to problems.
To restrict changes to the type and text description of members:
1. Press F18 (Change defaults) on the AS/400 Programming DevelopmentManager (PDM) menu. The Change Defaults display appears.
2. On the Change Defaults display, type N in the Change type and text prompt,and press Enter. The AS/400 Programming Development Manager (PDM)menu reappears.
You cannot change the type or text description of a member on the Work withMembers Using PDM display until you change the Change type and textprompt again.
68 Programming Development Manager (PDM)

Changing the Active Default User-Defined Options FileYou can change the active user-defined options file, library, and member bychanging the Option file prompt, the Library prompt, and the Member prompt on theChange Defaults display.
To change the active user-defined options file, library, and member from theirdefault values to the file, library, and member you created in “Copying the User-Defined Options File for Storage in Other Files” on page 61:
1. Press F18 (Change defaults) on the AS/400 Programming DevelopmentManager (PDM) menu. The Change Defaults display appears.
2. Type UDO in the Option file prompt, ATEST in the Library prompt, leave theMember prompt as QAUOOPT, and press Enter. The AS/400 ProgrammingDevelopment Manager (PDM) menu reappears.
Until you change these prompts again, the only user-defined options you canuse are those in the UDO file in the library ATEST.
Changing List Displays to Full Screen ModeAll PDM list displays initially show list items and the options and function keys avail-able for the display. You can change the mode of list displays so that more listitems are displayed without the options and function keys by using the Full screenmode prompt on the Change Defaults display.
To change list displays to full screen mode:
1. Press F18 (Change defaults) on the AS/400 Programming DevelopmentManager (PDM) menu. The Change Defaults display appears.
2. Type Y in the Full screen mode prompt on the Change Defaults display, andpress Enter. The AS/400 Programming Development Manager (PDM) menureappears. Until you change this prompt again, all PDM list displays are shownin full screen mode.
3. Press F3 (Exit) to return to the AS/400 Programming Development Manager(PDM) menu.
Chapter 8. Selecting Default Values 69

Logging Option CommandsYou can specify whether or not commands resulting from PDM options or user-defined options are logged. When the Log option commands prompt is set to Y(Yes), commands are logged, and can be retrieved on the PDM command line orPDM command entry panel with F9 (Retrieve). The default value for this prompt isN (No).
To log option commands:
1. Press F18 (Change defaults) on the AS/400 Programming DevelopmentManager (PDM) menu. The Change Defaults display appears.
2. On the Change Defaults display, page down to display the second display.
3. Type Y in the Log option commands prompt, and press Enter. The AS/400Programming Development Manager (PDM) menu reappears.
All PDM options and user-defined options will be logged.
Changing the Default Value of the Enter KeyYou can change the default value of the Enter key by changing the Exit lists onENTER prompt. The default value of the Enter key is Y (Yes), which allows you toexit list panels by pressing the Enter key.
To change the default value of the Enter key:
1. Press F18 (Change defaults) on the AS/400 Programming DevelopmentManager (PDM) menu. The Change Defaults display appears.
2. On the Change Defaults display, page down to display the second display.
3. Type N in the Exit lists on ENTER prompt, and press Enter. The AS/400 Pro-gramming Development Manager (PDM) menu reappears.
When you change the default value of the Enter key, you cannot use the Enter keyto exit from list displays. You can still use F3 (Exit) and F12 (Cancel) to exit fromlist displays.
70 Programming Development Manager (PDM)
Appendix A. Command Reference
This appendix lists the following commands:
� Command reference for objects, which consists of commands for the followingoptions:
– Change – Copy – Delete – Display – Rename – Display description – Save – Restore – Move – Work with – Change text – Copy file – Run
– Change using DFU – Find String
� Command reference for libraries
� Command reference for members
� Compile commands called for members
Command Reference for ObjectsThe following figures show you the AS/400 system commands that are called forparticular object types for each option available on the Work with Objects UsingPDM display.
These figures list only the object types on which PDM can perform operations.
Commands Called for the Change OptionThe commands used to call a specific object type for the Change option, and theobject attribute, if applicable, are:
Type Attribute Command
*AUTL EDTAUTL
*CFGL CHGCFGL
*CMD CHGCMD
*COSD CHGCOSD
*CRQD CHGCMD
*DTAARA CHGDTAARA
*FCT CHGFCT
*FILE DDMF CHGDDMF
*FILE DKTF CHGDKTF
Copyright IBM Corp. 1994 71

Type Attribute Command
*FILE DSPF CHGDSPF
*FILE ICFF CHGICFF
*FILE LF CHGLF
*FILE PF-DTA CHGPF
*FILE PF-SRC CHGSRCPF
*FILE PRTF CHGPRTF
*FILE SAVF CHGSAVF
*FILE TAPF CHGTAPF
*JOBD CHGJOBD
*JRN CHGJRN
*LIB CHGLIB
*MENU CHGMNU
*MODD CHGMODD
*MSGQ CHGMSGQ
*OUTQ CHGOUTQ
*PGM ALL CHGPGM
*SBSD CHGSBSD
*SSND CHGSSND
*USRPRF CHGUSRPRF
Commands Called for the Copy OptionExcept for object type *LIB, which calls the CPYLIB command, the CRTDUPOBJcommand is called for the Copy option and is valid for the following object types:
*ALRTBL *DTAARA *MSGF *QMFORM
*AUTL *FCT *MSGQ *QMQRY
*CHTFMT *FILE *OUTQ *QRYDFN
*CLD *FNTRSC *OVL *SBSD
*CLS *FORMDF *PAGSEG *SCHIDX
*CRQD *GSS *PDG *SSND
*CMD *JOBD *PGM *TBL
*CSPMAP *JOBQ *PNLGRP *USRIDX
*CSPTBL *MENU *PRDDFN *USRSPC
Commands Called for the Delete OptionThe commands used to call a specific object type for the Delete option, and theobject attribute, if applicable, are:
Type Attribute Command
*ALRTBL DLTALRTBL
*AUTL DLTAUTL
72 Programming Development Manager (PDM)

Type Attribute Command
*CFGL DLTCFGL
*CHTFMT DLTCHTFMT
*CLD DLTCLD
*CLS DLTCLS
*CMD DLTCMD
*CNNL DLTCNNL
*COSD DLTCOSD
*CRQD DLTCRQD
*CSI DLTCSI
*CSPMAP DLTCSPMAP
*CSPTBL DLTCSPTBL
*CTLD DLTCTLD
*DEVD DLTDEVD
*DTAARA DLTDTAARA
*DTADCT DLTDTADCT
*DTAQ DLTDTAQ
*EDTD DLTEDTD
*FCT DLTFCT
*FILE ALL DLTF
*FNTRSC DLTFNTRSC
*FORMDF DLTFORMDF
*GSS DLTGSS
*IGCDCT DLTIGCDCT
*IGCTBL DLTIGCTBL
*JOBD DLTJOBD
*JOBQ DLTJOBQ
*JRN DLTJRN
*JRNRCV DLTJRNRCV
*LIB DLTLIB
*LIND DLTLIND
*MENU DLTMNU
*MODD DLTMODD
*MSGF DLTMSGF
*MSGQ DLTMSGQ
*NWID DLTNWID
*OUTQ DLTOUTQ
*OVL DLTOVL
*PAGDFN DLTPAGDFN
*PAGSEG DLTPAGSEG
*PDG DLTPDG
Appendix A. Command Reference 73

Type Attribute Command
*PGM DFU DLTDFUPGM
*PGM other DLTPGM
*PNLGRP DLTPNLGRP
*QMFORM DLTQMFORM
*QMQRY DLTQMQRY
*QRYDFN DLTQRY
*SBSD DLTSBSD
*SCHIDX DLTSCHIDX
*SPADCT DLTSPADCT
*SSND DLTSSND
*TBL DLTTBL
*USRIDX DLTUSRIDX
*USRPRF DLTUSRPRF
*USRQ DLTUSRQ
*USRSPC DLTUSRSPC
Commands Called for the Display OptionThe commands used to call a specific object type for the Display option, and theobject attribute, if applicable, are:
Type Attribute Command
*AUTL DSPAUTL
*CFGL DSPCFGL
*CHTFMT DSPCHT
*CLS DSPCLS
*CMD DSPCMD
*CNNL DSPCNNL
*COSD DSPCOSD
*CRQD DSPOBJD
*CSI DSPCSI
*CSPMAP DSPCSPOBJ
*CSPTBL DSPCSPOBJ
*CTLD DSPCTLD
*DEVD DSPDEVD
*DTAARA DSPDTAARA
*DTADCT DSPDTADCT
*EDTD DSPEDTD
*EXITRG DSPOBJD
*FILE DDMF DSPDDMF
*FILE DKTF DSPFD
74 Programming Development Manager (PDM)

Type Attribute Command
*FILE DSPF STRSDA OPTION (3)
*FILE ICFF DSPFD
*FILE LF DSPFD
*FILE PF-DTA DSPFD
*FILE PF-SRC DSPFD
*FILE PRTF DSPFD
*FILE SAVF DSPSAVF
*FILE TAPF DSPFD
*IGCDCT DSPIGCDCT
*JOBD DSPJOBD
*JRN DSPJRN
*JRNRCV DSPJRNRCVA
*LIB DSPLIB
*LIND DSPLIND
*MENU DSPMNUA
*MODD DSPMODD
*MSGF DSPMSGD
*MSGQ DSPMSG
*NWID DSPNWID
*PGM ALL DSPPGM
*SBSD DSPSBSD
*USRPRF DSPUSRPRF
Command Called for the Rename OptionThe RNMOBJ command is called for the Rename option and is valid for the fol-lowing object types:
*ALRTBL *DTAARA *MENU *QMFORM
*AUTL *DTAQ *MSGF *QMQRY
*CFGL *EDTD *MSGQ *QRYDFN
*CHTFMT *FCT *NTBD *RCT
*CLD *FILE *NWID *SBSD
*CLS *FNTRSC *OUTQ *SCHIDX
*CMD *FORMDF *OVL *SPADCT
*CNNL *GSS *PAGSEG *SSND
*CRQD *JOBD *PDG *TBL
*CSPMAP *JOBQ *PGM *USRIDX
*CSPTBL *LIB *PNLGRP *USRQ
*CTLD *LIND *PRDDFN *USRSPC
*DEVD
Appendix A. Command Reference 75

Command Called for the Display Description OptionThe DSPOBJD command is called for the Display Description option and is valid forthe following object types:
*ALRTBL *DTADCT *LIND *PRDLOD
*AUTL *DTAQ *MENU *QMFORM
*CFGL *EDTD *MODD *QMQRY
*CHTFMT *FCT *MSGF *QRYDFN
*CLD *FILE *MSGQ *RCT
*CLS *FNTRSC *NTBD *SBSD
*CMD *FORMDF *NWID *SCHIDX
*CNNL *GSS *OUTQ *SPADCT
*COSD *IGCDCT *OVL *SSND
*CRQD *IGCSRT *PAGDFN *S36
*CSI *IGCTBL *PAGSEG *SVRSTG
*CSPMAP *JOBD *PDG *TBL
*CSPTBL *JOBQ *PGM *USRIDX
*CTLD *JRN *PNLGRP *USRPRF
*DEVD *JRNRCV *PRDAVL *USRQ
*DTAARA *LIB *PRDDFN *USRSPC
Commands Called for the Save OptionThe commands used to call a specific object type for the Save option, and theobject attribute, if applicable, are:
Type Attribute Command
*ALRTBL SAVOBJ
*CFGL SAVOBJ
*CHTFMT SAVOBJ
*CLD SAVOBJ
*CLS SAVOBJ
*CMD SAVOBJ
*CRQD SAVOBJ
*CSI SAVOBJ
*CSPMAP SAVOBJ
*CSPTBL SAVOBJ
*DTAARA SAVOBJ
*DTAQ SAVOBJ
*EDTD SAVOBJ
*EXITRG SAVOBJ
*FCT SAVOBJ
*FILE DDMF SAVOBJ
76 Programming Development Manager (PDM)

Type Attribute Command
*FILE DKTF SAVOBJ
*FILE DSPF SAVOBJ
*FILE ICFF SAVOBJ
*FILE LF SAVOBJ
*FILE PF-DTA SAVOBJ
*FILE PF-SRC SAVOBJ
*FILE PRTF SAVOBJ
*FILE SAVF SAVSAVFDTA
*FILE TAPF SAVOBJ
*FNTRSC SAVOBJ
*FORMDF SAVOBJ
*GSS SAVOBJ
*IGCSRT SAVOBJ
*IGCTBL CPYIGCTBL
*JOBD SAVOBJ
*JOBQ SAVOBJ
*JRN SAVOBJ
*JRNRCV SAVOBJ
*LIB SAVLIB
*MENU SAVOBJ
*MSGF SAVOBJ
*MSGQ SAVOBJ
*OUTQ SAVOBJ
*OVL SAVOBJ
*PAGDFN SAVOBJ
*PAGSEG SAVOBJ
*PDG SAVOBJ
*PGM SAVOBJ
*PNLGRP SAVOBJ
*PRDAVL SAVOBJ
*QMFORM SAVOBJ
*QMQRY SAVOBJ
*QRYDFN SAVOBJ
*RCT SAVOBJ
*SBSD SAVOBJ
*SCHIDX SAVOBJ
*SPADCT SAVOBJ
*SSND SAVOBJ
*S36 SAVOBJ
*SVRSTG SAVOBJ
Appendix A. Command Reference 77

Type Attribute Command
*TBL SAVOBJ
*USRIDX SAVOBJ
*USRQ SAVOBJ
*USRSPC SAVOBJ
Commands Called for the Restore OptionExcept for object type *IGCTBL, which calls the CPYIGCTBL command, theRSTOBJ command is called for the Restore option and is valid for the followingobject types:
*ALRTBL *FCT *OUTQ *QRYDFN
*CFGL *FILE *OVL *RCT
*CHTFMT *FNTRSC *PAGDFN *SBSD
*CLD *FORMDF *PAGSEG *SCHIDX
*CLS *GSS *PDG *SPADCT
*CMD *IGCSRT *PGM *SSND
*CRQD *JOBD *PNLGRP *S36
*CSI *JOBQ *PRDAVL *SVRSTG
*CSPMAP *LIB *PRDDFN *TBL
*CSPTBL *MENU *PRDLOD *USRIDX
*DTAARA *MSGF *QMFORM *USRQ
*EDTD *MSGQ *QMQRY *USRSPC
Command Called for the Move OptionThe MOVOBJ command is called for the Move option and is valid for the followingobject types:
*ALRTBL *FILE *MSGQ *QRYDFN
*CHTFMT *FNTRSC *OUTQ *RCT
*CLD *FORMDF *OVL *SBSD
*CLS *GSS *PAGSEG *SCHIDX
*CMD *JOBD *PDG *SPADCT
*CRQD *JOBQ *PGM *SSND
*CSPMAP *JRN *PNLGRP *TBL
*CSPTBL *JRNRCV *PRDDFN *USRIDX
*DTAARA *MENU *QMFORM *USRQ
*DTAQ *MSGF *QMQRY *USRSPC
*FCT
78 Programming Development Manager (PDM)

Commands Called for the Work With OptionThe commands used to call a specific object type for the Work With option, and theobject attribute, if applicable, are:
Type Attribute Command
*ALRTBL WRKALRTBL
*AUTL WRKAUTL
*CFGL WRKCFGL
*CHTFMT WRKCHTFMT
*CLS WRKCLS
*CNNL WRKCNNL
*COSD WRKCOSD
*CSI WRKCSI
*CSPMAP WRKOBJCSP
*CSPTBL WRKOBJCSP
*CTLD WRKCTLD
*DEVD WRKDEVD
*DTAARA WRKDTAARA
*DTADCT WRKDTADCT
*DTAQ WRKDTAQ
*EDTD WRKEDTD
*FILE PF-DTA WRKMBRPDM
*FILE PF-SRC WRKMBRPDM
*FILE Other WRKF
*FNTRSC WRKFNTRSC
*FORMDF WRKFORMDF
*GSS WRKGSS
*JOBD WRKJOBD
*JOBQ WRKJOBQ
*JRN WRKJRNA
*JRNRCV WRKJRNRCV
*LIB WRKOBJPDM
*LIND WRKLIND
*MENU WRKMNU
*MODD WRKMODD
*MSGF WRKMSGF
*MSGQ WRKMSGQ
*NWID WRKNWID
*OUTQ WRKOUTQ
*OVL WRKOVL
*PAGDFN WRKPAGDFN
Appendix A. Command Reference 79

Type Attribute Command
*PAGSEG WRKPAGSEG
*PGM WRKPGM
*PGM *CSPAE WRKOBJCSP
*PNLGRP WRKPNLGRP
*QMFORM WRKQMFORM
*QMQRY WRKQMQRY
*SBSD WRKSBSD
*SCHIDX WRKSCHIDX
*SPADCT WRKSPADCT
*TBL WRKTBL
*USRPRF WRKUSRPRF
Command Called for the Change Text OptionThe CHGOBJD command is called for the Change Text option and is valid for thefollowing object types:
*ALRTBL *EDTD *MENU *PRDLOD
*AUTL *EXITRG *MODD *QMFORM
*CFGL *FCT *MSGF *QMQRY
*CHTFMT *FILE *MSGQ *QRYDFN
*CLD *FNTSRC *NTBD *RCT
*CLS *FORMDF *NWID *SBSD
*CMD *GSS *NWSD *SCHIDX
*CNNL *IGCDCT *OUTQ *SPADCT
*COSD *IGCSRT *OVL *SSND
*CSI *IGCTBL *PAGDFN *S36
*CSPMAP *JOBD *PAGSEG *SVRSTG
*CSPTBL *JOBQ *PDG *TBL
*CTLD *JRN *PGM *USRIDX
*DEVD *JRNRCV *PNLGRP *USRPRF
*DTAARA *LIB *PRDAVL *USRQ
*DTADCT *LIND *PRDDFEN *USRSPC
*DTAQ
Commands Called for the Copy File OptionThe commands used to call a specific object type for the Copy File option, and theobject attribute, if applicable, are:
Type Attribute Command
*FILE DKTF CPYF
*FILE LF CPYF
80 Programming Development Manager (PDM)

Type Attribute Command
*FILE PF-DTA CPYF
*FILE PF-SRC CPYSRCF
Commands Called for the Run OptionThe commands used to call a specific object type for the Run option, and the objectattribute, if applicable, are:
Type Attribute Command
*CMD Command is called
*PGM DFU CHGDTA
*PGM other CALL
*QRYDFN RUNQRY
Commands Called for the Change Using DFU OptionThe commands used to call a specific object type for the Change Using DFUoption, and the object attribute, if applicable, are:
Type Attribute Command
*FILE PF-DTA UPDDTA
*FILE LF UPDDTA
*PGM DFU STRDFU OPTION (3)
Commands Called for the Find String OptionThe commands used to call a specific object type for the Find String option, andthe object attribute, if applicable, are:
Type Attribute Command
*FILE PF-DTA Find character string in member (interactive mode)
FNDSTRPDM (batch mode)
*FILE PF-SRC Find character string in member
Command Reference for LibrariesThe AS/400 system commands that are called for each option that can be per-formed on a library are:
Option Command
Change CHGLIB
Change text CHGOBJD
Copy CPYLIB
Delete DLTLIB
Display DSPLIB
Appendix A. Command Reference 81

Option Command
Display description DSPOBJD
Rename RNMOBJ
Restore RSTLIB
Save SAVLIB
Work with WRKOBJPDM
Command Reference for MembersThe AS/400 system commands that are called for each option that can be per-formed on a member are:
Option Command SourceMember
Command DataFile Member
Change text CHGPFM CHGPFM
Change using DFU UPDDTA
Change using RLU STRRLU OPTION(2)
Change using SDA STRSDA
Compile
Copy CPYSRCF CPYF
Delete RMVM RMVM
Display STRSEU OPTION(5) DSPPFM
Display description Display member description Display memberdescription
Edit STRSEU OPTION(2) Not available
Find string Search member for character string FNDSTRPDM
Print STRSEU OPTION(6) Not available
Rename RNMM RNMM
Run procedure REXX STRREXPRC
OCL36 STRS36PRC
BASP STRBASPRC
BASP38 QSYS38/EXCBASPRC
Save SAVOBJ SAVOBJ
82 Programming Development Manager (PDM)

Compile Commands for MembersIf you select the compile option for a member with a type that is not listed in thisfigure, an error message is issued. The compile commands that are called foreach of the member types are:
Type Compile Command
BAS CRTBASPGM
BAS36 CRTBASPGM
BAS38 CRTBASPGM
C CRTCMODCRTBNDC
CBL CRTCBLPGM
CBLLE CRTCBLMODCRTBNDCBL
CBL36 CRTS36CBL
CBL38 CRTCBLPGM
CLD CRTCLD
CLLE CRTCLMODCRTBNDCL
CLP CRTCLPGM
CLP38 CRTCLPGM
CMD CRTCMD
CMD38 CRTCMD
DSPF CRTDSPF
DSPF36 CRTS36DSPF
DSPF38 CRTDSPF
FTN CRTFTNPGM
ICFF CRTICFF
LF CRTLF
LF38 CRTLF
PAS CRTPASPGM
PF CRTPF
PF38 CRTPF
PLI CRTPLIPGM
PLI38 CRTPLIPGM
PNLGRP CRTPNLGRP
PRTF CRTPRTF
PRTF38 CRTPRTF
QRY38 CRTQRYAPP
RMC CRTRMCPGM
RPG CRTRPGPGM
Appendix A. Command Reference 83

Type Compile Command
RPGLE CRTRPGMODCRTBNDRPG
RPG36 CRTS36RPG
RPG38 CRTRPGPGM
RPT CRTRPTPGM
RPT36 CRTS36RPT
RPT38 CRTRPTPGM
SPADCT CRTSPADCT
SQLC CRTSQLC
SQLCBL CRTSQLCBL
SQLCBLLE CRTSQLCBLI
SQLCLE CRTSQLCI
SQLFTN CRTSQLFTN
SQLPLI CRTSQLPLI
SQLRPG CRTSQLRPG
SQLRPGLE CRTSQLRPGI
TBL CRTTBL
84 Programming Development Manager (PDM)

Appendix B. Control Language Commands
This appendix lists the Control Language commands that are specific to the pro-gramming development manager. Each of the command parameters is followed bya description of its use.
Start Programming Development Manager (STRPDM) Command
Calls the programming development manager (PDM) utility. A menu is shown on which you can choosefrom a set of options so that you can work with libraries, objects, members, and user-defined options.
Command Syntax
Job: I Pgm: I REXX: I Exec
55──STRPDM────────────────────────────────────────────────────────────────────────────────5%
Work with Libraries Using PDM (WRKLIBPDM) Command
Bypasses the programming development manager (PDM) menu and the Specify Libraries to Work Withdisplay so that you can work with lists of libraries.
Command Syntax
Job: I Pgm: I REXX: I Exec
55──WRKLIBPDM─ ──┬ ┬─────────────────────────────────────── ─────────────────────────────────5% │ │┌ ┐─\PRV─────────────────── └ ┘ ─LIB──(─ ──┼ ┼─\LIBL────────────────── ─)─ ├ ┤─\USRLIBL─────────────── ├ ┤─\ALL─────────────────── ├ ┤─\ALLUSR──────────────── ├ ┤─\CURLIB──────────────── ├ ┤─\generic\-library-name─ └ ┘─library-name───────────
LIB: Specifies the libraries with which to work.This parameter can be used to create a subset ofa list of libraries by a library name or a genericlibrary name.
*PRV:The library list type that was used during theprevious session is used.
*LIBL:All the libraries in the user and systemportions of the job's library list are used.
*USRLIBL:Only the libraries listed in the user portion ofthe job's library list are used.
*ALL:All the libraries in the system, including QSYSand QTEMP, are used.
*ALLUSR:All the nonsystem libraries, including a list ofall user-defined libraries, are used. The list isdisplayed alphabetically by library.
Copyright IBM Corp. 1994 85

*CURLIB:The current library in the library list is used. Ifa current library is not specified, the QGPLlibrary is used.
*generic*-library-name:Specify a partial library name qualified by anasterisk (*) to show a list of libraries whosenames begin with the prefix that precedes theasterisk. For a list of generic library names,see “Viewing a List of Libraries” on page 10.
For more information on the use of genericfunctions, refer to the CL Reference.
library-name:Specify a library name for a display with onlythat library name in the list.
Example: This command shows the Work withLibraries using PDM Display and shows alllibraries starting with ABC:
WRKLIBPDM LIB(ABC\)
Work with Members Using PDM (WRKMBRPDM) Command
Bypasses the Programming Development Manager (PDM) menu and the Specify Members to Work Withdisplay so that you can work with lists of members.
Command Syntax
Job: I Pgm: I REXX: I Exec
55──WRKMBRPDM─ ──┬ ┬────────────────────────────────────────────── ───────────────────────────5 │ │┌ ┐─\PRV───────────────────────── │ ││ │┌ ┐─\LIBL/──────── └ ┘ ─FILE──(─ ──┴ ┴──┼ ┼─────────────── ─file-name─ ─)─ ├ ┤─\CURLIB/────── ├ ┤─\PRV/───────── └ ┘─library-name/─
5─ ──┬ ┬────────────────────────────────────── ───────────────────────────────────────────────5 │ │┌ ┐─\ALL────────────────── └ ┘ ─MBR──(─ ──┼ ┼─\PRV────────────────── ─)─ ├ ┤─member-name─────────── └ ┘─\generic\-member-name─
5─ ──┬ ┬────────────────────────────────────────── ──────────────────────────────────────────5% │ │┌ ┐─\ALL────────────────── └ ┘ ─MBRTYPE──(─ ──┼ ┼─\PRV────────────────── ─)─ ├ ┤─\BLANK──────────────── ├ ┤─member-type─────────── └ ┘─\generic\-member-type─
FILE: Specifies the qualified name of the file (inthe form LIB/FILE) that contains the members withwhich to work. The first time this command isused, you must specify a file name; no default issupplied. The file can be a source physical file ora data physical file.
*PRV:Specifies that PDM uses the file name andlibrary name used in the previous PDMsession.
The possible library values are:
*LIBL:The library list is used to locate the file.
*CURLIB:The current library for the job is used tolocate the file. If no current library entryexists in the library list, the QGPL libraryis used.
*PRV:Specifies that PDM uses the library nameused in the previous PDM session.
86 Programming Development Manager (PDM)

library-name:Specify the library name containing thefile.
MBR: Specifies the member name. Thisparameter can be used to work with all themembers or a subset of members in the specifiedfile.
*ALL: Displays a list of all the members in thespecified file.
*PRV: Specifies the member name that was usedin the previous PDM session.
member-name: Specify a member name for adisplay with only that member name in the list.
*generic*-member-name: Specify a partialmember name qualified by an asterisk (*) todisplay a list of members that meet the specificcriteria. For a list of generic names, see “Viewinga List of Libraries” on page 10. For more informa-tion on the use of generic functions, refer to theCL Reference book.
MBRTYPE: Specifies the member type. Thisparameter can be used to work with all membertypes in a specified file or a subset of members.
*ALL: Displays a list of all members with anymember type.
*PRV: Specifies the member type that was usedin the previous PDM session.
member-type: Specify any member type todisplay a list of all members of that particular type.
You can use a member type that you havecreated, or use one of the following standardmember types used by PDM commands:
BAS BasicBAS36 Basic System/36BAS38 Basic System/38BASP Basic Native ProcedureBASP38 Basic System/38 Native Proce-
dureC C LanguageCBL COBOLCBLLE Integrated Language Environment
COBOL/400*CBL36 COBOL System/36
CBL38 COBOL System/38CICSCBL CICS* COBOLCICSMAP CICS MapCLD C Locale DescriptionCLE Integrated Language Environment
C/400*CLLE Control Language Integrated Lan-
guage EnvironmentCLP Control LanguageCLP38 System/38 Control LanguageCMD CommandCMD38 Command System/38DSPF Display FileDSPF36 Display File System/36DSPF38 Display File System/38FTN FORTRAN/400*ICFF Inter-System Communications
Function FileLF Logical FileLF38 Logical File System/38MENU UIM MenuMNU MenuMNUCMD Menu CommandMNUDDS Menu Data Description Specifica-
tionsMNU36 Menu System/36MSGF36 Message File For System/36OCL36 System/36 Operator Control Lan-
guagePAS PascalPF Physical FilePF38 Physical File System/38PLI PL/IPLI38 PL/I System/38PNLGRP Panel GroupPRTF Printer FilePRTF38 Printer File System/38QRY38 System/38 QUERYREXX Restructured Extended Executor
LanguageRMC RM/COBOL-85**RPG RPGRPGLE Integrated Language Environment
RPG/400*RPG36 RPG System/36RPG38 RPG System/38RPT ReportRPT36 Report System/36RPT38 Report System/38SAVF Save FileSPADCT Spelling Aid DictionarySQLC DB2/400 Query Manager CSQLCBL DB2/400 Query Manager COBOL
Appendix B. Control Language Commands 87

SQLCBLLE DB2/400 Query Manager Inte-grated Language EnvironmentCOBOL/400
SQLCLE DB2/400 Query Manager Inte-grated Language EnvironmentC/400
SQLFTN DB2/400 Query ManagerFORTRAN
SQLPLI DB2/400 Query Manager PL/ISQLRPG DB2/400 Query Manager RPGSQLRPGLE DB2/400 Query Manager Inte-
grated Language EnvironmentRPG/400
TBL TableTXT TextUIM User Interface Manager
*generic*-member-type: Specify a partial name ofa member type qualified by an asterisk (*) todisplay a specific subset of members in the filethat meets the specific criteria.
The generic member type can be in one of the fol-lowing typical formats:
� RPG* displays a list of all members whosemember type begins with the characters RPG.For example, RPG, RPG36, or RPG38.
� *C displays a list of all members whosemember type ends with the character C. Forexample, C or SQLC.
� *I* displays a list of all members that have thecharacter I anywhere in the member type. Forexample, ICFF, PLI, PLI38, or SQLPLI.
� R*36 displays a list of all members whosemember type begins with the character R andends with the characters 36. For example,RPG36 or RPT36.
� “a*7” displays a list of all members that are inquotation marks and start with a. Forexample, “a”, “aB”, or “aD”.
� **ALL displays a list of all members whosemember type ends with ALL. For example,ALL, BALL, or TESTALL. The double asteriskis needed in this case because *ALL isdefined as a special value.
For more information on the use of generic func-tions, refer to the CL Reference.
*BLANK: Displays a list of all members with notype.
Example: This command allows you to workwith the Work with Members Using PDM displayand lists all members in file QDDSSRC in libraryMYLIB that are of type DSPF:
WRKMBRPDM FILE(MYLIB/QDDSSRC) MBR(\ALL)MBRTYPE(DSPF)
Work with Objects Using PDM (WRKOBJPDM) Command
Bypasses the Programming Development Manager (PDM) menu and the Specify Objects to Work Withdisplay so that you can work with lists of objects.
Command Syntax
Job: I Pgm: I REXX: I Exec
55──WRKOBJPDM─ ──┬ ┬───────────────────────────── ──┬ ┬────────────────────────────────────── ──5 │ │┌ ┐─\PRV───────── │ │┌ ┐─\ALL────────────────── └ ┘ ─LIB──(─ ──┼ ┼─\CURLIB────── ─)─ └ ┘ ─OBJ──(─ ──┼ ┼─\PRV────────────────── ─)─ └ ┘─library-name─ ├ ┤─object-name─────────── └ ┘─\generic\-object-name─
5─ ──┬ ┬──────────────────────────────── ──┬ ┬────────────────────────────────────────────── ──5% │ │┌ ┐─\ALL──────── │ │┌ ┐─\ALL─────────────────────── └ ┘ ─OBJTYPE──(─ ──┼ ┼─\PRV──────── ─)─ └ ┘ ─OBJATR──(─ ──┼ ┼─\PRV─────────────────────── ─)─ └ ┘─object-type─ ├ ┤─\BLANK───────────────────── ├ ┤─object-attribute─────────── └ ┘─\generic\-object-attribute─
88 Programming Development Manager (PDM)

LIB: Specifies the library that contains theobjects you want to work with.
The possible library values are:
*PRV:Specifies that PDM uses the library nameused in your previous session.
library-name:Specify the library containing the objects.
*CURLIB:The current library for the job is used to locatethe objects. If no current library entry exists inthe library list, the QGPL library is used.
OBJ: Specifies the object name. You can usethis parameter to work with all the objects or asubset of objects in the specified library.
*ALL: Displays a list of all the objects in thespecified library.
*PRV: Specifies the object name that was used inyour previous PDM session.
object-name: Specify an object name for a list ofall the objects with that name.
*generic*-object-name: Specify a partial objectname qualified by an asterisk (*) to display a list ofobjects that meet the specific criteria. For a list ofgeneric names, see “Viewing a List of Libraries”on page 10. For more information on the use ofgeneric functions, refer to the CL Reference book.
OBJTYPE: Specifies the object type. You canuse this parameter to work with all object types ora subset of objects. See Appendix A, “CommandReference” on page 71 for a list valid OS/400object types.
*ALL: Displays a list of all objects regardless ofthe object type.
*PRV: Specifies the object type that was used inyour previous PDM session.
object-type: Specify any valid system object typeto display a list of all objects of that particulartype.
OBJATR: Specifies the object attribute. Youcan use this parameter to work with all object attri-butes or only specific object attributes.
*ALL: Displays a list of all objects regardless ofthe object attribute.
*PRV: Specifies the object attribute that was usedin your previous PDM session.
object-attribute: Specify any object attribute todisplay a list of all objects with that particular attri-bute. If you specify the object attribute, you donot have to specify the object type.
The following are valid attributes:
BAS BasicBAS36 Basic System/36BAS38 Basic System/38BSCF38 Binary Synchronous Communication
File System/38C C LanguageCBL COBOLCBLLE Integrated Language Environment
COBOL/400CBL36 COBOL System/36CBL38 COBOL System/38CLE Integrated Language Environment
C/400CLLE Control Language Integrated Lan-
guage EnvironmentCLP Control LanguageCLP38 Control Language System/38CMD CommandCMD38 Command System/38CMNF38 Communications FileCSPAE Cross-System Product Application
ExecutionDDMF Distributed Data ManagementDFU Data File UtilityDFUEXEC Data File Utility Executable FileDFUNOTEXC Data File Utility Non-Executable FileDKTF Diskette FileDSPF Display FileDSPF36 Display File System/36DSPF38 Display File System/38FTN FORTRAN/400ICFF Inter-System Communications Func-
tion FileLF Logical FileLF38 Logical File System/38MXDF38 Mixed File System/38PAS Pascal
Appendix B. Control Language Commands 89

PF-DTA Physical File - DataPF-SRC Physical File - SourcePF38 Physical File System/38PLI PL/IPLI38 PL/I System/38PRTF Printer FilePRTF38 Printer File System/38QRY38 System/38 QUERYRMC RM/COBOL-85**RPG RPGRPGLE Integrated Language Environment
RPG/400RPG36 RPG System/36RPG38 RPG System/38RPT RPG Auto ReportRPT36 RPG Auto Report System/36RPT38 RPG Auto Report System/38SAVF Save FileSPADCT Spelling Aid DictionarySQLC DB2/400 Query Manager CSQLCBL DB2/400 Query Manager COBOLSQLCBLLE DB2/400 Query Manager Integrated
Language Environment COBOL/400SQLCLE DB2/400 Query Manager Integrated
Language Environment C/400SQLFTN DB2/400 Query Manager FORTRANSQLPLI DB2/400 Query Manager PL/ISQLRPG DB2/400 Query Manager RPGSQLRPGLE DB2/400 Query Manager Integrated
Language Environment RPG/400TAPF Tape FileTBL Table
*generic*-object-attribute: Specify a partial attri-bute type qualified by an asterisk (*) to display aspecific subset of objects in the file that meets thecriteria.
The partial attribute type can be in one of the fol-lowing formats:
� RPG* displays a list of all objects whose attri-bute type begins with the characters RPG.For example, RPG, RPG36, or RPG38.
� *C displays a list of all objects whose attributetype ends with the characters C. Forexample, C or SQLC.
� *I* displays a list of all objects that have thecharacter I anywhere in the attribute type. Forexample, ICFF, PLI, PLI38, or SQLPLI.
� P*38 displays a list of all objects whose attri-bute type begins with the character P andends with the characters 38. For example,PLI38 or PRTF38.
� “a*” displays a list of all objects that havequoted attribute types that start with a. Forexample, "a", "aB", or "aD".
� **ALL displays a list of all objects whose attri-bute type ends with ALL. For example, ALL,BALL, or TESTALL. **ALL is a value neededfor only these situations because *ALL isalready used as a special value.
For more information on the use of generic func-tions, refer to the CL Reference book.
*BLANK: Displays a list of all objects with noattribute.
Example: This command allows you to workwith all physical files in library TESTLIB with TESTanywhere in the name:
WRKOBJPDM LIB(TESTLIB) OBJ(\TEST\)OBJTYPE(\FILE) OBJATR(PF\)
90 Programming Development Manager (PDM)

Find String Using PDM (FNDSTRPDM) Command
Searches for character or hexadecimal strings in source or data physical file members. You can use anyvalid PDM option or a user-defined option on the member that contains a match for the string.
Job: B,I Pgm: B,I REXX: B,I Exec
┌ ┐─\LIBL/────────55──FNDSTRPDM──STRING──(──'string'──)──FILE──(─ ──┼ ┼─────────────── ─file-name──)────────────5 ├ ┤─\CURLIB/────── └ ┘─library-name/─
┌ ┐─\NOPROMPT─5─ ──(P) ─MBR──(─ ──┬ ┬─\ALL───────────────── ─)─ ─OPTION──(─ ──┬ ┬──┴ ┴─\PROMPT─── ─)──────────────────5 ├ ┤─generic\-member-name─ └ ┘─\NONE───────── └ ┘─member-name──────────
5──COL──(── column-search──)─ ──┬ ┬───────────────────────── ─────────────────────────────────5 │ │┌ ┐─\IGNORE─ └ ┘ ─CASE──(─ ──┴ ┴─\MATCH── ─)─
5─ ──┬ ┬──────────────────────────── ─────────────────────────────────────────────────────────5 │ │┌ ┐─\NO── └ ┘ ─PRTMBRLIST──(─ ──┴ ┴─\YES─ ─)─
5─ ──┬ ┬──────────────────────────────────────────────────────────────────────── ─────────────5 │ │┌ ┐─\NONE─────────────────────────────────────────────── │ ││ │┌ ┐─\CHAR─── ┌ ┐─\MARK─── ┌ ┐─\FOLD───── └ ┘ ─PRTRCDS──(─ ──┴ ┴ ──┬ ┬─\ALL─── ──┼ ┼─\HEX──── ──┴ ┴─\NOMARK─ ──┼ ┼─────────── ─)─ └ ┘─number─ └ ┘─\ALTHEX─ └ ┘─\TRUNCATE─
5──PARM──(──parameters-appended──)────────────────────────────────────────────────────────5%
Note:P All parameters preceding this point are positional.
STRING: Specifies the string, enclosed in quo-tation marks, for which a search operation is per-formed. If a single word is specified in lowercaseletters without being enclosed in quotation marks,it is folded to uppercase letters for the search. Acharacter or a hexadecimal string can be speci-fied.
FILE: Specifies the qualified name of the filethat contains the members to be searched. Thefile searched can be a source physical file or adata physical file.
The library prompt specifies the name of thelibrary with the file and members to be searched.If this prompt is left blank, it defaults to *LIBL.The possible library values are:
*LIBL:The current library list is used to locate the fileto be searched. PDM will search the librarylist for the file specified.
*CURLIB:The current library for the job is used to locatethe file to be searched. If no library is speci-fied as the current library for the job, theQGPL library is used.
library-name:Specify the name of the library that containsthe file and members to be searched.
file-name: Specify the name of the file that con-tains the members to be searched.
MBR: Specifies the name of the member to besearched. This parameter can be used to searchall the members or a subset of members in thespecified file.
*ALL: All the members in the file are searched.
Appendix B. Control Language Commands 91
generic*-member-name: Specify a partial membername qualified by an asterisk (*) to search a list ofmembers that meet the specific criteria. For a listof generic names, see “Viewing a List of Libraries”on page 10. For more information on the use ofgeneric functions, refer to the CL Reference.
member-name: Specify the name of the memberto be searched. Type + to enter a list of membernames to search.
OPTION: Specifies the options to be per-formed on each member for which a match for theFIND string is found. The parameter is comprisedof two parts; one part for choosing an option andone part for prompting.
The option can be any PDM option that is valid forthis type of file, or any user-defined option in youractive option file. The valid options differ forsource physical files and data physical files.
*NOPROMPT: The user is not prompted.
*PROMPT: The user is prompted.
*NONE: Specifies that no options are performed.This implies that the PRTMBRLIST or PRTRCDSparameters must be selected for printing.
Source Physical File Member List
Choose:
*EDIT to edit one or more members using theSEU (Source Entry Utility) editor.
*COPY to copy one or more members to oneor more new members. You can also copymembers to another file, another library, orboth.
*DLT to delete one or more members from thefile.
*DSP to display one or more members usingSEU.
*PRT to print one or more members usingSEU.
*RNM to change the name of one or moremembers.
*DSPD to display information about one ormore members.
*SAVE to save a member on diskette or tape.
*CHGT to change some of the attributes ofone or more members.
*CMPL to compile one or more members.The system creates an object based on themember being compiled. The member iscompiled interactively or in batch mode,depending on what you have specified on thechange defaults display.
The following member types can be compiled:BAS, BAS36, BAS38, C, CBL, CBLLE,CBL36, CBL38, CICSCBL, CICSSQLCBL,CLD, CLE, CLLE, CLP, CLP38, CMD,CMD38, DSPF, DSPF36, DSPF38, FTN,ICFF, LF, LF38, MENU, PAS, PF, PF38, PLI,PLI38, PNLGRP, PRTF, PRINT38, QRY38,RMC, RPG, RPGLE, RPG36, RPG38, RPT,RPT36, RPT38, SPADCT, SQLC, SQLCBL,SQLCBLLE, SQLCLE, SQLFTN, SQLPLI,SQLRPG, SQLRPGLE, and TBL.
When PDM compiles a program using thenecessary create commands, the object nameto create is always specified as the sourcemember name. The object name parametercan be changed to another object name byprompting the option or typing the correctparameter on the command line. PDM checkswhether the object name already exists. If itdoes, the Confirm Compile of Member displayappears. This display can be used to deletethe existing object.
Note: This display does not appear if Y (Yes)is specified on the Replace objectprompt on the Change Defaultsdisplay.
If the object name parameter has beenchanged to a special value, PDM does notcheck whether the object exists. For example,if an RPG program has been compiled andthe Program prompt has been changed to*CTLSPEC, PDM does not check whether theobject exists.
*RUNP to run a source member with amember type of REXX, OCL36, BASP, orBASP38. If you try to run a member with atype that cannot be run, an error message issent. To run an OCL36 procedure, the filename must be QS36PRC. The member canbe run in batch mode or interactively,depending on what is specified in the Run inbatch prompt on the Change Defaults display.
92 Programming Development Manager (PDM)

*SDA to use SDA (Screen Design Aid) towork with the members containing the string.
� If the member type is DSPF, DSPF36, orDSPF38, SDA is called to work with adisplay.
� If the member type is MNU, MNUDDS,MNUCMD or MNU36, SDA is called towork with a menu.
� If the former type of member MNU isspecified, SDA converts this to MNUDDS.
� Note that menu members for PDM havetype MNUDDS for the image member andtype MNUCMD for the command sourcemember. The two are linked together toconstitute a group, so that specifying oneof the types means that you are also oper-ating on the linked member at the sametime.
*RLU to use RLU (Report Layout Utility) towork with the members containing the string.
User-defined options to use an optiondefined in the active option file.
Data Physical File Member List
Choose:
*COPY to copy one or more members to oneor more new members. Members can also becopied to another file, another library, or both.
*DLT to delete one or more members from thefile.
*DSP to display one or more members.
*RNM to change the name of one or moremembers.
*DSPD to display information about one ormore members.
*SAVE to save a member on diskette or tape.
*CHGT to change some of the attributes ofone or more members in a physical file.
*DFU to invoke DFU (Data File Utility) tochange the member containing the string.
User-defined options to use an optiondefined in your active option file.
The prompt portion of the OPTION parameterspecifies whether you are prompted each time thecommand for the option is carried out.
COL: Specifies the column numbers where thesearch begins and ends the search for eachrecord. The format for the parameter is COL(starting_column ending_column) where the startand end values range from 1 through the end ofthe record (*RCDLEN). The default starts at thebeginning of the record (column 1) and searchesto the end of the record (*RCDLEN).
CASE: Specifies whether the match is casesensitive.
*IGNORE: The member is searched for the stringwithout case sensitivity.
*MATCH: The member is searched for an exactmatch to the string.
PRTMBRLIST: Specifies whether a list ofthose members for which a match is found isprinted.
*NO: The list of members that contain a match tothe string are not printed.
*YES: The list of members containing the stringare printed.
PRTRCDS: Specifies whether each recordthat contains the string is printed. The rest of themember is not printed. The format for the param-eter is PRTRCDS (number format mark overflow).
Specify the number of records with the Find stringto be found during the search and printed. Thepossible values are:
*NONE: None of the records that contain the Findstring are printed.
*ALL: All records that contain the Find string areprinted.
number: Only a certain number of records thatmatch the Find string are printed. Valid valuesrange from 1 through 99999.
Records can be printed in character orhexadecimal format. Choose from the followingprint formats:
*CHAR Records are printed in character format.
Appendix B. Control Language Commands 93

*HEX Records are printed in hexadecimalover/under style format. This means that thecharacter value is printed with the hexadecimalbelow it.
*ALTHEX Records are printed in hexadecimalside-by side format.
The string on the printed record can be marked.The string itself is used as a marker for charactersearches for quick recognition. For hexadecimalsearches, the string is marked with asterisks (*).
*MARK : The occurrence of the string in therecord is marked.
*NOMARK : The occurrence of the string in therecord is not marked.
If the record is greater than the length of the printline, it can be folded or truncated.
*FOLD: The entire record is printed over multipleprint lines.
*TRUNCATE: Only that part of the record that fitson the print line is shown. When *ALTHEX isused, only columns 1 through 32 are printed.When *CHAR or *HEX are used, columns 1through 100 are printed.
PARM: Specifies the parameters to beappended to the command carried out as a resultof the option specified on the OPTION parameter.
Example: This command allows you to searchfrom columns 2 through 4 in all members in fileQDDSSRC in library MYLIB for the string h. Afterthe string is found, you are prompted on the EDITcommand and then able to edit the member con-taining the h. A list of the names of all themembers containing the string is printed. Also,the first two records containing the string is printedin character format. The string is not marked andif the record is longer than the length of the printline, it is truncated.
FNDSTRPDM STRING('h') FILE(MYLIB/QDDSSRC)MBR(\ALL) OPTION(\EDIT \PROMPT) COL(2 4)PRTMBRLIST(\YES)PRTRCDS(2 \CHAR \NOMARK \TRUNCATE)
94 Programming Development Manager (PDM)

Bibliography
The following publications are listed with their full titlesand base order numbers. When these publications arereferred to in the text, a shortened version of the title isused.
The related IBM Application Development ToolSet/400publications are:
� ADTS/400: Advanced Printer Function, SC09-1766
� ADTS/400: Character Generator Utility, SC09-1769
� ADTS/400: Data File Utility, SC09-1773
� ADTS/400: File Compare and Merge Utility,SC09-1772
� ADTS/400: Interactive Source Debugger,SC09-1897
� ADTS/400: Report Layout Utility, SC09-1767
� ADTS/400: Screen Design Aid, SC09-1768
� ADTS/400: Screen Design Aid for the System/36Environment, SC09-1893
� ADTS/400: Source Entry Utility, SC09-1774
� Introducing Application Development ToolSet/400and the AS/400 Server Access Programs,SC09-1939
The orderable features of 5763-PW1 are:
� ADTS/400: Application Development Manager/400Introduction and Planning Guide, GC09-1807
� ADTS/400: Application Development Manager/400User’s Guide, SC09-1808
� ADTS/400: Application Dictionary Services/400 Self-Study, SC09-1904
� ADTS/400: Application Dictionary Services/400User’s Guide, SC09-1860
The related IBM AS/400 publications are:
� CL Programming, SC41-3721
� CL Reference, SC41-3722
� Data Management, SC41-3710
� Database Programming, SC41-3701
� DDS Reference, SC41-3712
� IDDU Use, SC41-3704
� Publications Reference, SC41-3003
Copyright IBM Corp. 1994 95

96 Programming Development Manager (PDM)

Index
Special Characters*ALL list of libraries 10*ALLUSR list of libraries 10*CURLIB list of libraries 10*LIBL library list 10*PRV value 3*USRLIBL library list 10
Aactive user-defined options file 57additional publications 95Application Development Manager 1, 57AS/400 system organization of objects 1attributes of objects 1
BBASP member type 37BASP38 member type 37books, related 95
CChange Defaults display 65changing
default library list 67default prompts for compiling 66default run and compile modes 66default user-defined options file 69default user-defined options library 69default user-defined options member 69defaults 3Enter key value 70from list display to full screen mode 69global, using Find string function 50job description 68library list 18list displays to full screen mode 69member type and text restrictions 68members using DFU 40members using SDA 39objects using DFU 26report members using RLU 40session defaults 67text and type of libraries 14text and type of members 34user-defined options 60
CL commands 85 —94command line 5command reference
Change option command 71
command reference (continued)Change Text option command 80Change Using DFU option command 81Compile option command 83Copy File option command 80Copy option command 72Delete option command 72Display Description option command 76Display option command 74Find String option command 81libraries 81logging option commands 70members 82Move option command 78objects 71Rename option command 75Restore option command 78Run option command 81Save option command 76Work With option command 79
commands, displaying previous values 3comparing file members 28, 42compiling
changing defaults 66members 35mode, changing defaults 66option for Find string function 49
control language commandsFNDSTRPDM 91STRPDM 85WRKLIBPDM 85WRKMBRPDM 86WRKOBJPDM 88
copyinglibraries 15members 33objects 24to an existing library 16to existing objects 25user-defined options 60user-defined options file 61
creatingmodules 36program 27
current library 9
Ddata file utility (DFU)
changing members in data physical files 40changing objects using 26
Copyright IBM Corp. 1994 97

debugging programs 28defaults
change member type and text restrictions 68changing for a session 67changing from list display to full screen mode 69changing the Enter key 70changing, definition 3library list, changing 67modes 3prompts, changing 66run and compile modes, changing 66saving and restoring objects and members 67user-defined options, changing 69values, changing 70
deletingconfirm 38library 13members 37objects 22user-defined options 63
DFUSee data file utility (DFU)
DISAJOB object 29displays
description of libraries 16description of members 38description of objects 25grouping 3list of libraries 7member 38members on a list by date 41objects 26subset of a list of members 42subset of a list of objects 31subset of list of libraries 17user-defined options 62Work with User-Defined Options, accessing 57
DSPOBJD command 25DSPPGM command 26
Eediting members in source physical files 35Enter key, changing default 70entering commands 4
Ffile members
comparing 28, 42merging 43
filescopying members 33default user-defined options, changing 69description 2physical, working with members in 30
files (continued)viewing list in library 33
Find String optioncanceling 53changing a report 51character strings in quotation marks 47command 91—94compiling option 49description 3example 46exiting from RLU 51exiting from SDA 52exiting from SEU 52functions 46global changes 50multiple file option 47options 46restrictions in batch mode 48restrictions on canceling options 53scanning members for hexadecimal numbers 51specifying options 48tips and techniques 48using the FNDSTRPDM command 48using Work with Objects display 47
FNDSTRPDM command 48, 91 —94full screen, changing from list display 69
Ggeneric library names 10grouping displays 3grouping options 4
Hhexadecimal numbers 51
IIBM manuals, related 95Interactive Source Debugger 28
Jjob description, changing 68
Llibraries
adding to library list 18—19changing position in library list 19changing type and text 14copying 15copying to an existing library 16creating 12deleting from a list of 13deleting in batch mode 13
98 Programming Development Manager (PDM)

libraries (continued)display descriptions 16generic names 10list of 9, 10maximum number for system portion 9maximum number for user portion 9moving objects to another library 23object 36product 9removing from a library list 20renaming 13renaming restrictions 14specifying 10types 2using DFU to change objects 26viewing list of files 33working with objects 14WRKLIBPDM command 85
library list*CURLIB 9*LIBL 10*USRLIBL 10adding a library 18—19changing 18changing defaults 67changing position of a library 19current library 9definition 9maximum number of libraries 10parts 9portions 9product libraries 9QSYS 2removing a library 20system portion 9user portion 9WRKLIBPDM command 10
listinterface 2libraries 9libraries with WRKLIBPDM command 7members with the WRKMBRPDM command 8members, showing a subset of 42objects with WRKOBJPDM command 8samples of user-defined options 55selection 2sorting members by date 41subset of objects 31viewing files in library 33
list of libraries*ALL 10*ALLUSR 10*CURLIB 10*generic* 10creating a library 12definition 10
list of libraries (continued)deleting a library 13displaying using the WRKLIBPDM command 7formats 10renaming a library 13subset function key (F17) 11subset list 17subset of 18
logging option commands 70
Mmain menu, starting PDM 7making global changes with confirmation 50manuals, related 95members
changing text and type 34changing with DFU 40changing with RLU 40changing with SDA 39compiling 35copying 33deleting 37description 2displaying description 38editing 35running a procedure from the Work with Members
display 37scanning with Find string function 51showing a subset of a list 42sorting a list by date 41type and text, restriction to changes 68working with physical files 30WRKMBRPDM command 8, 86—88
merging file members 43modes
changing defaults 3compiling members 35deleting libraries in batch 13for running objects 29full screen, changing from list display 69renaming libraries in batch 14run and compile defaults, changing 66
module creation 36moving objects 23
Oobject
attributes of 1changing using DFU 26copying 24copying to existing objects 25created by compiling members 36creating 21creating a program 27
Index 99

object (continued)deleting 22description 1displaying description 25displaying information 26displaying subset of a list of 31features 1file 2moving 23refreshing subset of a list of 32renaming 23REPLACE parameter 36run mode 29special type, library 2suptypes 1types 1, 71value 1working with, in libraries 14—15WRKOBJPDM command 88—90
object librarycompiling members 36REPLACE parameter 36
object library prompt 66OCL36 member type 37options
accessing from main PDM menu 57compiling, Find string function 49definition of user-defined options 55file, copying 61Find string function 48processing order 4user-defined
changing 60changing defaults 69copying 60creating 57definition 55deleting 63displaying 62parameter variables 58sample list 55
user-defined, creating 58Work with 2
order, processing of options 4ordered list of library names 9organization of objects in the AS/400 system 1
Pparameter variables for user-defined options 58physical files
changing members using DFU 40, 41source, compiling members in 35viewing list in library 33working with members 30
position of members on a list by date 41product libraries, description 9program creation 27program debugging 28prompts
object library 66replace object 66System/38 in batch 67
publications, related 95
QQSYS system library 2QUSRTOOL library 62
Rrefreshing a subset of a list of objects 32related publications 95renaming
in batch mode 14libraries 13library restrictions 14objects 23
replace object prompt 66REPLACE parameter 36report layout utility (RLU)
changing report members in source physicalfiles 40
exiting from Find string function 51report members, changing using RLU 40restricting the ability to change member type and
text 68retrieve function key (F9) 5REXX member type 37RLU
See report layout utility (RLU)run
mode, changing defaults 66modes for objects 29objects in batch 27objects interactively 27source member procedure 37
Sscreen design aid (SDA)
changing members in source physical files 39exiting from Find string function 52
SDASee screen design aid (SDA)
searchcharacter string 46members in a list 46members in a subset of a list 46
100 Programming Development Manager (PDM)

search order, library list 9searching for a library 19selecting the job description 66SEU
See source entry utility (SEU)source entry utility (SEU)
editing a member in a source physical file 35exiting from Find string function 52
source member procedure 37special features
changing defaults 3Find string 3list interface 2previous values for commands 3selection lists 2user-defined options 2window program 2Work with option 2
specifyinglibrary name 9library type 17text description of a library 17
STRPDM command 7, 85Submit Job command 35substitution values for user-defined options 58system library, QSYS 2
Ttext
creating a subset by using 17members, restriction to changes 68
Uuser library 1user-defined options
changing 60changing defaults 69copying options 60creating 57—58definition 55deleting 63displaying 62file copying 61Find string function 48parameter variables 58sample list 55using window program 62window program, description 2
using a subset of a list of libraries 11
Vvariables for user-defined options 58
Wwindow program 2Work with option 2working with a subset of a list of libraries 11working with libraries
changing type and text of libraries 14CHGLIB command 14copying libraries 15copying to an existing library 16creating a library 12display description of libraries 16library list 9list of libraries 11renaming a library 13specifying 10starting PDM using WRKLIBPDM command 7STRPDM command 7
working with memberschanging text and type of members 34compiling members 35confirming delete of members 38copying members 33deleting members 37displaying description of members 38editing members 35Find string (option 25) 46physical files 30running source member procedure 37showing a subset of a list 42sorting members on a list by date 41starting PDM using WRKMBRPDM command 8STRPDM command 7using DFU 40using RLU 40using SDA 39
working with objectschanging using DFU 26copying objects 24copying to existing objects 25creating objects 21deleting objects 22, 23displaying description of objects 25displaying information 26displaying subset of a list 31Find string function 47in libraries, an example 14moving objects 23refreshing subset of a list 32run mode 29starting PDM 8STRPDM command 7WRKOBJPDM command 8
working with user-defined options 55
Index 101