robotics 2b -...
TRANSCRIPT
Robotics 2b
Lego Mindstorm EV3 Body Building
What we’re going to do in the session.
Build our robot’s chassis Test it with some basic programming blocks Modify the chassis if necessary
Designing a ChassisOkay, so you have a concept for how we’re going to tackle the problem of touching each wallof the enclosure from our brainstorming and decision-making session last time. Now we need to get down to the practical part of designing the chassis to help our robot meet this challenge.
In groups take a Mindstorms kit and decide on what sort of chassis will work best.
Here are some points to consider;
Can you still access the connection ports? Can you still connect the USB cable to program your robot? Can you still access the battery pack? How rigid or flexible is your robot’s structure? Which is best suited to the task? Are the sensors installed so that they can sense what they are supposed to? Do we have the bits in our kit?
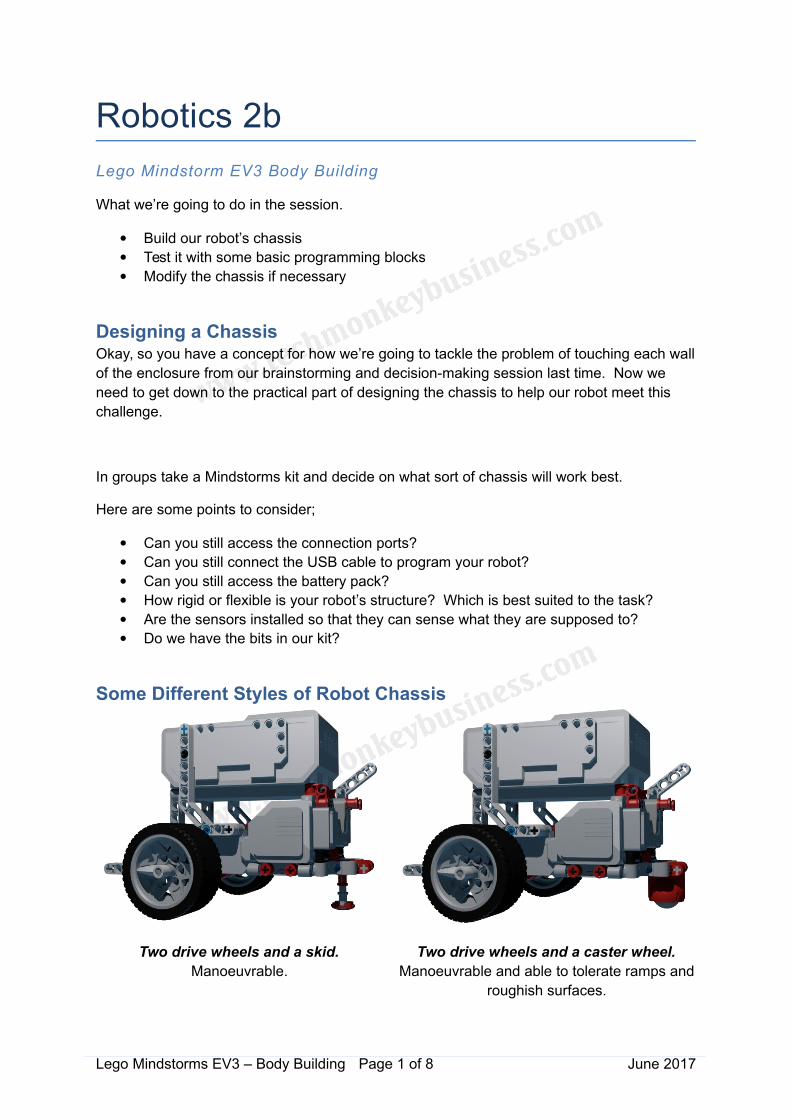
Some Different Styles of Robot Chassis
Two drive wheels and a skid.Manoeuvrable.
Two drive wheels and a caster wheel.Manoeuvrable and able to tolerate ramps and
roughish surfaces.
Lego Mindstorms EV3 – Body Building Page 1 of 8 June 2017

Two drive wheels and another pair ofwheels with no tires.
Good at straight lines, but may haveproblems turning on rough surfaces.
Two or Four wheel drive with two wheelsfor steering.
Good at straight lines, but tricky to program toaccommodate the turn radius.
TreadsVery stable with good traction. May not
execute turns repeatably on rough terrain.
WalkingHard to build, may not be structurally sound,
movement is not repeatable.
Lego Mindstorms EV3 – Body Building Page 2 of 8 June 2017

Balancing Hard to program and generally hard to build …. Especially since we don't have an electronic
gyroscope sensor to detect when the robot is level.
Let’s Build a Chassis for Our RobotIn your groups figure how your robot concept from last time can be built. Take one of the Mindstorm kits and begin to build it. Be open to changing your design if you have had some better ideas since our last session. If you are after a simple robot chassis to get you started so you can get on with adding sensors and programming it, there is a suggestion at the end of this document.
Some Quick Tests for Your Robot’s ChassisOnce you have built your robot chassis test it to see if it is structurally sound.
Does it fall apart when you pick it up? Are there places where you can add sensors? Are the wheels or frame flexing when you put it on the ground?
Add more structure to your robot’s chassis if you need to.
Why is this important?
Your robot needs to be able to move the same each time it does something. If there is too much slack in the system, it doesn’t know where it is and it will not be able to do things repeatably.
A successful robot is consistent.
Lego Mindstorms EV3 – Body Building Page 3 of 8 June 2017

Next TimeNext time we’ll program our robot to do some simple moves so that we can learn about how it will behave.
A Suggested Robot Chassis
Step 1:
Fit the wheels to the large motors.
Lego Mindstorms EV3 – Body Building Page 4 of 8 June 2017
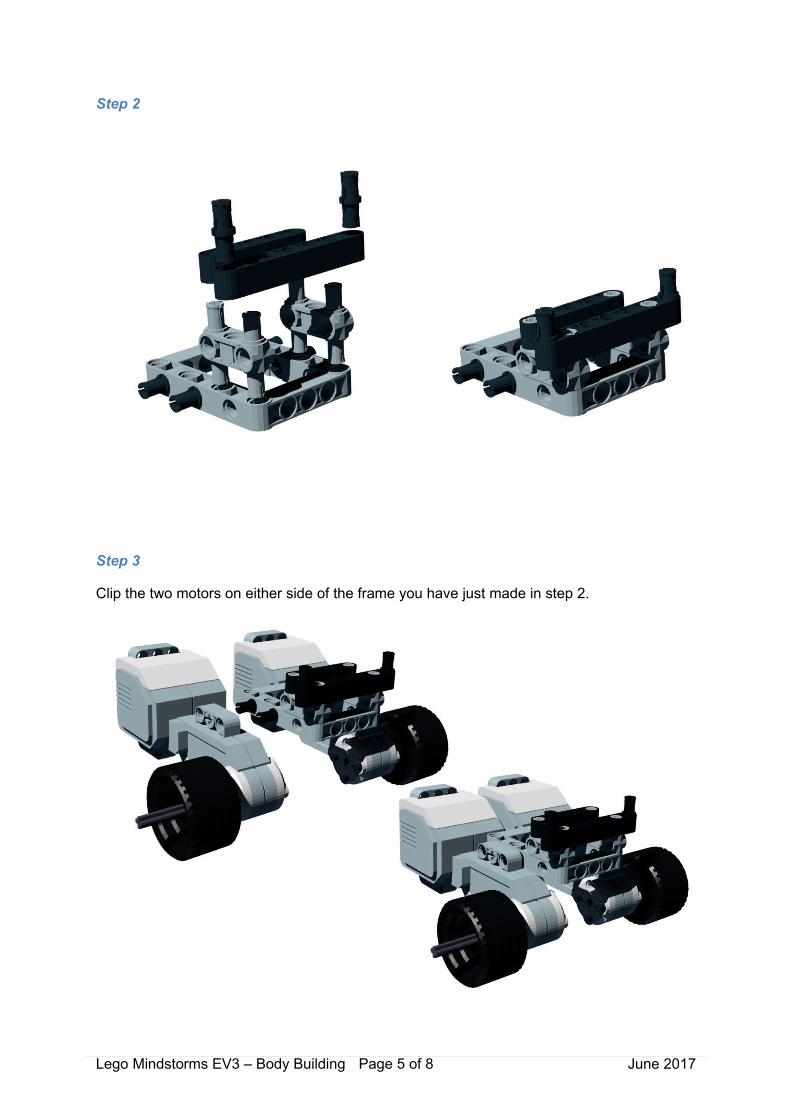
Step 2
Step 3
Clip the two motors on either side of the frame you have just made in step 2.
Lego Mindstorms EV3 – Body Building Page 5 of 8 June 2017

Step 4
For the next frame we will need to have the long red pins ready to go but not clipped into place. Put a pair of black pins into the underside of the frame.
Step 5
Taking the frame we have just made, slot it underneath the two motors and use the red pins to clip the frame into place.
Lego Mindstorms EV3 – Body Building Page 6 of 8 June 2017

Step 6
Make the skid from a left and right pair of “cowlings” clipped together with a pair of long blue pins.
Step 7
The skid clips onto the two black pins projecting down from the underside frame. Clip it in place as shown.
Lego Mindstorms EV3 – Body Building Page 7 of 8 June 2017
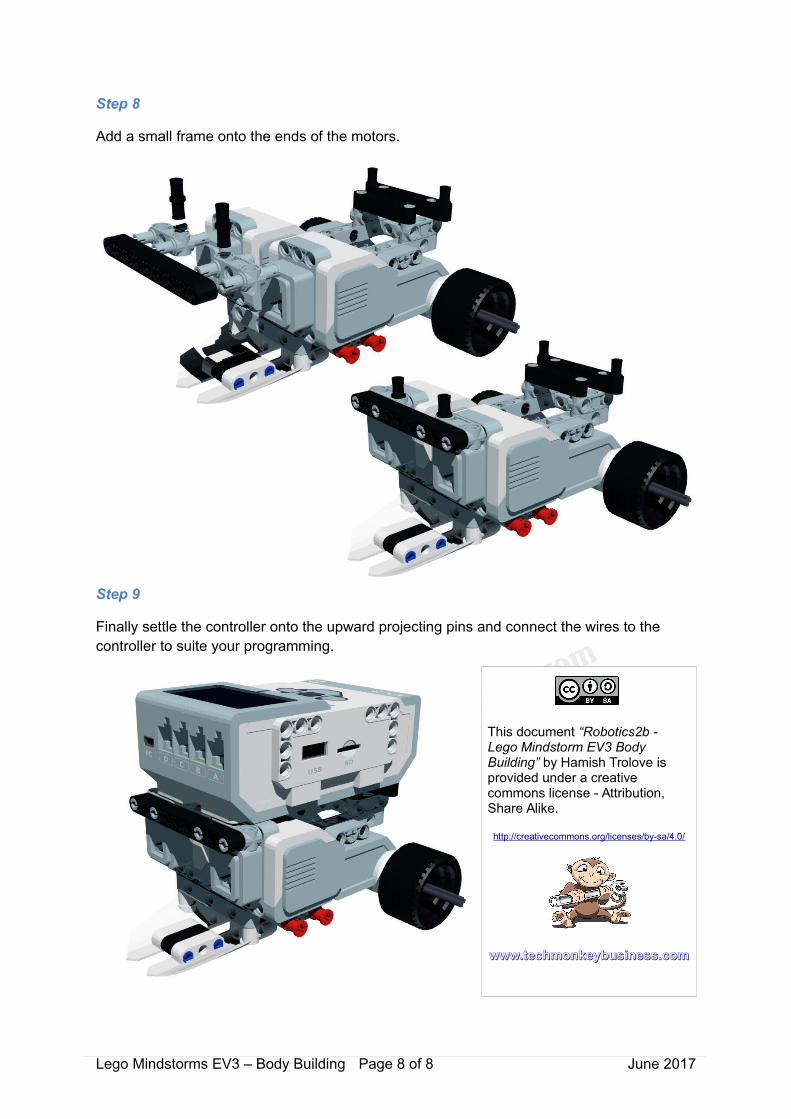
Step 8
Add a small frame onto the ends of the motors.
Step 9
Finally settle the controller onto the upward projecting pins and connect the wires to the controller to suite your programming.
Lego Mindstorms EV3 – Body Building Page 8 of 8 June 2017
This document “Robotics2b - Lego Mindstorm EV3 Body Building” by Hamish Trolove is provided under a creative commons license - Attribution, Share Alike.
http://creativecommons.org/licenses/by-sa/4.0/
www.techmonkeybusiness.comwww.techmonkeybusiness.com