split data in one column into two demo or more … data in one column into two demo or more columns...
TRANSCRIPT
Welcome to Excel Tips and Tricks with Chuck Chauvin. These Practice Notes are a handy reference to use while running the tip online, as a review when you want to use the Practice File, or to work on one of your own spreadsheets. You can view them on screen, print a copy, or save to your computer. You can save the Practice Notes or the Excel Practice File for each tip by opening the file on the Web site and “Saving As” to a folder on your PC. We recommend you create a folder on your PC called “Excel Tips,” in which you can store all the Practice Notes and Practice Files for your convenience.
Quick Tip: You can use the Select Tool in Acrobat ReaderTM to copy formulas or macros from the Practice Notes that Chuck has created to practice with the Practice File or to copy to your own worksheets.
Good Luck, enjoy the tip, and remember to practice, practice, practice to become truly proficient!
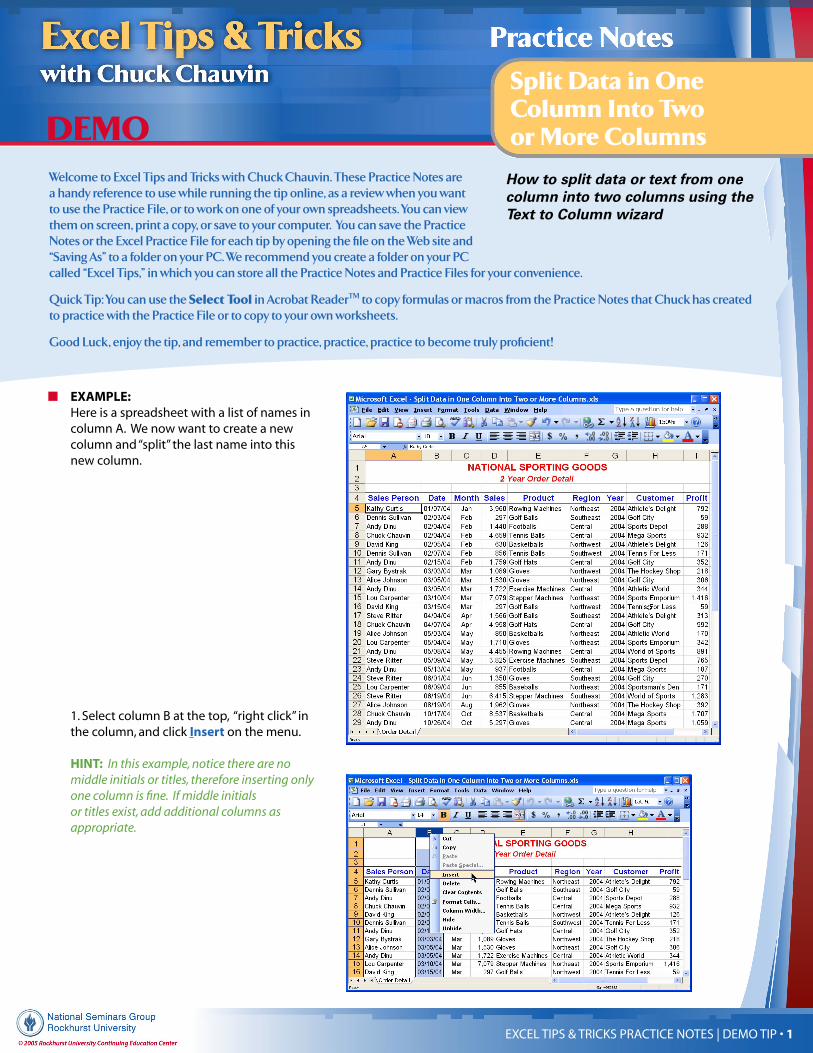
■ EXAMPLE: Here is a spreadsheet with a list of names in
column A. We now want to create a new column and “split” the last name into this new column. 1. Select column B at the top, “right click” in the column, and click Insert on the menu.
HINT: In this example, notice there are no middle initials or titles, therefore inserting only one column is fine. If middle initials or titles exist, add additional columns as appropriate.
Split Data in One Column Into Two or More ColumnsDEMO
EXCEL TIPS & TRICKS PRACTICE NOTES | DEMO TIP • 1
How to split data or text from one column into two columns using the Text to Column wizard
EXCEL TIPS & TRICKS PRACTICE NOTES | DEMO TIP • 2
Split Data in One Column Into Two or More Columns
EXCEL TIPS & TRICKS PRACTICE NOTES | DEMO TIP • 2
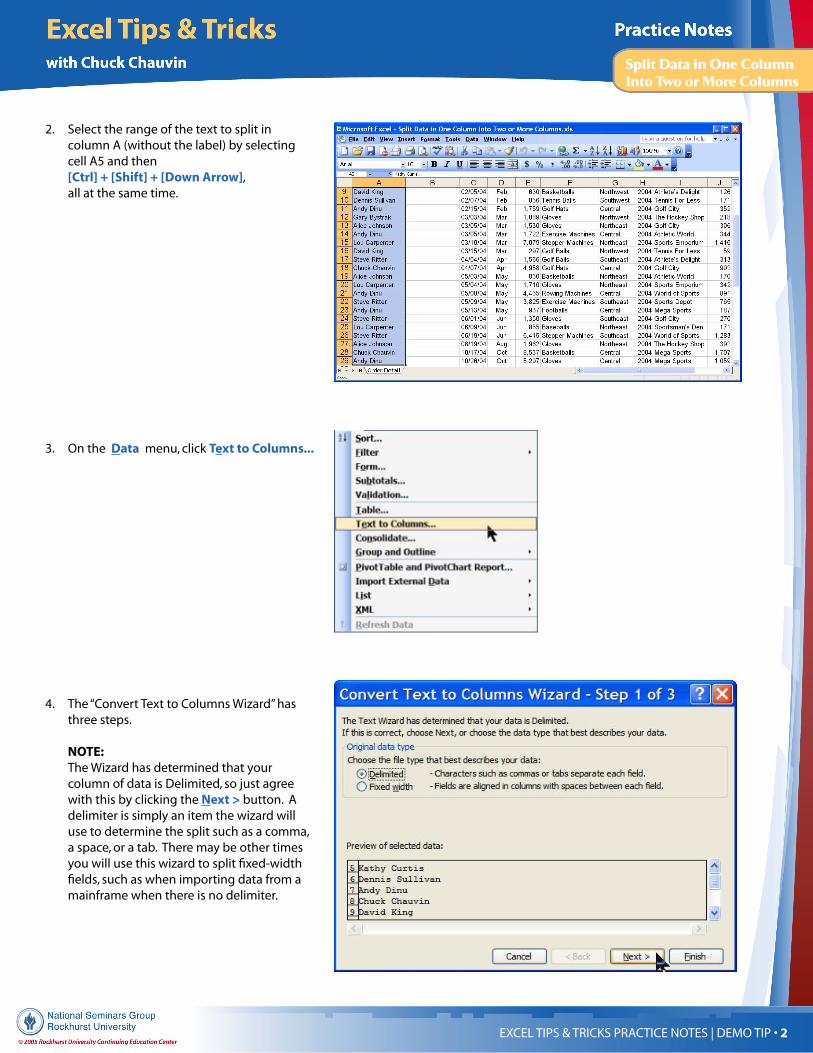
2. Select the range of the text to split in column A (without the label) by selecting cell A5 and then [Ctrl] + [Shift] + [Down Arrow], all at the same time.
3. On the Data menu, click Text to Columns...
4. The “Convert Text to Columns Wizard” has three steps.
NOTE: The Wizard has determined that your
column of data is Delimited, so just agree with this by clicking the Next > button. A delimiter is simply an item the wizard will use to determine the split such as a comma, a space, or a tab. There may be other times you will use this wizard to split fixed-width fields, such as when importing data from a mainframe when there is no delimiter.

EXCEL TIPS & TRICKS PRACTICE NOTES | DEMO TIP • 3
5. In Step 2, specify what the delimiter is. Be sure to uncheck any boxes which may be checked that do not apply, and in this example, choose Space since this is the delimiter you want to use to separate the last name from the first name. Note that when you do this, a line appears in the bottom section of the dialog box showing where the separation will be. In this example, we do not need Step 3, which is only to change formatting. Click the Finish button and look at the results.
How It Works:
NOTE: The Wizard moved the last name to column
B. Next, you should change the labels in Column A and B to reflect First Name and Last Name. The Text to Columns wizard used the Delimiter that we set (space) to determine what part of the text to move over to the column on the right.
Split Data in One Column Into Two or More Columns
EXCEL TIPS & TRICKS PRACTICE NOTES | DEMO TIP • 3