supplement: visual c++ 2010 tutorial - georgia southern...
TRANSCRIPT
1
Supplement: Visual C++ 2010 Tutorial
For Introduction to C++ Programming By Y. Daniel Liang
1 Introduction
Visual C++ is a component of Microsoft Visual Studio .NET for developing C++ programs. A free version named Visual C++ 2010 Express Edition can be downloaded from Supplement II.A. This section introduces how to create a project, create a program, compile and run the program in Visual C++ Express 2010 Edition.
2 Getting Started with Visual C++
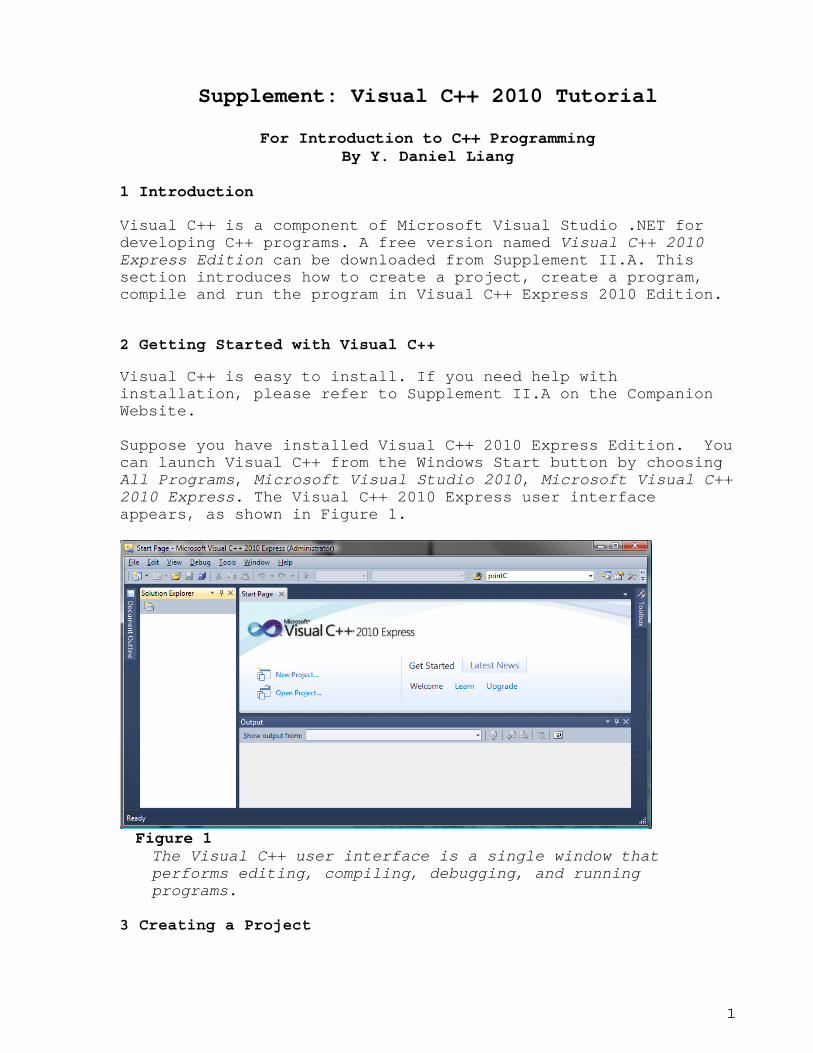
Visual C++ is easy to install. If you need help with installation, please refer to Supplement II.A on the Companion Website. Suppose you have installed Visual C++ 2010 Express Edition. You can launch Visual C++ from the Windows Start button by choosing All Programs, Microsoft Visual Studio 2010, Microsoft Visual C++ 2010 Express. The Visual C++ 2010 Express user interface appears, as shown in Figure 1.
Figure 1 The Visual C++ user interface is a single window that performs editing, compiling, debugging, and running programs.
3 Creating a Project
2
To create C++ programs in Visual C++, you have to first create a project. A project is like a holder that ties all the files together. Here are the steps to create a project:
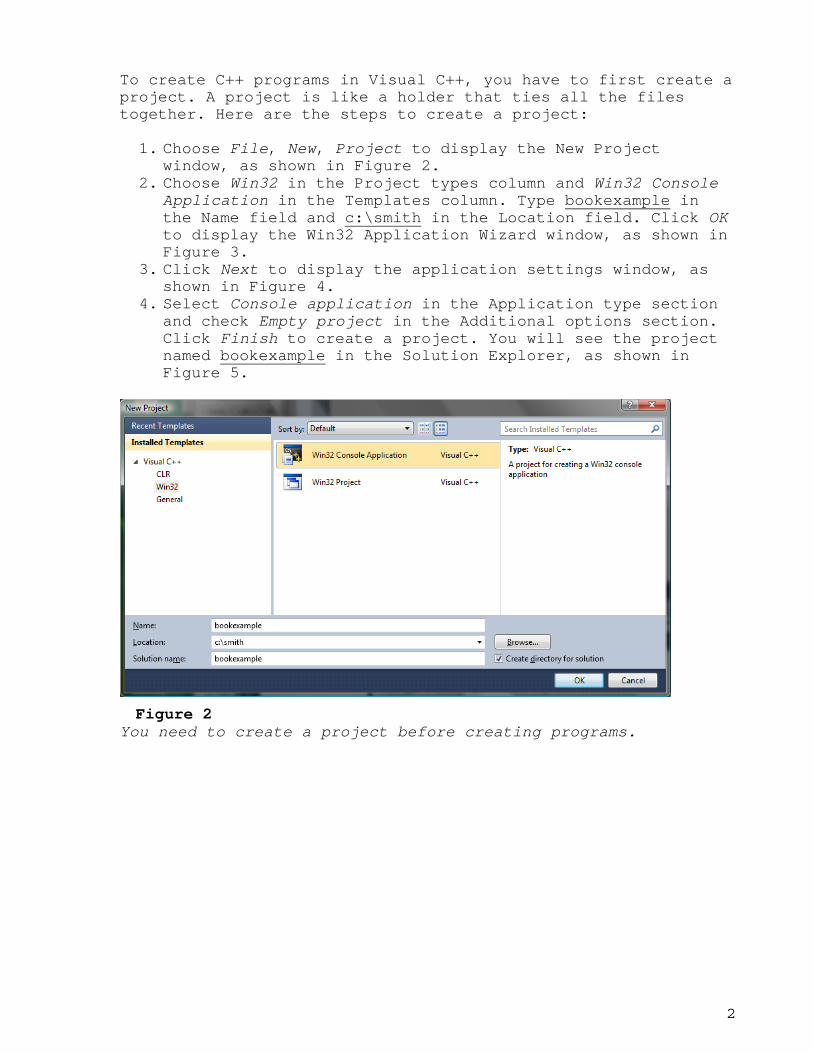
1. Choose File, New, Project to display the New Project window, as shown in Figure 2.
2. Choose Win32 in the Project types column and Win32 Console Application in the Templates column. Type bookexample in the Name field and c:\smith in the Location field. Click OK to display the Win32 Application Wizard window, as shown in Figure 3.
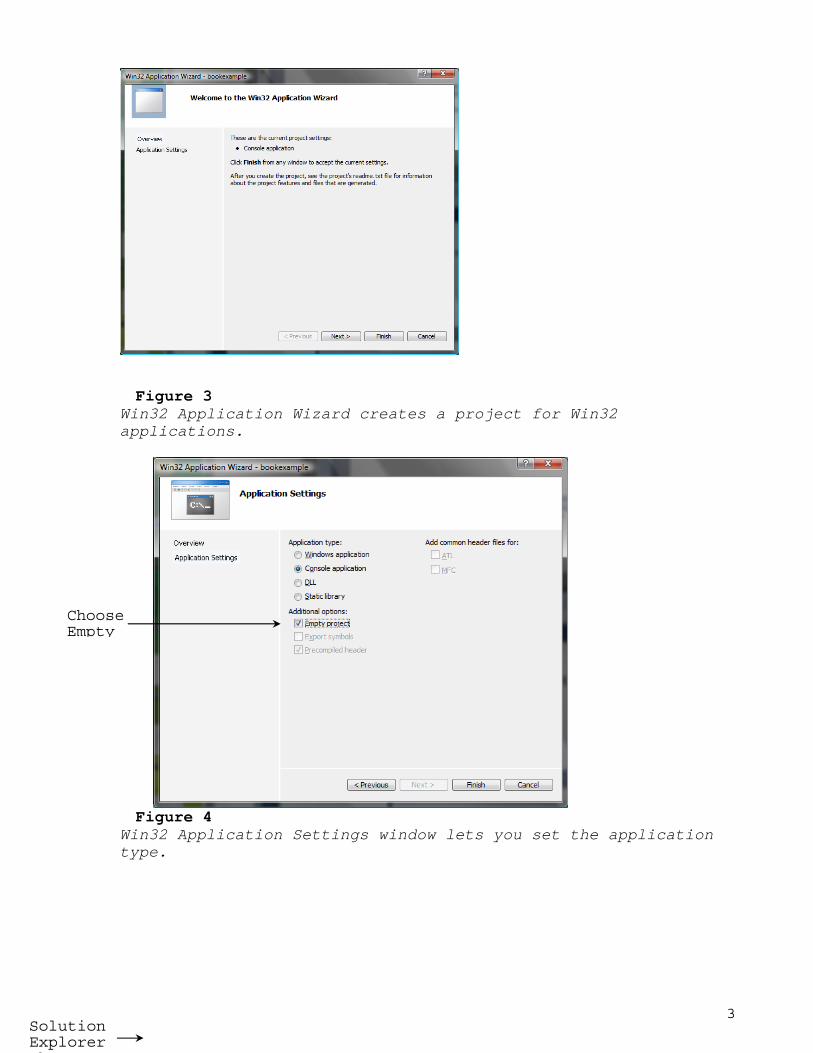
3. Click Next to display the application settings window, as shown in Figure 4.
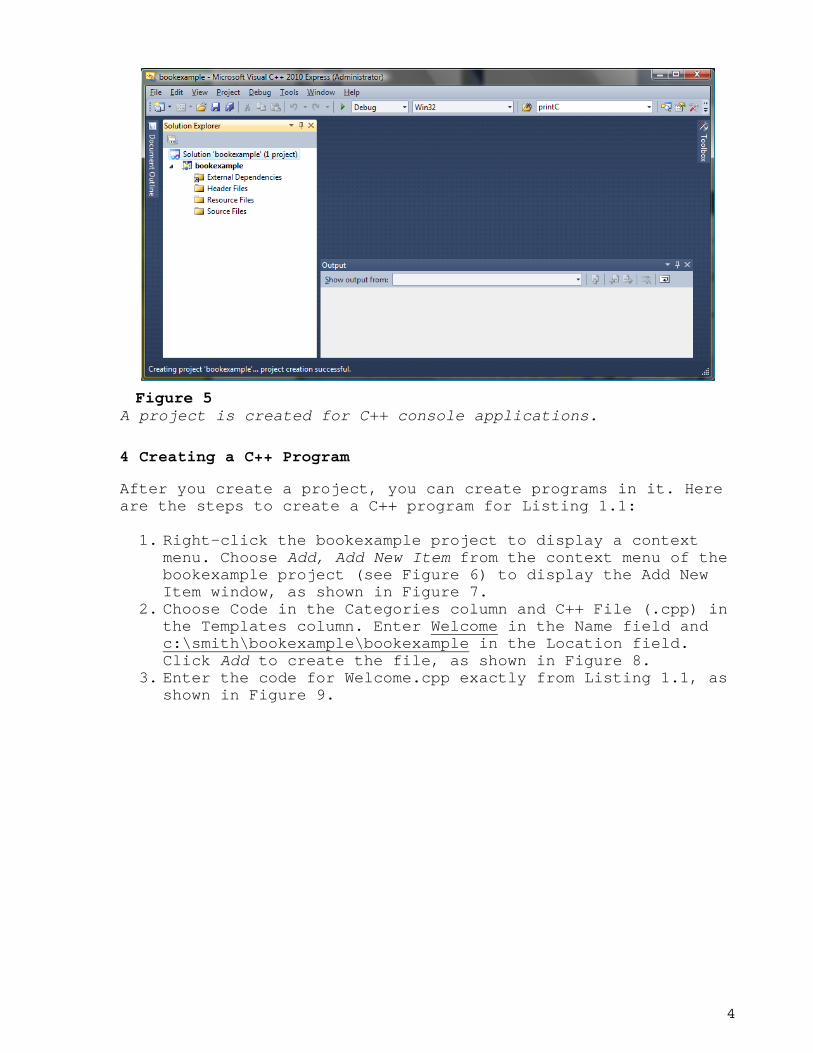
4. Select Console application in the Application type section and check Empty project in the Additional options section. Click Finish to create a project. You will see the project named bookexample in the Solution Explorer, as shown in Figure 5.
Figure 2 You need to create a project before creating programs.
3
Figure 3 Win32 Application Wizard creates a project for Win32 applications.
Figure 4
Win32 Application Settings window lets you set the application type.
Solution Explorer h
Choose Empty
4
Figure 5 A project is created for C++ console applications.
4 Creating a C++ Program
After you create a project, you can create programs in it. Here are the steps to create a C++ program for Listing 1.1:
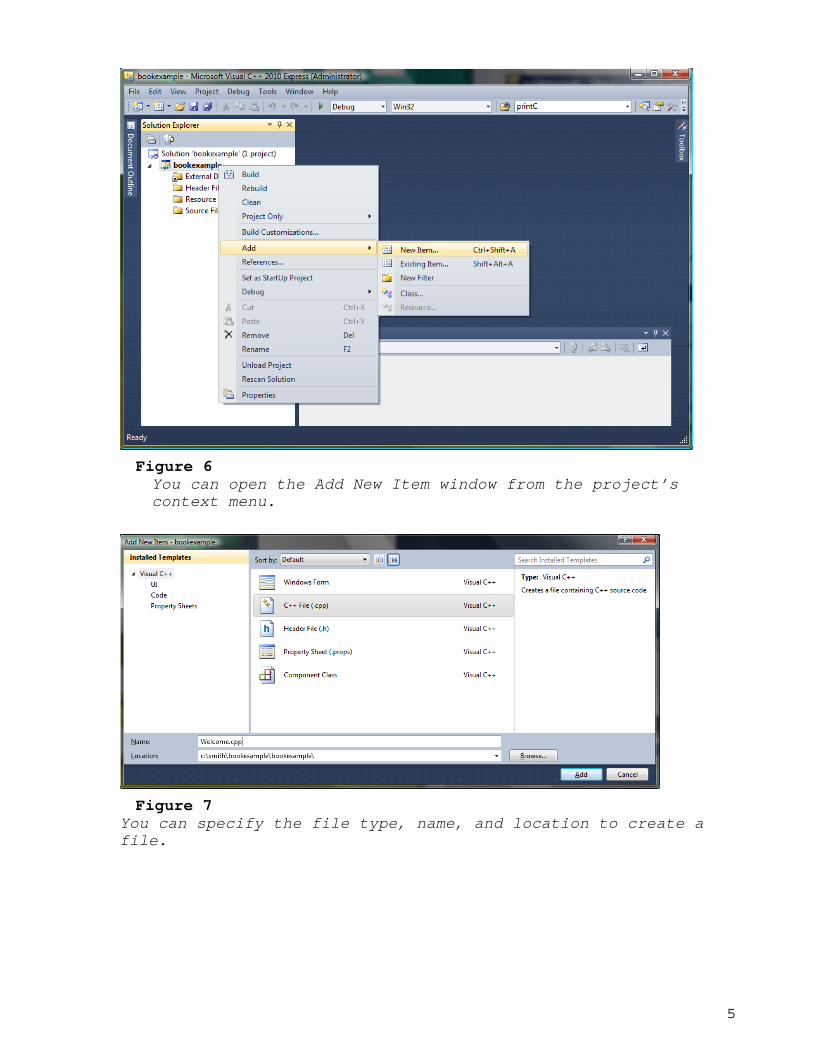
1. Right-click the bookexample project to display a context menu. Choose Add, Add New Item from the context menu of the bookexample project (see Figure 6) to display the Add New Item window, as shown in Figure 7.
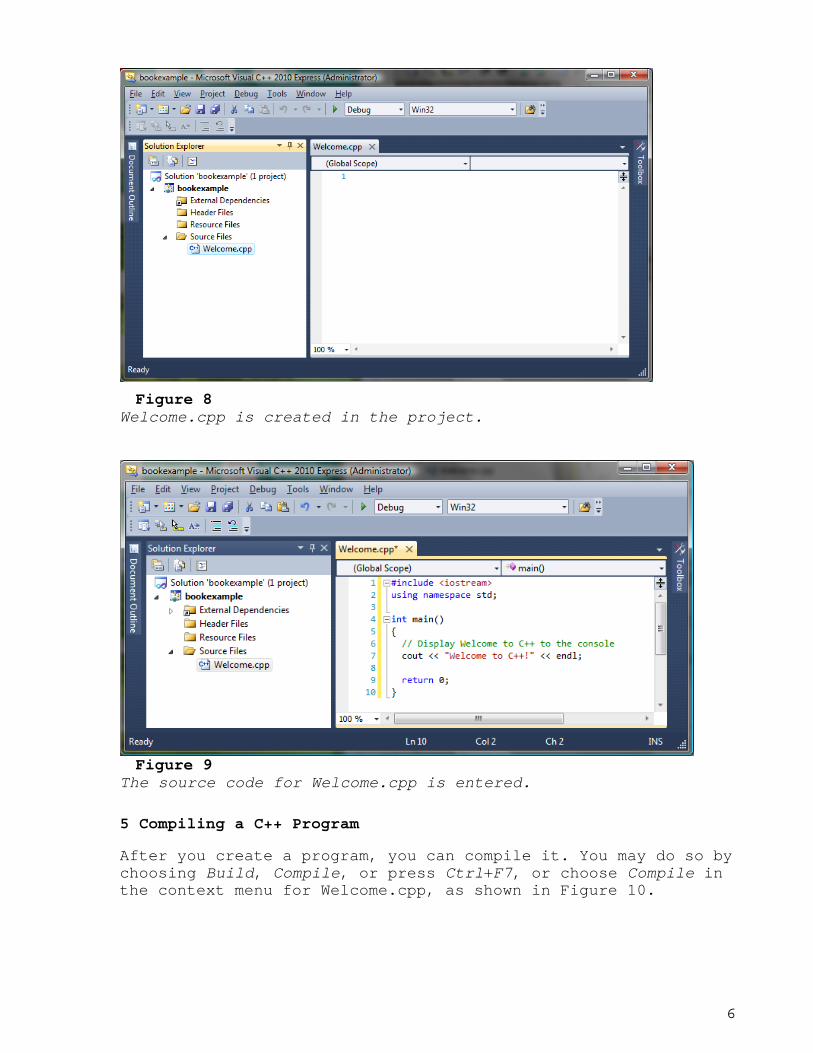
2. Choose Code in the Categories column and C++ File (.cpp) in the Templates column. Enter Welcome in the Name field and c:\smith\bookexample\bookexample in the Location field. Click Add to create the file, as shown in Figure 8.
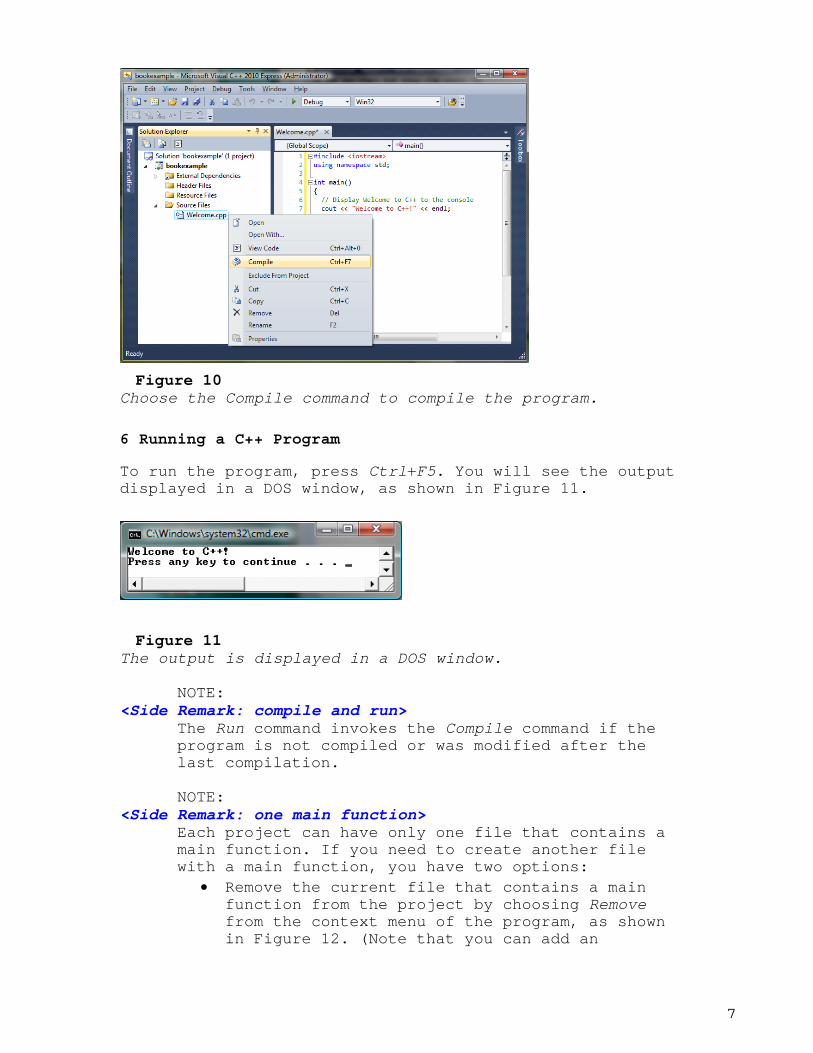
3. Enter the code for Welcome.cpp exactly from Listing 1.1, as shown in Figure 9.
5
Figure 6 You can open the Add New Item window from the project’s context menu.
Figure 7 You can specify the file type, name, and location to create a file.
6
Figure 8 Welcome.cpp is created in the project.
Figure 9
The source code for Welcome.cpp is entered.
5 Compiling a C++ Program
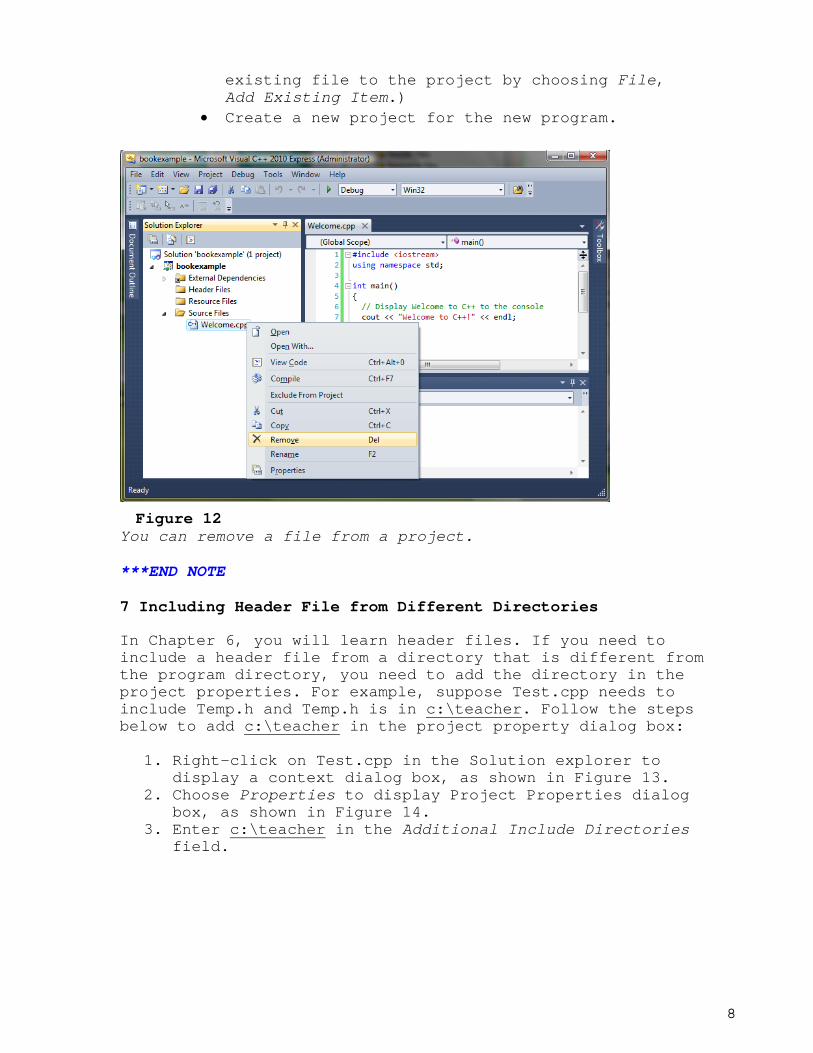
After you create a program, you can compile it. You may do so by choosing Build, Compile, or press Ctrl+F7, or choose Compile in the context menu for Welcome.cpp, as shown in Figure 10.
7
Figure 10 Choose the Compile command to compile the program.
6 Running a C++ Program
To run the program, press Ctrl+F5. You will see the output displayed in a DOS window, as shown in Figure 11.
Figure 11 The output is displayed in a DOS window.
NOTE: <Side Remark: compile and run>
The Run command invokes the Compile command if the program is not compiled or was modified after the last compilation. NOTE:
<Side Remark: one main function> Each project can have only one file that contains a main function. If you need to create another file with a main function, you have two options:
Remove the current file that contains a main function from the project by choosing Remove from the context menu of the program, as shown in Figure 12. (Note that you can add an
8
existing file to the project by choosing File, Add Existing Item.)
Create a new project for the new program.
Figure 12 You can remove a file from a project. ***END NOTE 7 Including Header File from Different Directories
In Chapter 6, you will learn header files. If you need to include a header file from a directory that is different from the program directory, you need to add the directory in the project properties. For example, suppose Test.cpp needs to include Temp.h and Temp.h is in c:\teacher. Follow the steps below to add c:\teacher in the project property dialog box:
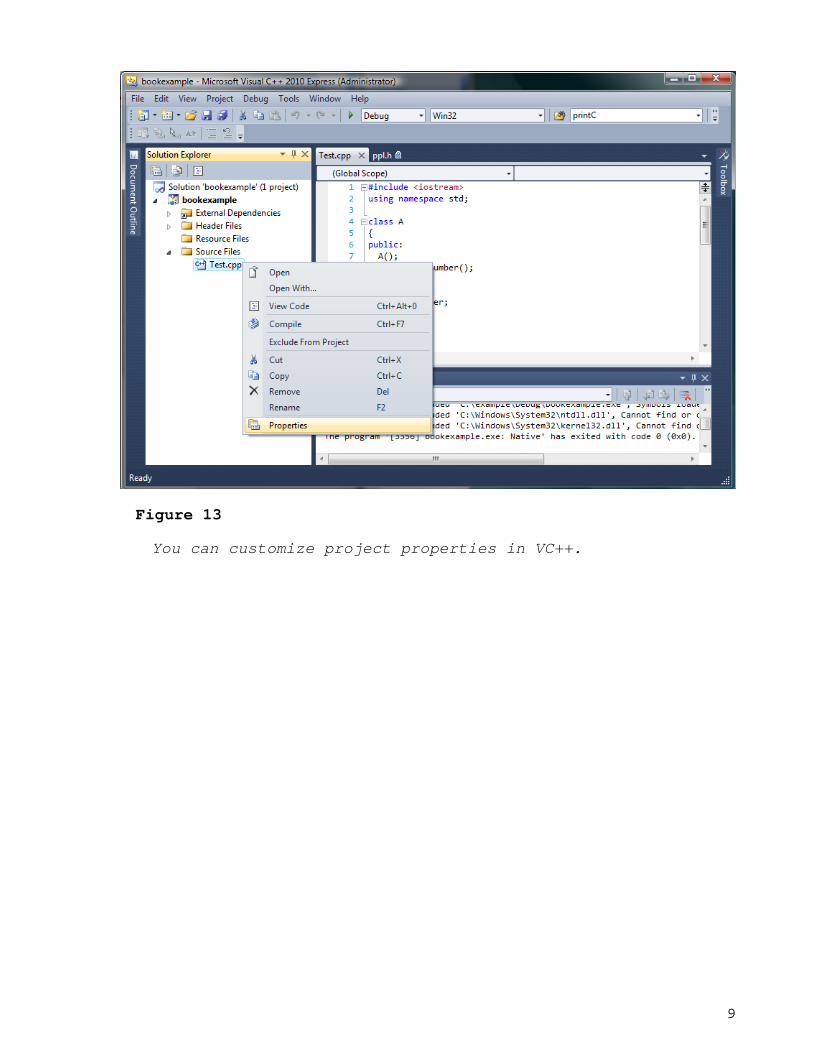
1. Right-click on Test.cpp in the Solution explorer to display a context dialog box, as shown in Figure 13.
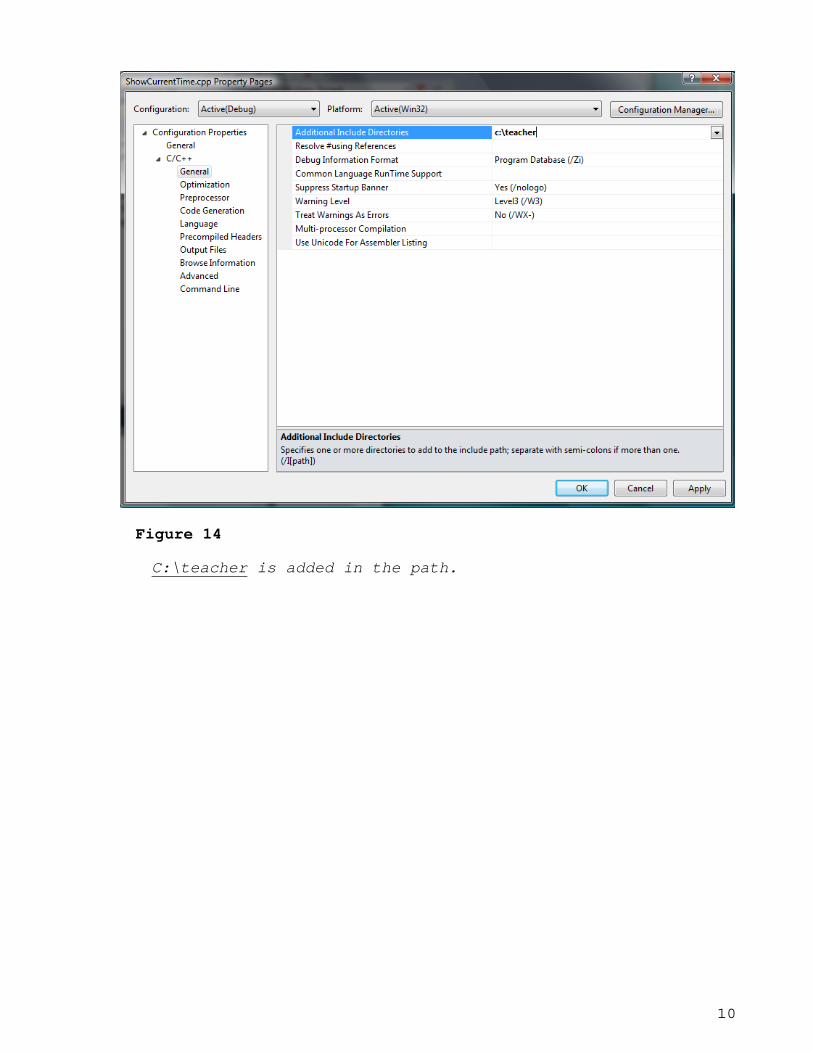
2. Choose Properties to display Project Properties dialog box, as shown in Figure 14.
3. Enter c:\teacher in the Additional Include Directories field.
9
Figure 13
You can customize project properties in VC++.
10
Figure 14
C:\teacher is added in the path.