table of contents - americanindianhealthyeating.unc.edu€¦ · web viewavoid using perfume or...
TRANSCRIPT

Food Demonstration
Guide

Table of Contents
Introduction.....................................................................................................2Keys to a Successful Demonstration................................................................3Setting up the Food Demonstration.................................................................5Types of Food Demonstrations......................................................................12Methods of Acquiring Food............................................................................14Methods of Acquiring an Audience.................................................................15Sanitation and Food Safety........................................................................... 16Fruit and Vegetable Guide.............................................................................23Recipes..........................................................................................................40 Broccoli.....................................................................................................41 Cabbage....................................................................................................45 Eggplant....................................................................................................49 Greens......................................................................................................53 Kiwifruit.....................................................................................................57 Melons.......................................................................................................61 Onions.......................................................................................................65 Oranges....................................................................................................69 Summer Squash........................................................................................73 Tomatoes..................................................................................................77 Turnips......................................................................................................81 Winter Squash...........................................................................................86Tools and Equipment ....................................................................................91Evaluations....................................................................................................94Bibliography and Resources...........................................................................95Appendix A.....................................................................................................97Appendix B.....................................................................................................98

Introduction
The Arizona Nutrition Network’s Mission and Vision
The mission of the Arizona Nutrition Network (AzNN) is to shape food consumption in a positive way, promote health and reduce disease among all people living in Arizona.
The AzNN’s vision is to be widely recognized as a model of collaboration and for its effectiveness in improving the nutritional status of people living in Arizona. Through the efforts of the Network working in partnership with all Arizonans, barriers to good nutrition can be eliminated and the benefits of eating well and making healthy food choices understood. As a result of increased consumption of nutritious foods, Arizona’s health will be improved and disease reduced.
Food Demonstration Guide
Food demonstrations using recipes from fruit and vegetables given out by different organizations such as Arizona Food Banks, the Commodity Supplemental Food Program (CSFP), the Emergency Food Assistance Program (TEFAP) and the Special Supplemental Nutrition Program for Women, Infants, and Children (WIC) can be an effective method in improving the nutritional status of people living in Arizona. This guide is designed to allow nutrition education program professionals, advisors and trained volunteers to give food demonstrations to food stamp eligible individuals throughout the state of Arizona. It provides information, advice, and recipes for planning and executing a successful food demonstration.
2

Keys to a Successful Food Demonstration
The purpose of this manual is to provide a set of guidelines to follow when planning and conducting a food demonstration. Food demonstrations are a simple, economical way to illustrate appetizing methods of including fruits and vegetables in a healthful diet.
Skills Needed
In order to conduct a simple food demonstration (demo), basic culinary skills, communication skills and food safety knowledge are essential. It is also recommended that the demonstrator have a Food Handlers Card. Demos should be limited to 1-2 techniques and up to three simple recipes per one hour class. Many resources are available to enhance your skills including classes on cooking techniques, culinary language, knife techniques, and food safety. See the reference section and food safety section of this guide for additional information.
Know Your Audience
The food demonstration is meant to be a fun way to teach class participants something new. Whether the goal is to teach a new technique, recipe, nutrition or food safety information, the message should be simple. Make sure the food demonstration is clear and organized and appropriate for the audience. Always explain everything in detail and allow time for questions. Class input in the form of written evaluations is a valuable way to refine your classes. (See Evaluation section for more information.)
The area used for the food demonstration should capture the audience’s attention. It should be clean and well organized as well as visually attractive. This can be done creatively through the use of simple props such as tablecloths and centerpieces. You might want to ask the following questions:
Is the area colorful? Is the area organized? Is the room clean? Is the demonstrator smiling? Does he or she look friendly? Is the demonstrator neat and confident?
3

Make sure that posters and other decorations are noticeable, bright and colorful and include the most important messages.
Messages or logos can be simple and catchy. They can be included on items such as aprons, koozy cups or other items that will be seen by the participants. Some examples are:
5 a Day (logo) Arizona Nutrition Network (logo) Eat well - Be well, Arizona Fruits and vegetables: Sometimes you have to be creative. “ Fruits and vegetables: How do you get them out of the
bag and into your family?”
Use short phrases while giving the demonstration such as “for a healthy snack,” “for a nutritious and quick dinner,” “vegetables are high in fiber,” “fruits in season are a better bargain,” or “frozen vegetables are excellent choices.” These phrases speak to the cook’s and the shopper’s needs and can help them learn about the product being used.
Give the participants something to take home such as recipes, flyers, brochures or other types of information.
Demonstrators should be knowledgeable and well informed, enthusiastic, friendly and appropriately dressed.
Conduct the food demonstration in a central location. Discuss transportation issues with the contact person at the food demonstration site and assist in arranging transportation if necessary. It is important that the location(s) chosen have running hot and cold water, adequate seating, lighting, restroom facilities and temperature control equipment.
Remember that taste-testing the food after the demonstration is probably the most important part of the food demonstration. Be prepared to have enough food for everyone to sample, as well as adequate utensils, paper plates, cups, and napkins.
Setting up the Food DemonstrationLocation

The following are suggestions of potential locations where you can arrange a food demonstration:
Food Banks
Food demonstrations at local food banks provide an opportunity to familiarize participants with commodity food boxes and foods that may be new or unfamiliar to them. Demonstrating “new” foods increases the probability that they will be used. Well-known foods can also be demonstrated in novel and creative ways. Also, combining unfamiliar foods with well-known ones in a recipe may increase the likelihood that participant will try the unfamiliar food. This can be helpful in providing variety for families.
Neighborhood Food Distribution Sites
Simple food demonstrations can be held using samples prepared off site and transported to the sites. It is important to meet food safety guidelines when transporting and holding the food for serving. At a minimum, the facility should have electricity. (See section on Sanitation and Food Safety for more details.)
Fairs and Festivals
Many cities and towns have local health fairs and festivals. These events usually have opportunities to set small cooking demonstrations and are excellent in reaching large number of individuals. If vendors are participating in these events, contact them ahead of time to see if they would be willing to donate product for a demonstration. Make sure the vendor and product used support the goals of the Dietary Guidelines.
Supermarkets
Supermarkets are another good venue for food demonstrations. Many supermarkets have fully equipped professional kitchens located in the store. Often, they are willing to provide the space, the promotional material and the ingredients. A demonstrator can provide the nutrition education material with appropriate recipes and a chance for customers to sample the food.

School Events
Schools can be great places for food demonstrations. There may be an opportunity to provide a cooking class (or several) for parents and/or children. Remember that children play a major role in influencing parents’ food selection at grocery stores and restaurants, as well as foods prepared and eaten at home.
Farmers’ Markets
Farmers’ Market programs are increasing around the state. They are good sites for food demonstrations using fresh locally grown fruits and vegetables. Farmers from the area might be able to provide some produce for onsite food tasting.
There are many challenges associated with preparing food at Farmers’ Markets. For instance, electric outlets or water might not be available. Flies and other insects might also be difficult to control. Accommodations should be in place in case of inclement weather, particularly wind and dust. Demand for samples can also be high on busy days. However, with good planning the benefits of doing food demonstrations at Farmers’ Markets will exceed the logistics. Food demonstrations offer opportunities to promote eating more fresh and locally grown fruits and vegetables. The farmer can often sell more produce and the demonstrator can show the consumer different ways to prepare fruits and vegetables.
Churches and Temples
Religious groups often look for outside programming ideas and are good places to contact. Many churches and temples have kitchen facilities that can be used for food demonstrations.
Planning a Food Demonstration
1. Choose several facilities to contact for conducting a food demonstration. Be prepared to discuss the program details including the dates, times, foods and recipes to be used, intended audience, and proposed educational materials.
2. Be certain to find out the following information: The name and phone number of the contact person at the
intended site. Accurate directions and estimated travel time to the facility.

How and where the demonstration will be advertised, and who will create the flier.
The electrical and water supply availability. The kitchen equipment available. The amount of time available for set up and clean up. If any staff will be available for help throughout the
demonstration. If there are other meetings held during the time allotted for set
up, demonstration, or clean up. If the facility will supply water pitchers, cups, napkins, plates and
utensils for tasting or if the demonstrator needs to provide them.
The kind of garbage facilities available.
3. Important points to remember:
Contact the facility at least three weeks before the event as well as the week of the event to verify the date, time and agenda.
Make a list of equipment and supplies that will be needed to conduct, serve, and cleanup the food demonstration. (See the Tools and Equipment section.)
Have the recipes and educational material to be used proofed and finished for distribution.
Follow all appropriate protocol for using the facility and leave the cooking and preparation area(s) clean.
4. Determine what foods will be available for the food demonstration and find appropriate recipes. (See the Recipe section for recipes that meet the criteria
for the Dietary Guidelines as well as 5 a Day.)
5. Determine the type of demonstration, i.e., cooking one, two, or three simple dishes, or precooked samples. (Different types of demonstrations will be covered in the next section.)
6. Select a theme or message, i.e., “Fruits and vegetables; how do you get them out of the bag into your family?”
7. Design a simple one page evaluation form for participants to complete after the demonstration. (See Evaluation section.)
8. Practice cooking the recipes that will be used for the demonstration at home. Check cooking times and flavor, as well as ease of preparation and

cost. Rehearse the talk while you practice preparing your recipe(s) as though there were an audience.
9. Prepare handouts of the recipes to be used for the demonstration, as well as any additional information that may be useful for the participants.
The cover page should include the title, location and date of the demonstration.
Include all of the recipes used in the demonstration written with clear, logical instructions.
If foods or techniques that may be unfamiliar to participants are used, provide some simple written information about these items.
Keep recipes for your use in a plastic folder.
10. Call your contact person a week before the demonstration to discuss the
following: Check to see how many participants will be attending and
arrange the room and chairs accordingly. Make sure that a table will be available for your
demonstration. Make a list of preparation and cooking equipment needed.
(See Tools and Equipment section.) Check recipes for all the ingredients needed and to
determine measuring utensils (liquid, dry, spoons, etc.) Arrange for serving plates, bowls and utensils for tasting
and for displaying. Bring decorative items such as tablecloths, flowers or other
seasonal items. Find out about washing, garbage, and restroom facilities. Bring appropriate equipment if not available.
11. The day before the demonstration make sure you follow the applicable
suggestions listed. Pick up donated food. Shop for recipe ingredients or if food is donated, make sure
to purchase or include additional items. Prepare ingredients that require cleaning, cutting or
mixing. Store in airtight containers and at the proper storage temperature (i.e. 32F, etc.)
Pack equipment and needed materials. If taking prepared samples, prepare all food and store at
the proper temperature.
12. The demonstrator’s attire must be appropriate.

Hair should be pulled back and tied or under a cap. Limit jewelry to a wedding band and watch. Short and clean fingernails are essential. Do not wear
colored nail polish or artificial nails. Avoid using perfume or cologne. Long sleeves should be fitted close to the body. Wear conservative colors. Wear an apron. Wear flat shoes with closed toes.
13. Right before the demonstration. Arrive at least one to two hours early depending on the
amount of preparation time needed. Set up the cooking station and preparation area. Arrange chairs and any necessary written materials.
14. During the demonstration. If possible, the contact person should introduce the
demonstrator to the audience. The demonstrator should tell the audience something
personal about themselves or why they are presenting. The audience should be given an overview of the
demonstration including what will be covered, the main nutrition theme, and approximate length of the demonstration. The nutrition messages should be repeated often throughout the presentation.
Focus on the fruits or vegetables being used in the recipe and give details about their nutritional content, selection, and storage tips. (Additional information on these topics can be found in the Fruit and Vegetable Guide of this manual).
Each step should be explained in detail as if the audience cannot actually view the techniques.
Be sure to taste the products for correct seasoning before serving. Use a clean plastic spoon for tasting the food, then discard it.
Show a finished version of the recipe in its serving dish with a garnish.
Discuss alternative ingredients that can be substituted (e.g., frozen for fresh, or black beans for pinto beans.)
Discuss alternative equipment that might be used (e.g., a toaster oven instead of a stove oven.)
Ask participants if they have any questions.

15. Have participants taste the food. Serve two or three bites. For large groups, prepare the finished recipe ahead of time
and plate for tasting. Always follow proper sanitary techniques. Pass out napkins separately. Ask for volunteers to help pass out food. Discuss the eye appeal, aroma, “mouthfeel”, and flavor. Distribute an evaluation sheet for participants to fill out at
the end of the food demonstration.
16. Open the floor for questions and answers.
17. If possible, give the participants something to take home, i.e., a brochure, a
pamphlet, the recipe, etc. as you collect the class evaluations.
18. Clean up, dispose of trash, thank the contact person, and record the number of participants.
Types of Food DemonstrationsThere are many ways to do food demonstrations depending on the facilities, time, audience, food availability and other factors. You may offer whole or cut up fruits and vegetables or teach a multi-session cooking class. Whatever the type of food demonstration, here are some tips to remember:
Have a message. You are not there just to give away samples but to teach.
Be enthusiastic about the food and the nutrition message you are sharing.
Always follow proper sanitation guidelines for food preparation, holding, and serving. It is better to serve individual servings rather than to have one large bowl. Always make sure the demonstrator serves the food.

Ensuring safety is very important. Never give a child a sample without the parent present. Legal considerations in the case of an allergic reaction in the child are best avoided.
If using electrical appliances, locate the food demonstration near an outlet and tape the cord down.
If water is not available nearby, be sure to have a clean container filled with water for cooking and cleaning.
Sampling
Wash and cut bite-sized pieces of a new or unusual fruit or vegetable for people to taste. Use toothpicks inserted into the samples to maintain cleanliness. This is an easy way to expose people to foods they may not have tried before.
Sampling is often used at supermarkets, farmers’ markets or other outdoor events with limited space and equipment. Keep it simple.
Precooked
It is possible to precook a recipe and transport it to a site for sampling. Things to consider if precooked samples should be used include: if there is an electrical source for holding hot foods in an electric pan; or if warming trays with sterno candles will be needed. If serving cold foods, make sure to plan for adequate ice to maintain proper refrigeration temperature. Other arrangements may need to be made such as coolers, etc. Bring containers of clean water if there will be no reliable source near the demo. Other things to consider include: bringing sufficient serving utensils, plates, napkins, and garbage receptacles.
Precooked demonstrations can also be used in sites with limited equipment and space; however, it may be difficult in outdoor settings if electricity is needed for preparing or holding food.
Cooking entire dish

If conducting a formal cooking demonstration, carefully consider the topic, menu, and recipes. This will be determined by many factors. Some of these include the location, time, equipment, season, audience demographics, and the demonstrators’ skill.
In an indoor facility with kitchen equipment, 3 simple recipes and 1 to 2 techniques is all that should be covered in a 1-hour demonstration. Try to stick to recipes that use no more than 10 common ingredients (excluding seasonings, cooking spray, and water).
For any type of food demonstration the goal should always be to educate while maintaining safety and sanitation.
Methods of Acquiring FoodThe following are suggestions of possible resources to contact for food donations for conducting demonstrations:
Food Distribution Programs
Using foods given out from local food distribution centers is a great way to make sure that the food received in a food distribution gets consumed in the home. Places to contact for donations include:
Gleaning programs Commodity Supplemental Food Program (CSFP) or Food Plus Food Distribution Programs on Indian Reservations Neighborhood Food Distribution Sites
Supermarkets
Supermarkets may be willing to donate products for an in-store demonstration. Make sure the products being sampled are culturally

appropriate as well as nutritionally sound.
Purchasing
The cost of food for recipe/taste testing purposes and the cost of kitchen equipment necessary for food storage, preparation, and display are an “Allowable” expense in the Arizona Nutrition Network plan. Distribution of food items or incentive payments for attendance are “Unallowable” expenses.
Community Organizations
Churches, temples, and local community organizations can be a good resource to contact for donations.
Fairs and FestivalsMany cities and towns have local health fairs and festivals. Contacting vendors in advance for donations for a food demonstration can be a great way to reach large audiences.
Methods of Acquiring an AudienceMarketing a food demonstration or recipe tasting is as important as choosing the recipes and preparing the food. Marketing can be done using a simple one-page flier with event details. The flier should be brief, eye catching and contain all pertinent information related to the demonstration. Key elements include:
Date Time (start time and finish time, e.g. 6:30 pm – 7:30 pm) Exact location (e.g. in the basement kitchen of the church) Parking information Main theme (e.g. “Winter vegetable dishes”) R.S.V.P. if seating is limited Phone number to call for reservations or additional information
Advertising the demonstration should be done in places that the intended audience frequents. For example, post fliers at local grocery stores, churches, community centers, food banks, DES offices, WIC clinics, doctors’ offices, etc. Be sure to check with the store owners/centers before posting the fliers, as certain rules for advertising may exist. If possible print a small ad in the local community newspaper or church bulletin advertising the event.

Advertising should be done well in advance of the event, yet not far enough that people will forget. Aim for 2-3 weeks ahead of the demonstration if only using fliers, and 4 weeks ahead of the demonstration if printing an ad in a paper or bulletin.

Sanitation and Food SafetyPersonal Hygiene
The first step in preventing food-borne disease is practicing good personal hygiene. Even when an individual is healthy, many bacteria reside both inside and on the body, including the hair, skin, mouth, throat, and nose. Under proper conditions, these bacteria can make people ill.
Rules to Follow
There are a number of rules that one should follow before and during a food demonstration in order to ensure that the food that you prepare is not contaminated with any harmful micro-organisms:
1. If you have any communicable disease (e.g., a cough, cold, sore throat) or infection, DO NOT work with food. Reschedule the food demonstration or have a colleague conduct it.
2. Shower or bathe daily.3. Wear clean clothes and clean aprons.4. Hair should be neat and clean. Use a clean hair restraint such as a hat,
hairnet, or rubber band.5. Keep beards and moustaches trimmed and cleaned. Ideally, be clean-
shaven.6. Wash hands and exposed parts of arms before work and as often as
necessary during work, including: After eating, drinking, or smoking. After using the restroom. After using a handkerchief or tissue. After handling raw food, especially poultry or meat. After touching or handling anything that may be
contaminatedby micro-organisms.
7. Cover coughs and sneezes, and then wash hands.8. Keep hands away from the face, eyes, hair, and arms.9. Keep fingernails clean and short. 10. Do not wear nail polish.11. Do not smoke or chew gum.12. Cover cuts and sores with clean bandages. Wear gloves over hands if
hands are bandaged.
13. Do not sit or stand on food preparation tables.
2

14. When sampling foods, use a clean utensil each time.15. Do not eat or drink in the food preparation area unless sampling
demonstrated food or beverage for taste.
Food Storage
The following rules have two purposes:1. To prevent contamination of foods.2. To prevent the growth of bacteria that may already be present in
foods.
Keep perishable foods out of the Food Danger Zone, 41 to 140F (5 to 60C), as much as possible. This temperature range is optimal for the growth of most bacteria. A key rule-of-thumb is to KEEP HOT FOODS HOT AND COLD FOODS COLD.
Dry Food Storage
Store dry goods in a cool and dry place. Dry foods should not be stored directly on the floor, or touching a wall. Additionally, be sure not to place dry goods under a sewer line. Keep previously opened packages of dry goods in tightly sealed containers as these prevent insects, rodents, and dust from getting into the food.
Dry goods include:Flour Dried beans OilSugar Dried peas ShorteningSalt Bread Canned foodsCereals Crackers Bottled foodsRice Grains

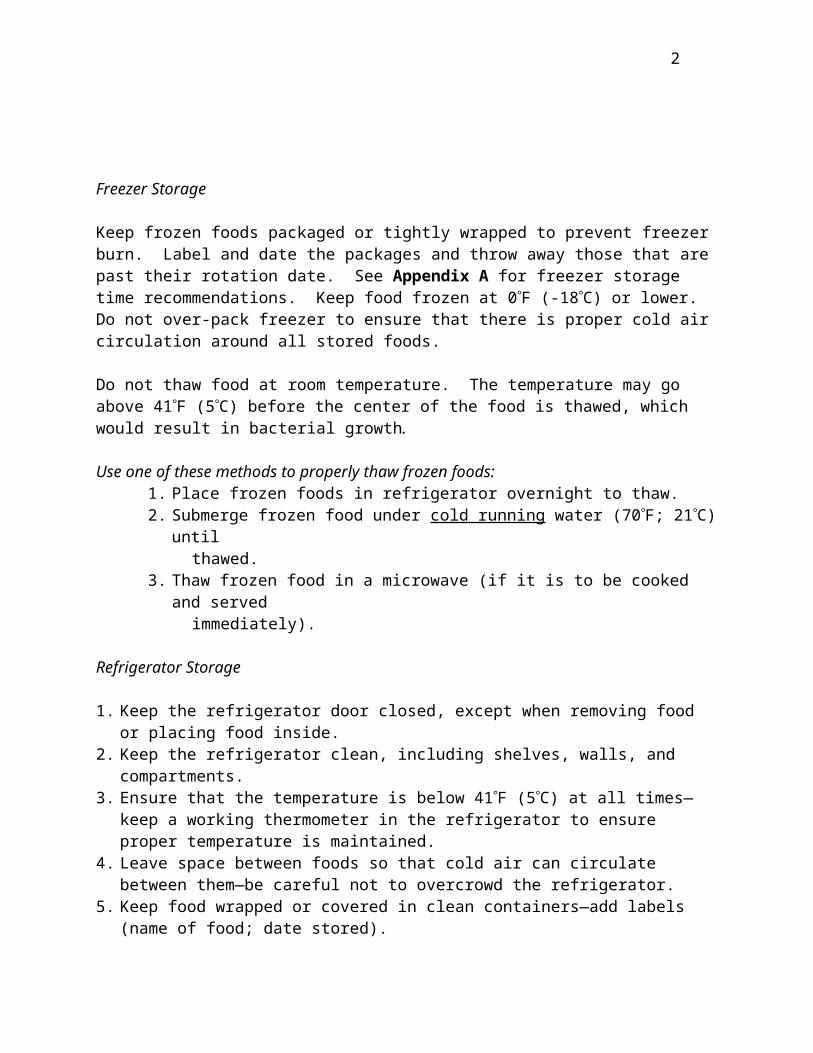
Freezer Storage
Keep frozen foods packaged or tightly wrapped to prevent freezer burn. Label and date the packages and throw away those that are past their rotation date. See Appendix A for freezer storage time recommendations. Keep food frozen at 0F (-18C) or lower. Do not over-pack freezer to ensure that there is proper cold air circulation around all stored foods.
Do not thaw food at room temperature. The temperature may go above 41F (5C) before the center of the food is thawed, which would result in bacterial growth.
Use one of these methods to properly thaw frozen foods:1. Place frozen foods in refrigerator overnight to thaw.2. Submerge frozen food under cold running water (70F; 21C) until
thawed.3. Thaw frozen food in a microwave (if it is to be cooked and served
immediately).
Refrigerator Storage
1. Keep the refrigerator door closed, except when removing food or placing food inside.
2. Keep the refrigerator clean, including shelves, walls, and compartments.3. Ensure that the temperature is below 41F (5C) at all times—keep a
working thermometer in the refrigerator to ensure proper temperature is maintained.
4. Leave space between foods so that cold air can circulate between them—be careful not to overcrowd the refrigerator.
5. Keep food wrapped or covered in clean containers—add labels (name of food; date stored).
6. Store raw and cooked food separately.7. Keep cooked foods on shelves above raw foods to prevent drips and spills
from raw foods from contaminating the cooked foods.8. Do not allow container bottoms to touch any food.9. Chill foods as quickly as possible over ice or in a cold water bath before
placing into the refrigerator.
2

Food Handling and Preparation
There are two major sanitation problems when handling and preparing food:
1. Cross contamination—the transfer of bacteria from one source to another. Bacteria transfer may occur from food to food, from equipment to food, or from work surface to food.
2. Bacterial growth—the multiplication of bacteria. This is most likely to occur when working in the Danger Zone (between 41 and 140F); most fresh foods fall into this temperature range.
Rules to follow:
1. Purchase government-inspected meat, poultry, fish, dairy, and egg products.
2. Handle foods as little as possible.3. Use spatulas, tongs, or other utensils instead of hands whenever possible.4. Keep equipment, worktables, and stations clean and sanitary at all times.5. Clean as you go. Do not wait until the end of the day to clean everything
at once.6. After handling raw poultry, meat, fish, or eggs, immediately clean and
sanitize cutting surfaces and equipment.7. Wash raw vegetables and fruits thoroughly. Use a brush and/or water
bath. 8. Do not take more food from refrigeration than you will use in one hour.9. Freeze or refrigerate perishables, prepared food, and leftovers within two
hours.. 10. Keep foods covered.11. Do not mix leftover food with freshly prepared food.12. Before serving, boil leftover gravies, soups, sauces, and vegetables.13. Chill all ingredients before combining protein salad (eg, potato, egg,
chicken).14. Cook all pork products to an internal temperature of 160F (71.1C).
Use ameat thermometer placed into the thickest part of the meat to ensure proper temperature. Additionally, take at least two readings from different locations to ensure that the proper temperature has been reached. See Appendix B for a list of proper cooking temperatures for various foods.
15. Chill custards and cream fillings as quickly as possible; keep cool at alltimes.

Equipment Handling
Safe practices are imperative when working in a kitchen or any other food demonstration site. In order to prevent accidents from occurring, one must not behave carelessly or recklessly when working with food preparation equipment. Additionally, one should pay close attention to any potential hazards that may be present while using foodservice equipment.
1. Be attentive to your situation when using a knife or any cutting equipment.
2. Do not attempt to catch a falling knife.3. Always keep knives sharp.4. Use knives only for cutting, not for opening bottles, or any other
unintended purpose.5. Cut away from yourself and other workers.6. Carry a knife properly by holding it beside yourself, point down, with the
sharp edge back and away from your body. Do not swing your arm while carrying a knife.
7. Do not put knives anywhere they cannot be seen (e.g., into a sink full of soapy water).
8. Point pot handles away from gas burners, open flames, and out of aisles in order to prevent burns or spills.
9. Do not grasp any pot handle with your bare hands.10. Use dry potholders or towels to handle hot pans (damp or wet towels
will create steam, which can cause steam burns).11. Dry wet foods before putting them into frying fat to prevent fat from
splattering.12. Keep a supply of salt or baking soda nearby in case it becomes
necessary to put out a range top fire.13. Choose the correct type of fire extinguisher when putting out a fire.
Fire extinguishers are labeled according to the type of fire they smother.14. Do not use any equipment unless you understand its proper
application and operation.15. Be sure to unplug electric equipment before cleaning it.16. Do not leave hot fat unattended on the stove.17. Do not touch or handle electrical equipment while your hands are wet.18. Clean up any spills immediately.19. Keep aisles and stairs clear and uncluttered.20. Do not carry objects over which you cannot see.21. Sprinkle salt over a slippery area if it cannot be cleaned immediately.22. Walk, do not run.
23. Use a ladder or stable chair to reach objects on high shelves.24. Get help when lifting heavy objects25. Use a cart when moving heavy objects over a long distance.

Equipment Cleaning and SanitizingWhile cleaning means the removal of visible soil, sanitizing means the removal of disease-causing bacteria. Bacteria are destroyed in two ways—by using heat or by using chemicals.
Manual Dishwashing
1. Scrape and pre-rinse. This step keeps the washing water clean longer.2. Wash. This removes all soil and grease. Use warm water (110F; 43C)
and a cleaning agent. Scrub equipment well with a brush. Replace cleaning agent solution when water is unclear or suds have disappeared.
3. Rinse. The purpose of rinsing is to remove all soap from the equipment. Use clean, warm water (110F; 43C), and change the water several times. Use running water to rinse equipment when a 3-compartment sink is not available.
4. Sanitize. Place equipment in a rack and immerse it in hot water (171 F; 77C) for 30 seconds. Sanitizing can also be completed with disinfectants instead of heat. If disinfectant chemicals are used (e.g., Clorox), it is important to follow the instructions on the manufacturer’s label. (Example sanitizing solution: mix 3 tablespoons of liquid Clorox into 1 gallon of water).
5. Drain and air dry. Do not touch the food contact surfaces on utensils or cutlery. Also, do not towel dry equipment, as this may lead to re-contamination.
Mechanical Dishwashing
1. Scrape and pre-rinse.2. Place the dishes in the rack so that the dishwasher spray will strike all
surfaces.3. Run the machine for a full cycle. Proper temperature depends on the type
of machine used. Check user’s manual for appropriate temperature.4. Sanitizing temperature depends on the method used by the dishwashing
machine; a machine that sanitizes by chemical disinfectant should be set between 120-140F (49-60C), and a machine that sanitizes by heat should be set at 180F (82C). Again, check user’s manual to verify appropriate temperature.
5. Air dry and inspect for cleanliness. Do not touch food contact surfaces of utensils or cutlery.
Stationary Equipment and Work Surfaces
1. Unplug all electrical equipment before cleaning.
2. Disassemble the equipment whenever possible—this allows for more thorough access to all surfaces to be cleaned.
3. All immersible parts should be cleaned and sanitized in the same manner as kitchen utensils.
4. Wash all food contact surfaces using a detergent solution and clean cloths.
5. Sanitize all surfaces with a double strength sanitizing solution and with clean cloths used only for this purpose.
6. Allow equipment and surfaces to air dry.7. Reassemble equipment.

Fruit and Vegetable GuideThis section covers general nutrition information about the nutrient content of fruits and vegetables. Purchasing, storage, and preparation ideas for selected fruits and vegetables are also presented (see fact sheets). The food demonstrator should become familiar with the specific fruits and vegetables being prepared during the food demonstration. As the demonstrator prepares the recipes he/she is demonstrating, a running dialogue about different aspects of the fruits and vegetables being used (e.g., nutrient content, alternative preparation methods) will be both interesting to and practical for the participants.
Health experts agree that eating five or more servings of fruits and vegetables each day, together with a healthful diet, may reduce the risk for diseases such as heart disease, stroke, and cancer. Likewise, eating more fruits and vegetables will help one’s family to look and feel great. Fruits and vegetables are full of many vitamins, minerals, and fiber.
Fruit and Vegetable Nutrition Information
CaloriesCalories are the units used to measure the energy in foods.
Fruits and vegetables are low in Calories. One serving of fruit has about 60 Calories; one serving of vegetables has approximately 25 Calories or less.
Starchy vegetables such as corn, potatoes, peas, and winter squash are higher in Calories than most other vegetables. Dried beans and legumes are also higher in Calories than most other vegetables because of their higher starch and protein content.
Tropical fruits (e.g., avocados, coconuts) are higher in Calories (from fat) than other fruits.
2

Fat
Most fruits and vegetables are low in fat, or have a negligible amount of fat.
Low fat diets can help lower the risk of certain chronic diseases (e.g., colon cancer, breast cancer, heart disease, type 2 diabetes mellitus).
A low fat diet can be achieved by consuming five or more servings of fruits and vegetables per day. Preparation technique (e.g., frying versus grilling) can affect the fat content of produce.
FiberFiber is necessary to maintain normal digestive function.
Fiber may lower one’s risk for heart disease and certain cancers. Adults need to consume between 25 and 35 grams of fiber each
day. Children and adolescents (until 20 years of age) should follow the
“Age + 5 rule”: consume an amount of fiber equal to their age plus an additional 5 grams of fiber.
Fruits and vegetables with edible skins and seeds contain the most fiber; peeling and excessive trimming will decrease fiber content.
SodiumSodium is a component of table salt, which is comprised of 40% sodium and 60% chloride.
One teaspoon of salt contains 2400 mg sodium. Most fresh vegetables are very low in sodium (35 mg or less). Pickled vegetables are very high in sodium; some canned and some
frozen vegetables may also be very high in sodium—check the nutrition facts label for sodium content.
All fresh fruits are low in sodium.
MineralsAll vegetables contain minerals. In general, fruits contain smaller quantities
2

of minerals than do vegetables.
Potassium – needed for fluid balance, muscle contraction, and nerve function.
Fruits and vegetables are the best food sources of potassium. Potassium can help lower the risk for high blood pressure. People who take medication for high blood pressure need to
watch their potassium intake.
Iron – needed to carry oxygen in blood and muscles so your body has energy.
Women and children need to ensure adequate iron intakes. Vegetables that contain ample quantities of iron include
spinach, broccoli, and other greens. (Note: the iron in these foods may not be readily absorbed.)
Legumes are also high in iron. Consuming a source of vitamin C with plant foods that are a
source of iron will enhance iron absorption. Some dried fruits also contain iron.
Calcium – needed to build strong bones and teeth. Calcium also helps to regulate blood pressure. Non-milk sources of calcium include calcium-processed tofu
(see label on product package), calcium-fortified orange juice, some nuts and seeds (e.g., almonds, sesame seeds), and green, leafy vegetables (e.g., broccoli, turnip greens, bok choy).
Some green leafy vegetables contain calcium (e.g., spinach, swiss chard, rhubarb) that is not well-absorbed.

VitaminsAll fruits and vegetables contain vitamins. Shorter cooking times help to preserve vitamins in fruits and vegetables, as well as in other foods.
Vitamin A – needed for proper night vision and skin maintenance. Vitamin A helps the body to resist infection. Vitamin A is necessary for children’s growth. Many fruits and vegetables contain carotenoids, some of
whichcan be turned into vitamin A inside the body.
Dark green or dark yellow/orange fruits and vegetables (e.g., apricots, mangoes, broccoli, carrots, sweet potatoes,
spinach) contain more vitamin A than the more pale fruits and vegetables.
Some carotenoids help to protect the body against cancer and heart disease.
Vitamin C – needed to form collagen—this substance glues your cells together and keeps blood vessels elastic.
Another name for vitamin C is “ascorbic acid.” Vitamin C helps to form bones and teeth. Vitamin C helps cuts and bruises to heal. This vitamin helps the body to absorb iron. As an antioxidant, vitamin C may help lower one’s risk for
cancer. Vegetables high in vitamin C include tomatoes, broccoli,
cabbage, cauliflower, and peppers. Fruits high in vitamin C include citrus fruit (e.g., oranges,
grapefruit, lemons), kiwis, strawberries, and mangoes.
Folate – needed for proper cell growth and function. Other names for folate are “folacin” and “folic acid.” Folate is very important for women of childbearing age,
including pregnant and nursing women, and children. The risk for neural tube defects, such as spina bifida, is
Higher when a woman does not consume adequate folate prior
to and during the first few weeks of pregnancy. Vegetables (e.g., spinach, broccoli, peas) and legumes contain
ample quantities of folate.
2

Fruits also contain folate (e.g., oranges, bananas, avocados).

Oranges
What’s in an orange? Not only do oranges taste great, but one medium orange is also an
excellent source of vitamin C! The pulp is high in fiber that can help to lower your cholesterol.
Selection: Choose oranges that are firm and heavy for their size. Skin should be bright and colorful. Avoid bruised or wrinkled oranges. Some ripe oranges may even have a slight green color.
Storage: Keep oranges in a plastic bag or the produce drawer in your refrigerator. Oranges will also remain fresh for several days at room temperature. Freeze fresh-squeezed orange juice for use later. You may also grate the orange rind and freeze or refrigerate it for later
use.
Preparation: Wash the orange to remove all dirt and soil before peeling. Peel the skin from the orange with your fingers. (Be sure to wash your
hands before handling clean produce.) Remove as much of the white membrane from the orange as desired.
Serving ideas: Eat oranges raw as a snack or use in recipes for fruit salads.

Broccoli
What’s in Broccoli? Broccoli provides beta carotene, which helps to fight cancer. Broccoli is an excellent source of vitamin C, and a good source of folate.
Selection: Choose broccoli that has tender, firm stalks and tightly closed dark-green
buds. Avoid limp broccoli. Avoid broccoli with yellow buds
Storage: Keep broccoli in a plastic bag or in the produce drawer of your refrigerator
up to 5 days.
Preparation: Wash broccoli in cold water. Remove large leaves and trim ends of stalks if they are tough or woody. Split the stems lengthwise to speed cooking since broccoli stalks cook
more slowly than the buds.
Serving ideas: Eat broccoli raw as a snack or in salads. To cook, place in saucepan or pot in 1 inch of cold water and cook about
10 minutes, or until tender.
2

Cabbage
What’s in cabbage? Along with its bold flavor, cabbage contains substances that may help
fight cancer. One cup of cabbage is also high in vitamin C.
Selection: Cabbage may be red or green. Choose cabbage that has fresh, crisp-looking tightly packed leaves. Cabbage should be firm and heavy for its size.
Storage: Refrigerate cabbage in a plastic bag or vegetable drawer. Use within 3
weeks.
Preparation: Rinse cabbage well in cold water. Remove outer leaves of cabbage. Cut cabbage into shreds or wedges. Only cut what you will use. Refrigerate the rest for later use.
Serving ideas: Eat cabbage raw in salads. To cook, place in saucepan or pot in 1 inch of cold water and cook 10-15
minutes, or until tender. Shredded cabbage cooks in 3-10 minutes.
2

Onion
What’s in an onion? Aside from adding great flavor to other foods, one medium onion is a
good source of vitamin C.
Selection: Choose firm onions that are heavy for their size. They should have dry skins with no soft spots or green sprouts.
Storage: Uncut onions can last for 4 weeks in a cool, dark place. Do not store whole onions in plastic wrap. Wrap cut onions in plastic wrap and store in refrigerator up to 4 days.
Preparation: Chill onions for 30 minutes in the refrigerator to help stop tears while
cutting. Cut off top of onion and remove papery skin. Cutting off the bottom of the onion will make your eyes tear more.
Serving ideas: Add onion to salads, soups, casseroles, and sandwiches for a great flavor.
2

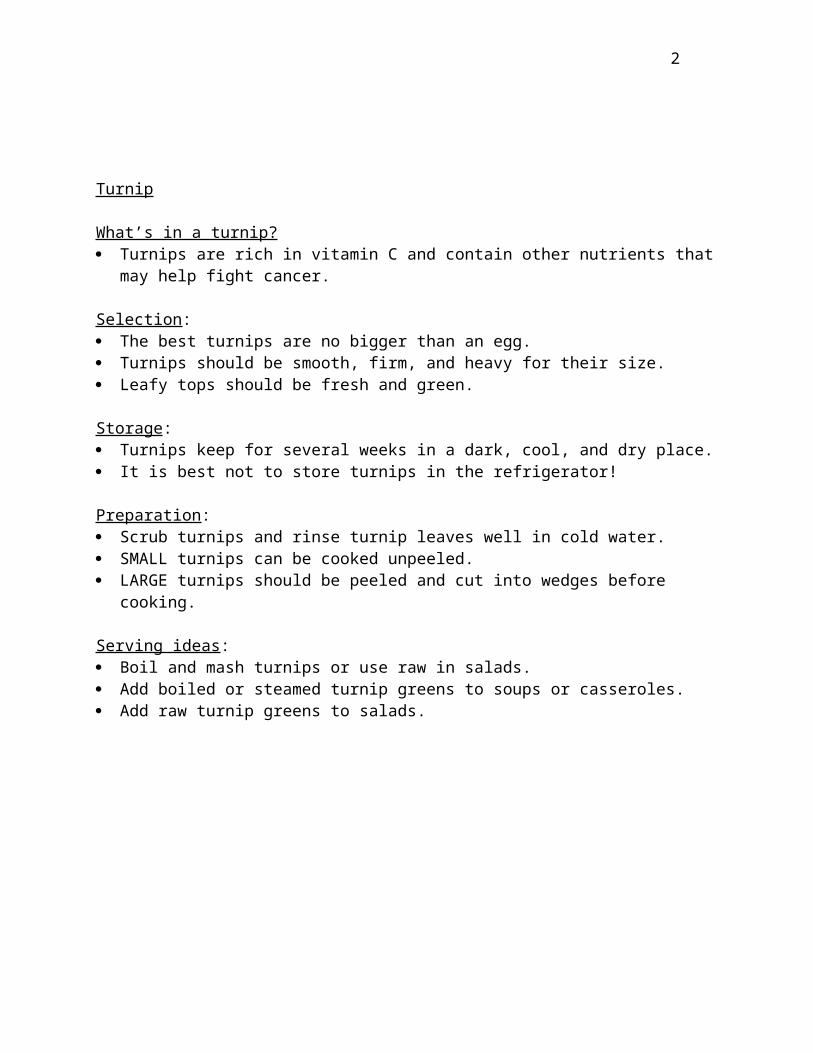
Turnip
What’s in a turnip? Turnips are rich in vitamin C and contain other nutrients that may help
fight cancer.
Selection: The best turnips are no bigger than an egg. Turnips should be smooth, firm, and heavy for their size. Leafy tops should be fresh and green.
Storage: Turnips keep for several weeks in a dark, cool, and dry place. It is best not to store turnips in the refrigerator!
Preparation: Scrub turnips and rinse turnip leaves well in cold water. SMALL turnips can be cooked unpeeled. LARGE turnips should be peeled and cut into wedges before cooking.
Serving ideas: Boil and mash turnips or use raw in salads. Add boiled or steamed turnip greens to soups or casseroles. Add raw turnip greens to salads.
2

Tomato
What’s in a tomato? Juicy tomatoes are a good source of vitamin A, which is necessary for
healthy skin and eyes, and are also high in vitamin C.
Selection: Choose firm, unblemished tomatoes with bright color. Green tomatoes are not ripe. Avoid soft or bruised tomatoes.
Storage: Do not refrigerate tomatoes. Use ripe tomatoes within 1 week. If tomatoes are still green, leave them at room temperature to ripen.
Preparation: Wash tomato in cold water. Slice, chop, or cut into wedges, unless you wish to stuff the tomatoes.
Serving ideas: Eat tomatoes raw in salads and sandwiches. Tomatoes can also be cooked.
2

Melons
What’s in a melon? Melons contain lots of water, which is very important in the summer
months. Melons can be good or excellent sources of vitamin A, vitamin C and
folate.
Selection: Pick melons that are fully ripened for best sweetness and flavor. There should be no stem, and the rind around the blossom end should
give slightly with gentle thumb pressure. Melons should have a pleasant smell and a rough skin texture. Avoid
melons that are bruised, cracked, or green.
Storage: Uncut melons may be kept at room temperature or in refrigerator. Use uncut melons within 1 week. Keep cut melons well wrapped in refrigerator and use within 2-3 days. Melons will ripen at room temperature.
Preparation: Wash outside of melon well with cold water. Cut melons in half and scoop out seeds.
Serving ideas: Eat raw, use in recipes for fruit salads, fruit cups, and sherbets. Serve cubed or in wedges.
2

Summer Squash
What’s in summer squash? Sweet and crunchy summer squash adds flavor to your plate. Zucchini is high in vitamin C.
Selection: Choose summer squash that are small, young, and heavy for their size. Pattypan squash is usually yellow and round. Scalloped squash is round
and green. Crookneck squash is yellow, usually with a curved neck. Zucchini is usually long and green.
The skin should be tender and shiny. AVOID soft or limp squash.
Storage: Keep summer squash in a plastic bag or in the produce drawer in your
refrigerator for up to 5 days.
Preparation: Scrub the squash gently in cold water. Trim both ends. Slice, chop, or cut squash into wedges. You do not have
to peel summer squash.
Serving ideas: Eat summer squash raw as a snack and in salads. Substitute summer squash for carrots or eggplant in recipes. To cook, place squash in a saucepan or pot in 1 inch of cold water, and
heat for 3-5 minutes, or until tender.
2

Eggplant
What’s in eggplant? Like other vegetables, eggplant is naturally low in calories and sodium. Eggplant can have purple or white skin.
Selection: Choose firm eggplants with a dark, rich purple color and a bright green
cap. AVOID eggplants that are soft, or that have scars, cuts, or wrinkles.
Storage: Keep eggplants in a plastic bag or the produce drawer in your refrigerator
for up to 5 days.
Preparation: Wash eggplant gently in cold water. Fresh eggplant does not have to be
peeled. Cut eggplant into desired shape just before cooking so that it does not
turn brown.
Serving ideas: Place eggplant in saucepan or pot in 1 inch of cold water. Cover and cook
about 5 minutes, or until tender.
2

Kiwifruit
What’s in a kiwifruit? Two medium kiwifruit are high in fiber and vitamin C. They are also a good source of potassium and vitamin E.
Selection: Choose kiwifruit that are not bruised or wrinkled. They should give slightly to pressure and have no cuts or soft spots.
Storage: Ripen kiwifruit at room temperature. Refrigerate ripe kiwifruit in a plastic bag or vegetable drawer in your
refrigerator for up to 10 days.
Preparation: Scrub kiwifruit lightly in cold water. You may peel the kiwifruit before eating it, but the skin is edible. Cut kiwifruit into thick slices to keep most of the nutrients.
Serving ideas: Eat kiwifruit raw with breakfast or as a snack. Cut kiwifruit in half to form a bowl and scoop out flesh to eat. Add kiwifruit slices to fruit salad.
2
Greens
What’s in greens? There are lots of types of greens, such as spinach, collard greens, kale,
mustard greens, and turnip greens. A serving of greens can be an excellent source of vitamin A, vitamin C,
and folate. Cooking greens quickly helps them to retain their vitamins and minerals.
Selection: Choose greens that are fresh, young, and tender. AVOID greens with limp, dried, yellowed leaves, or coarse stems.
Storage: Keep greens in a plastic bag or the produce drawer in your refrigerator. Use greens within 2 days. (Kale can be kept for up to 5 days.)
Preparation: Wash greens well in cold water, and drain well. Trim off tough stems.
Serving ideas: Greens may be eaten raw in salads. They may also be cooked. To cook, place greens in a saucepan or pot in 1/2 inch of cold water and
cook 3-8 minutes, or until tender. Some greens, like collards, can take up to 30 minutes to become soft.
2

Winter Squash
What’s in winter squash? Winter squash include acorn squash, butternut squash, hubbard squash,
and pumpkin. Squashes that have bright orange flesh are an excellent source of vitamin
A. Like other vegetables, squash is low in calories and low-fat.
Selection: Choose squash that is heavy for its size. Winter squash should have a hard skin. AVOID bruised or scarred squash.
Storage: Keep winter squash in a cool, dry place. Winter squashes can be stored for 1 to 2 months.
Preparation: Wash the squash well in cold water, cut it into halves or quarters, and
remove the seeds.
Serving ideas: Winter squash can be baked with skin or boiled without skin. Add mashed winter squash to makes stews thick. Larger winter squash can be stuffed.
2

RECIPES

Broccoli
Broccoflower
1 head (4 cups) broccoflower, broccoli, or cauliflower1/4 teaspoon salt1 tablespoon lemon juice (optional)
1. Wash and cut the broccoflower into small florets. 2. Place in a pot of water on top of a steaming basket.3. Season with salt, place the lid on the pot. 4. Steam for about 6 minutes, until tender.5. Serve on a dish with a splash of lemon juice.
Serves 4
This is an official 5 a Day recipe. Recipe from “Do Yourself a Flavor” by Graham Kerr.
Nutritional analysis per serving: calories, 21; carbohydrates, 4 g; protein, 2 g; fat, 0 g; saturated fat, 0 g; fiber, 2 g; sodium, 154 mg; percent calories from fat, 0%.

Ranch-Style Vegetables 1 cup cauliflower, broken into bite-sized pieces 2 cups broccoli, broken into bite-sized pieces 3/4 cup sliced carrots 1/2 cup sliced celery 1/2 cup chopped onion 1/4 teaspoon dried dill weed1 1/2 tablespoons lemon juice 2 tablespoons fat free or reduced fat ranch-style dressing
1. Fill a 1 1/2 quart microwave-safe dish with the vegetables.2. Add dill and lemon juice.3. Cover and microwave 5 to 8 minutes.4. Drain and mix in dressing 5. Serve warm.
Serves 4
This is an official 5 a Day recipe
Nutritional analysis per serving: calories, 49; carbohydrate, 11 g; protein, 2 g; fat, 0 g; saturated fat, 0 g; fiber, 3 g; sodium, 112 mg; percent calories from fat, 0%.
2

Broccoli Salad6 cups broccoli, cut into small pieces1 cup raisins1 medium red onion, peeled and diced2 tablespoons sugar8 slices bacon, cooked and crumbled (optional)2 tablespoons lemon juice3/4 cup low-fat mayonnaise
1. Combine all ingredients in a medium bowl.2. Mix well.3. Chill for 1 to 2 hours and serve.
Serves 8
This is an official 5 a Day recipe.
Nutritional analysis per serving: calories, 127; carbohydrate, 29 g; protein, 3 g; fat, 2 g; saturated fat, 0 g; fiber, 3 g; sodium, 229 mg; percent calories from fat, 11%.
2

Northeast Cream-That-Broccoli Soup 3 medium brown russet potatoes1 1/2 pounds fresh broccoli3 1/2 cups fat free, low sodium chicken broth 5 cloves garlic 1 teaspoon vegetable oil salt to taste pepper to taste (optional) 1/2 cup grated Parmesan cheese for garnish (optional)
1. Bring a large pot of water to a boil.2. Meanwhile, cut potatoes into quarters, leaving skin on, and add them to
the pot of boiling water.3. Cook for 20 to 25 minutes, or until potatoes are very soft.4. Remove any tough ends from the broccoli.5. Chop the broccoli into bite-sized pieces and steam for 5 to 7 minutes,
using a steamer insert that can go into the large pot of potatoes.6. Peel and mince the garlic, and heat the oil in a small pan on medium heat.7. Gently saute the garlic for 3 to 4 minutes, until soft and light brown.8. Drain the potatoes.9. Blend the potatoes and broccoli with the chicken broth in a blender,
working in batches since the blender will not be large enough for all ingredients at the same time.
10. Once done, pour the puree into a large pot and reheat, adding salt and pepper.
11. Serve warm garnished with Parmesan cheese.
Serves 6-8
This is an official 5 a Day recipe.
Nutritional analysis per serving: calories, 171; carbohydrate, 25 g; protein, 10 g; fat, 5 g; saturated fat, 2 g; fiber, 5 g; sodium, 394 g; percent calories from fat, 26%.
2

CabbageCrispy Apple Coleslaw
2 cups cabbage, shredded2 medium apples, cored and cut up1 can crushed pineapple (drained)1/2 cup fat free mayonnaise
1. Mix the cabbage, apples, and crushed pineapple with the mayonnaise in a large bowl.
2. Refrigerate for at least one hour.3. Serve chilled.
Serves 6.
This is an official 5 a Day recipe. Recipe provided by the Western New York Apple Growers Association.
Nutritional analysis per serving: calories, 73; carbohydrate, 16 g; protein, 1 g; fat, .5 g; saturated fat, 0 g; fiber, 2 g; sodium, 258 mg; percent calories from fat 3%.
2

Chicken-Cabbage Stir-Fry 3 chicken breast halves, skinned and boned3 cups green cabbage, cut in 1/2-inch slices1/2 teaspoon ground ginger1/2 cup water1 teaspoon oil1 tablespoon cornstarch1/4 teaspoon garlic powder1 tablespoon soy sauce
1. Cut chicken breast halves into strips.2. Heat oil in frying pan.3. Add chicken strips and stir-fry over moderately high heat, turning pieces
constantly, until lightly browned (about 2 to 3 minutes).4. Add cabbage; stir-fry 2 minutes until cabbage is tender-crisp.5. Mix cornstarch and seasonings; add to water and soy sauce, mixing until
smooth.6. Stir into chicken mixture.7. Cook until thickened and pieces are coated, about 1 minute.
Serves 4.
This is an official 5 a Day recipe.
Nutritional analysis per serving: calories, 135; carbohydrate, 5 g; protein, 27 g; fat, 2 g; saturated fat, 0 g; cholesterol, 50 mg; fiber, 1 g; sodium, 325 mg; percent calories from fat, 13%.
2

Cabbage Comfort1 onion, sliced1 teaspoon vegetable oil1 pound sliced cabbage1/4 teaspoon salt1/4 teaspoon black pepper1 teaspoon caraway seeds
1. Heat oil in large saute pan.2. Saute onion over medium heat, until light brown, about 5 to 6 minutes.3. Add sliced cabbage, salt, black pepper, and caraway seeds.4. Stir and cook for 30 minutes.5. Serve immediately.
Serves 4.
This is an official 5 a Day recipe. Recipe from “Do Yourself a Flavor” by Graham Kerr.
Nutritional analysis per serving: calories, 71; carbohydrate, 13 g; protein, 2 g; fat, 2 g; saturated fat, 0 g; fiber, 4 g; sodium, 168 mg; percent calories from fat, 25%.
2

Caraway Cabbage Soup1 teaspoon vegetable oil1 cup chopped onions1 russet potato, peeled and cut into 1/2-inch cubes4 cups chopped cabbage1 teaspoon caraway seeds4 cups low sodium vegetable or chicken broth1/4 teaspoon salt1/4 teaspoon pepper
1. Heat the oil in a large saucepan on medium heat.2. Cook the onion until it begins to wilt, about 2 minutes.3. Add the potatoes, cabbage, and caraway seeds and stir-fry 1 minute.4. Pour in the broth and season with salt and pepper.5. Bring to a boil, reduce the heat, and simmer 1 hour.6. Serve with a piece of crusty rye bread.
Serves 4.
This is an official 5 a Day recipe.
Nutritional analysis per serving: calories, 103; carbohydrate, 19 g; protein, 2 g; fat, 2 g; saturated fat, 0 g; fiber, 3 g; sodium, 222 mg; percent calories from fat, 17%.
2

EggplantMediterranean Roasted Eggplant with Tomato Sauce
2 small eggplants1 cup low-sodium pizza or spaghetti sauce1/4 cup low-fat plain yogurt1 clove garlic, finely choppedvegetable oil spray
1. Preheat the oven to 350F. 2. Wash and remove the stem end, and slice the eggplants into 1/2-inch
slices.3. Spray a baking pan with vegetable oil spray and lay the eggplant in the
pan in a single layer.4. Spoon low-sodium pizza or spaghetti sauce on each slice.5. Bake 30 minutes in the preheated oven.6. Stir the yogurt and garlic together.7. Drizzle the sauce in thin lines on each of the eggplant slices before
serving. You can do this easily by putting the sauce in a plastic squirt bottle or using a spoon.
8. Serve immediately as an entrée or side dish.
Serves 4.
This is an official 5 a Day recipe. Recipe from “Do Yourself a Flavor” by Graham Kerr.
Nutritional analysis per serving: calories, 86; carbohydrate, 18 g; protein, 1 g; fat, 1 g; saturated fat, 0 g; fiber, 5 g; sodium, 210 mg; percent calories from fat, 7%.
2

Roasted Eggplant and Red Pepper Sandwich8 slices French or Italian bread2 cloves garlic, peeled and cut in half1 medium eggplant, cut in 1/2-inch slices1/4 teaspoon pepper1 cup roasted red pepper, cut in stripsvegetable oil spray
1. Preheat the broiler.2. Lay the bread on the broiler pan, spray with vegetable oil spray, and toast
lightly on both sides.3. Remove toasted bread from broiler, rub the top of each with garlic, and
set aside.4. Reduce the oven heat to 450F.5. Lay the eggplant slices on a greased baking sheet and coat lightly with
vegetable oil spray.6. Season with pepper.7. Roast for 20 minutes or until tender and caramelized.8. Cover each slice of bread with the roasted eggplant and lay the red
pepper strips over the top.9. Give each one a quick spray of vegetable oil spray and serve.
Serves 4.
This is an official 5 a Day recipe. Recipe from “Do Yourself a Flavor” by Graham Kerr.
Nutritional analysis per serving: calories, 204; carbohydrate, 38 g; protein, 9 g; fat, 2 g; saturated fat, 1 g; fiber, 3 g; sodium, 388 mg; percent calories from fat, 9%.
2

Packed Pita Pocket4 whole wheat pita breads1/2 cup sliced zucchini1/2 cup red pepper strips1/2 cup sliced onions4 1/2-inch slices eggplantvegetable oil spray1/8 teaspoon salt1/4 teaspoon pepper1/2 teaspoon dried oregano1 teaspoon balsamic vinegar, or any other variety (optional)
1. Place cut vegetables on broiler rack or cookie sheet.2. Spray lightly with vegetable oil cooking spray.3. Season with salt, pepper, and oregano.4. Broil the vegetables until beginning to soften, about 5 or 6 minutes.5. Cook in pan then place into plastic storage bag and add vinegar.6. Shake bag coating all vegetables with vinegar.7. Split pita bread and fill each half with vegetables.8. Serve immediately.
To carry this recipe as a lunch, place pita bread halves in one bag and vegetables in another and fill pita with vegetables just before eating.
Serves 4.
This is an official 5 a Day recipe. Recipe from “Do Yourself a Flavor” by Graham Kerr.
Nutritional analysis per serving: calories, 228; carbohydrate, 45 g; protein, 1 g; fat, 5 g; saturated fat, 1 g; fiber, 7 g; sodium, 416 mg; percent calories from fat, 20%.
2

Eggplant, Beans & PastaChoose your favorite bean and pasta for this easy main dish. Serve with a tossed green salad.
1 tablespoon vegetable oil1 large onion, chopped2 large garlic cloves, minced1 medium eggplant, cut into 1/2-inch pieces2 cups chopped fresh tomatoes1 can (about 15-oz.) beans, such as pinto beans, navy beans or black-eyed peas, undrained1 pound pasta shells or macaroni, cooked until just tender and drained1/8 teaspoon saltPepper, to taste
1. Heat oil in a large skillet over medium heat. 2. Add onion and garlic and cook, stirring until onion is softened. 3. Add eggplant and tomatoes. 4. Reduce heat to low; cook, covered, until eggplant is tender, about 10
minutes, stirring occasionally. 5. Add beans and bring to a boil. 6. Add pasta and season with salt and pepper. 7. Serve hot.
Makes 6 servings.
This is an official 5 a Day recipe. Recipe provided by Jeanette P. Egan.
Nutritional analysis per serving: calories, 274; carbohydrate, 50 g; protein, 12 g; fat, 3 g; saturated fat, 0.5 g; cholesterol, 0 mg; fiber, 9 g; sodium, 168 mg; percent of calories from fat, 11%.
2

GreensQuick-Steamed Greens
4 cups washed, sliced collard greens, stems removed1/2 teaspoon fresh lemon juice1/8 teaspoon cayenne pepper1/8 teaspoon salt
1. Steam greens for about 4 minutes until crisp tender.2. Toss with lemon juice, pepper, and salt.
Serves 2.
This is an official 5 a Day recipe. Recipe from “Do Yourself a Flavor” by Graham Kerr.
Nutritional analysis per serving: calories, 22; carbohydrate, 4 g; protein, 2 g; fat, 0 g; saturated fat, 0 g; cholesterol, 0 mg; fiber, 1 g; sodium, 80 mg; percent of calories from fat, 0%.
2

Steamed Collard Greens1 pound collard greens1/4 teaspoon dried basil1 tablespoon fresh lemon juice
1. Wash greens in cold water.2. Remove stems and slice greens.3. Place in double boiler or steaming basket.4. Steam for 8 minutes.5. Sprinkle with basil and lemon juice before serving.6. Serve immediately.
Serves 2.
This is an official 5 a Day recipe. Recipe from “Do Yourself a Flavor” by Graham Kerr.
Nutritional analysis per serving: calories, 70; carbohydrate, 13 g; protein, 6 g; fat, 1 g; saturated fat, 0 g; cholesterol, 0 mg; fiber, 8 g; sodium, 45 mg; percent of calories from fat, 10%.
2

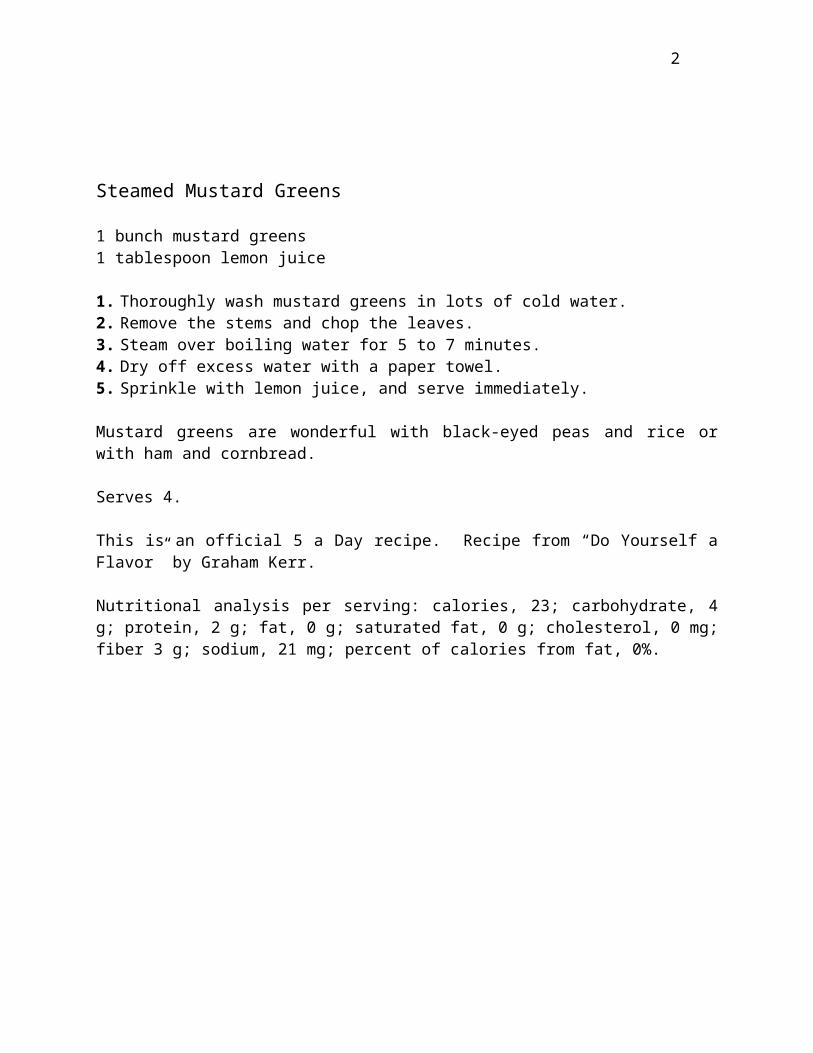
Steamed Mustard Greens1 bunch mustard greens1 tablespoon lemon juice
1. Thoroughly wash mustard greens in lots of cold water.2. Remove the stems and chop the leaves.3. Steam over boiling water for 5 to 7 minutes.4. Dry off excess water with a paper towel.5. Sprinkle with lemon juice, and serve immediately.
Mustard greens are wonderful with black-eyed peas and rice or with ham and cornbread.
Serves 4.
This is an official 5 a Day recipe. Recipe from “Do Yourself a Flavor” by Graham Kerr.
Nutritional analysis per serving: calories, 23; carbohydrate, 4 g; protein, 2 g; fat, 0 g; saturated fat, 0 g; cholesterol, 0 mg; fiber 3 g; sodium, 21 mg; percent of calories from fat, 0%.
2

Sweet and Sour Beets1 bunch beets with greens2 Granny Smith apples1 cup chopped onion1/4 cup lemon juice1/4 teaspoon ground nutmeg1/4 teaspoon salt2 tablespoons brown sugar1/4 teaspoon salt
1. Preheat the oven to 350F.2. Peel and trim the beets and apples, cut into 1/2-inch slices and place in a
baking dish.3. Set the greens aside.4. Sprinkle lemon juice over the beet/apple combination and mix nutmeg
and salt throughout. 5. Top with the brown sugar.6. Cover lightly with aluminum foil and bake for 30 minutes.7. Remove the foil, stir, and bake uncovered for 15 minutes more or until
tender.8. Wash and trim the stems from the beet greens.9. Stack the leaves on top of each other and cut into strips.10. Steam 3 minutes or until tender. 11. Mix with the cooked beets, add salt, and serve.
Serves 4.
This is an official 5 a Day recipe. Recipe from “Do Yourself a Flavor” by Graham Kerr.
Nutritional analysis per serving: calories, 172; carbohydrate, 41 g; protein, 1 g; fat, 1 g; saturated fat, 0 g; cholesterol, 0 mg; fiber, 9 g; sodium, 369 mg; percent of calories from fat, 5%.
2

KiwifruitStrawberry-Kiwi Eye Opener
4 cups low-fat vanilla yogurt2 cups sliced strawberries1 cup low-fat granola1 cup sliced kiwi
1. Divide yogurt among 4 bowls.2. Top each with 1/2 cup sliced strawberries.3. Sprinkle with 1/4 cup granola.4. Top with 1/4 cup sliced kiwi.5. Serve immediately, or refrigerate covered until served.
Serves 4.
This is an official 5 a Day recipe. Recipe from “Do Yourself a Flavor” by Graham Kerr.
Nutritional analysis per serving: calories, 351; carbohydrate, 66 g; protein, 11 g; fat, 5 g; saturated fat, 2 g; cholesterol, 11 mg; fiber, 5 g; sodium, 178 mg; percent of calories from fat, 13%.
2

Mixed Fruit Shortcake1 cup peeled, diced kiwifruit1 cup fresh, frozen, or canned blueberries1 cup fresh, or canned in juice peaches1 cup sliced strawberries2 tablespoons sugar4 small slices (1 ounce each) angel food or sponge cake2 tablespoons chopped fresh mint (optional)
1. Mix kiwifruit, blueberries, peaches, strawberries, and sugar.2. Let sit for 30 minutes to juice up.3. Place a cake slice on each of 4 plates and divide fruit topping among
them.4. Top with a scattering of mint.5. Serve immediately.
Serves 4.
This is an official 5 a Day recipe. Recipe from “Do Yourself a Flavor” by Graham Kerr.
Nutritional analysis per serving: calories, 211; carbohydrate, 50 g; protein, 1 g; fat, 1 g; saturated fat, 0 g; cholesterol, 0 mg; fiber, 7 g; sodium, 219 mg; percent of calories from fat, 4%.
2

Red
Grapefruit Salad2 whole red grapefruit (2 cups)1 cup fresh or canned orange segments1 cup peeled kiwi wedges1/4 cup chopped chives
1. Cut the red grapefruit in half.2. Remove the fruit from the shell whole by cutting around the outside of the
fruit with a spoon.3. Separate the segments and cut each in half. You should have 2 cups.4. Combine the red grapefruit with the orange segments and kiwi wedges.5. Spoon into the grapefruit shells and top with a crossed sprig of chives or a
chive flower.6. Refrigerate until serving.
Serves 4.
This is an official 5 a Day recipe. Recipe from “Do Yourself a Flavor” by Graham Kerr.
Nutritional analysis per serving: calories, 112; carbohydrate, 26 g; protein, 0 g; fat, 1 g; saturated fat, 0 g; cholesterol, 0 mg; fiber, 5 g; sodium, 2 mg; percent of calories from fat, 8%.
2

Green Machine Milkshake1 cup (about 3 kiwi) ripe kiwifruit, peeled and sliced1/2 cup 1% or less milk1 tablespoon fresh lemon juice2 large scoops (about 1 cup total) lime sherbet
1. Combine the kiwifruit pieces, milk, and lemon juice in a blender container. 2. Place lid on blender container and blend on high speed for 10 seconds.3. Add the lime sherbet and blend on low speed until thick and smooth.4. Pour into tall glasses and serve immediately.
Serves 2.
This is an official 5 a Day recipe.
Nutritional analysis per serving: calories, 240; carbohydrate, 49 g; protein, 5 g; fat, 3 g; saturated fat, 2 g; cholesterol, 7 mg; fiber, 4 g; sodium, 78 mg; percent of calories from fat, 12%.
2

MelonsWatermelon Soup
4 cups bright red watermelon pieces1 cup 100% orange juice2 tablespoons lime juice1 teaspoon lime zest or chopped fresh mint
1. Place the watermelon pieces in a processor or blender and whiz until smooth.
2. Combine in a bowl the 100% orange juice, lime juice, and lime zest (or mint).
3. Add the blended watermelon.4. Chill thoroughly and serve or keep cold in an insulated cup to eat later.
Serves 4.
This is an official 5 a Day recipe.
Nutritional analysis per serving: calories, 80; carbohydrate, 17 g; protein, 1 g; fat, 1 g; saturated fat, 0 g; cholesterol, 0 mg; fiber, 1 g; sodium, 3 mg; percent of calories from fat, 11%.
2

Cantaloupe Crush 1/2 cantaloupe 1 cup fat free milk1 1/2 cups icesweetener as needed
1. Cut cantaloupe flesh into small cubes.2. Blend all ingredients until smooth.3. Sweeten to taste.4. Serve immediately.
Serves 4.
This is an official 5 a Day recipe.
Nutritional analysis per serving: calories, 90; carbohydrate, 19 g; protein, 4 g; fat, 0 g; saturated fat, 0 g; cholesterol, 2 mg; fiber, 1 g; sodium, 74 mg; percent of calories from fat, 0%.
2

Chicken-Cantaloupe SaladThis is good for lunch or supper when it’s too hot to cook. The shredded cabbage is a nice change from just lettuce leaves—and it’s more nutritious! Serve with fresh rolls.
2 cups 1-inch chunks skinless cooked chicken, white meat only (9 ounces)2 cups cantaloupe balls or cubes2 large celery stalks, chopped3 green onions, finely chopped1 tablespoon sesame seeds (optional)1/8 teaspoon saltPepper, to taste2 cups shredded cabbage
Lemon Dressing1/2 cup fat free plain yogurt1 tablespoon lemon or lime juiceAbout 2 tablespoons skim or low-fat milk1 teaspoon sugar
1. Prepare dressing: Combine all ingredients in a small bowl, adding enough milk to make a thin dressing; set aside.
2. Combine chicken, cantaloupe, celery, onions and sesame seeds in a medium bowl.
3. Stir dressing into chicken mixture; season with salt and pepper. 4. Cover and refrigerate 30 minutes. 5. Arrange cabbage on 4 plates. 6. Mound salad in center of cabbage.
Makes 4 servings.
This is an official 5 a Day recipe. Recipe provided by Jeanette P. Egan.
Nutritional analysis per serving: calories, 201; carbohydrate, 15 g; protein, 25 g; fat, 5 g; saturated fat, 1 g; cholesterol, 58 mg; fiber, 2 g; sodium, 198 mg; percent of calories from fat, 22%.
2
Peach-Melon SalsaUse fresh or frozen peaches. The lime or lemon juice adds flavor and keeps the peaches from darkening.
2 cups sliced frozen peaches, thawed and drained1 cup diced cantaloupe or 4 canned apricot halves, diced1/4 cup diced onion2 tablespoons lime or lemon juice, or to taste1 tablespoon chopped fresh mint (optional)
1. Dice peaches; add to a large bowl. 2. Stir in cantaloupe, onion, lime juice and mint, if using. 3. Refrigerate 30 minutes to blend flavors.4. Serve chilled.
Makes about 6 servings.
This is an official 5 a Day recipe. Recipe provided by Jeanette P. Egan.
Nutritional analysis per serving: calories, 33; carbohydrate, 8 g; protein, 1 g; fat, 0 g; saturated fat, 0 g; cholesterol, 0 mg; fiber, 1 g; sodium, 6 mg; percent of calories from fat, 4%.
2

OnionsCarmelized Onions
1 teaspoon vegetable oil1 pound onions, peeled and sliced
1. Heat the oil in a heavy skillet on medium heat.2. Add onions and cook, strirring occasionally, until soft and browned, about
20 minutes.3. Serve warm.
Serve these onions as a side dish or as an addition to salad, spaghetti sauce, or vegetables and rice.
Serves 4.
This is an official 5 a Day recipe. Recipe from “Do Yourself a Flavor” by Graham Kerr.
Nutritional analysis per serving: calories, 53; carbohydrate, 10 g; protein, 1 g; fat, 1 g; saturated fat, 0 g; cholesterol, 0 mg; fiber, 2 g; sodium, 3 mg; percent of calories from fat, 17%.
2

Mexican Stuffed Peppers4 red bell peppers1 teaspoon vegetable oil1 cup chopped onions3 cloves garlic, peeled and chopped1 chopped jalapeño or chipotle chile (remove seeds if you like it mild)1 tablespoon chili powder1/2 teaspoon cumin1 15 1/4 ounce can diced tomatoes in juice1 cup cooked white rice1 cup fresh, frozen, or canned corn1 cup cooked or canned pinto beans
1. Preheat oven to 350F.2. Cut the tops off the peppers, remove seeds and white membrane, and set
aside.3. Heat the oil in a skillet and cook the onion until it starts to wilt, about 2
minutes.4. Add the garlic, jalapeño, chili powder, and cumin.5. Fry for 2 more minutes.6. Stir in the tomatoes, rice, corn, and beans.7. Cook until the liquid disappears and the stuffing holds together.8. Spoon into the prepared peppers and set into a baking dish.9. Bake for 1 hour or until the peppers are tender.
Serves 4.
This is an official 5 a Day recipe. Recipe from “Do Yourself a Flavor” by Graham Kerr.
Nutritional analysis per serving: calories, 231; carbohydrate, 47 g; protein, 4 g; fat, 3 g; saturated fat, 0 g; cholesterol, 0 mg; fiber, 8 g; sodium, 387 mg; percent of calories from fat, 12%.
2

Cucumber & Onion SaladThis salad goes well with almost everything from casseroles to hamburgers.
3/4 cup cider vinegar1/4 cup water1 tablespoon sugar1/2 teaspoon salt1 large cucumber, peeled and thinly sliced1 large onion, thinly sliced1/2 cup lightly packed cilantro leaves
1. Combine vinegar, water, sugar and salt in a glass bowl; stir until sugar and salt dissolve.
2. Stir in cucumber, onion and cilantro. 3. Cover and refrigerate at least 30 minutes or overnight. 4. To serve, lift out cucumber, onion and cilantro with a slotted spoon and
place evenly into 4 bowls.
Makes 4 servings.
This is an official 5 a Day recipe. Recipe provided by Jeanette P. Egan.
Nutritional analysis per serving: calories, 42; carbohydrate, 11 g; protein, 1 g; fat, 0 g; saturated fat, 0 g; cholesterol, 0 mg; fiber, 1 g; sodium 301 mg; percent of calories from fat, 4%.
2

Black-eyed Peas, Tomatoes and OnionActually these “peas,” are beans and like other dried beans, they are even better when combined with the flavors of onion and garlic. In the American South, they are eaten on New Year’s Day to bring good luck throughout the year.
1 tablespoon vegetable oil1/2 cup onion, chopped1 large garlic clove, minced2 tomatoes, chopped1 can (about 15-oz.) black-eyed peas, undrained1/4 cup packed cilantro leaves (optional)
1. Combine oil, onion and garlic in a medium saucepan. 2. Cook over medium heat, stirring occasionally, until onion is softened. 3. Stir in tomatoes and black-eyed peas. 4. Cook over low heat, stirring occasionally, about 10 minutes or until onion
is tender. 5. Stir in cilantro, if using.6. Serve hot.
Makes 4 servings.
This is an official 5 a Day recipe. Recipe provided by Jeanette P. Egan.
Nutritional analysis per serving: calories, 176; carbohydrate, 27 g; protein, 9 g; fat, 4 g; saturated fat, 1 g; cholesterol, 0 mg; fiber, 8 g; sodium, 226 mg; percent of calories from fat, 22%.
2

Oranges
Icy Oranges4 medium, thin-skinned oranges
1. Cut each orange into 6 wedges.2. Peel each wedge halfway down one side; tuck peel under.3. Place on baking sheet; freeze 1 hour or until partially frozen.
Serves 4.
This is an official 5 a Day recipe.
Nutritional analysis per serving: calories, 65; carbohydrate, 15 g; protein, 1 g; fat, 0 g; saturated fat, 0 g; cholesterol, 0 mg; fiber, 3 g; sodium, 0 mg; percent of calories from fat, 3%.
2

Winter Fruit Salad1 cup sliced canned peaches in juice, drained1 cup sliced canned pears in juice, drained1 cup pineapple chunks in juice, drained1 cup fresh orange sections1 cup diced fresh apple1/2 cup orange juice1 teaspoon honey*1 tablespoon lime juice
Serves 6.
This is an official 5 a Day recipe. Recipe from “Do Yourself a Flavor” by Graham Kerr.
* Honey should not be fed to infants under 1 year of age.
Nutritional analysis per serving: calories, 115; carbohydrate, 27 g; protein, 2 g; fat, 0 g; saturated fat, 0 g; cholesterol, 0 mg; fiber, 2 g; sodium, 0 mg; percent of calories from fat, 12%.
2

Orange & Beet SaladBeets and oranges are a classic combination. Canned mandarin orange segments could be substituted for the fresh oranges. As is usually the case, freshly cooked beets taste better than the canned ones.
3 medium oranges1 can (about 1-lb.) julienned or sliced beets, well drained, or cooked fresh beets, shredded or sliced (see below)1 tablespoon vegetable oil1 teaspoon sugar1/8 teaspoon saltPepper, to taste
1. Peel oranges, holding over a medium bowl to catch the juice. 2. Remove bitter white layer. 3. Cut oranges crosswise into 1/4-inch slices and remove any seeds; set
aside. 4. Squeeze juice from orange membranes into bowl. 5. Measure 1/4 cup of the orange juice; save any remaining juice for another
use. 6. Stir in oil and sugar. 7. Season with salt and pepper. 8. Stir in beets. 9. Cover and refrigerate orange slices and beets separately about 30
minutes or until chilled. 10. To serve, mound beets in center of a serving plate; overlap orange
slices around beets.
Makes 6 servings.
This is an official 5 a Day recipe. Recipe provided by Jeanette P. Egan.
Nutritional analysis per serving: calories, 77; carbohydrate, 14 g; protein, 1 g; fat, 2 g; saturated fat, 0 g; cholesterol, 0 mg; fiber, 3 g; sodium, 196 mg; percent of calories from fat, 29%.
2

Peach-Orange SmoothieNo time for a hot breakfast? This quick drink supplies both fruit and milk. There’s no need to thaw the peaches; they will help thicken and chill the drink. The dried milk adds calcium—important for healthy bones.
1 cup sliced frozen peaches2 cups fresh or canned orange juice, chilled2/3 cup dried milk powder
1. Add all ingredients to blender container. 2. Place lid on blender container and blend at high speed until smooth. 3. Pour into 2 glasses and serve immediately.
Makes 2 servings.
This is an official 5 a Day recipe. Recipe provided by Jeanette P. Egan.
Nutritional analysis per serving: calories, 215; carbohydrate, 44 g; protein, 10 g; fat, 1 g; saturated fat, 0 g; cholesterol, 4 mg; fiber, 2 g; sodium, 133 mg; percent of calories from fat, 2%.
2

Summer SquashBaby Summer Squash
1 pound mixed baby squash1/2 teaspoon vegetable oil1 teaspoon chopped garlic2 tablespoons chopped fresh parsley or 2 teaspoons of dried parsley1/4 teaspoon salt (optional)1/4 teaspoon pepper (optional)
1. Wash and trim off the stem end of the squash and dry on paper towels.2. Cut the larger ones in half.3. Heat the oil in a skillet over medium-high heat.4. Saute the squash until tender, 8 to 10 minutes.5. Stir in the garlic, parsley, salt, and pepper (optional). 6. Cook 1 minute longer.7. Serve hot.
Serves 4.
This is an official 5 a Day recipe. Recipe from “Do Yourself a Flavor” by Graham Kerr.
Nutritional analysis per serving: calories, 30; carbohydrate, 4 g; protein, 1 g; fat, 1 g; saturated fat, 0 g; cholesterol, 0 mg; fiber, 1 g; sodium, 144 mg; percent of calories from fat, 30%.
2

Super Charged Sandwich2 slices whole wheat bread2 teaspoons Dijon mustard1 ounce low-fat low-sodium cheddar cheese2 slices tomato4 slices cucumber, zucchini, or crookneck squash1/2 cup red bell pepper strips1 thin slice onion (optional)4 leaves fresh spinach or 2 romaine leaves
1. Open the bread slices on a plate.2. Spread both sides with mustard.3. Lay the cheese, tomato, cucumber, bell pepper, onion, and lettuce on one
side and top with the second slice of bread.4. Cut in half on the diagonal and enjoy!
Serves 1.
This is an official 5 a Day recipe. Recipe from “Do Yourself a Flavor” by Graham Kerr.
Nutritional analysis per serving: calories, 249; carbohydrate, 36 g; protein, 13 g; fat, 6 g; saturated fat, 2 g; cholesterol, 0 mg; fiber, 7 g; sodium, 360 mg; percent of calories from fat, 22%.
2

Sumptuous Summer Salad1 cup chopped zucchini1 cup fresh, canned, or frozen corn kernels1 cup chopped, seeded tomatoes1 cup fresh or frozen peas1/4 cup sliced green onions2 cups cooked rice, quinoa, bulgur, or millet1/4 cup chopped fresh basil or 1 tablespoon dried basil1/3 cup low-fat vinaigrette salad dressing6 large butter or leaf lettuce leaves
1. Combine zucchini, corn, tomatoes, peas, onions, rice, basil, and salad dressing in a large bowl.
2. Mix well and let sit for at least 1/2 hour.3. Serve chilled on lettuce leaves with a good slice of crusty whole wheat
bread.
Serves 6.
This is an official 5 a Day recipe. Recipe from “Do Yourself a Flavor” by Graham Kerr.
Nutritional analysis per serving: calories, 164; carbohydrate, 26 g; protein, 4 g; fat, 5 g; saturated fat, 1 g; cholesterol, 0 mg; fiber, 4 g; sodium, 118 mg; percent of calories from fat, 27%.
2

Kid
Friendly Vegetable Spaghetti8 ounces dry spaghetti1 teaspoon vegetable oil2 cloves garlic, chopped1 cup sliced fresh or 1 7-ounce can sliced low-sodium mushrooms, drained1 cup fresh or frozen green zucchini, cut into strips1 cup fresh or frozen yellow squash, cut into strips1 15-ounce can no salt added tomato sauce1 teaspoon dried basil1 teaspoon dried oregano2 tablespoons grated Parmesan cheese
1. Cook the spaghetti according to package directions.2. Drain and keep warm in a colander over hot water.3. Heat the oil in a high-sided skillet over medium-high heat.4. Add the garlic, mushrooms, zucchini, and squash and cook 3 minutes.5. Pour in the tomato sauce, basil, and oregano and bring to a boil.6. Reduce heat and simmer 5 minutes.7. Serve over the hot spaghetti and top with Parmesan cheese.
Serves 4.
This is an official 5 a Day recipe. Recipe from “Do Yourself a Flavor” by Graham Kerr.
Nutritional analysis per serving: calories, 296; carbohydrate, 55 g; protein, 10 g; fat, 4 g; saturated fat, 2 g; cholesterol, 0 mg; fiber, 5 g; sodium, 378 mg; percent of calories from fat, 12%.
2

TomatoesThe Comfort of Tomatoes and Toast
4 medium-sized tomatoes1/2 teaspoon salt1/2 teaspoon pepper2 tablespoons Parmesan cheese4 slices dry toasted whole wheat bread
1. Preheat broiler.2. Slice tomatoes in half and place on tray.3. Season with salt and pepper and broil 4 inches away from the heat for
about 5 minutes.4. Serve on top of toast slices.5. Sprinkle with Parmesan cheese.
Serves 4.
This is an official 5 a Day recipe. Recipe from “Do Yourself a Flavor” by Graham Kerr.
Nutritional analysis per serving: calories, 110; carbohydrate, 20 g; protein, 1 g; fat, 3 g; saturated fat, 1 g; cholesterol, 2 mg; fiber, 3 g; sodium, 452 mg; percent of calories from fat, 26%.
2

Broiled Tomatoes with Basil4 medium tomatoes, cut in half1/4 teaspoon salt1/2 teaspoon black pepper2 teaspoons dried basil or 1 tablespoon fresh basil, choppedvegetable oil cooking spray
1. Preheat broiler.2. Place tomatoes on baking sheet and season with salt and pepper.3. Sprinkle with basil and mist with vegetable oil spray.4. Put under the broiler for about 6 minutes.5. Serve immediately.
Serves 4.
This is an official 5 a Day recipe. Recipe from “Do Yourself a Flavor” by Graham Kerr.
Nutritional analysis per serving: calories, 27; carbohydrate, 5 g; protein, 1 g; fat, 0.5 g; saturated fat, 0 g; cholesterol, 0 mg; fiber, 1 g; sodium, 144 mg; percent of calories from fat, 30%.
2

Cucumber Salad with Tomatoes2 cups diced cucumber1 cup seeded and diced tomatoes1/4 cup chopped sweet onions2 cups cooked couscous or rice2 teaspoons fresh chopped dill weed or 1/2 teaspoon dried dill weed1/2 cup low-fat vinaigrette salad dressing
1. Toss together the cucumbers, tomatoes, onions, couscous or rice, dill, and salad dressing.
2. Chill for 1 hour.3. Serve cold.
Serves 4.
This is an official 5 a Day recipe. Recipe from “Do Yourself a Flavor” by Graham Kerr.
Nutritional analysis per serving: calories, 153; carbohydrate, 24 g; protein, 3 g; fat, 5 g; saturated fat, 1 g; cholesterol, 0 mg; fiber, 2 g; sodium, 107 mg; percent of calories from fat, 29%.
2

Black Beans with Corn and Tomatoes1 15-ounce can low-sodium, no fat added black beans1 cup frozen corn, thawed1 cup cut tomatoes, fresh or canned1 clove garlic, pureed or roasted1 teaspoon fresh parsley, chopped or 1/2 teaspoon dried parsley1/8 teaspoon cayenne pepper or more to taste1/2 teaspoon chili powder
1. Drain and rinse beans.2. In a bowl, combine beans, corn, tomatoes, and garlic.3. Add parsley, pepper, and chili powder.4. Combine and serve.
Serves 4.
This is an official 5 a Day recipe. Recipe from “Do Yourself a Flavor” by Graham Kerr.
Nutritional analysis per serving: calories, 185; carbohydrate, 35 g; protein, 9 g; fat, 1 g; saturated fat, 0 g; cholesterol, 0 mg; fiber, 9 g; sodium, 254 mg; percent of calories from fat, 5%.
2

TurnipsRosemary Roasted Vegetables
4 cups root vegetables (such as potatoes, carrots, parsnips, sweet potatoes, or turnips), washed, peeled, and cut into slices or bite-sized chunks.3 sprigs fresh rosemary or 1 tablespoon dried rosemary vegetable oil cooking spray
1. Preheat oven to 350F.2. Place vegetables in a small roasting pan.3. Spray lightly with vegetable oil cooking spray.4. Drape rosemary sprigs or sprinkle dried rosemary over vegetables and
roast in oven for 25 minutes or until tender.
Serves 4.
This is an official 5 a Day recipe. Recipe from “Do Yourself a Flavor” by Graham Kerr.
Nutritional analysis per serving: calories, 166; carbohydrate, 32 g; protein, 1 g; fat, 4 g; saturated fat, 1 g; cholesterol, 0 mg; fiber, 3 g; sodium, 6 mg; percent of calories from fat, 22%.
2

Double-the-Serving Stew2 tablespoons all-purpose flour3/4 teaspoon salt1/2 teaspoon ground black pepper1 pound lean beef stew meat, cut into 1-inch cubes1 tablespoon vegetable oil3 cups low-fat, low-sodium beef broth, plus more as needed2 medium onions4 stalks celery2 medium potatoes2 medium turnips4 carrots2 cloves garlic, chopped1/2 teaspoon dried thyme1/4 cup fresh parsley, chopped (optional)
1. In a plastic bag, combine flour, salt, and pepper.2. Add meat and shake to coat.3. Heat oil in large saucepan or Dutch oven.4. Add meat and brown.5. Prepare the vegetables by cutting one onion, two celery stalks, one
potato, one turnip, and two carrots into large chunks.6. Add the vegetables to the meat along with the garlic and thyme.7. Stir in broth and bring to a boil.8. Reduce heat and cover.9. Simmer for about 40 minutes or until meat is tender.10. While meat is cooking, prepare remaining vegetables by cutting
the onion, celery, potato, turnip, and carrot into 1-inch cubes. 11. Remove simmered vegetables (onion, celery, potatoes, turnips,
carrots) and whiz in a blender until smooth.12. Return vegetable puree to pot.13. Thin with beef broth or water, if necessary.14. To pot, add remaining uncooked onions, celery, potato, turnips,
and carrots.15. Bring to simmer and cover.16. Cook for an additional 30 minutes or until vegetables are tender.17. Add parsley just before serving.18. Serve hot. Serves 6.
2

This is an
official 5 a Day recipe. Recipe from “Do Yourself a Flavor” by Graham Kerr.
Nutritional analysis per serving: calories, 303; carbohydrate, 40 g; protein, 29 g; fat, 3 g; saturated fat, 1 g; cholesterol, 40 mg; fiber, 7 g; sodium, 402 mg; percent of calories from fat, 9%.
2

Roasted Turnips6 medium turnips, peeled and cut into quarters.Vegetable oil cooking spray
1. Preheat the oven to 375F.2. Set the turnip wedges in a baking pan and coat lightly with vegetable oil
cooking spray.3. Roast for 30 minutes or until soft.4. Season with a little salt and pepper.5. Serve warm as a vegetable side dish.
You may puree these and use as a thickener for a soup or a stew.
Serves 4.
This is an official 5 a Day recipe. Recipe from “Do Yourself a Flavor” by Graham Kerr.
Nutritional analysis per serving: calories, 33; carbohydrate, 8 g; protein, 1 g; fat, 0 g; saturated fat, 0 g; cholesterol, 0 mg; fiber, 2 g; sodium, 78 mg; percent of calories from fat, 0%.
2

Turnip Soup4 medium turnips1 small onion1/2 teaspoon freshly grated gingerroot or 1/8 teaspoon dried ground ginger
1. Peel the turnips and onion and cut into chunks.2. Place into pot and cover with water and boil until soft3. Drain turnips and place into blender container.4. Place lid on blender container and puree.5. Place turnip puree back into pot and add water to make soup desired
thickness.6. Add grated gingerroot and stir.7. Reheat and serve warm.
Serves 4.
This is an official 5 a Day recipe. Recipe from “Do Yourself a Flavor” by Graham Kerr.
Nutritional analysis per serving: calories, 40; carbohydrate, 9 g; protein, 1 g; fat, 0 g; saturated fat, 0 g; cholesterol, 0 mg; fiber, 2 g; sodium, 82 mg; percent of calories from fat, 0%.
2

Winter SquashRoasted Butternut Squash
1 butternut squash, about 1 1/2 to 2 poundsvegetable oil cooking spray1/8 teaspoon allspice1/8 teaspoon salt1/4 teaspoon pepper
1. Preheat oven to 350F.2. Cut the squash into four wedges.3. Remove the seeds.4. Mist each wedge with the cooking spray and dust with allspice, salt, and
pepper.5. Bake for 40 minutes until soft.6. Serve warm.
Serves 4.
This is an official 5 a Day recipe. Recipe from “Do Yourself a Flavor” by Graham Kerr.
Nutritional analysis per serving: calories, 85; carbohydrate, 20 g; protein, 1 g; fat, 1 g; saturated fat, 0 g; cholesterol, 0 mg; fiber, 5 g; sodium, 79 mg; percent of calories from fat, 11%.
2

Baked Winter Squash4 serving-size pieces winter squash (2 acorns, 1 butternut, 2 delicatas, or 2 pounds larger squash like hubbard)vegetable oil cooking spray1/4 teaspoon salt1/4 teaspoon pepper1 teaspoon dried tarragon or thyme
1. Preheat the oven to 350F.2. Cut the acorns, delicates, or butternut squash in half and scoop out the
seeds and pulp.3. Leave the acorns or delicates in halves.4. Cut the butternut squash into quarters and cut the larger squash into
serving-sized pieces.5. Lay the squash pieces on a baking sheet.6. Spray lightly with vegetable oil spray.7. Season with salt and pepper and scatter the tarragon or thyme over the
top.8. Bake for about an hour, depending on the thickness of the squash, or until
soft when pierced with a fork.9. Serve warm.
Serves 4.
This is an official 5 a Day recipe. Recipe from “Do Yourself a Flavor” by Graham Kerr.
Nutritional analysis per serving: calories, 88; carbohydrate, 19 g; protein, 1 g; fat, 1 g; saturated fat, 0 g; cholesterol, 0 mg; fiber, 4 g; sodium, 149 mg; percent of calories from fat, 10%.
2

Spaghetti Squash with Parsley and Garlic 1 spaghetti squash (4 pounds) 1 tablespoon margarine 3 cloves garlic, minced 1 cup coarsely chopped fresh parsley or grated zucchini1 1/4 cup low-fat plain yogurt freshly ground pepper
Boiled method:1. In large pot of boiling water, cook whole spaghetti squash until tender
when pierced with skewer, about 30 minutes (some varieties of squash may take longer).
2. In small skillet, melt margarine over medium low heat; add garlic and cook until tender, about 1 minute.
3. Drain squash and cut in half crosswise.4. Scoop out seeds.5. Run tines of fork lengthwise over squash to loosen spaghetti-like strands;
scoop out strands into baking dish or serving bowl.6. Add garlic mixture, parsley or zucchini, yogurt, and pepper to taste; toss
to mix.7. Serve warm.
Microwave method:1. Pierce spaghetti squash in 10 to 15 places with a fork.2. Place in microwave safe dish and microwave at HIGH (100%) power for 5
to 7 minutes per pound or until tender when pierced with a fork.3. Turn over halfway through cooking.4. Let stand 5 minutes.5. Follow boiled method directions 3 through 6.
Steamer method:1. Cut squash in half crosswise.2. Scoop out seeds.3. Steam for 15 to 20 minutes or until tender.4. Follow boiled method directions 5 through 7.
Serves 8.
2

This is an
official 5 a Day recipe.
Nutritional analysis per serving: calories, 102; carbohydrate, 18 g; protein, 3 g; fat, 2 g; saturated fat, 0 g; cholesterol, 0 mg; fiber, 6 g; sodium, 23 mg; percent of calories from fat, 17%.
2

Spaghetti Squash with Tomato SauceOne three-pound spaghetti will make about 6 cups lightly packed squash when the strands are separated with a fork. Extra squash can be refrigerated up to 3 days or frozen. Use leftover squash in casseroles or soups.
1 tablespoon vegetable oil1 medium onion, thinly sliced1 large garlic clove, minced2 cups frozen or canned green peas or green beans1 cup fat free reduced-sodium chicken broth 1 can (about 15-oz.) chopped tomatoes or 2 cups chopped fresh tomatoes1 teaspoon dried oregano (optional)1/8 teaspoon saltPepper, to tasteHot pepper sauce, to taste4 cups cooked spaghetti squash Grated Parmesan or other cheese (optional)
1. Heat oil in a large skillet over medium heat. 2. Add onion and garlic. 3. Cook, stirring occasionally, until onion is softened, about 5 minutes. 4. Add peas, broth, tomatoes and oregano, if using. 5. Season with salt, pepper and hot pepper sauce. 6. Bring to a boil. 7. Add squash; toss to combine and heat through. 8. Serve warm with cheese, if desired.
Makes 4 servings.
This is an official 5 a Day recipe. Recipe from Jeanette P. Egan.
Nutritional analysis per serving: calories, 162; carbohydrate, 27 g; protein, 7 g; fat, 5 g; saturated fat, 1 g; cholesterol, 0 mg; fiber, 7 g; sodium, 435 mg; percent of calories from fat, 25%.
2

Tools and EquipmentEquipment for each food demonstration will vary depending on the recipes and the type of demonstration given. Consider the following questions when preparing for a food demonstration:
What preparation equipment is required for each recipe? Which pieces of measuring equipment are needed? Check
eachingredient in each recipe to determine this. Ensure allnecessary equipment is included in the food demonstration
kit. In what serving dishes will the final products be displayed? Is there extra space for decorations or props? How many disposable serving plates and utensils are needed
forthe audience to taste recipe samples? Ensure proper
quantities are included in the food demonstration equipment.
Will equipment be needed for more than one recipe? If so, besure that washing facilities are available, or bring multiple pieces of that equipment.
To keep food demonstration equipment costs down, avoid making impulse purchases. Shop around to find the right size and quality of equipment. You may consider a purchase at discount stores or dollar stores. Look for good quality secondhand items at garage sales. Ensure that the equipment purchased is safe, of good quality, and easy to use. In general, standard sized items usually are the most appropriate for use in food demonstrations.
A checklist of items that may be helpful in a food demonstration box is given on the next pages. Keeping these items all together in a large container will help to facilitate the preparation for each food demonstration. Consider using an ice chest with wheels or a rolling luggage rack to help transport the food demonstration equipment.
2

Equipment Checklist:____ Apron (with 5 a Day logo) ____Strainer____ Hair Cover (hat, hairnet) ____ Colander_____ Disposable Gloves ____ Mixing Bowls_____ Recipes ____ Measuring Spoons
____ Measuring Cups (dry and liquid)
_____ Cutting Board (2)_____ Chef Knife ____ Vegetable Steamer_____ Paring Knife ____ Baking Pan_____ Masher ____ Baking Sheet_____ Grater ____ Pots and Pans _____ Potato Peeler (non-stick)
____ Skillet____ Dutch Oven
_____ Spatula ____ 1 Quart Pan_____ Wire Whisk ____ 2 Quart Pan_____ Ladle ____ 3 Quart Pan_____ Rubber Scrapers ____ Potholders _____ Wooden Spoons ____ Thermometer, _____ Slotted Spoon Oven
____ Thermometer, Meat
_____ Tongs ____ Cooling Rack_____ Vegetable Brush
____ Jar Opener_____ Soap and Washcloth (moist towelettes) ____ Can Opener with_____ Dishtowel and Dishcloth Bottle Opener_____ Paper Towels_____ Scrub Pad ____ Foil_____ Dish Detergent (in packets) ____ Saran Wrap_____ Plastic Dishpans (2) ____ Vegetable Spray
____ Dial Timer_____ Serving Platters and Bowls ____ Spice Kit_____ Table Cloths ____ Salt / Baking Soda_____ Serving Equipment (Spoons, Forks)
2

____ Folding Luggage _____ Place Mats Rack_____ Place Setting ____ Ice Chest with
Wheels_____ Plastic Spoons_____ Plastic Knives _____ Plastic Forks_____ Toothpicks_____ Sample Cups_____ Paper Napkins
2

Evaluations
Evaluations are a valuable tool for refining teaching techniques, class structure, and content. Evaluations should be short (5-6 questions), concise, and direct. Below is a sample evaluation that can be used in most classroom settings.
Please take a few moments to answer the following questions.Circle response.
1. Please give this class an overall rating.
Excellent Good Fair Poor
2. Please give the instructor an overall rating.
Excellent Good Fair Poor
3. What did you like best about the class?
_______________________________________________________
4. What did you like least about the class?
_______________________________________________________
5. Would you consider taking another cooking class in the future?
Yes No Don’t know
Please add any other comments you wish to make:
_______________________________________________________
_______________________________________________________
THANK YOU FOR COMPLETING THIS EVALUATION!
2

Bibliography and Recommended Resources and Literature
Cornell Cooperative Extension. Farmers Market Fruits and Vegetables Guide.
Denny R, Ingram, C. The Complete Encyclopedia of Vegetables and Vegetarian Cooking. New York, New York. Anness Publishing Limited; 1997.
The Educational Foundation of the National Restaurant Association. Applied Foodservice Sanitation: A Certification Coursebook, 4th ed; 1995.
4-H Food Presentations. Penn State College of Agricultural Sciences Cooperative Extension. The Pennsylvania State University; 1994.
4-H Food Presentations. West Virginia University Extension Service. West Virginia University; 1997.
Guidelines and Quick Ideas for Effective Food Demonstrations Using Fruits and Vegetables. Produce for Better Health Foundation in Cooperation with the National Cancer Institute. October 1991.
Hampl JS, Betts NM, Benes BA. The ‘age+5’ rule: Comparisons of dietary fiber intake among 4- to 10-year-old children. J Am Diet Assoc. 1998; 98:1418-1423.
Hart PH, Salomon SB. Mastering the Cooking Demo for Dietitians; 1999.
National Restaurant Association. ServSafe Essentials. National Restaurant Association Educational Foundation; 1999.
The Ohio State University Extension. Human Nutrition and Food Management. Freezing meat, poultry and game. Available at: http://ohioline.osu.edu/hyg-fact/5000/5334.html. Accessed 1/2/02.
Produce For Better Health Foundation. 5 A Day Storage & Handling Tips. Publication #ORG101-01.
The Packer’s 2001 Availability and Merchandising Guide. Vol. CVIII No. 53.
2

The
Pennsylvania State University. College of Agricultural Sciences. Cooperative Extension. The Portable Kitchen Guide; 1998.
Quick Ideas for Effective 5 a Day Food/Taste Testing Demonstrations Using Fruits and Vegetables. Available at: http://dccps.nci.nih.gov/5aday/tips/QUICKTPS.HTML. Accessed 12/04/01.
Texas Agricultural Extension Service. The Texas A&M University System. Freezing poultry for home use; 1994.
Try Foods International, Inc. Shopper’s Guide to Fresh Produce: More Than 300 Items From Around the World; 1999.
University of Connecticut Cooperative Extension System and Hispanic Health Council, Inc. From the Farm to the Table: Delicious Recipes Prepared With Locally Grown Vegetables; 1996.
United States Department of Agriculture. Food Safety and Inspection Service. Cooking for Groups: A Volunteer’s Guide to Food Safety. March 2001.
University of California at Davis. Freezing seafood at home. August 1990. Available at: http://seafood.ucdavis.edu/Pubs/freezing.htm. Accessed 1/2/02.
University of Florida Cooperative Extension Service. Institute of Food an Agricultural Sciences, University of Florida. Storage time for home frozen foods. April 1998. Available at: http://edis.ifas.ufl.edu/BODY_HE485. Accessed 1/2/02.
2

Appendix AFreezer Storage Guidelines
Vegetables: 6 – 12 monthsFruits (not citrus): 6 – 12 monthsCitrus fruits: up to 6 monthsSoups and stews: 3 – 4 monthsBeef: 6 – 12 monthsGround beef: 3 – 4 monthsPork: 3 – 6 monthsGround pork: 1 – 3 monthsLeftover cooked meat: 2 – 3 months Lean fish: 6 – 9 monthsFatty fish and shellfish: 3 – 4 months
For best flavor, use the minimum time guidelines. Foods stored longer are still good, but taste and texture quality will decrease.
2

Appendix BBelow is a list of foods and the required minimum cooking temperature to kill bacteria in these foods. These temperatures must be reached to minimize the potential for foodborne illness. Be sure to use a properly calibrated thermometer to measure the internal temperature of the food. For more information on safe food temperatures, please refer to the USDA’s Fight BAC!™ program, located online at www.fightbac.org, or call the USDA’s Meat and Poultry Hotline at 1-800-535-4555 (TTY: 1-800-256-7072).
Safe Food TemperaturesFish 145F (62.8C) Beef roasts (medium) 160F (71.1C) Ground or flaked meats 160F (71.1C) Pork, ham, bacon 160F (71.1C) Egg dishes 160F (71.1C)Stuffed meats 165F (73.9C)(meat and stuffing) Ground poultry 165F (73.9C)Casseroles 165F (73.9C) Reheated foods 165F (62.8C) Microwaved foods 165F (62.8C); let stand for 1/3 of the original
cooking time, or as recipe directsPoultry (breasts) 170F (76.7C)Poultry (whole) 180F (82.2C)
2