#4065 (cpe-2 plus) & #4069 (cpe-2 plus starter kit) the processor when unpacking your new cpe-2...
TRANSCRIPT

Instructions For The JOBO CPE-2 Plus Processor #4065 (CPE-2 Plus) & #4069 (CPE-2 Plus Starter Kit)
Section 1
Note: This is a very detailed and profusely illustrated web page. It will take a little time to load it into your browser. Get a cup of coffee and stretch while it is downloading. It is worth the wait!
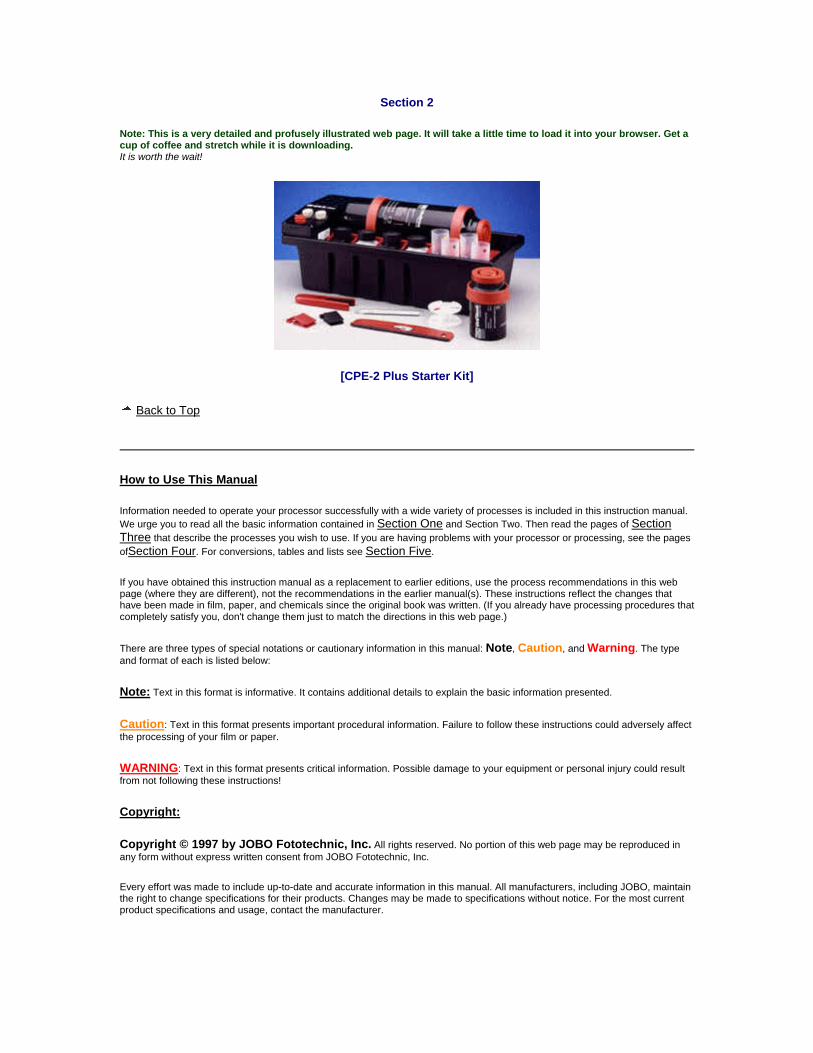
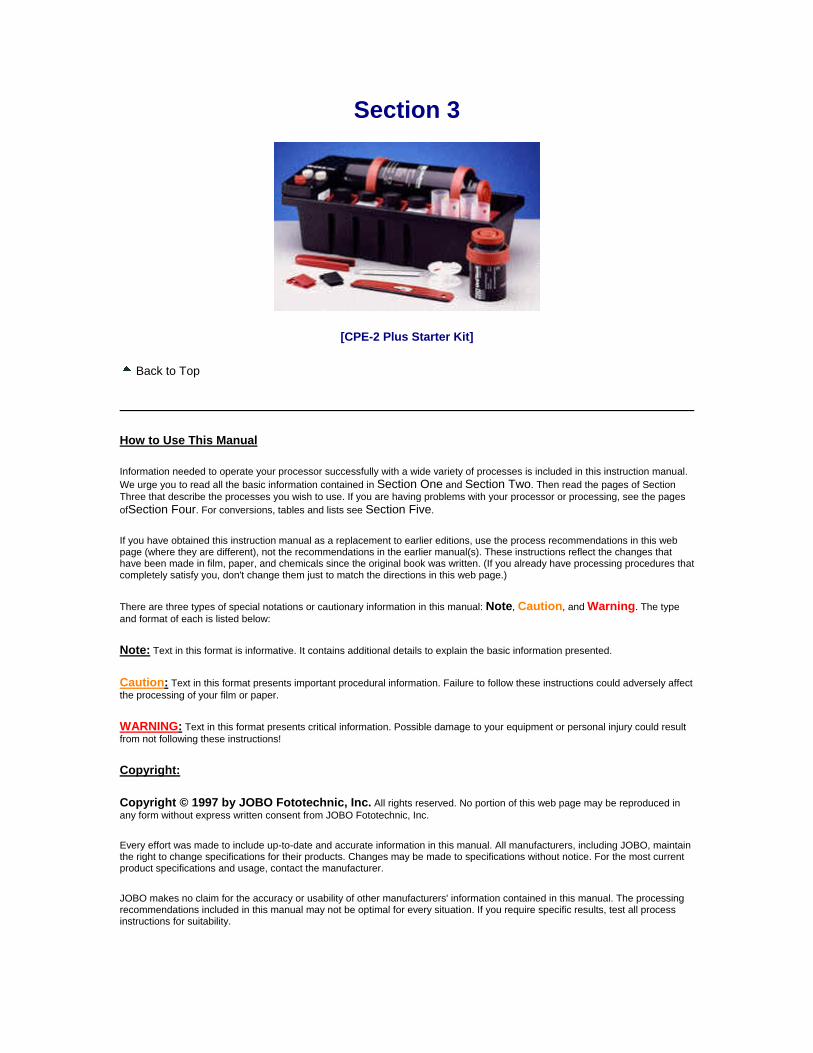
[CPE-2 Plus Starter Kit]
Back to Top
How to Use This Manual
Information needed to operate your processor successfully with a wide variety of processes is included in this instruction manual. We urge you to read all the basic information contained in Section One and Section Two. Then read the pages of Section Three that describe the processes you wish to use. If you are having problems with your processor or processing, see the pages ofSection Four. For conversions, tables and lists see Section Five.
If you have obtained this instruction manual as a replacement to earlier editions, use the process recommendations in this web page (where they are different), not the recommendations in the earlier manual(s). These instructions reflect the changes that have been made in film, paper, and chemicals since the original book was written. (If you already have processing procedures that completely satisfy you, don't change them just to match the directions in this web page.)
There are three types of special notations or cautionary information in this manual: Note, Caution, and Warning. The type and format of each is listed below:
Note: Text in this format is informative. It contains additional details to explain the basic information presented.
Caution: Text in this format presents important procedural information. Failure to follow these instructions could adversely affect the processing of your film or paper.
WARNING: Text in this format presents critical information. Possible damage to your equipment or personal injury could result from not following these instructions!
Copyright:
Copyright © 1997 by JOBO Fototechnic, Inc. All rights reserved. No portion of this web page may be reproduced in any form without express written consent from JOBO Fototechnic, Inc.

Every effort was made to include up-to-date and accurate information in this manual. All manufacturers, including JOBO, maintain the right to change specifications for their products. Changes may be made to specifications without notice. For the most current product specifications and usage, contact the manufacturer.
JOBO makes no claim for the accuracy or usability of other manufacturers' information contained in this manual. The processing recommendations included in this manual may not be optimal for every situation. If you require specific results, test all process instructions for suitability.
JOBO is not liable for any damages, direct or consequential, occurring from the use or misuse of information contained in this manual.
Credits:
Author: Damon Dean
JOBO Contributors: Ken Owen, Chris Mishler, Sam Proud, Paul Rowe
Manual part number 66051. Revision 06/97.
[CPE-2 Plus]
Back to Top
Index:
Important Safeguards
Section 1: Introduction
Introduction to JOBO Setting Up
o Unpacking the Processor o Installation Location o Installing the Processor
The Processor o CPE-2 Plus Processor Illustrations o Close-up Processor Illustrations o Roller Block Assembly Settings for Tanks and Drums o Processor Description
Cleaning the Processor
Processor Maintenance and Tips
Section 2: General Processing Instructions
Section 3: Specific Processes
Section 4: Troubleshooting
Section 5: Appendices
Back to Top
Introduction to JOBO
Since the mid-1920's, JOBO AG has been a manufacturer and supplier of photographic darkroom equipment. While the early years were confined to Germany and Europe, by the 1960's we had become international in scope. In 1981, JOBO Fototechnic Inc. began distribution in the United States.
The CPE-2 Plus or CPE-2 Plus Starter Kit processor you have purchased is part of the JOBO line of manual processors. Your processor is capable of processing virtually all film and print processes. This processor provides the temperature and agitation consistency vital to repeatable results.
This manual will inform you about the processor, accessories, setup, and processes you may use.
Our approach has been to assume the owner has very little photo lab knowledge. We suggest that even if you are well acquainted with photo lab processes and procedures, you review the information contained in this manual. It presents a solid background in processing techniques, and has directions that are specific to rotary processing.
We sincerely hope you will have many pleasant hours with your JOBO processor. We are dedicated to making this goal a reality for you. For any of your questions, comments, or suggestions, call JOBO Customer Service at (734) 677-6989, ext. 4721. Our hours are from 8 a.m. to 5 p.m. Eastern Time, Monday through Friday, but our voice mail answering system is available 24 hours a day. You may fax us at (734) 677-6963. If you wish to write us, our address is: JOBO Fototechnic, P.O. Box 3721, Ann Arbor, MI 48106-3721, USA. Our shipping address is: JOBO Fototechnic, 4401 Varsity Drive, Suite D, Ann Arbor, MI 48108, USA
Back to Top
Setting Up
Unpacking the Processor Installation Location Installing the Processor
Back to Top
Unpacking the Processor
When unpacking your new CPE-2 Plus processor or CPE-2 Plus Starter Kit , it should contain the accessories listed below. Check to be sure they are included. Contact your dealer if any are missing.
The following parts and accessories are included with the CPE-2 Plus processor (#4065):
CPE-2 Plus Processor (#4065) 2 Black 600 ml Bottles (#3370) 2 White 600 ml Bottles (#3371) 4-260 ml Graduates (#3318 Kit) 1 Roller Block Assembly (#95183) Warranty Registration Form Instruction Manual (#66051, this this web page is a copy of it)
The following parts and accessories are included with the CPE-2 Plus Starter Kit (#4069):
CPE-2 Plus Processor (#4065) 2 Black 600 ml Bottles (#3370) 2 White 600 ml Bottles (#3371) 4-260 ml Graduates (#3318 Kit) 1 Roller Block Assembly (#95183) Print Drum (#2840) Film Tank (#1520, includes one Reel #1501) 2 Magnets (#1504, already attached to the tank and the drum) Print Wiper (#4122) Film Wiper (#3530) Film Clips (#3312) Color Thermometer (#3321) Warranty Registration Form Instruction Manual (#66051, this web page is a copy of it)
Note: You may find water marks in your new processor. These marks are from final quality control inspections. It is not a used processor. Check carefully for damage. If you find any damage, immediately contact your dealer and/or the carrier that delivered the unit to you. Some processors may be labeled on the box as #4067 (European designation) instead of #4069 (US designation). The processor in the box is the correct (#4069) one.
Back to Top
Installation Location
The CPE-2 Plus can be used in many different environments. It is a daylight processor. You do not need to install it in a darkroom. You only need a grounded 120 Volt AC outlet.
Consider these things before installing the processor:

Water: Being close to a water supply will aid getting water for rinses and mixing chemicals.
Drain: Proximity to a drain makes disposing of used chemicals and rinse water easier. Processors with the JOBO Lift accessory are most easily used with a drain to the left of the unit.
Work Area: The processor should be placed on a level surface, at a height convenient for the operator. Optimum height is 30-35 inches (75-90 cm). A working surface next to the processor aids filling, draining, and mixing of chemicals. Many people prefer to have the processor located in a 'darkroom' sink. Although not required, the convenience of running water and drainage provided by placing the processor in, or right next to a sink should be considered. Most people spend a lot of time in front of the processor. Make sure you have a comfortable location for it.
Clearance: The CPE-2 Plus has a base area (including overhang) of 12 x 16 inches (30 x 40 cm). With a JOBO Lift attached, you need 36 inches (92 cm) height from the support surface (counter or sink) when draining tanks or drums. Check for items at the location that could prevent full operation of the lift or make operation of the processor awkward.
Back to Top
Installing the Processor
1 The CPE-2 Plus Processor should be plugged into a grounded 120 Volts AC outlet capable of supplying at least 4 Amps. (The electrical service provided in any home meeting electrical codes should be sufficient.)
WARNING: Do not operate the processor using an ungrounded or two pronged connection outlet. Never remove the third (ground) prong from the power cord plug. Never use the processor plugged into a 'two to three pronged' adapter or extension cord.
Note: A ground-fault interrupt circuit (G.F.I.) will provide even more safety from shock hazard and is strongly recommended. See your local electrician for installation of a ground fault interrupt.
[JOBO #4502 Spirit Level]
2 Level the processor. A set of two leveling wedges are available as an accessory from JOBO (part #95520). You may also use small blocks of wood or plastic. Use a small torpedo level, a line level, or the JOBO #4502 Spirit Level. Place your processor on the surface you intend to use. Put a drum or tank in operating position on the processor. Place your level on the front edge of the trough and level the processor with a leveling wedge. Leveling the processor will provide a starting base for leveling the tank or drum. Next, place your level on the drum or tank in the processor. Check the level of the drum right to left. Though the processor body is level, the drum may not be. The drum or tank must be level, even if the processor is slightly tilted! Adjust the processor until the tank or drum is level. When using a JOBO Lift, be sure that its arm is fully down (nested in the trough) before leveling the drum or tank.

Note: The primary concern for leveling the processor is the 'left to right' axis. Leveling the processor 'front to back' is not as critical, but should be close to level also.
The leveling of the processor, tank, or drum, is mentioned many times in this manual. Leveling plays a big part in developing quality and consistency. If you store your processor after use, be sure to re-level it the next time you set up.
3 The tempering bath must be filled with water. Add water until it reaches approximately the shoulder of the bottles in the bath. Be sure the water level is high enough to bathe the mounted tank or drum with water (1/8" to 1/4" or 3 to 6 mm, above the tank bottom). Do not adjust the level too high or the non-motor end of the tank or drum will float. To shorten the warm-up time for color processes, add warm (not above 120°F or 50° C) water to the tempering bath.
4 Locate the Thermal Overload Switch on the left side of the motor head. Note that when the switch is tripped, it does not protrude further out of the motor head. Press the Overload Switch button. The processor may now be turned on with the On/Off switch ('1'= 'On').
This step is necessary because the Thermal Overload Switch may be tripped from heavy motion or jarring during shipment. If this switch is tripped, the processor will not heat. (This step should only be needed for your initial setup.) It is safer to add water to the water bath before turning the processor 'On.' The Thermal Overload Switch may trip almost immediately without water in the water bath
Back to Top
The Processor
CPE-2 Plus Processor Illustrations Close-up Processor Illustrations Roller Block Assembly Settings for Tanks and Drums Processor Description
Back to Top
CPE-2 Plus Processor Illustrations
[CPE-2 Plus: (click on part)]
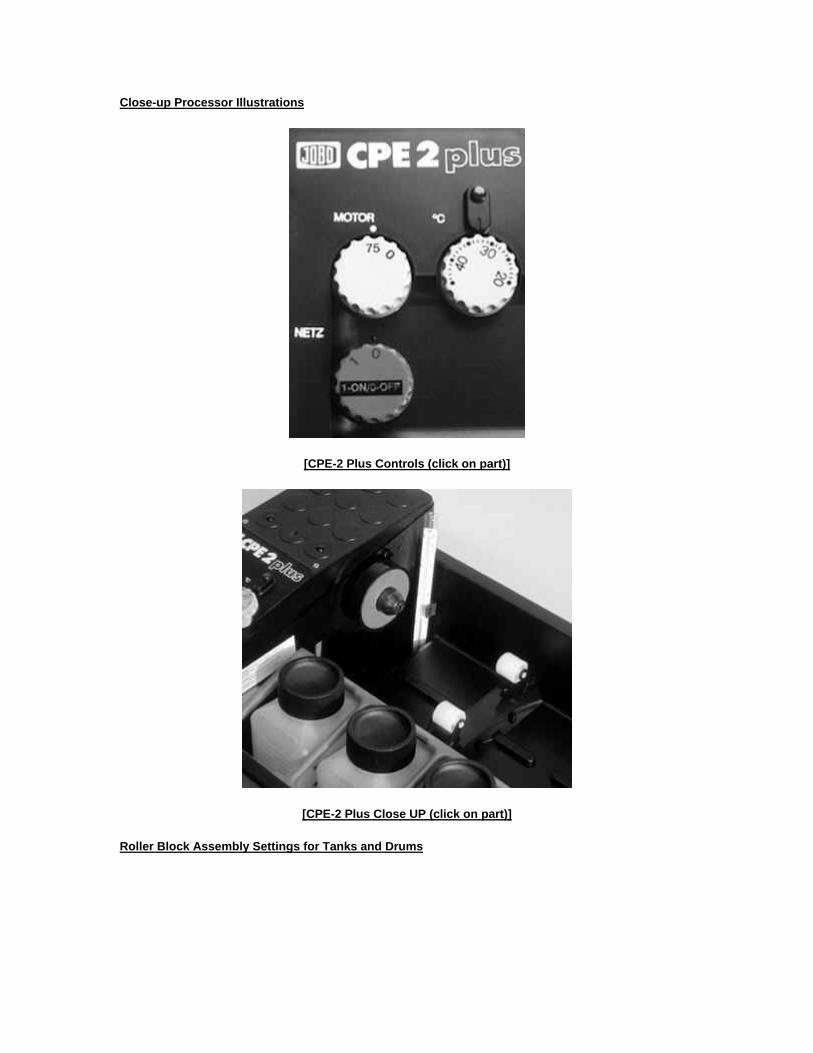
Close-up Processor Illustrations
[CPE-2 Plus Controls (click on part)]
[CPE-2 Plus Close UP (click on part)]
Roller Block Assembly Settings for Tanks and Drums

[Rollers up and inward for the 1500 series]
[Rollers without extensions for 2500 & 2800 series]
Back to Top
Processor Description
On/Off Switch This switch controls the power to the whole processor. `0' is `off', `1' is `on' (NETZ is German for `power.').
Rotation Motor Control This switch turns the rotation motor on and off. `0' is `off,' `75' is `on.' The `75' represents the rotation speed of about 75 RPM.
Heater Indicator Lamp This light is illuminated when the heating element is in operation. It goes off when the water bath has reached its set temperature.
Temperature Control Dial This dial is used to select the desired operating temperature (in degrees C). (Although the thermostat will maintain the temperature within ± 0.2º C once set, it is not unusual for the dial itself to be off by ± 2.0º C.) If you want to convert ºF to ºC, see the page with the Formula to Convert ºF to ºC or the Table to Convert ºF to ºC.
Magnet Coupling This magnet couples with the magnet on the bottom of a JOBO tank or drum. The coupling provides rotary agitation for the tank or drum. (If you are using the JOBO Lift accessory, see Section 2, Processing Using the JOBO Lift.)
Thermometer Holder This clip holds the Color Thermometer (#3321) for monitoring water bath temperature.

Bottles & Graduates The CPE-2 Plus Processor comes with four 260 ml graduates, located in the tempering bath. These graduates are used to pre-measure chemical solutions before or during a process. They also can be used to temper rinse water. The graduates lock into place with a 'bayonet' (insert and turn) type fixture to prevent them from floating. Four 600 ml bottles for storing and tempering processing chemicals or rinse water also come with the processor. These bottles are placed in the four bottle openings. To prevent the bottles from floating, push down and tilt them toward the front side of the processor. Lock the front shoulders of the bottles under the bottle frame.
Roller Block Assembly This cluster of parts serves as a support point for the tanks or drums during processing. It is placed at various distances from the magnet coupling (or cog gear, if using JOBO Lift), depending on the length of the tank or drum. It is attached on the raised ridge molded in the tempering bath trough. The roller block assembly is also adjustable in height, to accommodate the drum or tank series being used.
Thermal Overload Reset Switch This white button resets the thermal overload circuit breaker. The overload automatically turns off the heating element in cases of overheating, such as heating without a sufficient level of water in the processor. Pressing the button (after the heating element has cooled) will reset the circuit.
Tempering Bath The trough tempers the bottles and graduates. Tanks or drums being used for processing are tempered in the trough or 'tempering bath'.
Back to Top
Cleaning the Processor
Clean all chemical spills immediately to prevent staining the unit, contamination of the tempering bath, and possible introduction of corrosive chemicals into the control unit.
The CPE-2 Plus Processor is made of chemical resistant plastics, however, periodic cleaning is recommended:
1 The outside of the processor can be cleaned by simply wiping it with a damp cloth.
2 The water in the tempering bath should be changed regularly to prevent buildup of algae. Depending on local conditions and water quality, this step may be needed weekly or even daily. For best results, drain the tempering bath at the end of your processing session. Avoid getting water into the motor head (electronics box) when draining the processor.
3 The inside of the tempering bath should be cleaned periodically to remove any buildup of scum.
WARNING: Do not use chlorine bleach (Clorox) or other products that contain chlorine to clean or maintain the water bath. Chlorine will corrode the heating element, possibly causing an electrical short circuit. The amount of chlorine, in 'chlorinated' drinking water, is not enough to damage the heating element.
JOBO offers an excellent product for cleaning your processor called Processor Clean II, a powdered concentrate, available in two sizes #4135 (4.7 lb. jug) and #4136 (4 oz. packet). To use: Turn off the processor. Drain all water from the processor. If the outside of the bottles or graduates need cleaning, leave them in their slots, otherwise remove them. Place about 100 ml. (3 1/2 fluid oz.) measure of the powder (or one packet) in a graduate or bottle with about 1/2 liter (17 oz.) of water and dissolve. Fill the trough with water. Pour the container of dissolved cleaner into the trough. Turn on the processor. Set the temperature of the processor to about 38°C (100°F). Leave the processor on (to recirculate) for at least eight hours or overnight. Turn off the processor. Drain and rinse the trough. Refill the trough before using the processor.
Back to Top
Processor Maintenance and Tips
Your CPE-2 Plus processor is nearly maintenance-free under normal operation. However, with heavy, long-term usage, a periodic check of the items below will ensure maximum performance and reliability from your processor. Also included are usage tips and cleaning recommendations.
1 Wipe up all chemical spills when they happen. Most chemicals will not stain the processor unless they have had time to set in. A damp sponge or towel will remove still wet chemicals. Do not use any abrasive cleaning materials as they may scratch the surface of the processor. If necessary, use a damp sponge with a mild soap. Follow with a water rinse using a clean damp sponge. This procedure will usually remove dried chemical deposits. Processor Clean II may be used to remove more stubborn chemical deposits. Follow instructions provided with the cleaner. Whenever cleaning the motor head (electrical equipment), unplug the processor and be sure to avoid getting moisture inside the unit.
2 The drive cogs (used only with the JOBO Lift) on earlier versions of the processors were white. The current version drive cogs are black. The newer black drive cogs are used with all versions of the processors. Use part number #95299, a black drive cog, for the rotation motor shaft.
3 Be sure to fill the tempering bath with water whenever you are using the processor, to prevent overheating and tripping of the thermal overload mechanism. Running the processor without water but with a tank or drum will also cause excessive wear on the roller block assembly.
4 Do not exceed the maximum quantity (600 ml) of chemicals or water (in a tank or drum), for any process. This can wear out the rotation motor prematurely. Be careful to not have the water level too high in the trough. If the level is too high, the tank or drum will float, causing uneven development.
5 When using the stainless steel reel system, be sure to keep the plug in the funnel fully inserted.
6 Periodically examine the trough for buildup of foreign deposits. Hard water often leaves deposits of rust and calcium. A warm bath of water is likely to accumulate an algae-like growth. If any of these deposits are noticed, use Processor Clean II (follow the instructions that come with the product). Microorganism growth can be minimized by draining and rinsing the processor troughs between uses.
7 If you wish to cool a CPE-2 Plus processor below room temperature, use the following procedure: Fill unused or extra 600 ml bottles with water, and cap loosely. Do not put more than 600 ml in each bottle. Place the bottles in a freezer or refrigerator until frozen or cool. Put these bottles into unused bottle slots. Set the temperature on the processor to the desired process temperature. Let the processor run until the correct temperature is obtained. Be sure to check the temperature of the chemicals and rinse water. Run the process when all temperatures have stabilized at the desired point. You may need to exchange chilled bottles periodically in long processes (extra bottles already cooling in the refrigerator would be useful). The chilled bottles constantly cool the water bath, and the heating element of the processor heats as necessary to bring the temperature up to the process temperature. Alternatively, re-freezable 'ice packs' (Blue Ice) may be carefully placed in the trough. Be sure the pack does not interfere with the moving parts of the processor.
WARNING: Do not put loose ice in the processor trough! The ice could get caught in the rotation system and cause severe damage.
8 If you have obtained this instruction manual as a replacement to earlier editions, use the process recommendations in this web page (where they are different), not the recommendations in the earlier manual(s). These instructions reflect the changes that have been made in film, paper, and chemicals since the original book was written. (If you already have processing procedures that completely satisfy you, don't change them just to match the directions in this web page.)
9 Don't worry. The CPE-2 Plus Processor is an excellent machine. It will produce quality processing simply and consistently with only a little care and understanding of these instructions.
Section 2
Note: This is a very detailed and profusely illustrated web page. It will take a little time to load it into your browser. Get a cup of coffee and stretch while it is downloading. It is worth the wait!
[CPE-2 Plus Starter Kit]
Back to Top
How to Use This Manual
Information needed to operate your processor successfully with a wide variety of processes is included in this instruction manual. We urge you to read all the basic information contained in Section One and Section Two. Then read the pages of Section Three that describe the processes you wish to use. If you are having problems with your processor or processing, see the pages ofSection Four. For conversions, tables and lists see Section Five.
If you have obtained this instruction manual as a replacement to earlier editions, use the process recommendations in this web page (where they are different), not the recommendations in the earlier manual(s). These instructions reflect the changes that have been made in film, paper, and chemicals since the original book was written. (If you already have processing procedures that completely satisfy you, don't change them just to match the directions in this web page.)
There are three types of special notations or cautionary information in this manual: Note, Caution, and Warning. The type and format of each is listed below:
Note: Text in this format is informative. It contains additional details to explain the basic information presented.
Caution: Text in this format presents important procedural information. Failure to follow these instructions could adversely affect the processing of your film or paper.
WARNING: Text in this format presents critical information. Possible damage to your equipment or personal injury could result from not following these instructions!
Copyright:
Copyright © 1997 by JOBO Fototechnic, Inc. All rights reserved. No portion of this web page may be reproduced in any form without express written consent from JOBO Fototechnic, Inc.
Every effort was made to include up-to-date and accurate information in this manual. All manufacturers, including JOBO, maintain the right to change specifications for their products. Changes may be made to specifications without notice. For the most current product specifications and usage, contact the manufacturer.

JOBO makes no claim for the accuracy or usability of other manufacturers' information contained in this manual. The processing recommendations included in this manual may not be optimal for every situation. If you require specific results, test all process instructions for suitability.
JOBO is not liable for any damages, direct or consequential, occurring from the use or misuse of information contained in this manual.
Credits:
Author: Damon Dean
JOBO Contributors: Ken Owen, Chris Mishler, Sam Proud, Paul Rowe
Manual part number 66051. Revision 06/97.
[CPE-2 Plus]
Back to Top
Index:
Important Safeguards
Section 1: Introduction
Section 2: General Processing Instructions
Introduction to Processing Loading Film and Paper (all are links to additional pages)
o 35 mm Film With 1501 or 2502 Reels o 120 or 220 Roll Film With 1501 or 2502 Reels o 35 mm, 120 or 220 With Stainless Steel Reels o 4 x 5" Sheet Film With the 2509N Reel o Loading Paper
Post-Process Tank and Drum Care (linked to additional page) Tank and Drum Parts (linked to additional page) Tank and Drum Capacities (linked to additional page) Processing Instructions for Film Using Magnet Drive Processing Instructions for Prints Using Magnet Drive
Processing Using the JOBO Lift Accessory Processing Instructions With the JOBO Lift Accessory Precautions for Film and Paper Processing Additional Processing Information
Section 3: Specific Processes
Section 4: Troubleshooting
Section 5: Appendices
Back to Top
Introduction to Processing
This processing information is up-to-date, as of this publishing.
Over many years, JOBO has been providing instructions on processing. Changes have taken place in the films, papers and chemistries available. In addition, we at JOBO continue to test and refine process procedures. Our customers also give feedback on processing problems and their solutions to these problems.
If you have used JOBO products a long time, you may have noticed some slight changes in our published processing recommendations. Some of our earlier suggestions may not exactly match the information in this page. Do not be alarmed or confused. The changes that have been made are part of the ongoing, 'fine-tuning' of the processing craft. None of the changes are so drastic as to cause a 'disaster.' If you already have processing procedures that completely satisfy you, don't change them just to match the directions in this web page.
The recommendations for processing contained in this web page are just recommendations. They are derived from many years experience, and countless users, but not all lab situations, or personal tastes are the same. Experiment if you wish. Use what works best for you.
Many people find satisfaction in 'fine-tuning' or 'tweaking' their processing, to deliver the best possible process for their own setup. If you are one of these people, use our recommendations as a starting point. Adjust and log your changes (changing only one thing at a time). Test your ideas.
Don't expect to become an 'expert' the first week you are working with your processor. Relax and enjoy it. Expertise will come with time.
Are you new to processing? Do you dislike 'experimenting?' Use these recommendations. They will help you to produce consistent, quality processing.
Note: JOBO's Customer Service Department is available to aid you with any processing questions or problems. Call JOBO Customer Service at (734) 677-6989, ext. 4721. Our hours are from 8 a.m. to 5 p.m. Eastern Time, Monday through Friday, but our voice mail answering system is available 24 hours a day. You may fax us at (734) 677-6963. If you wish to write us, our address is: JOBO Fototechnic, P. O. Box 3721, Ann Arbor, MI 48106-3721, USA. E-mail [email protected] We will be happy to help you.
Back to Top
Processing Instructions for Film Using Magnet Drive

Read and familiarize yourself with the entire process procedure, before starting the process.
1 Fill the trough with water to the shoulder of the bottles. -- To speed warming of the processor you may fill the trough with water at the process temperature, but check the solution temperatures before starting the process. Be careful, if the water is too warm (50+ C. or 120+ F.), it will trip the Thermal Overload Switch.
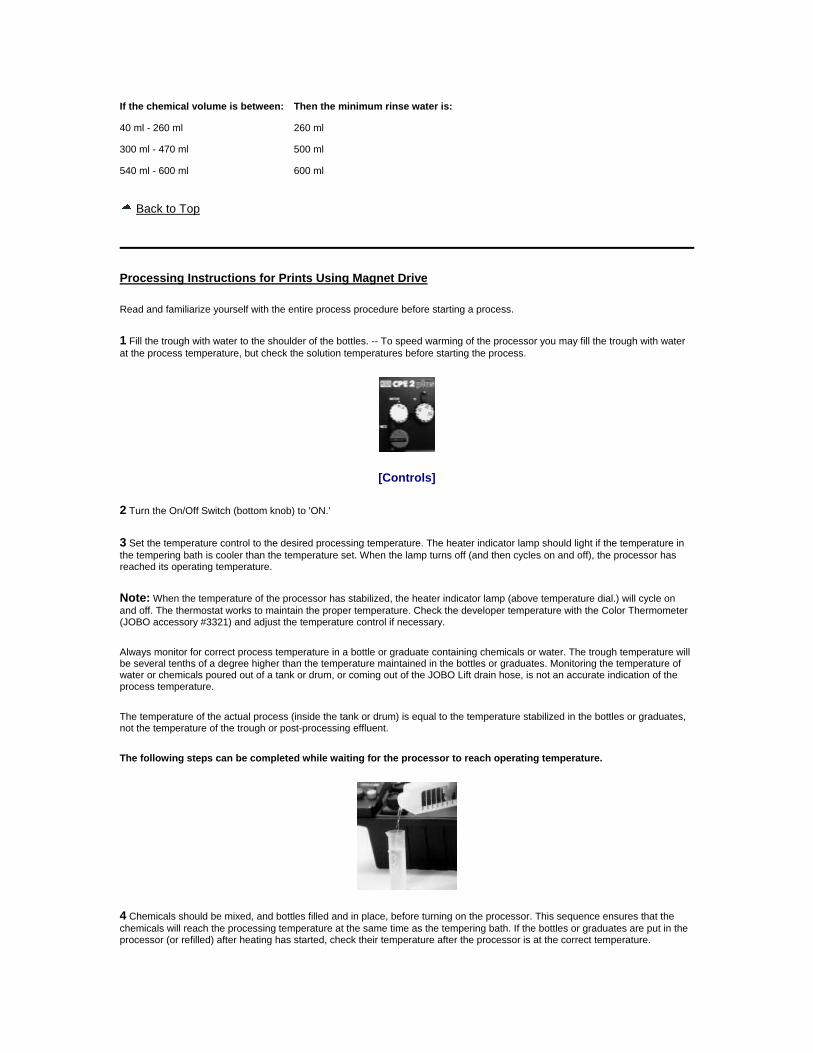
[Controls]
2 Turn the On/Off switch to 'On'. (bottom knob)
3 Set the temperature control (upper right knob) to the desired processing temperature. The heater indicator lamp (above temperature knob) should light if the temperature in the tempering bath is cooler than the temperature set. When the lamp turns off (and then cycles on and off), the processor has reached its operating temperature.
Note: When the temperature of the processor has stabilized, the heater indicator lamp will cycle on and off. The thermostat works to maintain the proper temperature. Check the developer temperature with the Color Thermometer (JOBO accessory #3321) and adjust the temperature control if necessary.
Always monitor for correct process temperature in a bottle or graduate containing chemicals or water. The trough temperature will be several tenths of a degree higher than the temperature maintained in the bottles or graduates. Monitoring the temperature of water or chemicals poured out of a tank or drum, or coming out of the JOBO Lift drain hose, is not an accurate indication of the process temperature.
The temperature of the actual process (inside the tank or drum) is equal to the temperature stabilized in the bottles or graduates, not the temperature of the trough or post-processing effluent.
The following steps can be completed while waiting for the processor to reach operating temperature.
4 Chemicals should be mixed, and bottles filled and in place, before turning on the processor. This sequence ensures the chemicals will reach the processing temperature about the same time as the tempering bath. If the bottles or graduates are put in the processor (or refilled) after heating has started, check their temperature. Do this after the processor is at the correct temperature.
Caution: Do not start a process until all solutions are at the required processing temperature.
5 Be sure you have enough rinse water available. If your process does not require the use of all four bottles, the unused bottles may be used for rinse water. They are kept at the processing temperature by the lower trough. If you do not have room in the processor, and require additional rinse water, use one or more bottles or graduates filled with water at or about 10º F (5º C) over the processing temperature. For most color processes, rinse water should be within ± 8º to 10º F (4º or 5º C). The cooling that takes place before use will not drop the temperature out of tolerance. Black and white processes usually use room temperature rinse water.

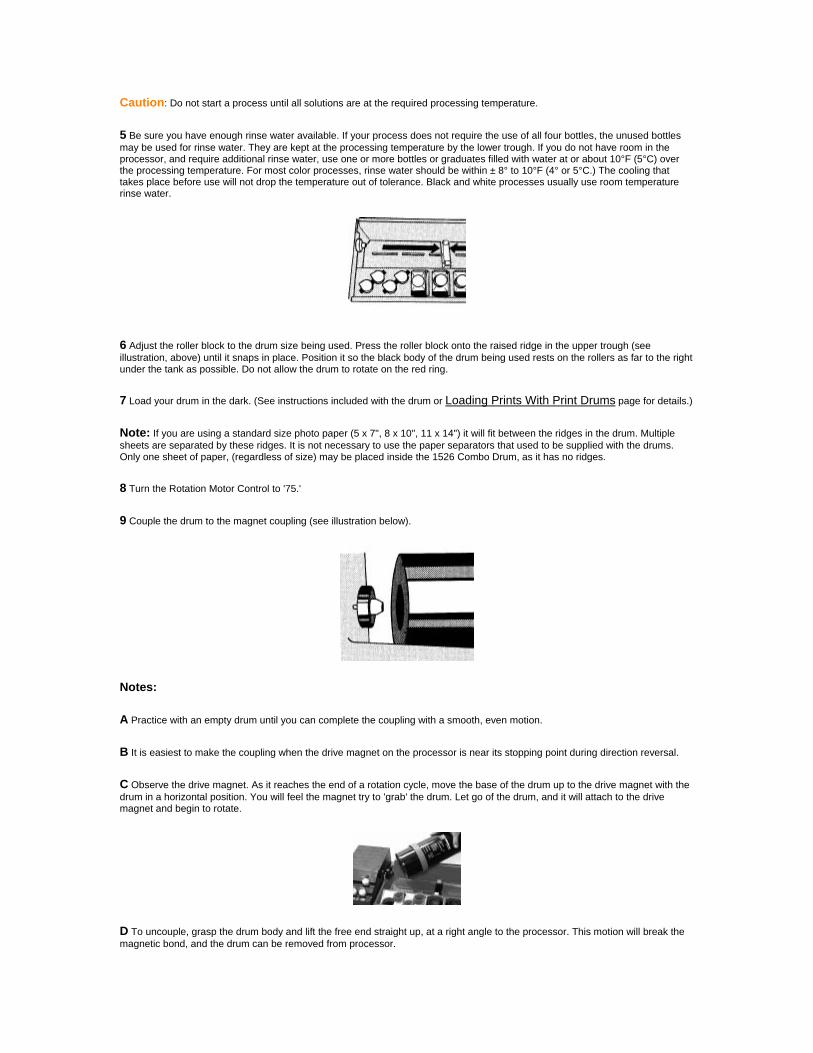
6 Adjust the roller block to the tank size being used.
Press the roller block onto the raised ridge in the upper trough until it snaps into place. Position it so the black body of the tank being used rests on the rollers as far to the right under the tank as possible. Do not allow the tank to rotate on the red ring.
7 Load your tank in the dark. Note the volume of chemicals required for the tank and reel combination. For further information see the Loading Film and Paper and Tank and Drum Capacities pages.
8 Turn the Rotation Speed Dial (upper left knob) to '75.'
9 Couple the tank to the magnet coupling.
Notes:
A Practice with an empty tank until you can complete the coupling with a smooth, even motion.
B It is easiest to make the coupling when the drive magnet on the processor is near its stopping point. Mount the tank on the drive magnet when the drive magnet is changing direction of rotation.
C Observe the drive magnet. As it reaches the end of a rotation cycle, move the base of the tank up to the drive magnet. Move it with the tank in a horizontal position. You will feel the magnet try to 'grab' the tank. Let go of the tank, and it will attach to the drive magnet and begin to rotate.
D To uncouple, grasp the tank body and lift the free end straight up, at a right angle to the processor. This motion will break the magnetic bond, and the tank can be removed from processor.
10 Refer to instructions for the specific process you are using (see Section 3 pages). They will cover pre-rinse or pre-warm time, as well as times for each processing step, rinses, etc. Be sure the water level is high enough in the trough (to bathe the tank with water (1/8" to 1/4", or 3 mm to 6 mm, above the bottom of the tank). Do not go too high. The lid end of the tank will float.
Notes:
A When using a pre-warm, allow the tank to rotate in the trough (the loaded tank is dry inside, with no water or chemicals in it) for the specified warm-up time.
B When using a pre-rinse, allow the loaded tank to rotate in the trough with the appropriate amount of rinse water (see table below for specified pre-rinse volume).
C At the end of the pre-warm or pre-rinse step, remove the tank from the processor. Remove the red cap. Pour out the pre-rinse water (if a pre-rinse was used). Pour in enough of the chemical for the tank and film you are using. Replace the red cap. Start timing the step.
Caution: Many photographic solutions can produce gasses that cause a pressure buildup inside the tank. The red cap is constructed with a flexible membrane section at its center. Press down the center of the red cap before putting the cap on the lid. Pressure generated will move the depressed membrane in the cap, rather than forcing the cap off the tank.
D When processing film (without the JOBO Lift attached), manually invert the tank two or three times. This action ensures that the solution has covered all the films' surface quickly. Strike the bottom of the tank against the heel of your hand, or against the counter top to dislodge any 'air bells' (bubbles) on the film. Couple the tank to the processor.
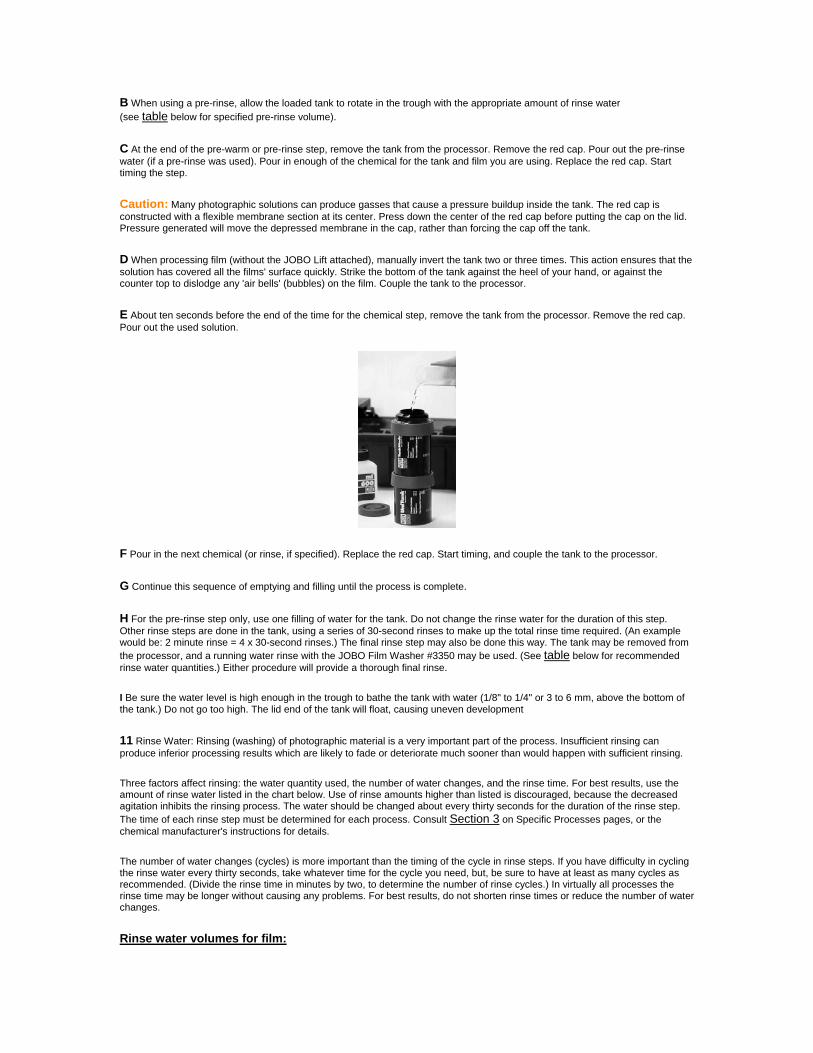
E About ten seconds before the end of the time for the chemical step, remove the tank from the processor. Remove the red cap. Pour out the used solution.
F Pour in the next chemical (or rinse, if specified). Replace the red cap. Start timing, and couple the tank to the processor.
G Continue this sequence of emptying and filling until the process is complete.
H For the pre-rinse step only, use one filling of water for the tank. Do not change the rinse water for the duration of this step. Other rinse steps are done in the tank, using a series of 30-second rinses to make up the total rinse time required. (An example would be: 2 minute rinse = 4 x 30-second rinses.) The final rinse step may also be done this way. The tank may be removed from the processor, and a running water rinse with the JOBO Film Washer #3350 may be used. (See table below for recommended rinse water quantities.) Either procedure will provide a thorough final rinse.
I Be sure the water level is high enough in the trough to bathe the tank with water (1/8" to 1/4" or 3 to 6 mm, above the bottom of the tank.) Do not go too high. The lid end of the tank will float, causing uneven development
11 Rinse Water: Rinsing (washing) of photographic material is a very important part of the process. Insufficient rinsing can produce inferior processing results which are likely to fade or deteriorate much sooner than would happen with sufficient rinsing.
Three factors affect rinsing: the water quantity used, the number of water changes, and the rinse time. For best results, use the amount of rinse water listed in the chart below. Use of rinse amounts higher than listed is discouraged, because the decreased agitation inhibits the rinsing process. The water should be changed about every thirty seconds for the duration of the rinse step. The time of each rinse step must be determined for each process. Consult Section 3 on Specific Processes pages, or the chemical manufacturer's instructions for details.
The number of water changes (cycles) is more important than the timing of the cycle in rinse steps. If you have difficulty in cycling the rinse water every thirty seconds, take whatever time for the cycle you need, but, be sure to have at least as many cycles as recommended. (Divide the rinse time in minutes by two, to determine the number of rinse cycles.) In virtually all processes the rinse time may be longer without causing any problems. For best results, do not shorten rinse times or reduce the number of water changes.
Rinse water volumes for film:
If the chemical volume is between: Then the minimum rinse water is:
40 ml - 260 ml 260 ml
300 ml - 470 ml 500 ml
540 ml - 600 ml 600 ml
Back to Top
Processing Instructions for Prints Using Magnet Drive
Read and familiarize yourself with the entire process procedure before starting a process.
1 Fill the trough with water to the shoulder of the bottles. -- To speed warming of the processor you may fill the trough with water at the process temperature, but check the solution temperatures before starting the process.
[Controls]
2 Turn the On/Off Switch (bottom knob) to 'ON.'
3 Set the temperature control to the desired processing temperature. The heater indicator lamp should light if the temperature in the tempering bath is cooler than the temperature set. When the lamp turns off (and then cycles on and off), the processor has reached its operating temperature.
Note: When the temperature of the processor has stabilized, the heater indicator lamp (above temperature dial.) will cycle on and off. The thermostat works to maintain the proper temperature. Check the developer temperature with the Color Thermometer (JOBO accessory #3321) and adjust the temperature control if necessary.
Always monitor for correct process temperature in a bottle or graduate containing chemicals or water. The trough temperature will be several tenths of a degree higher than the temperature maintained in the bottles or graduates. Monitoring the temperature of water or chemicals poured out of a tank or drum, or coming out of the JOBO Lift drain hose, is not an accurate indication of the process temperature.
The temperature of the actual process (inside the tank or drum) is equal to the temperature stabilized in the bottles or graduates, not the temperature of the trough or post-processing effluent.
The following steps can be completed while waiting for the processor to reach operating temperature.
4 Chemicals should be mixed, and bottles filled and in place, before turning on the processor. This sequence ensures that the chemicals will reach the processing temperature at the same time as the tempering bath. If the bottles or graduates are put in the processor (or refilled) after heating has started, check their temperature after the processor is at the correct temperature.
Caution: Do not start a process until all solutions are at the required processing temperature.
5 Be sure you have enough rinse water available. If your process does not require the use of all four bottles, the unused bottles may be used for rinse water. They are kept at the processing temperature by the lower trough. If you do not have room in the processor, and require additional rinse water, use one or more bottles or graduates filled with water at or about 10°F (5°C) over the processing temperature. For most color processes, rinse water should be within ± 8° to 10°F (4° or 5°C.) The cooling that takes place before use will not drop the temperature out of tolerance. Black and white processes usually use room temperature rinse water.
6 Adjust the roller block to the drum size being used. Press the roller block onto the raised ridge in the upper trough (see illustration, above) until it snaps in place. Position it so the black body of the drum being used rests on the rollers as far to the right under the tank as possible. Do not allow the drum to rotate on the red ring.
7 Load your drum in the dark. (See instructions included with the drum or Loading Prints With Print Drums page for details.)
Note: If you are using a standard size photo paper (5 x 7", 8 x 10", 11 x 14") it will fit between the ridges in the drum. Multiple sheets are separated by these ridges. It is not necessary to use the paper separators that used to be supplied with the drums. Only one sheet of paper, (regardless of size) may be placed inside the 1526 Combo Drum, as it has no ridges.
8 Turn the Rotation Motor Control to '75.'
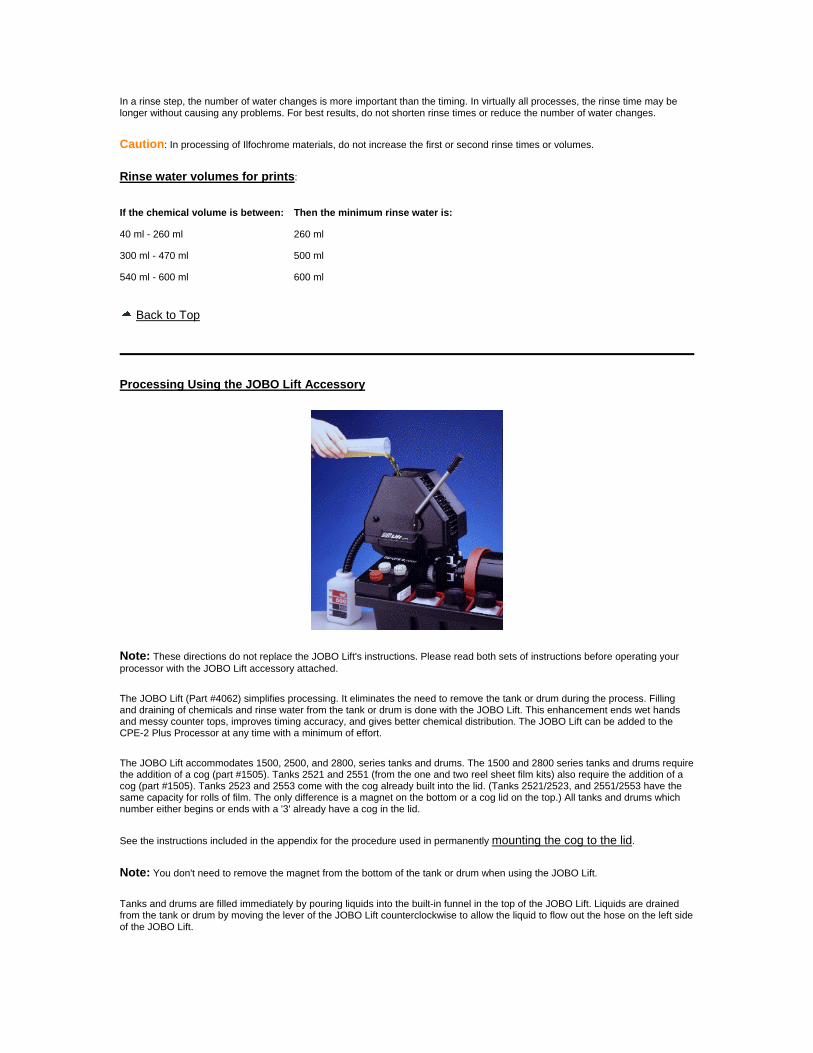
9 Couple the drum to the magnet coupling (see illustration below).
Notes:
A Practice with an empty drum until you can complete the coupling with a smooth, even motion.
B It is easiest to make the coupling when the drive magnet on the processor is near its stopping point during direction reversal.
C Observe the drive magnet. As it reaches the end of a rotation cycle, move the base of the drum up to the drive magnet with the drum in a horizontal position. You will feel the magnet try to 'grab' the drum. Let go of the drum, and it will attach to the drive magnet and begin to rotate.
D To uncouple, grasp the drum body and lift the free end straight up, at a right angle to the processor. This motion will break the magnetic bond, and the drum can be removed from processor.

10 Be sure the water level is high enough in the trough to bathe the drum with water (1/8" to 1/4", or 3 to 6 mm, above the bottom of the drum.) Do not fill too high. The lid end of the drum will float.
Notes:
A When doing a pre-rinse, allow the drum to rotate in the trough with the right amount of rinse water (seeTable in Section 2) for the specified pre-rinse volume.
B At the end of the pre-rinse step remove the drum from the processor. Remove the red cap. Pour out the pre-rinse water.
C Pour in enough chemical for the drum and paper you are using. (See instructions included with the drum orTank and Drum Capacities page) Replace the red cap. Start timing the step.
Caution: Many photographic solutions can produce gasses that cause a pressure buildup inside the drum. The red membrane cap is constructed with a flexible membrane section at its center. Press down the center of the red cap before putting the cap on the lid. Pressure generated will move the depressed membrane in the cap, rather than forcing the cap off the drum.
D About ten seconds before the end of the time for the chemical step, remove the drum from the processor. Remove the red cap. Pour out the used solution.
E Pour in the next chemical (or rinse, if specified). Replace the red cap, with its center depressed. Start timing, and couple the drum to the processor.
F Continue this sequence of emptying and filling until the process is complete.
G For the pre-rinse step only, use one filling of water for the drum. Do not change the rinse water for the duration of this step. Other rinse steps are done in the drum, using a series of 30-second rinses to make up the total rinse time required. (An example would be: 2 minute rinse = 4 x 30-second rinses.)
11 To Process Prints: Refer to instructions for the specific process you are using (see Section 3) which will cover pre-rinse or pre-warm times, as well as times for each of the processing steps, rinses, etc.
Note: The lid of the print drum is fitted with a light-trap beaker. The beaker keeps solutions off the paper, as long as the drum is vertical. Once the drum has been turned horizontal, immediately couple it to the processor (to ensure even development). Practice will help you take a drum from a vertical to horizontal coupled position in an easy fluid motion. If you do the final rinse off the processor, rinse the drum thoroughly before drying. The beaker should be removed from the lid when drying the drum.
12 Rinse Water: Rinsing (washing) of photographic material is an important part of the process. Insufficient rinsing can adversely affect processes and decrease longevity of the final results.
Three factors affect rinsing: The water quantity use, the number of water changes, and the rinse time. For best results, use the amount of rinse water listed in the chart below. Use of rinse amounts higher than listed is discouraged, because the decreased agitation inhibits the rinsing process. The water should be changed about every thirty seconds for the duration of the rinse step. The time of each rinse step must be determined for each process. Consult Section 3 on Specific Processes, or the chemical manufacturer's instructions for details.
In a rinse step, the number of water changes is more important than the timing. In virtually all processes, the rinse time may be longer without causing any problems. For best results, do not shorten rinse times or reduce the number of water changes.
Caution: In processing of Ilfochrome materials, do not increase the first or second rinse times or volumes.
Rinse water volumes for prints:
If the chemical volume is between: Then the minimum rinse water is:
40 ml - 260 ml 260 ml
300 ml - 470 ml 500 ml
540 ml - 600 ml 600 ml
Back to Top
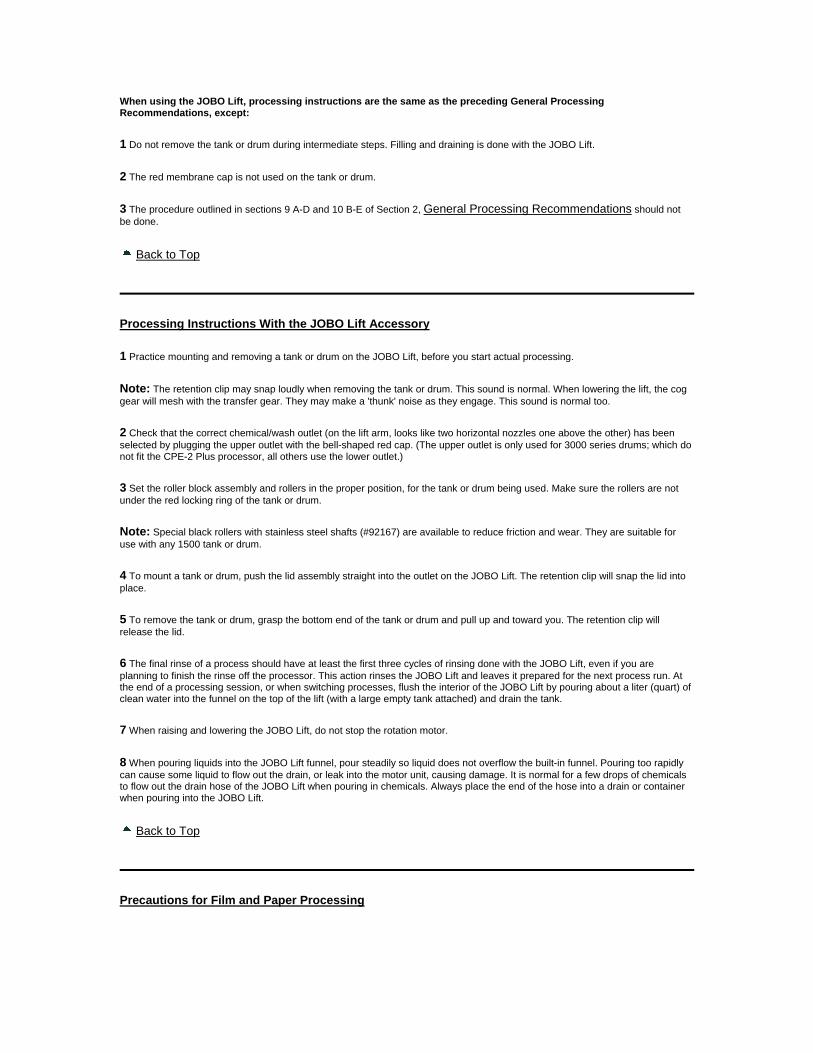
Processing Using the JOBO Lift Accessory
Note: These directions do not replace the JOBO Lift's instructions. Please read both sets of instructions before operating your processor with the JOBO Lift accessory attached.
The JOBO Lift (Part #4062) simplifies processing. It eliminates the need to remove the tank or drum during the process. Filling and draining of chemicals and rinse water from the tank or drum is done with the JOBO Lift. This enhancement ends wet hands and messy counter tops, improves timing accuracy, and gives better chemical distribution. The JOBO Lift can be added to the CPE-2 Plus Processor at any time with a minimum of effort.
The JOBO Lift accommodates 1500, 2500, and 2800, series tanks and drums. The 1500 and 2800 series tanks and drums require the addition of a cog (part #1505). Tanks 2521 and 2551 (from the one and two reel sheet film kits) also require the addition of a cog (part #1505). Tanks 2523 and 2553 come with the cog already built into the lid. (Tanks 2521/2523, and 2551/2553 have the same capacity for rolls of film. The only difference is a magnet on the bottom or a cog lid on the top.) All tanks and drums which number either begins or ends with a '3' already have a cog in the lid.
See the instructions included in the appendix for the procedure used in permanently mounting the cog to the lid.
Note: You don't need to remove the magnet from the bottom of the tank or drum when using the JOBO Lift.
Tanks and drums are filled immediately by pouring liquids into the built-in funnel in the top of the JOBO Lift. Liquids are drained from the tank or drum by moving the lever of the JOBO Lift counterclockwise to allow the liquid to flow out the hose on the left side of the JOBO Lift.
When using the JOBO Lift, processing instructions are the same as the preceding General Processing Recommendations, except:
1 Do not remove the tank or drum during intermediate steps. Filling and draining is done with the JOBO Lift.
2 The red membrane cap is not used on the tank or drum.
3 The procedure outlined in sections 9 A-D and 10 B-E of Section 2, General Processing Recommendations should not be done.
Back to Top
Processing Instructions With the JOBO Lift Accessory
1 Practice mounting and removing a tank or drum on the JOBO Lift, before you start actual processing.
Note: The retention clip may snap loudly when removing the tank or drum. This sound is normal. When lowering the lift, the cog gear will mesh with the transfer gear. They may make a 'thunk' noise as they engage. This sound is normal too.
2 Check that the correct chemical/wash outlet (on the lift arm, looks like two horizontal nozzles one above the other) has been selected by plugging the upper outlet with the bell-shaped red cap. (The upper outlet is only used for 3000 series drums; which do not fit the CPE-2 Plus processor, all others use the lower outlet.)
3 Set the roller block assembly and rollers in the proper position, for the tank or drum being used. Make sure the rollers are not under the red locking ring of the tank or drum.
Note: Special black rollers with stainless steel shafts (#92167) are available to reduce friction and wear. They are suitable for use with any 1500 tank or drum.
4 To mount a tank or drum, push the lid assembly straight into the outlet on the JOBO Lift. The retention clip will snap the lid into place.
5 To remove the tank or drum, grasp the bottom end of the tank or drum and pull up and toward you. The retention clip will release the lid.
6 The final rinse of a process should have at least the first three cycles of rinsing done with the JOBO Lift, even if you are planning to finish the rinse off the processor. This action rinses the JOBO Lift and leaves it prepared for the next process run. At the end of a processing session, or when switching processes, flush the interior of the JOBO Lift by pouring about a liter (quart) of clean water into the funnel on the top of the lift (with a large empty tank attached) and drain the tank.
7 When raising and lowering the JOBO Lift, do not stop the rotation motor.
8 When pouring liquids into the JOBO Lift funnel, pour steadily so liquid does not overflow the built-in funnel. Pouring too rapidly can cause some liquid to flow out the drain, or leak into the motor unit, causing damage. It is normal for a few drops of chemicals to flow out the drain hose of the JOBO Lift when pouring in chemicals. Always place the end of the hose into a drain or container when pouring into the JOBO Lift.
Back to Top
Precautions for Film and Paper Processing
In rotary processing, the most frequently seen fault is runs or streaks on film and paper. This effect is caused almost exclusively by water in the tank, drum or reel being carried forward to the next process. This carry-forward affects the contents of the tank or drum before any new solutions reach the film or paper. For further information see the Troubleshooting page.
Often the first run of the day is fine (the equipment dried overnight). However, the next run may show streaks. The film tank, film reel, paper drum, and the lids, must all be dry before loading them for the next processing run. For more information see the Tank and Drum Care page. Illustrations of tank and drum parts can be found on the Tank and Drum Parts page.
For the film tank or paper drum:
1 Disassemble all removable components.
2 Rinse and drain completely.
3 Dry inside and out with paper towel or cloth until there is no visible water remaining either inside or out.
For the tank or drum lid:
1 Disassemble the lid by removing the funnel or beaker. Turn it counterclockwise. Remove the red cap if it is being used.
2 Rinse and drain completely.
3 Dry each piece with a paper towel or cloth until there is no visible water remaining. Shake the lid, or rap it against a towel in the palm of your hand, or counter top. This action will dislodge water droplets that are caught under the red ring of the lid.
For the center core of a film tank:
1 Disassemble the core into its components.
2 Rinse and shake all excess water from inside the cores.
3 Dry the outside of the cores with a paper towel or cloth.
For a film reel:
1 Disassemble the reel into its two halves by twisting counterclockwise past the detent. (Stainless steel reels do not come apart.)
2 Rinse the reel components
3 Rap the reel halves sharply against a towel to dislodge any water droplets from between the spirals.
4 Use a paper towel or cloth to finish drying the reel halves.
Note: If you have time, any of these items may be left to air dry. Other options are hair dryers (use very low heat), fans, etc. Reels and cores may be put in the bottom of a film drying cabinet to speed drying.
Both film and paper are very sensitive to small quantities of water running across the emulsion. If a drop of water runs across a piece of paper or film before it is pre-rinsed and developed, the droplet area will be easily seen in the finished print or film.
To pre-rinse, pour in all the water quickly, completely covering the paper or film in the drum at one time. This step prevents stray droplets from 'running around' before the pre-rinse.
Rarely, runs across the face of a print or film may be caused by other problems. Almost always a run mark is caused by stray water droplets.
Back to Top
Additional Processing Information
Warm-up Time:
The processor will require 1 hour, 15 minutes to 1 hour, 30 minutes to warm from about 68° F (20°C) to 100°F (38°C).
If you know when you are using the processor for any given day, it can be set up in advance. Chemicals should be put in the processor bottles. Check the water level and fill the trough as necessary. Switches should be set as if you were ready to start warm-up. Set temperature control (upper right knob) to the desired process temperature. Set rotation motor control to '0' (Off) and ON/OFF switch to '1' ('On'). The processor is then plugged into an electrical timer (not supplied by JOBO). Set the timer to turn on about 1 or 2 hours before the next time you want to do processing. The processor will be warmed and waiting for your use.
WARNING: The CPE-2 Plus Processor requires 300 watts at 120 volts. Any timer used must be capable of switching at least that power level, and must be grounded.
Another method of hastening the warm-up of the processor is the introduction of hotter (not over 50°C or 120°F) water into the trough. Do it carefully to avoid overfilling the processor. It may be necessary to drain water from the tempering bath to allow room for the water being added. The On/Off switch should be on ('1') and the temperature control set. A little practice with this method will allow you to warm the processor rapidly to operating temperature. (Normally the water bath can be ready in 30 minutes or less with this approach.) In fact, the water bath can be up to temperature almost instantly with this approach. The bottles will not heat as rapidly as the water bath. Check the bottles with a thermometer to be sure the chemicals are at the processing temperature.
Timing Process Steps:
Use this procedure to achieve accuracy in timing any process step. Start timing of the step immediately upon pouring into the lift or tank. Start draining the tank (raise lift, if used) so that it will have just finished draining at the end of the step's time. The time you need for draining will depend on the specific tank and the volume of solution you are using. You may want to do a few practice runs with water and no film (or paper) until you get the technique to run smoothly and accurately. As a rough guide, figure about one second for every 100 ml to drain.
Graduates:
The 260 ml (8 oz.) graduates supplied with the processor, three have colored dots on them. These dots allow rapid identification. It is possible to set up your own code (such as developer in red, stop in yellow, etc.) Each graduate is then used for only one type of chemical. The graduates also may be used to temper rinse water.
Rotation Motor:
While processing, do not shut off the rotation motor. You may be tempted, especially if you are not yet skilled at mounting and dismounting the tanks or drums. Once you have introduced chemicals to a film tank, or turned a paper drum into a horizontal position, processing has started! You must start rotary motion as soon as possible to avoid streaking the film or paper.
Tempering Bath:
The CPE-2 Plus Processor uses warm water in contact with open air. Foreign organisms may grow in the water bath. One type is algae, and the other is airborne fungus. The open warm water bath provides ideal conditions for either organism to grow. To prevent the growth of these organisms, change the water frequently. A dilute non-chlorinated algaecide used in swimming pools also will work to control growth in the tempering bath. (There are many different brands of non-chlorinated algaecide available; all seem to work quite well.) Periodic use of Processor Clean II #4135 (4.7 lb.) or #4136 (4 oz.) will help prevent growths and remove chemical stains in the tempering bath. Drain the processor after use. Neither algae nor fungus grows well in the cool and dry environment of an empty water bath.
Replenishment:
JOBO tanks and drums require small quantities of chemicals and are well suited to 'one shot' use. However, it is possible to recover your used chemicals for replenishment and reuse, disposal, or for silver recovery. Follow the chemical manufacturers' recommendations if you replenish your chemicals.
Additional Reading:
Unit Fails To Heat...
Temperature selection dial not set properly. The processor will not heat if the selected temperature is lower than actual temperature of the tempering bath.
The Thermal Overload has tripped...
This switch may trip from vibrations during shipment. Press the reset button.
Caution: If the processor is turned on without water in the tempering bath (or very hot water is added to the bath), the thermal overload will trip. This is a safety feature, to prevent overheating and damage to the processor. Always fill the tempering bath with water (not over 50°C, or 120°F), even when doing 'room temperature' processing.
Drum Or Tank Floats While Processing...
Lower water level in tempering trough.
Check for the proper roller block arrangement, for the tank or drum used. For 2500 and 2800 system tanks or drums use the lower setup. For 1500 series tanks use the higher setup.
Rotation Motor Slows When Coupling Tank, Or Adding Chemicals...
A slight slowing of the rotation speed is normal when coupling a tank or drum, or when adding chemicals or rinse water to a lift equipped processor. If the slowdown is significant, you are probably using more than the recommended amount of chemicals or rinse water. The maximum recommended volume to be used is 600 ml (20 oz.). If the volume is not excessive, check the positioning of the tank or drum on the roller block. The lid or locking ring should not ride on the rollers. Check that the supports are set correctly for the series tank or drum in use. If you are using the lift, be sure that the correct coupling position is selected. Be sure that the trough level is not set too high. If the Transfer Gear shaft is worn, it may slow down the rotation in one direction more than the other - replace the Transfer Gear (#95200).
The Temperature Of The Processor Does Not Lower...
The CPE-2 Plus does not have a cooling mechanism. The processor cools by radiating heat to the air and counter. If the temperature difference is slight, it could take some time to stabilize. If the room temperature is higher than the dialed in temperature, it will remain at, or slightly above room temperature. For alternative procedures to lower the temperature, see Section 1, Processor Maintenance and Tips.
Section 3
[CPE-2 Plus Starter Kit]
Back to Top
How to Use This Manual
Information needed to operate your processor successfully with a wide variety of processes is included in this instruction manual. We urge you to read all the basic information contained in Section One and Section Two. Then read the pages of Section Three that describe the processes you wish to use. If you are having problems with your processor or processing, see the pages ofSection Four. For conversions, tables and lists see Section Five.
If you have obtained this instruction manual as a replacement to earlier editions, use the process recommendations in this web page (where they are different), not the recommendations in the earlier manual(s). These instructions reflect the changes that have been made in film, paper, and chemicals since the original book was written. (If you already have processing procedures that completely satisfy you, don't change them just to match the directions in this web page.)
There are three types of special notations or cautionary information in this manual: Note, Caution, and Warning. The type and format of each is listed below:
Note: Text in this format is informative. It contains additional details to explain the basic information presented.
Caution: Text in this format presents important procedural information. Failure to follow these instructions could adversely affect the processing of your film or paper.
WARNING: Text in this format presents critical information. Possible damage to your equipment or personal injury could result from not following these instructions!
Copyright:
Copyright © 1997 by JOBO Fototechnic, Inc. All rights reserved. No portion of this web page may be reproduced in any form without express written consent from JOBO Fototechnic, Inc.
Every effort was made to include up-to-date and accurate information in this manual. All manufacturers, including JOBO, maintain the right to change specifications for their products. Changes may be made to specifications without notice. For the most current product specifications and usage, contact the manufacturer.
JOBO makes no claim for the accuracy or usability of other manufacturers' information contained in this manual. The processing recommendations included in this manual may not be optimal for every situation. If you require specific results, test all process instructions for suitability.

JOBO is not liable for any damages, direct or consequential, occurring from the use or misuse of information contained in this manual.
Credits:
Author: Damon Dean
JOBO Contributors: Ken Owen, Chris Mishler, Sam Proud, Paul Rowe
Manual part number 66051. Revision 06/97.
[CPE-2 Plus]
Back to Top
Index:
Important Safeguards
Section 1: Introduction
Section 2: General Processing Instructions
Section 3: Specific Processes (all are links to additional pages)
Introduction to Specific Processes Color Transparency Film Process (Slides) E-6
o Process Times for E-6 (six-step) o Process Sequence for E-6 (six step) o Process Information for E-6 (six step) o Process Times for E-6 (three-step) o Process Sequence for E-6 (three step) o Process Information for E-6 (three step) o Process Control for E-6 (six and three step) o Push or Pull Processing for E-6 (six or three step)
Color Negative Film Process C-41 o Process Sequence for C-41 Compatible Chemicals o Process Sequence for Tetenal Mono C-41 and Tetenal Press C-41
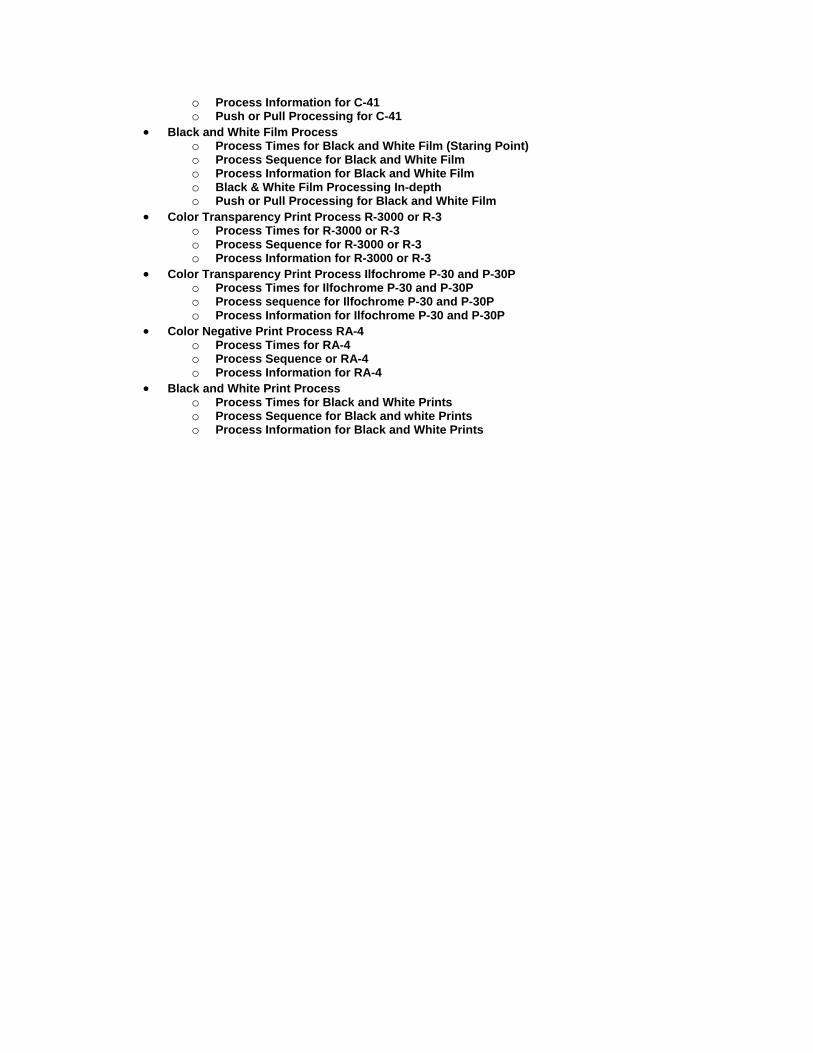
o Process Information for C-41 o Push or Pull Processing for C-41
Black and White Film Process o Process Times for Black and White Film (Staring Point) o Process Sequence for Black and White Film o Process Information for Black and White Film o Black & White Film Processing In-depth o Push or Pull Processing for Black and White Film
Color Transparency Print Process R-3000 or R-3 o Process Times for R-3000 or R-3 o Process Sequence for R-3000 or R-3 o Process Information for R-3000 or R-3
Color Transparency Print Process Ilfochrome P-30 and P-30P o Process Times for Ilfochrome P-30 and P-30P o Process sequence for Ilfochrome P-30 and P-30P o Process Information for Ilfochrome P-30 and P-30P
Color Negative Print Process RA-4 o Process Times for RA-4 o Process Sequence or RA-4 o Process Information for RA-4
Black and White Print Process o Process Times for Black and White Prints o Process Sequence for Black and white Prints o Process Information for Black and White Prints

Troubleshooting
Introduction
Sometimes you may find that your processing results do not meet your expectations. This section deals with troubleshooting the problems that can occur.
Please note that many errors other than actual processing may appear to be a processing fault. A partial list of these are: Out-of-date or improperly stored film or paper; over- or underexposure; camera, drum or tank, or darkroom light leaks; exposure of the film or paper to X-rays, microwaves, or some chemical fumes; and incorrect identification of the process required for the material you have exposed.
If it is likely that the problem is in the processing, use this section to determine the most likely source. Only test runs should be made until the problem is resolved.
If you are at a loss trying to solve a processing problem, it may be the local water supply. In many locations, the softness level or pH value of the water may not be optimal for photo chemicals. The water may contain dissolved or suspended impurities that may be harmful to the chemicals. Further, the level of these problems may fluctuate seasonally or even more often. If you have any reason to suspect that the water may be contributing to processing irregularities or problems, buy bottled, distilled water to mix your chemicals, and try again. This minimal expense can yield great benefits in quality and consistency of the process.
Note: This information page was prepared for the JOBO manual operating rotary processors (CPE-2 Plus, CPA-2, and CPP-2). Most of this information will apply equally well for the Autolab processors, and to a slightly lesser extent to any processing equipment and procedure.
Troubleshooting Index
Introduction Index Checklists for Troubleshooting With JOBO Customer Service Troubleshooting General Checklist
o Review Non-Processing Errors or Faults o Mechanical Troubleshooting
Processing Faults for Specific Processes
o Processing Faults - Color Transparency Film, E-6 o Processing Faults - Color Negative Film, C-41 o Processing Faults - Black and White Film o Processing Faults - Prints From Transparencies, R-3000 o Processing Faults - Prints From Transparencies, Ilfochrome o Processing Faults - Prints From Color Negatives, RA-4 o Processing Faults - Prints From Black and White Negatives
Checklists for Troubleshooting With JOBO Customer Service
We urge you to review the following checklists to help solve any problems that might arise. If the problem persists after investigating the lists below, prepare a detailed list including:
Equipment
• Processor model, serial number, accessories (JOBO lift?), how long you have owned the processor.
• Film or paper processed: brand, type, age.
• Model of drum or tank used, reel(s) used.
• Other darkroom equipment used.
Supplies
• Process chemicals type, brand.
• When purchased, when mixed.
• How mixed, type of water used.
• How stored.
• Dilutions used.
Processor Settings
• Temperature set, actual temperature of process.
• Rotation: speed.
The Process
• Volume of chemistries, rinses.
• Names and times of each step.
• Any changes in procedure from instructions.
The Problem
• Full description of problem.
• Frequency of problem: once, several times, random, always.
• Full description of attempts to correct problem.
• Corrections you think may work, but have not tried.

With this list at hand, call JOBO Customer Service at (734) 677-6989 Ext. 4721. We are available to diagnose your problem and present possible solutions.
Return to Troubleshooting Index
Troubleshooting General Checklist
Review Non-Processing Errors or Faults
Film and Paper
• Is the film or paper past its expiration date?
• Was it properly stored?
• Was it properly exposed, or exposed at all, or fogged?
• Was the film or paper loaded in the tank or drum correctly?
Chemical Stock
• Did I use the correct chemicals for this film or paper?
• Is the chemical past its expiration date?
• Was it properly stored?
Chemical Mix
• Dilution correct?
• All components mixed in proper order?
• Stirred after each component added?
• Used all the proper components for each solution?
• Mixed at the proper temperature?
• Used at the proper temperature?
Mixing Contamination
• The graduates or mixing vessels thoroughly washed between the mixing of each step?
• The bottles used for storage thoroughly cleaned before using?
• Water rinse was run through the JOBO Lift after the last process to clean the lift?

• Drum or tank rinsed after the last process?
• Drum or tank dried before use?
Mixed Chemicals Impaired
• Stored properly? (There should be as little air as possible over the developer in the storage bottle. It is best if the bottle is full to the brim with no air space.)
• Stored too long? (Date the bottle of chemical when mixed, to know how old it is when used.)
• Used in the correct order?
Much can be deduced about a problem by using the edge markings printed on 35 mm and 120/220 roll film. The marks generally tell the frame or negative number, type of film, and sometimes the emulsion number. This information is pre-exposed on the film during manufacture, and its exposure is correct.
If edge markings appear properly developed on your film, the problem is generally not with the chemicals. Look for difficulties in exposure (camera or light meter problems).
If the edge markings are dull, appear underexposed, or are not fully visible for the length of the film, the problem can be:
• Loading or unloading of film in camera.
• Loading of film on reel in the darkroom.
• Improper storage of the film (excess heat, radiation, or chemical fumes).
• Age of film (old film develops a high fog level).
• Chemical mixing, or dilution, or contamination problems.
Return to Troubleshooting Index
Mechanical Troubleshooting
Nothing Works
• Unit not plugged in. Plug the processor into a grounded outlet.
• Check the button on your Ground Fault Interrupt to be sure the receptacle is 'reset.'
• On/Off switch not on. Set switch to '1.'
• AC outlet faulty (check fuse box or circuit breaker).
• The fuse has blown. Replace the fuse. See Appendices for details.
WARNING: If you replace the fuse, and it blows again, contact JOBO for servicing of the processor.
Unit Fails To Heat...
Temperature selection is not set properly. The processor will not heat if the selected temperature is lower than actual temperature of the tempering bath.
The Thermal Overload (CPE-2 Plus, CPA-2, CPP-2) has tripped...
This switch may trip from vibrations during shipment. Press the reset button.
Caution: If the processor is turned on without water in the tempering bath (or very hot water is added to the bath), the thermal overload will trip. This is a safety feature, to prevent overheating and damage to the processor. Always fill the tempering bath with water (not over 50°C, or 120°F), even when doing 'room temperature' processing.
Drum Or Tank Floats While Processing...
Lower water level in tempering trough by turning the level control dial.
Check for the proper roller block arrangement, for the tank or drum used. For 2500 and 2800 system tanks or drums use the lower setup. For 1500 series tanks use the higher setup, facing each other. For 3000 system drums the rollers on their supports face away from each other.
Rotation Motor Slows When Coupling Tank, Or Adding Chemicals...
A slight slowing of the rotation speed is normal when coupling a tank or drum, or when adding chemicals or rinse water to a lift equipped processor. If the slowdown is significant, you are probably using more than the recommended amount of chemicals or rinse water. The maximum recommended volume to be used is 600 ml (20 oz.) with the CPE-2 Plus, and 1000 ml (34 oz.) with the CPA-2 and CPP-2. If the volume is not excessive, check the positioning of the tank or drum on the roller block. The lid or locking ring should not ride on the rollers. Check that the supports are set correctly for the series tank or drum in use. If you are using the lift, be sure that the correct coupling position is selected. Be sure that the trough level is not set too high. If the Transfer Gear shaft is worn, it may slow down the rotation in one direction more than the other - replace the Transfer Gear (#95200).
The Temperature Of The Processor Does Not Lower...
The CPE-2 Plus and CPA-2 do not have a cooling mechanism. The processor cools by radiating heat to the air and counter. If the temperature difference is slight, it could take some time to stabilize. If the room temperature is higher than the selected temperature, it will remain at, or slightly above room temperature.
Return to Troubleshooting Index
Processing Faults for Specific Processes
Processing Faults - Color Transparency Film, E-6
Transparency too dark...
• Increase time or temperature of the first developer.
• This effect also could be caused by underexposure of the film.
Transparency too light...
• Decrease time or temperature of the first developer.
• This effect also could be caused by overexposure of the film.
Transparency too light with a color shift toward blue...
• First developer contaminated with fixing bath.
• Clean equipment and mix fresh developer.
Color shift toward blue...
• Be sure to adjust the reversal bath to a 60% solution for Kodak chemicals (Tetenal is already at the correct dilution.)
• For further adjustments, see E-6 manuals from the major chemical manufacturers.
Color shift toward yellow...
• See the JOBO E-6 Handbook, part #4192, or the E-6 Manuals from the major chemical manufacturers.
Strong color shift toward green with insufficient black density...
• Reversal bath is exhausted. Use fresh reversal.
• With three-step chemicals, replace the color developer, as the reversal agent is incorporated in the color developer. Alternately, you may use a reversal exposure, done after the first rinse is completed.
Yellow spots. High minimum density...
• Developer contaminated with stabilizer.
• Clean reels and tanks.
• See comments on stabilizer in the E-6 Process section.
High minimum density...
• Sometimes a gray, muddy appearance to the whole slide (silver residue). Silver has been retained in the film emulsion due to inadequate action of the bleach or bleach-fix. Aerate the bleach, and re-bleach and fix (rinse and stabilize) to remove the retained silver.
• Weak conditioner in six-bath E-6.
Color shift toward magenta...
• Increase the time of the rinse after first developer to a maximum of four minutes.
• Be sure that the temperature of the rinse water is at the processing temperature. Overly cold or hot rinse water can cause color shifts.
• Aerate the bleach or bleach-fix before starting the process.
• Increase the color developer concentration by 10%.
Film end closest to center core of the reel is undeveloped, or streaked...
• Increase the amount of chemicals being used.
Return to Troubleshooting Index
Processing Faults - Color Negative Film, C-41
Negative too light. (Not dense enough)...
• Developer old or exhausted.
• Could be underexposure of the film.
Negative too dark. (Too dense)...
• Developer mixed wrong.
• Could be overexposure of the film.
No image on film - no edge markings...
• Check sequence of processing steps. Developer must come before the bleach step.
• Developer may be old or exhausted.
No image on film - edge markings are present...
• Chemical steps of the process are OK, film unexposed.
Film end closest to the center core of the reel is undeveloped or streaked...
• Increase the amount of chemicals being used.
Negatives more dense toward edges, gradually getting less dense toward center...

• Reels contaminated with stabilizer. Replace reels.
• See comments on stabilizer in the sections on E-6 and C-41 Film processing.
Film image appears dense, base color of film is very reddish. Long exposure time required for prints, which may have red shadows and cyan colored highlights...
• Fault is with the bleach or bleach-fix step of the process. Silver residues remain in the film, which creates the high density. It is also possible that a colorless leuco-cyan dye has formed in the image, resulting in the red shadows or cyan highlights in a print. Both problems, the retained silver, and the leuco-cyan dye, can be corrected by aerating the bleach (bleach-fix). Then re-bleach, fix, rinse and stabilize the film.
Return to Troubleshooting Index
Processing Faults - Black and White Film
Negative too light...
• Check camera or light meter for possible exposure problems.
• Increase the time of developer.
• Increase the amount of developer. (Particularly if image is 'mottled' and low contrast.)
Negative too dark (dense)...
• Check camera or light meter for possible exposure problems.
• Decrease the time of developer.
Film end closest to center core of the reel is undeveloped, or streaked...
• Increase the amount of chemicals being used.
No image on film - no edge markings...
• Check sequence of processing steps. Developer must come before the fixer step.
• Developer may be old or exhausted.
No image on film - edge markings are present...
• Chemical steps of the process are OK, film unexposed.
Density streaks or clouds...
• Developing time is too short. Dilute the developer to a concentration requiring five minutes or more developing time, or change to a different developer.
• Incomplete fixing of the film. Re-fix and wash the film. Increase fixer time.
• Uneven development. Try slower or faster rotation speed. Add or delete pre-rinse. Clean tank and reels.
Return to Troubleshooting Index
Processing Faults - Prints From Transparencies, R-3000
Print is too dark...
• Increase exposure time.
Print is too light...
• Decrease exposure time.
Contrast is excessive, or black areas are green...
• Reduce time or temperature of the first developer.
Dark areas and colors are uneven...
• Processor is not level, or drum is floating. Level the processor (See the section on Installing the Processor). If the drum is floating, lower the water level.
• Insufficient chemicals. As a minimum use the amount recommended by JOBO, or by the chemical manufacturer, whichever is higher.
Print is too dark, and has low contrast and impure blacks....
• Increase time or temperature of the first developer.
Stripes in print from end nearest to end farthest from the processor motor head...
• Use 1 minute pre-rinse. If using the magnet drive, be sure to start the drum in rotation immediately after turning horizontal.
• Dry drum and lid thoroughly.
Print with undeveloped areas (white areas)...
• Processor is not level or drum is floating. Level the processor. Lower the water level if the drum is floating.
• Chemical amount is insufficient. At a minimum, use the amount recommended by JOBO or by the chemical manufacturer, whichever is higher.
Print has light to white spots...
• Paper has been exposed to light.
Black areas of print lack density. The print has a color shift...
• Exposure to safelight.
Black areas of print (borders) appear red or brown.
• Reduce color developer time.
Very light print with strong magenta-purple color shift...
• Contamination of color developer with first developer. Insufficient rinse after first developer. Increase the number of changes of water in rinse after developer. Be sure to drain the drum thoroughly at the end of each change of rinse water.
Return to Troubleshooting Index
Processing Faults - Prints From Transparencies, Ilfochrome
You must be cautious about the rinse after the developer in the Ilfochrome process. It is a 30-second rinse and the quantity of water should be no more than the quantity of chemical being used. The following cautions should be adhered to:
• Do not extend the time of this rinse past 30 seconds.
• Do not change the water during this rinse.
• Do not increase the volume of the water for this rinse.
Brown or yellow spots on back side of print, or red stains on the exposed side of the print...
• Decrease rinse time and/or water volume after developer.
Spots or streaks - light or completely white...
• Paper has been exposed to light.
Gray or black spots on print...
• Processor is not level or drum is floating. Check if processor is level (see section on 'Installing The Processor'). Lower the level of the water bath, if the drum is floating.
• Chemical amount is insufficient. At a minimum use the amount recommended by Ilford.
Print has reverse (left to right) image - too dark, and orange...
• Paper was exposed through the back side. Expose paper with emulsion side up.
Faint, dark print...
• Increase developing time.
Black areas lack density, and a color shift...
• Safelight exposure, or exposure to light.
Yellow spots on the print...
• Developer contaminated by fixer. Rinse and clean drums carefully. You may need to discard developer and mix fresh.
Yellow edges of Print..
• Increase final rinse time or do additional rinse outside of drum.
Gradual diminishing of color and density on the print from end nearest the motor head to end farthest from the motor head...
• Level processor, or increase chemical amounts.
• Check temperatures and process times.
• Drum is floating in the water bath. Lower the water level until drum no longer floats.
Blue streaks on print...
• Emulsion has been scratched. Remove from drum carefully. Use less pressure on the print squeegee.
Return to Troubleshooting Index
Processing Faults - Prints From Color Negatives, RA-4
Print is too dark...
• Use shorter exposure time.
Print is too light...
• Use longer exposure time.
Black areas of the print are dark blue...
• Increase developer time.
• Increase developer temperature.
• Developer is old or exhausted. Mix fresh chemicals.
Dark blotches in print...
• Paper has been exposed to light.
Print has light colored stripes...
• Processor is not level, or drum is floating in the water bath. Check the processor with level. If drum is floating, lower the water level.
• Insufficient chemical amount. As a minimum, use either the amount recommended by JOBO or by the chemical manufacturer, whichever is greater.
Print is light or off-color on the end away from the motor head...
• Chemical volume insufficient or drum not level. Check that processor is level. Be sure drum is not floating.
Print has stripes from end nearest motor head to end farthest from motor head...
• Use 1 minute pre-rinse. Position drum on processor more rapidly after turning horizontal (if using the magnet drive).
• Be sure that the drum and lid are dry before placing paper to start a process. Be sure to remove the beaker or funnel, and dry them with the lid, before using for the next process.
Light spots in print...
• Bleach-Fix contamination. Clean drum and cap assembly carefully.
• If using a JOBO Lift, run water through the lift after processing, or before the next process.
Color shift when switching from larger to smaller drums...
• Increase amount of fresh chemicals being used. If practical, be sure that the diameter of the test drum and the print drum are the same. Different diameters are likely to give different results.
White in print is impure. (Often Cyan)...
• Wrong, or too bright safelight is in use.
• Darkroom is not light-tight.
• Contamination of the developer with bleach-fix. Rinse drum and lid thoroughly between runs.
Magenta-purple swirls in random pattern(s) or overall across the face of the print...
• Most often from a carry-forward of the developer into the bleach-fix. Increase the concentration or time of the stop-bath. Use a 30-second rinse after the stop-bath step.
Yellow-red to brown 'flame-like' appearance particularly noticeable on edge of print...
• Light fog (light strike) on paper. Check paper storage and handling procedures.
Return to Troubleshooting Index
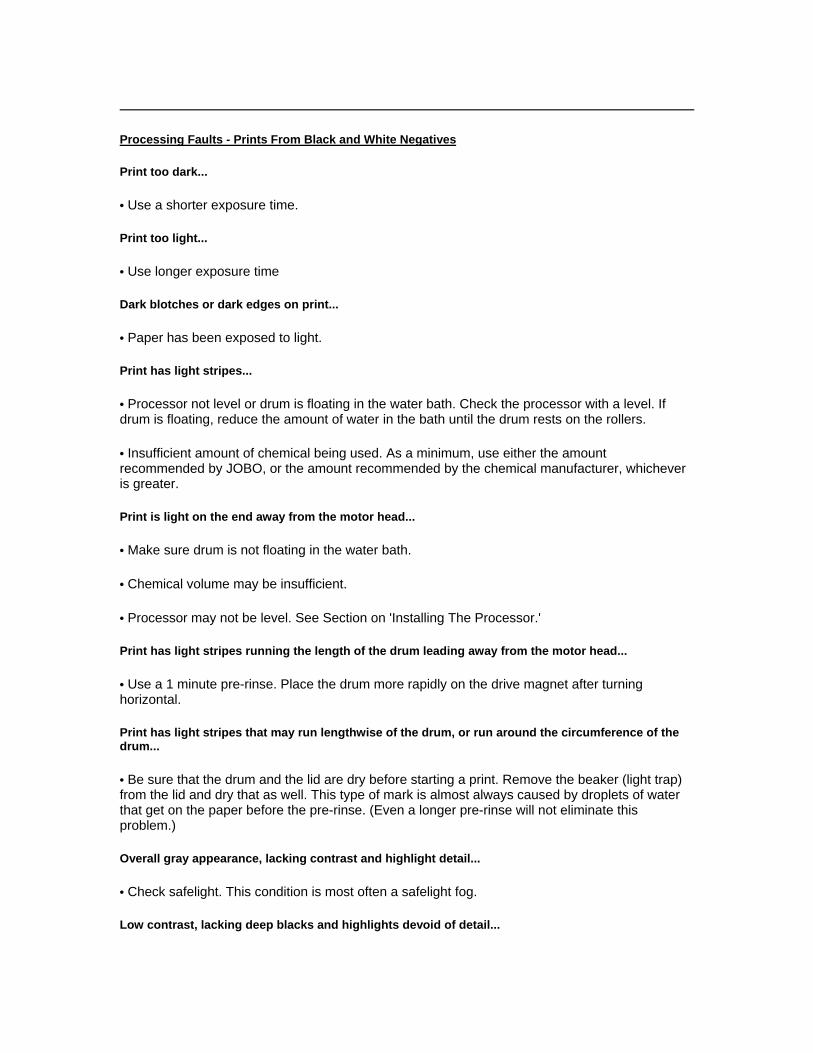
Processing Faults - Prints From Black and White Negatives
Print too dark...
• Use a shorter exposure time.
Print too light...
• Use longer exposure time
Dark blotches or dark edges on print...
• Paper has been exposed to light.
Print has light stripes...
• Processor not level or drum is floating in the water bath. Check the processor with a level. If drum is floating, reduce the amount of water in the bath until the drum rests on the rollers.
• Insufficient amount of chemical being used. As a minimum, use either the amount recommended by JOBO, or the amount recommended by the chemical manufacturer, whichever is greater.
Print is light on the end away from the motor head...
• Make sure drum is not floating in the water bath.
• Chemical volume may be insufficient.
• Processor may not be level. See Section on 'Installing The Processor.'
Print has light stripes running the length of the drum leading away from the motor head...
• Use a 1 minute pre-rinse. Place the drum more rapidly on the drive magnet after turning horizontal.
Print has light stripes that may run lengthwise of the drum, or run around the circumference of the drum...
• Be sure that the drum and the lid are dry before starting a print. Remove the beaker (light trap) from the lid and dry that as well. This type of mark is almost always caused by droplets of water that get on the paper before the pre-rinse. (Even a longer pre-rinse will not eliminate this problem.)
Overall gray appearance, lacking contrast and highlight detail...
• Check safelight. This condition is most often a safelight fog.
Low contrast, lacking deep blacks and highlights devoid of detail...

• Insufficient developer time.
• Developer too dilute or exhausted.
• Higher contrast paper (or printing filter for multi-contrast) needed.
• Old paper (or paper improperly stored).

Section 5
Note: This is a very detailed and profusely illustrated web page. It will take a little time to load it into your browser. Get a cup of coffee and stretch while it is downloading. It is worth the wait!
[CPE-2 Plus Starter Kit]
Back to Top
How to Use This Manual
Information needed to operate your processor successfully with a wide variety of processes is included in this instruction manual. We urge you to read all the basic information contained in Section One and Section Two. Then read the pages of Section Three that describe the processes you wish to use. If you are having problems with your processor or processing, see the pages ofSection Four. For conversions, tables and lists see Section Five.
If you have obtained this instruction manual as a replacement to earlier editions, use the process recommendations in this web page (where they are different), not the recommendations in the earlier manual(s). These instructions reflect the changes that have been made in film, paper, and chemicals since the original book was written. (If you already have processing procedures that completely satisfy you, don't change them just to match the directions in this web page.)
There are three types of special notations or cautionary information in this manual: Note, Caution, and Warning. The type and format of each is listed below:
Note: Text in this format is informative. It contains additional details to explain the basic information presented.
Caution: Text in this format presents important procedural information. Failure to follow these instructions could adversely affect the processing of your film or paper.
WARNING: Text in this format presents critical information. Possible damage to your equipment or personal injury could result from not following these instructions!
Copyright:
Copyright © 1997 by JOBO Fototechnic, Inc. All rights reserved. No portion of this web page may be reproduced in any form without express written consent from JOBO Fototechnic, Inc.
Every effort was made to include up-to-date and accurate information in this manual. All manufacturers, including JOBO, maintain the right to change specifications for their products. Changes may be made to specifications without notice. For the most current product specifications and usage, contact the manufacturer.

JOBO makes no claim for the accuracy or usability of other manufacturers' information contained in this manual. The processing recommendations included in this manual may not be optimal for every situation. If you require specific results, test all process instructions for suitability.
JOBO is not liable for any damages, direct or consequential, occurring from the use or misuse of information contained in this manual.
Credits:
Author: Damon Dean
JOBO Contributors: Ken Owen, Chris Mishler, Sam Proud, Paul Rowe
Manual part number 66051. Revision 06/97.
[CPE-2 Plus]
Back to Top
Index:
Important Safeguards
Section 1: Introduction
Section 2: General Processing Instructions
Section 3: Specific Processes
Section 4: Troubleshooting
Section 5: Appendices
Processor Specifications; CPE-2 Plus Accessories
o JOBO Lift o E-6 Conversion Kit o JoMate Conversion Kit
Spare Parts o Parts for the Motor Head CPE-2 Plus o Parts for the Motor Head CPE-2 (Only for Non-Plus) o Parts for the Tempering Bath o Parts for the JOBO Lift o Parts for the Roller Block o Parts for JOBO Film Tanks and Print Drums
Fuse Replacement CPE-2 Plus Improvements Using This Manual for the Original CPE-2 Processor Cogs and Magnets(linked to additional page) JOBO Chemicals (all are links to additional pages)
o C-41 Press Kit Tetenal Chemicals (all are links to additional pages)
o C-41 Chemicals o RA-4 Chemicals o E-6 Chemicals o Black and White Chemicals and Accessories
Conversion Formulas and Tables, Metric and English (linked to additional Page) Tank and Drum Capacities (linked to additional page) 1500 Series Tanks (Illustrations) 2500 Series Tanks (Illustrations) 2800 Series Drums (Illustrations) Trademarks
Back to Top
Processor Specifications; CPE-2 Plus
Tempering bath capacity: 2 gallons (7.6 liters) Base Area: 12 x 16 inches (30 x 40 cm), including overhang Chemical Solution Capacity: Four 260 ml (8 oz.) graduates; four 600 ml
(20 oz.) bottles (optional six bottles only with E-6 Conversion Kit #4061) Voltage: 120 Volts, 60 cycles (Hz) AC Power Consumption: 300 Watts, 2.5 Amps Tanks and Drums:
o 1510 o 1520 o 1526 (1520 and 1530 together) o 1530 (extension module used with 1510 or 1520) o 1540 (1510 and 1530 together) o 2517 o 2521/2523 o 2551/2553 o 2820 o 2830 o 2840

o 2870 (extension module used with 2820 to make 2830)
Note: Tanks or drums with a last digit of '3' only work with the JOBO Lift accessory. Tanks with a last digit of '1' come with an attached magnet (#1504.) All tanks or drums (except extension modules) with a last digit of '0' require a magnet accessory (#1504), mounted on the bottom, to be used on the CPE-2 Plus processor (without the JOBO Lift). The 1526 Combo Drum does not come with either a magnet or cog. To use any of the above tanks or drums with the JOBO Lift (except the ones already equipped with a cog), you must add a Cog (#1505). Install it in the lid of the tank or drum.
Reels: o 1501 (35 mm, 1 or 2 120, 220) o 1502 (2 110, or 16 mm 5' or 1.5 M maximum) o 1555 (35 mm Stainless Steel) o 1557 (120 Stainless Steel) o 1559 (220 Stainless Steel) o 2502 (35 mm, 1 or 2 120, 220) o 2509N (4 x 5", 6 x 9 cm, 9 x 12 cm, up to six sheets) o 2517 (70 mm, 5' or 1.5 M maximum) o 2518 (2 1/4 x 3 1/4" up to six sheets)
Back to Top
Accessories
JOBO Lift E-6 Conversion Kit JoMate Conversion Kit
Additional or replacement: Black Bottle 600 ml (#3370), White Bottle 600 ml (#3371), Graduate 260 ml (3308), Color Thermometer (#3321).
For other JOBO products that will enhance the use of your processor, check your JOBO catalog, talk to your JOBO dealer, or call JOBO Customer Service at (734) 677-6989, ext. 4721. Our hours are from 8 a.m. to 5 p.m. Eastern Time, Monday through Friday, but our voice mail answering system is available 24 hours a day. You may fax us at (734) 677-6963. E-mail us [email protected]. If you wish to write us, our address is: JOBO Fototechnic, P. O. Box 3721, Ann Arbor, MI 48106-3721, USA. We will be happy to help you.
Back to Top
CPE-2 JOBO Lift

The JOBO Lift (#4062) accessory makes it easier to dump and fill the chemical and rinse steps. Instead of grabbing the tank off the processor, removing the tank cap, pouring out the solution, pouring in the next solution, replacing the tank cap, and putting the tank back on the processor, all you do is pull back on handle to drain the tank, then lower the handle and fill the tank.
Back to Top
E-6 Conversion Kit
Use the #4061 E-6 Conversion Kit to transform your CPE-2 Plus to a full six-step E-6 processor. The conversion kit comes with a replacement bottle rack and two 600ml bottles (to be used with the four bottles that come with the processor).
Back to Top
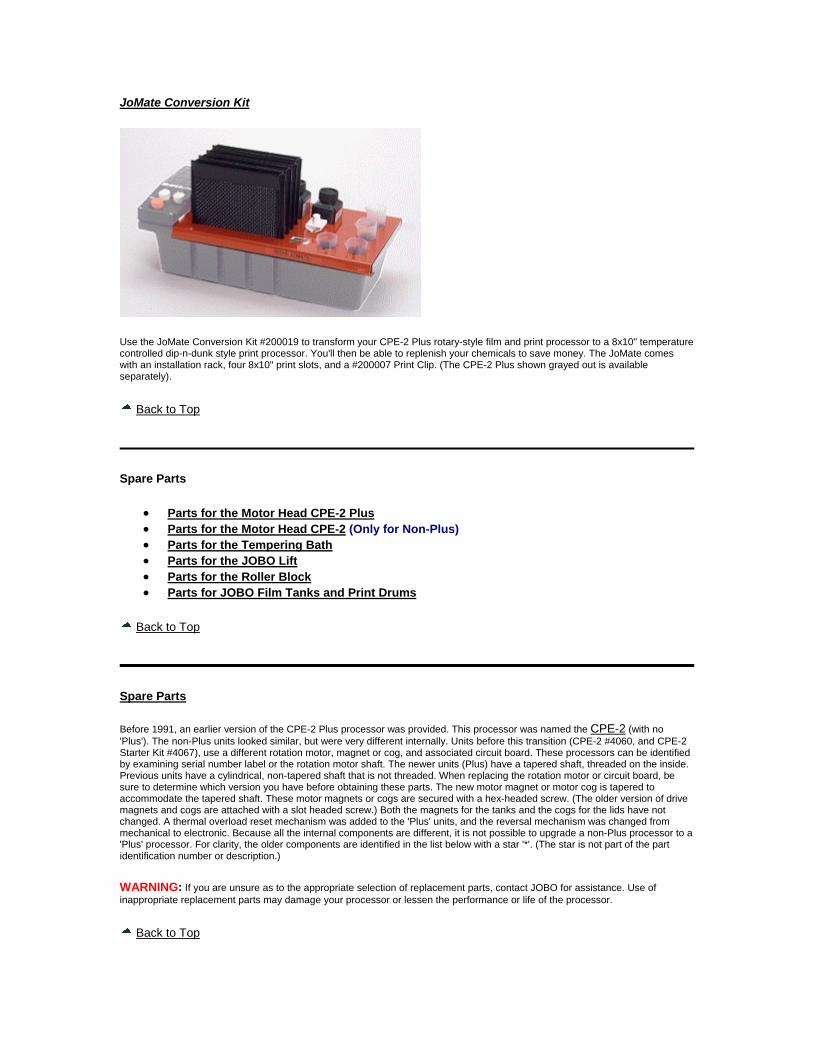
JoMate Conversion Kit
Use the JoMate Conversion Kit #200019 to transform your CPE-2 Plus rotary-style film and print processor to a 8x10" temperature controlled dip-n-dunk style print processor. You'll then be able to replenish your chemicals to save money. The JoMate comes with an installation rack, four 8x10" print slots, and a #200007 Print Clip. (The CPE-2 Plus shown grayed out is available separately).
Back to Top
Spare Parts
Parts for the Motor Head CPE-2 Plus Parts for the Motor Head CPE-2 (Only for Non-Plus) Parts for the Tempering Bath Parts for the JOBO Lift Parts for the Roller Block Parts for JOBO Film Tanks and Print Drums
Back to Top
Spare Parts
Before 1991, an earlier version of the CPE-2 Plus processor was provided. This processor was named the CPE-2 (with no 'Plus'). The non-Plus units looked similar, but were very different internally. Units before this transition (CPE-2 #4060, and CPE-2 Starter Kit #4067), use a different rotation motor, magnet or cog, and associated circuit board. These processors can be identified by examining serial number label or the rotation motor shaft. The newer units (Plus) have a tapered shaft, threaded on the inside. Previous units have a cylindrical, non-tapered shaft that is not threaded. When replacing the rotation motor or circuit board, be sure to determine which version you have before obtaining these parts. The new motor magnet or motor cog is tapered to accommodate the tapered shaft. These motor magnets or cogs are secured with a hex-headed screw. (The older version of drive magnets and cogs are attached with a slot headed screw.) Both the magnets for the tanks and the cogs for the lids have not changed. A thermal overload reset mechanism was added to the 'Plus' units, and the reversal mechanism was changed from mechanical to electronic. Because all the internal components are different, it is not possible to upgrade a non-Plus processor to a 'Plus' processor. For clarity, the older components are identified in the list below with a star '*'. (The star is not part of the part identification number or description.)
WARNING: If you are unsure as to the appropriate selection of replacement parts, contact JOBO for assistance. Use of inappropriate replacement parts may damage your processor or lessen the performance or life of the processor.
Back to Top
Parts for the Motor Head CPE-2 Plus (#4065):
# 94064 Circuit Board for CPE-2 Plus, (110 volt - plus only) # 32025A Rotation Motor without shaft (plus only) # 93029 Shaft with Nut for Rotation Motor (tapered - plus only) # 95442 Rotation Magnet with Hex Screw for motor shaft (for motor w/o lift
only - plus only) # 95299 Cog Gear (black, for motor with lift only - plus only) # 26003 Heat Indicator Lamp, 110 volt # 95178 Thermostat (with probe) # 95250 Thermal Overload Reset (with probe - plus only) # 27010 Fuse, 3.15 amp, type T (slow blow), 250 volt # 93035 Heating Element, 110 volt
Back to Top
Parts for the Motor Head CPE-2 (#4060) (Only for Non-Plus):
# 94002 * Circuit Board for CPE-2, (110 volt - non-plus only) # 32007 * Rotation Motor (with non tapered shaft - non-plus only) # 95001 * Rotation Magnet (for motor w/o lift only - non-plus only) # 95523 * Cog Gear (black, for motor with lift only - non-plus only) # 95226 * Micro Switch for Reversal (non-plus only)
Back to Top
Parts for the Tempering Bath:
# 3371 600 ml Bottle, White # 3370 600 ml Bottle, Black # 3380 600 ml Bottle Set (3 white, 1 black) # 05042 Cap for 600 ml Bottle # 3308 260 ml Graduate # 3318 Graduate Kit (four #3308 graduates) # 95520 Set of two Processor Leveling Wedges # 15018 Ceramic Spacer (bottom of trough) # 3321 Color Thermometer # 35054 Push Pin for Bottle Rack # 13008 Cone for bottle rack support # 91045 Bottle Rack (4-bottle, 4-graduates) - requires two (2) #35054
push pins

# 4061 E-6 Conversion Kit (Accessory Rack for 6-600 ml Bottles, with two (2) 600 ml Bottles)
Back to Top
Parts for the JOBO Lift:
# 07083 White Retaining Clip (old style lift only) # 92157 Black Retaining Clip Assembly (new style lift only) # 92158 Red Cap for Lift (new style lift only) # 07109 Lift Handle Attachment (black hub only) # 95186 Lift Handle Assembly (includes hub, tube and cap) # 34200 Screw for the Lift Handle # 95200 Transfer Gear Set (2 sets) # 34901 Washer for Transfer Gear (old style lift only) # 95465 Grease Syringe (for lift gears)
Back to Top
Parts for the Roller Block:
# 95215 Roller Block Assembly for Lift Arm # 95183 Roller Block Assembly for Processor Trough # 07067 Roller Extensions (angled arms) for roller block # 07007 White Rollers for roller block # 92167 Black Rollers with stainless steel axle (substitute for 07007 with
07067 extensions attached)
Back to Top
Parts for JOBO Film Tanks and Print Drums:
# 03042 Funnel, light trap for 1500/2500 Film Tanks (2800 with stopper, lift only)
# 03046 Red Cap, for lid of 1500/2500/2800 series # 03049 Beaker, for lid of 1500/2800 Paper Drums # 04043 Center Core for single reel with base (1510, 1540) # 04044 Center Core for two reels with base (1520, 1526, 2521, 2523,
2551, 2553) # 04045 Center Core for three reel extension (1526, 1530, 1540, 2553)
# 91034 Inversion Lid With Ring for 1500 series (no funnel, beaker, or cap)
# 91036 Inversion Lid With Ring for 2500/2800 series (no funnel, beaker, or cap)
# 1505 Cog (converts inversion lid to cog lid for use on lift) # 07095 Cog Lid Washer (Red) # 15042 Cog Lid Stopper (makes funnel #03042 a light trap for prints,
used with lift) # 1503 Cog Lid for 1500 series (with funnel) # 2503 Cog Lid for 2500/2800 series (with funnel and stopper)
Back to Top
Fuse Replacement
If the processor does not function, the fuse may be blown. If nothing at all works on the processor, first check that the power cord is plugged in, and the outlet it is plugged into is 'live.' If the only thing that does not work is the heating of the water bath, reset the thermal overload button. To check and replace the fuse, use the procedure listed below.
Turn off the processor and unplug the power cord. Drain all the water from the trough. Remove the JOBO Lift (if attached). Remove the five slot-headed screws in the top of the motor housing. Carefully remove all three knobs.
Gently remove the top cover of the motor head, being careful to not stress the switch shafts. Set the top cover aside. (The heat indicator light is attached to the top cover and will limit how far the lid may be placed from the bottom section.)
Locate the fuse. (See below for location, function and specifications of the fuse.) Verify that the power cord is unplugged. Carefully remove the fuse from its holder. (You may use a small screw driver or needle-nose pliers.) Replace the fuse with the designated replacement. Do not substitute a differently rated fuse! Verify complete seating of the new fuse. Reverse the disassembly procedure listed above to reassemble motor head. Test the function of the reassembled motor head. If your processor blows another fuse, contact JOBO for repair assistance.
WARNING: Always unplug the power cord before opening the motor head. Make sure that water does not get into the motor head. If there is any water (or chemicals) inside the motor head, do not plug in power cord, contact JOBO for repair assistance. Never replace a fuse with a different rating. If the processor continues to blow fuses, or there is any function not working correctly, contact JOBO for repair assistance. Do not use the processor if it is not functioning properly.
WARNING: If there is a label beside the fuse indicating a different value (other than what is listed below) for the fuse, contact JOBO for assistance.
Notes:
The screws holding the circuit board to the bottom of the motor head are deliberately not turned down all the way. They are left loose (so the circuit board can move) to prevent the switches from being damaged when the cover is installed or removed. Do not over-tighten these screws.
Visual inspection of a fuse is not a reliable method for determining if the fuse is good. Use a 'continuity checker', or 'Ohm meter' to verify fuse condition. If you do not have access to a checker or meter, replace the suspect fuse with a new, same rated fuse.
The fuse for the CPE-2 Plus is rated at 250 Volts. 250 Volt fuses work with any voltage less than or equal to 250 Volts. You do not need '110 Volt fuses' for processors using 110 Volt power sources.
Main Circuit Fuse
Type: 3.15 Amp 250 Volt (rated) Type T (slow blow), JOBO part #27010
Processor: CPE-2 Plus and CPE-2 Protection: All electrical circuits Failure Symptoms: Nothing works Location: Circuit board, near the On/Off switch
Back to Top
CPE-2 Plus Improvements
You may be wondering what the differences are between the original CPE-2, and the CPE-2 Plus Processors. Briefly, they are:
A thermal overload was been added. This device gives additional protection from overheating when there is not enough water in the tempering bath. If the processor overheats, a circuit breaker trips. Pressing the white button will reset the circuit breaker. If the thermal overload is tripped, the processor will not heat.
The original rotation motor was replaced with a more robust motor. This increases the reliability of the unit with heavy loads.
A more secure mount was made for the magnet or cog, on the end of the motor shaft.
The original mechanical device used for switching the rotation direction of the motor was replaced with an electronic switching circuit. There are no mechanical parts to wear out, or get out of alignment.
The two speeds for rotation have been replaced with a single speed, electronically metered at 75 rpm. The original speed of `2' was also about 75 rpm. Deleting the slower speed of `1' was done because all modern processes worked better at the faster speed.
The motor housing, transformer, and the entire circuit board were replaced to accommodate the above changes.
The JOBO product numbers were changed for the processor and the Starter Kit.
Note: Because of these extensive changes, it is not possible to upgrade a CPE-2 to a CPE-2 Plus.
Back to Top
Using This Manual for the Original CPE-2 Processor
You may use this instruction book for the original CPE-2 Processor, with the following changes and recommendations:
When turning on the rotation motor, use the setting of `2'. The magnet and the drive cog have been changed. Use part number
#95001 for the magnet, and #95523 for the drive cog on the original processor.
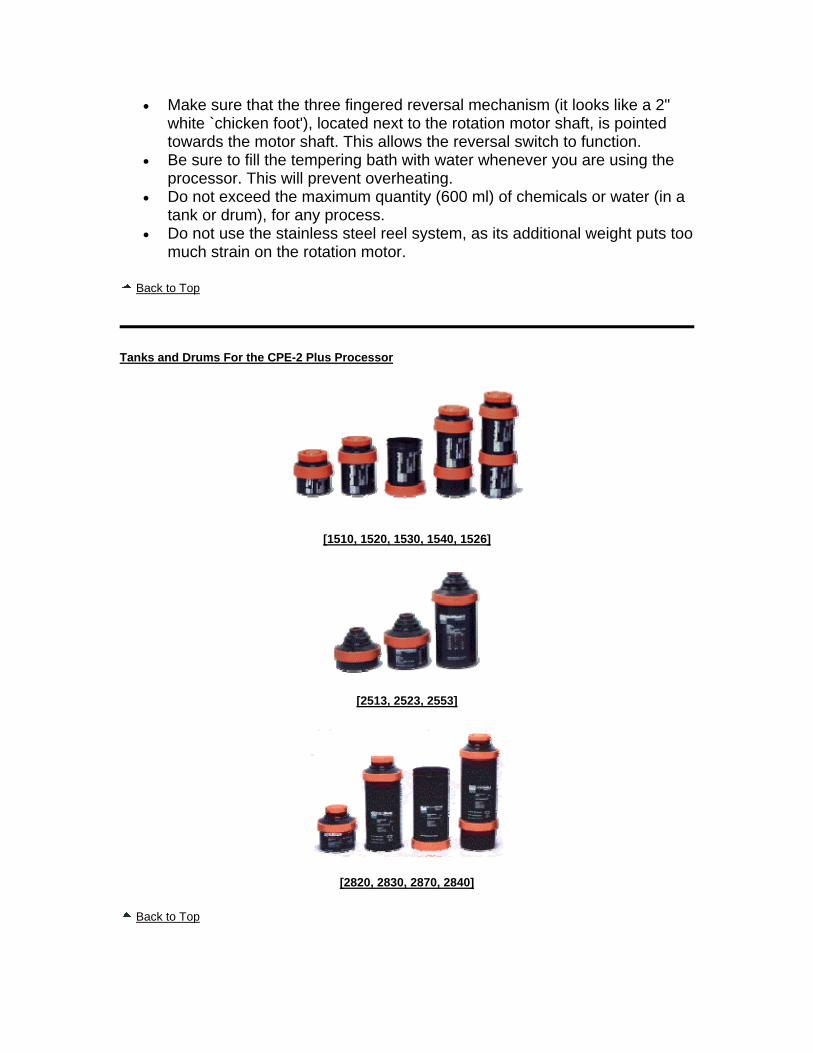
Make sure that the three fingered reversal mechanism (it looks like a 2" white `chicken foot'), located next to the rotation motor shaft, is pointed towards the motor shaft. This allows the reversal switch to function.
Be sure to fill the tempering bath with water whenever you are using the processor. This will prevent overheating.
Do not exceed the maximum quantity (600 ml) of chemicals or water (in a tank or drum), for any process.
Do not use the stainless steel reel system, as its additional weight puts too much strain on the rotation motor.
Back to Top
Tanks and Drums For the CPE-2 Plus Processor
[1510, 1520, 1530, 1540, 1526]
[2513, 2523, 2553]
[2820, 2830, 2870, 2840]
Back to Top

Trademarks
'Agfa', 'Agfachrome' and 'Agfacolor' are registered trademarks of Agfa Gevaert, a division of Bayer.
'Kodak', 'Kodachrome', 'Ektachrome', 'Lumiere', 'Elite', E-6, C-41, EP-2, RA-4, R-3, R-3000, D-76 and X-Tol are registered trademarks of Eastman Kodak Co.
'Fujichrome', 'Velvia', 'Sensia', 'Provia' and 'Reala' are registered trademarks of Fuji Film Co.
'Ilfochrome' and 'Cibachrome' are registered trademarks of Ilford, Inc. 'Tetenal' is a registered trademark of Tetenal Photowerk GmbH & Co.
Use of a trademarked name does not imply an endorsement by the manufacturer. The lack of a trademark does not indicate a challenge to the ownership of a product.
Every effort was made to include up-to-date and accurate information in this manual. All manufacturers, including JOBO, maintain the right to change specifications for their products. Changes may be made to specifications without notice. For the most current product specifications and usage, contact the manufacturer.
JOBO makes no claim for the accuracy or usability of other manufacturers' information contained in this manual. The processing recommendations included in this manual may not be optimal for every situation. If you require specific results, test all process instructions for suitability.
JOBO is not liable for any damages, direct or consequential, occurring from the use or misuse of information contained in this manual.