bb flashback v · publishing your movie ... here, you will use bb flashback recorder to record a...
TRANSCRIPT

BB FlashBack v4
Quick Start Guide


iii
I. Quick Start Guide ......................................................................................................... 1Recording a movie .................................................................................................... 2
How to make your first recording ....................................................................... 2Editing your movie ................................................................................................... 6
The toolbar ...................................................................................................... 6Editing frames .................................................................................................. 9
How to delete frames: ............................................................................... 9How to insert frames: ................................................................................ 9How to crop a movie: ................................................................................ 9
Annotating your movie .................................................................................... 10How to add text to a movie ...................................................................... 10How to add an image to a movie ............................................................... 15
Using zoom/pan, cropping and autoscroll ........................................................... 17How to zoom or pan: ............................................................................... 17How to crop a movie and use the autoscroll ............................................... 18
Publishing your movie ............................................................................................. 20Exporting your movie ...................................................................................... 20Uploading to YouTube for easy sharing ............................................................. 22

Part I. Quick Start Guide

2
Recording a movieFirst you need to make a recording which you can edit and publish.
How to make your first recording
Here, you will use BB FlashBack Recorder to record a movie which you can then edit in BB FlashBackPlayer
1. Open the BB FlashBack Pro 3 Recorder from the windows start menu.
2. On the welcome screen, click Record a new movie;
Recording a movie
3
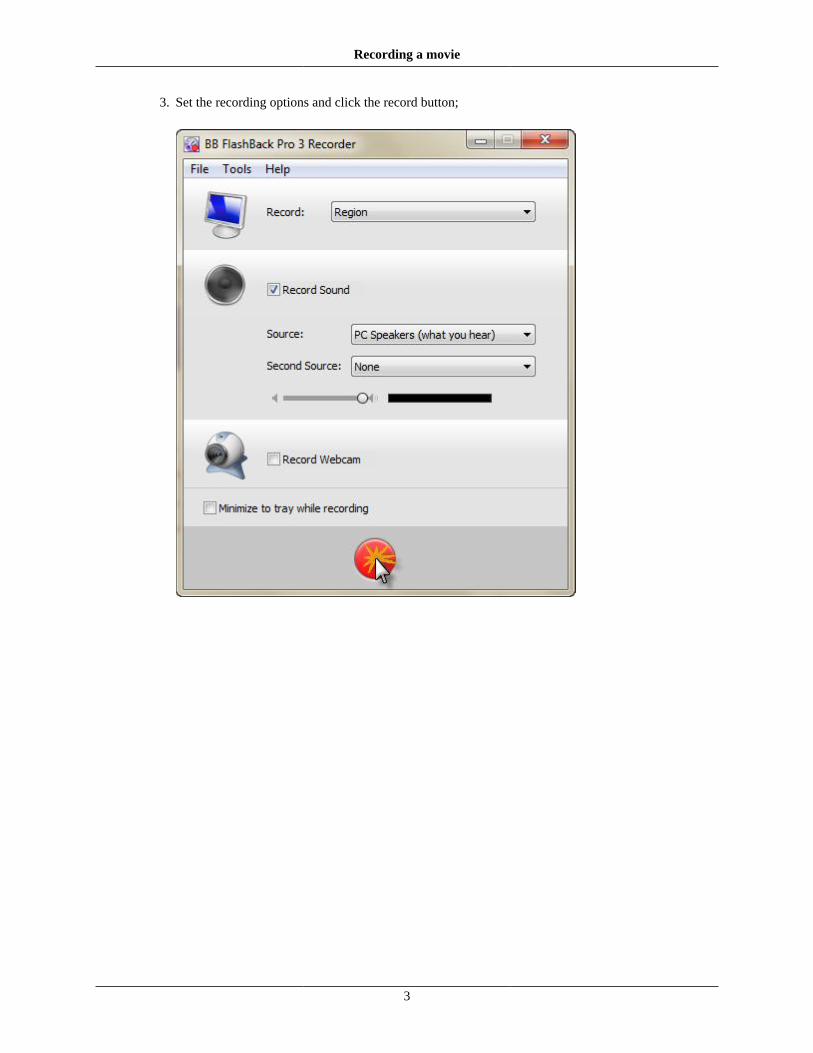
3. Set the recording options and click the record button;

Recording a movie
4
4. In the options, the Record: Region was selected, so set the size and position of the region and clickRecord;
5. Click the stop button to end recording;

Recording a movie
5
6. Click Save and follow the steps to save the recording;
6
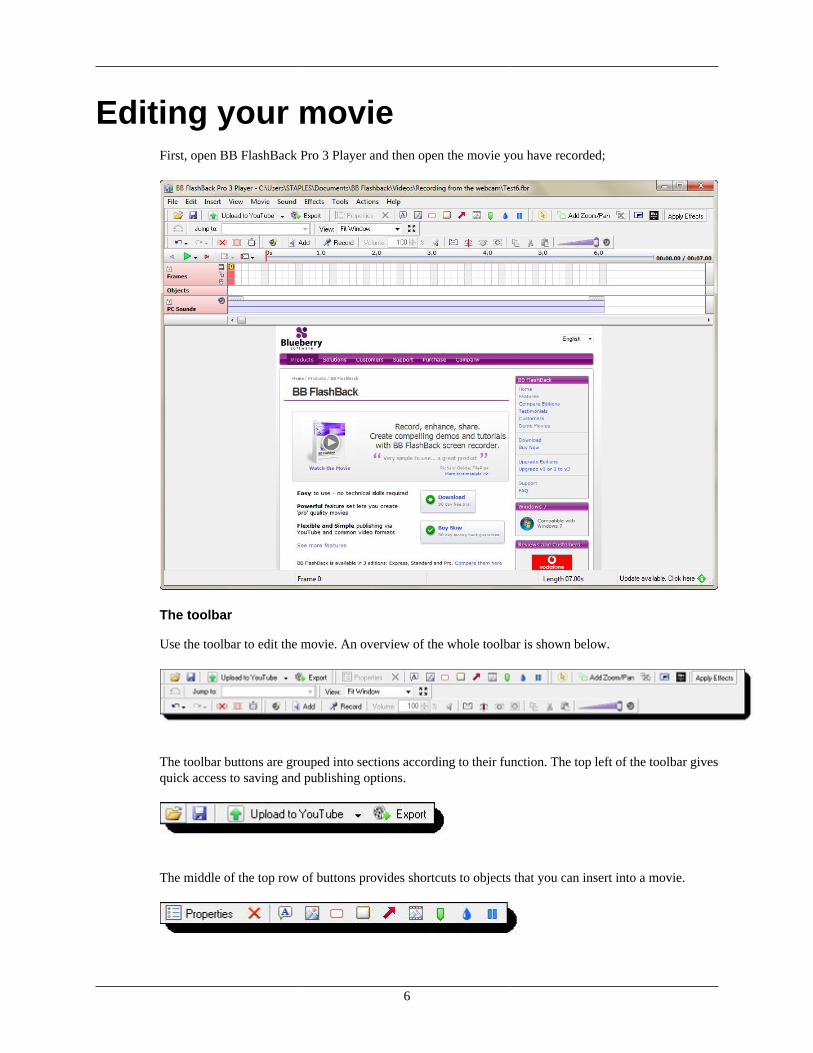
Editing your movieFirst, open BB FlashBack Pro 3 Player and then open the movie you have recorded;
The toolbar
Use the toolbar to edit the movie. An overview of the whole toolbar is shown below.
The toolbar buttons are grouped into sections according to their function. The top left of the toolbar givesquick access to saving and publishing options.
The middle of the top row of buttons provides shortcuts to objects that you can insert into a movie.
Editing your movie
7
• Click to edit the properties of any object which has been inserted into the movie
• Click to delete any object from the movie
• Click to insert a textbox
• Click to insert an image
• Click to highlight a section of your screen
• Click to add a button
• Click to insert an arrow
• Click to insert another movie
• Click to set a marker
• Click to insert a watermark
• Click to pause a section of the movie
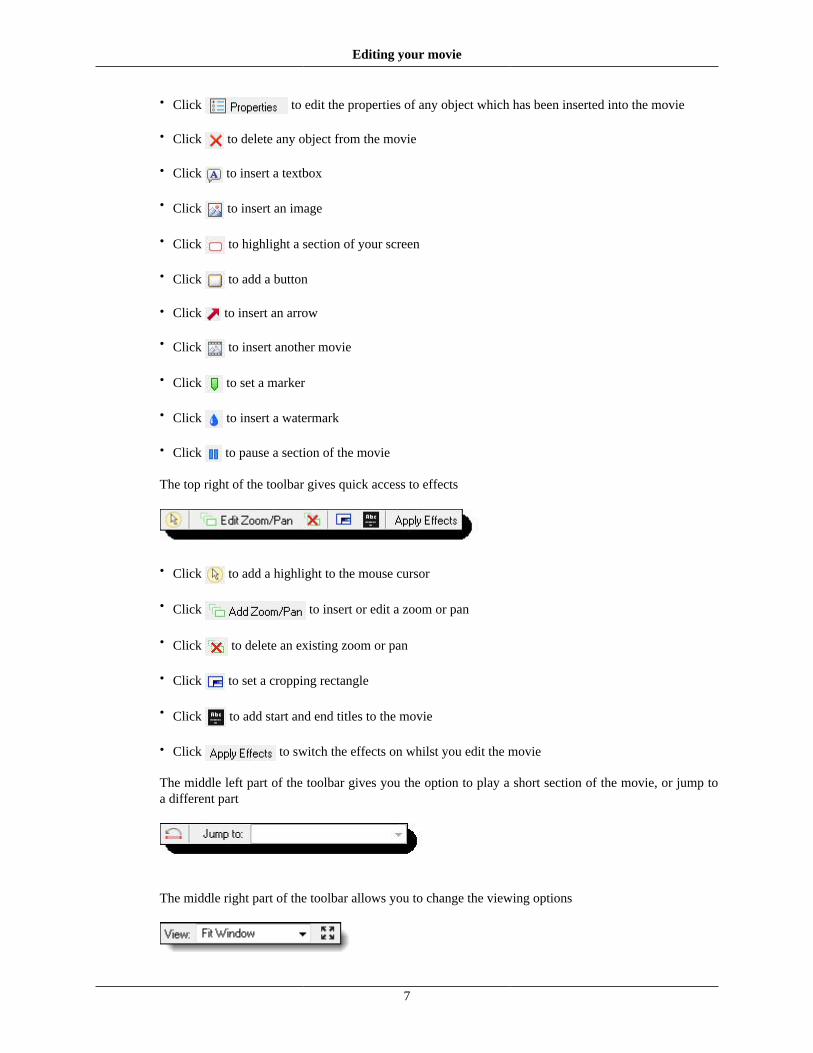
The top right of the toolbar gives quick access to effects
• Click to add a highlight to the mouse cursor
• Click to insert or edit a zoom or pan
• Click to delete an existing zoom or pan
• Click to set a cropping rectangle
• Click to add start and end titles to the movie
• Click to switch the effects on whilst you edit the movie
The middle left part of the toolbar gives you the option to play a short section of the movie, or jump toa different part
The middle right part of the toolbar allows you to change the viewing options

Editing your movie
8
The bottom left of the toolbar gives quick access to basic editing options
• Click to undo or redo previous steps.
• Click to delete
• Click to crop the movie to a selected area
• Click to insert
The bottom right of the toolbar is for sound editing operations
• Click to add a new sound track.
• Click to add a new sound.
• Click to record a new sound.
• Click to adjust the volume levels or mute a track or clip.
• Click to apply a fade in or fade out to a clip.
• Click to split a sound clip.
• Click to merge sound clips.
• Click to merge sound tracks.
• Click to copy sound.
• Click to cut sound.
• Click to paste a copied or cut sound.
• Click adjust or mute the master volume.
The playback bar gives easy access to playing the movie at various speeds, skipping forward and back orgoing directly to a different part of the movie.
Editing your movie
9
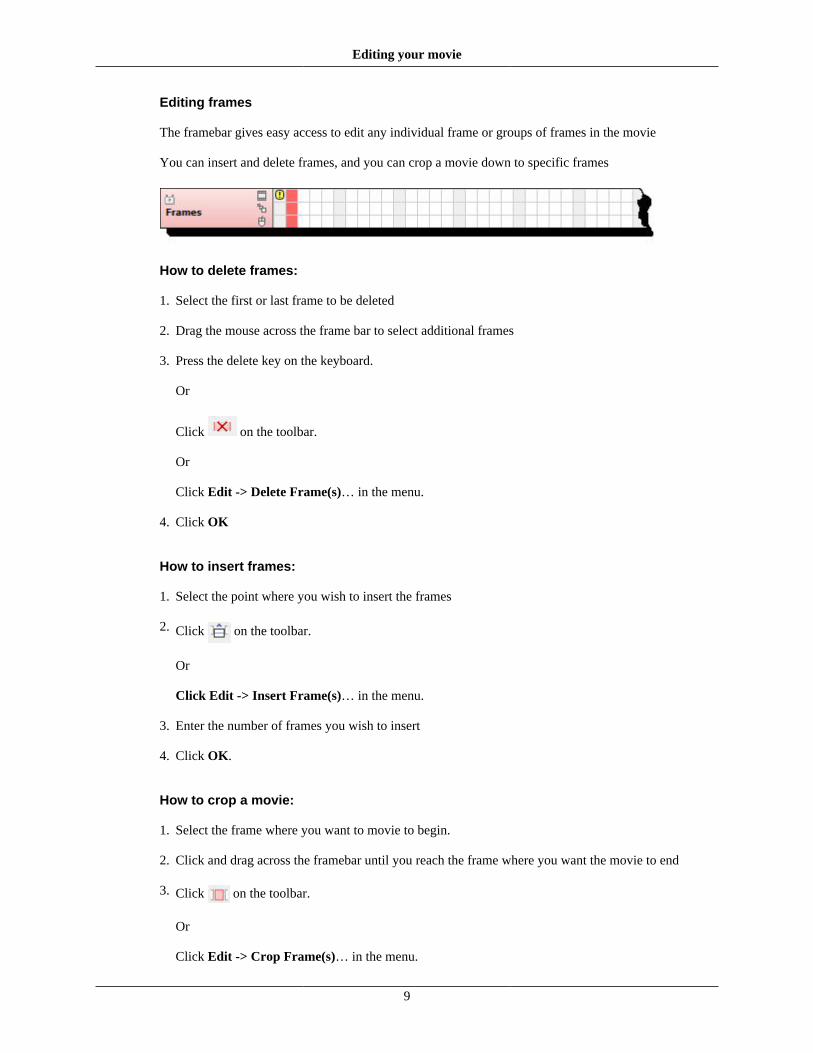
Editing frames
The framebar gives easy access to edit any individual frame or groups of frames in the movie
You can insert and delete frames, and you can crop a movie down to specific frames
How to delete frames:
1. Select the first or last frame to be deleted
2. Drag the mouse across the frame bar to select additional frames
3. Press the delete key on the keyboard.
Or
Click on the toolbar.
Or
Click Edit -> Delete Frame(s)… in the menu.
4. Click OK
How to insert frames:
1. Select the point where you wish to insert the frames
2. Click on the toolbar.
Or
Click Edit -> Insert Frame(s)… in the menu.
3. Enter the number of frames you wish to insert
4. Click OK.
How to crop a movie:
1. Select the frame where you want to movie to begin.
2. Click and drag across the framebar until you reach the frame where you want the movie to end
3. Click on the toolbar.
Or
Click Edit -> Crop Frame(s)… in the menu.

Editing your movie
10
4. Click OK to confirm the edit;
Annotating your movie
You can add text, images and other objects to a movie.
How to add text to a movie
1. Select the frame where you want to insert the textbox.
2. Click on the toolbar.
Or
Click Insert -> Text in the menu.

Editing your movie
11
3. Set the properties of the textbox;

Editing your movie
12
4. Set the appearance of the textbox;

Editing your movie
13
5. You can create and edit styles to use with textboxes throughout a movie;
Editing your movie
14
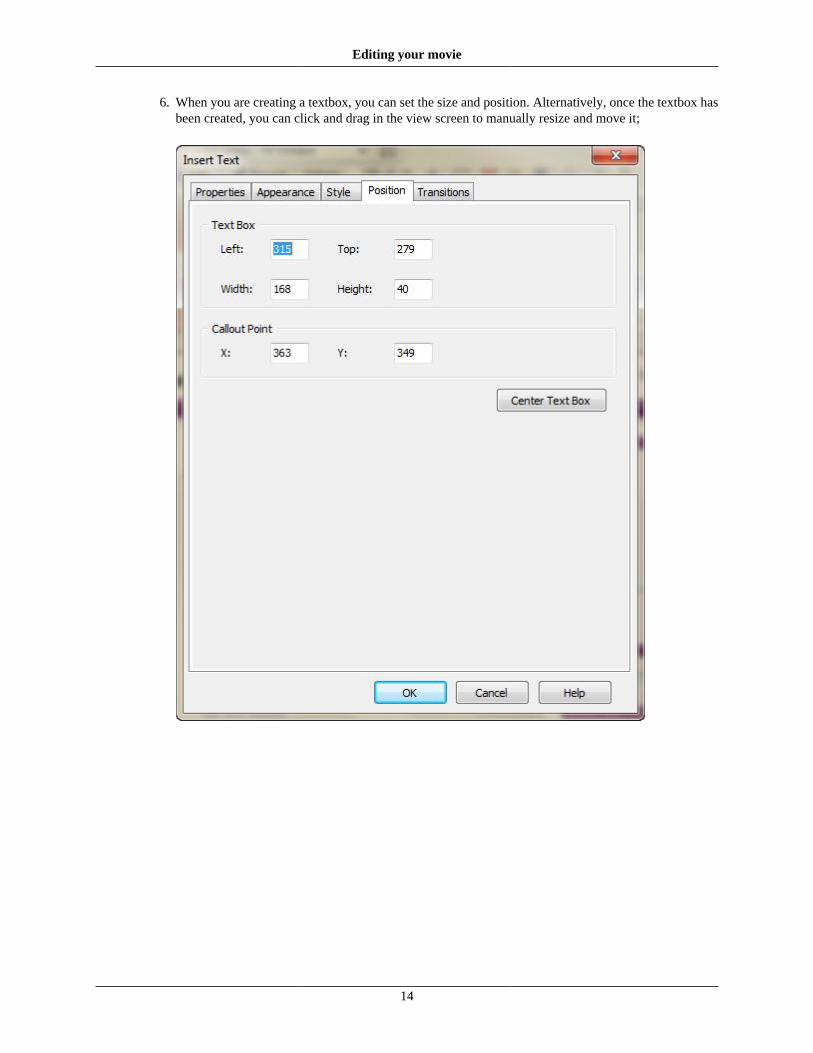
6. When you are creating a textbox, you can set the size and position. Alternatively, once the textbox hasbeen created, you can click and drag in the view screen to manually resize and move it;

Editing your movie
15
7. You can create a transition to fade the textbox in and out;
8. Click OK to insert the textbox.
How to add an image to a movie
1. Select the frame where you want to insert the image.
2. Click on the toolbar.
Or
Click Insert -> Image in the menu.

Editing your movie
16
3. Click Load Image;
4. Browse to the image, select it and click Open.

Editing your movie
17
5. Set the properties of your image.
• Set the size and position of where it will appear in the movie from the Position tab.
• Add a fade in or fade out, using the Transitions tab;
6. Click OK to insert the image.
You can also insert highlights, buttons, arrows and other objects into the movie in a similar way.
Using zoom/pan, cropping and autoscroll
You can create zoom and pan effects in a movie. You can also crop a large movie to a smaller section anduse the autoscroll effect to follow the mouse, missing none of the action.
How to zoom or pan:
1. Select the frame where you want to add the zoom or pan.
2. Click on the toolbar.
Or
Click Effects -> Add ZoomPan in the menu.

Editing your movie
18
3. Set the properties of the zoom;
• Select Custom Area to zoom to a particular region of the movie.
• Select Whole Movie to zoom back to show the entire movie if you previously added a zoom-in.
• The transition speed sets how quickly the zoom or pan will appear on screen.
4. Click OK to insert the zoom effect.
Click and drag to re-size the zoom/pan.
Please note, the zoom will remain in the movie until the end, or another zoom effect is created.
How to crop a movie and use the autoscroll

Editing your movie
19
1. First, add a cropping rectangle to the movie:
Click on the toolbar.
Or
Click Effects -> Set Cropping Rectangle in the menu.
2. Then add the autoscroll effect:
Click Effects.
3. Go to the Autoscroll Cropping Rectangle submenu.
4. Click Mouse In Centre.
Or
Click Mouse Near Centre.
The cropping rectangle can be resized in the view screen. When you export the movie, only the area withinthe cropping rectangle will be exported.
The cropping rectangle will follow the mouse cursor as it moves across the screen when the autoscroll is set.
If zoom and pan effects are being used, a zoom in or pan will only show sections within the croppingrectangle.

20
Publishing your movieWhen you have finished editing the movie, it can be exported in a variety of formats and can be uploadedto YouTube.
Exporting your movie
Here I will demonstrate how to export the movie to Flash
1. Click on the toolbar.
Or
Click File -> Export in the menu.
2. Select the Flash export format;
3. Click OK.
Publishing your movie
21
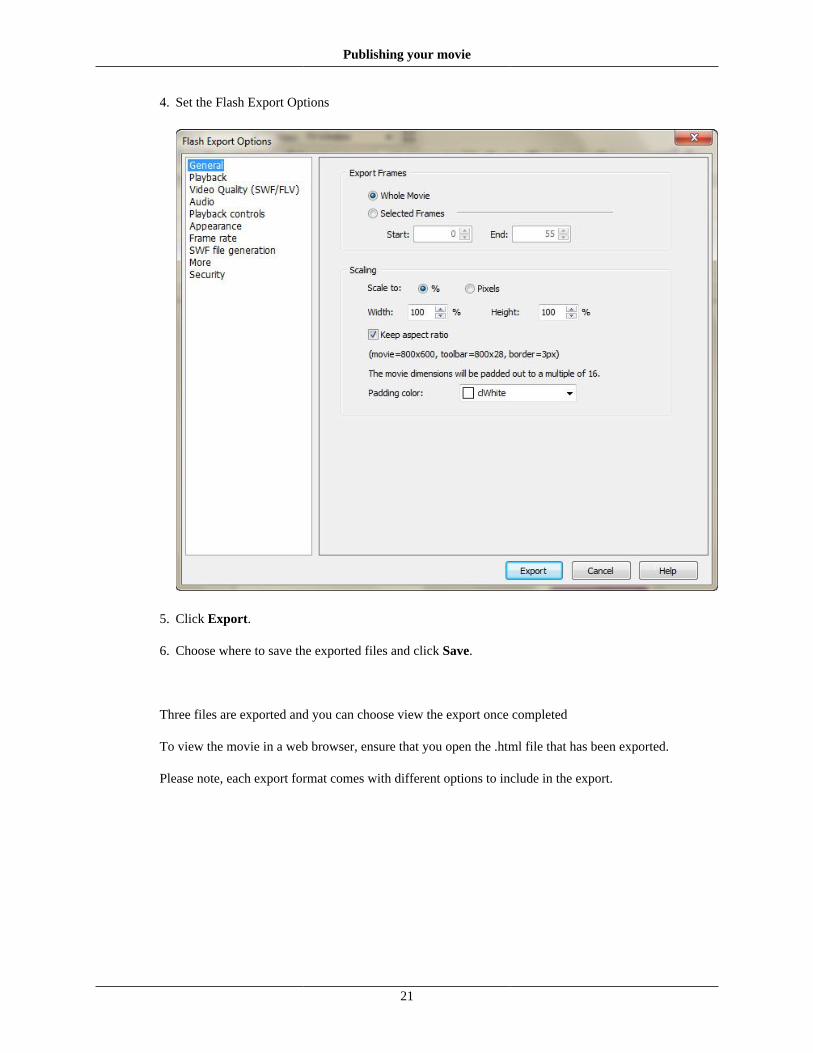
4. Set the Flash Export Options
5. Click Export.
6. Choose where to save the exported files and click Save.
Three files are exported and you can choose view the export once completed
To view the movie in a web browser, ensure that you open the .html file that has been exported.
Please note, each export format comes with different options to include in the export.

Publishing your movie
22
1. When exporting to AVI, you need to select the Codec;
2. After selecting the Codec, you can set the AVI export options;
For example, you may choose to export the movie to AVI (which can be opened and edited again inFlashBack);
Uploading to YouTube for easy sharing
You can upload a movie to YouTube, directly from BB Flashback Pro 3 Player
1. Click on the toolbar.
Ot
Click File -> Upload -> YouTube in the menu.
Publishing your movie
23
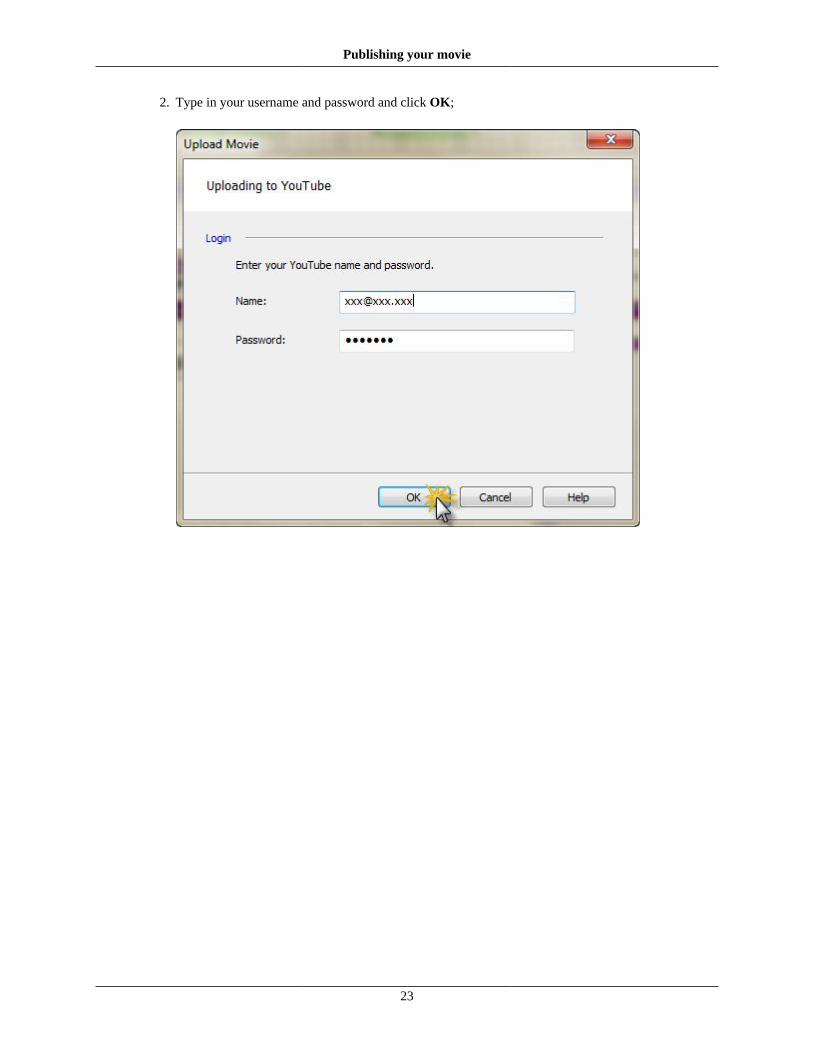
2. Type in your username and password and click OK;

Publishing your movie
24
3. Complete the movie details and click OK;
Publishing your movie
25
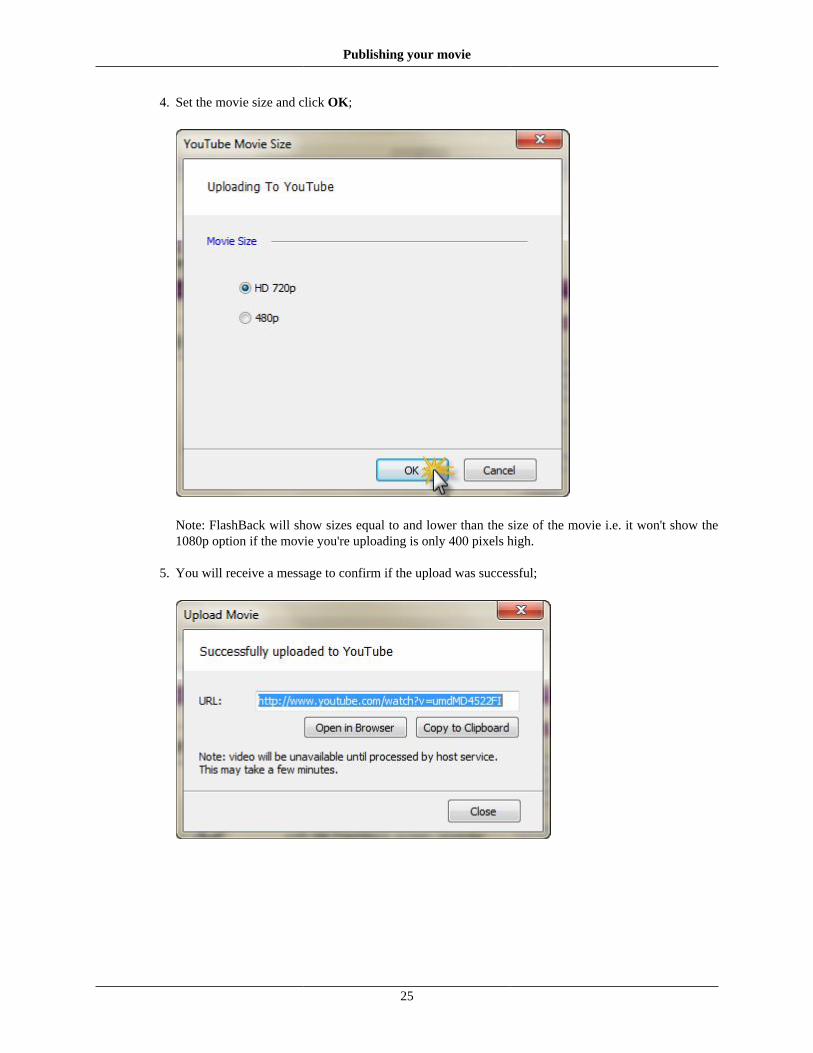
4. Set the movie size and click OK;
Note: FlashBack will show sizes equal to and lower than the size of the movie i.e. it won't show the1080p option if the movie you're uploading is only 400 pixels high.
5. You will receive a message to confirm if the upload was successful;

Publishing your movie
26
6. Click Open in Browser to view the movie in YouTube;