pack 165 paper stomp rocket plans - fishawack districtfishawack.ppbsa.org/2014/stomp rocket...
TRANSCRIPT
Pack 165
Paper
Stomp
Rocket
Plans
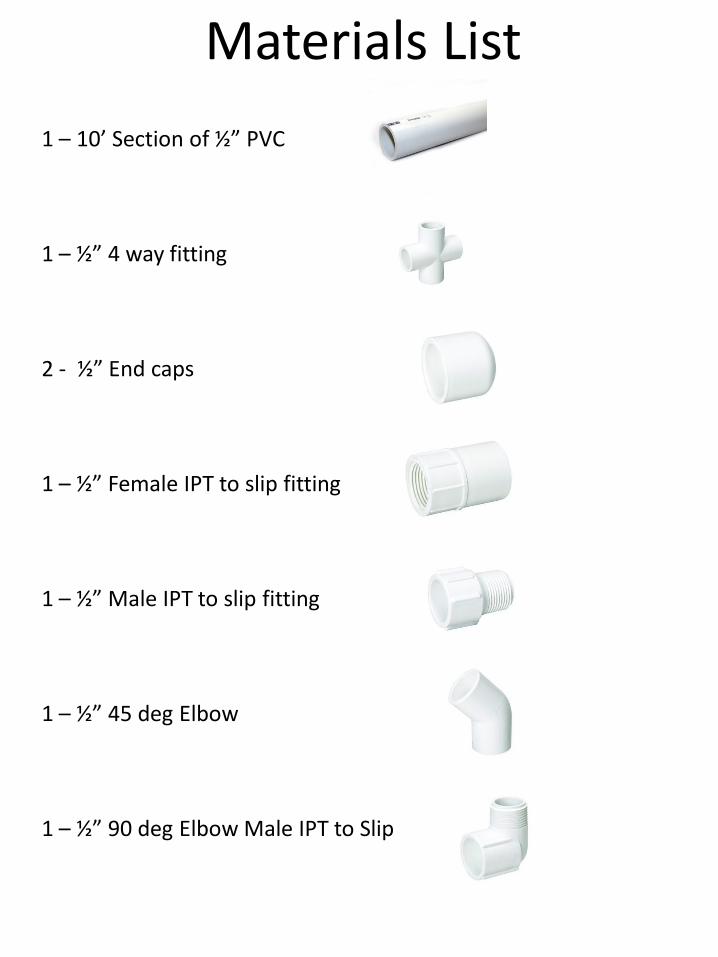
1 – 10’ Section of ½” PVC 1 – ½” 4 way fitting 2 - ½” End caps 1 – ½” Female IPT to slip fitting 1 – ½” Male IPT to slip fitting 1 – ½” 45 deg Elbow 1 – ½” 90 deg Elbow Male IPT to Slip
Materials List
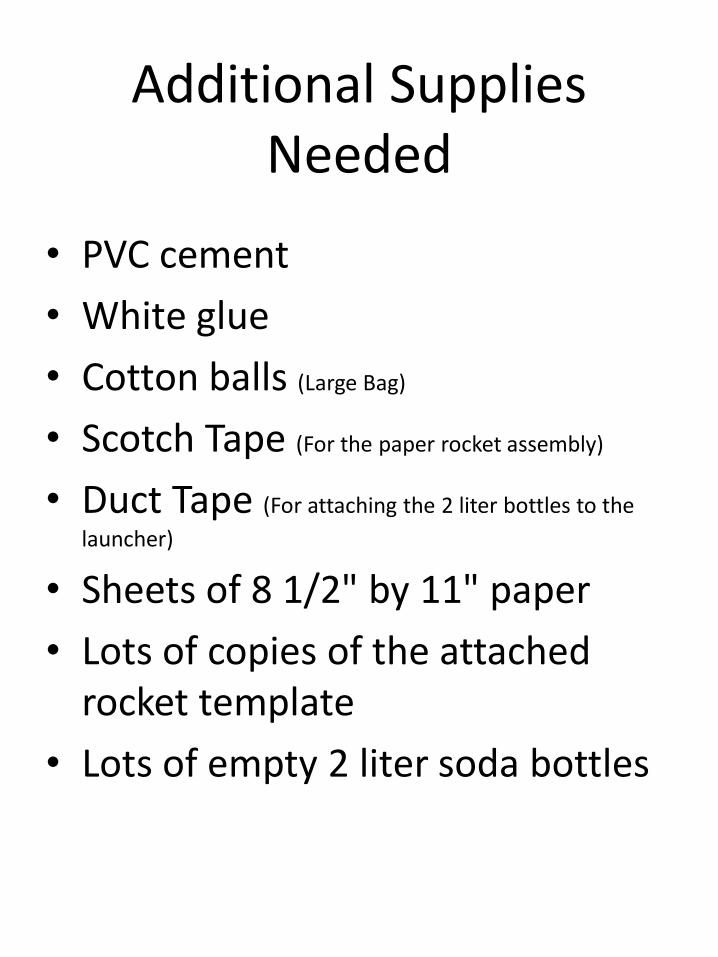
Additional Supplies Needed
• PVC cement
• White glue
• Cotton balls (Large Bag)
• Scotch Tape (For the paper rocket assembly)
• Duct Tape (For attaching the 2 liter bottles to the
launcher)
• Sheets of 8 1/2" by 11" paper
• Lots of copies of the attached rocket template
• Lots of empty 2 liter soda bottles

Step 1 - Cut the PVC From the 10-foot Long Piece cut the following
pieces:
• 1 – 38” Piece
• 2 – 18” Pieces
• 2 – 5” Pieces
• 3 – 12” Pieces
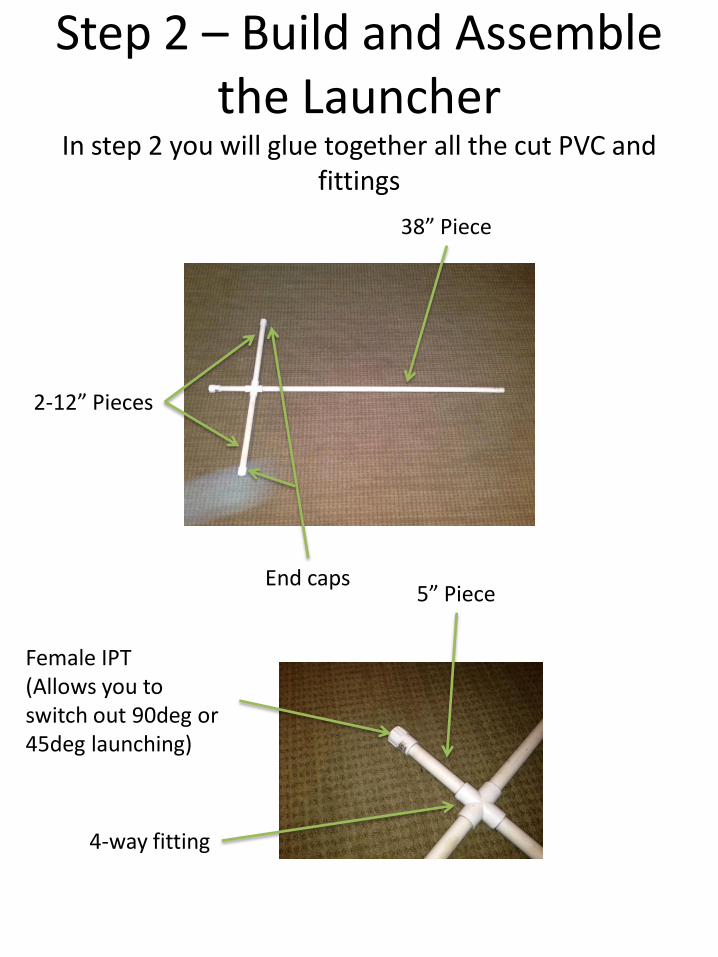
Step 2 – Build and Assemble the Launcher
In step 2 you will glue together all the cut PVC and fittings
2-12” Pieces
5” Piece
38” Piece
4-way fitting
Female IPT (Allows you to switch out 90deg or 45deg launching)
End caps
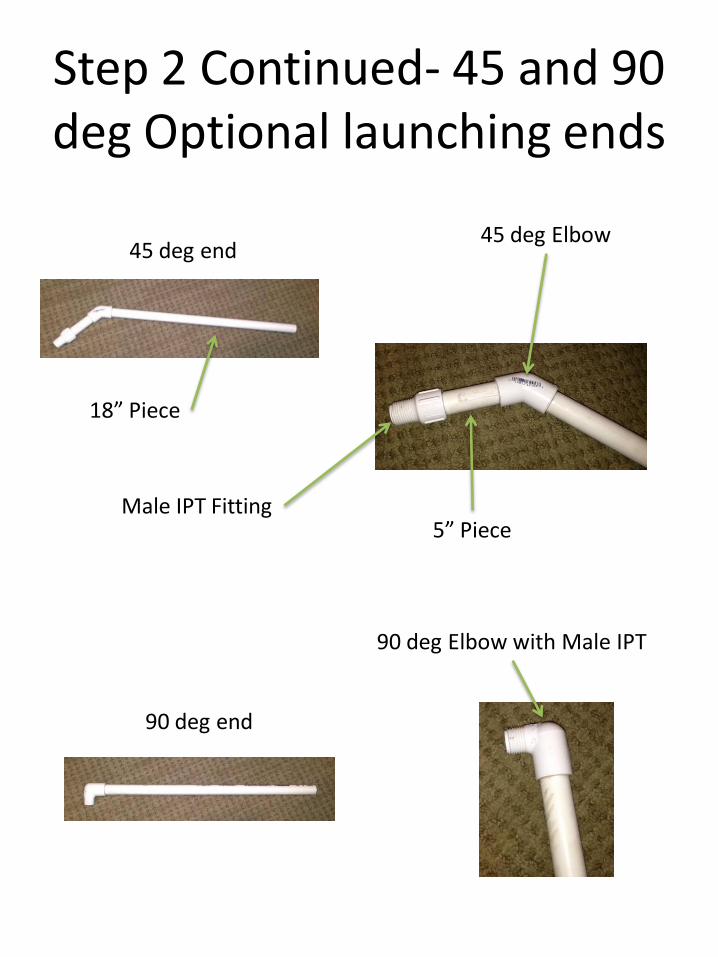
Step 2 Continued- 45 and 90 deg Optional launching ends
18” Piece
5” Piece
45 deg end
90 deg Elbow with Male IPT
90 deg end
45 deg Elbow
Male IPT Fitting

Step 3 - Make the Rocket Forming Tubes
The remaining 12-inch piece of PVC will be used to make a rocket forming tube. This will help you make perfect rockets every time. It's nice to have a few on hand so more than one
person can be working on a rocket at the same time.
You want the forming tubes to be slightly bigger than the tube that the rockets get launched from. This is accomplished by gluing a sheet of 8 1/2" by 11" paper around each forming tube. I used white glue and glued each sheet directly to the tube, and then to itself after rolling it on tight.
A piece of tape (I used electrical tape) was wrapped around one end of each paper-covered tube. I wrapped around three times. This is to aid in the construction of the rocket, as detailed in the next step

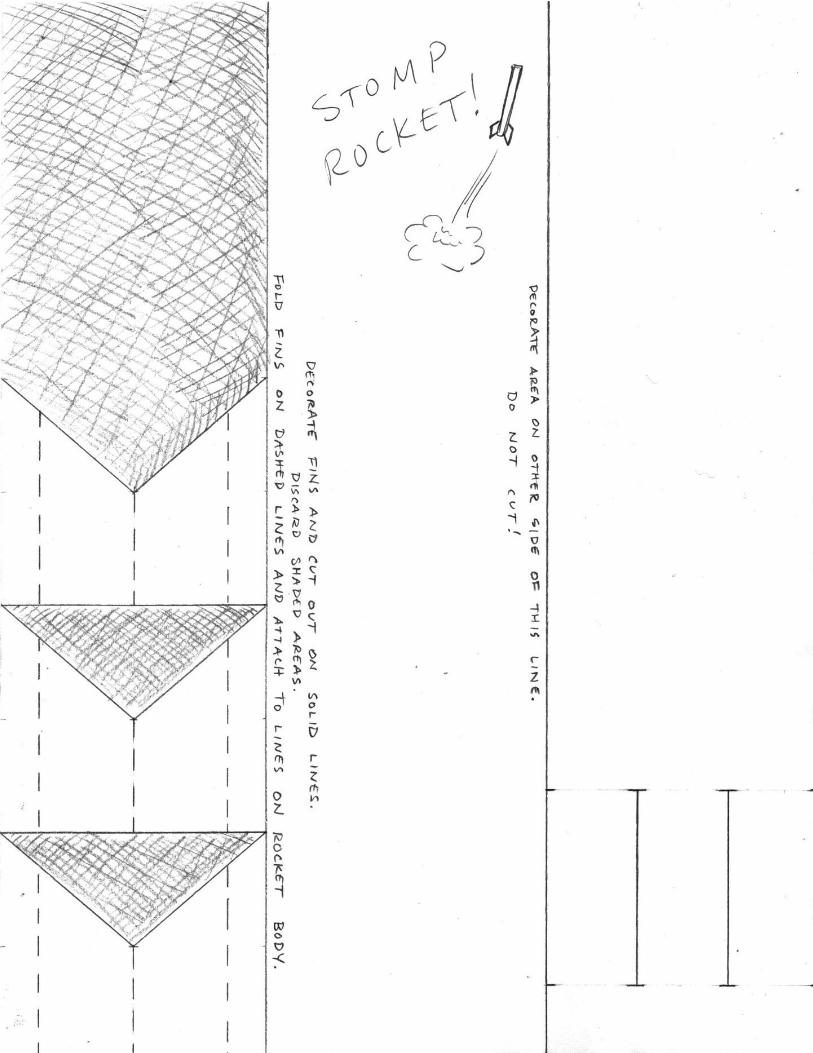
Step 4 Make the Rockets
Print out and make plenty of copies of the attached rocket template. There are basic building instructions on the rocket template. Decorate and cut out areas as directed. Roll the rocket body section onto forming tube, with the bottom of rocket (where the fin placement lines are located) just above the tape at the end of the forming tube. This creates a slight taper on the rocket and allows it to slip over the end of the launcher easier. Tape the body tube together, but NOT to the forming tube. Fold the fins and tape them in place on the fin placement lines. Place two cotton balls into the open area at the top of the paper tube, pinch and fold over slightly and cover with a couple of pieces of tape. Remove rocket from forming tube.
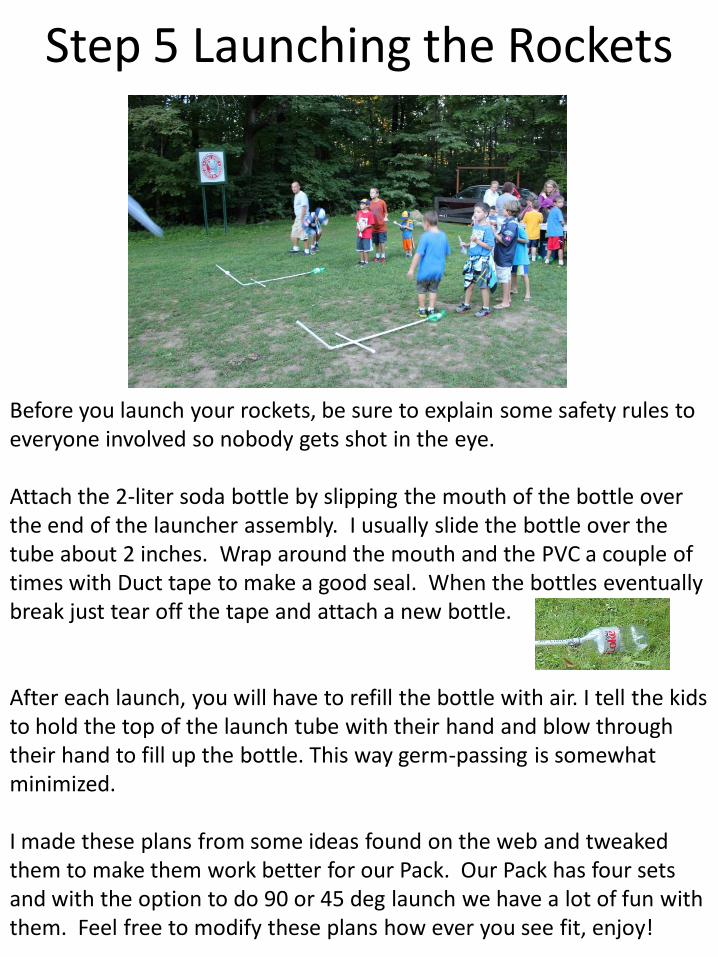
Step 5 Launching the Rockets
Before you launch your rockets, be sure to explain some safety rules to everyone involved so nobody gets shot in the eye. Attach the 2-liter soda bottle by slipping the mouth of the bottle over the end of the launcher assembly. I usually slide the bottle over the tube about 2 inches. Wrap around the mouth and the PVC a couple of times with Duct tape to make a good seal. When the bottles eventually break just tear off the tape and attach a new bottle. After each launch, you will have to refill the bottle with air. I tell the kids to hold the top of the launch tube with their hand and blow through their hand to fill up the bottle. This way germ-passing is somewhat minimized. I made these plans from some ideas found on the web and tweaked them to make them work better for our Pack. Our Pack has four sets and with the option to do 90 or 45 deg launch we have a lot of fun with them. Feel free to modify these plans how ever you see fit, enjoy!