the forest professional: guidelines for the stewards of ... · guidelines for the stewards of...
TRANSCRIPT

Guidelines forthe Stewards of
tomorrow’s forests(Fourth Edition)

Page 1
Guidelines for the Stewards of tomorrow’s forests
(Fourth Edition)
Describing practical techniques and procedures for good forest operations
The ForestProfessional
Occupational Health and Safety DivisionDepartment of Environment and LabourNova Scotia
Prevention ServicesWorkplace Health, Safety and CompensationCommission of New Brunswick
Occupational Health and Safety ServicesWorkers’ Compensation BoardPrince Edward Island
Health and Safety ServicesWorkplace Health, Safety and Compensation Commissionof Newfoundland and Labrador

Page 2
Canadian Cataloguing in Publication Data
Main entry under title :
The Forest Professional - guidelines for the Stewards of tomorrow's forests, Fourth EditionISBN 1-55457-025-5
1. Forests and forestry — Safety measures — Handbooks,manuals, etc. I. Nova Scotia. Occupational Health andSafety Division. Workplace Health, Safety andCompensation Commission of New Brunswick. WorkplaceHealth, Safety and Compensation Commission ofNewfoundland and Labrador. PEI Worker's Compensation Board. II. Nova Scotia ForestProducts Association. Safety and Training Committee.
SD 387.S3P76 1994 363.11’96349 C94-966001–9
Printed in Canada
© Province of Nova Scotia, 2005
Published by theNova Scotia Department of Environment and Labour
Printed on paper that contains recycled fibre

Page 3
Preface
The agencies in the Atlantic Provinces responsible forworkplace health and safety recognize the importanceof providing information to help their clients to comply with the legislation and of developing goodindustry practices that will promote safe and healthyworkplaces.
This manual has been produced by the OccupationalHealth and Safety Division, Nova Scotia Department ofEnvironment and Labour with the co-operation of theAtlantic jurisdictions, adapted from material preparedby the Safety and Training Committee, Nova ScotiaForest Products Association.
This document was submitted and reviewed by theOccupational Health and Safety agencies from theAtlantic Provinces as part of the Conference of Atlantic Premiers Harmonization of Occupational Safety and Health initiative.
Although this document is intended to representacceptable industry practice that will promotesafe work practices, there may be a conflict with legal standards in any specific jurisdiction.The appropriate provincial laws must be followed whenever the text of this booklet andthe laws differ.
The Nova Scotia Department of Environment and Labouris responsible for updating this publication. In anattempt to keep this publication current we would askfor your assistance. If you have comments that shouldbe considered in the next version of the document,please complete and return the form found in the back of the publication.
The agencies responsible for workplace health andsafety in the Atlantic Provinces hope that thisdocument will be of assistance to you in improvinghealth and safety performance in the forestry sector.

Page 4
This document can be used for information regardingsafe work practices. However, Regulation 91-191requires different practices in some areas. The NewBrunswick Workplace Health Safety and CompensationCommission has also developed a video on basic safetyin forestry operations which is available free of charge.
This document can be used for information regardingacceptable industry practice.
This document can be used for information regardingacceptable industry practice.
This document can be used for information regardingacceptable industry practice.
In all cases, the legislation of the province in which youwork takes precedence over this guideline document. If you have questions, review the appropriate regulationsor consult with your occupational health and safetyagency.
Document Status
New Brunswick
Prince EdwardIsland
Newfoundlandand Labrador
Nova Scotia

Page 5
Prevention ServicesWorkplace Health, Safety and CompensationCommission of New Brunswick500 Beaverbrook CourtFredericton, NBE3B 5X4Telephone: (506)-453-24671-800-442-9776Fax: (506)-453-7982Website: www.whscc.nb.ca
Occupational Health and Safety DivisionWorkers’ Compensation BuildingWorkers’ Compensation BoardPrince Edward IslandPO Box 2000Charlottetown, PEC1A 7N8Telephone: (902) -368-5562Fax: (902) -368-5696www.wcb.pe.ca
Occupational Health and Safety DivisionNova Scotia Department of Environment and Labour5151 Terminal Road, 6th FloorPO Box 697Halifax, NSB3J 1A1Telephone: (902) -424-54001-800-952-2687 (9-LABOUR—Nova Scotia only)Fax: (902) -424-5640E-mail: [email protected]: www.gov.ns.ca/enla/healthandsafety
Health and Safety ServicesWorkplace Health, Safety and CompensationCommission of Newfoundland and Labrador146–148 Forest RoadPO Box 9000St. John’s, NFA1A 3B8Telephone: (709) -778-1000Fax: (709) -778-1564Website: www.whscc.nf.caE-mail: [email protected]
ATLANTIC OCCUPATIONAL SAFETY ANDHEALTH AGENCIES
New Brunswick
Prince EdwardIsland
Nova Scotia
Newfoundlandand Labrador

Page 6
Human Resources Development Canada—Labour Program (Federal Workplaces)
PO Box 1166Moncton, NBE1C 8L4Telephone: (506) -851-6640Fax: (506) -851-6645
99 Wyse RoadDartmouth, NSB3A 1L9Telephone: (902) -426-4995Fax: (902) -426-1390
PO Box 850Sydney, NSB1P 6J3Telephone: (902) -564-7130Fax: (902) -564-7131
PO Box 8000Charlottetown, PEC1A 8K1Telephone: (902) -566-7171Fax: (902) -566-7699
PO Box 8548St. John’s, NFA1B 3P3Telephone: (709) -772-5022Fax: (709) -772-5985

Page 7
Protective Equipment and Clothing ______________11What You Need ______________________________________11Standards and Care Required ______________________14
Hard hat ____________________________________14Safety footwear ______________________________14Hearing protectors____________________________14Leg protection ______________________________14Gloves or mitts ______________________________14Equipment for chemical application ____________14
Supervising Employees __________________________15Equipment Training ____________________________________15Equipment Operation __________________________________15Supervision ____________________________________________15Employee Responsibilities ________________________________16Housekeeping __________________________________________16Reporting Accidents ____________________________________17
Chain Saws ______________________________________________18Safety Check ________________________________________18
Chain brake __________________________________19Throttle-control lock out ______________________19Anti-vibration mounts ________________________19Rear hand guard ____________________________19Chain catcher ________________________________19Guide bar ____________________________________19Spark arrestor ________________________________19Sprocket-nose guide bar ______________________19On/off switch ________________________________19Safety chain__________________________________19
Filing techniques ________________________________20Trouble-shooting ________________________________21Operating a Chain Saw __________________________23
To start ______________________________________23Position of hands ____________________________24Speed ______________________________________24Position of saw ______________________________25Carrying the saw ____________________________25Components ________________________________25Refueling ____________________________________26Storage and transportation of flammable material __26Fire protection ______________________________26
Contents

Page 8
Clearing Saws______________________________________27Standards Required________________________________________________________________________27
Safety check __________________________________27Throttle control lockout ________________________27Anti-vibration mounts __________________________27On/Off switch__________________________________27Spark arrestor ________________________________27Proper blade __________________________________28Blade lock nut ________________________________28
Cutting Attachments ____________________________________________________________________29Sharpening the Blade____________________________________________________________________30
Making a sharpening post ______________________30Filing angle____________________________________30
Cutting Techniques ________________________________________________________________________32Blade position ________________________________32Tilt or angle of blade __________________________33Direction of approach __________________________34Stump height __________________________________34Directional felling______________________________34
Mobile Equipment ________________________________35Standards Required________________________________________________________________________35
Rollover requirements __________________________35Modifications__________________________________35Seat belts ____________________________________35Equipment not built by manufacturer __________35Debris ________________________________________35Head boards __________________________________35Climbing, walking, and working surfaces ________35Christmas tree balers __________________________35Fire protection ________________________________36Brakes ________________________________________36Steering ______________________________________36Warning devices ______________________________36
Operating Mobile Equipment____________________________________________________37Safety check __________________________________37Refueling______________________________________37Unattended equipment ________________________37Swinging equipment __________________________37Excess items __________________________________37Slopes ________________________________________37

Page 9
Passengers____________________________________________38Transportation of flammable materials, tools, equipment ______________________________________38
Maintaining Mobile Equipment ____________________________________________________38Modifications and repairs ________________________38Moving parts ____________________________________38Tire inflation ____________________________________38Hand tools ______________________________________39Blocking ________________________________________39Servicing ________________________________________39
Correct Logging Procedures ________________________40Before Felling ____________________________________________40Prelimbing a Standing Tree ______________________________41
Step 1 __________________________________________41Step 2 __________________________________________41
Felling______________________________________________________42Felling principles__________________________________42The notch ________________________________________42Felling cut________________________________________43Hinge____________________________________________43When the tree starts to fall ________________________44Preventing barber chairs __________________________44Partially cut or lodged trees ______________________46
Dead or Dying Trees ____________________________________________________________________________47Snags ____________________________________________47Cavity trees ______________________________________47Cutting Spring Poles ____________________________________________________________________47
Limbing ________________________________________________________________________________________________________48Before you begin ________________________________48Position of saw __________________________________49Beware __________________________________________50Six Step Limbing Method ______________________________51
Bucking ________________________________________________________________________________________________________53Yarding ________________________________________________________________________________________________________54
When yarding with animals ______________________54When choking logs or trees________________________54Grappling or winching logs or trees ________________54Wire rope lines __________________________________54
Lifting Wood ____________________________________________________________________________________________55Hauling, Loading, and Piling Wood on Vehicles ________55

Page 10
Working near Power Lines ________________________________56Planning your work ________________________________56Ground clearance __________________________________56Crossing under power lines__________________________57Cutting near power lines ____________________________58Tree contact with power lines ______________________59Equipment contact with power lines ________________60Rescuing a co-worker ______________________________60
Woods Roads ____________________________________61Maintenance____________________________________________61Posting signs____________________________________________61Temporary workplace traffic control ______________________61New Brunswick ________________________________________61Newfoundland and Labrador ____________________________61Nova Scotia ____________________________________________62Prince Edward Island ____________________________________62Public roads ____________________________________________62Forestry access roads ____________________________________62
First Aid ________________________________________65Personal Hygiene ________________________________65Glossary ________________________________________________66Acts and Regulations ____________________________70
Occupational Health and SafetyLegislative Framework __________________________________70The Acts ________________________________________________71Regulations ____________________________________72Codes of practice________________________________________73Guidelines ______________________________________________73Provincial legislation ____________________________________74New Brunswick ________________________________________74Newfoundland and Labrador ____________________________74Nova Scotia ____________________________________________75Prince Edward Island ____________________________________76

Page 11
What YouNeed
Protective Equipment and Clothing
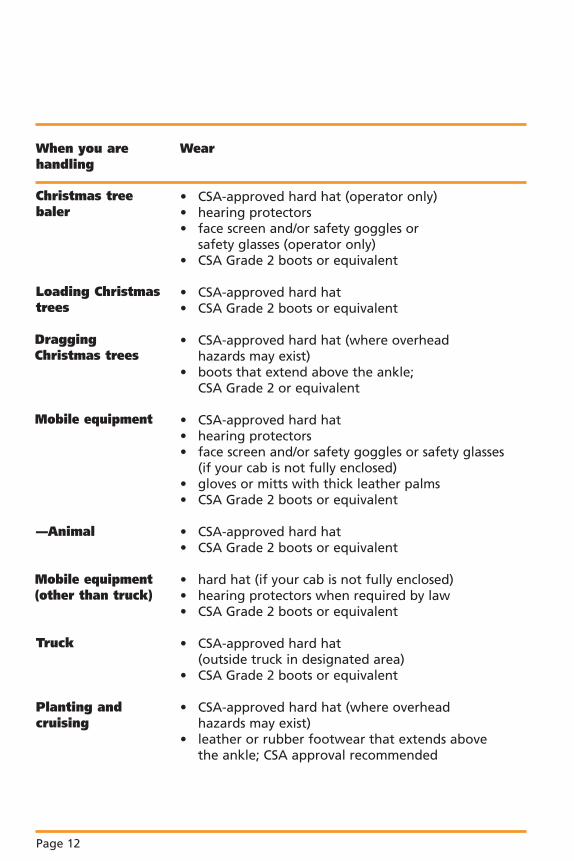
As a professional forestry worker, you must wearprotective equipment and clothing when you areworking. Whenever possible, all the forest industryequipment you use in the Atlantic Provinces should be approved by the Canadian Standards Association(CSA) or equivalent. In New Brunswick, CSA-approvedfootwear is mandatory. The following chart showsyou what you need:
Wear
• CSA-approved hard hat• hearing protectors• face screen and/or safety goggles or safety glasses• leg protection that is resistant to chain saw cuts• CSA Grade 1 boots or equivalent;
chain saw boots are recommended • carry pressure bandage
• CSA-approved hard hat• hearing protectors• face screen and/or safety goggles or safety glasses• CSA Grade 2 boots or equivalent• carry pressure bandage
• CSA-approved hard hat• leg protection that is resistant to knife cuts• CSA Grade 2 boots or equivalent• industrial-quality leather gloves
• CSA-approved hard hat (where overhead hazards may exist)
• CSA Grade 2 boots or equivalent• leg protection that is resistant to knife cuts
• CSA-approved hard hat (where overhead hazards may exist)
• boots that extend above the ankle; CSA Grade 2 or equivalent
When you are handling a
Chain saw
Clearing saw
Axe, bush axe, or machete
Shearing knife
Christmas treeshearer
Page 12
Planting andcruising
Christmas treebaler
Loading Christmastrees
DraggingChristmas trees
Mobile equipment
—Animal
Mobile equipment(other than truck)
When you arehandling
Wear
• CSA-approved hard hat (operator only)• hearing protectors• face screen and/or safety goggles or
safety glasses (operator only)• CSA Grade 2 boots or equivalent
• CSA-approved hard hat• CSA Grade 2 boots or equivalent
• CSA-approved hard hat (where overhead hazards may exist)
• boots that extend above the ankle; CSA Grade 2 or equivalent
• CSA-approved hard hat• hearing protectors• face screen and/or safety goggles or safety glasses
(if your cab is not fully enclosed)• gloves or mitts with thick leather palms• CSA Grade 2 boots or equivalent
• CSA-approved hard hat• CSA Grade 2 boots or equivalent
• hard hat (if your cab is not fully enclosed)• hearing protectors when required by law• CSA Grade 2 boots or equivalent
• CSA-approved hard hat (outside truck in designated area)
• CSA Grade 2 boots or equivalent
• CSA-approved hard hat (where overhead hazards may exist)
• leather or rubber footwear that extends above the ankle; CSA approval recommended
Truck

Page 13
Wear When you arehandling
—electric welding
Land survey crew
—cutting and gas welding
Supervision
Chemicalapplication
Machinemaintenance—grinding,hammering, and chipping
• CSA-approved hard hat (where overhead hazards may exist)
• hearing protectors on motorized equipment• personal protective equipment recommended
by chemical manufacturer (respirator, gloves, eye protection as specified)
• CSA Grade 2 boots or equivalent
• CSA-approved hard hat• CSA Grade 2 boots or equivalent• safety goggles or safety glasses with side protection• gloves or mitts with thick leather palms• hearing protection
• CSA-approved hard hat• welding hood/shield• welding gloves• CSA Grade 2 boots or equivalent
• CSA-approved hard hat• welding glasses• welding gloves• CSA Grade 2 boots or equivalent
• CSA-approved hard hat (where overhead hazards may exist)
• CSA Grade 2 boots or equivalent
• CSA-approved hard hat• CSA Grade 2 boots or equivalent• retro-reflective vest if working on or near roadways

Page 14
Equipment for chemicalapplication
Hard hat
Safety footwear
Hearingprotectors
Leg protection
Gloves or mitts
Standards and CareRequired
If your equipment and clothing are to protect youproperly, they must meet certain standards and be kept in good repair.
• The hard hat you wear must be CSA approved. It mustbe highly visible (blaze orange is recommended). Awhite, silver, or dark-colour hard hat cannot be worn.
• Replace any hard hat whose shell or suspension has been damaged.
• Don’t use fly repellent or oil on your hard hat becausethis will affect its protective quality.
• Don’t leave your hard hat on the rear window shelf ofa vehicle. Intense sunlight will affect its protectivequality, and the hat may become a dangerous missileif the vehicle stops suddenly.
• Footwear must be CSA Grade 1 or Grade 2 or of anequivalent standard. Factory-installed ballistic nylon isrecommended, as are high-traction soles or the use ofstuds, caulks, or screws when conditions warrant.
If you are working in an area where the sound level isgreater than 85 decibels, you must wear CSA Class A or Bhearing protectors.
Muffs are more sanitary than earplugs. When using ear plugs, be sure to keep them clean and followinstallation instructions on the package. Cotton wooland non-approved headphone sets cannot be used toreplace proper hearing protectors.
Leg protection must be resistant to chain saw cuts. It must be approved by the Bureau de normalisation du Quebec (BNQ) or the equivalent. It should provideprotection to both the front and back of the legs. It is recommended that the leg protection meet therequirements of category A or C devices as defined inBNQ standard CAN/BNQ 1923-450-M91 Leg ProtectiveDevices for Chain Saw Users.
Gloves or mitts must have thick leather palms to protectyour hands if handling wire cable.
If you are unsure of the personal protective equipmentrequired, refer to the material safety data sheet or contactthe supplier for details before applying the chemical.

Page 15
Supervising Employees
Mobile equipment may be operated only by a trained operatoror by someone who is being trained to operate the equipment.
No one may work without supervision on any machineunless that person
• has been properly trained and instructed in how themachine operates and the dangers associated with it
• has previously been supervised by someone who has athorough knowledge of that machine and has hadexperience operating it
• is capable of safely operating the machine withoutsupervision.
The operator of each piece of equipment must be able torecognize defects or unsafe conditions and carry outprocedures to correct them.
• A periodic visual check must be made of any employeeworking under hazardous conditions who might not beable to get immediate help in case of an injury. Checksmust be made at intervals that are adequate for safetyand that the employer and employee agree arepracticable. If visual checks can not be made, othereffective measures should be taken for securing help inthe event of an emergency. The measures selected willdepend on the hazard and the location of the work.
• A chain saw operator should not work alone. Another worker should be in the same operating area.
• Workers must not be given work that will endangerthemselves or others.
• People under the influence of alcohol, drugs, or othersubstances that may affect their ability to work safelymust not be allowed to enter or remain on the work site,because they could endanger their own health andsafety and that of others.
As a supervisor, employer, contractor, or owner you play a key role in ensuring the safetyof your workers during forest operations. You should understand and act in accordancewith the occupational health and safety acts and regulations, codes of practice in yourprovince, and other applicable acts and/or regulations (see Appendix). The following aresome of your responsibilities under the various acts.
Equipmenttraining
Equipmentoperation
Supervision

Page 16
Housekeeping
Employeeresponsibilities
• Precautions should be taken if weather conditionscreate a hazard for workers.
• First aid supplies and services must be available.• Generators, gas barrels, and the like must be located
on mineral soil.• When building roads, no employee other than the
operator may work closer than twice the height ofthe tallest tree to a bulldozer that is clearing a roadright-of-way. In New Brunswick the standard is within 50 m of mobile equipment.
Employees at work have responsibilities for health and safety and must co-operate with the employer and fellow employees to protect their own health andsafety and that of other people at or near the workplace.(For more details, consult your provincial legislation.)
• Garbage and litter must be removed from the site,for example, lunch wrappers, empty oil containers.
• Environmental standards must be complied with.

Page 17
Reportingaccidents
Provincial laws contain various requirements to reportaccidents. Readers should consult their provincialoccupational health and safety agency and workers'compensation board or health, safety, andcompensation commission.
In New BrunswickPhone: (506) 453-2467 or 1-800-442-9776Fax: (506) 453-7982
In Newfoundland and LabradorHealth and Safety Services24-Hour Accident Reporting LinePhone: (709) 729-44441-800-563-5471 (during working hours)Fax: (709) 729-7982
Workplace Health, Safety and Compensation CommissionPhone: (709) 778-1000Toll-free 1-800-563-9000Fax: (709) 778-1302
In Nova ScotiaOccupational Health and Safety DivisionPhone: 1-800-952-2687 (toll-free in Nova Scotia)Fax: (902) 424-5640Workers’ Compensation BoardPhone: (902) 491-8000
1-800-870-3331 (Mainland)1-800-880-0003 (Cape Breton)
Fax: 491-8002 (Halifax—General)563-0512 (Sydney—Accidents and General)
In Prince Edward IslandOccupational Health and Safety DivisionPhone: (902) 368-5562; 628-7513 (after hours)Toll-free: 1-800-237-5049Fax: (902) 368-5696
Workers’ Compensation BoardPhone: (902) 368-5680Fax: (902) 368-5696

Page 18
When operating a chain saw you are required to have:
1. personal protective equipment (as described on page 11)2. a chain saw with safety features (as described below)3. felling devices4. first aid available at the worksite (see page 65)5. an approved fuel container (as described on page 26)6. fire protection (as described on page 26).
Chain saws used in forest operations must be equipped with certain safety features in working order: a fronthandle guard with a chain brake, a throttle control lockout,anti-vibration mounts, a safety chain, a rear hand guard, a chain catcher, a spark arrestor, a sprocket-nose guide bar,and an on/off switch. Before you start a chain saw checkthese features:
Chain SawsWith a little extra attention to the care and operation of chain saws, manyinjuries can be avoided.
Safety check
Throttle control lockout—thisprevents inadvertentthrottling
Chain catcher in casethe chain breaks
Anti-vibration mounts
Rear hand guard
Sprocket-noseguide bar
Front handle guardwith chain brake
Spark arrestor
Safety chain
On/off switch inworking condition

Page 19
The chain brake must be able to prevent the chain from moving even though the throttle has beenopened from idle to maximum. Saws must not beoperated unless this standard is met.
The throttle must open only when the throttle controllockout is engaged.
All rubber mounts or devices required to reduce chainsaw vibration must be present and in good condition.
The rear hand guard is installed under the rear handle.It is designed to protect the operator’s hand if the chain breaks or leaves the guide bar.
The chain catcher is installed on the body of the sawbelow and ahead of the drive sprocket. It is designed to prevent the chain from whiplashing should the chain break or leave the guide bar.
A 9- or 10-tooth sprocket-nose guide bar isrecommended, depending on the chain pitch.
Muffler and spark arrestor devices must be in placeyear-round on all engines operated in the forestenvironment.
The sprocket-nose guide bar is intended to reduce the travel friction of the chain and may reduce the risk of kickback.
Switches, as designed by the manufacturer, must beoperational.
The saw chain must either include safety devices or bedesigned to prevent kickback.
Chain brake
Throttle controllockout
Anti-vibrationmounts
Rear hand guard
Chain catcher
Guide bar
Spark arrestor
On/off switch
Sprocket-noseguide bar
Safety chain

Page 20
Safety devices can be made ineffective with improperfiling or poor maintenance. You can prevent this byusing the following procedures:
Top plate
Side plate
Depth gauge
Rivet hole
Body
HeelToe
Round side plate Chisel-shaped side plateLow profile
Keep at least 10 per cent of the file above the topplate of the cutting tooth when filing. Less than 10per cent will cause you to file a hook in your chain.
FilingTechniques

Page 21
Follow the manufacturer’s recommendations for filing. For example,
• Maintain the manufacturer’s top plate cutting angle.• Use the correct file size.• Your depth gauge must not be lower than 0.0125 cm
(0.005 in) from the manufacturer’s specifications. If, for example, the manufacturer specified .0635 cm(0.025 in), your depth gauge should be no lowerthan .0760 cm (0.030 in).
• Use a filing gauge when filing the cutters and adepth-gauge tool when filing the depth gauges.
• Never file down or modify a safety link designed toprevent kickback.
Trouble-shooting
Cause The file was held too high, or it was too large.
Result The cutters won’t feed into the wood resultingin slow cutting. Having to force chain to cut willcause excessive bottom wear.
Remedy File cutters to the recommended angle. Check filingmethods with filing instructions. Check file size.
Cause The file was held too low or it was too small.
Result The chain grabs, causing rough cutting. The cutters dull quickly or won’t hold a cutting edge.
Remedy File cutters to the recommended angle. Check filingmethod with filing instructions. Check file size.
Backslope on side plate cutting edge
Hook in side plate cutting edge

Page 22
• Your chain should not be loose on the guide bar. For proper chain tension, make sure the tie straps of the chain are in contact with the bar rails on thebottom of the guide bar.
A chain with hooks filed in the cutters, withdepth gauges filed too low, or with safety linksfiled down will grab and cause kickback. It willalso cause excessive vibration and reduce theeffectiveness of the anti-vibration features of the saw.
If the depth gauge protrudes, file to propersetting. Round off the leading edge of the depth gauge.

Page 23
To operate a chain saw safely, read the saw’soperating manual and keep the following in mind.
The saw should be started in accordance with theoperating manual. The following figure demonstratestypical starting procedures used, with the chain brakeon to prevent the chain from turning.
Operating aChain Saw
To start
Note: In Newfoundland and Labrador, this is the onlyapproved method for starting a chainsaw.

Page 24
When operating a chain saw, hold the saw firmly withboth hands. Place your left thumb under the fronthandle; this reduces the chance that the saw will bewrenched from your hands if a kickback occurs andmay increase the chance of activating the chain brake.
Position of hands
Allow the saw to reach full speed before cutting, andmaintain this speed while cutting.
Speed
Keep your wrists straight. Bent wrists causeunnecessary muscle strain, and your arms willbecome tired.

Page 25
Never use the upper half of the guide bar tip to limb,buck, or start a felling or boring cut. If you use this part of the bar, the cutters will hook the wood, and the saw will kick back. Kickback will be significantlyreduced by using a low profile chain on a narrow nosebar (a 9- or 10-tooth sprocket-nose bar is recommendeddepending on the pitch of the chain).
Position of saw
Do not operate the saw with the power headabove shoulder height.
Make sure the saw is switched to the off position orthe chain brake is engaged when you carry the saw.Don’t carry it on your shoulder unless the chain isguarded and the guard is firmly secured to the saw.
Do not use components on your saw that are notspecifically made for that chain saw.
Carrying the saw
Components
Page 26
Do not refuel the saw while the engine is running.Move the chain saw at least 3 m (10 ft) from the placewhere you refuelled before starting it. Do not overfillthe fuel tank.
Transport gasoline only in containers approved by the Underwriters Laboratories of Canada, CanadianStandards Association, or the provincial Fire Marshal or Commissioner.
Fire Marshal/Commissioner OfficeNew Brunswick Newfoundland and LabradorPhone: (506) 453-2393 Phone: (709) 726-1050Fax: (506) 453-5513 Fax: (709) 729-2524
Nova Scotia Prince Edward IslandPhone: (902) 424-5721 Phone: (902) 368-4869Fax: (902) 424-3239 Fax: (902) 368-5526
• A chain saw operator must have a minimum of 227 mL(1 cup) of ABC fire extinguishing powder immediatelyavailable at the refueling site during the fire season.*
• Employers and employees must comply with fireprotection requirements of the provincial Departmentof Natural Resources or other regulatory agencies.Information on fire season dates is available fromyour local office.
• The chain saw, clearing saw, and all other internalcombustion engines must have spark arrestors.
* In New Brunswick the powder is required at all times.
* In Newfoundland and Labrador, the fire extinguisher(chemical) is required to be on the person, not at therefueling site.
Refueling
Storage andtransportation offlammablematerial
Fire protection

Page 27
Clearing SawsWith a little extra attention to the care and operation of the clearing saw,many injuries can be avoided.
Safety CheckWhen operating a clearing saw, you are required to have• personal protective equipment (as described on p. 11)• a clearing saw with safety features (as described
below)• first aid available at the worksite (p. 65)• an approved fuel container (p. 26)• fire protection (p.26)
Clearing saws used in forest operations must beequipped with certain safety features in working order:• a throttle control lockout• anti-vibration mounts• blade guard• on/off switch• spark arrestor• proper blade• blade lock nut• proper harness latch• proper harness (note that adjustments to the
harness should be made in accordance withmanufaturer's specifications or instructions)
Note: Ensure that the clearing saw is turned off beforeperforming maintenance.
The throttle control must not open when the throttlecontrol lockout is engaged.
All rubber mounts or devices required to reduce sawvibration must be present and in good condition.
Switches, as designed by the manufacturer, must beoperational.
Muffler and spark arrestor devices must be in placeyear-round on all engines operated in a forest environment.
Throttle controllockout
Anti-vibrationmounts
On/off switch
Spark arrestor
Standards Required

Page 28
Use only blades designed for the clearing saw inquestion. Inspect the blade each operating day, andreplace it as soon as cracks or fractures appear.
Replace the blade lock nut as soon as it loses its lockingpower.
Proper blade
Blade lock nut
Throttle control
Cutting blade
Drive shaft tube
Guard
Shoulder harness hook*
EngineOn/Off switch
Muffler/SparkArrestor
Anti-vibrationmount
Handles
* Be sure to adjust the harness in accordance with themanufacturer's instructions.

Page 29
Clearing saws have a wide variety of cuttingattachments. This versatility is at least partiallyresponsible for the rapid expansion of this tool in non-forestry tasks by highway maintenance crews and landscape gardeners.
There are three basic types of clearing saw accessories,and each is designed for a particular application. These include
• grass-cutting bladesfor mowing matted grass,weeds, and light shrubgrowth
• brush blades for cuttingand clearing undergrowthand brush; the additionalweight provides thenecessary chopping force to cut bushes and heaviershrub growth
• circular saw bladesfor traditional silvicultureapplications like clearingwoody bushes in aplantation, weeding, orprecommercial thinning(PCT) a young forest stand;these come with varioustypes of teeth, the mostcommon being a chisel-tooth design.
CuttingAttachments

Page 30
Sharpening is one of the most important aspects ofusing a clearing saw. The blade must be correctlysharpened so you can work effectively and avoidunnecessary wear on the blade and clearing saw.
Although the saw can be heldin several positions to sharpenthe blade, the best approach is to make a sharpening post.A few quick cuts will provide a sturdy support at acomfortable working position.Find a tree 7–10 cm (3–4 in) indiameter. (Use a tree you aregoing to cut anyway.) To makea V-cut at waist height, graspthe drive shaft firmly with your left hand. Think of the blade as the hour hand of a clock. Use the5 o’clock position to make the first angled cut midwaythrough the stem. Make the second angled cut to meet the first using the 9 o’clock position. Shut off theengine, unlatch the saw from your harness, and placethe tube in the V-notch. Wedge a short stick betweenthe blade and the guard to act as a friction brake andto allow you to use both hands when sharpening.
Consistency is as important when sharpening a clearingsaw blade as it is when sharpening a chainsaw. All filingangles are to be the same (usually 15°) with the fileheld level or just below horizontal (e.g., 5°). Alwaysread the manufacturer’s instructions for any specialsharpening requirements for the blade you are using.
Sharpening the Blade
Making a sharpening post
Filing angle

Page 31
The actual file size for a specific blade is alsorecommended by the manufacturer and printed on theblade package. Most recommend a 5.5-mm (7/32-in)round file, together with the correct file holder and a handle. Ensure that the file holder is held firmly ontop of the tooth.
After each stroke, ease up on the file as you draw itback. You will get a sharp edge on the tooth and avoid damaging the file. Sharpen the teeth on one side of the blade, then tilt the saw to do the other side. Working close to the ground, you can sometimesdamage the blade by striking a rock. Severe damagewill require more attention back at the repair shop or a new blade. Light damage can be corrected in thewoods by the following procedure. Use a flat file to file the top of all teeth gently, until onlya small area of damage remains at the front tip of thetooth. Then, correct the filing angle with a round file.Ensure that all teeth are equal height after sharpening.
For the blade to cut with maximum speed and efficiency,it must be set to produce the desired kerf. Check thesetting as part of your regular maintenance or if theblade has been damaged. For proper adjustment, twistthe tooth tip out by pressing down and in on the settingtool. Most blade manufacturers recommend a settingof 1 mm.

Page 32
Avoid setting the teeth beyond the manufacturer’sspecifications and then readjusting. Unnecessaryadjustments may weaken the tooth or cause breakage.Check the blade daily for cracks and/or broken teeth.
The clearing saw is a special tool requiring specialtechniques and training. Professional instruction isworthwhile to eliminate any early frustrating situations that could easily have been corrected.
The cutting techniques used with the clearing saw mayappear to be difficult. Actually, they can be easy, butit’s a classic example of experience being the betterteacher. Many clearing-saw operators say that you need a full season working with the saw to becomecomfortable with it. Most will also indicate that onceyou learn to use the saw properly, it is the best tool forsmall-diameter trees in various silviculture treatments in the right forest conditions.Before beginning any cut, ensure that the saw isoperating at full throttle and consider the blade position,tilt or angle of the blade, direction of approach, and stump height. Paying close attention to these items will make or break you as a good operator. The following techniques are for trees up to 6.3 cm (2.5 in).
To describe the various techniques, we will refer to theblade as a clock face. The blade guard covers from 5 to7 o’clock, so cuts can be made only from 8 to 4 o’clock.The illustration also shows the kickback zone, 12 to 2
CuttingTechniques
Blade position

Page 33
Tilt or angle of blade
o’clock. This zone should beavoided because it creates thegreatest risk of having the sawsuddenly kick out to the rightside. Many trees have beenaccidentally wounded or cutdown when the saw nexpectedlykicked. The kickback motion ispowerful and can throw theoperator off balance.The circular blade moves in acounterclockwise direction. The right side of the blade from 12 to 4 o’clock pushes the base of thestem away from you so that the tree falls towards you.The left side of the blade from 8 to 12 o’clock pulls thebase of the stem towards you so the tree falls awayfrom you.All felling is accomplished by deciding where you wantthe tree to fall and then choosing where to startcutting with the blade.
The tilt of the blade determines how long the stemstays on the blade and how far it moves from thestump. Stems cut using the 4 o’clock position andangled down to the right will fall off the stump fast.Stems cut using the 2 to 3 o’clock position, but angledup on the right, will stay on the blade while it isrotating and move away from you to the left. Thesafest control position when trying to protect the blade from hitting another object is 10 to 11 o’clock.

Page 34
Whenever a cut is made, the direction youchoose to “hit” the steminfluences where it will go. This motionwill help the stem gofarther from the stump.Excessive force maydamage the blade orsaw. This “hit” motionshould always be madewith your legs and notyour arms. At first, this method of moving your bodywith the saw instead of depending on your arms is noteasy to do. It takes practice to develop, and it is bestdemonstrated by a skilled clearing-saw operator.
The location of the cut is also important for directionalfelling. It may be necessary to change the height of thestump to influence where the stem will fall. Cuts madehigher on the stemand at an angle willallow the stem toslide off the stumpand fall further away.Note: For safetyreasons, cut as lowas possible.
With the information presented, the followingtechniques demonstrate the three main fellingdirections of the clearing saw.
Stump height
Directional felling
Direction of approach

Page 35
Mobile EquipmentLike chain saws, all mobile equipment used in the forest industry must meetcertain standards and be properly operated and maintained to reduce thechance of injuries.
Rolloverrequirements
Wherever required, rollover protective structures mustmeet the requirements set in the Canadian StandardsAssociation B352-M1980 Code for Rollover ProtectiveStructures (ROPS) or the Engineering Society forAdvancing Mobility in Land Sea Air and Space SAE J1040or J2194 and subsequent revisions.
Modifications made to a rollover protective structuremust be certified by a professional engineer or have the written approval of the original manufacturer.
Seat belts or other restraining devices must be usedwhen mobile equipment is moving.
All operator protection on mobile equipment used forlogging, silviculture, and forest road construction that is built by someone other than a manufacturer must becertified by a professional engineer.
All debris such as twigs, leaves, etc., should be removedfrom around manifolds, transfer cases, and other areasthat get hot and could cause a fire.
Head boards must be able to prevent objects fromcoming forward and hitting the cab.
The climbing, walking, and working surfaces of mobileequipment must be non-skid. There must also be handholds on each side of steps or ladders, and suitable footand hand holds where someone might slip. Three-pointcontact while getting on and off a machine is a must.
All Christmas tree balers with twine containers must be equipped with a locking or braking device on thetwine can mechanism to prevent accidental rotation,unless work procedures can ensure equivalent workerprotection.
Equipment notbuilt bymanufacturer
Debris
Head boards
Seat belts
Climbing, walking,and workingsurfaces
Christmas treebalers
Standards Required
Modifications

Page 36
Employers and employees must comply with fireprotection requirements of the provincial Departmentof Natural Resources or the appropriate regulatoryagencies.
Brakes must be able to stop the machine within a safedistance under all reasonably anticipated load/drag,speed, grade, and road conditions. They should at least be able to hold the machine stationary on a levelroad in second gear when the clutch is engaged at 50per cent maximum-rated engine rpm or in accordancewith the manufacturer’s specifications.
Brakes should not be modified or changed from the manufacturer’s design, because this will reduce theireffectiveness.
Mobile equipment must have a parking brake that willprevent it from moving when fully loaded on anaverage grade of forest road without help from theengine, blade, or other attachment.
The steering mechanism must allow the operator tohave full control over the direction in which themachine is moving.
All road-building equipment in a logging operationmust have an automatic back-up device/alarm thatautomatically operates when the reverse gear isengaged.
All pulp and log trucks should have an automatic back-up device/alarm. If not, the driver must give ashort blast on the horn before shifting into reverse.
In New Brunswick, automatic back-up devices/alarmsare required on all powered mobile equipment.
Fireprotection
Brakes
Steering
Warning devices

Page 37
When you operate mobile equipment, you areresponsible for maintaining full control of it. Safeoperation involves adherence to manufacturers'recommended maintenance and operationalprocedures.
Examine your equipment before each shift begins and atregular intervals. Report any defects or conditions that mayaffect its safe operation to your supervisor or employer.
Fuel tanks in mobile equipment should never be filled while the engine is running, while anyone is smoking in oraround the vehicle, or while a source of ignition is nearby.
Never leave the controls of your machine unattendedunless you make sure the machine cannot accidentallymove in your absence. Set parking brakes andtransmission locks; lower blades, buckets, or forks to the ground; lower grapples to the deck; and chock the wheels if necessary.
The swinging movement of a cab, load, counterweight,or other part of your mobile equipment can be a hazardto workers in the area. Never move your equipmentwhen it will pose a hazard to another worker. No workeris allowed on the load, truck platform, or trailer whenpulpwood, sawlogs, fuel wood, or similar products arebeing loaded on a truck.
Remove from your mobile equipment any unsecuredmaterial, tools, or equipment that could cause a workerto slip or trip or could be a fire hazard or danger if themachine upsets.
Whenever possible, work up and down slopes ratherthan across them.
Safety check
Unattendedequipment
Swingingequipment
Excess items
Slopes
Refueling
OperatingMobile Equipment

Page 38
Only the operator of the machine may ride it, unless seat belts or other safe and secure facilities have beenprovided for other workers.
Vehicles used to transport workers must have a firmlysecured seat for each passenger and have adequateventilation in each enclosed area used to transport workers.
Flammable materials, or saws and other pieces ofequipment that contain flammable material, may betransported in a vehicle designed to carry workers onlyif they are carried in approved containers and in an areaof the vehicle that will protect the workers from vapours.
Materials, tools, or other equipment can be carried in the part of a vehicle where workers are riding only ifthese items are placed and secured so they will not injure anyone if an accident occurs.
Proper maintenance of your equipment will help assure a longer life and prevent injuries.
All modifications, extensions, parts replacements, andrepairs made to mobile equipment must maintain atleast the same safety factor used in the equipment’soriginal design.
Moving parts on mobile equipment that pose a hazard to the operator or other workers must be properlyguarded.
If the tire rims are equipped with lock rings, use a cageor any other device, such as a chain, to encase the tirebefore inflating it.
Transportation of flammablematerials, tools,equipment
MaintainingMobileEquipment
Modifications and repairs
Moving parts
Tire inflation
Chain
Cage
Passengers

Page 39
Use only methods approved by the tire, wheel, and rim manufacturers when mounting, inflating,and seating tubeless tires (ether, flammable, andpetroleum-based products must not be used).
All hand tools must be kept in good condition. Theyshould be used only for jobs for which they wereintended, and only by workers who know how to usethem properly.
Equipment must be blocked securely when it is beingdismantled, altered, or repaired, because a worker maybe endangered if the equipment collapses or moves.
The blade, bucket, boom, cable, or other movable parts of the mobile equipment must not be used as asubstitute for secure blocking.
Servicing, maintenance, or repair should be done onlywhen the equipment is not being used unless thecontinued operation of the machine is essential to therepair process and the repairs can be done safely.
Inspection, operation, repair, maintenance, andmodification of mobile equipment must be carried outaccording to the manufacturer’s instructions oraccording to good practice if there are no suchinstructions.
When working on the joint of an articulated machine,use a lock bar or similar device.
Hand tools
Blocking
Servicing

Page 40
First, take a few minutes to assess the tree youplan to fall. A large sawlog tree may weigh a ton,so you must predict where it will be falling.
Some trees are more difficult to assess thanothers. Although trees generally grow upright,few stand perfectly straight. A lopsided crown, abroken top, dead limbs, prevailing winds, snow,and ice can all affect the direction a tree will fall.
Remove the brush and slash from the base of thetree before you start to fell it. This will ensure thatbrush and slash will not interfere with your saw oryour footing, and you will have a clear escape routeaway from the tree.
Never work closer to another worker than twice the height of the tallest trees in the work area, unless that person is helping you.
In New Brunswick, no worker is allowed within40 m of another worker.
Correct Logging ProceduresMany injuries and deaths that occur in forest operations result from improperlogging practices. There is a correct way to prelimb, fell, limb, and buck a tree. As a professional forest worker, you can protect your own safety and the safety of others by following correct logging practices.
Before Felling
Removing brush and slashfrom the base of a tree
Wind
Lopsidedcrown
Snow & ice

Page 41
Prelimbing aStanding Tree
The first step is to cut back the ends of the branches soyou can reach the trunk of the tree. Hold your chainsaw parallel to your body. Then if the saw kicks back itwill be directed away from your body.
After you reach the trunk of the tree, hold your chainsaw so the tree is between you and the guide bar. Inthis way, the tree will protect you if the saw kicks back.
Step 2
Step 1
Operate the throttlewith your thumb.

Page 42
Many fatal logging injuries occur when workers arestruck by falling trees. Improper felling proceduresoften cause this kind of accident. To reduce this risk, fell a tree in the following way:
• Use a wedge, felling lever, or push pole to makesure the tree falls in the intended direction.
• Fell the tree away from you, downhill or across aslope if there is a chance that the tree may movedownward towards you after it hits the ground.
• No one should push on a tree while a chain sawoperator is cutting it.
• Both cuts should meet to form at least a 70° anglenotch opening.
• Always make the upper notch cut first and then look into the kerf as you saw the lower cut. In thisway, you can check that you do not saw too deeplyinto the trunk and cut the hinge.
• The depth of the notch should be at least one-fifthand no more than one-third of the tree diameter.
Felling
Felling principles
The notch
ESCAPEROUTE
ESCAPEROUTE
DANGERZONE
DANGERZONE

Page 43
Felling cutMake the felling cut at right angles to the stem of thetree, level with or slightly above the notch.
The hinge should be as thick as necessary to hold thetree to the stump until felling is completed (one-tenthof the tree diameter is recommended). If the tree isrotten, double the hinge width. For example, a 30-cm(12-in) tree should have a 3-cm (1.2-in) hinge; a 30-cm(12-in) rotten tree should have a 6-cm (2.4-in) hinge.
Hinge
minimumnotchopening of 70°
Always make the uppernotch cut first and thenlook through the kerf asyou saw the lower cut.
In this way you can makesure you do not saw toodeeply into the trunk

Page 44
When the treestarts to fall
Move diagonally backward 1–5 m (3–16 ft) from the tree,depending on its size. When the butt kicks up it usuallymoves backwards or to the side.
A tree that is leaning heavily has tremendous tensiondirectly behind the lean. As soon as you make aconventional felling cut you release this tension, and the tree will begin to fall. If too much wood is left holdingthe tree, this wood will split vertically, forming a barberchair, instead of breaking off horizontally. Barber chairscan also be caused by too small a notch.
minimum of 70° minimum of 70°
30 cm (12 in)30 cm (12 in)
A hinge of at least3 cm (1.2 in)
Increase width to compensatefor wood defects
Preventing barberchairs

Page 45
To prevent a barber chair when cutting a tree that isleaning heavily:
1. Make a 45° bore into the centre of the tree while holdingyour saw in the normal felling cut position (Fig. 1).
2. Continue to bore through the tree, being careful youdon’t cut off the hinge (Fig. 2 & A).
3. Cut towards the notch, leaving enough holding woodor hinge (Fig. 3 & B).
4. To cut the remaining wood, move the saw from thehinge towards the opposite side of the tree, leavingenough wood to prevent the tree from falling. If youare felling a tree that is larger in diameter than thelength of your guide bar, bore cut from both sides(Fig. 4 & C).
5. Make the release cut on the back side of the treebelow the bore cut to allow the tree to fall(Fig. 5 & D).
3. 4. 5.
B C D
A2.1.

Page 46
Never leave a partially cut tree standing. If a treebecomes lodged in another tree, work on it until it ison the ground. You can do this by using a skidder orforwarder to remove it, or by rolling the tree free,prying the butt end backwards, or bucking off short ormerchantable pieces. When you are bucking offpieces, be careful that the tree does not reverseits falling direction from the lodged position, and do not operate your chain saw guide barabove your shoulders.
Partially cut orlodged trees
Lodged trees can be dangerous, so make sure you• Do not work in the area where the tree is likely to fall.• Do not try to cut down the support tree.• Do not fell another tree across the lodged one.• Do not climb on the lodged tree.• Properly mark or flag the area to alert
others of the hazard.
Rolling the tree
Prying the buttend backwards
Pulling thetree downwith askidder
Forest workers should not:— cut down a support tree
— cut a tree so it willfall across a lodged tree
— work near a treethat could fall

Page 47
Dead or DyingTrees
SnagsA snag is a standing dead or dying tree and must be felledwhen it presents a hazard to any worker. Do not do other work in an area where a snag poses a threat.
Snags are very dangerous, so be careful when fellingthem. Fell a snag in the direction it is leaning. If you areusing a wedge, do not drive it in, because this can createvibrations in the snag and cause the top to break off.
A cavity tree is a standing dead or dying tree with holesor the potential for holes that small wildlife may inhabit.Perching or nesting trees are also valuable habitats forwildlife. Cavity, perching, or nesting trees may be leftstanding if they are windfirm and present no hazard toworkers. However, if these trees present a hazard,they are to be felled.
Spring poles must be cut after a tree is felled and before it is limbed or bucked. To cut spring poles safely:• Release the tension by carefully cutting partway
through the spring pole from the inside bend. Make a wide notch by using a series of shallow cuts near the base.
Cutting springpoles
Cavity trees
• The release cut (felling cut) can be made oppositeand below the lowest inside cut.
• Do not cut the top of the stem until the tension is released at the base of the tree.
Release cut
Series of cuts

Page 48
Limbing Most of the professional chain saw operator’s energy is used while limbing fallen trees. To reduce fatigueand lessen the chance of injury, limb a tree in thefollowing way.
Before you begin limbing, and every time before youstep forward, make sure the guide bar of your saw ison the opposite side of the tree from you.
Before you begin
The saw should function as a lever
Page 49
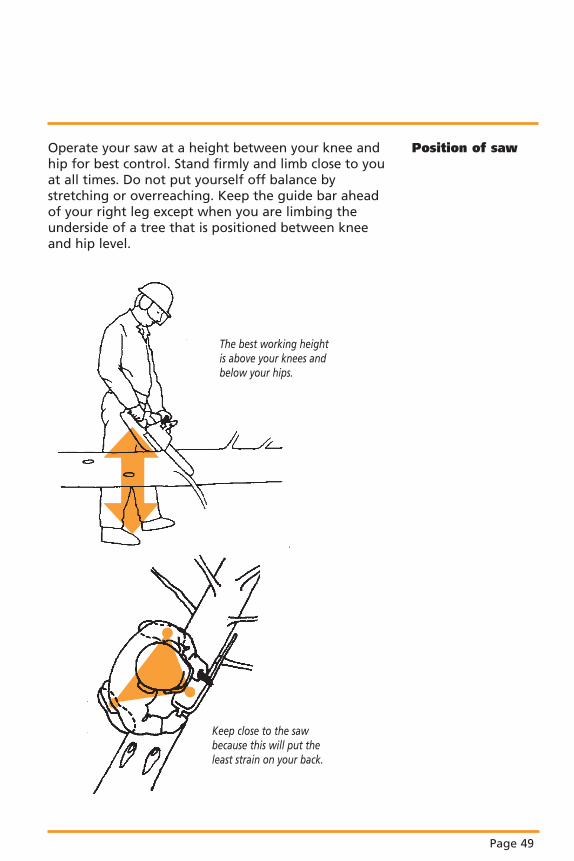
Operate your saw at a height between your knee andhip for best control. Stand firmly and limb close to youat all times. Do not put yourself off balance bystretching or overreaching. Keep the guide bar aheadof your right leg except when you are limbing theunderside of a tree that is positioned between kneeand hip level.
Position of saw
The best working height is above your knees andbelow your hips.
Keep close to the sawbecause this will put theleast strain on your back.

Page 50
Always support the saw on the trunk of the tree.Do not limb with the tip of the guide bar, because thesaw may kick back.
Support the weight ofthe saw on the trunk.
Do not delimb with theupper tip of the guide bar.
Never walk on the stem of a tree while it is beinglimbed.
Beware

Page 51
1. 2.
Six-step limbing method
Fatigue and injuries can be reduced by using the followinglimbing method:
1. Always begin with the saw on the opposite side of the tree.Position your feet so they arepointed towards the top of the tree, and rest the saw body on the tree stem.
2. Continue to rest the saw on thetree and rotate the saw towards your side, over the top of the tree stem.
3. Pull the saw towards your side ofthe tree. Rest the saw body againstyour right leg and tree stem.
4. Push the saw forward. Keepyour knees bent and your backstraight. Continue to support thesaw with your leg. Stop pushingthe saw forward when it becomesawkward to support the sawagainst your leg.
5. Turn the saw and use the top ofthe bar to remove the top limbs.Rest the saw on the tree stem.
6. To complete the sequence, use the bottom of the saw bar to remove limbs on the oppositeside of the tree
You are now ready to begin again with the first step.

Page 52
5. 6.
3. 4.

Page 53
By following proper bucking procedures, you willreduce the likelihood of injuring yourself. Make sure you buck a tree in this way:
• Stand inside the bend when bucking wood undertension.
Bucking
• Stand on the uphill side of pulpwood or logs you arebucking.
• Do not buck a log or top off a tree by using the upperside of the guide bar and pulling the saw towards you.
• Buck in the manner shown in the following illustration.
Don’t backcut, pulling the sawtowards yourself.Stand to one side of the cut andkeep an escape route open.
ESCAPEROUTE

Page 54
Wood can be brought to roadside (yarded) by eitherskidding or using a forwarder. In either case, certainpractices should be followed:
Make sure you remove the choker, twitching chain, ordog from the log before you buck or measure the wood.
Chokers should be attached no farther than 1 m (3 ft)from the forward end of the tree.
Stand a safe distance away from any logs or trees being grappled or winched. If you areoperating the skidder or forwarder, ensure allother workers have moved to a safe distancebefore grappling or winching logs or trees.
Yarding
When yardingwith animals
When chokinglogs or trees
Grappling orwinching logs or trees
Change wire rope lines (cables) if they become frayedor damaged.
Wire rope lines
Stand clear. If a logbeing pulled by amachine strikes anotherobject, it may movedangerously in anunanticipated direction.

Page 55
Lifting WoodSerious back injuries are caused by lifting and pilingwood in the wrong way. To avoid injury:
• Roll, pull, balance, or lever wood to a pile. Make sureyou keep your back straight and your knees bent.
• If the load is too large, get help.
Hauling,Loading, andPiling Wood onVehicles
If you are hauling logs by truck, you must follow therequirements of the Motor Vehicle Act and Regulationsconcerning the security of your load. Contact your localregulatory agency. For provincial information on loadtransportation contact: New Brunswick: Maintenanceand Traffic Branch (506) 453-2600, Newfoundland andLabrador: Works, Services and Transportation, MotorRegistration Division (709) 729-4640, Nova Scotia: RoadTransport Inspection Division (902) 424-5973, PrinceEdward Island: Highway Safety Division (800) 368-5200.
Use a short leverto put less strainon your back
A long lever willcause excessiveand uneven strainon your back.
Keep your back straight anduse your leg muscles.
Use both hands.

Page 56
Power lines and electrical equipment can be deadlyunless you know how to work around them. Beforeworking near them, notify the people responsible for the lines or equipment so they can determine if working conditions are safe.
There are three main classes of power line: (1) transmission, (2) distribution, and (3) secondary andservice lines. Transmission lines operate at voltagesgreater than 25,000 volts (25 kV). Distribution lines arelines that operate at a nominal circuit voltage of 750 to25,000 volts (0.75–25 kV) measured phase to phase.Secondary and service lines operate at less than 750 volts.If you are working near power lines and do not knowthe voltage, contact the local electric utility office.
As part of your overall planning process, check for power lines in the area where you are going to work.Talk to the utility to assess hazards and plan safeguards.When planning operations, consider the following:
• Locate roads and trails to minimize crossing underpower lines. Where crossing is required, ensure thatthere is adequate clearance for the equipment to beused. Travel areas under lines may have to be markedso operators can be guided to cross at appropriatelocations.
• Locate landings and loading areas away fromoverhead lines.
• Mark “danger” trees that could fall into lines, so cutters can take appropriate precautions.
Keep the following in mind.
Ground clearance under a power line may not beenough to allow you to drive a truck or mobileequipment underneath it. If you are working near a power line whose clearance is not clearly marked:• Contact the local electric utility, which has the
proper tools to measure ground clearance and canquickly establish the clearance for you.
Working nearPower Lines
Planning yourwork
Ground clearance

Page 57
• Remember that ground clearance must bemeasured for overhead transmission anddistribution lines.
• Never attempt to measure ground clearance onyour own.
• Make sure the ground clearance is checked andindicated with a highly visible marker before youcross under the line with a vehicle.
When your truck or mobile equipment will cross undera power line:
• Cross under the line within 10–15 m (33–50 ft) of the structure supporting the line so your vehicle willhave maximum clearance beneath overhead wires.If this is not possible, contact the electric utility.
• Cross only at designated spots.• Don’t travel directly under the wires when moving
parallel to them.• Maintain at least 3 m (10 ft) between overhead
transmission lines and any extended part of your vehicle. In Newfoundland and Labradorthe required clearance distance is 5.5 m (18 ft).
In New Brunswick, the required clearances are: • 750 volts to 100,000 volts 3.6 m (12 ft)• 100,000 volts to 250,000 volts 5.2 m (17 ft)• 250,000 volts to 345,000 volts 6.1 m (20 ft)
In Nova Scotia, the required clearances are:• 750 volts to 69,000 volts 3 m (10 ft)• 69,000 volts to 138,000 volts 5 m (16 ft, 5 in)• More than 138,000 volts 6 m (20 ft)
• Maintain at least 3 m (10 ft) between the lowestoverhead distribution or secondary lines and anyextended part of your vehicle.
• If you are travelling under 120/240 volt service wiresthat run between a pole and a building, make sureyour vehicle does not touch the wires.
• Be aware that the sags in overhead wires change,and clearances may vary from time to time.
Crossing underpower lines

Page 58
Cutting near power lines can be hazardous. To reducethe chance of injury, observe the following rules.
• Do not cut any tree that is within 3.0 m (10 ft) of a transmission line or that when felled couldpass within 3.0 m (10 ft) of a transmission line. In Newfoundland and Labrador the requiredclearance distance is 5.5 m (18 ft).
• Do not cut any tree that is within 3.0 m (10 ft) of adistribution line or that when felled could passwithin 3.0 m (10 ft) of the distribution line, unlessthe tree is at least 0.6 m (2 ft) shorter than theheight of the distribution line. In Newfoundlandand Labrador the required clearance distance is 5.5 m (18 ft).
• Do not cut any tree that may come into contact with a secondary or service line unless measuresare taken to control the descent of the tree.
• Cutting trees closer than the above limits requiresspecial training, should only be done by qualifiedpersonnel, and in some provinces requires certification.
Notify the local electric utility whenever you are workingin an area where trees are within the above limits.
Cutting nearpower lines
Don‘t work closer to transmission anddistribution linesthan the distanceslisted below.

Page 59
If, after you make your felling cut, you realize a tree isgoing to strike a power line:
Tree contact withpower lines
• Move quickly out of the work area.• Do not try to clear the tree or any cutting
equipment, or return to the site to retrieveyour saw if the tree is touching the line—thiscould be fatal.
• Advise the local electric utility of the contactimmediately, whether the tree contacts the line onthe way to the ground, remains lodged on the line,or causes the wire to burn, break, and fall to theground. (If the tree contacts the line on the way tothe ground, the utility will want to check the wirefor damage.)
• Post a guard about 15 m (50 ft) from the butt of alodged tree to warn others of the danger.
• If you must leave the area unattended, mark or flagthe area to alert others of the hazard.

Page 60
If you are driving a truck or mobile equipment thattouches an overhead power line and remains in contact with it, stay where you are and warn othersto stay away until the power has been disconnected orthe contact broken. If possible, drive the vehicle awayfrom the line.
You should only try to leave the vehicle if a fire breaksout or there is other danger. To leave an energizedvehicle:
• Jump clear of the main frame, making sure you donot touch the tracks or tires, or any other part of thevehicle and the ground at the same time.
• Land with both feet close together and shuffle awayfrom the vehicle until you are 15 m (50 ft) from it.
• Notify the electric utility of the contact.
If a co-worker contacts an energized wire, tree, orvehicle and remains in contact with it, do notattempt rescue. You could receive a serious or fatalelectrical shock.
If the person is thrown out of contact with theenergized source, you can move the victim to a safelocation and administer first aid.
Equipment contact withpower lines
Rescuing a co-worker

Page 61
Woods Roads
How well woods roads are maintained and posteddetermines how safe they are.
Maintenance means
• maintaining woods roads in a condition that allowstrucks and other mobile equipment to travel safelyon them at all times
• installing bumpers at least 25 cm (10 in) high alongthe sides and entire length of the decking of bridgesand of culverts over 1.5 m (5 ft) high (1.2 m(4 ft) inNew Brunswick) that have a wooden deck
• felling snags that might eventually fall across a roador plug a ditch
Signs should be posted so they are highly visible
• at the intersection of a woods road and a publicroad designed for normal vehicle travel at 50 km/hor more
• 100 m (325 ft) from a bridge or other structure thatrequires vehicles to stop or slow down to pass and isnot clearly visible
• 100 m (325 ft) from an obstruction used to preventmotorized vehicles from travelling on a particularroad
All gates and cables must be clearly visible.
Each jurisdiction may have specific requirements thatmust be met when forestry operations are conductedfrom or near highways, streets, or other rights of wayregularly travelled by the public
Contact the local authority.
Refer to the Traffic Central Manual for Roadway WorkOperations. Contact the Traffic Engineer, Department ofWork Services and Transportation.
Maintenance
Posting signs
Temporaryworkplace trafficcontrol
New Brunswick
Newfoundland and Labrador

Page 62
This section is adopted under sub-section 4(3) of theTemporary Workplace Traffic Control Regulations, made pursuant to the Occupational Health and SafetyAct as a procedure acceptable to the Director.
Contact the local authority.
Forestry operations conducted from or near highways,streets or their right of ways regularly travelled by the public must be signed as required by the provincialregulatory authority.
Forestry operations conducted from or near forestryroads must meet the Temporary Workplace TrafficControl criteria specified in this Code of Practice.1. Application
1.1 This code applies to roads built or usedprimarily to facilitate forestry work activityor to transport forestry products.
1.2 This code applies to any forestry work activityincluding, but not limited to, harvesting,loading, road maintenance/repairs, silviculture,Christmas tree operations, surveying, or anyother work that is intended to supportforestry operations.
2. Definition2.1 Work activity includes any active work site on
the road surface or road shoulder.2.1.1 Road Class A, Road Class B are described
as having a travel surface greater than5.5 metres and have 1 1/2 to 2 lanes.
2.1.2 Road Class C, Road Class D are describedas having a travel surface less than 5.5metres and have one lane with turnoutsrequired to meet or pass other vehicles.
2.2 All signs specified for use must meetregulatory requirements.
Nova Scotia
Public roads
Forestry access roads
Prince EdwardIsland

Page 63
3. General Requirements3.1 All temporary workplace traffic control signs
must be located off the travel lane(s).3.2 All stationary vehicles and machines equipped
with four-way flashers must use these lightswhen conducting work activity.
3.3 All stationary vehicles and machines equipped with revolving 360-degree flashing amberlight(s) must use these when conducting work activity.
3.4 All road maintenance equipment must haverevolving 360-degree flashing amber light(s)operating when conducting work activity.
3.5 All work activity involving stationary vehiclesor machines shall be conducted to the extentreasonably practiceable at locations where thevehicle and machines are visible from bothapproaching directions.
3.6 Where the visibility of the work site isrestricted from either approach direction so as to create a hazard, “Road Work” (TC-5) signswill be placed 100 metres from the work siteon the approach direction where the visibility isrestricted.
4. Where the Road Class is A and B:4.1 Vehicles and machines shall use four-way
flashers and a 360-degree flashing amberlight(s), visible from both approachingdirections.
4.2 “Road Work” (TC-5) signs must be located100 metres on each side at the work site.
4.3 “Road Ends” (TC-43) or “Municipal Barrier” (TC-51) signs are required where conditions, orwork activities at the work site are such thatthe road is not passable. Where practical the“Municipal Barrier” (TC-51) sign should beplaced at the road entrance, or the intersectionnearest the work site that would permit trafficto detour around the work site.

Page 64
4.4 Where the work site is longer than 800 metres,“Person Working” signs are to be placed at 800-metre intervals along the road throughout the work site.
4.5 All signs indicating work-site activity are to beremoved at the end of the work day.
4.6 Where roads are gated and secured toprohibit unauthorized entry, traffic controlsigns are not required where all authorizedusers know the location of the work site onthe roadway.

Page 65
Each forest operation must have first aid supplies andservices, as required by the regulations in the province,available at all times, including
• adequate first aid supplies available at the work site• a transportation plan• someone at each work site who is certified in
first aid and able to administer first aid• a communications plan or remote location plan
as required
As well, every chain saw operator must carry anapproved pressure dressing when operating a chainsaw. The need for a stretcher or backboard on site should be reviewed. Personal transport vehicles should be parked facing the most direct exit route from the site.
Personal hygiene facilities including toilets andsanitation facilities must be considered and providedwhere required by regulation.
First Aid
Personal Hygiene

Page 66
Glossary
backcutting the dangerous and unacceptable practice of dragging the saw back towards your body, using the top of the bar
baler, Christmas motorized machine for wrapping Christmas trees with tree mesh or rope
barber chair formed by a tree that splits up the stem from the base during the felling
boring cut a cut into a tree started with the bottom tip of the guide bar
bridge buttress and stringers 1.8 m (6 ft) or more in length
brush limbs and tops cut from the stems of trees
buck to cut a tree into logs after it is felled
bumper the low curb on a bridge
cavity tree a standing dead or dying tree greater than 30 cm (12 in) in diameter at chest height, with holes or potential for holes suitable for wildlife habitat, that does not create a hazard to workers
chain saw any hand-held portable motorized saw used in a forest operation
choker a cable or chain with a sliding device that enables the cable to self-tighten around the material being hauled
choking attaching a choker
clearing saw motorized portable saw with a circular cutting blade or attachment connected to an extended shaft
culvert a structure less than 1.8 m (6 ft) in width used to direct water under a roadbed
dog a device attached to trees or parts of trees to allow them to be hauled

Page 67
a vehicle in contact with a power line energized vehicle
a process whereby a standing tree is mechanically fellingseparated from its base, allowing it to fall to the ground
a final cut made directly opposite the notch to allow felling cutthe tree to fall
burning of combustible solids such as wood or paper fire, Class A
burning of combustible liquids such as gasoline fire, Class B or diesel fuel
electrical fires fire, Class C
logging equipment used to carry trees or parts forwarderof trees to roadside
the distance between an overhead electrical line ground clearanceand the ground
the part of a chain saw on which the saw’s chain travels guide bar
the portion of a tree between notch and felling cut hingethat allows control of the tree during felling
a saw cut made into a tree kerf
the sudden upward or sideways movement of a kickbackchain or clearing saw
the removal of limbs from the stem of a tree limbing
a split-metal band used to secure a two-piece tire rim lock ring
a tree that has been cut and has not fallen completely lodged treeto the ground because it has become lodged on another tree or other object
any piece of pulpwood, sawlog, pitprop, pole, post, logtie, fuel wood, or similar product of a tree

Page 68
mineral soil ground free of combustible soil and debris
mobile equipment self-propelled machinery used in a logging operation, excluding trucks
notch a wedge or section of a tree base that is sawn out to control the direction the tree will fall
overhead a power line that distributes electricity withindistribution line communities and surrounding areas and has a capacity
of 25,000 volts or less
overhead a power line that transmits electricity to various partstransmission line of the province and has a capacity greater than
25,000 volts
prelimbing the removal of lower limbs from the stem of a standing tree to create easier access to its base
rollover protective a cab or roll bar to protect the operator of mobile structure equipment in case the equipment rolls over
safety footwear footwear that will withstand a toe impact of CSA Grade 1 125 joules
safety footwear, footwear that will withstand a toe impact of CSA Grade 2 90 joules
service wire a power line that services homes and businesses from the distribution system
shearing knife a long-bladed knife with varied handle lengths, used to shear (shape) trees
skidder an animal-powered or mechanized piece of equipmentused to skid or drag whole trees or parts of trees
slash portion of tree cut and left on the ground

Page 69
a standing dead or dying tree or part of a tree that snagpresents a hazard to workers
a standing tree with the top stem trapped, spring polecreating a bow-like structure
the main body of a tree from base to top, the trunk stem
like a choker but without a slider twitching chain
truck or mobile equipment vehicle
pulling a load towards a machine, using a cable winching
a road through a forested area, other than a municipal woods roador provincial highway, that may be used to transport forest products by motorized vehicle
an area where logging operations are being carried on work area
dragging trees or parts of trees to a roadside yarding

Page 70
Occupational Safety and Health Legislative FrameworkEach year in the Atlantic Provinces, workplace accidents and disease directly cost well over $100million and directly affect thousands of workers whoare injured or ill. These statistics do not consider thethousands more workers and many more millions ofdollars that are indirectly related to workplaceincidents.
Current occupational health and safety acts are a major step towards reducing accidents and illnesses in the workplaces in the Atlantic Provinces. This isachieved by providing rights and responsibilities toemployees, employers, and others in the workplace.
An important part of each occupational health andsafety agency’s efforts to provide reasonable andpractical rules to meet the needs of their clients is to consult with employers, unions, government, andpublic interest groups and make recommendations on matters related to occupational health and safety.
The objective in regard to occupational health andsafety is to promote comprehensive and practicalpreventive strategies to improve the workingenvironment.
This approach to workplace health and safety providesfor consultation and an opportunity to educateworkplace parties about hazards in their workplaces.The legislation and programs go beyond providingrights and responsibilities to the parties by helpingthem develop safety and health systems in theirworkplaces.
The legislation and programs provide support foremployers, employees, and others through education,promotion, facilitation, and enforcement of thelegislation.
Acts and Regulations

Page 71
The following information is available to employers,employees, and other interested parties as backgroundto understand the legislative framework.
The occupational health and safety acts provide for the promotion, co-ordination, administration, andenforcement of occupational safety and health.
The acts place certain duties on a number of workplace parties, that can include employers,employees, self-employed persons, constructors,contractors, professionals, owners, suppliers, andproviders of occupational health and safety services.
They also place emphasis on the prevention ofaccidents, injury, and disease through an internalresponsibility system that promotes co-operation andinvolves the workplace parties in workplace health andsafety practices.
The Occupational Health and Safety Acts are organized around five basic elements:
• Prevention—Education, policies and procedurescreate a safe and healthy workplace in which, to the greatest extent possible, potential hazards areanticipated and prevented before they arise.
• Internal responsibility—Each workplace isresponsible for implementing an effective system for employer, employees, and others to co-operatively
- identify health and safety problems in theworkplace
- identify and implement potential solutions- provide an internal audit of the workplace’s
compliance with health and safetyrequirements
The Acts

Page 72
• External support—A system external to the workplaceto support the internal responsibility system withinthe workplace and monitor its effectiveness.
• Enforcement—Legal sanctions may be applied toparties who fail to comply with the requirements of the acts.
• Response to changing needs—Through policy and leadership capacity government and affectedparties evaluate and respond to the needs of theworkplace.
In addition, the broad duties established by the acts aresupported by a further tier of laws, commonly referredto as regulations, together with lower tiers of codes ofpractice and guidelines.
Regulations have the effect of spelling out the specificrequirements of the legislation and may prescribespecific standards or performance. Regulations may also have general application or apply to a particularhazard or a particular type of work or workplace.
Specification regulations prescribe the minimumstandards that will be considered acceptable.Performance regulations specify the objective and allow a variety of approaches to meeting the objective.Both approaches to regulation are used separately and in combination.
Regulations

Page 73
A code of practice is a document prepared to providepractical advice on preventive strategies, for a specifichazard or in a specific workplace, or a practical meansof achieving compliance with occupational health andsafety in legislation.
A code of practice may contain explanatoryinformation in addition to specific advice on activities.The preventive strategies outlined in a code of practice may not represent the only acceptable meansof achieving the standard to which the code refers.
A code of practice does not always have the same legal force as a regulation but in some cases can bemade so, through enforcement by the occupationalsafety and health agency.
The next tier comes in the form of guidelines. A guideline is an explanatory document providingdetailed information on the requirements oflegislation, regulations, standards, codes of practice, or matters relating to occupational health and safety.
The guideline, although not intended as a legallybinding instrument, is based on the regulatoryframework and provides information on acceptablepractices to achieve regulatory compliance. In manycases the guideline will provide interpretation of theintent of the legislation and describe the rationale used in its development. The guideline may, inaddition, describe proactive programs or services thatexceed the regulatory and legislative requirements.
Codes ofPractice
Guidelines

Page 74
Each province has specific legislation that applies toforestry operations. To assist in the identification of the frequently cited legislation the following list hasbeen prepared for each province.
Although we have attempted to be accurate, the listing may not be complete, and you should contactyour provincial regulator.
1. Selected regulations made pursuant to theOccupational Health and Safety Act. Statutes ofNew Brunswick 1995.• Occupational Health and Safety Act• General Regulations• Administration Regulations• Code of Practice for Working with Material
Containing Asbestos• Code of Practice for Working Alone• Workplace Hazardous Materials Information
System Regulations
2. Additional legislation available• Labour Standards Code• Workplace Health Safety and
Compensation Commission Act
3. Transportation of Dangerous Goods Regulations New Brunswick
4. New Brunswick Environmental Protection Act
5. New Brunswick Motor Vehicle Act and Regulations
1. Selected regulations made pursuant to theOccupational Health and Safety Act. Statutes ofNewfoundland, March 10, 1999.• Occupational Health and Safety Act• Occupational Health and Safety Regulations• First Aid Regulations• Occupational Health and Safety (Electrical and
Fisheries Advisory Committees) Regulations
Provincial Legislation
NewBrunswick
Newfoundlandand Labrador

Page 75
• Workplace Hazardous Materials InformationSystem Regulations
• Newfoundland and Labrador Petroleum DrillingRegulations
• Electrical Regulations• Asbestos Abatement Code of Practice• Newfoundland and Labrador Offshore
Petroleum Drilling Regulations
2. Additional legislation available• Labour Standards Code• Radiation Health and Safety Act and Regulations• Smoke-Free Environment Act
3. Transportation of Dangerous Goods RegulationsNewfoundland and Labrador
4. Newfoundland and Labrador EnvironmentalProtection Act
5. Newfoundland and Labrador Motor Vehicle Act and Regulations
1. Selected regulations made pursuant to theOccupational Health and Safety Act. Statutes ofNova Scotia 1996, Chapter 7.• Occupational Safety General Regulations• Occupational Health Regulations• First Aid Regulations• Disclosure of Information Regulations• Workplace Hazardous Materials Information
System Regulations• General Blasting Regulations• Temporary Workplace Traffic Control
Regulations• Fall Protection and Scaffolding Regulations• Appeal Panel Regulations
2. Additional legislation available• Labour Standards Code• Workers’ Compensation Act
Nova Scotia

Page 76
3. Nova Scotia Environment Act and Regulations
4. Nova Scotia Motor Vehicle Act and Regulations
5. Nova Scotia Forests Act
1. Selected regulations made pursuant to theOccupational Health and Safety Act. Statutes ofPrince Edward Island, December 2000.• Occupational Health and Safety Act• Occupational Health and Safety Regulations• Workplace Hazardous Materials Information
System Regulations
2. Additional legislation available• Labour Standards Code• Workers’ Compensation Act
3. Transportation of Dangerous Goods RegulationsPrince Edward Island
4. Prince Edward Island Environmental Protection Act
5. Prince Edward Island Highway Act and Regulations
Prince EdwardIsland

Page 77
The Atlantic Provinces’ occupational safety and health (OSH) agencies strive to provide contemporary legislation and material to their clients. To help us in this mission, we request your assistance in letting us knowabout any issues and concerns you may have with this publication. If youhave comments, contact us through the co-ordinators for this document:
Occupational Health & Safety DivisionNova Scotia Department of Environment and LabourPO Box 697, Halifax, Nova Scotia B3J 2T8Phone: 1-800-952-2687 (1-800-9LABOUR) or (902) 424-5400Fax: (902) 424-5640E-mail: [email protected]: http://www.gov.ns.ca/enla/healthandsafety
Comments:
cut
her
e
Identification Information:
Name:
Address:
Phone: Fax:
E-mail:

Page 78

Page 79
Notes

Page 80
Notes
