ysu wireless: windows vista - youngstown state university
TRANSCRIPT
YSU Secure Wireless Connection Guide (Windows Vista) v. 09-12-2013 – J. Eddy
1
YSU Secure Wireless Connection Guide
Windows Vista Required Items:
• Windows Vista • Any 802.11 a/g/n wireless radio supporting the WPA2 Enterprise authentication
method and AES encryption • A current supported anti-virus product • Your YSU Directory Account (MyYSU) username and password
YSU Wireless: Windows Vista
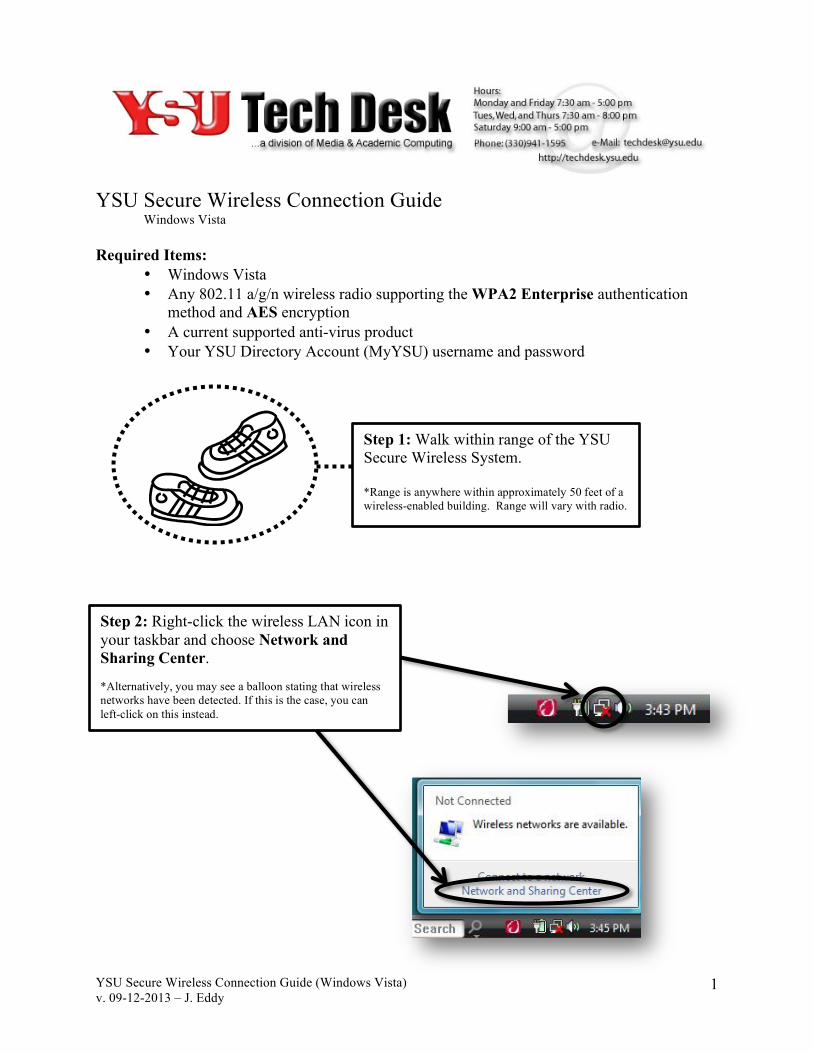
Step 1: Walk within range of the YSU Secure Wireless System. *Range is anywhere within approximately 50 feet of a wireless-enabled building. Range will vary with radio.
Step 2: Right-click the wireless LAN icon in your taskbar and choose Network and Sharing Center. *Alternatively, you may see a balloon stating that wireless networks have been detected. If this is the case, you can left-click on this instead.
YSU Secure Wireless Connection Guide (Windows Vista) v. 09-12-2013 – J. Eddy
2
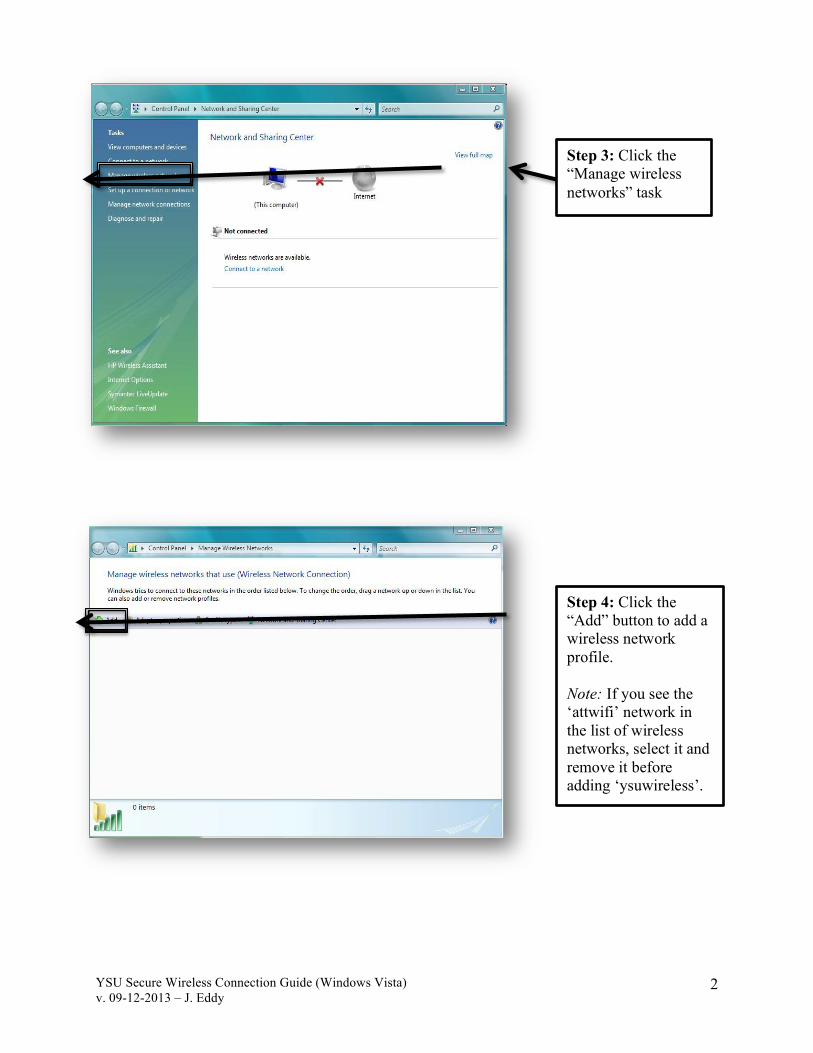
Step 3: Click the “Manage wireless networks” task
Step 4: Click the “Add” button to add a wireless network profile. Note: If you see the ‘attwifi’ network in the list of wireless networks, select it and remove it before adding ‘ysuwireless’.
YSU Secure Wireless Connection Guide (Windows Vista) v. 09-12-2013 – J. Eddy
3
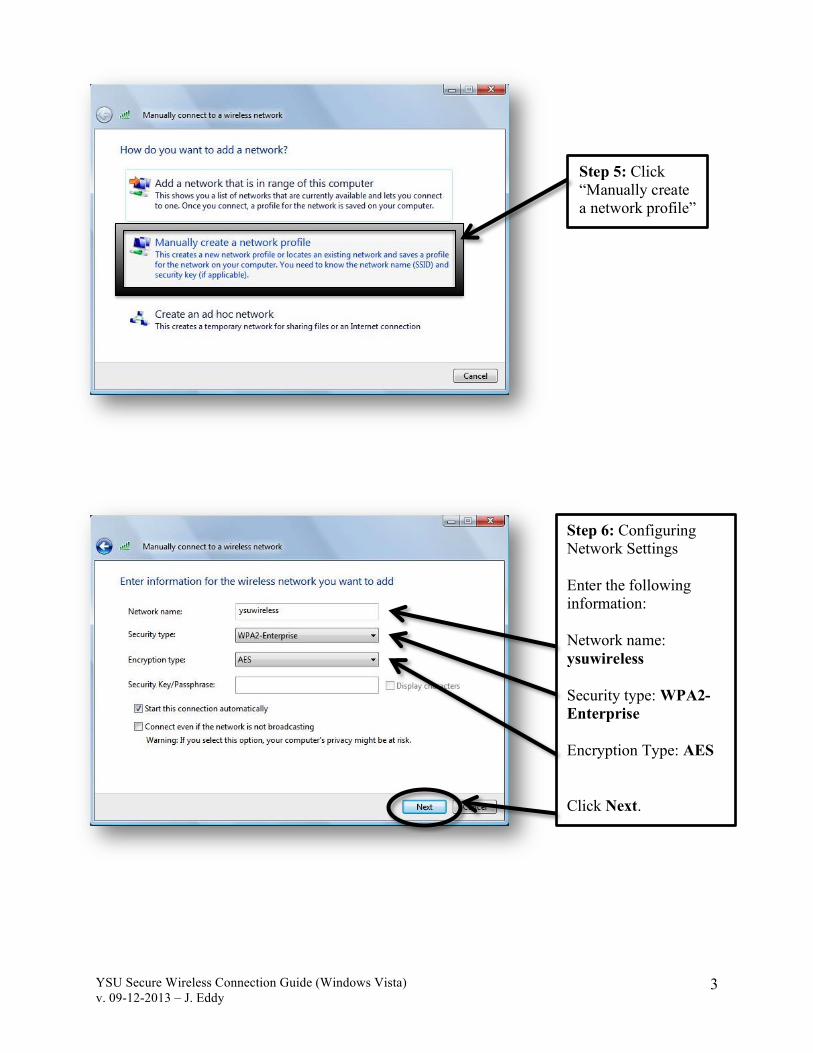
Step 5: Click “Manually create a network profile”
Step 6: Configuring Network Settings Enter the following information: Network name: ysuwireless Security type: WPA2-Enterprise Encryption Type: AES Click Next.
YSU Secure Wireless Connection Guide (Windows Vista) v. 09-12-2013 – J. Eddy
4
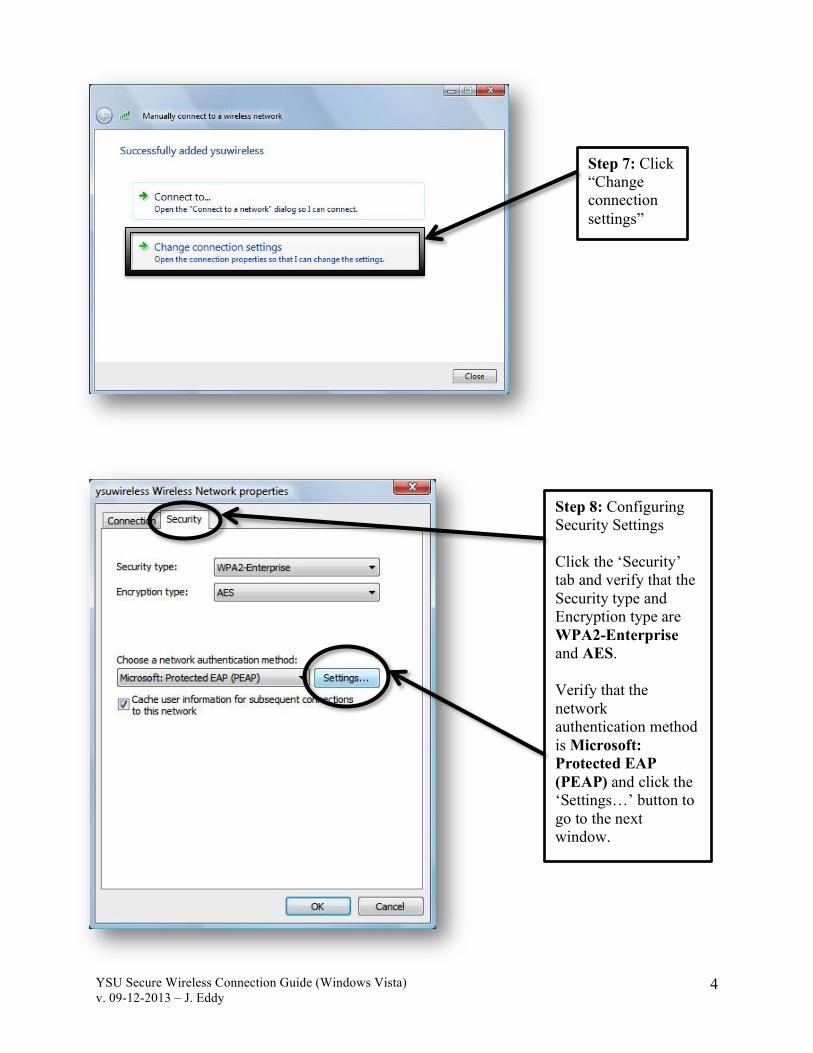
Step 8: Configuring Security Settings Click the ‘Security’ tab and verify that the Security type and Encryption type are WPA2-Enterprise and AES. Verify that the network authentication method is Microsoft: Protected EAP (PEAP) and click the ‘Settings…’ button to go to the next window.
Step 7: Click “Change connection settings”
YSU Secure Wireless Connection Guide (Windows Vista) v. 09-12-2013 – J. Eddy
5
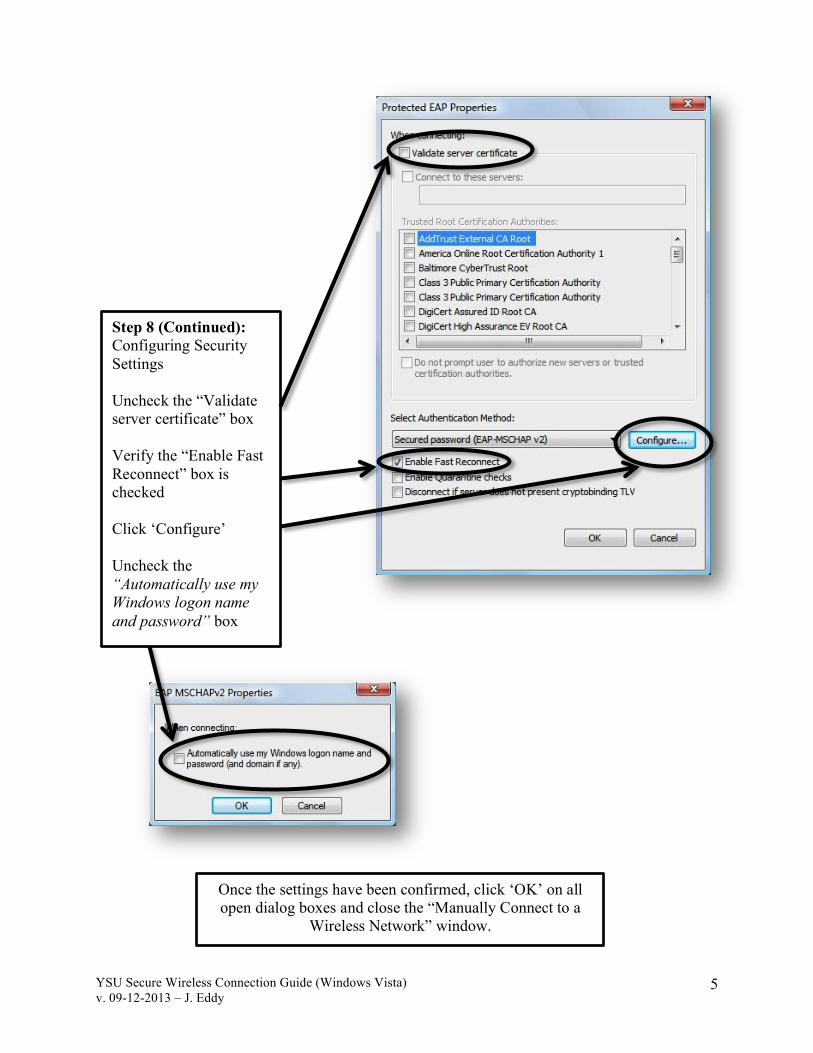
Step 8 (Continued): Configuring Security Settings Uncheck the “Validate server certificate” box Verify the “Enable Fast Reconnect” box is checked Click ‘Configure’ Uncheck the “Automatically use my Windows logon name and password” box
Once the settings have been confirmed, click ‘OK’ on all open dialog boxes and close the “Manually Connect to a
Wireless Network” window.

YSU Secure Wireless Connection Guide (Windows Vista) v. 09-12-2013 – J. Eddy
6
Step 9: Click on the notification balloon in order to enter your credentials. Enter your YSU Directory Account (MyYSU) User name and Password into the ‘User name’ and ‘Password’ fields at the “Enter Credentials” window while leaving ‘Logon domain’ blank and click OK. If your credentials are not correct, you will be prompted again to enter the correct username and/or password.
YSU Secure Wireless Connection Guide (Windows Vista) v. 09-12-2013 – J. Eddy
7
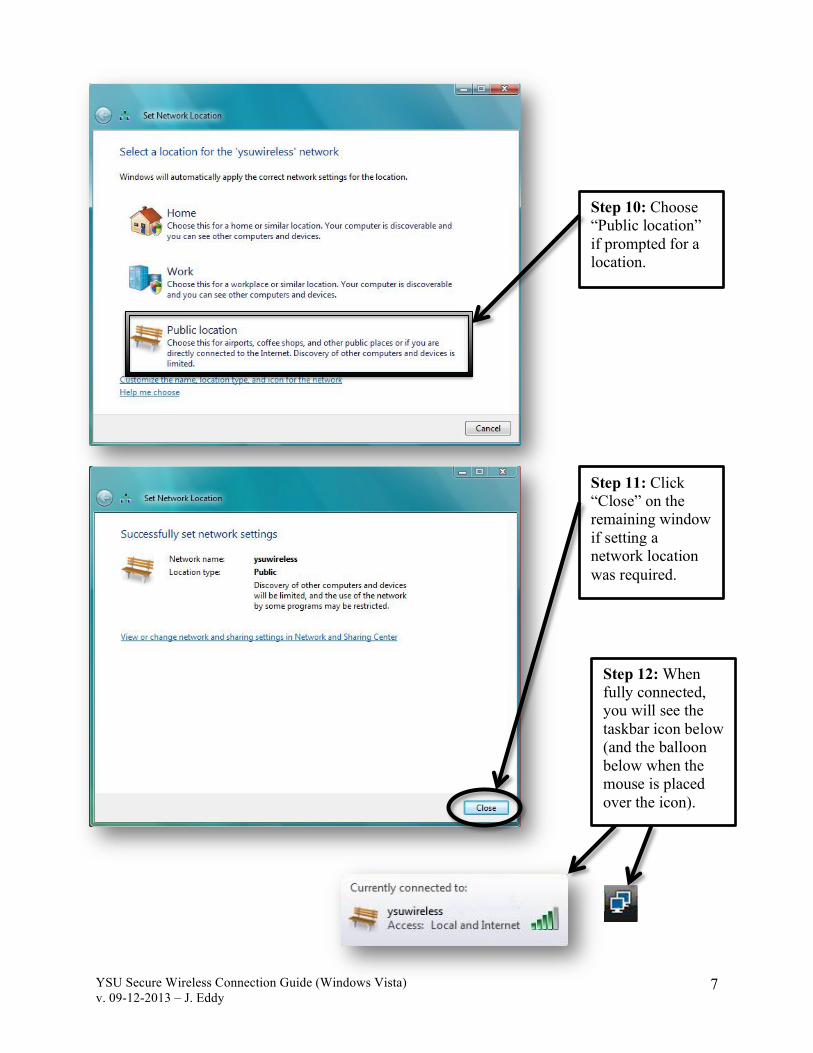
Step 12: When fully connected, you will see the taskbar icon below (and the balloon below when the mouse is placed over the icon).
Step 10: Choose “Public location” if prompted for a location.
Step 11: Click “Close” on the remaining window if setting a network location was required.