how to configure your mac post migrating to microsoft office 365
TRANSCRIPT
1
How to configure your Mac post migrating to
Microsoft Office 365
2
Contents
Purpose ................................................................................................................................ 3
Document support boundaries .............................................................................................. 3
Examples used in this document ........................................................................................... 3
Apple Mail on Mac OS X 10.6 (Snow Leopard) and later ...................................................... 4
Apple Mail (Mac OS X 10.5 (Leopard) and earlier) ................................................................ 9
Outlook 2011 for Mac .......................................................................................................... 10
Entourage 2008 (Web Services Edition) ............................................................................. 14
Thunderbird for Mac: ........................................................................................................... 15
Thunderbird re-subscribe to your existing email folders ...................................................... 18
Thunderbird needs an advanced configuration to work with Office 365 IMAP. .................... 20
3
Purpose
This document is designed to assist with configuring Mac email clients following your
migration to Microsoft Office 365 (Office 365).
Document support boundaries
This Document is written to support the following mail clients used on a Mac Operating
System:
Apple Mail on Mac OS X 10.6 and later
Apple Mail on Mac OS X 10.5 and earlier
Outlook 2011 for Mac
Entourage 2008 (Web Services Edition)
Thunderbird for Mac
NOTE
For any other versions of email clients, please consult your manual, built in help system, place of purchase, or use online searches for configuration instructions.
Examples used in this document
We have used examples throughout this document for usernames and email addresses
Where email address is asked for, please enter your ANU email address
Where username is asked for please enter it in the format listed below
[email protected] (for example [email protected])
4
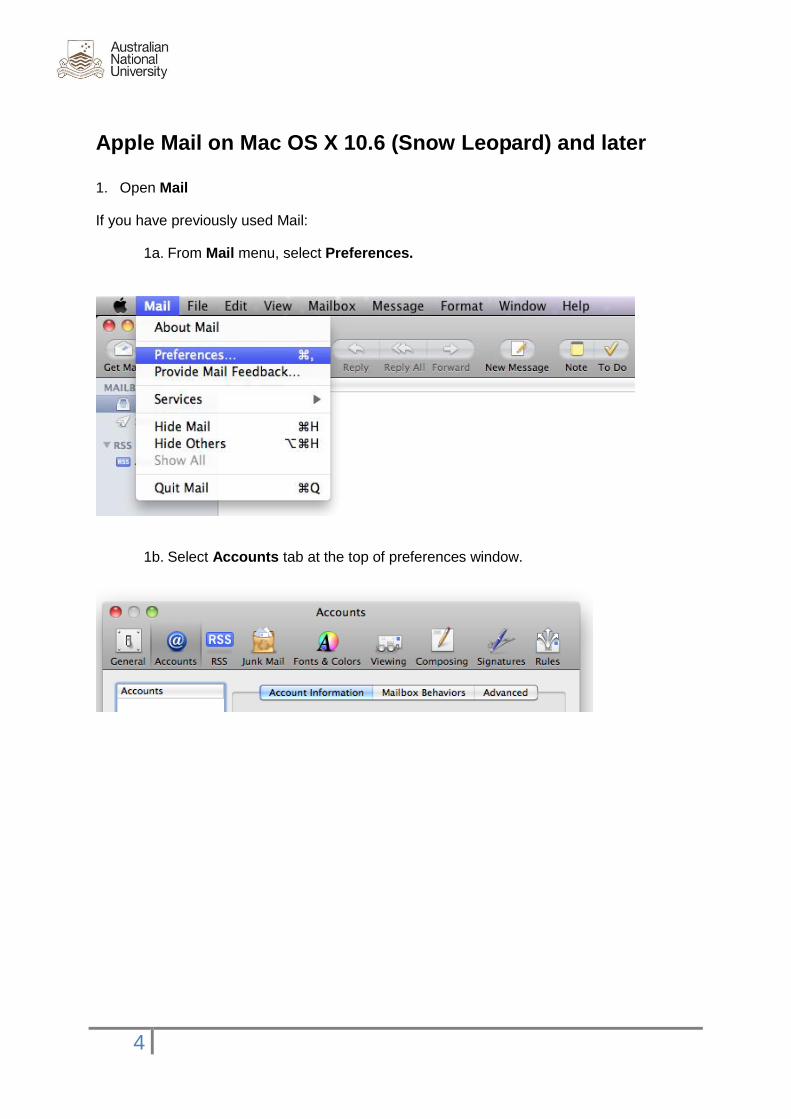
Apple Mail on Mac OS X 10.6 (Snow Leopard) and later
1. Open Mail
If you have previously used Mail:
1a. From Mail menu, select Preferences.
1b. Select Accounts tab at the top of preferences window.
5
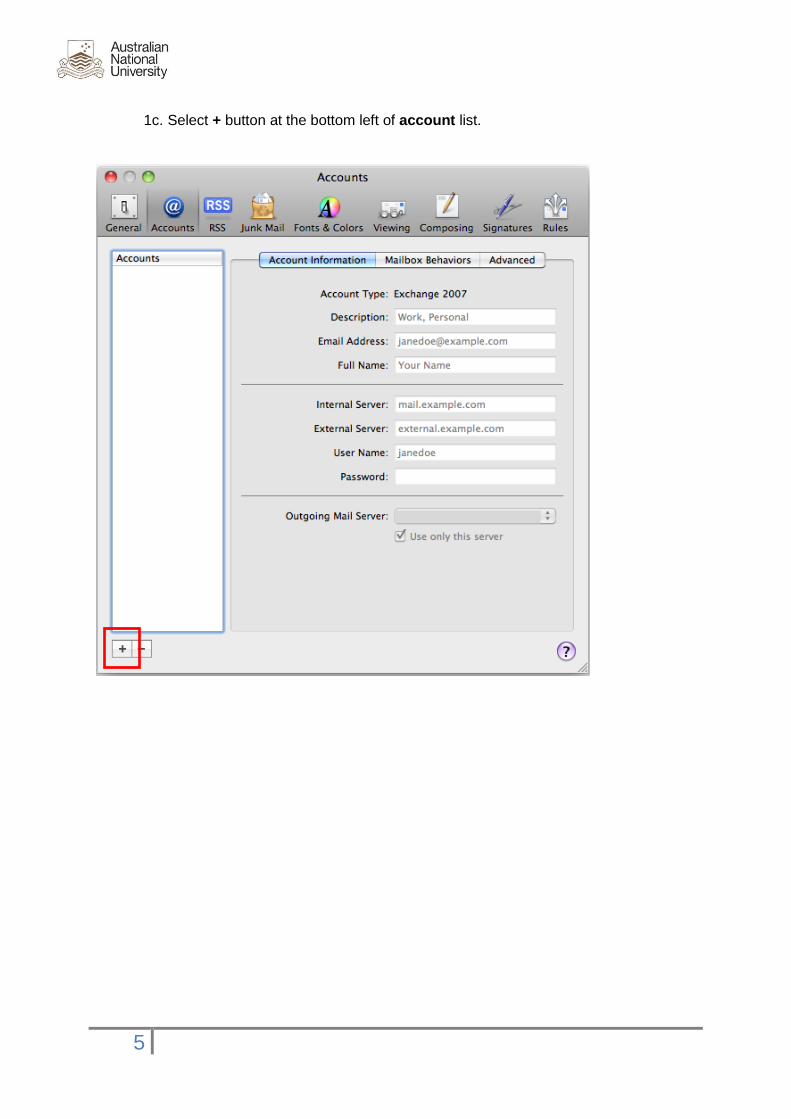
1c. Select + button at the bottom left of account list.
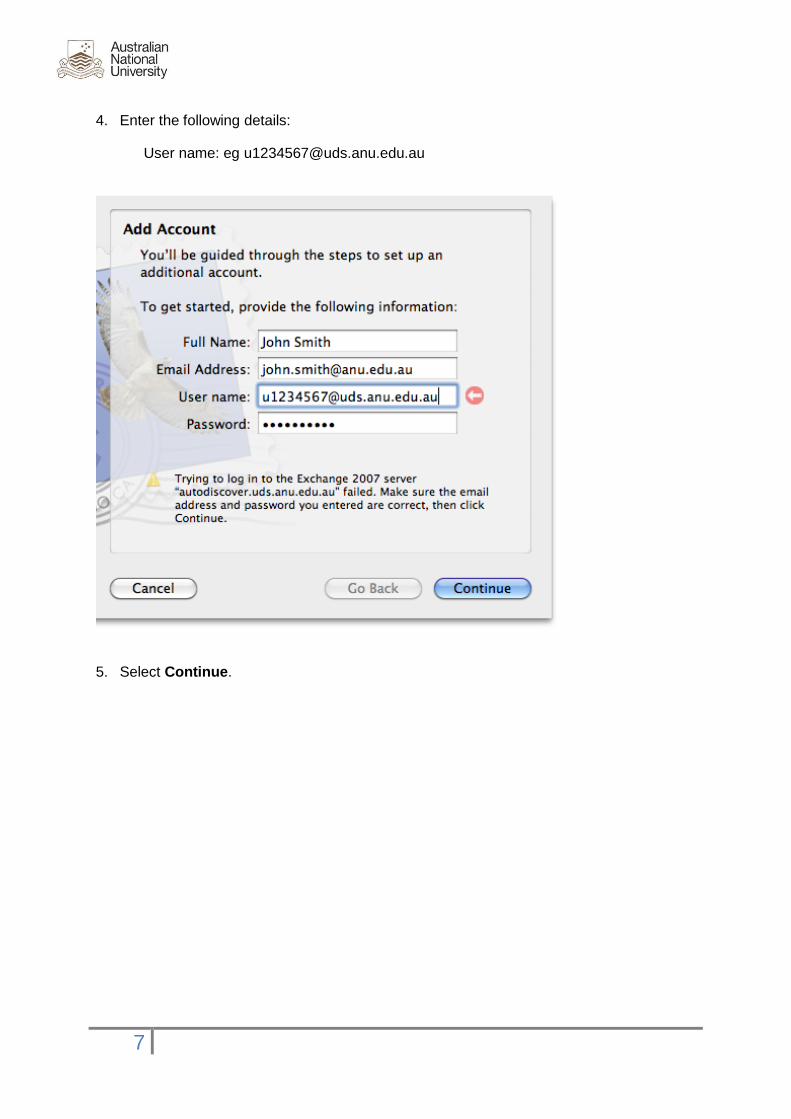
6
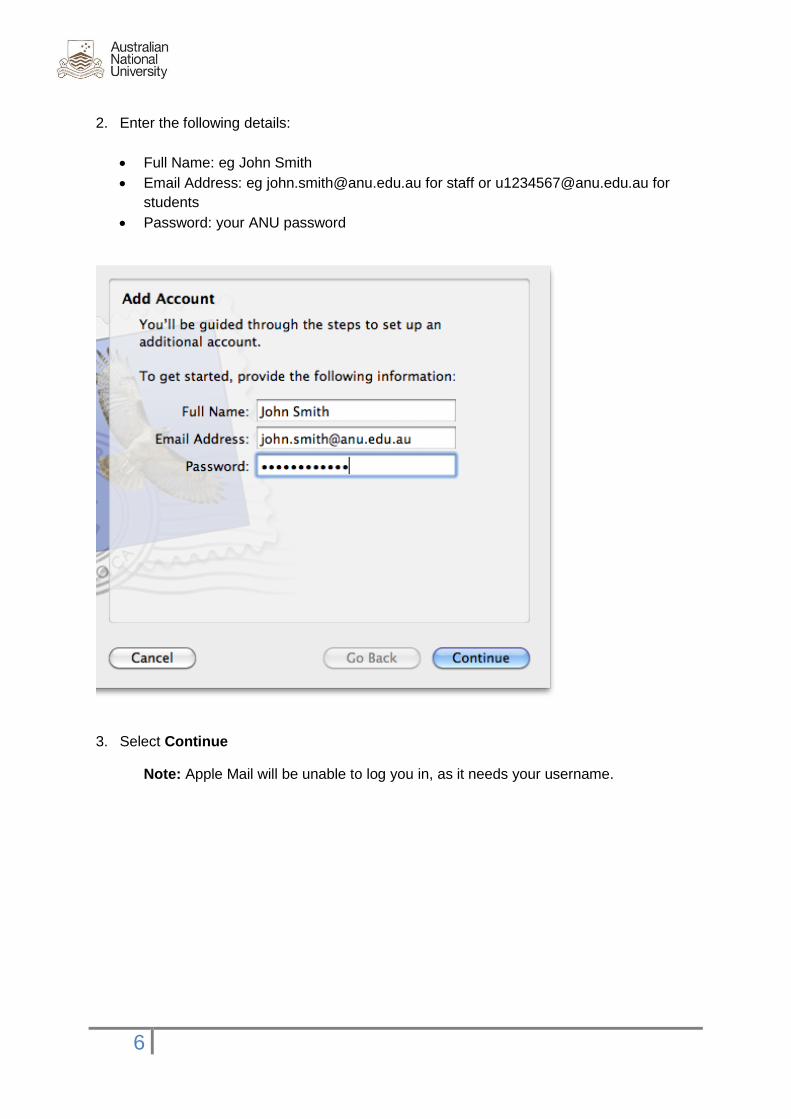
2. Enter the following details:
Full Name: eg John Smith
Email Address: eg [email protected] for staff or [email protected] for
students
Password: your ANU password
3. Select Continue
Note: Apple Mail will be unable to log you in, as it needs your username.
8
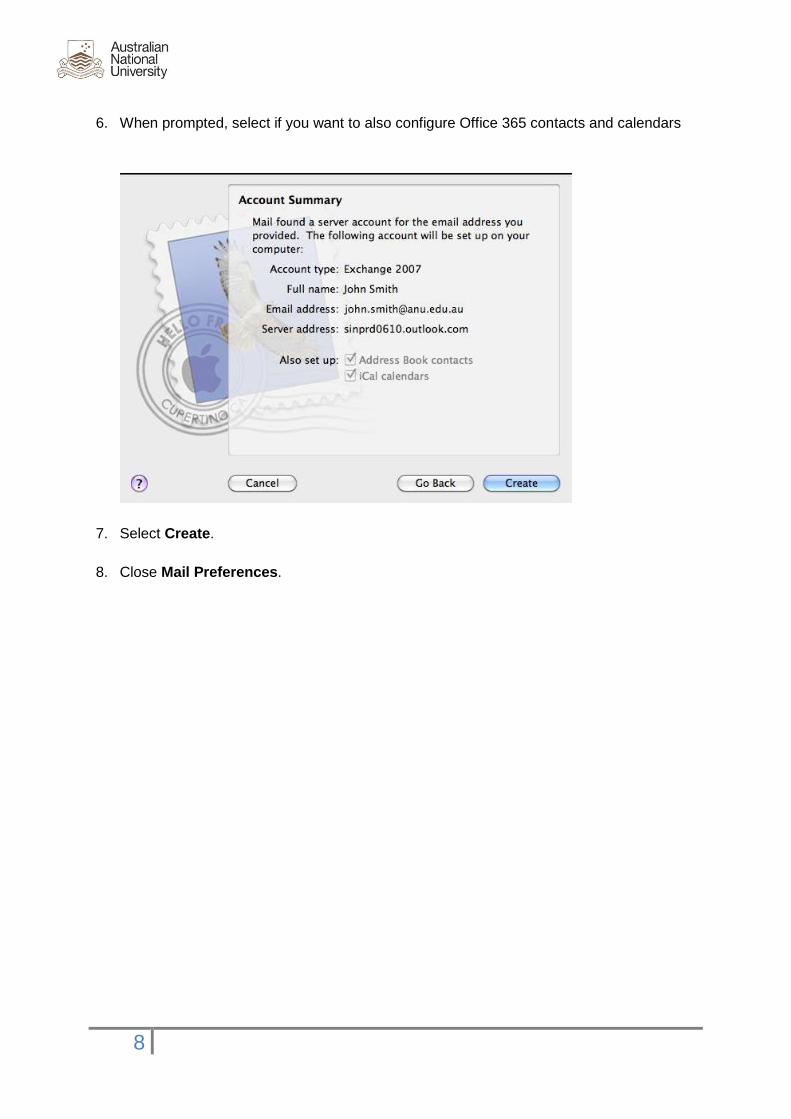
6. When prompted, select if you want to also configure Office 365 contacts and calendars
7. Select Create.
8. Close Mail Preferences.
9
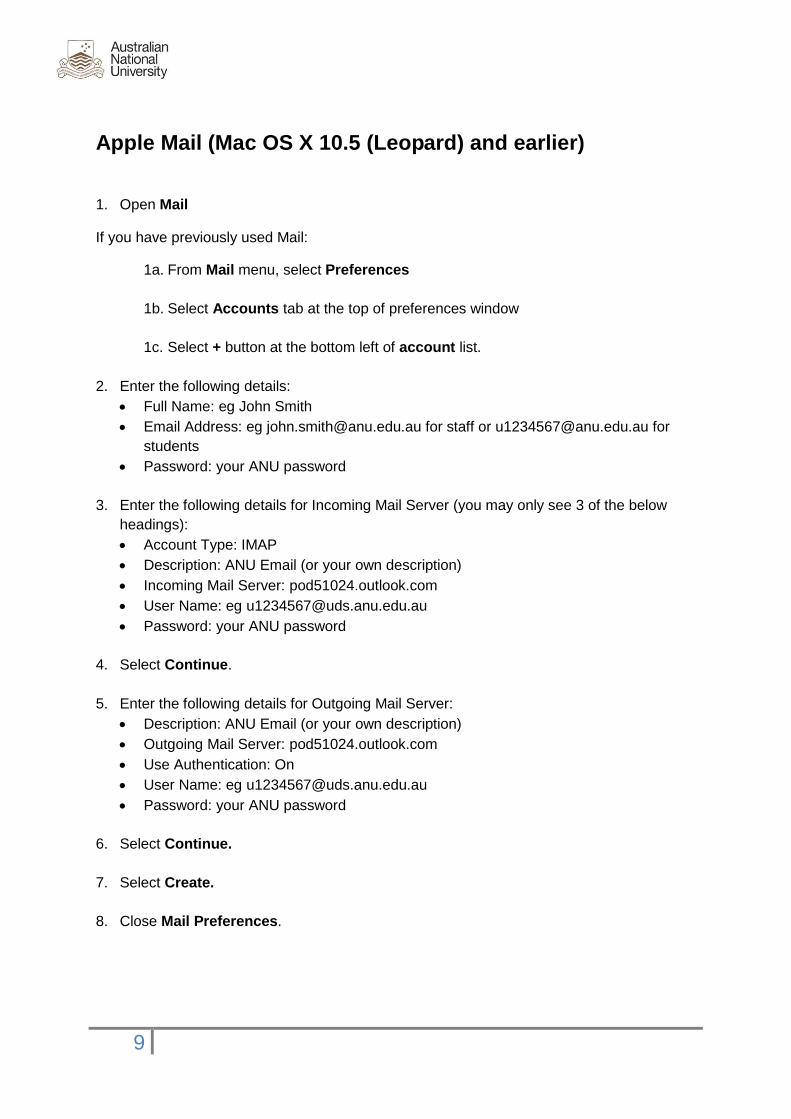
Apple Mail (Mac OS X 10.5 (Leopard) and earlier)
1. Open Mail
If you have previously used Mail:
1a. From Mail menu, select Preferences
1b. Select Accounts tab at the top of preferences window
1c. Select + button at the bottom left of account list.
2. Enter the following details:
Full Name: eg John Smith
Email Address: eg [email protected] for staff or [email protected] for
students
Password: your ANU password
3. Enter the following details for Incoming Mail Server (you may only see 3 of the below
headings):
Account Type: IMAP
Description: ANU Email (or your own description)
Incoming Mail Server: pod51024.outlook.com
User Name: eg [email protected]
Password: your ANU password
4. Select Continue.
5. Enter the following details for Outgoing Mail Server:
Description: ANU Email (or your own description)
Outgoing Mail Server: pod51024.outlook.com
Use Authentication: On
User Name: eg [email protected]
Password: your ANU password
6. Select Continue.
7. Select Create.
8. Close Mail Preferences.
10
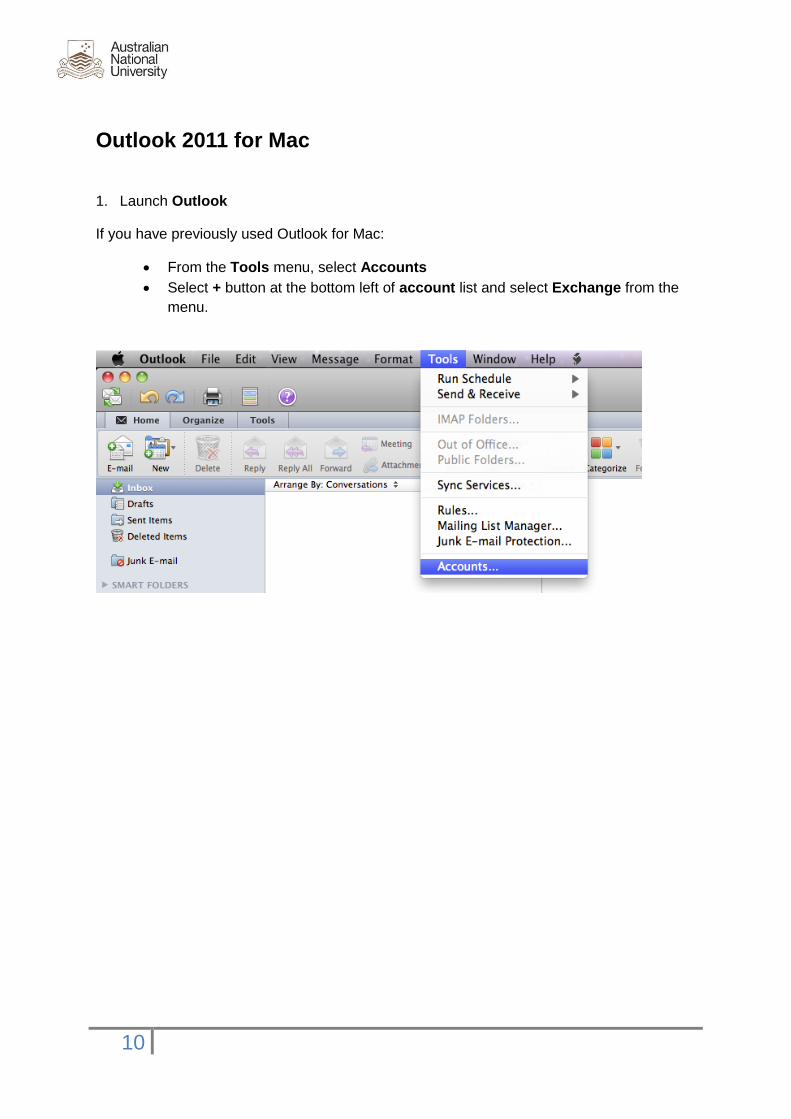
Outlook 2011 for Mac
1. Launch Outlook
If you have previously used Outlook for Mac:
From the Tools menu, select Accounts
Select + button at the bottom left of account list and select Exchange from the
menu.
11
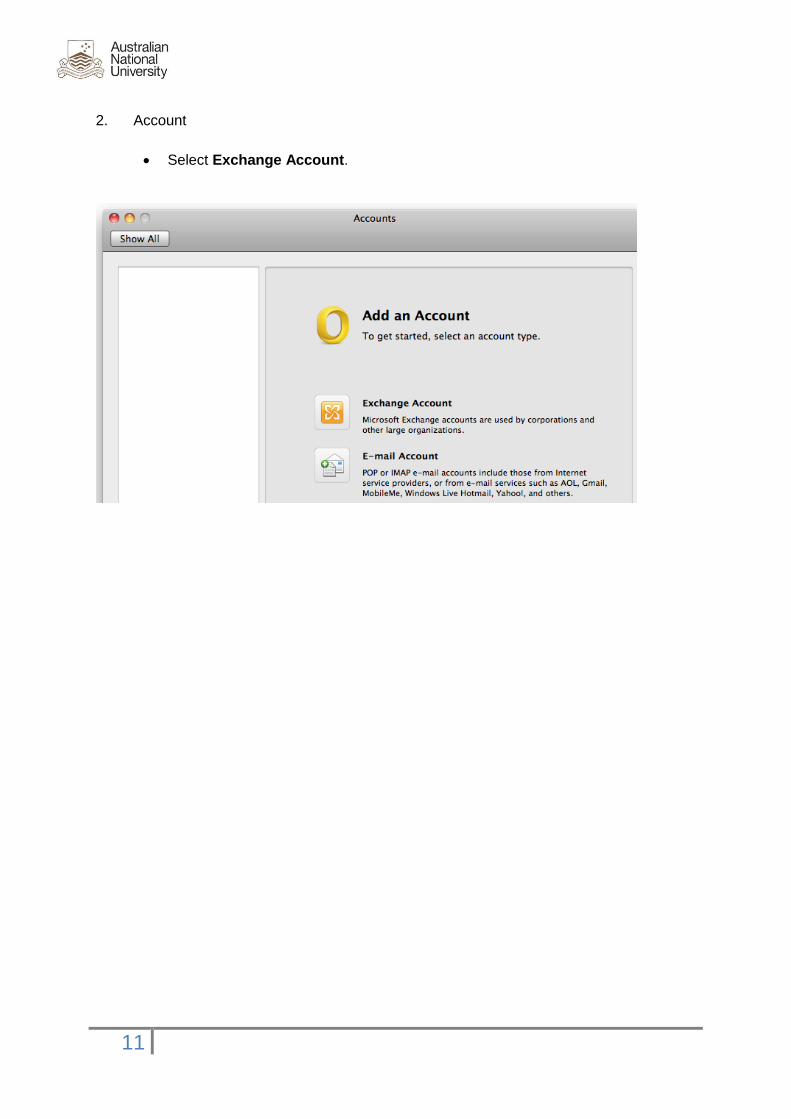
2. Account
Select Exchange Account.
12
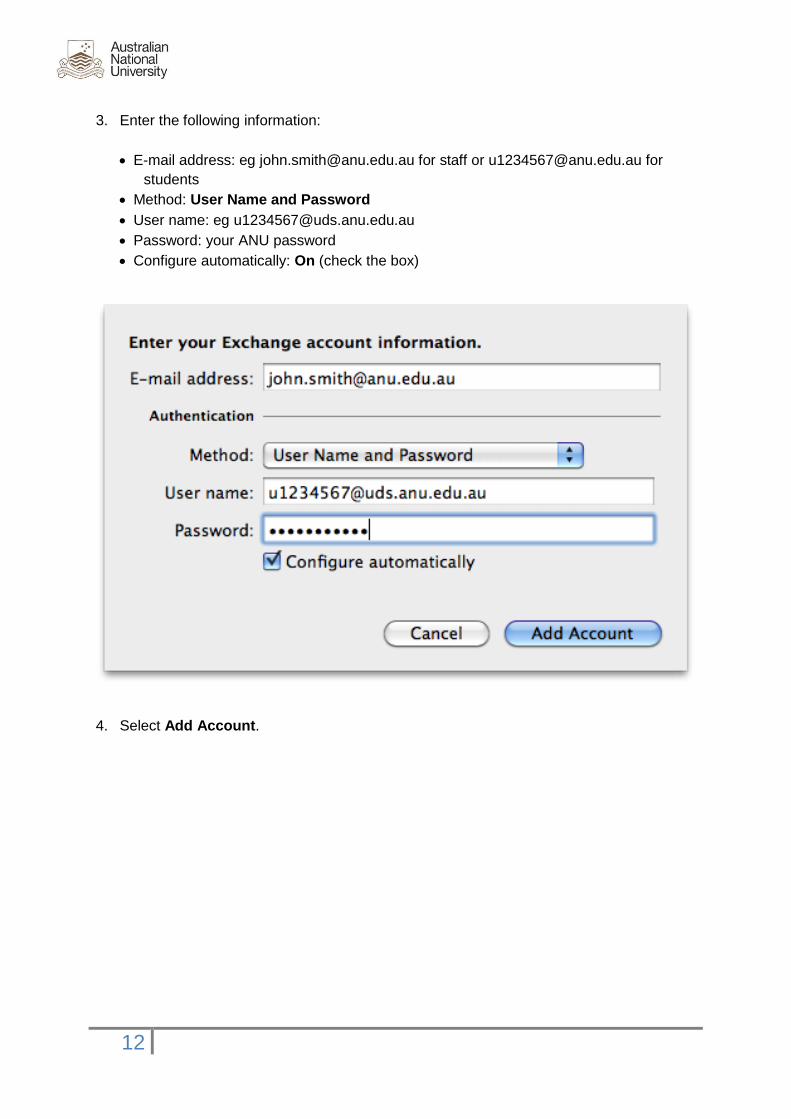
3. Enter the following information:
E-mail address: eg [email protected] for staff or [email protected] for
students
Method: User Name and Password
User name: eg [email protected]
Password: your ANU password
Configure automatically: On (check the box)
4. Select Add Account.
13
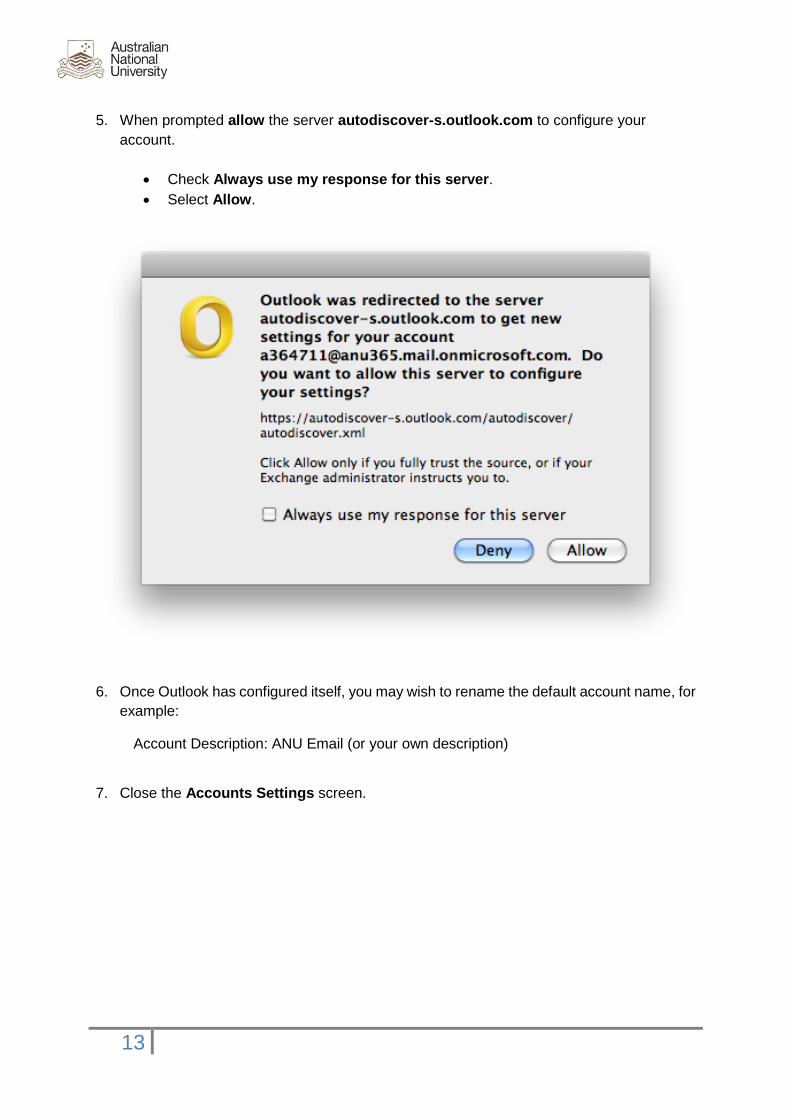
5. When prompted allow the server autodiscover-s.outlook.com to configure your
account.
Check Always use my response for this server.
Select Allow.
6. Once Outlook has configured itself, you may wish to rename the default account name, for
example:
Account Description: ANU Email (or your own description)
7. Close the Accounts Settings screen.
14
Entourage 2008 (Web Services Edition)
You must have the Entourage (Web Services Edition) optional update from Microsoft installed
to work with Office 365. Office 365 does not work with the standard version of Entourage 2008.
1. Launch Entourage.
If you have previously used Entourage:
1a. Select Accounts from the Tools menu.
1b. Select the New button at the top of the Accounts window.
If you have not used Entourage before:
1a. Select Start using Entourage without importing anything.
1b. Select the right arrow
2. Enter your email address when requested:
E-mail address: eg [email protected] for staff or [email protected] for
students
My account is on an Exchange server: On
3. When prompted, enter your account details:
Account ID: eg [email protected]
Password: your ANU password
Save password in my Mac OS keychain: On (recommended)
4. When prompted, allow the server autodiscover-s.outlook.com to configure your account
by selecting Allow.
5. Select the right arrow when asked to confirm your account details.
6. Check that your name and email address are correct on this screen, then select the right
arrow.
7. Select Verify my settings and ensure that the following is displayed:
Your account settings have been successfully verified.
8. Select the right arrow.
9. Enter a description for your account, for example:
Account name: ANU Email (or your own description)
15
Thunderbird for Mac:
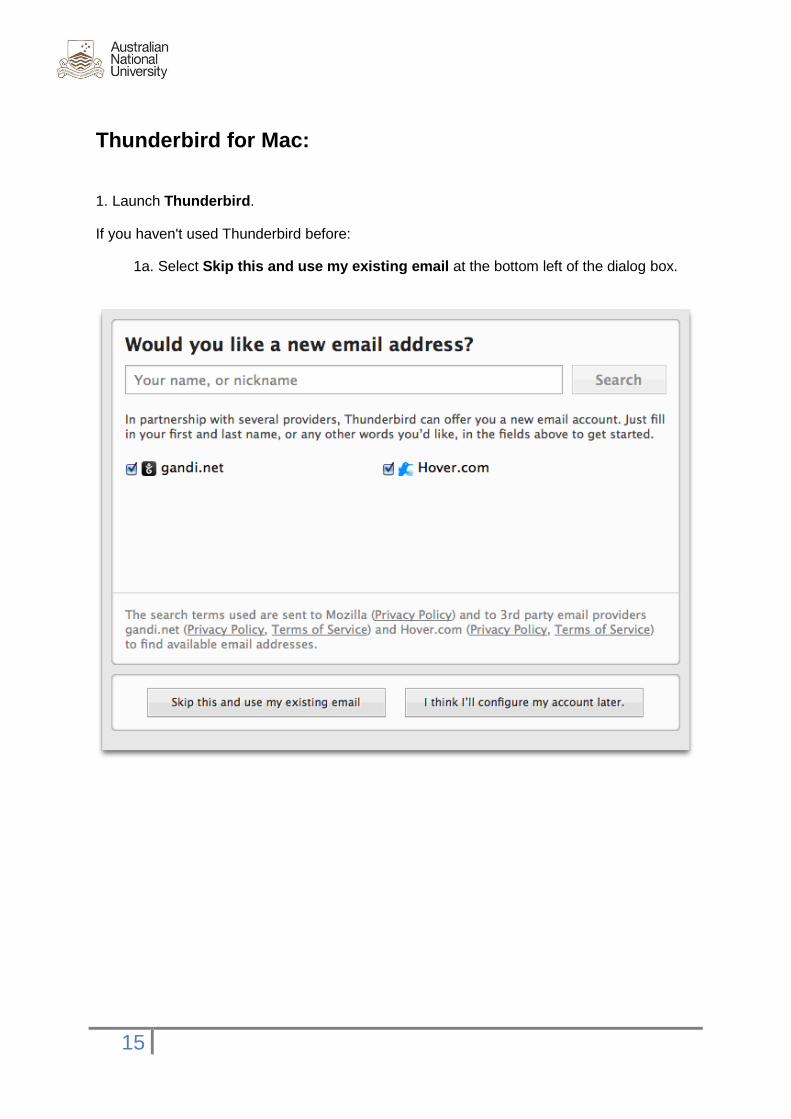
1. Launch Thunderbird.
If you haven't used Thunderbird before:
1a. Select Skip this and use my existing email at the bottom left of the dialog box.
16
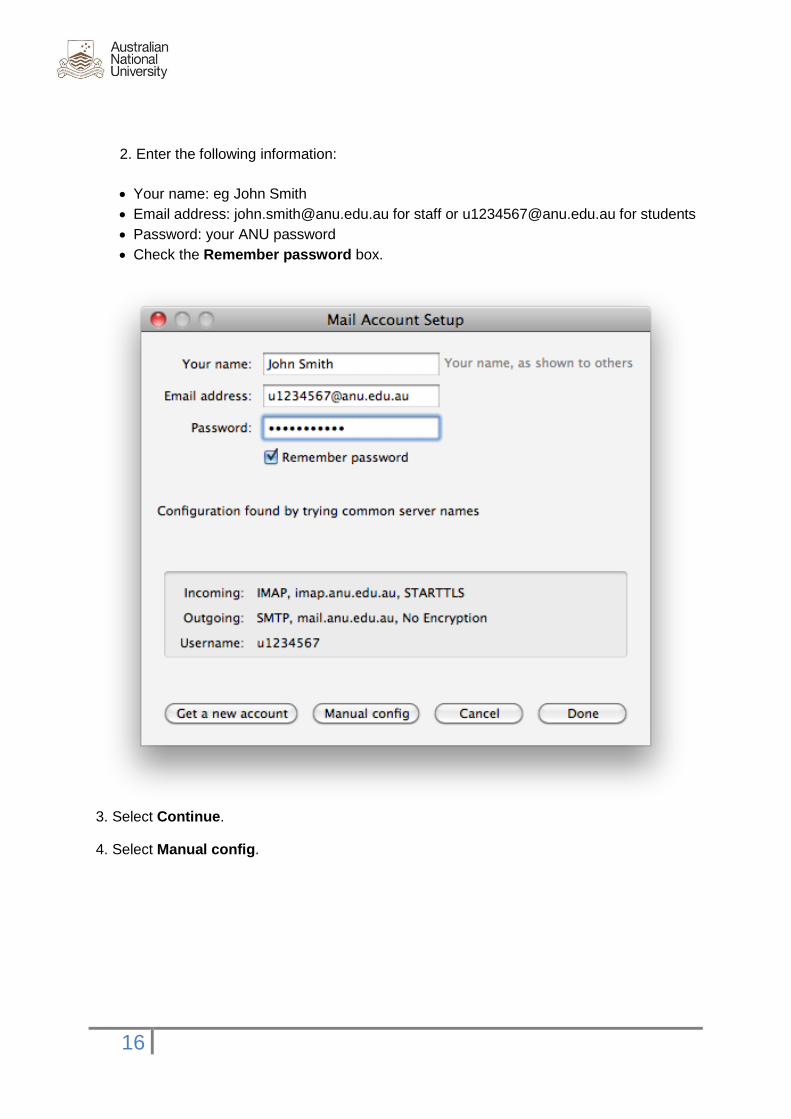
2. Enter the following information:
Your name: eg John Smith
Email address: [email protected] for staff or [email protected] for students
Password: your ANU password
Check the Remember password box.
3. Select Continue.
4. Select Manual config.
17
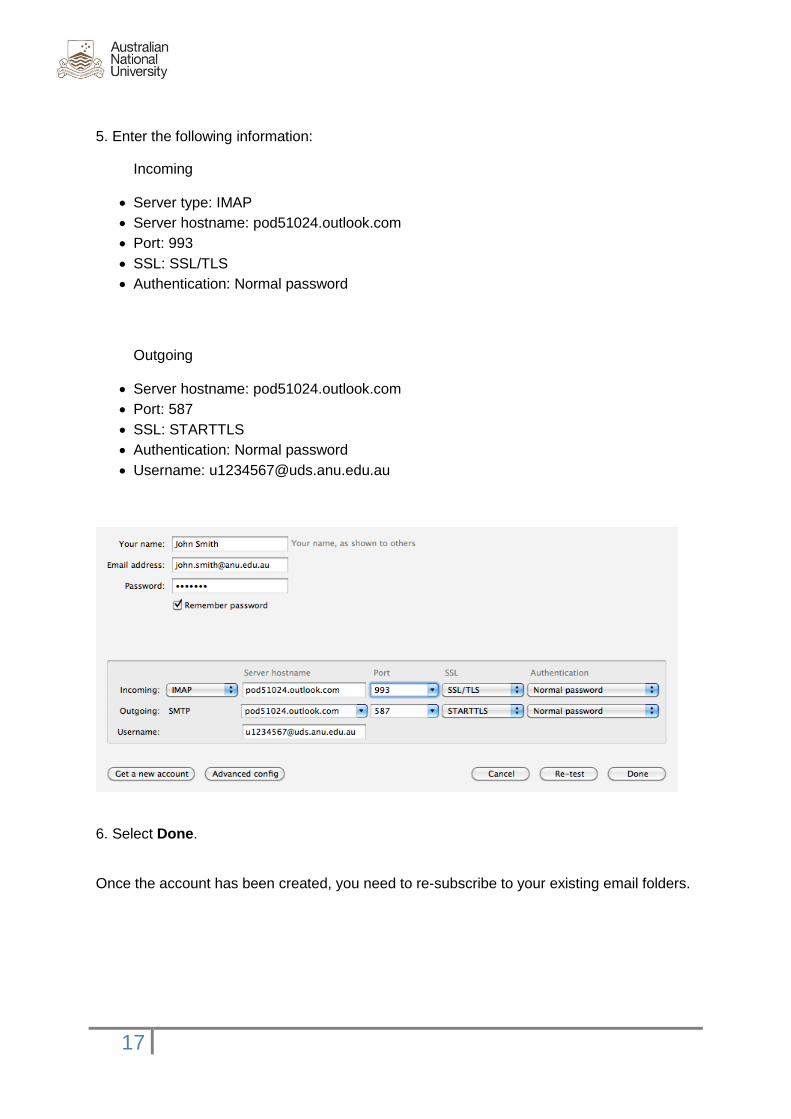
5. Enter the following information:
Incoming
Server type: IMAP
Server hostname: pod51024.outlook.com
Port: 993
SSL: SSL/TLS
Authentication: Normal password
Outgoing
Server hostname: pod51024.outlook.com
Port: 587
SSL: STARTTLS
Authentication: Normal password
Username: [email protected]
6. Select Done.
Once the account has been created, you need to re-subscribe to your existing email folders.
18
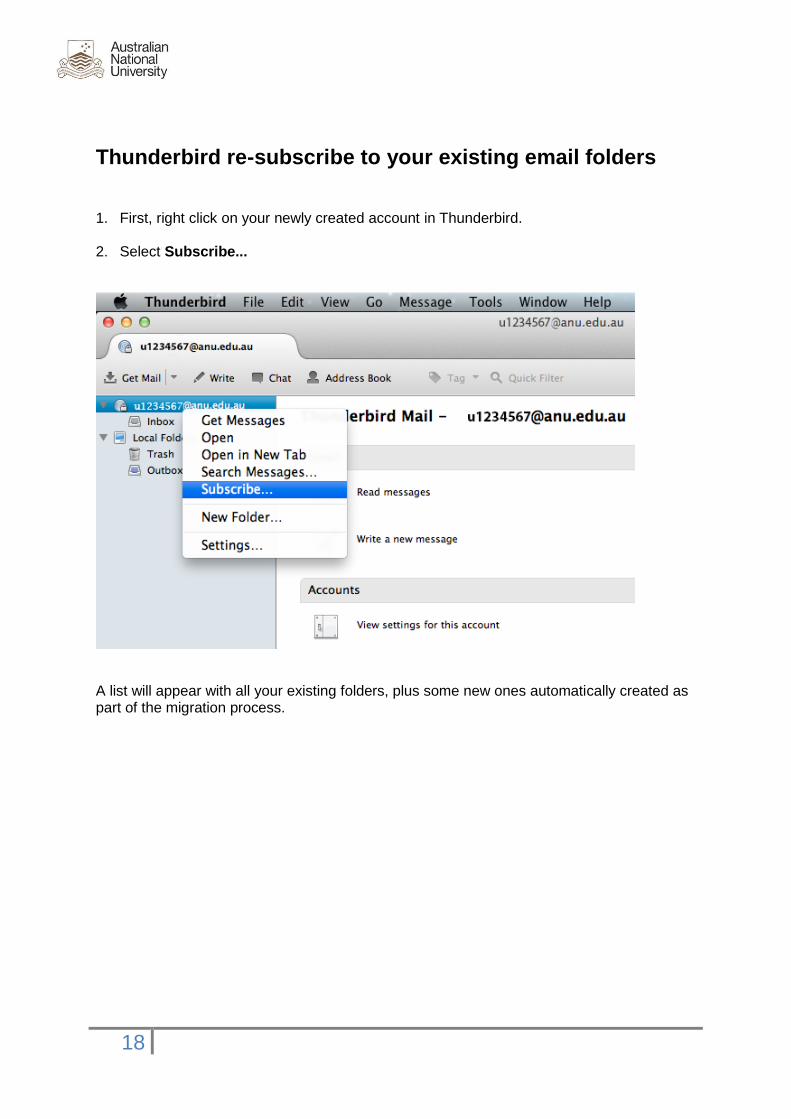
Thunderbird re-subscribe to your existing email folders
1. First, right click on your newly created account in Thunderbird. 2. Select Subscribe...
A list will appear with all your existing folders, plus some new ones automatically created as part of the migration process.
19
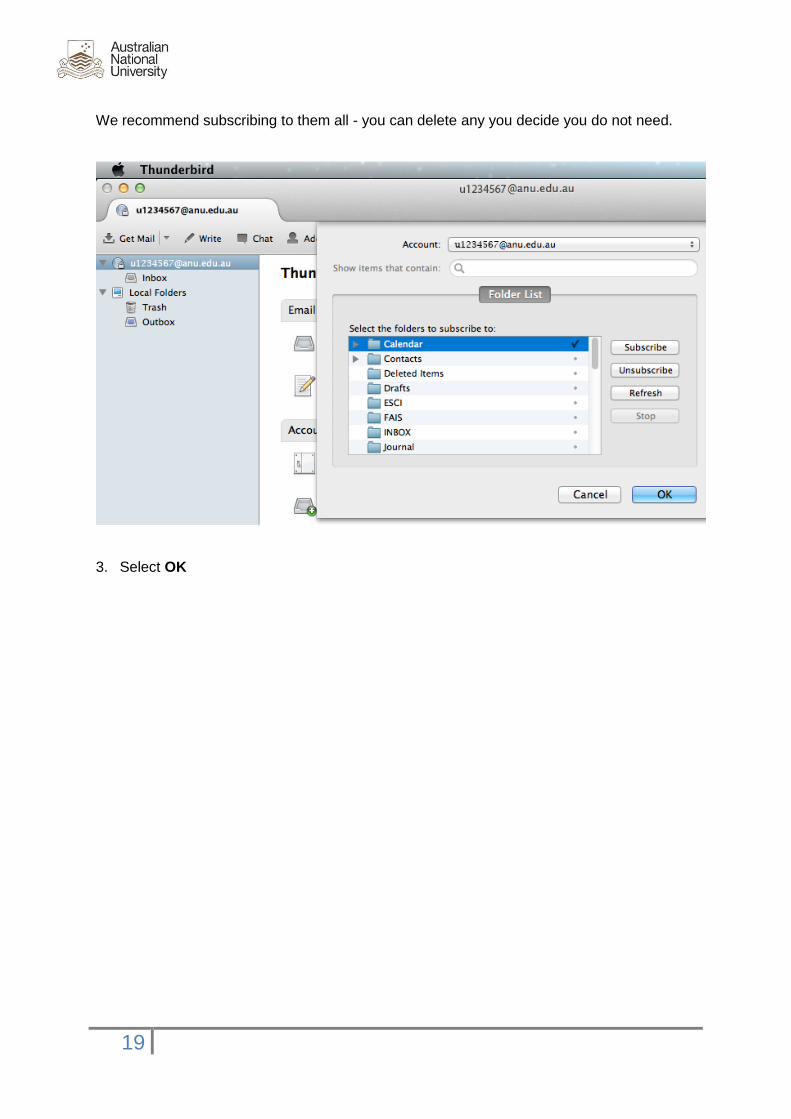
We recommend subscribing to them all - you can delete any you decide you do not need.
3. Select OK
20
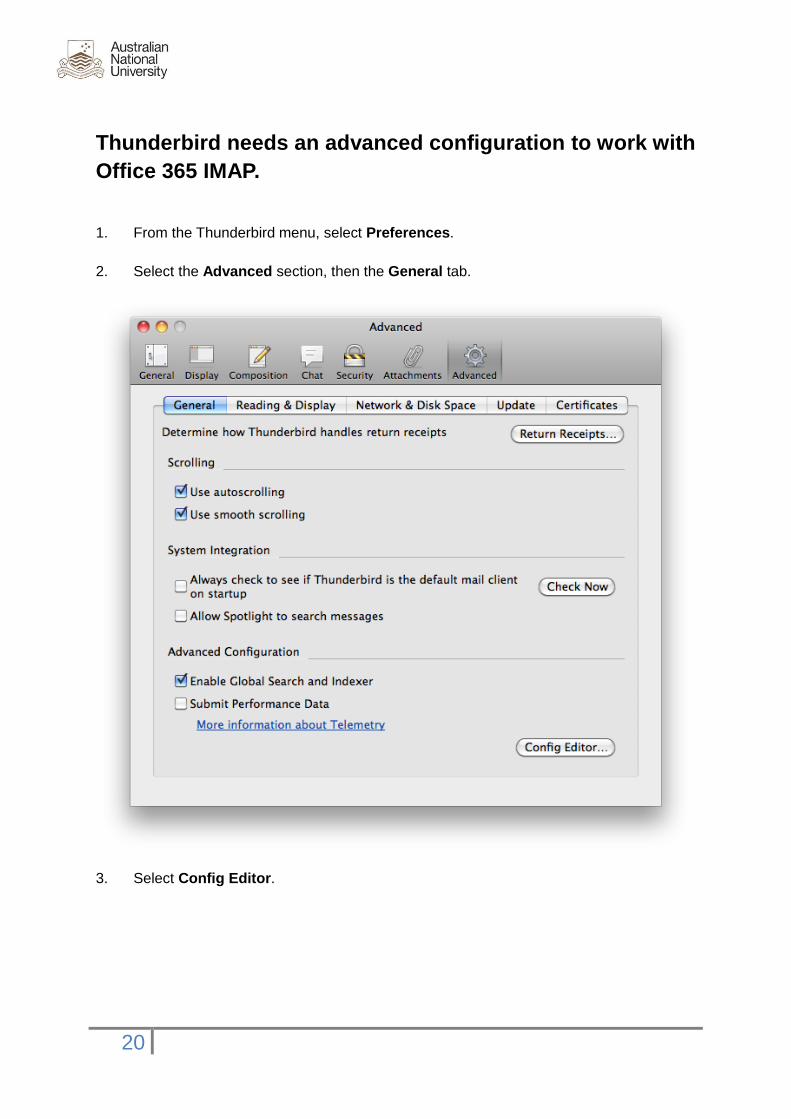
Thunderbird needs an advanced configuration to work with
Office 365 IMAP.
1. From the Thunderbird menu, select Preferences.
2. Select the Advanced section, then the General tab.
3. Select Config Editor.
21
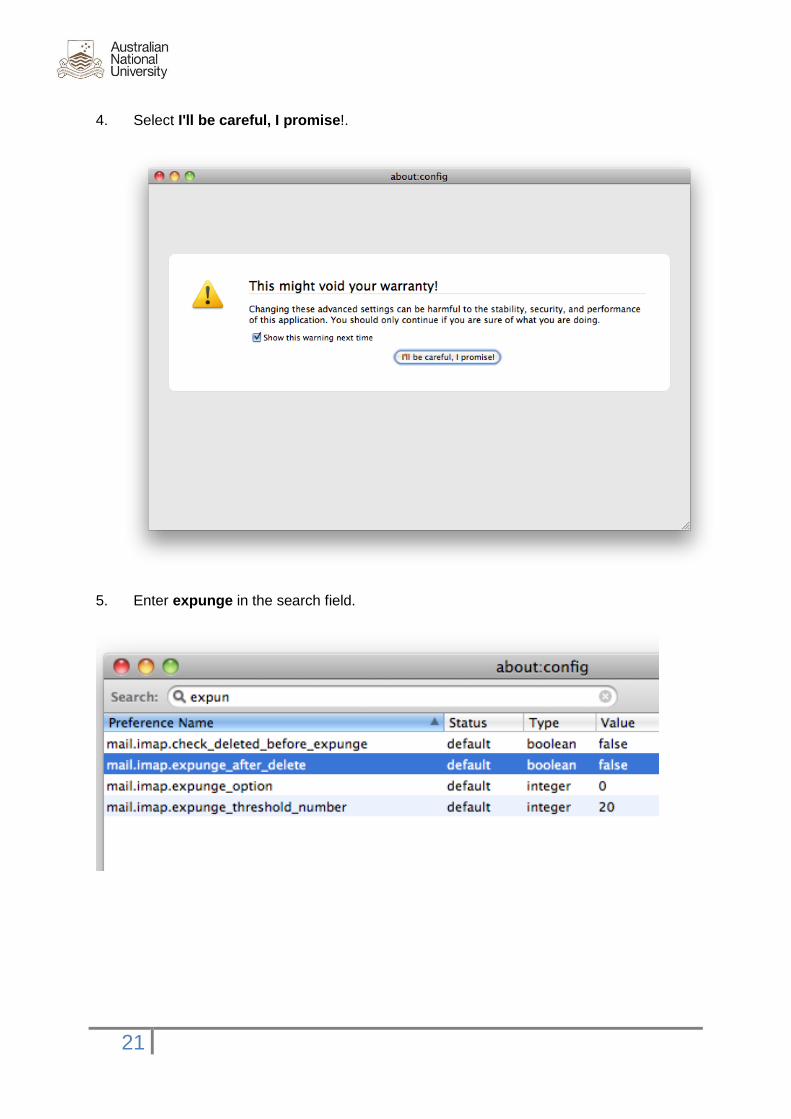
4. Select I'll be careful, I promise!.
5. Enter expunge in the search field.
22
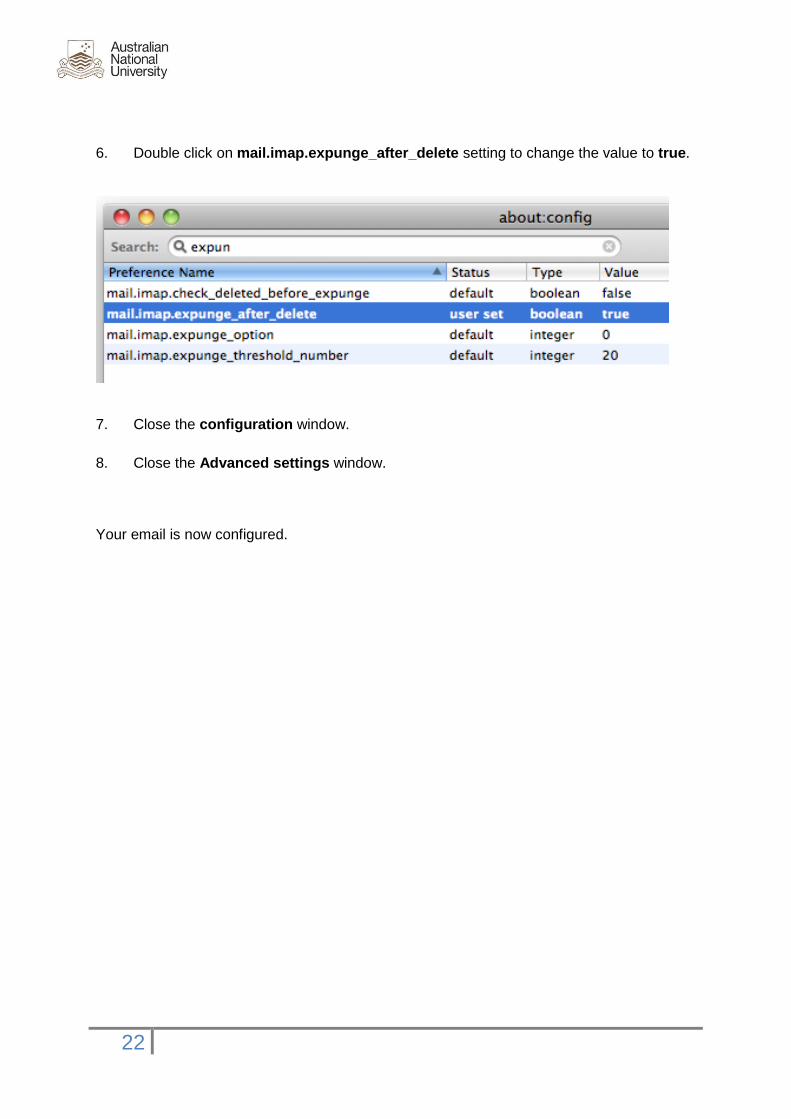
6. Double click on mail.imap.expunge_after_delete setting to change the value to true.
7. Close the configuration window.
8. Close the Advanced settings window.
Your email is now configured.