on-farm irrigation tracking software for the …
TRANSCRIPT

ON-FARM IRRIGATION TRACKING SOFTWARE
FOR THE IMPERIAL VALLEY
by
Taylor Andrew Brady
BioResource and Agricultural Engineering
BioResource and Agricultural Engineering Department
California Polytechnic State University
San Luis Obispo
2012
ii
TITLE: ON-FARM IRRIGATION TRACKING
SOFTWARE FOR THE IMPERIAL
VALLEY
AUTHOR: Taylor Andrew Brady
DATE SUBMITTED: March 16, 2012
Daniel J. Howes
Senior Project Advisor Signature
Date
Richard Cavaletto
Department Head Signature
Date
iii
ACKNOWLEDGEMENTS
Thanks to Jesus Christ for being my strength and my guide.
Thanks to my Dad and Mom for always being a source of encouragement.
Thanks to Dr. Howes for his help and support with this project.
iv
ABSTRACT
In order to improve on farm irrigation, a water scheduling program specific to the needs
of Imperial Valley farmers will be created. The program will help keep track of daily
water schedules, as well as stay connected with the farm personnel to reduce error and
save time. The program will help with on farm operations and productivity by allowing
the famer, irrigation foremen, and secretary to view the same schedule simultaneously.
The information that is inputted into the program will be editable by all the chosen
personnel, to keep everyone on the same page. Weekly, monthly, or yearly usage reports
will be easily created from data stored in the database section of the program allowing the
farm to compare their estimated water usage against their bills from the irrigation district.
There are several programs available for record keeping that are specific to farming
operations, however, currently there is no water management software available that
quickly and effectively manages a water schedule specific to each farmer’s needs.

v
DISCLAIMER STATEMENT
The university makes it clear that the information forwarded herewith is a project
resulting from a class assignment and has been graded and accepted only as a fulfillment
of a course requirement. Acceptance by the university does not imply technical accuracy
or reliability. Any use of the information in this report is made by the user(s) at his/her
own risk, which may include catastrophic failure of the device of infringement of patent
or copyright laws.
Therefore, the recipient and/or user of the information contained in this report agrees to
indemnify, defend and save harmless the State its officers, agents and employees from
any and all claims and losses accruing or resulting to any person, firm, or corporation
who may be injured or damaged as a result of the use of this report.
vi
TABLE OF CONTENTS
Page:
SIGNATURE PAGE ...................................................................................................... ii
ACKNOWLEGEMENTS .............................................................................................. iii
ABSTRACT ................................................................................................................... iv
DISCLAIMER STATEMENT ......................................................................................... v
LIST OF FIGURES .......................................................................................................vii
LIST OF TABLES ...................................................................................................... viii
INTRODUCTION ........................................................................................................... 1
LITERATURE REVIEW ................................................................................................ 2
PROCEDURES AND METHODS .................................................................................. 6
DESIGN PROCEDURE ........................................................................................... 6
CONSTRUCTION PROCEDURE ........................................................................... 6
FIELDS PAGE ......................................................................................... 6
SCHEDULE PAGE .................................................................................. 7
REPORTS PAGE ..................................................................................... 7
RESULTS ....................................................................................................................... 9
DISCUSSION ............................................................................................................... 12
RECOMMENDATIONS ............................................................................................... 14
REFERENCES .............................................................................................................. 16
APPENDICIES
Appendix A: Source Code ...................................................................................... 17
Appendix B: Project Screen Shots .......................................................................... 31
Appendix C: How Project Meets Requirements for the BRAE Major ..................... 35
vii
2 3 4 9
10 11
LIST OF FIGURES
Page
1. User Interface …………………………………………………………………..
2. Data Server Map………………………………………………………………..
3. Usage Report……………………………………………………………………
4. Home Screen……………………………………………………………………
5. Fields Page………………………………………………………………………
6. Schedule Page ………………………………………………………………….
viii
LIST OF TABLES
Page
1. Cost and Effectiveness Comparison Table …………………………………….. 13
1
INTRODUCTION
As of 1999, over 550,000 acres were harvested in the Imperial Valley (IV), which had a
total economic value of over $1 billion dollars. To produce this staggering amount of
crops, approximately 3 million acre feet of water is consumed annually. The supply of
this water is the Colorado River which is an accumulation of water shed from seven
western states. From the Colorado River, the water is fed into the 80 mile All-American
canal which delivers the water to the Imperial Irrigation District (IID). The IID then
distributes the water throughout the IV through over 16,000 miles of intricate canal
systems. (UCCE, 2011)
With many farmers in the IV managing over 10,000 acres, coupled with the deteriorating
economy and increasing concern to improve on farm irrigation management practices, it
was found that a new method for water management scheduling needed to be created.
Everyday these farmers rely on some sort of calendar, whether that calendar is in the
form of a day planner, blank piece of paper with an expected wet date, or plain
memorization. These practices are sloppy, time consuming, and out of date. These old
scheduling practices require an extreme amount of communication with the office to stay
well documented and organized. With the current scheduling practices in effect for many
years, many old timers will be hesitant to “jump ship” to this new method for managing
their irrigation schedule. With an inefficient management program in place, missed
irrigation events can occur easily and frequently. With today’s commodity prices, the cost
of a damaged crop due to a missed irrigation event cannot occur, with the extreme
weather in the IV during the summer, a missed irrigation event, even if delayed by only 2
days can cause severe damage to the crop.
The new scheduling program needs to be simple and easy to use and appealing to the eye,
otherwise there will be no incentive to change. In order to make the transition, the new
program would need to incorporate the current scheduling characteristics used by IV
farmers and compile a computer program that is simple and effective. By using simple
user interfaces and relational databases the farmer will be able to visually see his past,
present, and future irrigation schedule which will not only make record keeping easier,
but it will keep the office, his irrigation foremen, and himself all on the same page. By
keeping a record of previous water usage, it will be possible to check the water bill from
the irrigation district against the actual amount received to the field. Detailed reports will
be easy to generate which will list details such as previous watering dates, volume of
water applied over a certain time, the irrigator who applied the water, and any fertilizer
that was applied. By knowing where and how much water his crops are using, the farmer
will be able to employ the most effective growing techniques that minimize the overall
water use, and maximize the yield, which in turn will maximize the overall profit of his
farming operation.
2
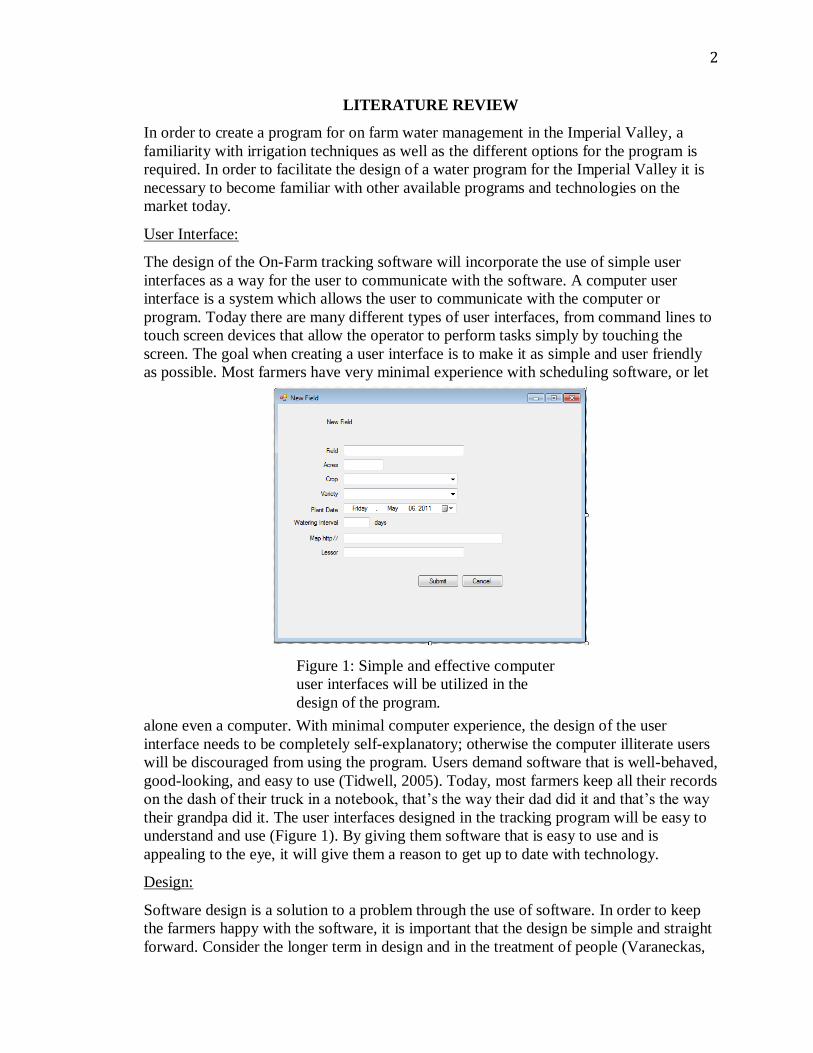
Figure 1: Simple and effective computer
user interfaces will be utilized in the
design of the program.
LITERATURE REVIEW
In order to create a program for on farm water management in the Imperial Valley, a
familiarity with irrigation techniques as well as the different options for the program is
required. In order to facilitate the design of a water program for the Imperial Valley it is
necessary to become familiar with other available programs and technologies on the
market today.
User Interface:
The design of the On-Farm tracking software will incorporate the use of simple user
interfaces as a way for the user to communicate with the software. A computer user
interface is a system which allows the user to communicate with the computer or
program. Today there are many different types of user interfaces, from command lines to
touch screen devices that allow the operator to perform tasks simply by touching the
screen. The goal when creating a user interface is to make it as simple and user friendly
as possible. Most farmers have very minimal experience with scheduling software, or let
alone even a computer. With minimal computer experience, the design of the user
interface needs to be completely self-explanatory; otherwise the computer illiterate users
will be discouraged from using the program. Users demand software that is well-behaved,
good-looking, and easy to use (Tidwell, 2005). Today, most farmers keep all their records
on the dash of their truck in a notebook, that’s the way their dad did it and that’s the way
their grandpa did it. The user interfaces designed in the tracking program will be easy to
understand and use (Figure 1). By giving them software that is easy to use and is
appealing to the eye, it will give them a reason to get up to date with technology.
Design:
Software design is a solution to a problem through the use of software. In order to keep
the farmers happy with the software, it is important that the design be simple and straight
forward. Consider the longer term in design and in the treatment of people (Varaneckas,
3
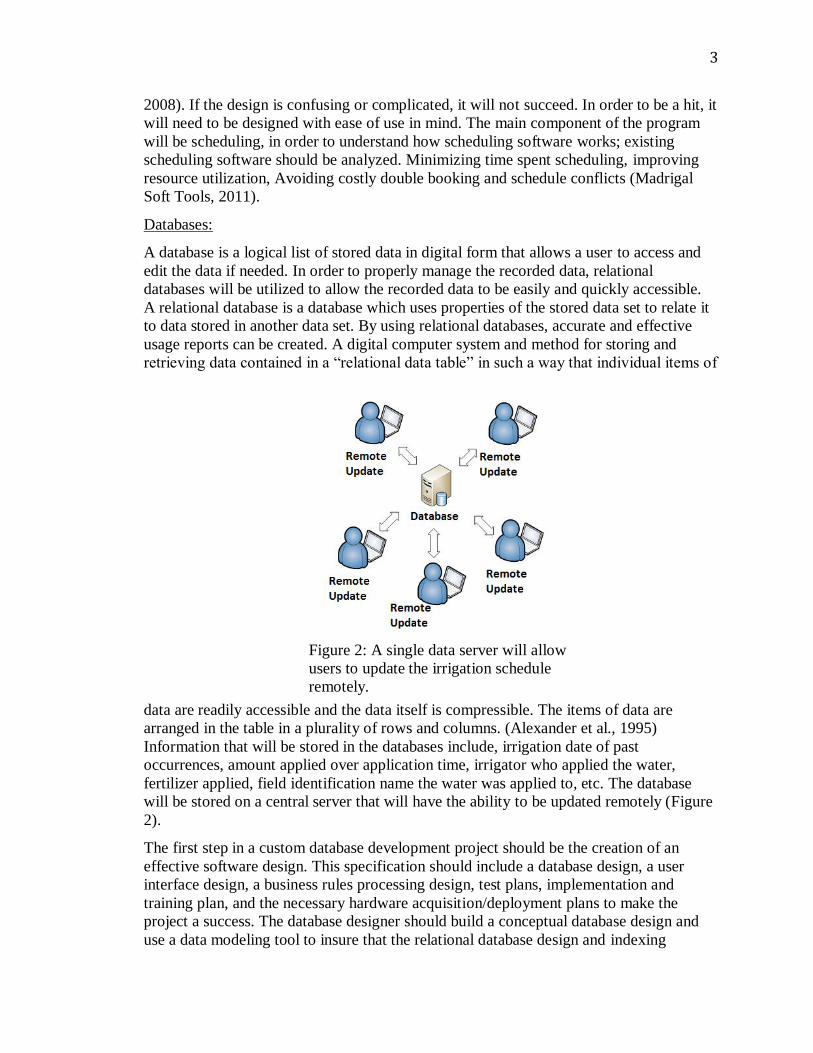
Figure 2: A single data server will allow
users to update the irrigation schedule
remotely.
2008). If the design is confusing or complicated, it will not succeed. In order to be a hit, it
will need to be designed with ease of use in mind. The main component of the program
will be scheduling, in order to understand how scheduling software works; existing
scheduling software should be analyzed. Minimizing time spent scheduling, improving
resource utilization, Avoiding costly double booking and schedule conflicts (Madrigal
Soft Tools, 2011).
Databases:
A database is a logical list of stored data in digital form that allows a user to access and
edit the data if needed. In order to properly manage the recorded data, relational
databases will be utilized to allow the recorded data to be easily and quickly accessible.
A relational database is a database which uses properties of the stored data set to relate it
to data stored in another data set. By using relational databases, accurate and effective
usage reports can be created. A digital computer system and method for storing and
retrieving data contained in a “relational data table” in such a way that individual items of
data are readily accessible and the data itself is compressible. The items of data are
arranged in the table in a plurality of rows and columns. (Alexander et al., 1995)
Information that will be stored in the databases include, irrigation date of past
occurrences, amount applied over application time, irrigator who applied the water,
fertilizer applied, field identification name the water was applied to, etc. The database
will be stored on a central server that will have the ability to be updated remotely (Figure
2).
The first step in a custom database development project should be the creation of an
effective software design. This specification should include a database design, a user
interface design, a business rules processing design, test plans, implementation and
training plan, and the necessary hardware acquisition/deployment plans to make the
project a success. The database designer should build a conceptual database design and
use a data modeling tool to insure that the relational database design and indexing
4
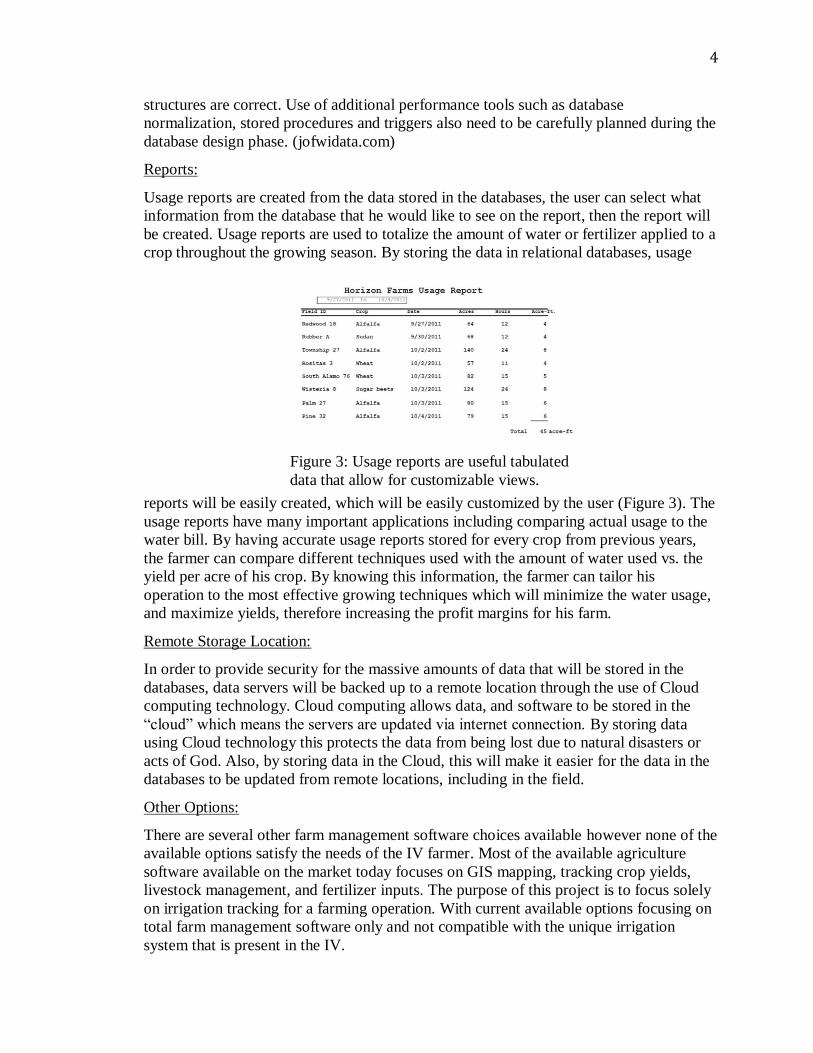
Figure 3: Usage reports are useful tabulated
data that allow for customizable views.
structures are correct. Use of additional performance tools such as database
normalization, stored procedures and triggers also need to be carefully planned during the
database design phase. (jofwidata.com)
Reports:
Usage reports are created from the data stored in the databases, the user can select what
information from the database that he would like to see on the report, then the report will
be created. Usage reports are used to totalize the amount of water or fertilizer applied to a
crop throughout the growing season. By storing the data in relational databases, usage
reports will be easily created, which will be easily customized by the user (Figure 3). The
usage reports have many important applications including comparing actual usage to the
water bill. By having accurate usage reports stored for every crop from previous years,
the farmer can compare different techniques used with the amount of water used vs. the
yield per acre of his crop. By knowing this information, the farmer can tailor his
operation to the most effective growing techniques which will minimize the water usage,
and maximize yields, therefore increasing the profit margins for his farm.
Remote Storage Location:
In order to provide security for the massive amounts of data that will be stored in the
databases, data servers will be backed up to a remote location through the use of Cloud
computing technology. Cloud computing allows data, and software to be stored in the
“cloud” which means the servers are updated via internet connection. By storing data
using Cloud technology this protects the data from being lost due to natural disasters or
acts of God. Also, by storing data in the Cloud, this will make it easier for the data in the
databases to be updated from remote locations, including in the field.
Other Options:
There are several other farm management software choices available however none of the
available options satisfy the needs of the IV farmer. Most of the available agriculture
software available on the market today focuses on GIS mapping, tracking crop yields,
livestock management, and fertilizer inputs. The purpose of this project is to focus solely
on irrigation tracking for a farming operation. With current available options focusing on
total farm management software only and not compatible with the unique irrigation
system that is present in the IV.

5
Farmplan, which is based in the United Kingdom, does not sell the software to the USA
but can be used as a model for creating irrigation management software for the IV. Crop
farmers and vegetable farmers, whatever the farm size, can use it to facilitate informed
management, purchasing and planning decisions (Farmplan, 2011). Farmplan has a very
user friendly feel to it which would be widely accepted by young and old farmers alike,
this software, if sold in the USA would be very widely accepted in the agriculture
community.
Another option is Farm Files out of Kansas, farm files has several different software
types that can be utilized to manage farms all over the USA. Farm Files Premier is an
agriculturate software package that tracks commodities, fields, harvest, chemicals,
planning, fertilizer, tillage, expenses, income, contracts and custom trucking (Farm Files,
2011). Farm Files is in dire need of an update. Not only is their software look and feel out
of date, it is extremely difficult to maneuver through the different sections of the
program.
Software will help keep track of water records and schedules not only in the field but in
the office as well. Hardware and software are available for everything from controlling
the flow of irrigation water to pin-pointing application of fertilizer--from record keeping
to manure management (Kaplan et. al., 1996) Although there are farm software options
available, none of them are specific to the unique water delivery system that is present in
the Imperial Valley. By having the software specifically tailored to their needs, the
farmers will be more likely to employ the use of the software.
Irrigation Practices
The current method for ordering irrigation water to a field in the Imperial Valley is a
simple process, however when one irrigation manager is in charge of 50 or 100 fields,
and can have up to 10 or 15 irrigation events occurring in one day, missed irrigation
events can happen easily and unnoticed. A missed irrigation event, especially during the
harsh summer months of the Imperial Valley, will have immense negative effects on crop
yields and crop quality. After reviewing current irrigation practices, discussion is
centered on the sensitivity of crops to water deficit, the finding that growth of many crops
is unaffected by considerable lowering of soil water content and, on this basis, the
creation of improved means of irrigation scheduling (Greenwood et. al., 2010). In order
to increase the irrigation practices on the farms in the Imperial Valley, a scheduling
program will be used to better manage the irrigation for fields. The new tracking program
will prevent missed irrigation events, which in turn will maintain a higher level of crop
yields and quality. Not only will a high quality crop be maintained in the field, the paper
trail in the office will be minimized.
6
PROCEDURES AND METHODS
Design Procedure
In order to create a program specific to the famers needs, a farmer who is managing
irrigation events day in and day out needed to be consulted. Stephen Hawk, Irrigation
Manager, of Horizon Farms LLC. in Holtville, CA was consulted with to create a
program that satisfied the needs of the everyday farmer and made the management of
thousands of acres a breeze.
While consulting with Mr. Hawk, he made it very clear what characteristics he was
looking for in an Irrigation Management program which included:
Simple and easy to use
A calendar which showed irrigation events for the entire month
Daily notification of irrigation events
Simple creation of monthly usage reports
Simple record keeping of fields, acreage, seed varieties, and plant dates
When choosing the collaboration partner for the project, a farmer who demonstrated a
serious dedication to organization was chosen. At Horizon Farms they are always looking
for ways to be innovative and up to date with the latest technology available. Although
only one farmer was consulted, in the Imperial Valley there seems to be an “industry
standard” for irrigation management that the majority of farmers use. So many of the
same techniques are used on the grander scheme of things, however smaller personal
preferences may arise that would require personalization for each individual farmers
needs.
Construction Procedure
Microsoft Visual Studio 2010 is very powerful computer programming software which
allows developers who have little or no experience in computer programming to create
powerful and in depth programs. Visual Studio can be used to create many different
applications, including console applications, graphical user interfaces, windows forms
applications, web pages, and web applications. Visual Studio uses a powerful
development tool which creates common code for the user with the simple click of a
mouse, instead of having to write all the monotonous code for a button, or a checkbox,
simply add the features from a tool box and all of the functionality is added instantly.
There are three basic sections to the management program which are; Fields, Schedule,
and Reports. Each page is accessed from a button click event on the home screen of the
program.
Fields Page
The Fields page employs the use of a .mdf SQL database to store the data input of the
fields and their characteristics such as watering interval, plant date, seed variety, acreage,
etc. The database is accessed through the use of a Windows Form application in Visual
Basic. The information is viewed, edited, added, and removed from the database through
the use of a data grid view and table view to display the information from the database.
7
Schedule Page
The Schedule page employs the use of the built in calendar function of Visual Studio
which is placed into a Windows Form application. The calendar is used to show irrigation
events on and to store pertinent information regarding the event. The user also has the
option to save the event or to go back to the previous page. If there happens to be an
irrigation event scheduled on the day that the schedules page is being accessed, a
notification page will pop up and notify the user that there is an irrigation event occurring
that day and questioning them if they would like to view it.
Reports Page
Due to time constraints, the reports page was not created for this project. See
recommendations page.
Data Storage
In the management program, the data is stored in a .mdf (master database file) database
which is the standard for storing data in Visual Studio. The database is an offshoot of
Microsoft SQL database and SQL Server must be installed to connect with the database
through Visual Studio. One of the main reasons for storing the data in a database, is for
easy creation of usage reports with the reports page.
Equipment Selection
Programs created in Visual Studio are supported my numerous platforms in order to
provide the customer with a wide variety of options. Visual Studio supports Windows
based systems, Windows Server, Web, Cloud, Office and SharePoint, and more. By
choosing a program that would allow a wide range of flexibility to the farmer, it allows
for greater personalization to their equipment preferences and overall productivity.
Windows based computers are the industry standard for businesses today, this is why
they were chosen as the platform to run the farm program.
Software Testing Procedure
The purpose of software testing is to detect “bugs” in the code that can cause the program
to act in ways not intended by the developer. Proper testing requires that a third party
operator not familiar with the design of the program run through all of the display
windows and operations found in the program. The information found by the tester is
then used to correct or adjust the program to suit the needs of the everyday user.
Secondary testing may also include a software expert evaluate the code to evaluate the
efficiency of the operations performed. For this project only primary testing has been
performed.
Cost Analysis
There were minimal costs associated with this project. The main cost was purchasing
Microsoft Visual Studio 2010, which was purchased through Cal Poly’s El Corral
Bookstore with a student discount. The total price for purchasing the necessary software
for completing this project was $119.99. If a student discount is not available to the
8
developer the full price for VS 2010 is approximately $800. After the Irrigation
Management software is exported to an .exe format, any Windows based computer
running Windows Vista or 7 will be able to run the program without any additional
software. Therefore there is no additional cost for running the program on the user’s
computer.
Simple management errors on the farm can potentially be the difference in turning a
profit or recording a substantial loss, so one of the main purposes of this project was to
create a simple program which would minimize the chance for possible error pertaining
to irrigation events on the farm. In the Imperial Valley, where temperatures can reach
120°F during the summer, a missed irrigation event or one that is delayed by even a
single day can have severe negative consequences to the crop and the profit margin as
well. So by making a small investment into a management program, famers could
potentially save substantial amounts of money over the course of the year simply by
staying organized.
Laws, Regulations, and Standards
In the state of California, water conservation for agriculture operations is becoming more
and more prevalent. The Department of Water Resources (DWR) is cracking down on
Agricultural users to be more efficient with their water use. On July12th, 2011 the DWR
submitted a Certificate of Compliance to the Office of Administrative Law to start a
regular rulemaking process for the adoption of a permanent agricultural water
measurement regulation. In many places, farmers are only allotted certain amounts of
water for their fields, and are often audited yearly to see how and where they used their
allotment. By using the management program, the farmer will have a very detailed and
accurate record of where he used his water allotment throughout the year. Through the
use of the reports page, detailed water usage reports can be created to show where the
water was used and if it was used effectively or not.
9
RESULTS
Project Overview
Home Page
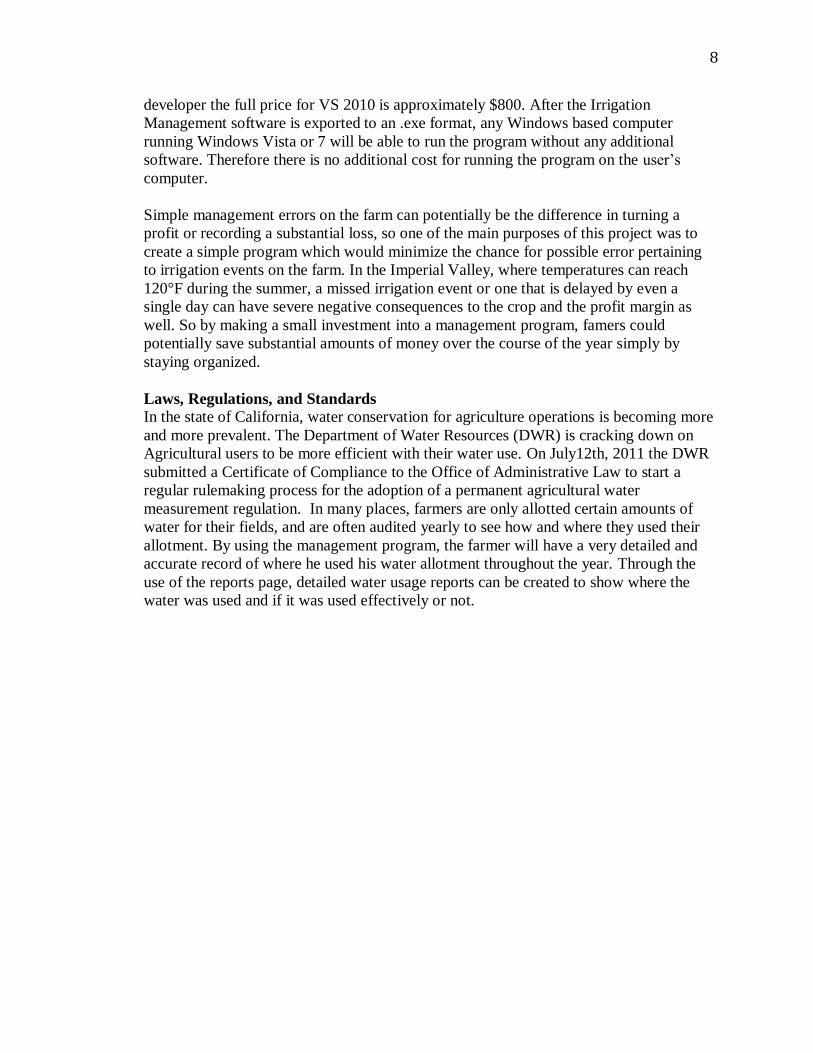
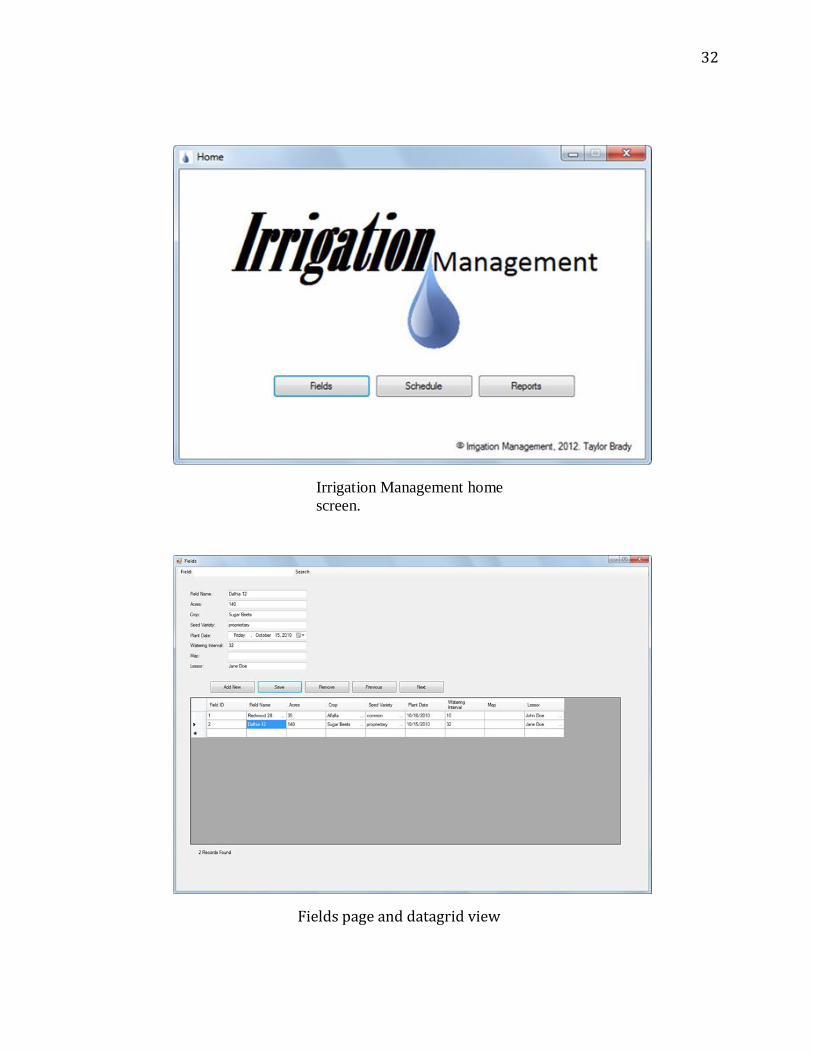
The Home page (Figure 4) is where the different sections of the program are reached. The
Home page consists of the Irrigation Management logo, the copyright information, and 3
buttons to access the 3 different sections of the program. Those buttons are Fields,
Schedule, and Reports.
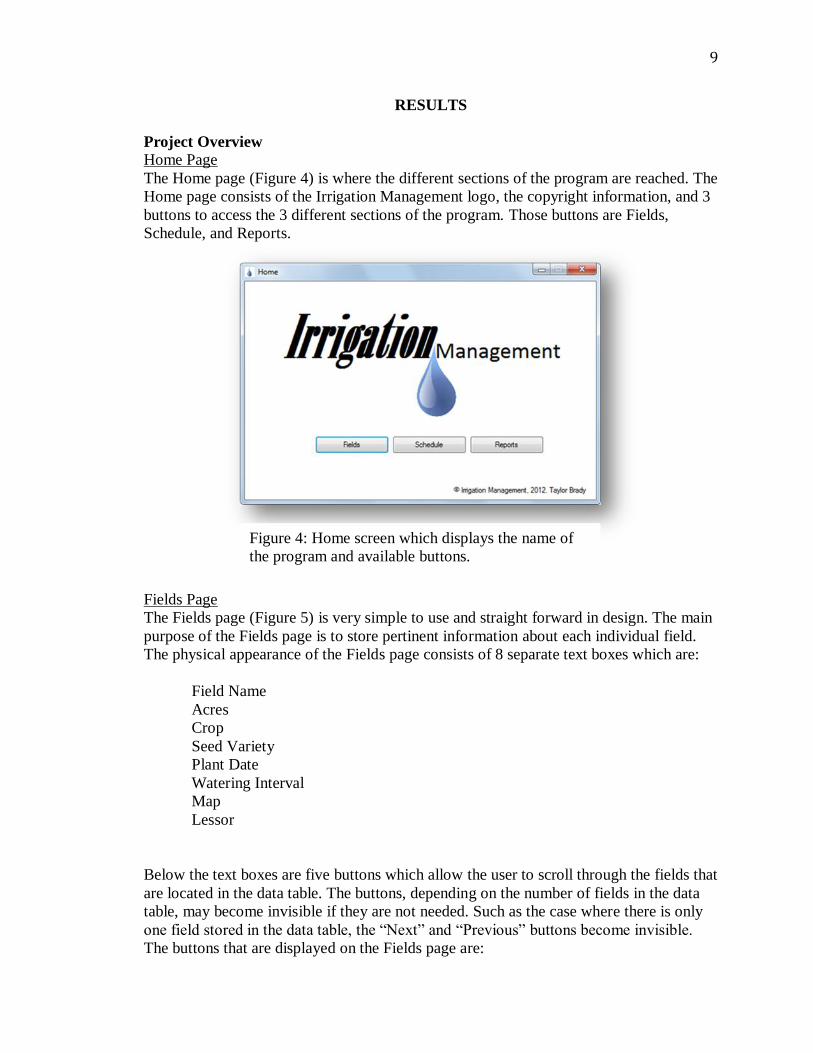
Fields Page
The Fields page (Figure 5) is very simple to use and straight forward in design. The main
purpose of the Fields page is to store pertinent information about each individual field.
The physical appearance of the Fields page consists of 8 separate text boxes which are:
Field Name
Acres
Crop
Seed Variety
Plant Date
Watering Interval
Map
Lessor
Below the text boxes are five buttons which allow the user to scroll through the fields that
are located in the data table. The buttons, depending on the number of fields in the data
table, may become invisible if they are not needed. Such as the case where there is only
one field stored in the data table, the “Next” and “Previous” buttons become invisible.
The buttons that are displayed on the Fields page are:
Figure 4: Home screen which displays the name of
the program and available buttons.
10
Add New
Save
Remove
Previous
Next
The Add New button will add a new field to the data table, which will allow the user to
input all the necessary information about the field of concern. After all the data is inserted
into the text boxes, the Save button will then store the information to the database for safe
and secure storage. The Remove button will remove a field from the database. While
viewing the fields in the data table, the Previous and Next buttons can be used to navigate
up and down in the data table that is present on the Fields page.
Also included on the fields page is a data table that displays all of the fields that are
currently stored in the database under the headings mentioned above. The data that is
stored in the data table also has the ability to be organized by clicking on the heading of
each column. If the values in the column are numerical they can be sorted from least to
greatest or greatest to least in value. If they are words, the table will be sorted
alphabetically from a to z or from z to a simply by clicking on the title of the column at
the top of the page. Below the data table, is a counter, which displays the number of
records that are currently stored in the database. At the top of the Fields page, there is
another text box and button, the combination allows for searching the data table to allow
for quicker navigation.
Figure 5: The Fields page consists of 8 text boxes, a data table, and 5 buttons.
11
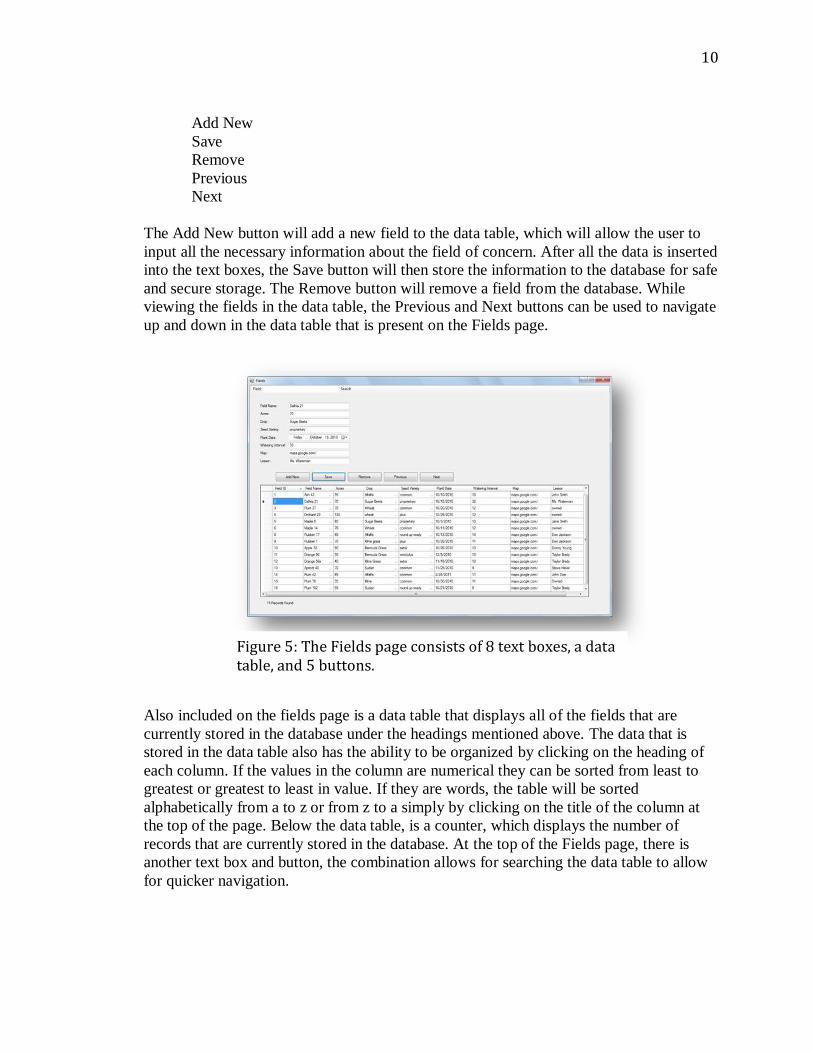
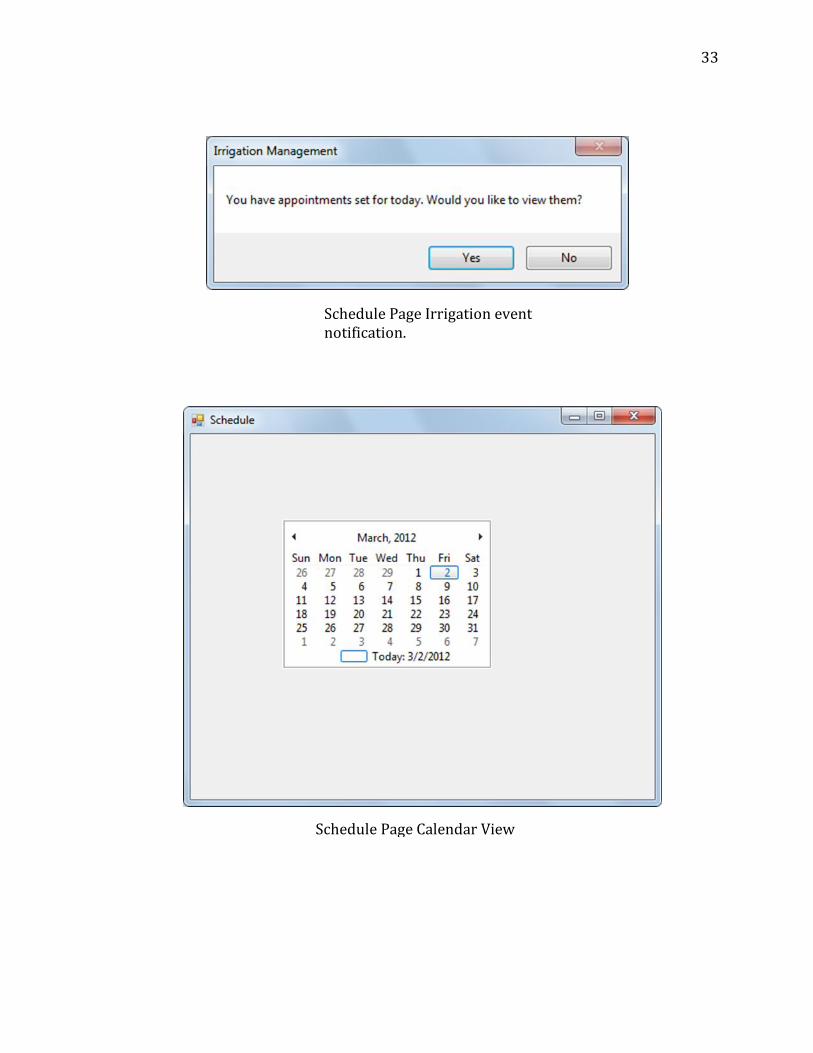
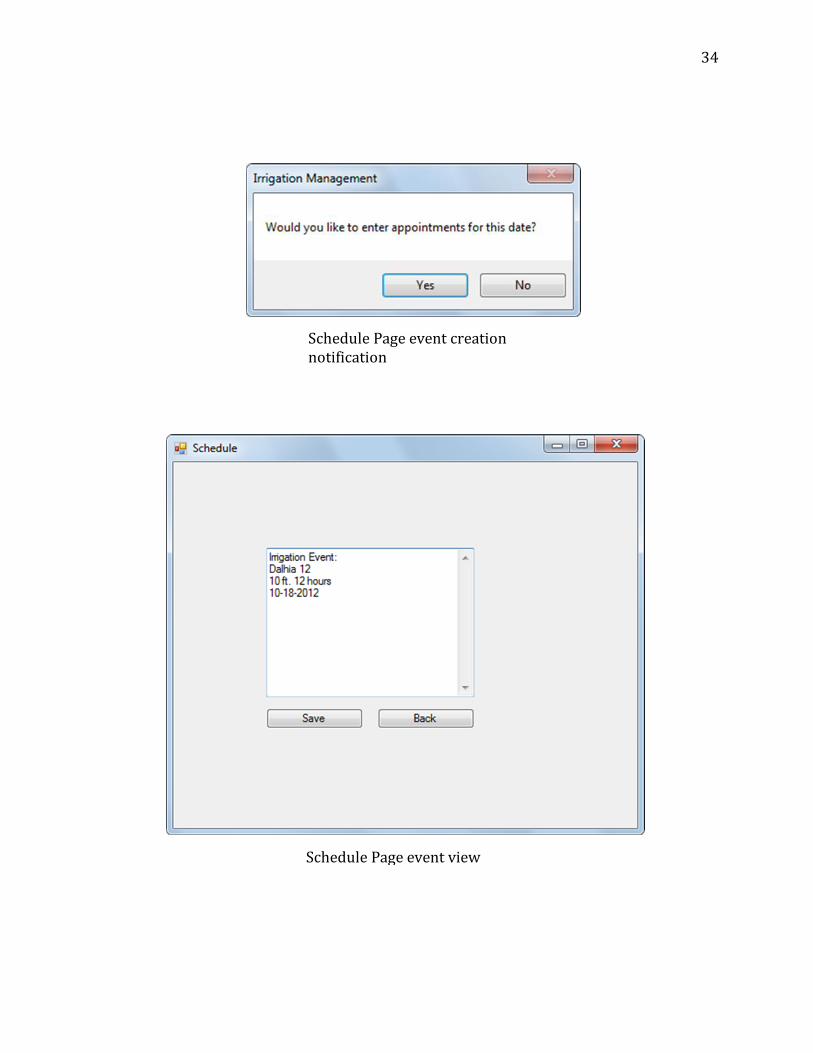
Schedule Page
The Schedule page (Figure 6) is accessed through the Home page via the Schedule
button. When opening the Schedule page, the first thing that is viewed is a calendar,
which has todays date selected. When an irrigation event is to be added to the schedule,
simply click on the date when the irrigation event is to occur which will trigger a
notification to pop up. The notification will question the user if they would like to add an
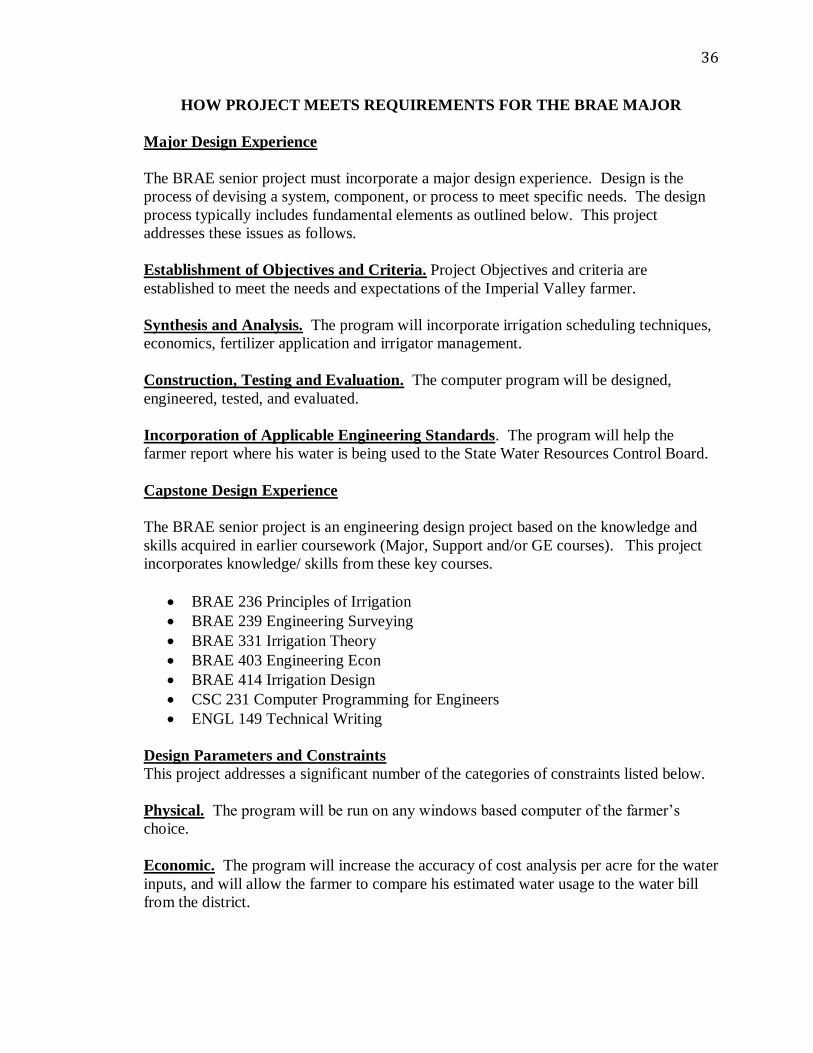
appointment on the specified day. By clicking yes, a text box will appear which will
allow for the information describing the irrigation event. Two buttons below the text box
allow the user to save the inputted information, and go back to the previous page.
After irrigation events are saved in the calendar, upon reopening, the calendar will
prompt the user that there are active irrigation events scheduled for Today, and questions
if they would like to view the event.
Figure 6: The Schedule page opens with a calendar view.
12
DISCUSSION
Difficult Construction Technique
There were many challenges associated with getting the program to behave as expected.
Many new functions and design styles had to be learned in Visual Studio to be able to
create a functional program that would allow for top quality functionality at a minimal
price tag. There was extreme difficulty in linking the Fields page and the Schedules page
together so that the data stored in each would allow for data recalling between the two
pages. For example if a drop down menu was placed in the schedules page for the Field
Name data field, it would have been ideal for the drop down menu to access the field
names that were stored in the data table from the Fields page.
Expected Transferability
By storing data in databases, the user will have the ability to create back up files in case
damage occurs to the computer in use. To restore the data, simply upload data to the data
base from the back up files. Also by creating Irrigation Management to operate on a
Windows platform, the transferability from computer to computer is very likely. Most
businesses today operate with windows based computers which would allow for
Irrigation Management to be utilized, without requiring massive amounts of memory to
be operated on most computers.
Design Changes Made During Construction
There were several changes made to the design once construction of the program began.
Initially on the Fields page there was supposed to be a user form that popped up when the
user desired to add a new field to the data table. Instead of having a separate user form, it
was decided to have the user form and the data table on the same page in order to make it
possible to use the same text boxes for editing as well as the input of new fields. Also, the
initial database design was to use Microsoft Access to create the data bases. However, it
was found to be much easier to store the data in SQL databases from within Visual
Studio.
The schedules page has two different designs that were actually created and tested before
choosing the calendar method for scheduling. The first design for the scheduling page
was very similar to the Fields page in the fact that it had the user form and the data table
on the same page, and utilized buttons to navigate through the data table. While
collaborating with Horizon Farms, it was made known that they wanted to be able to
visually see their irrigation schedule on a calendar. Also they wanted to be able to add
irrigation events with a button click event from the calendar view.
Cost Comparison
Although there are no exact software matches to compete with Irrigation Management,
there are several options available to the user. There are farm software available on the
market that allow the user to keep track of many different inputs including fertilizer
inputs, harvest info, crop yields, and many various things. However none currently allow
for a simple interface that allow farmers to simply track their water schedule. Generic
scheduling software could be utilized, however many farmers find it useful to store
13
information about their field in the same software as their schedule is located.
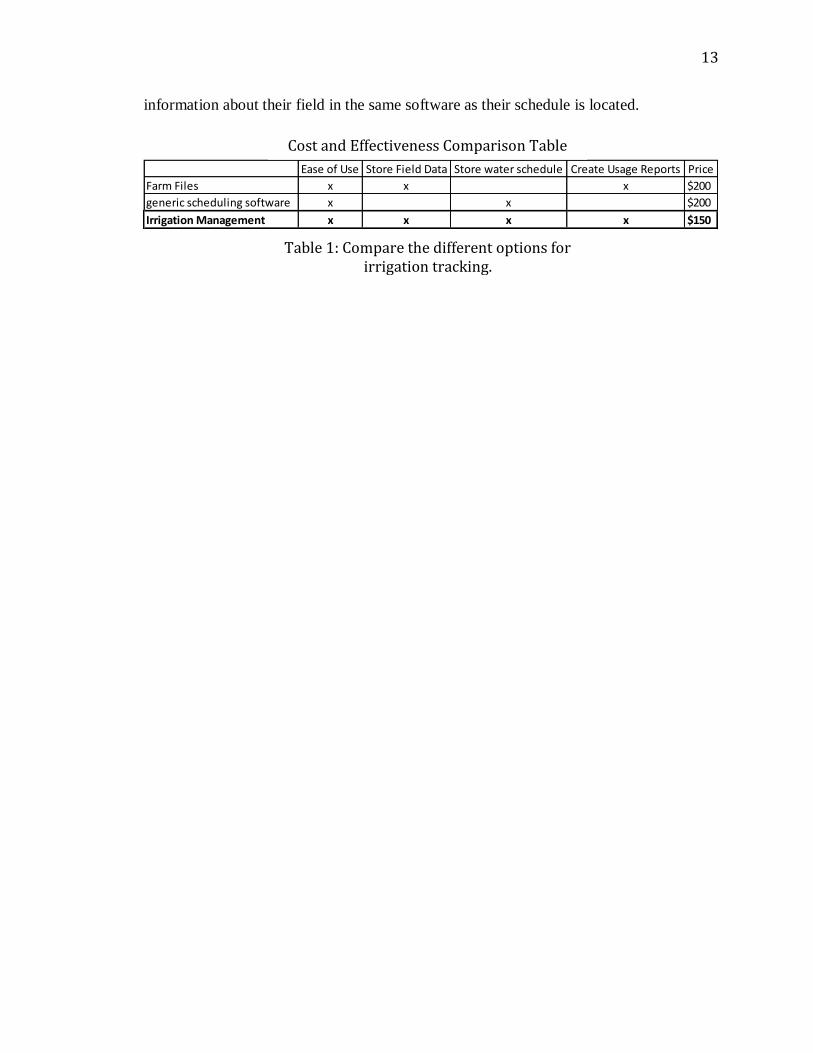
Ease of Use Store Field Data Store water schedule Create Usage Reports Price
Farm Files x x x $200
generic scheduling software x x $200
Irrigation Management x x x x $150
Cost and Effectiveness Comparison Table
Table 1: Compare the different options for irrigation tracking.
14
RECOMMENDATIONS
Continuation of this Irrigation Management software would include a more development
in the functionality and user friendliness of the user interface. Software users always
desire a program that is simple and straight forward. In order for this program to be
simple and straight forward, further development is required. Expansion to cloud
computing would allow for a safer method of storing data in case of damage occurring to
the computer or data storage device.
Fields page
The Fields page is working as expected. However there is some more coding that could
provide more functionality to the page. Currently it will store the information pertaining
to each field and will recall the information later for viewing or editing of the data. For
further functionality, perhaps a button click event from the name of the field could take
you to the Schedules page to add an irrigation event.
Schedule page
The Schedule page has multiple areas for improvement. The first being ease of use, this
page is a little confusing to use and could use a totally different design to make it more
functional and user friendly. The second area for improvement would be database
storage; currently the schedules page is not very easy compatible with database entry.
Possibly a similar design to the fields page, with a drop down menu for the field name
would access the Fields database and only allow for irrigation events to be created for
fields that are already entered into the Fields page.
Reports page
The reports page is yet to be constructed. The design that is in the development stage
would include several options for reporting which would include.
Water usage by field
Water usage by date
Water usage by crop
Water usage for the entire month
Water usage for the entire year
Total water usage
These selections could be made by simple checkboxes or perhaps a dropdown menu
where the selection was made. Having a very flexible reports page would allow for very
informative and useful reports that could be used to justify where, how much, and when
water was applied on the farm.
Cloud Based Development
For future versions of the farm management program, Cloud based development should
be considered. With most cellular service providers providing 3G or even 4G internet
connections for very reasonable prices, Cloud based software would allow for a safer way

15
to store the information. With the information stored in the “Cloud” it would allow
seamless integration for multiple users connecting to the program simultaneously. By
storing all of the data in the cloud, it would essentially be protected from damage that
could possibly occur to a server located in the office which is prone to water damage, fire
damage, and memory loss due to power outages.
16
REFERENCES
Alexander, V. (1995). U.S. Patent No. 5,414,834. Washington, DC: U.S.
Farm Files. 2011. “Farm Files Crops”. Valley, KS. Available at:
http://www.farmfiles.com/crops.html
Farmplan. 2011. “Crop Management”. United Kingdom. Available at:
http://www.farmplan.co.uk/software/crop-management.aspx
Greenwood, D.J.; Thompson, A.J.; Hilton, H.W.; Zhang, K. 2010. “Opportunities for
improving irrigation efficiency with quantitative models, soil water sensors and wireless
technology”. Journal of agricultural science. v. 148, issue 1, p. 1-16. 148 1.
JoFwi Data and Design. 2011. “Database Development”. Sunnyvale, CA. Available at:
http://www.jofwidata.com/database.html
Kaplan, J.K.; Lee, J.; Comis, D.; Senft, D. 1996. “High-tech fattens the bottom line”.
Agricultural research (Washington, D.C.) Agricultural research, Apr 1996. v. 44 (4), p. 4-
11. 44 4
Madrigal Soft. 2011. “Resource Scheduling Software”. Victoria, BC Canada. Available
at: http://www.madrigalsoft.com/
Tidwell, J. 2005. “Designing User Interfaces”. O’Reilly Media Inc.
University of California Cooperative Extension – Imperial County. 1999. “Imperial
County Agriculture”. Holtville, CA. Available at: http://commserv.ucdavis.edu/CEImperial/overview.htm
Varaneckas, T. 2008. “Software design tips from the creator of C++ programming
language”. Available at: http://paranoid-engineering.blogspot.com/2008/11/software-
design-tips-from-creator-of-c.html

17
APPENDIX A
SOURCE CODE
18
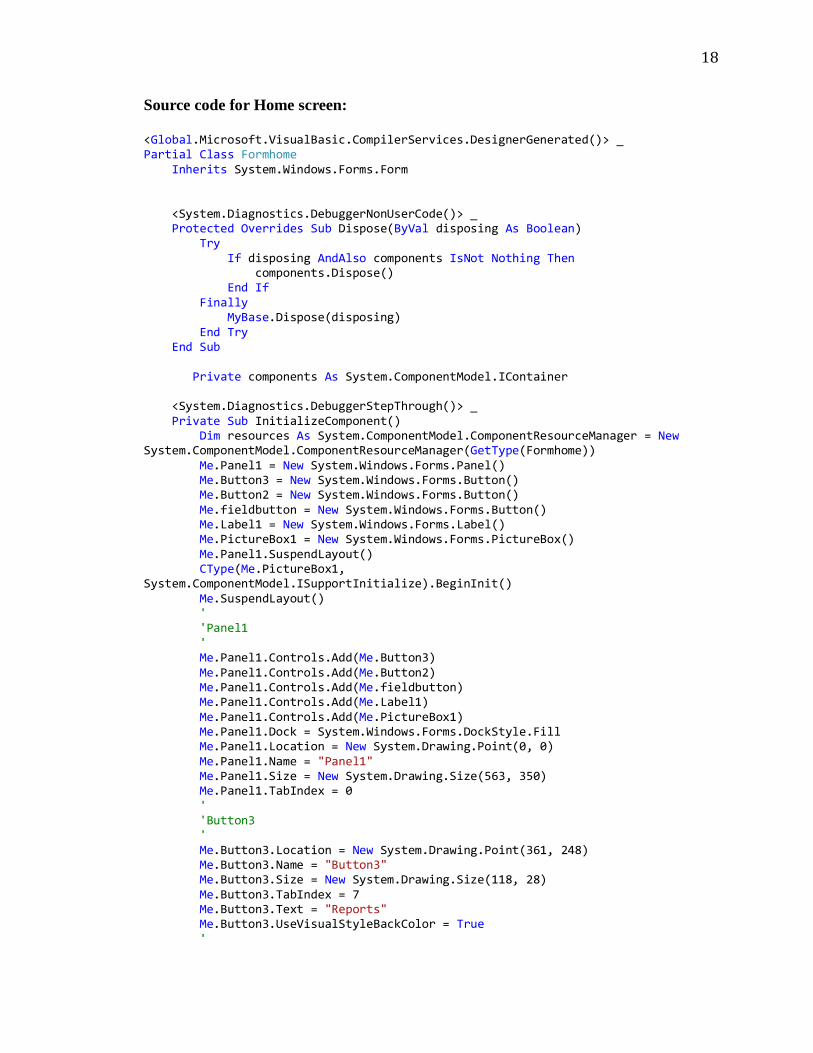
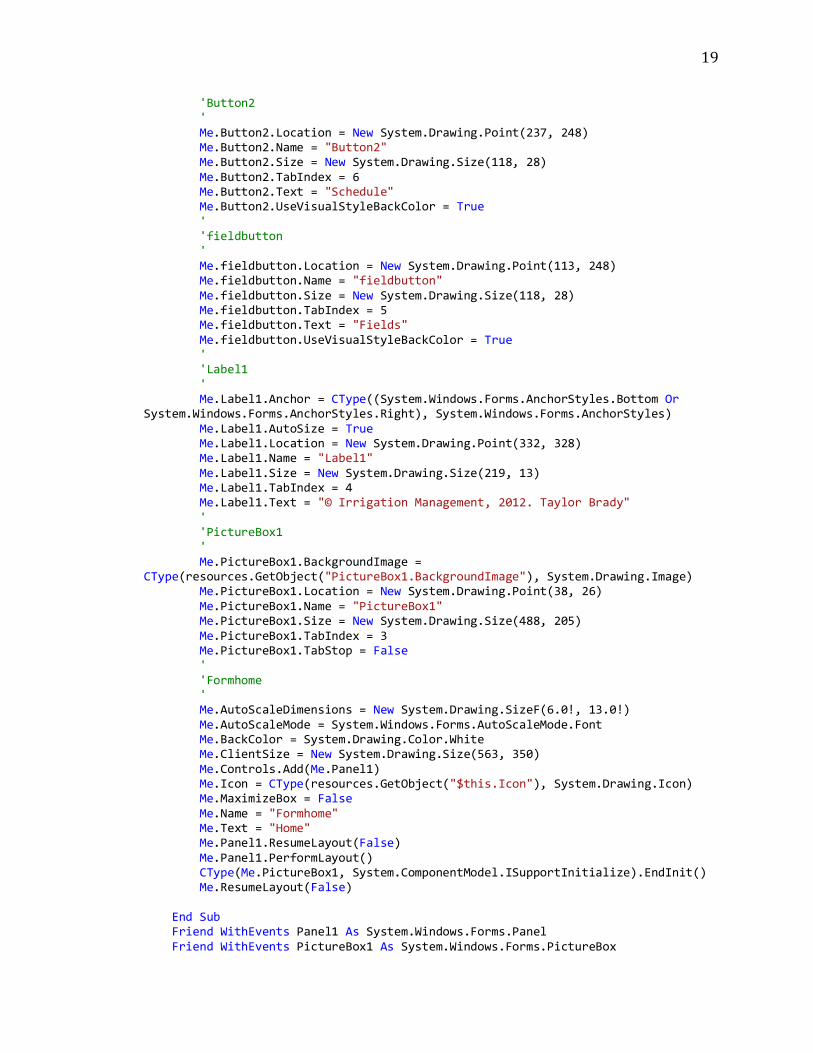
Source code for Home screen:
<Global.Microsoft.VisualBasic.CompilerServices.DesignerGenerated()> _ Partial Class Formhome Inherits System.Windows.Forms.Form <System.Diagnostics.DebuggerNonUserCode()> _ Protected Overrides Sub Dispose(ByVal disposing As Boolean) Try If disposing AndAlso components IsNot Nothing Then components.Dispose() End If Finally MyBase.Dispose(disposing) End Try End Sub Private components As System.ComponentModel.IContainer <System.Diagnostics.DebuggerStepThrough()> _ Private Sub InitializeComponent() Dim resources As System.ComponentModel.ComponentResourceManager = New System.ComponentModel.ComponentResourceManager(GetType(Formhome)) Me.Panel1 = New System.Windows.Forms.Panel() Me.Button3 = New System.Windows.Forms.Button() Me.Button2 = New System.Windows.Forms.Button() Me.fieldbutton = New System.Windows.Forms.Button() Me.Label1 = New System.Windows.Forms.Label() Me.PictureBox1 = New System.Windows.Forms.PictureBox() Me.Panel1.SuspendLayout() CType(Me.PictureBox1, System.ComponentModel.ISupportInitialize).BeginInit() Me.SuspendLayout() ' 'Panel1 ' Me.Panel1.Controls.Add(Me.Button3) Me.Panel1.Controls.Add(Me.Button2) Me.Panel1.Controls.Add(Me.fieldbutton) Me.Panel1.Controls.Add(Me.Label1) Me.Panel1.Controls.Add(Me.PictureBox1) Me.Panel1.Dock = System.Windows.Forms.DockStyle.Fill Me.Panel1.Location = New System.Drawing.Point(0, 0) Me.Panel1.Name = "Panel1" Me.Panel1.Size = New System.Drawing.Size(563, 350) Me.Panel1.TabIndex = 0 ' 'Button3 ' Me.Button3.Location = New System.Drawing.Point(361, 248) Me.Button3.Name = "Button3" Me.Button3.Size = New System.Drawing.Size(118, 28) Me.Button3.TabIndex = 7 Me.Button3.Text = "Reports" Me.Button3.UseVisualStyleBackColor = True '
19
'Button2 ' Me.Button2.Location = New System.Drawing.Point(237, 248) Me.Button2.Name = "Button2" Me.Button2.Size = New System.Drawing.Size(118, 28) Me.Button2.TabIndex = 6 Me.Button2.Text = "Schedule" Me.Button2.UseVisualStyleBackColor = True ' 'fieldbutton ' Me.fieldbutton.Location = New System.Drawing.Point(113, 248) Me.fieldbutton.Name = "fieldbutton" Me.fieldbutton.Size = New System.Drawing.Size(118, 28) Me.fieldbutton.TabIndex = 5 Me.fieldbutton.Text = "Fields" Me.fieldbutton.UseVisualStyleBackColor = True ' 'Label1 ' Me.Label1.Anchor = CType((System.Windows.Forms.AnchorStyles.Bottom Or System.Windows.Forms.AnchorStyles.Right), System.Windows.Forms.AnchorStyles) Me.Label1.AutoSize = True Me.Label1.Location = New System.Drawing.Point(332, 328) Me.Label1.Name = "Label1" Me.Label1.Size = New System.Drawing.Size(219, 13) Me.Label1.TabIndex = 4 Me.Label1.Text = "© Irrigation Management, 2012. Taylor Brady" ' 'PictureBox1 ' Me.PictureBox1.BackgroundImage = CType(resources.GetObject("PictureBox1.BackgroundImage"), System.Drawing.Image) Me.PictureBox1.Location = New System.Drawing.Point(38, 26) Me.PictureBox1.Name = "PictureBox1" Me.PictureBox1.Size = New System.Drawing.Size(488, 205) Me.PictureBox1.TabIndex = 3 Me.PictureBox1.TabStop = False ' 'Formhome ' Me.AutoScaleDimensions = New System.Drawing.SizeF(6.0!, 13.0!) Me.AutoScaleMode = System.Windows.Forms.AutoScaleMode.Font Me.BackColor = System.Drawing.Color.White Me.ClientSize = New System.Drawing.Size(563, 350) Me.Controls.Add(Me.Panel1) Me.Icon = CType(resources.GetObject("$this.Icon"), System.Drawing.Icon) Me.MaximizeBox = False Me.Name = "Formhome" Me.Text = "Home" Me.Panel1.ResumeLayout(False) Me.Panel1.PerformLayout() CType(Me.PictureBox1, System.ComponentModel.ISupportInitialize).EndInit() Me.ResumeLayout(False) End Sub Friend WithEvents Panel1 As System.Windows.Forms.Panel Friend WithEvents PictureBox1 As System.Windows.Forms.PictureBox
20
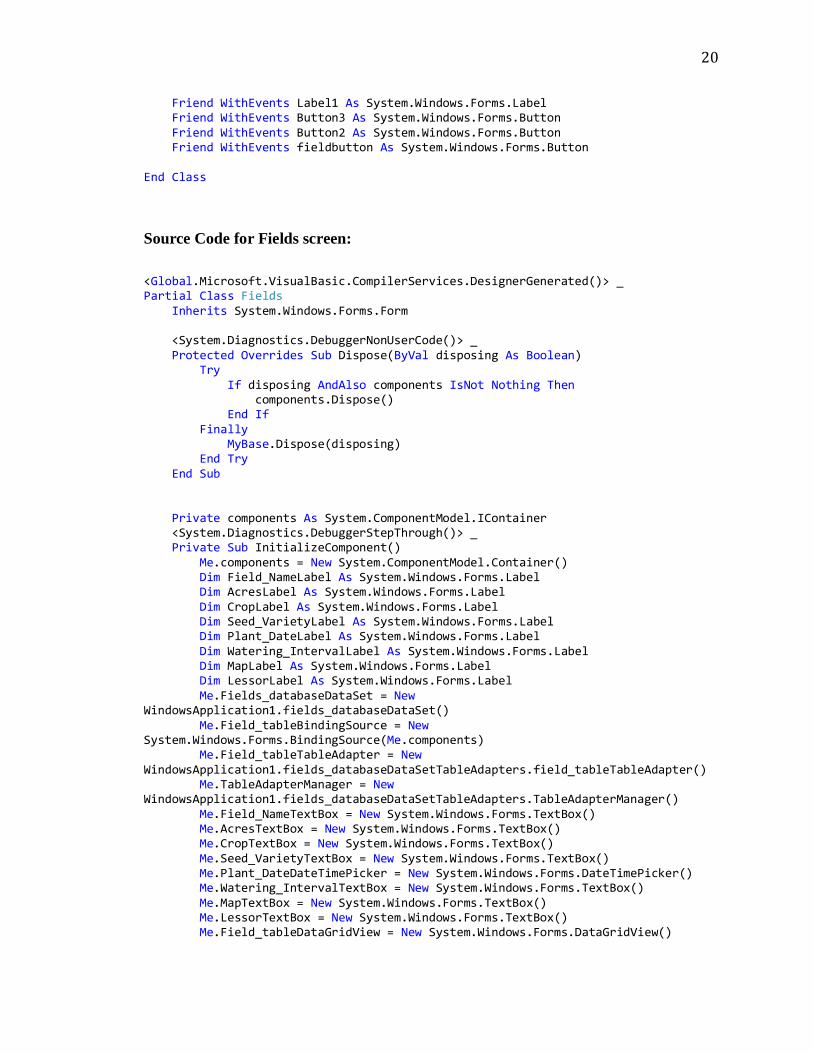
Friend WithEvents Label1 As System.Windows.Forms.Label Friend WithEvents Button3 As System.Windows.Forms.Button Friend WithEvents Button2 As System.Windows.Forms.Button Friend WithEvents fieldbutton As System.Windows.Forms.Button End Class
Source Code for Fields screen:
<Global.Microsoft.VisualBasic.CompilerServices.DesignerGenerated()> _ Partial Class Fields Inherits System.Windows.Forms.Form <System.Diagnostics.DebuggerNonUserCode()> _ Protected Overrides Sub Dispose(ByVal disposing As Boolean) Try If disposing AndAlso components IsNot Nothing Then components.Dispose() End If Finally MyBase.Dispose(disposing) End Try End Sub Private components As System.ComponentModel.IContainer <System.Diagnostics.DebuggerStepThrough()> _ Private Sub InitializeComponent() Me.components = New System.ComponentModel.Container() Dim Field_NameLabel As System.Windows.Forms.Label Dim AcresLabel As System.Windows.Forms.Label Dim CropLabel As System.Windows.Forms.Label Dim Seed_VarietyLabel As System.Windows.Forms.Label Dim Plant_DateLabel As System.Windows.Forms.Label Dim Watering_IntervalLabel As System.Windows.Forms.Label Dim MapLabel As System.Windows.Forms.Label Dim LessorLabel As System.Windows.Forms.Label Me.Fields_databaseDataSet = New WindowsApplication1.fields_databaseDataSet() Me.Field_tableBindingSource = New System.Windows.Forms.BindingSource(Me.components) Me.Field_tableTableAdapter = New WindowsApplication1.fields_databaseDataSetTableAdapters.field_tableTableAdapter() Me.TableAdapterManager = New WindowsApplication1.fields_databaseDataSetTableAdapters.TableAdapterManager() Me.Field_NameTextBox = New System.Windows.Forms.TextBox() Me.AcresTextBox = New System.Windows.Forms.TextBox() Me.CropTextBox = New System.Windows.Forms.TextBox() Me.Seed_VarietyTextBox = New System.Windows.Forms.TextBox() Me.Plant_DateDateTimePicker = New System.Windows.Forms.DateTimePicker() Me.Watering_IntervalTextBox = New System.Windows.Forms.TextBox() Me.MapTextBox = New System.Windows.Forms.TextBox() Me.LessorTextBox = New System.Windows.Forms.TextBox() Me.Field_tableDataGridView = New System.Windows.Forms.DataGridView()
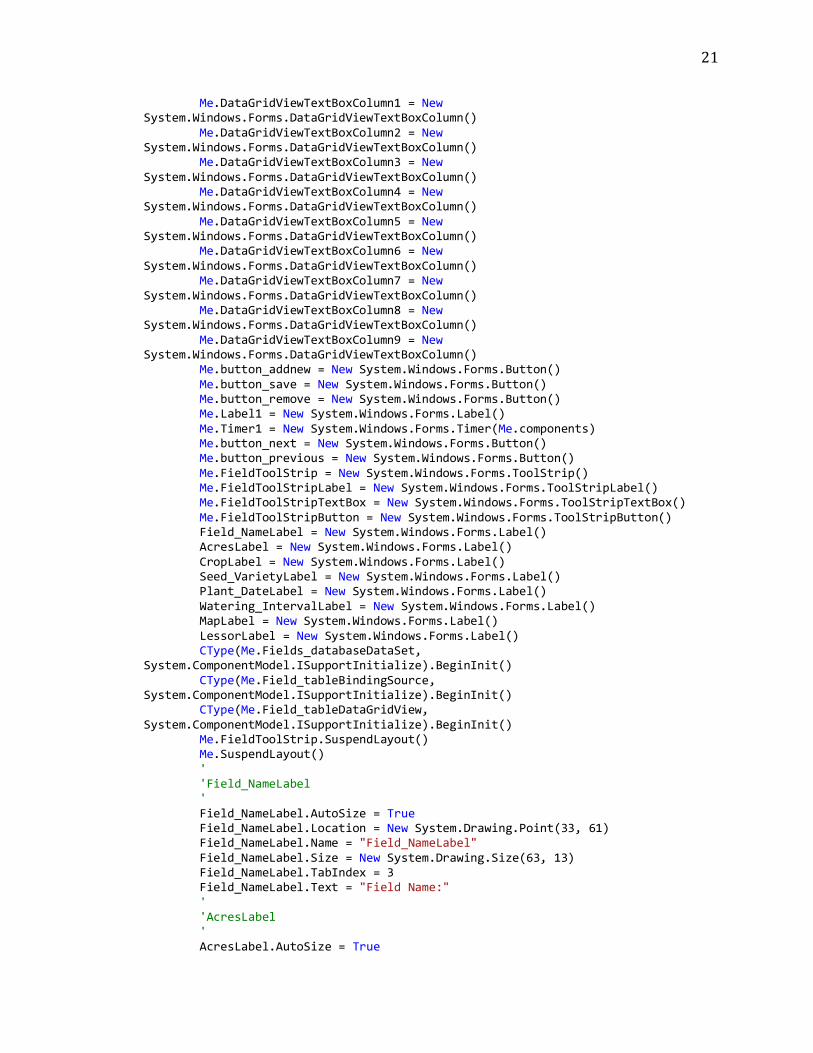
21
Me.DataGridViewTextBoxColumn1 = New System.Windows.Forms.DataGridViewTextBoxColumn() Me.DataGridViewTextBoxColumn2 = New System.Windows.Forms.DataGridViewTextBoxColumn() Me.DataGridViewTextBoxColumn3 = New System.Windows.Forms.DataGridViewTextBoxColumn() Me.DataGridViewTextBoxColumn4 = New System.Windows.Forms.DataGridViewTextBoxColumn() Me.DataGridViewTextBoxColumn5 = New System.Windows.Forms.DataGridViewTextBoxColumn() Me.DataGridViewTextBoxColumn6 = New System.Windows.Forms.DataGridViewTextBoxColumn() Me.DataGridViewTextBoxColumn7 = New System.Windows.Forms.DataGridViewTextBoxColumn() Me.DataGridViewTextBoxColumn8 = New System.Windows.Forms.DataGridViewTextBoxColumn() Me.DataGridViewTextBoxColumn9 = New System.Windows.Forms.DataGridViewTextBoxColumn() Me.button_addnew = New System.Windows.Forms.Button() Me.button_save = New System.Windows.Forms.Button() Me.button_remove = New System.Windows.Forms.Button() Me.Label1 = New System.Windows.Forms.Label() Me.Timer1 = New System.Windows.Forms.Timer(Me.components) Me.button_next = New System.Windows.Forms.Button() Me.button_previous = New System.Windows.Forms.Button() Me.FieldToolStrip = New System.Windows.Forms.ToolStrip() Me.FieldToolStripLabel = New System.Windows.Forms.ToolStripLabel() Me.FieldToolStripTextBox = New System.Windows.Forms.ToolStripTextBox() Me.FieldToolStripButton = New System.Windows.Forms.ToolStripButton() Field_NameLabel = New System.Windows.Forms.Label() AcresLabel = New System.Windows.Forms.Label() CropLabel = New System.Windows.Forms.Label() Seed_VarietyLabel = New System.Windows.Forms.Label() Plant_DateLabel = New System.Windows.Forms.Label() Watering_IntervalLabel = New System.Windows.Forms.Label() MapLabel = New System.Windows.Forms.Label() LessorLabel = New System.Windows.Forms.Label() CType(Me.Fields_databaseDataSet, System.ComponentModel.ISupportInitialize).BeginInit() CType(Me.Field_tableBindingSource, System.ComponentModel.ISupportInitialize).BeginInit() CType(Me.Field_tableDataGridView, System.ComponentModel.ISupportInitialize).BeginInit() Me.FieldToolStrip.SuspendLayout() Me.SuspendLayout() ' 'Field_NameLabel ' Field_NameLabel.AutoSize = True Field_NameLabel.Location = New System.Drawing.Point(33, 61) Field_NameLabel.Name = "Field_NameLabel" Field_NameLabel.Size = New System.Drawing.Size(63, 13) Field_NameLabel.TabIndex = 3 Field_NameLabel.Text = "Field Name:" ' 'AcresLabel ' AcresLabel.AutoSize = True
22
AcresLabel.Location = New System.Drawing.Point(33, 87) AcresLabel.Name = "AcresLabel" AcresLabel.Size = New System.Drawing.Size(37, 13) AcresLabel.TabIndex = 5 AcresLabel.Text = "Acres:" ' 'CropLabel ' CropLabel.AutoSize = True CropLabel.Location = New System.Drawing.Point(33, 113) CropLabel.Name = "CropLabel" CropLabel.Size = New System.Drawing.Size(32, 13) CropLabel.TabIndex = 7 CropLabel.Text = "Crop:" ' 'Seed_VarietyLabel ' Seed_VarietyLabel.AutoSize = True Seed_VarietyLabel.Location = New System.Drawing.Point(33, 139) Seed_VarietyLabel.Name = "Seed_VarietyLabel" Seed_VarietyLabel.Size = New System.Drawing.Size(70, 13) Seed_VarietyLabel.TabIndex = 9 Seed_VarietyLabel.Text = "Seed Variety:" ' 'Plant_DateLabel ' Plant_DateLabel.AutoSize = True Plant_DateLabel.Location = New System.Drawing.Point(33, 166) Plant_DateLabel.Name = "Plant_DateLabel" Plant_DateLabel.Size = New System.Drawing.Size(60, 13) Plant_DateLabel.TabIndex = 11 Plant_DateLabel.Text = "Plant Date:" ' 'Watering_IntervalLabel ' Watering_IntervalLabel.AutoSize = True Watering_IntervalLabel.Location = New System.Drawing.Point(33, 191) Watering_IntervalLabel.Name = "Watering_IntervalLabel" Watering_IntervalLabel.Size = New System.Drawing.Size(91, 13) Watering_IntervalLabel.TabIndex = 13 Watering_IntervalLabel.Text = "Watering Interval:" ' 'MapLabel ' MapLabel.AutoSize = True MapLabel.Location = New System.Drawing.Point(33, 217) MapLabel.Name = "MapLabel" MapLabel.Size = New System.Drawing.Size(31, 13) MapLabel.TabIndex = 15 MapLabel.Text = "Map:" ' 'LessorLabel ' LessorLabel.AutoSize = True LessorLabel.Location = New System.Drawing.Point(33, 243) LessorLabel.Name = "LessorLabel" LessorLabel.Size = New System.Drawing.Size(41, 13) LessorLabel.TabIndex = 17
23
LessorLabel.Text = "Lessor:" ' 'Fields_databaseDataSet ' Me.Fields_databaseDataSet.DataSetName = "fields_databaseDataSet" Me.Fields_databaseDataSet.SchemaSerializationMode = System.Data.SchemaSerializationMode.IncludeSchema ' 'Field_tableBindingSource ' Me.Field_tableBindingSource.DataMember = "field_table" Me.Field_tableBindingSource.DataSource = Me.Fields_databaseDataSet ' 'Field_tableTableAdapter ' Me.Field_tableTableAdapter.ClearBeforeFill = True ' 'TableAdapterManager ' Me.TableAdapterManager.BackupDataSetBeforeUpdate = False Me.TableAdapterManager.field_tableTableAdapter = Me.Field_tableTableAdapter Me.TableAdapterManager.UpdateOrder = WindowsApplication1.fields_databaseDataSetTableAdapters.TableAdapterManager.UpdateOrderOption.InsertUpdateDelete ' 'Field_NameTextBox ' Me.Field_NameTextBox.DataBindings.Add(New System.Windows.Forms.Binding("Text", Me.Field_tableBindingSource, "Field Name", True)) Me.Field_NameTextBox.Location = New System.Drawing.Point(130, 58) Me.Field_NameTextBox.Name = "Field_NameTextBox" Me.Field_NameTextBox.Size = New System.Drawing.Size(200, 20) Me.Field_NameTextBox.TabIndex = 4 ' 'AcresTextBox ' Me.AcresTextBox.DataBindings.Add(New System.Windows.Forms.Binding("Text", Me.Field_tableBindingSource, "Acres", True)) Me.AcresTextBox.Location = New System.Drawing.Point(130, 84) Me.AcresTextBox.Name = "AcresTextBox" Me.AcresTextBox.Size = New System.Drawing.Size(200, 20) Me.AcresTextBox.TabIndex = 6 ' 'CropTextBox ' Me.CropTextBox.DataBindings.Add(New System.Windows.Forms.Binding("Text", Me.Field_tableBindingSource, "Crop", True)) Me.CropTextBox.Location = New System.Drawing.Point(130, 110) Me.CropTextBox.Name = "CropTextBox" Me.CropTextBox.Size = New System.Drawing.Size(200, 20) Me.CropTextBox.TabIndex = 8 ' 'Seed_VarietyTextBox '
24
Me.Seed_VarietyTextBox.DataBindings.Add(New System.Windows.Forms.Binding("Text", Me.Field_tableBindingSource, "Seed Variety", True)) Me.Seed_VarietyTextBox.Location = New System.Drawing.Point(130, 136) Me.Seed_VarietyTextBox.Name = "Seed_VarietyTextBox" Me.Seed_VarietyTextBox.Size = New System.Drawing.Size(200, 20) Me.Seed_VarietyTextBox.TabIndex = 10 ' 'Plant_DateDateTimePicker ' Me.Plant_DateDateTimePicker.DataBindings.Add(New System.Windows.Forms.Binding("Value", Me.Field_tableBindingSource, "Plant Date", True)) Me.Plant_DateDateTimePicker.Location = New System.Drawing.Point(130, 162) Me.Plant_DateDateTimePicker.Name = "Plant_DateDateTimePicker" Me.Plant_DateDateTimePicker.Size = New System.Drawing.Size(200, 20) Me.Plant_DateDateTimePicker.TabIndex = 12 ' 'Watering_IntervalTextBox ' Me.Watering_IntervalTextBox.DataBindings.Add(New System.Windows.Forms.Binding("Text", Me.Field_tableBindingSource, "Watering Interval", True)) Me.Watering_IntervalTextBox.Location = New System.Drawing.Point(130, 188) Me.Watering_IntervalTextBox.Name = "Watering_IntervalTextBox" Me.Watering_IntervalTextBox.Size = New System.Drawing.Size(200, 20) Me.Watering_IntervalTextBox.TabIndex = 14 ' 'MapTextBox ' Me.MapTextBox.DataBindings.Add(New System.Windows.Forms.Binding("Text", Me.Field_tableBindingSource, "Map", True)) Me.MapTextBox.Location = New System.Drawing.Point(130, 214) Me.MapTextBox.Name = "MapTextBox" Me.MapTextBox.Size = New System.Drawing.Size(200, 20) Me.MapTextBox.TabIndex = 16 ' 'LessorTextBox ' Me.LessorTextBox.DataBindings.Add(New System.Windows.Forms.Binding("Text", Me.Field_tableBindingSource, "Lessor", True)) Me.LessorTextBox.Location = New System.Drawing.Point(130, 240) Me.LessorTextBox.Name = "LessorTextBox" Me.LessorTextBox.Size = New System.Drawing.Size(200, 20) Me.LessorTextBox.TabIndex = 18 ' 'Field_tableDataGridView ' Me.Field_tableDataGridView.AllowUserToOrderColumns = True Me.Field_tableDataGridView.AutoGenerateColumns = False Me.Field_tableDataGridView.ColumnHeadersHeightSizeMode = System.Windows.Forms.DataGridViewColumnHeadersHeightSizeMode.AutoSize Me.Field_tableDataGridView.Columns.AddRange(New System.Windows.Forms.DataGridViewColumn() {Me.DataGridViewTextBoxColumn1, Me.DataGridViewTextBoxColumn2, Me.DataGridViewTextBoxColumn3, Me.DataGridViewTextBoxColumn4, Me.DataGridViewTextBoxColumn5, Me.DataGridViewTextBoxColumn6, Me.DataGridViewTextBoxColumn7, Me.DataGridViewTextBoxColumn8, Me.DataGridViewTextBoxColumn9})
25
Me.Field_tableDataGridView.DataSource = Me.Field_tableBindingSource Me.Field_tableDataGridView.Location = New System.Drawing.Point(36, 329) Me.Field_tableDataGridView.Name = "Field_tableDataGridView" Me.Field_tableDataGridView.Size = New System.Drawing.Size(1084, 371) Me.Field_tableDataGridView.TabIndex = 19 ' 'DataGridViewTextBoxColumn1 ' Me.DataGridViewTextBoxColumn1.DataPropertyName = "Field ID" Me.DataGridViewTextBoxColumn1.HeaderText = "Field ID" Me.DataGridViewTextBoxColumn1.Name = "DataGridViewTextBoxColumn1" Me.DataGridViewTextBoxColumn1.ReadOnly = True ' 'DataGridViewTextBoxColumn2 ' Me.DataGridViewTextBoxColumn2.DataPropertyName = "Field Name" Me.DataGridViewTextBoxColumn2.HeaderText = "Field Name" Me.DataGridViewTextBoxColumn2.Name = "DataGridViewTextBoxColumn2" ' 'DataGridViewTextBoxColumn3 ' Me.DataGridViewTextBoxColumn3.DataPropertyName = "Acres" Me.DataGridViewTextBoxColumn3.HeaderText = "Acres" Me.DataGridViewTextBoxColumn3.Name = "DataGridViewTextBoxColumn3" ' 'DataGridViewTextBoxColumn4 ' Me.DataGridViewTextBoxColumn4.DataPropertyName = "Crop" Me.DataGridViewTextBoxColumn4.HeaderText = "Crop" Me.DataGridViewTextBoxColumn4.Name = "DataGridViewTextBoxColumn4" ' 'DataGridViewTextBoxColumn5 ' Me.DataGridViewTextBoxColumn5.DataPropertyName = "Seed Variety" Me.DataGridViewTextBoxColumn5.HeaderText = "Seed Variety" Me.DataGridViewTextBoxColumn5.Name = "DataGridViewTextBoxColumn5" ' 'DataGridViewTextBoxColumn6 ' Me.DataGridViewTextBoxColumn6.DataPropertyName = "Plant Date" Me.DataGridViewTextBoxColumn6.HeaderText = "Plant Date" Me.DataGridViewTextBoxColumn6.Name = "DataGridViewTextBoxColumn6" ' 'DataGridViewTextBoxColumn7 ' Me.DataGridViewTextBoxColumn7.DataPropertyName = "Watering Interval" Me.DataGridViewTextBoxColumn7.HeaderText = "Watering Interval" Me.DataGridViewTextBoxColumn7.Name = "DataGridViewTextBoxColumn7" ' 'DataGridViewTextBoxColumn8 ' Me.DataGridViewTextBoxColumn8.DataPropertyName = "Map" Me.DataGridViewTextBoxColumn8.HeaderText = "Map" Me.DataGridViewTextBoxColumn8.Name = "DataGridViewTextBoxColumn8" ' 'DataGridViewTextBoxColumn9 ' Me.DataGridViewTextBoxColumn9.DataPropertyName = "Lessor"

26
Me.DataGridViewTextBoxColumn9.HeaderText = "Lessor" Me.DataGridViewTextBoxColumn9.Name = "DataGridViewTextBoxColumn9" ' 'button_addnew ' Me.button_addnew.Location = New System.Drawing.Point(86, 287) Me.button_addnew.Name = "button_addnew" Me.button_addnew.Size = New System.Drawing.Size(113, 31) Me.button_addnew.TabIndex = 20 Me.button_addnew.Text = "Add New" Me.button_addnew.UseVisualStyleBackColor = True ' 'button_save ' Me.button_save.Location = New System.Drawing.Point(205, 287) Me.button_save.Name = "button_save" Me.button_save.Size = New System.Drawing.Size(113, 31) Me.button_save.TabIndex = 21 Me.button_save.Text = "Save" Me.button_save.UseVisualStyleBackColor = True ' 'button_remove ' Me.button_remove.Location = New System.Drawing.Point(324, 287) Me.button_remove.Name = "button_remove" Me.button_remove.Size = New System.Drawing.Size(113, 31) Me.button_remove.TabIndex = 22 Me.button_remove.Text = "Remove" Me.button_remove.UseVisualStyleBackColor = True ' 'Label1 ' Me.Label1.AutoSize = True Me.Label1.Location = New System.Drawing.Point(54, 713) Me.Label1.Name = "Label1" Me.Label1.Size = New System.Drawing.Size(0, 13) Me.Label1.TabIndex = 23 ' 'Timer1 ' Me.Timer1.Interval = 1 ' 'button_next ' Me.button_next.Location = New System.Drawing.Point(562, 287) Me.button_next.Name = "button_next" Me.button_next.Size = New System.Drawing.Size(113, 31) Me.button_next.TabIndex = 24 Me.button_next.Text = "Next" Me.button_next.UseVisualStyleBackColor = True ' 'button_previous ' Me.button_previous.Location = New System.Drawing.Point(443, 287) Me.button_previous.Name = "button_previous" Me.button_previous.Size = New System.Drawing.Size(113, 31) Me.button_previous.TabIndex = 25 Me.button_previous.Text = "Previous"
27
Me.button_previous.UseVisualStyleBackColor = True ' 'FieldToolStrip ' Me.FieldToolStrip.Items.AddRange(New System.Windows.Forms.ToolStripItem() {Me.FieldToolStripLabel, Me.FieldToolStripTextBox, Me.FieldToolStripButton}) Me.FieldToolStrip.Location = New System.Drawing.Point(0, 0) Me.FieldToolStrip.Name = "FieldToolStrip" Me.FieldToolStrip.Size = New System.Drawing.Size(1190, 25) Me.FieldToolStrip.TabIndex = 26 Me.FieldToolStrip.Text = "FieldToolStrip" ' 'FieldToolStripLabel ' Me.FieldToolStripLabel.Name = "FieldToolStripLabel" Me.FieldToolStripLabel.Size = New System.Drawing.Size(35, 22) Me.FieldToolStripLabel.Text = "Field:" ' 'FieldToolStripTextBox ' Me.FieldToolStripTextBox.Name = "FieldToolStripTextBox" Me.FieldToolStripTextBox.Size = New System.Drawing.Size(250, 25) ' 'FieldToolStripButton ' Me.FieldToolStripButton.DisplayStyle = System.Windows.Forms.ToolStripItemDisplayStyle.Text Me.FieldToolStripButton.Name = "FieldToolStripButton" Me.FieldToolStripButton.Size = New System.Drawing.Size(46, 22) Me.FieldToolStripButton.Text = "Search" ' 'Fields ' Me.AutoScaleDimensions = New System.Drawing.SizeF(6.0!, 13.0!) Me.AutoScaleMode = System.Windows.Forms.AutoScaleMode.Font Me.ClientSize = New System.Drawing.Size(1190, 817) Me.Controls.Add(Me.FieldToolStrip) Me.Controls.Add(Me.button_previous) Me.Controls.Add(Me.button_next) Me.Controls.Add(Me.Label1) Me.Controls.Add(Me.button_remove) Me.Controls.Add(Me.button_save) Me.Controls.Add(Me.button_addnew) Me.Controls.Add(Me.Field_tableDataGridView) Me.Controls.Add(Field_NameLabel) Me.Controls.Add(Me.Field_NameTextBox) Me.Controls.Add(AcresLabel) Me.Controls.Add(Me.AcresTextBox) Me.Controls.Add(CropLabel) Me.Controls.Add(Me.CropTextBox) Me.Controls.Add(Seed_VarietyLabel) Me.Controls.Add(Me.Seed_VarietyTextBox) Me.Controls.Add(Plant_DateLabel) Me.Controls.Add(Me.Plant_DateDateTimePicker) Me.Controls.Add(Watering_IntervalLabel) Me.Controls.Add(Me.Watering_IntervalTextBox) Me.Controls.Add(MapLabel) Me.Controls.Add(Me.MapTextBox)
28
Me.Controls.Add(LessorLabel) Me.Controls.Add(Me.LessorTextBox) Me.Name = "Fields" Me.Text = "Fields" CType(Me.Fields_databaseDataSet, System.ComponentModel.ISupportInitialize).EndInit() CType(Me.Field_tableBindingSource, System.ComponentModel.ISupportInitialize).EndInit() CType(Me.Field_tableDataGridView, System.ComponentModel.ISupportInitialize).EndInit() Me.FieldToolStrip.ResumeLayout(False) Me.FieldToolStrip.PerformLayout() Me.ResumeLayout(False) Me.PerformLayout() End Sub Friend WithEvents Fields_databaseDataSet As WindowsApplication1.fields_databaseDataSet Friend WithEvents Field_tableBindingSource As System.Windows.Forms.BindingSource Friend WithEvents Field_tableTableAdapter As WindowsApplication1.fields_databaseDataSetTableAdapters.field_tableTableAdapter Friend WithEvents TableAdapterManager As WindowsApplication1.fields_databaseDataSetTableAdapters.TableAdapterManager Friend WithEvents Field_NameTextBox As System.Windows.Forms.TextBox Friend WithEvents AcresTextBox As System.Windows.Forms.TextBox Friend WithEvents CropTextBox As System.Windows.Forms.TextBox Friend WithEvents Seed_VarietyTextBox As System.Windows.Forms.TextBox Friend WithEvents Plant_DateDateTimePicker As System.Windows.Forms.DateTimePicker Friend WithEvents Watering_IntervalTextBox As System.Windows.Forms.TextBox Friend WithEvents MapTextBox As System.Windows.Forms.TextBox Friend WithEvents LessorTextBox As System.Windows.Forms.TextBox Friend WithEvents Field_tableDataGridView As System.Windows.Forms.DataGridView Friend WithEvents DataGridViewTextBoxColumn1 As System.Windows.Forms.DataGridViewTextBoxColumn Friend WithEvents DataGridViewTextBoxColumn2 As System.Windows.Forms.DataGridViewTextBoxColumn Friend WithEvents DataGridViewTextBoxColumn3 As System.Windows.Forms.DataGridViewTextBoxColumn Friend WithEvents DataGridViewTextBoxColumn4 As System.Windows.Forms.DataGridViewTextBoxColumn Friend WithEvents DataGridViewTextBoxColumn5 As System.Windows.Forms.DataGridViewTextBoxColumn Friend WithEvents DataGridViewTextBoxColumn6 As System.Windows.Forms.DataGridViewTextBoxColumn Friend WithEvents DataGridViewTextBoxColumn7 As System.Windows.Forms.DataGridViewTextBoxColumn Friend WithEvents DataGridViewTextBoxColumn8 As System.Windows.Forms.DataGridViewTextBoxColumn Friend WithEvents DataGridViewTextBoxColumn9 As System.Windows.Forms.DataGridViewTextBoxColumn Friend WithEvents button_addnew As System.Windows.Forms.Button Friend WithEvents button_save As System.Windows.Forms.Button Friend WithEvents button_remove As System.Windows.Forms.Button Friend WithEvents Label1 As System.Windows.Forms.Label Friend WithEvents Timer1 As System.Windows.Forms.Timer Friend WithEvents button_next As System.Windows.Forms.Button
29
Friend WithEvents button_previous As System.Windows.Forms.Button Friend WithEvents FieldToolStrip As System.Windows.Forms.ToolStrip Friend WithEvents FieldToolStripLabel As System.Windows.Forms.ToolStripLabel Friend WithEvents FieldToolStripTextBox As System.Windows.Forms.ToolStripTextBox Friend WithEvents FieldToolStripButton As System.Windows.Forms.ToolStripButton End Class
Source code for Scheduling screen:
<Global.Microsoft.VisualBasic.CompilerServices.DesignerGenerated()> _ Partial Class calendar Inherits System.Windows.Forms.Form <System.Diagnostics.DebuggerNonUserCode()> _ Protected Overrides Sub Dispose(ByVal disposing As Boolean) Try If disposing AndAlso components IsNot Nothing Then components.Dispose() End If Finally MyBase.Dispose(disposing) End Try End Sub Private components As System.ComponentModel.IContainer <System.Diagnostics.DebuggerStepThrough()> _ Private Sub InitializeComponent() Me.MonthCalendar1 = New System.Windows.Forms.MonthCalendar() Me.button_back = New System.Windows.Forms.Button() Me.button_save = New System.Windows.Forms.Button() Me.TextBox1 = New System.Windows.Forms.TextBox() Me.SuspendLayout() ' 'MonthCalendar1 ' Me.MonthCalendar1.Location = New System.Drawing.Point(100, 93) Me.MonthCalendar1.Name = "MonthCalendar1" Me.MonthCalendar1.TabIndex = 0 ' 'button_back ' Me.button_back.Location = New System.Drawing.Point(222, 267) Me.button_back.Name = "button_back" Me.button_back.Size = New System.Drawing.Size(105, 22) Me.button_back.TabIndex = 1 Me.button_back.Text = "Back" Me.button_back.UseVisualStyleBackColor = True Me.button_back.Visible = False ' 'button_save ' Me.button_save.Location = New System.Drawing.Point(101, 267) Me.button_save.Name = "button_save"
30
Me.button_save.Size = New System.Drawing.Size(105, 22) Me.button_save.TabIndex = 2 Me.button_save.Text = "Save" Me.button_save.UseVisualStyleBackColor = True Me.button_save.Visible = False ' 'TextBox1 ' Me.TextBox1.Location = New System.Drawing.Point(101, 93) Me.TextBox1.Multiline = True Me.TextBox1.Name = "TextBox1" Me.TextBox1.ScrollBars = System.Windows.Forms.ScrollBars.Vertical Me.TextBox1.Size = New System.Drawing.Size(226, 162) Me.TextBox1.TabIndex = 3 Me.TextBox1.Visible = False ' 'calendar ' Me.AutoScaleDimensions = New System.Drawing.SizeF(6.0!, 13.0!) Me.AutoScaleMode = System.Windows.Forms.AutoScaleMode.Font Me.ClientSize = New System.Drawing.Size(504, 397) Me.Controls.Add(Me.TextBox1) Me.Controls.Add(Me.button_save) Me.Controls.Add(Me.button_back) Me.Controls.Add(Me.MonthCalendar1) Me.Name = "calendar" Me.Text = "Schedule" Me.ResumeLayout(False) Me.PerformLayout() End Sub Friend WithEvents MonthCalendar1 As System.Windows.Forms.MonthCalendar Friend WithEvents button_back As System.Windows.Forms.Button Friend WithEvents button_save As System.Windows.Forms.Button Friend WithEvents TextBox1 As System.Windows.Forms.TextBox End Class

31
APPENDIX B
PROJECT SCREEN SHOTS
32
Irrigation Management home
screen.
Fields page and datagrid view
33
Schedule Page Irrigation event notification.
Schedule Page Calendar View
34
Schedule Page event creation notification
Schedule Page event view

35
APPENDIX C
HOW PROJECT MEETS REQUIREMENTS FOR THE BRAE MAJOR
36
HOW PROJECT MEETS REQUIREMENTS FOR THE BRAE MAJOR
Major Design Experience
The BRAE senior project must incorporate a major design experience. Design is the
process of devising a system, component, or process to meet specific needs. The design
process typically includes fundamental elements as outlined below. This project
addresses these issues as follows.
Establishment of Objectives and Criteria. Project Objectives and criteria are
established to meet the needs and expectations of the Imperial Valley farmer.
Synthesis and Analysis. The program will incorporate irrigation scheduling techniques,
economics, fertilizer application and irrigator management.
Construction, Testing and Evaluation. The computer program will be designed,
engineered, tested, and evaluated.
Incorporation of Applicable Engineering Standards. The program will help the
farmer report where his water is being used to the State Water Resources Control Board.
Capstone Design Experience
The BRAE senior project is an engineering design project based on the knowledge and
skills acquired in earlier coursework (Major, Support and/or GE courses). This project
incorporates knowledge/ skills from these key courses.
BRAE 236 Principles of Irrigation
BRAE 239 Engineering Surveying
BRAE 331 Irrigation Theory
BRAE 403 Engineering Econ
BRAE 414 Irrigation Design
CSC 231 Computer Programming for Engineers
ENGL 149 Technical Writing
Design Parameters and Constraints
This project addresses a significant number of the categories of constraints listed below.
Physical. The program will be run on any windows based computer of the farmer’s
choice.
Economic. The program will increase the accuracy of cost analysis per acre for the water
inputs, and will allow the farmer to compare his estimated water usage to the water bill
from the district.
37
Environmental. The program will reduce the environmental footprint by significantly
reducing the amount of paper used on a daily basis by introducing the use of electronic
data storage.
Sustainability. n/a
Manufacturability. The program will be created with Microsoft Visual Studio 2010,
any farmer will be able to open the program on a windows based computer and
immediately begin entering data. The program will be circulated through the use of a
Compact Disc.
Ethical. N/A
Social. N/A
Political. In a time where water is becoming more and more precious every day, a
farmer will be able to effectively show when, where, and how much water he put on each
field.
Aesthetic. The program will be aesthetically pleasing to the farmer.
Other - Productivity. The program must have the capability of effectively organizing
the inputted information in such a way that quick and easy for the farmer to access, edit,
or create reports.