photography assignment 3 the rule of...
TRANSCRIPT
Photography Assignment 3 The Rule of Thirds
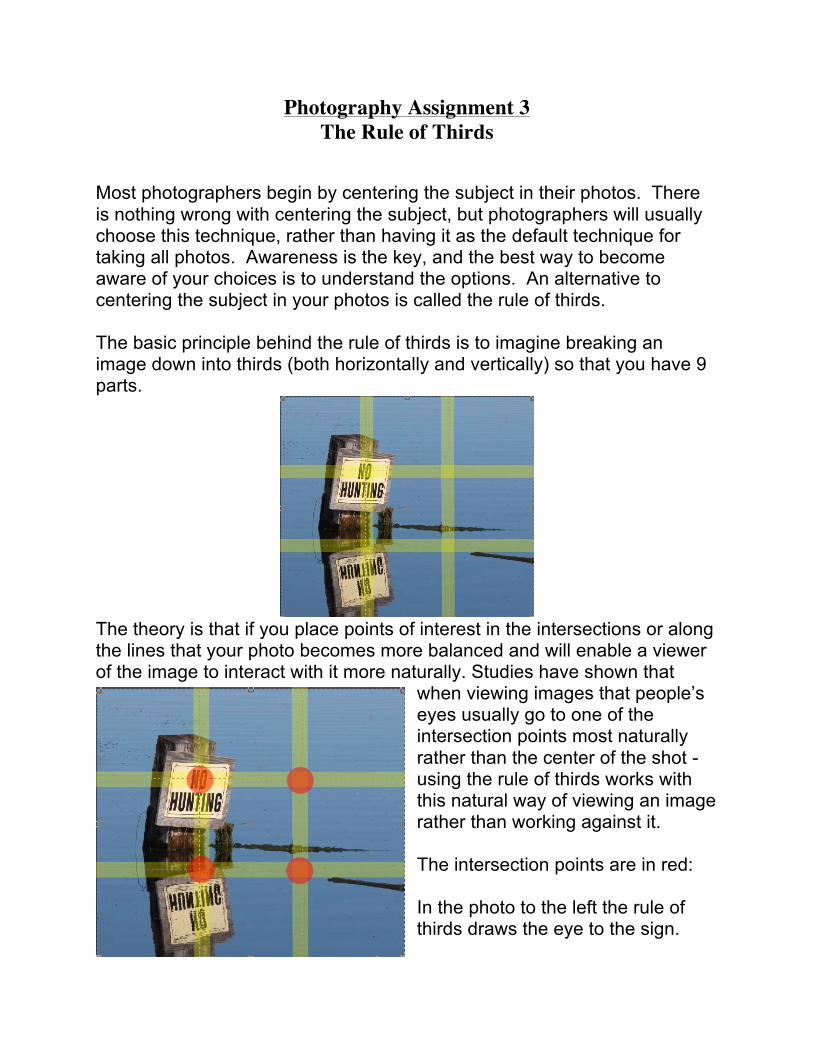
Most photographers begin by centering the subject in their photos. There is nothing wrong with centering the subject, but photographers will usually choose this technique, rather than having it as the default technique for taking all photos. Awareness is the key, and the best way to become aware of your choices is to understand the options. An alternative to centering the subject in your photos is called the rule of thirds. The basic principle behind the rule of thirds is to imagine breaking an image down into thirds (both horizontally and vertically) so that you have 9 parts.
The theory is that if you place points of interest in the intersections or along the lines that your photo becomes more balanced and will enable a viewer of the image to interact with it more naturally. Studies have shown that
when viewing images that people’s eyes usually go to one of the intersection points most naturally rather than the center of the shot - using the rule of thirds works with this natural way of viewing an image rather than working against it. The intersection points are in red:
In the photo to the left the rule of thirds draws the eye to the sign.

How do you take a rule of thirds photo? There are two basic ways to take a rule of thirds photo. The first is the traditional way, which means lining up your subject into your rule of thirds grid when taking your photo. Most recent cameras help you do this by providing a display grid on the camera.
You can usually find this feature in your Menu options in your camera.

The second way to create a rule of thirds photo is by using photo editing software, such as Photoshop, after you’ve taken your photos. The crop tool in the newer Photoshop versions has a rule of thirds overlay which helps you create a rule of thirds photo. The photo below is shown being cropped with the rule of thirds overlay in Photoshop. In this case, both the original photo and the cropped photo would follow the rule of thirds.
(continued…)

By cropping your photo with photo editing software one is able to take a centered photo like the one above, and make it look like the one below using the rule of thirds.
Your assignment: Your assignment is to apply the information that you’ve learned about the rule of thirds, and take 15 of your own rule of thirds photos. Do not use old photos that you have previously taken. Think about the point or points of interest in your photo, and where you’re placing them in order to take the most interesting photos. You will then be choosing 7 of your BEST images to put into the RofT document to turn in to be graded.