sharing your media library with roxio streamer
TRANSCRIPT
Sharing Your Media Library with Roxio StreamerWant to access your media !les anywhere? We all have more media !les than ever, and more devices to enjoy them on. But the need to copy these !les multiple places in order to play them can become a chore. Now, you don't have to! With Roxio Streamer, you simply copy your media !les to special folders on your hard disk. From there, you can then access and play them anywhere you can connect to the Web — in the living room, the office or the airport. You can play your music while you work, watch a video in your hotel room, or play a slideshow for the friends you are visiting. You’ll always have your media at hand.
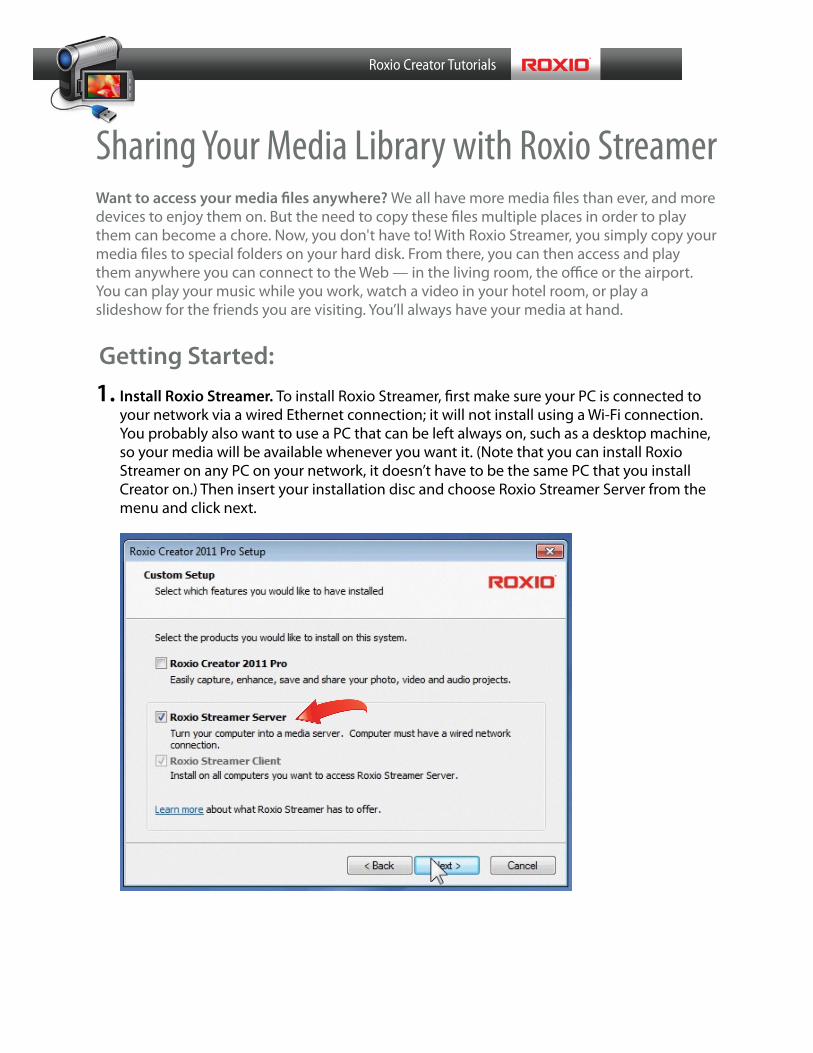
Getting Started: 1. Install Roxio Streamer. To install Roxio Streamer, !rst make sure your PC is connected to
your network via a wired Ethernet connection; it will not install using a Wi-Fi connection. You probably also want to use a PC that can be left always on, such as a desktop machine, so your media will be available whenever you want it. (Note that you can install Roxio Streamer on any PC on your network, it doesn’t have to be the same PC that you install Creator on.) Then insert your installation disc and choose Roxio Streamer Server from the menu and click next.
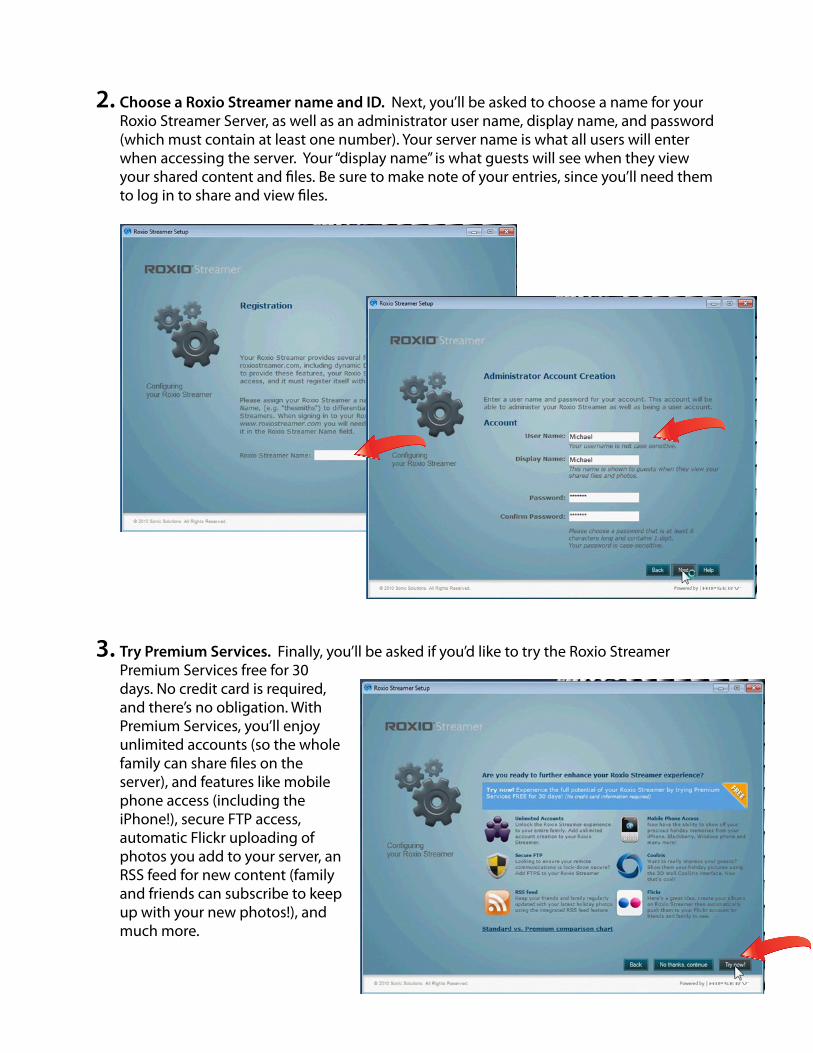
2. Choose a Roxio Streamer name and ID. Next, you’ll be asked to choose a name for your Roxio Streamer Server, as well as an administrator user name, display name, and password (which must contain at least one number). Your server name is what all users will enter when accessing the server. Your “display name” is what guests will see when they view your shared content and !les. Be sure to make note of your entries, since you’ll need them to log in to share and view !les.
3. Try Premium Services. Finally, you’ll be asked if you’d like to try the Roxio Streamer Premium Services free for 30 days. No credit card is required, and there’s no obligation. With Premium Services, you’ll enjoy unlimited accounts (so the whole family can share !les on the server), and features like mobile phone access (including the iPhone!), secure FTP access, automatic Flickr uploading of photos you add to your server, an RSS feed for new content (family and friends can subscribe to keep up with your new photos!), and much more.
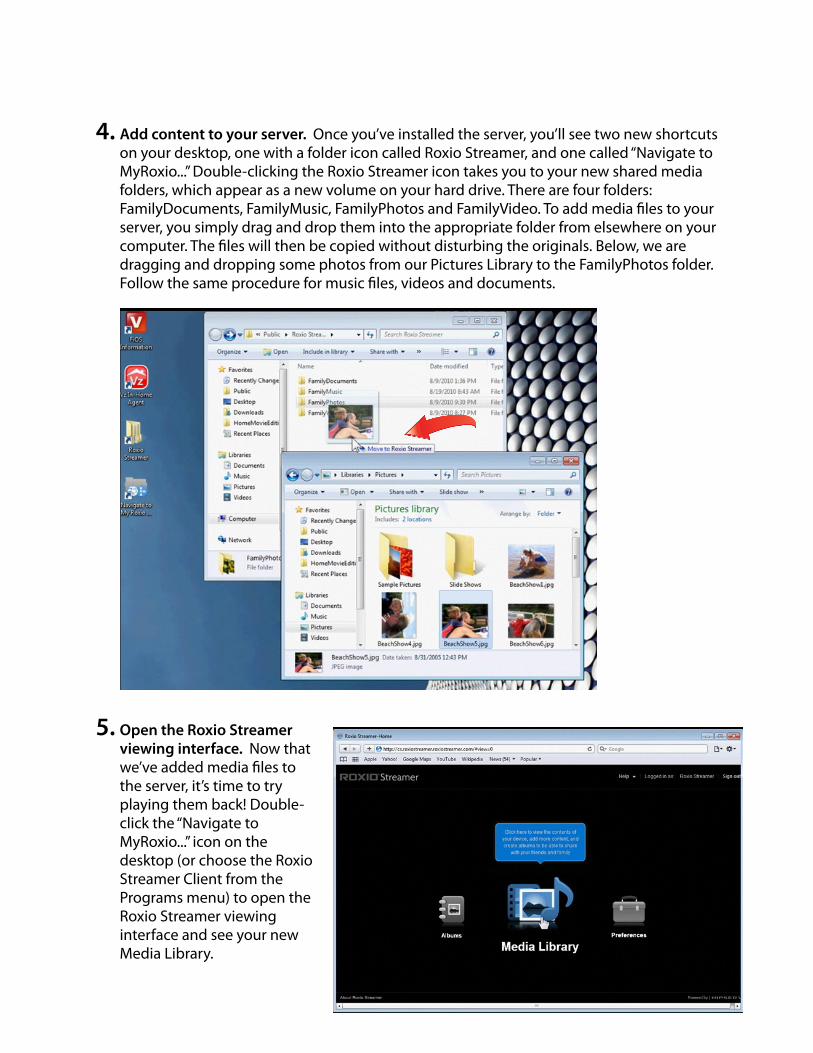
4. Add content to your server. Once you’ve installed the server, you’ll see two new shortcuts on your desktop, one with a folder icon called Roxio Streamer, and one called “Navigate to MyRoxio...” Double-clicking the Roxio Streamer icon takes you to your new shared media folders, which appear as a new volume on your hard drive. There are four folders: FamilyDocuments, FamilyMusic, FamilyPhotos and FamilyVideo. To add media !les to your server, you simply drag and drop them into the appropriate folder from elsewhere on your computer. The !les will then be copied without disturbing the originals. Below, we are dragging and dropping some photos from our Pictures Library to the FamilyPhotos folder. Follow the same procedure for music !les, videos and documents.
5. Open the Roxio Streamer viewing interface. Now that we’ve added media !les to the server, it’s time to try playing them back! Double-click the “Navigate to MyRoxio...” icon on the desktop (or choose the Roxio Streamer Client from the Programs menu) to open the Roxio Streamer viewing interface and see your new Media Library.
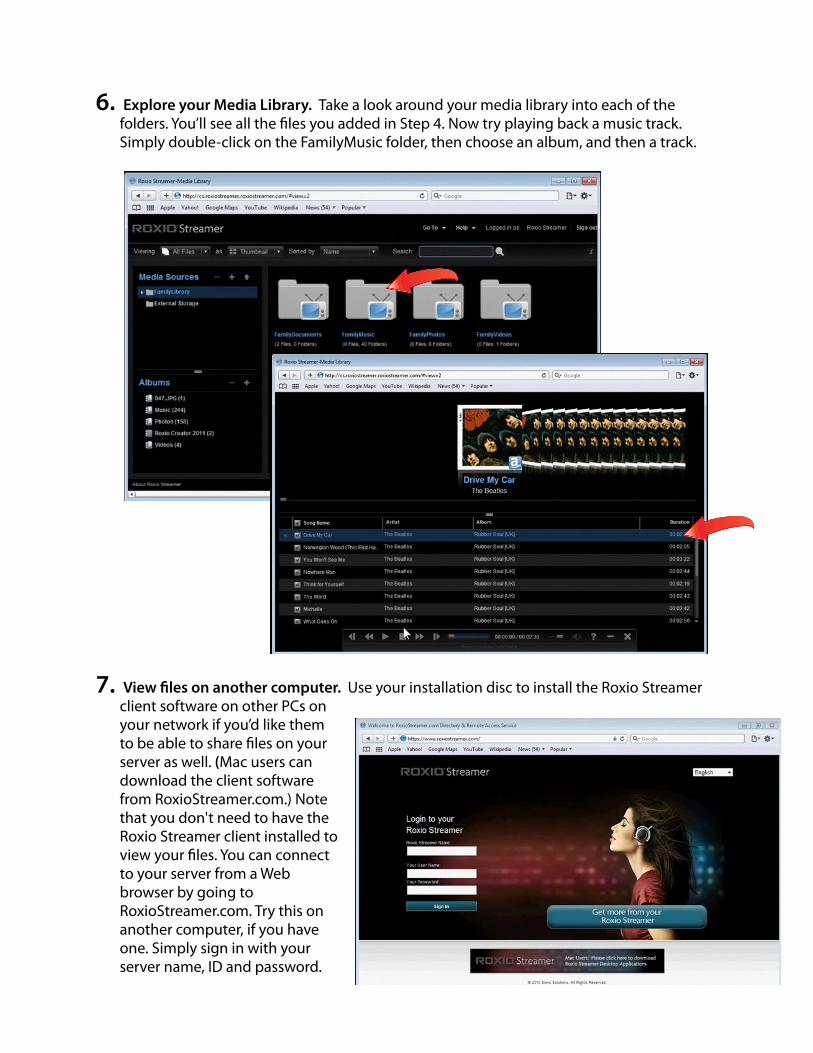
6. Explore your Media Library. Take a look around your media library into each of the folders. You’ll see all the !les you added in Step 4. Now try playing back a music track. Simply double-click on the FamilyMusic folder, then choose an album, and then a track.
7. View !les on another computer. Use your installation disc to install the Roxio Streamer client software on other PCs on your network if you’d like them to be able to share !les on your server as well. (Mac users can download the client software from RoxioStreamer.com.) Note that you don't need to have the Roxio Streamer client installed to view your !les. You can connect to your server from a Web browser by going to RoxioStreamer.com. Try this on another computer, if you have one. Simply sign in with your server name, ID and password.
8. View !les on your big-screen TV. You can also access your media directly on your big-screen TV if you have a PS3, or a TV or DVD player that supports DLNA. Many new models have DLNA. See the intructions that came with your player for how to view your !les.
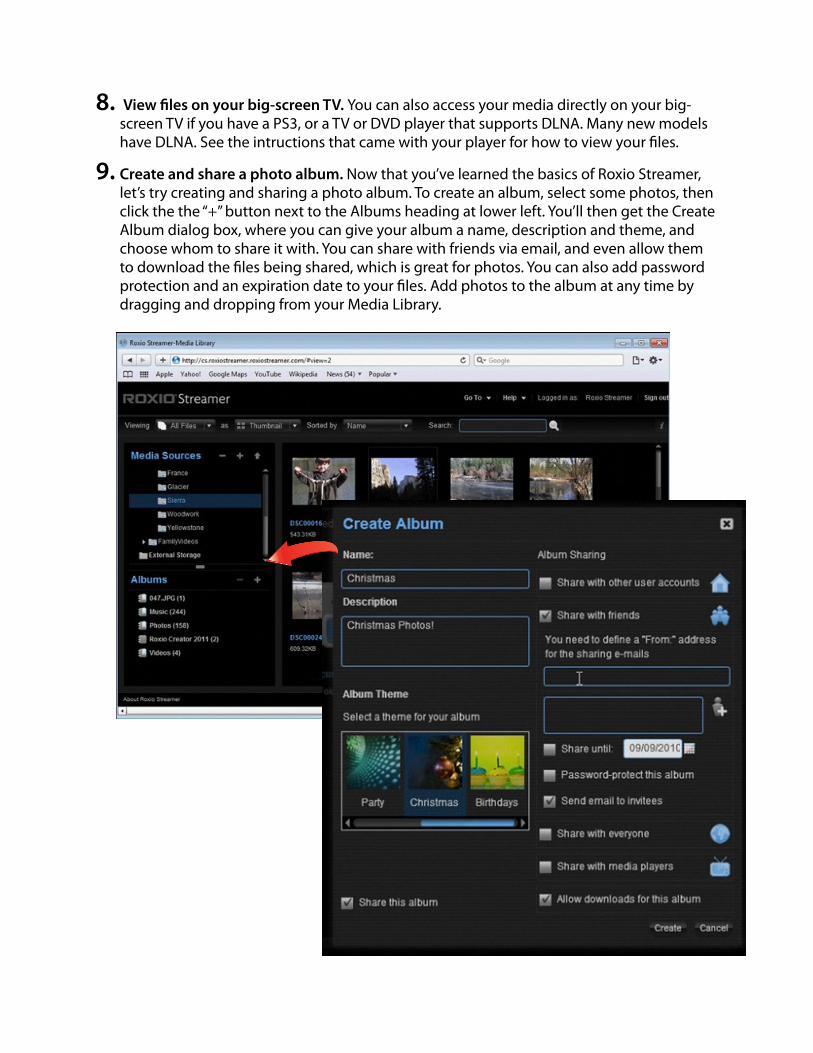
9. Create and share a photo album. Now that you’ve learned the basics of Roxio Streamer, let’s try creating and sharing a photo album. To create an album, select some photos, then click the the “+” button next to the Albums heading at lower left. You’ll then get the Create Album dialog box, where you can give your album a name, description and theme, and choose whom to share it with. You can share with friends via email, and even allow them to download the !les being shared, which is great for photos. You can also add password protection and an expiration date to your !les. Add photos to the album at any time by dragging and dropping from your Media Library.
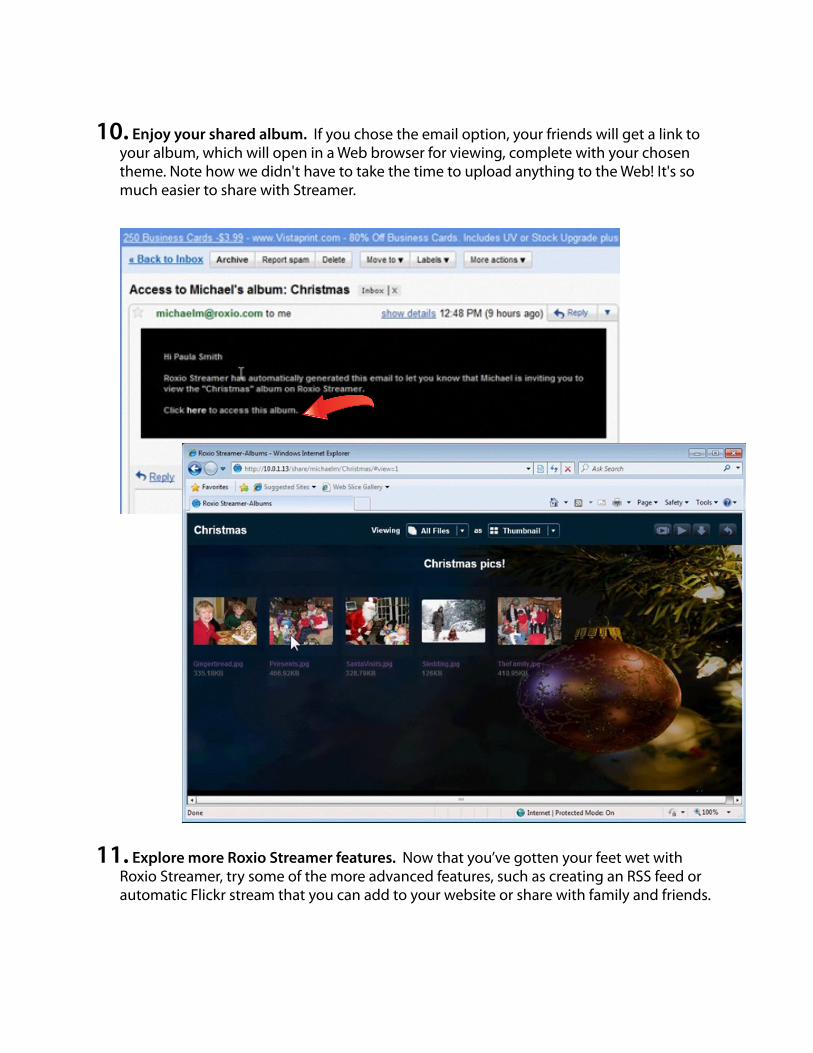
10. Enjoy your shared album. If you chose the email option, your friends will get a link to your album, which will open in a Web browser for viewing, complete with your chosen theme. Note how we didn't have to take the time to upload anything to the Web! It's so much easier to share with Streamer.
11. Explore more Roxio Streamer features. Now that you’ve gotten your feet wet with Roxio Streamer, try some of the more advanced features, such as creating an RSS feed or automatic Flickr stream that you can add to your website or share with family and friends.