training course prospectus - solidapps.co.uk
TRANSCRIPT
www.solidapps.co.uk
Tel: +44 (0) 121 544 1400 SOLID Applications Limited | Old Market Place | Market Street | Oldbury | West Midlands | B69 4DH
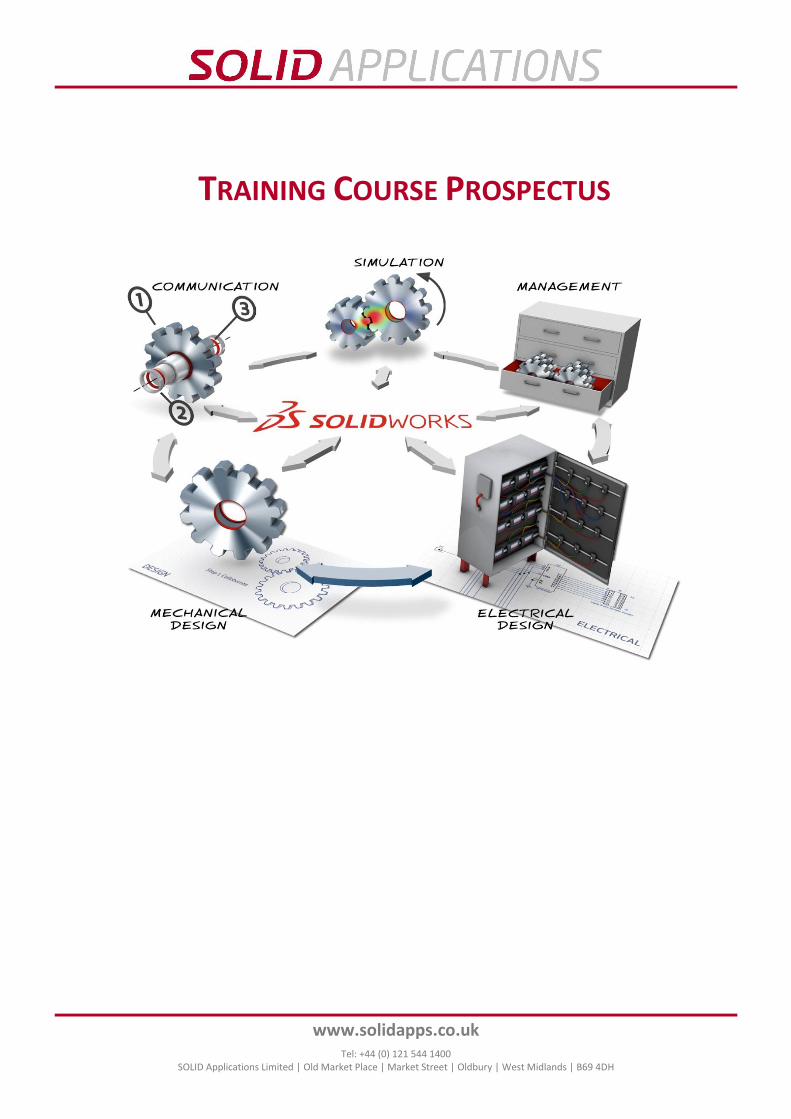
TRAINING COURSE PROSPECTUS
Training Course Prospectus
Page 2 of 82 Revision 17
Training Course Prospectus
Revision 17 Page 3 of 82
Contents Introduction .................................................................................................................................................................. 5 Training Details ............................................................................................................................................................. 6 Training Course Costs ................................................................................................................................................... 7 Training Grants ............................................................................................................................................................. 8
SOLIDWORKS Courses .............................................................................................................................................. 9 SOLIDWORKS Transition ...................................................................................................................................... 9 SOLIDWORKS Essentials ..................................................................................................................................... 11 SOLIDWORKS New Version Update Training ..................................................................................................... 15 SOLIDWORKS Drawings ...................................................................................................................................... 17 SOLIDWORKS Assembly Modelling .................................................................................................................... 19 SOLIDWORKS Advanced Part Modelling ............................................................................................................ 23 SOLIDWORKS Surface Modelling ....................................................................................................................... 27 SOLIDWORKS Mould Design .............................................................................................................................. 29 SOLIDWORKS Sheet Metal ................................................................................................................................. 33 SOLIDWORKS Weldments .................................................................................................................................. 37 SOLIDWORKS Routing – Electrical ...................................................................................................................... 39 SOLIDWORKS Routing – Piping and Tubing ....................................................................................................... 41 SOLIDWORKS File Management ........................................................................................................................ 43 SOLIDWORKS API Fundamentals ....................................................................................................................... 45
SOLIDWORKS Electrical Courses ............................................................................................................................. 47 SOLIDWORKS Electrical Schematic .................................................................................................................... 47 SOLIDWORKS Electrical 3D ................................................................................................................................. 49
SOLIDWORKS Simulation Courses .......................................................................................................................... 51 SOLIDWORKS Plastics Professional .................................................................................................................... 51 SOLIDWORKS Plastics Premium ......................................................................................................................... 53 SOLIDWORKS Simulation ................................................................................................................................... 56 SOLIDWORKS Simulation Professional ............................................................................................................... 60
SOLIDWORKS PDM Courses ................................................................................................................................... 62 Using SOLIDWORKS PDM Professional .............................................................................................................. 62 Administering SOLIDWORKS PDM Professional ................................................................................................ 64 Administering SOLIDWORKS PDM Standard ...................................................................................................... 66
SOLIDWORKS Workgroup PDM Courses ................................................................................................................ 68 SOLIDWORKS Workgroup PDM Contributor...................................................................................................... 68 SOLIDWORKS Workgroup PDM CAD Editor ....................................................................................................... 70 Administering SOLIDWORKS Workgroup PDM .................................................................................................. 72
SOLIDWORKS Composer Courses ........................................................................................................................... 74 Using SOLIDWORKS Composer .......................................................................................................................... 74
KeyShot Courses ..................................................................................................................................................... 78 KeyShot Training ................................................................................................................................................ 78
Registration Procedure ............................................................................................................................................... 80 Fees and Invoicing ...................................................................................................................................................... 80 Terms and Conditions ................................................................................................................................................. 80 Cancellation Terms ..................................................................................................................................................... 80 Training Course Registration Form ............................................................................................................................. 81

Training Course Prospectus
Page 4 of 82 Revision 17
Training Course Prospectus
Revision 17 Page 5 of 82
Introduction As a SOLID Applications Ltd customer, your design system can and will make a significant contribution towards increased efficiency and productivity. Effective training of all personnel involved with the system is a key factor in obtaining the maximum return on your investment. By continuing to invest in high quality, relevant training for your personnel you will:
Ensure that your organisation gains the optimum benefit from your system
Maximise users personal productivity through in-depth knowledge of system functionality
Enhance your business operation through innovative and effective system usage
Identify scope for system applications that may not have been part of the initial justification for your investment
Deliver personal satisfaction and motivation to system users through increased skills and expertise. It is our aim at SOLID Applications Ltd to assist you in achieving these goals through the provision of purpose-developed, specialised training courses designed to enhance the skill and expertise of your system users and to maximise the benefit you gain from your investment in a SOLID Applications Ltd solution. All SOLID Applications Ltd training courses are structured so that your staff may learn not only the theoretical but also the practical aspects of system usage. SOLID Applications Ltd is able to provide training of the necessary high quality because:
We listen to the needs of our customers and gain an understanding of your business and training needs so that training courses are relevant and develop effective skills
We are able to respond to changing market demands
Our instructors are highly professional, experienced tutors who are fully aware of product capabilities and how these may best be applied to meet your business needs
Our training courses are designed to require total delegate participation in a distraction free training environment, conducive to effective learning.
Should you need further details about any of the courses outlined in this document, require assistance identifying the most appropriate courses to meet your training needs, or need any help in developing your training programme please contact us.
Training Course Prospectus
Page 6 of 82 Revision 17
Training Details Courses are scheduled on demand and the frequency of any course will reflect that demand. Therefore, although a course you desire may not be included in the current schedule, please do call and enquire about the course. If sufficient demand is shown then a course will be scheduled. Training courses are to pre-set formats and each is designed to train delegates in specific aspects of the product as outlined in this prospectus. Please check the pre-requisites of the course before you enrol delegates. Although specific SOLID Applications Ltd courses may be stated as having pre-requisites, delegates may have attained the required background via other channels. It is the delegates' responsibility to ensure that they have the required knowledge for a course before enrolling. If you have any queries regarding course pre-requisites we will be pleased to advise you. Training at our site:
All courses are conducted at SOLID Applications Ltd’s fully equipped training rooms with dedicated
facilities.
On the first day of the course, delegates should report to the reception area for registration at 9.15am.
Delegates are requested to arrive promptly and a map will be sent showing the location of our Oldbury
Training Centre when course bookings are confirmed.
Classes are conducted from 9.30am to 5.00pm each day with a break of approximately one hour for
lunch. Lunch is provided each day of the training.
Delegates are responsible for all personal expenses such as travel, accommodation and evening meals.
Lunch will be provided each day. Details of local accommodation will be provided with confirmation of
your booking.
Courses include classroom lecture, demonstration and supervised "hands on" exercises.
Training course manuals will be provided per workstation/laptop for use whilst on the course.
Training at your site:
The customer is responsible for providing a suitable training room, white-board, and projector.
Unless specified, the customer is responsible for providing a suitable training workstations/laptops with
the appropriate software installed and licensed.
If SOLID Applications Ltd provides training workstations/laptops, the customer is responsible for securely
storing them during non-training periods such as breaks or overnight, with the appropriate insurance in
place.
Classes can be conducted to start/end based on the customer’s normal working hours each day, with a
break of approximately one hour for lunch (subject to confirmation).
It is assumed that the customer will provide lunches each day of the training.
For standard courses, manuals will be provided per workstation/laptop for use whilst on the course.
Training Course Prospectus
Revision 17 Page 7 of 82
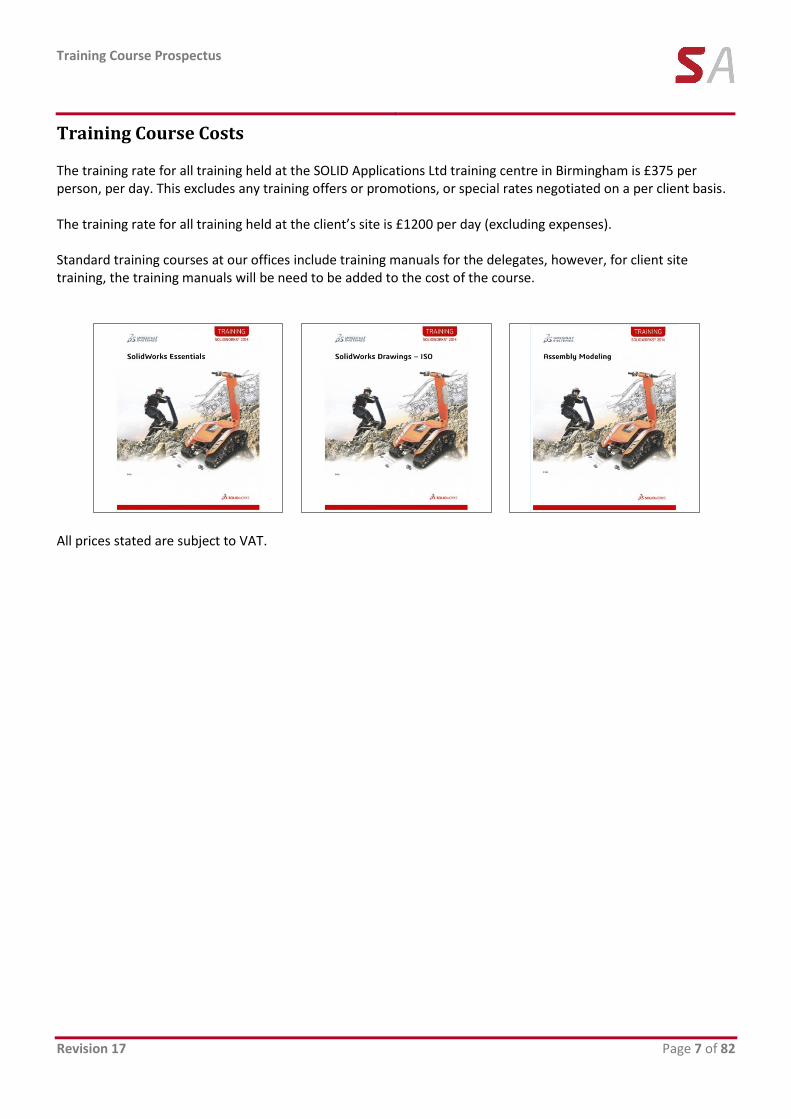
Training Course Costs The training rate for all training held at the SOLID Applications Ltd training centre in Birmingham is £375 per person, per day. This excludes any training offers or promotions, or special rates negotiated on a per client basis. The training rate for all training held at the client’s site is £1200 per day (excluding expenses). Standard training courses at our offices include training manuals for the delegates, however, for client site training, the training manuals will be need to be added to the cost of the course.
All prices stated are subject to VAT.

Training Course Prospectus
Page 8 of 82 Revision 17
Training Grants SOLID Applications Ltd works with an impartial training broker who liaise closely with Train to Gain, Skills Funding Agency, European Social Funding, Manufacturing Advisory Services, Individual Regional Grant Funds and a variety of individual awarding bodies to distribute relevant training grants within ALL sectors nationally. An example of some of the sectors that have had specialist grants are the Engineering, Manufacturing, Energy Related, Hi-tech, Automotive, Design, Architectural, Creative, Pharmaceutical and Construction industries and sectors (this list is not restrictive or exhaustive). These Grants can really help elevate your business, staff and products as well as safe guard jobs and boost your company’s image and output. Grants change very frequently, and can be for Match funding, Training for Leaders, Managers and Key/Principle decision makers, and also Business Critical Training. The funding is dependent on the region of the UK you are in; If you would like to check if you are eligible for any funding, please contact us. Please be aware this is a FREE NO OBLIGATION SERVICE to check eligibility, and in most cases the application process is also free or on a no win no fee basis.
Training Course Prospectus
Revision 17 Page 9 of 82
SOLIDWORKS Courses
SOLIDWORKS Transition Code: SA-SWT Duration: 1 Day Cost: £375 per person Prerequisites: Solid Edge experience Description: The aim of the course is to seamlessly transition existing Solid Edge users to
SOLIDWORKS, ensuring minimal disruption to current working practices. This course will train the users the most commonly used tools to create some basic part components, to be then used in the assembly environment to create a finished product. This product will then be taken into the drafting environment to produce a detailed production drawing.
The topics covered in this course are:
Generic User Interface
Part Modelling
Assembly modelling
Drafting
Lesson 1: SOLIDWORKS user interface
Overview of the user interface
Opening files
Part and Sheet Metal environment
Basic settings
Options to speed up your workflows
Lesson 2: Introduction to Part Modelling
Planes Manipulating FeatureManager Design Tree to access reference planes
Use of design panes
Sketching Variants to create a sketch
Solid Edge similarity settings
Centre line and construction lines
Trim command
Constraining sketches
Aligning to origin/planes
Sketch dimensioning
Sketch relationships
Part Modelling features Solid from existing sketch
Solid from feature selection
Solid from instant 3D
Editing sketches
Instant 3D edit
Solid from open profiles
Training Course Prospectus
Page 10 of 82 Revision 17
Hole command
Fillet command and fillet expert
Draft command
Revolve base /cut
Sheet Metal Modelling features Tabs
Flanges
Holes and Cutouts
Flat pattern
Convert to sheet metal
Lesson 3: SOLIDWORKS basic Assembly Modelling
Insert components
Mates/smart mates
Movement
Planar align with angle
Lesson 4: SOLIDWORKS Drawings
Importing items – from environment or folder structure
Creating views
Sectioning and detail views
Dimensioning
Parts list and ballooning
Lesson 5: Data Migration
Feature Recogniser
Strategy for migrations
Training Course Prospectus
Revision 17 Page 11 of 82
SOLIDWORKS Essentials Code: SA-TR40 Duration: 4 Days Cost: £1500 per person (includes course manual) Prerequisites: Mechanical design experience; experience with the Windows™ operating system Description: SOLIDWORKS Essentials teaches you how to use the SOLIDWORKS mechanical design
automation software to build parametric models of parts and assemblies, and how to make drawings of those parts and assemblies.
The topics covered in this course are:
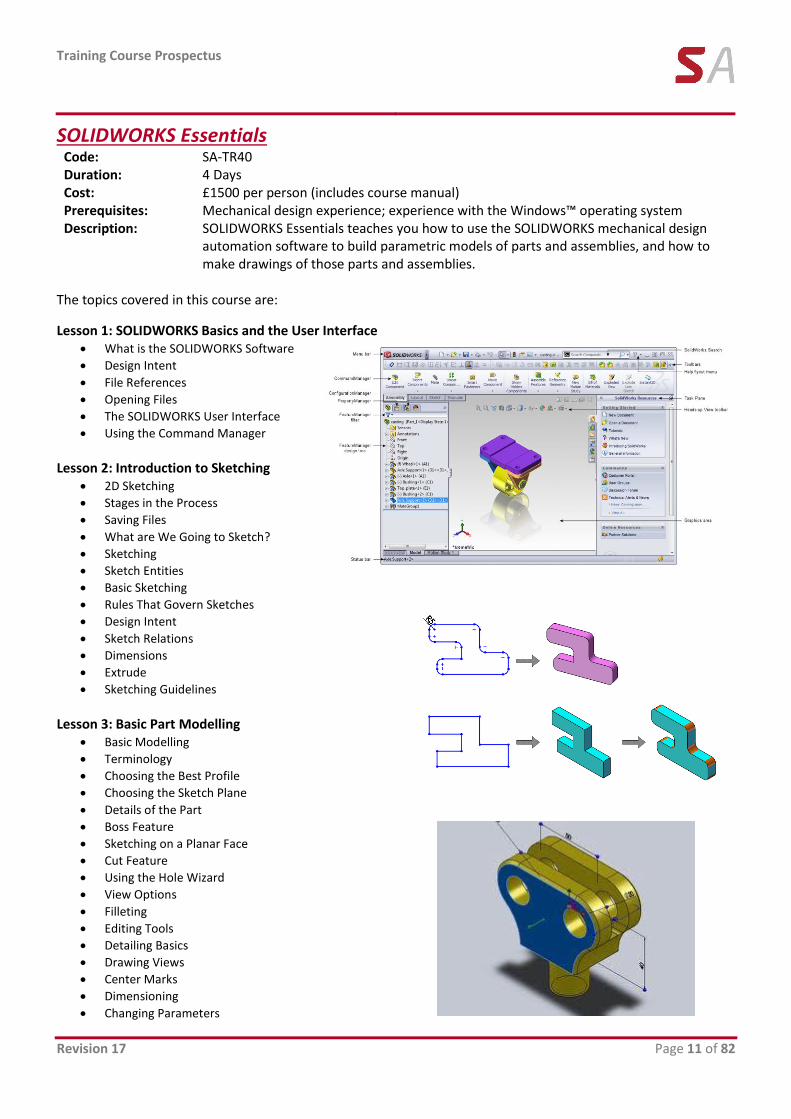
Lesson 1: SOLIDWORKS Basics and the User Interface What is the SOLIDWORKS Software
Design Intent
File References
Opening Files
The SOLIDWORKS User Interface
Using the Command Manager
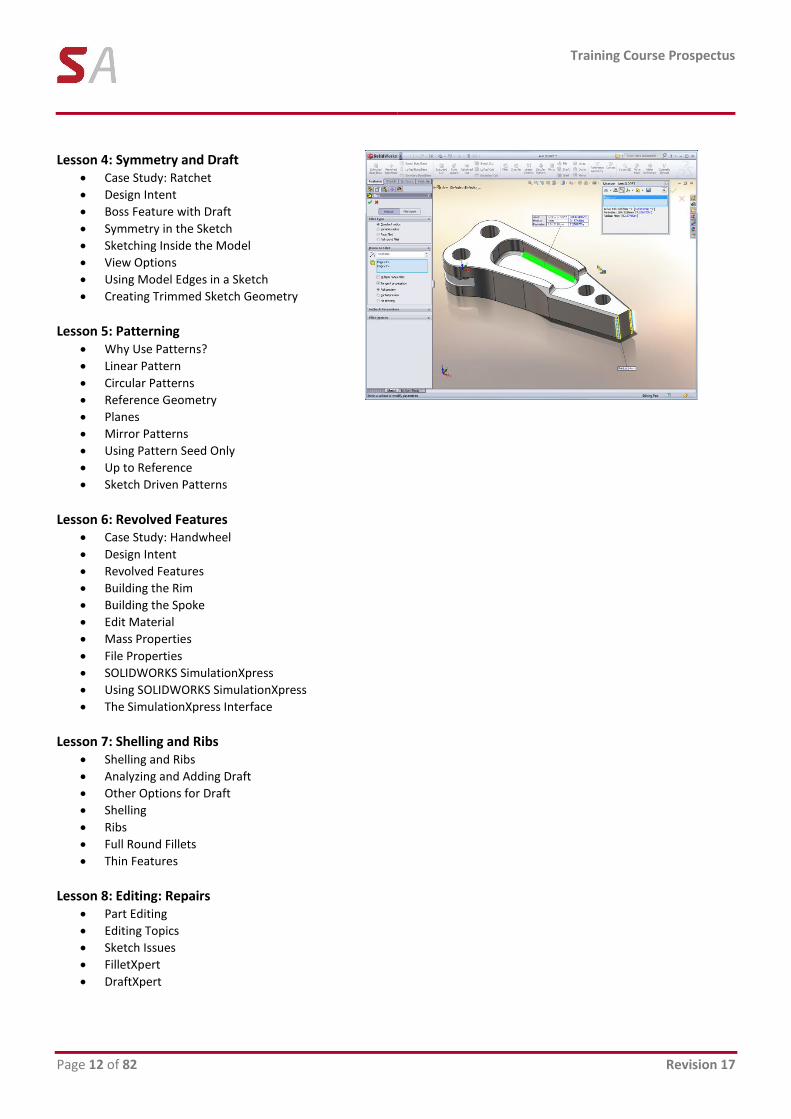
Lesson 2: Introduction to Sketching
2D Sketching
Stages in the Process
Saving Files
What are We Going to Sketch?
Sketching
Sketch Entities
Basic Sketching
Rules That Govern Sketches
Design Intent
Sketch Relations
Dimensions
Extrude
Sketching Guidelines
Lesson 3: Basic Part Modelling
Basic Modelling
Terminology
Choosing the Best Profile
Choosing the Sketch Plane
Details of the Part
Boss Feature
Sketching on a Planar Face
Cut Feature
Using the Hole Wizard
View Options
Filleting
Editing Tools
Detailing Basics
Drawing Views
Center Marks
Dimensioning
Changing Parameters
Training Course Prospectus
Page 12 of 82 Revision 17
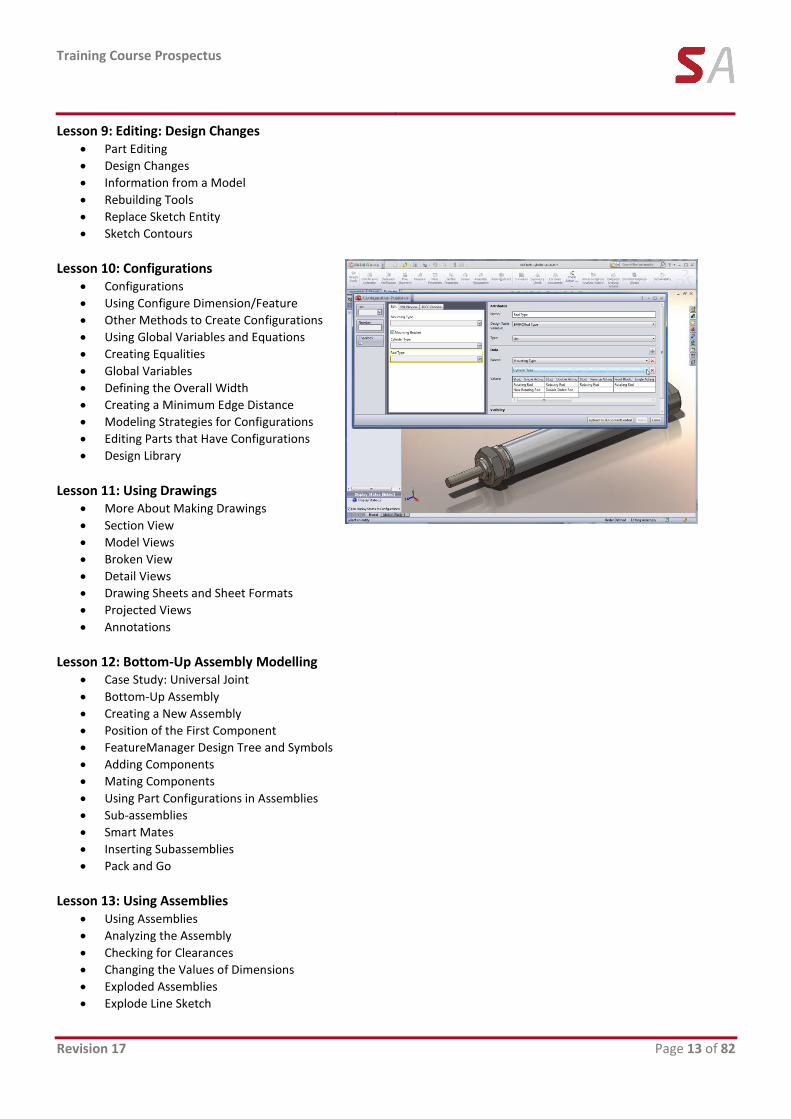
Lesson 4: Symmetry and Draft
Case Study: Ratchet
Design Intent
Boss Feature with Draft
Symmetry in the Sketch
Sketching Inside the Model
View Options
Using Model Edges in a Sketch
Creating Trimmed Sketch Geometry
Lesson 5: Patterning
Why Use Patterns?
Linear Pattern
Circular Patterns
Reference Geometry
Planes
Mirror Patterns
Using Pattern Seed Only
Up to Reference Sketch Driven Patterns
Lesson 6: Revolved Features
Case Study: Handwheel
Design Intent
Revolved Features
Building the Rim
Building the Spoke
Edit Material
Mass Properties
File Properties
SOLIDWORKS SimulationXpress
Using SOLIDWORKS SimulationXpress
The SimulationXpress Interface
Lesson 7: Shelling and Ribs
Shelling and Ribs
Analyzing and Adding Draft
Other Options for Draft
Shelling
Ribs
Full Round Fillets
Thin Features
Lesson 8: Editing: Repairs
Part Editing
Editing Topics
Sketch Issues
FilletXpert
DraftXpert
Training Course Prospectus
Revision 17 Page 13 of 82
Lesson 9: Editing: Design Changes Part Editing
Design Changes
Information from a Model
Rebuilding Tools
Replace Sketch Entity
Sketch Contours
Lesson 10: Configurations
Configurations
Using Configure Dimension/Feature
Other Methods to Create Configurations
Using Global Variables and Equations
Creating Equalities
Global Variables
Defining the Overall Width
Creating a Minimum Edge Distance
Modeling Strategies for Configurations
Editing Parts that Have Configurations Design Library
Lesson 11: Using Drawings
More About Making Drawings
Section View
Model Views
Broken View
Detail Views
Drawing Sheets and Sheet Formats
Projected Views
Annotations
Lesson 12: Bottom-Up Assembly Modelling
Case Study: Universal Joint
Bottom-Up Assembly
Creating a New Assembly
Position of the First Component
FeatureManager Design Tree and Symbols
Adding Components
Mating Components
Using Part Configurations in Assemblies
Sub-assemblies
Smart Mates
Inserting Subassemblies Pack and Go
Lesson 13: Using Assemblies
Using Assemblies
Analyzing the Assembly
Checking for Clearances
Changing the Values of Dimensions
Exploded Assemblies
Explode Line Sketch

Training Course Prospectus
Page 14 of 82 Revision 17
Bill of Materials
Assembly Drawings
Appendix A: Templates
Options Settings
Document Templates
Training Course Prospectus
Revision 17 Page 15 of 82
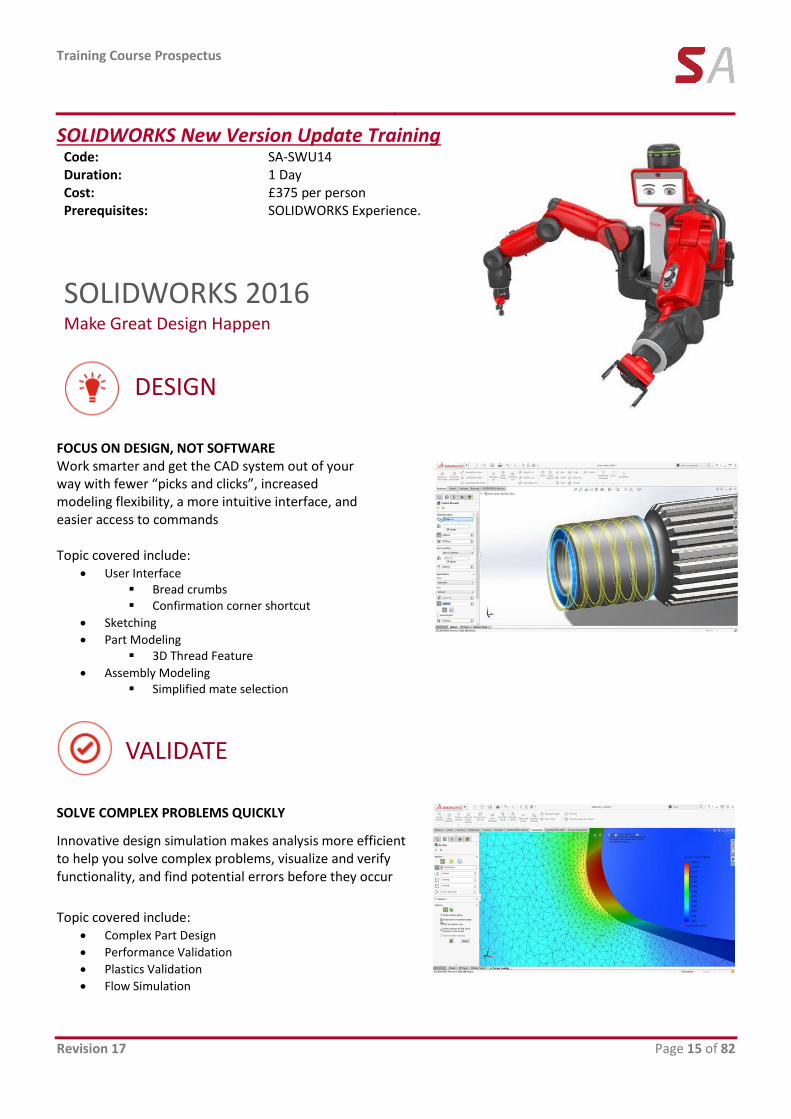
SOLIDWORKS New Version Update Training Code: SA-SWU14 Duration: 1 Day Cost: £375 per person Prerequisites: SOLIDWORKS Experience.
SOLIDWORKS 2016 Make Great Design Happen
FOCUS ON DESIGN, NOT SOFTWARE Work smarter and get the CAD system out of your way with fewer “picks and clicks”, increased modeling flexibility, a more intuitive interface, and easier access to commands Topic covered include:
User Interface Bread crumbs Confirmation corner shortcut
Sketching
Part Modeling 3D Thread Feature
Assembly Modeling Simplified mate selection
SOLVE COMPLEX PROBLEMS QUICKLY Innovative design simulation makes analysis more efficient to help you solve complex problems, visualize and verify functionality, and find potential errors before they occur
Topic covered include:
Complex Part Design
Performance Validation
Plastics Validation
Flow Simulation
DESIGN
VALIDATE
Training Course Prospectus
Page 16 of 82 Revision 17
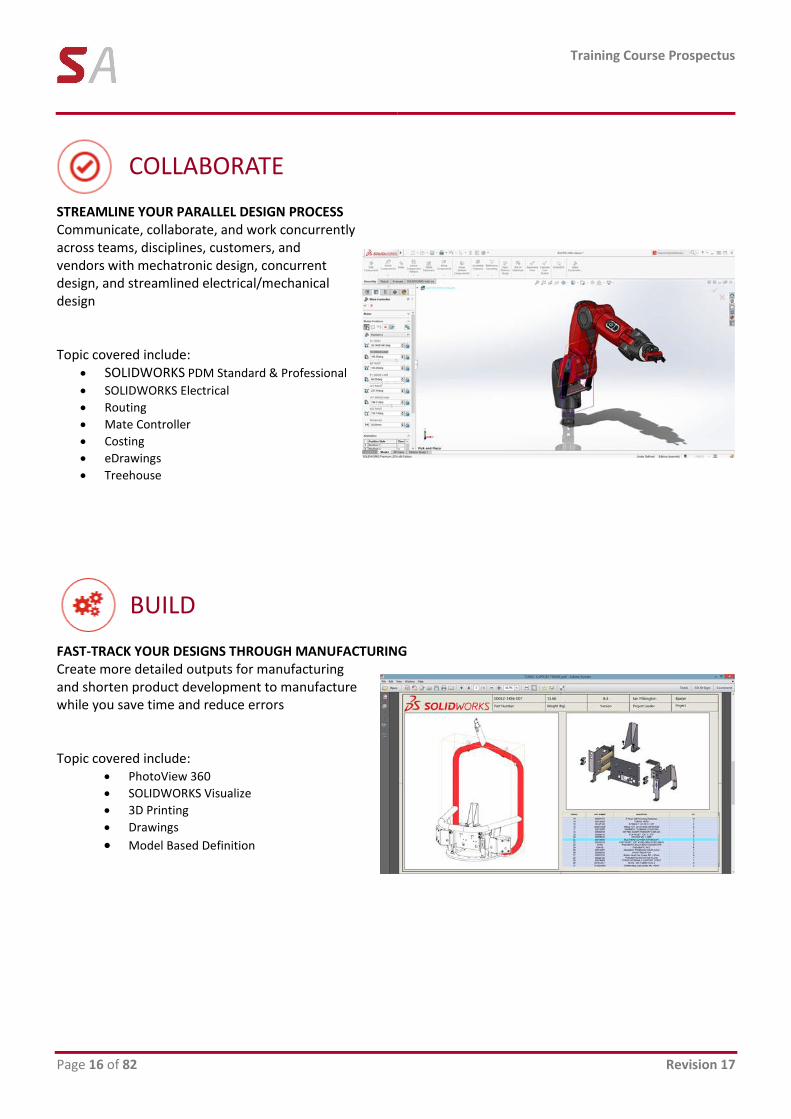
COLLABORATE
BUILD
STREAMLINE YOUR PARALLEL DESIGN PROCESS Communicate, collaborate, and work concurrently across teams, disciplines, customers, and vendors with mechatronic design, concurrent design, and streamlined electrical/mechanical design Topic covered include:
SOLIDWORKS PDM Standard & Professional
SOLIDWORKS Electrical
Routing
Mate Controller
Costing
eDrawings
Treehouse
FAST-TRACK YOUR DESIGNS THROUGH MANUFACTURING Create more detailed outputs for manufacturing and shorten product development to manufacture while you save time and reduce errors Topic covered include:
PhotoView 360
SOLIDWORKS Visualize
3D Printing
Drawings
Model Based Definition
Training Course Prospectus
Revision 17 Page 17 of 82
SOLIDWORKS Drawings
Code: SA-TR41 Duration: 2 Days Cost: £750 per person (includes course manual) Prerequisites: SOLIDWORKS Essentials Description: This course teaches you how to make drawings of SOLIDWORKS parts and assemblies.
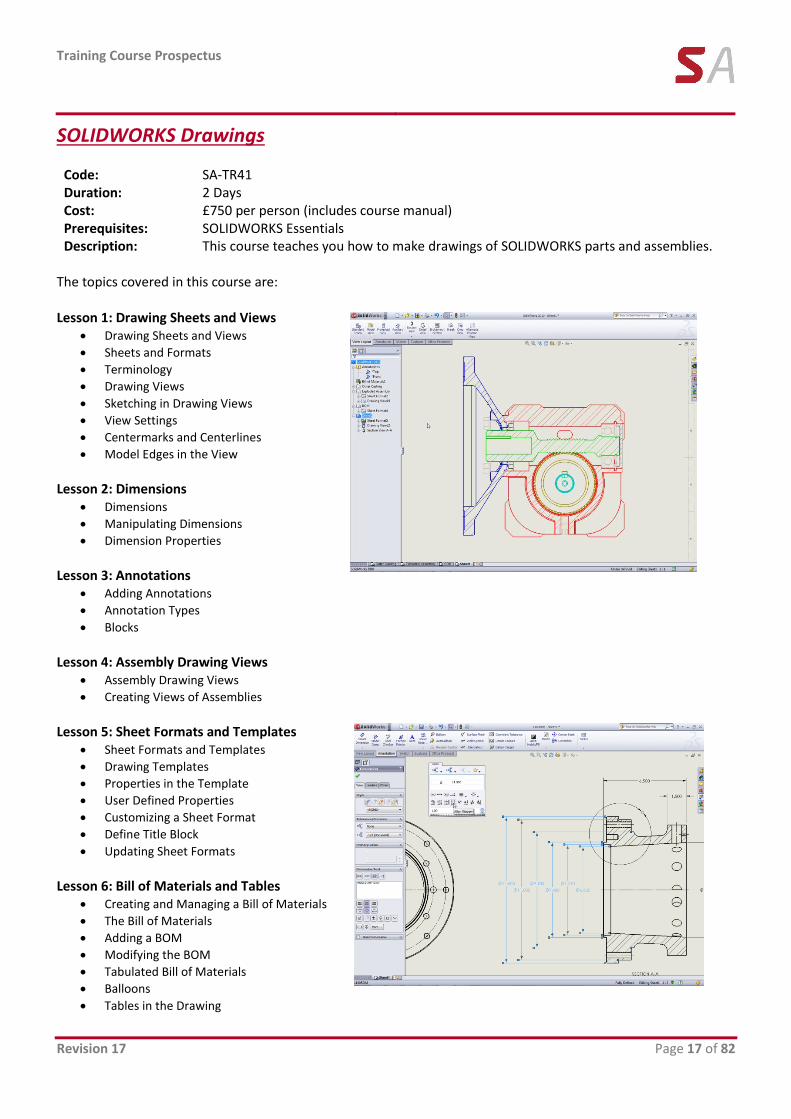
The topics covered in this course are: Lesson 1: Drawing Sheets and Views
Drawing Sheets and Views
Sheets and Formats
Terminology
Drawing Views
Sketching in Drawing Views
View Settings
Centermarks and Centerlines Model Edges in the View
Lesson 2: Dimensions
Dimensions
Manipulating Dimensions
Dimension Properties
Lesson 3: Annotations
Adding Annotations
Annotation Types
Blocks
Lesson 4: Assembly Drawing Views
Assembly Drawing Views
Creating Views of Assemblies
Lesson 5: Sheet Formats and Templates
Sheet Formats and Templates
Drawing Templates
Properties in the Template
User Defined Properties
Customizing a Sheet Format
Define Title Block Updating Sheet Formats
Lesson 6: Bill of Materials and Tables
Creating and Managing a Bill of Materials
The Bill of Materials
Adding a BOM
Modifying the BOM
Tabulated Bill of Materials
Balloons
Tables in the Drawing

Training Course Prospectus
Page 18 of 82 Revision 17
Lesson 7: Performance and Display Issues
Performance and Display Issues
Large Assembly Mode
Lightweight Drawings
Detached Drawings
Display Issues in Drawing Views
Lesson 8: Drawing References and Comparison
Reusing a Drawing File
Changing Drawing References
Using DrawCompare
SOLIDWORKS Design Checker
Appendix A: Preparations for Detailing
Training Course Prospectus
Revision 17 Page 19 of 82
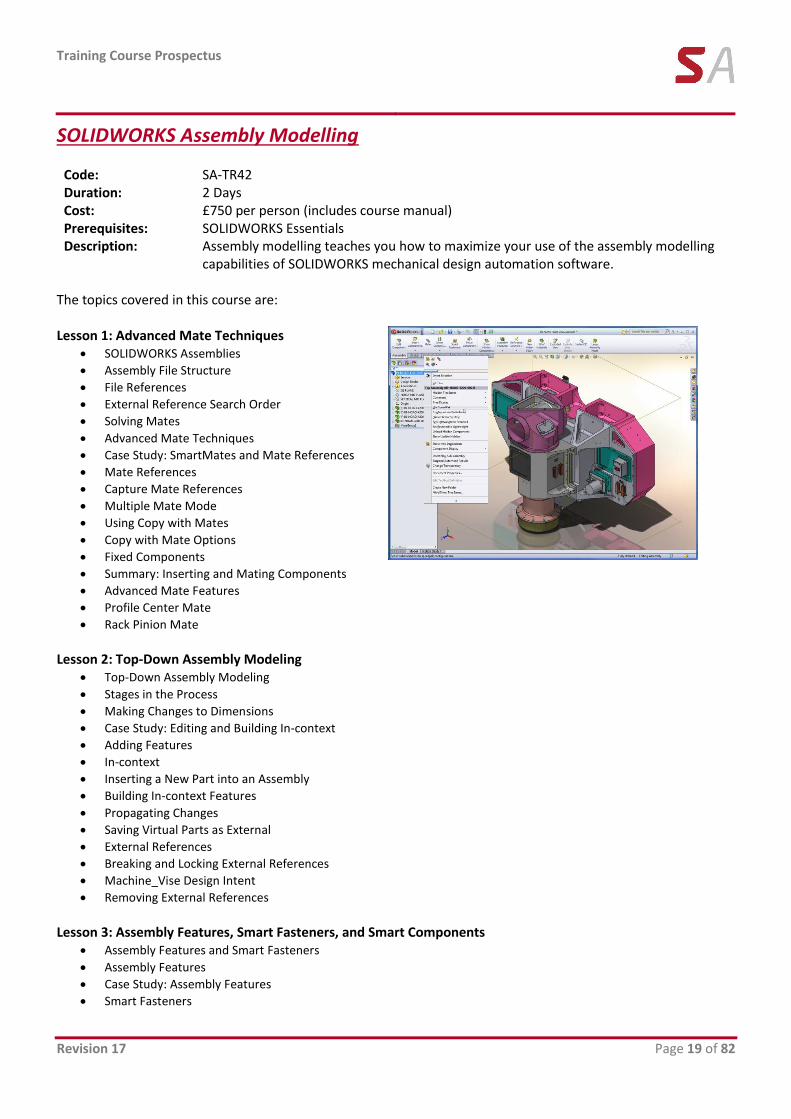
SOLIDWORKS Assembly Modelling
Code: SA-TR42 Duration: 2 Days Cost: £750 per person (includes course manual) Prerequisites: SOLIDWORKS Essentials Description: Assembly modelling teaches you how to maximize your use of the assembly modelling
capabilities of SOLIDWORKS mechanical design automation software. The topics covered in this course are: Lesson 1: Advanced Mate Techniques
SOLIDWORKS Assemblies
Assembly File Structure
File References
External Reference Search Order
Solving Mates
Advanced Mate Techniques
Case Study: SmartMates and Mate References
Mate References
Capture Mate References
Multiple Mate Mode
Using Copy with Mates
Copy with Mate Options
Fixed Components
Summary: Inserting and Mating Components
Advanced Mate Features
Profile Center Mate
Rack Pinion Mate
Lesson 2: Top-Down Assembly Modeling
Top-Down Assembly Modeling
Stages in the Process
Making Changes to Dimensions
Case Study: Editing and Building In-context
Adding Features
In-context
Inserting a New Part into an Assembly
Building In-context Features
Propagating Changes
Saving Virtual Parts as External
External References
Breaking and Locking External References
Machine_Vise Design Intent
Removing External References
Lesson 3: Assembly Features, Smart Fasteners, and Smart Components
Assembly Features and Smart Fasteners
Assembly Features
Case Study: Assembly Features
Smart Fasteners
Training Course Prospectus
Page 20 of 82 Revision 17
Smart Components
Lesson 4: Assembly Editing
Assembly Editing
Key Topics
Editing Activities
Case Study: Assembly Editing
Replacing and Modifying Components
Troubleshooting an Assembly
Replacing Components Using Save As
Reloading Components
Component Patterns
Lesson 5: Using Configurations with Assemblies
Using Configurations with Assemblies
Case Study: Assembly Configurations
Creating Configurations Manually
Configuration Properties
Using the Modify Configurations Dialog
Changing Configurations using the Context Toolbar
Assembly Evaluation Tools
Case Study: Hole Alignment
Controlling Dimensions in an Assembly
Creating an Equality
Equations With Functions
Comments
Sensors
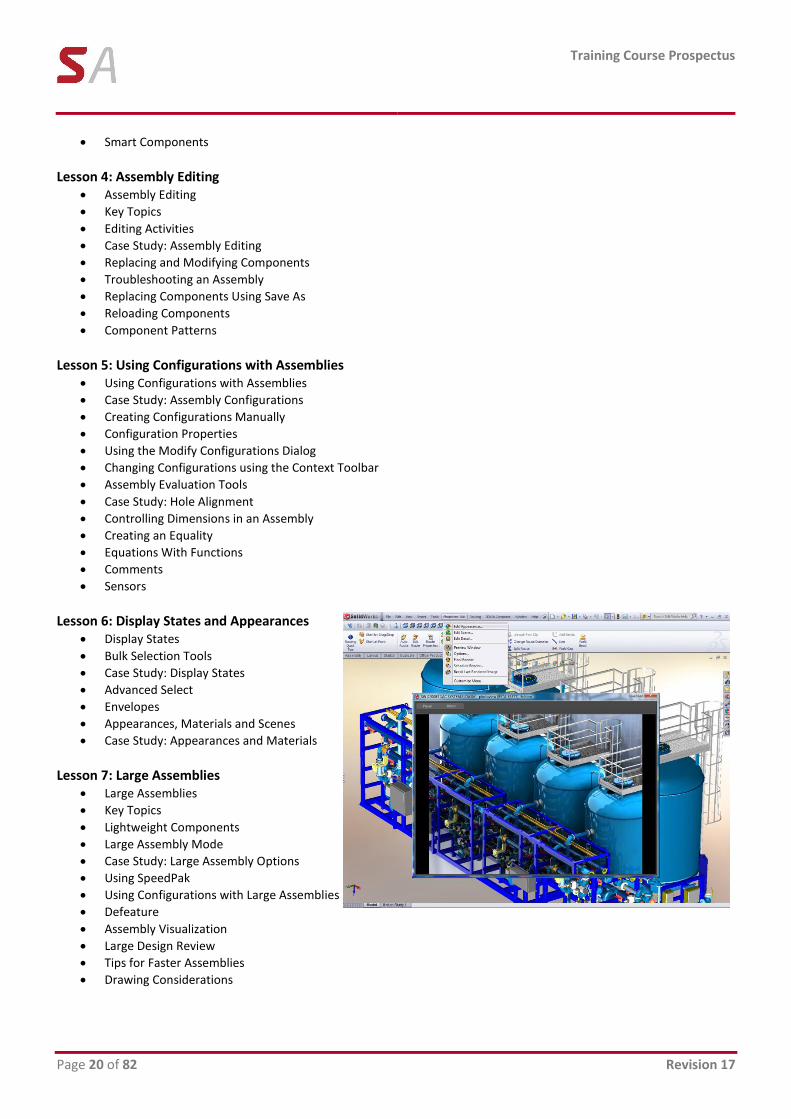
Lesson 6: Display States and Appearances
Display States
Bulk Selection Tools
Case Study: Display States
Advanced Select
Envelopes
Appearances, Materials and Scenes
Case Study: Appearances and Materials
Lesson 7: Large Assemblies
Large Assemblies
Key Topics
Lightweight Components
Large Assembly Mode
Case Study: Large Assembly Options
Using SpeedPak
Using Configurations with Large Assemblies
Defeature
Assembly Visualization
Large Design Review
Tips for Faster Assemblies
Drawing Considerations
Training Course Prospectus
Revision 17 Page 21 of 82
Lesson 8: Using SOLIDWORKS Treehouse SOLIDWORKS Treehouse
Setting Treehouse Instances
Exporting Treehouse Data
Lesson 9: Layout-based Assembly Design
Key Topics
Case Study: Clamp
Blocks
Inserting Blocks
Creating a Part from a Block
Gear and Pulley Motion in Blocks
Case Study: Gears and Pulleys

Training Course Prospectus
Page 22 of 82 Revision 17
Training Course Prospectus
Revision 17 Page 23 of 82
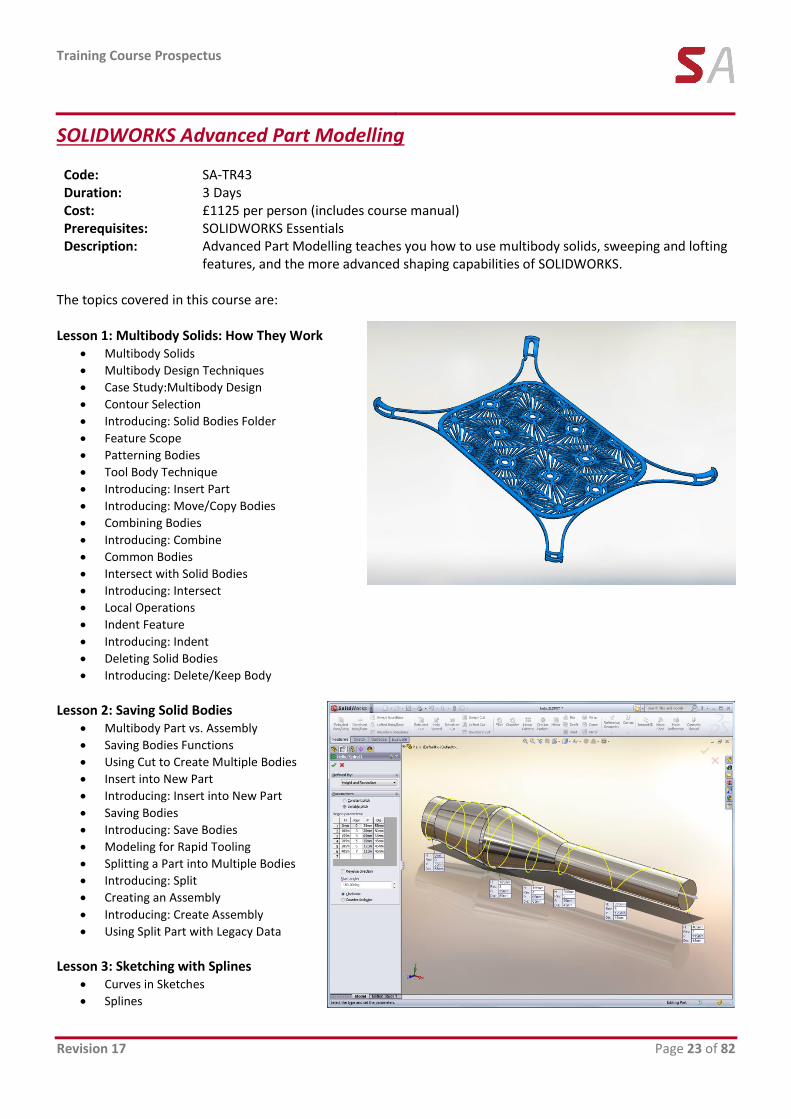
SOLIDWORKS Advanced Part Modelling
Code: SA-TR43 Duration: 3 Days Cost: £1125 per person (includes course manual) Prerequisites: SOLIDWORKS Essentials Description: Advanced Part Modelling teaches you how to use multibody solids, sweeping and lofting
features, and the more advanced shaping capabilities of SOLIDWORKS. The topics covered in this course are: Lesson 1: Multibody Solids: How They Work
Multibody Solids
Multibody Design Techniques
Case Study:Multibody Design
Contour Selection
Introducing: Solid Bodies Folder
Feature Scope
Patterning Bodies
Tool Body Technique
Introducing: Insert Part
Introducing: Move/Copy Bodies
Combining Bodies
Introducing: Combine
Common Bodies
Intersect with Solid Bodies
Introducing: Intersect
Local Operations
Indent Feature
Introducing: Indent
Deleting Solid Bodies Introducing: Delete/Keep Body
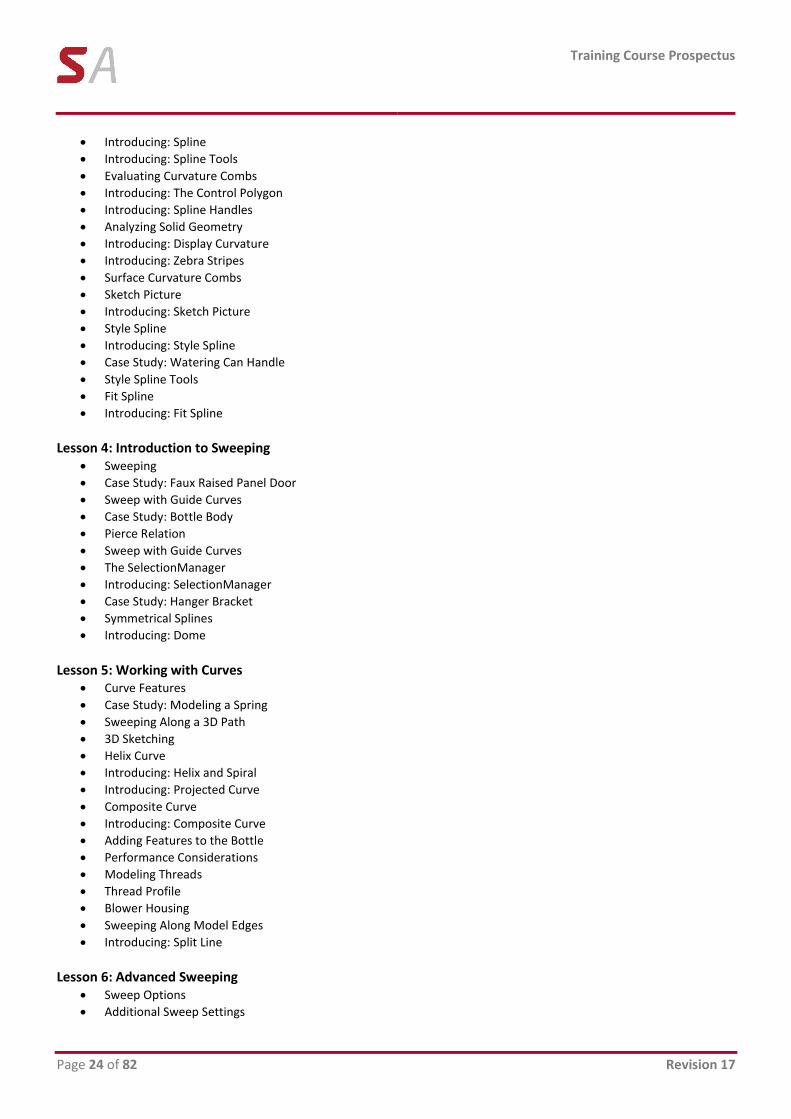
Lesson 2: Saving Solid Bodies
Multibody Part vs. Assembly
Saving Bodies Functions
Using Cut to Create Multiple Bodies
Insert into New Part
Introducing: Insert into New Part
Saving Bodies
Introducing: Save Bodies
Modeling for Rapid Tooling
Splitting a Part into Multiple Bodies
Introducing: Split
Creating an Assembly
Introducing: Create Assembly
Using Split Part with Legacy Data
Lesson 3: Sketching with Splines
Curves in Sketches
Splines
Training Course Prospectus
Page 24 of 82 Revision 17
Introducing: Spline
Introducing: Spline Tools
Evaluating Curvature Combs
Introducing: The Control Polygon
Introducing: Spline Handles
Analyzing Solid Geometry
Introducing: Display Curvature
Introducing: Zebra Stripes
Surface Curvature Combs
Sketch Picture
Introducing: Sketch Picture
Style Spline
Introducing: Style Spline
Case Study: Watering Can Handle
Style Spline Tools
Fit Spline
Introducing: Fit Spline
Lesson 4: Introduction to Sweeping
Sweeping
Case Study: Faux Raised Panel Door
Sweep with Guide Curves
Case Study: Bottle Body
Pierce Relation
Sweep with Guide Curves
The SelectionManager
Introducing: SelectionManager
Case Study: Hanger Bracket
Symmetrical Splines Introducing: Dome
Lesson 5: Working with Curves
Curve Features
Case Study: Modeling a Spring
Sweeping Along a 3D Path
3D Sketching
Helix Curve
Introducing: Helix and Spiral
Introducing: Projected Curve
Composite Curve
Introducing: Composite Curve
Adding Features to the Bottle
Performance Considerations
Modeling Threads
Thread Profile
Blower Housing
Sweeping Along Model Edges
Introducing: Split Line
Lesson 6: Advanced Sweeping
Sweep Options
Additional Sweep Settings
Training Course Prospectus
Revision 17 Page 25 of 82
Orientation and Twist Control
Visualizing Sweep Sections
Introducing: Face Curves
Align with End Faces
Solid Sweep
Introducing: Equation Driven Curve
Lesson 7: Boundary Feature and Lofting
Comparing Complex Features
How Lofting and Boundary Work
Loft vs Boundary Feature
Introducing: Loft
Boundary Feature
Introducing: Boundary Feature
Using Derived and Copied Sketches
Copying a Sketch
Modify Sketch
Introducing: Modify Sketch
Derived Sketches
Introducing: Derived Sketch
Boundary Preview Options
Sketch Block and Library Feature Profiles
Additional Curves in Loft and Boundary
Centerline Lofting
Loft Preview Options
Adding Sketch Segments
Introducing: Segment
Introducing: Split Entities
Cleaning Up a Model
Deleting Faces
Introducing: Delete Face
Evaluating Edges
Introducing: Deviation Analysis
Lofting with Guide Curves
Curve Influence
Hook Using Boundary
Conics
Introducing: Conic
Introducing: Curve Through XYZ
Sketch Blocks
Introducing: Sketch Blocks
Lesson 8: Advanced Filleting and Other Features
Fillet Settings
Fillet Parameters
Constant Size Fillets
Delete Face: Delete and Fill
Fillet Options
Variable Size Fillets
Face Fillets
Other Advanced Features
Wrap Feature
Introducing: Wrap

Training Course Prospectus
Page 26 of 82 Revision 17
Deform Feature
Introducing: Deform
Introducing: Knit Surface
Direct Editing
Introducing: Move Face
Training Course Prospectus
Revision 17 Page 27 of 82
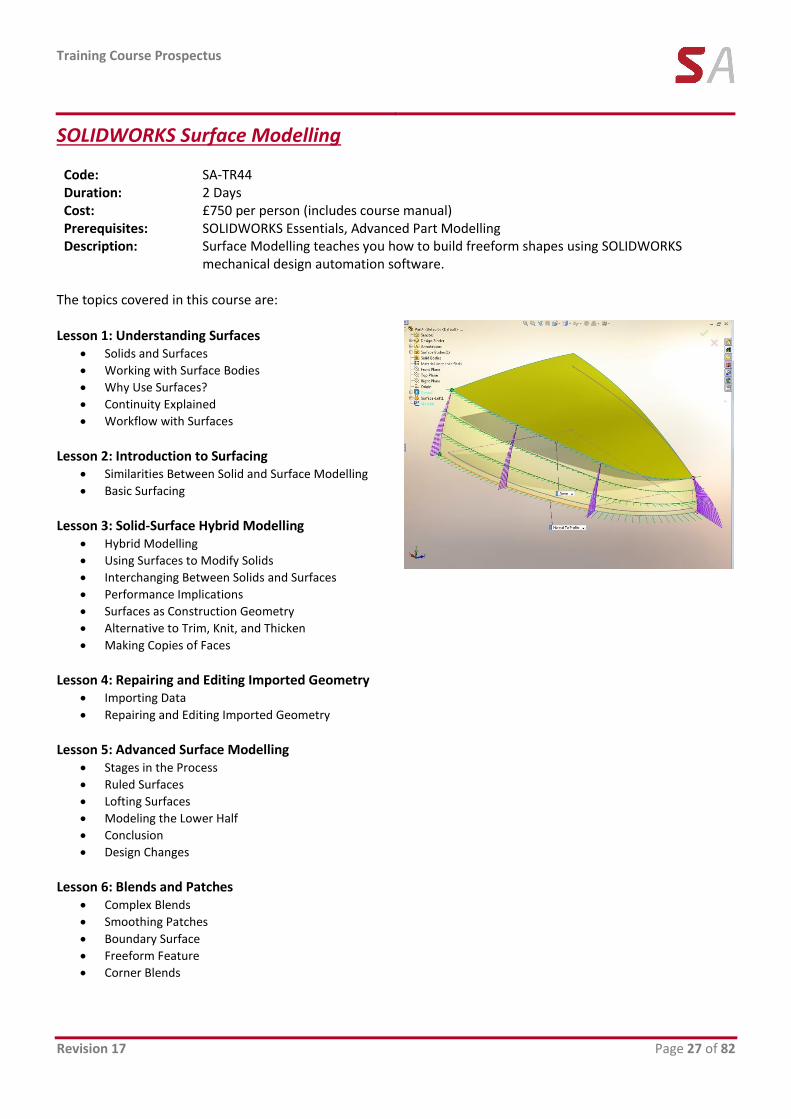
SOLIDWORKS Surface Modelling
Code: SA-TR44 Duration: 2 Days Cost: £750 per person (includes course manual) Prerequisites: SOLIDWORKS Essentials, Advanced Part Modelling Description: Surface Modelling teaches you how to build freeform shapes using SOLIDWORKS
mechanical design automation software. The topics covered in this course are: Lesson 1: Understanding Surfaces
Solids and Surfaces
Working with Surface Bodies
Why Use Surfaces?
Continuity Explained
Workflow with Surfaces
Lesson 2: Introduction to Surfacing
Similarities Between Solid and Surface Modelling
Basic Surfacing
Lesson 3: Solid-Surface Hybrid Modelling
Hybrid Modelling
Using Surfaces to Modify Solids
Interchanging Between Solids and Surfaces
Performance Implications
Surfaces as Construction Geometry
Alternative to Trim, Knit, and Thicken
Making Copies of Faces
Lesson 4: Repairing and Editing Imported Geometry
Importing Data
Repairing and Editing Imported Geometry
Lesson 5: Advanced Surface Modelling
Stages in the Process
Ruled Surfaces
Lofting Surfaces
Modeling the Lower Half
Conclusion
Design Changes
Lesson 6: Blends and Patches
Complex Blends
Smoothing Patches
Boundary Surface
Freeform Feature
Corner Blends

Training Course Prospectus
Page 28 of 82 Revision 17
Lesson 7: Master Model Techniques Introduction to Master Models
Surface Master Model Technique
Working with a Solid Master Model
Specialized Features for Plastic Parts
SOLIDWORKS Explorer
Training Course Prospectus
Revision 17 Page 29 of 82
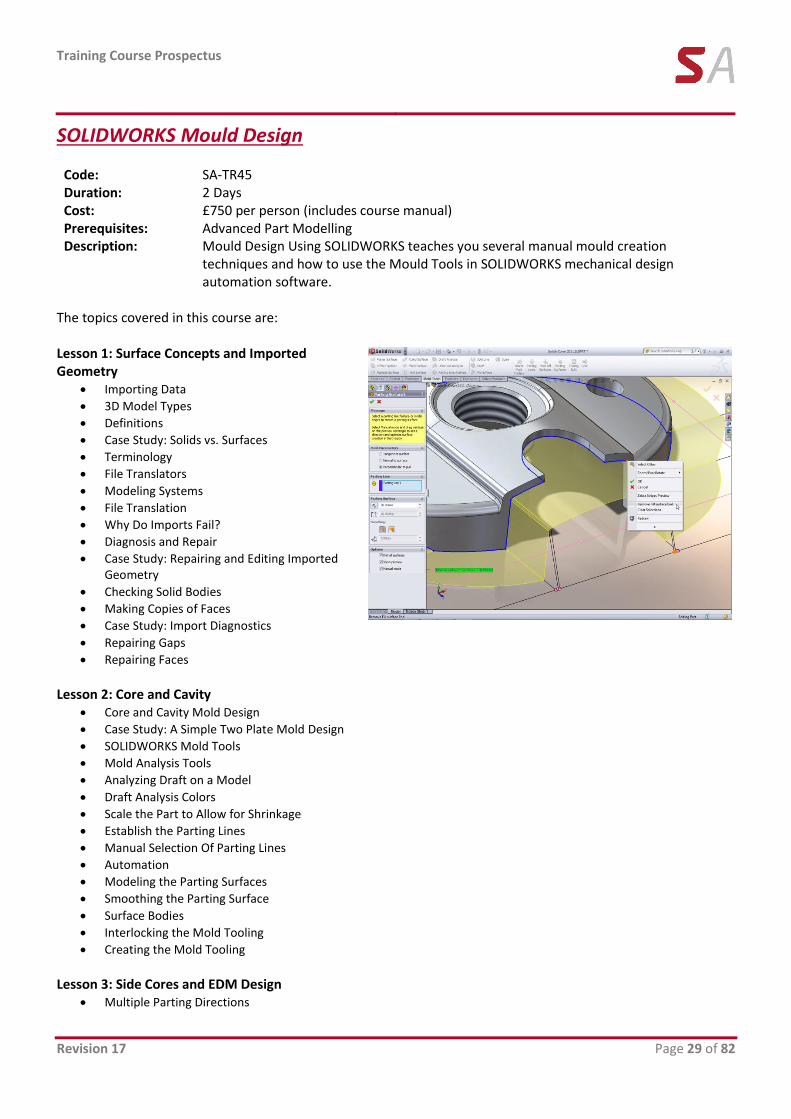
SOLIDWORKS Mould Design
Code: SA-TR45 Duration: 2 Days Cost: £750 per person (includes course manual) Prerequisites: Advanced Part Modelling Description: Mould Design Using SOLIDWORKS teaches you several manual mould creation
techniques and how to use the Mould Tools in SOLIDWORKS mechanical design automation software.
The topics covered in this course are: Lesson 1: Surface Concepts and Imported Geometry
Importing Data
3D Model Types
Definitions
Case Study: Solids vs. Surfaces
Terminology
File Translators
Modeling Systems
File Translation
Why Do Imports Fail?
Diagnosis and Repair
Case Study: Repairing and Editing Imported Geometry
Checking Solid Bodies
Making Copies of Faces
Case Study: Import Diagnostics
Repairing Gaps
Repairing Faces
Lesson 2: Core and Cavity
Core and Cavity Mold Design
Case Study: A Simple Two Plate Mold Design
SOLIDWORKS Mold Tools
Mold Analysis Tools
Analyzing Draft on a Model
Draft Analysis Colors
Scale the Part to Allow for Shrinkage
Establish the Parting Lines
Manual Selection Of Parting Lines
Automation
Modeling the Parting Surfaces
Smoothing the Parting Surface
Surface Bodies
Interlocking the Mold Tooling
Creating the Mold Tooling
Lesson 3: Side Cores and EDM Design
Multiple Parting Directions
Training Course Prospectus
Page 30 of 82 Revision 17
Trapped Molding Areas
Side Cores
Feature Freeze
Lifters
Core Pins
Case Study: Electrode Design
Electrode Clearances
Keeping the Sharp Edges
Lesson 4: Advanced Parting Lines, Shut-Off Surfaces, and Cores
Parting Lines and Shut-Off Surfaces
Draft Analysis Options
Parting Line Options
Core and Cavity Surfaces
Shut-Off Surfaces
Parting Surface
Tooling Split
Seeing Inside the Mould
Lesson 5: Using Surfaces for Model Prep and Interlocks
Surfaces in Mold Making
Case Study: Cordless Drill Bezel
Creating New Drafted Faces Interlock Surfaces
Lesson 6: Using Surfaces for Mold Design Features
Surfaces in Mould Making
Case Study: Router Bottom
The Mixer
Case Study: Mixer Upper Half
Case Study: Manual Parting Surface
Mold Split Folders
Lesson 7: Alternative Methods for Mold Design
Alternate Methods for Mold Design
Using Combine and Split
Creating a Cavity
Case Study: Cavity
Using Surfaces
Techniques for Mold Tooling
Using the Up To Surface Method
Using the Split Method
Manually Creating Shut-off Surfaces
Lesson 8: Reusable Data
Reusing Data
Task Pane
SOLIDWORKS Resources
Design Library
File Explorer
Case Study: 3D ContentCentral
Library Features

Training Course Prospectus
Revision 17 Page 31 of 82
Case Study: Create A Library Feature
Configurations in Library Features
Case Study: Water Line
Smart Components
Lesson 9: Completing the Mold Base
Case Study: Mold Base
Organizing the Assembly
Modifying the Lifters
Ejector Pins
Cooling the Mold
Making the Drawing
Making Changes
Completing the Process

Training Course Prospectus
Page 32 of 82 Revision 17
Training Course Prospectus
Revision 17 Page 33 of 82
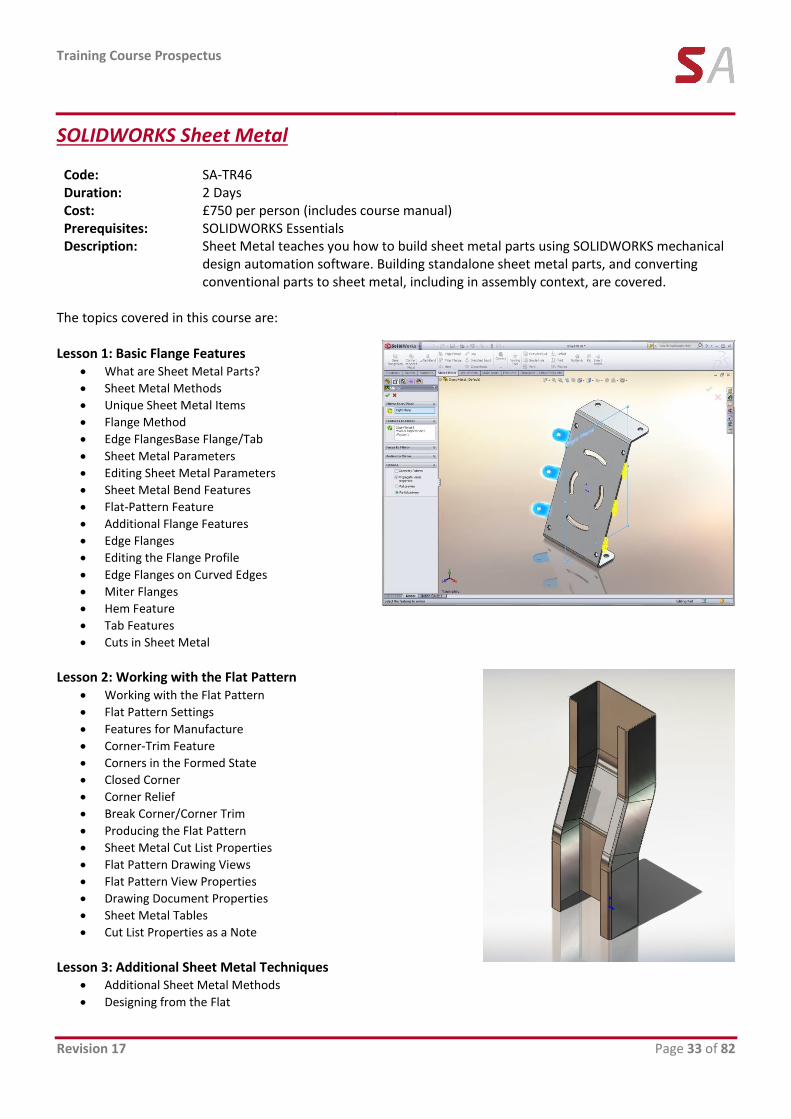
SOLIDWORKS Sheet Metal
Code: SA-TR46 Duration: 2 Days Cost: £750 per person (includes course manual) Prerequisites: SOLIDWORKS Essentials Description: Sheet Metal teaches you how to build sheet metal parts using SOLIDWORKS mechanical
design automation software. Building standalone sheet metal parts, and converting conventional parts to sheet metal, including in assembly context, are covered.
The topics covered in this course are: Lesson 1: Basic Flange Features
What are Sheet Metal Parts?
Sheet Metal Methods
Unique Sheet Metal Items
Flange Method
Edge FlangesBase Flange/Tab
Sheet Metal Parameters
Editing Sheet Metal Parameters
Sheet Metal Bend Features
Flat-Pattern Feature
Additional Flange Features
Edge Flanges
Editing the Flange Profile
Edge Flanges on Curved Edges
Miter Flanges
Hem Feature
Tab Features Cuts in Sheet Metal
Lesson 2: Working with the Flat Pattern
Working with the Flat Pattern
Flat Pattern Settings
Features for Manufacture
Corner-Trim Feature
Corners in the Formed State
Closed Corner
Corner Relief
Break Corner/Corner Trim
Producing the Flat Pattern
Sheet Metal Cut List Properties
Flat Pattern Drawing Views
Flat Pattern View Properties
Drawing Document Properties
Sheet Metal Tables Cut List Properties as a Note
Lesson 3: Additional Sheet Metal Techniques
Additional Sheet Metal Methods
Designing from the Flat
Training Course Prospectus
Page 34 of 82 Revision 17
Sketched Bend Feature
Jog Feature
Adding Features in an Unfolded State
Unfold and Fold
Swept Flange
Swept Flange Flat Pattern Options
Lofted Bends
Lofted Bends in the Design Library
Lesson 4: Converting to Sheet Metal
Sheet Metal Conversion
Insert Bends Method
Imported Geometry to Sheet Metal
Adding Rips
Insert Bends
Making Changes
Welded Corner
Converting Cones and Cylinders
Convert to Sheet Metal
Lesson 5: Multibody Sheet Metal Parts
Multibody Sheet Metal Parts
Multibodies with Base Flange
Sheet Metal Parameters for Multibodies
Cut List Item Properties for Multibodies
Flat Pattern Drawing Views for Multibodies
Cut List Balloon Annotations
Exporting to DXF/DWGs with Multibodies
Convert with Multibodies
Hiding and Showing Bodies
Using Split with Sheet Metal Parts
Patterning for Multibodies
Using Edge Flanges to Merge Bodies
Interfering Bodies
Combining Sheet Metal with Other Bodies
Lesson 6: Forming Tools and Gussets
Sheet Metal Forming Tools
Standard Forming Tools
Form Tool Features in the Flat
Part Document Properties
Custom Form Tools
Split Line
Forming Tool
Form Tools in Drawings Sheet Metal Gusset
Lesson 7: Additional Sheet Metal Functions
Additional Sheet Metal Functions
Cross-Breaks
Vent Features
Mirror Part

Training Course Prospectus
Revision 17 Page 35 of 82
Process Plans Sheet Metal Costing

Training Course Prospectus
Page 36 of 82 Revision 17
Training Course Prospectus
Revision 17 Page 37 of 82
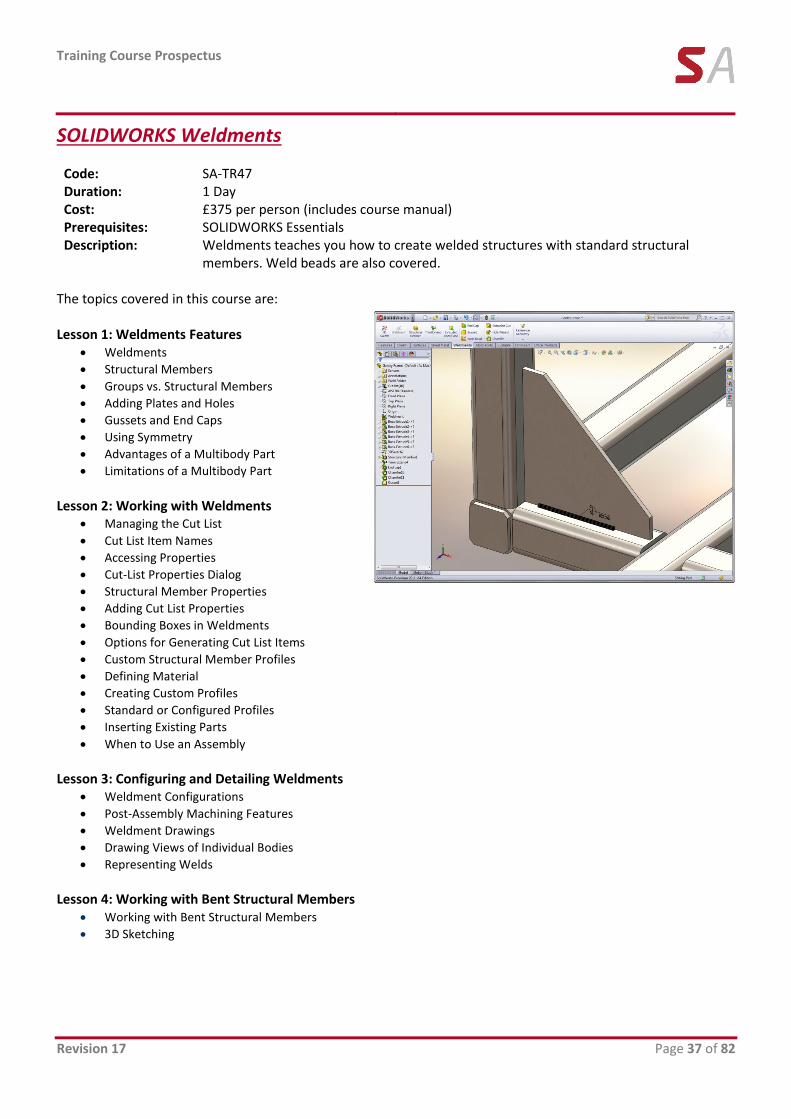
SOLIDWORKS Weldments
Code: SA-TR47 Duration: 1 Day Cost: £375 per person (includes course manual) Prerequisites: SOLIDWORKS Essentials Description: Weldments teaches you how to create welded structures with standard structural
members. Weld beads are also covered. The topics covered in this course are: Lesson 1: Weldments Features
Weldments
Structural Members
Groups vs. Structural Members
Adding Plates and Holes
Gussets and End Caps
Using Symmetry
Advantages of a Multibody Part Limitations of a Multibody Part
Lesson 2: Working with Weldments
Managing the Cut List
Cut List Item Names
Accessing Properties
Cut-List Properties Dialog
Structural Member Properties
Adding Cut List Properties
Bounding Boxes in Weldments
Options for Generating Cut List Items
Custom Structural Member Profiles
Defining Material
Creating Custom Profiles
Standard or Configured Profiles
Inserting Existing Parts
When to Use an Assembly
Lesson 3: Configuring and Detailing Weldments
Weldment Configurations
Post-Assembly Machining Features
Weldment Drawings
Drawing Views of Individual Bodies Representing Welds
Lesson 4: Working with Bent Structural Members
Working with Bent Structural Members 3D Sketching

Training Course Prospectus
Page 38 of 82 Revision 17
Training Course Prospectus
Revision 17 Page 39 of 82
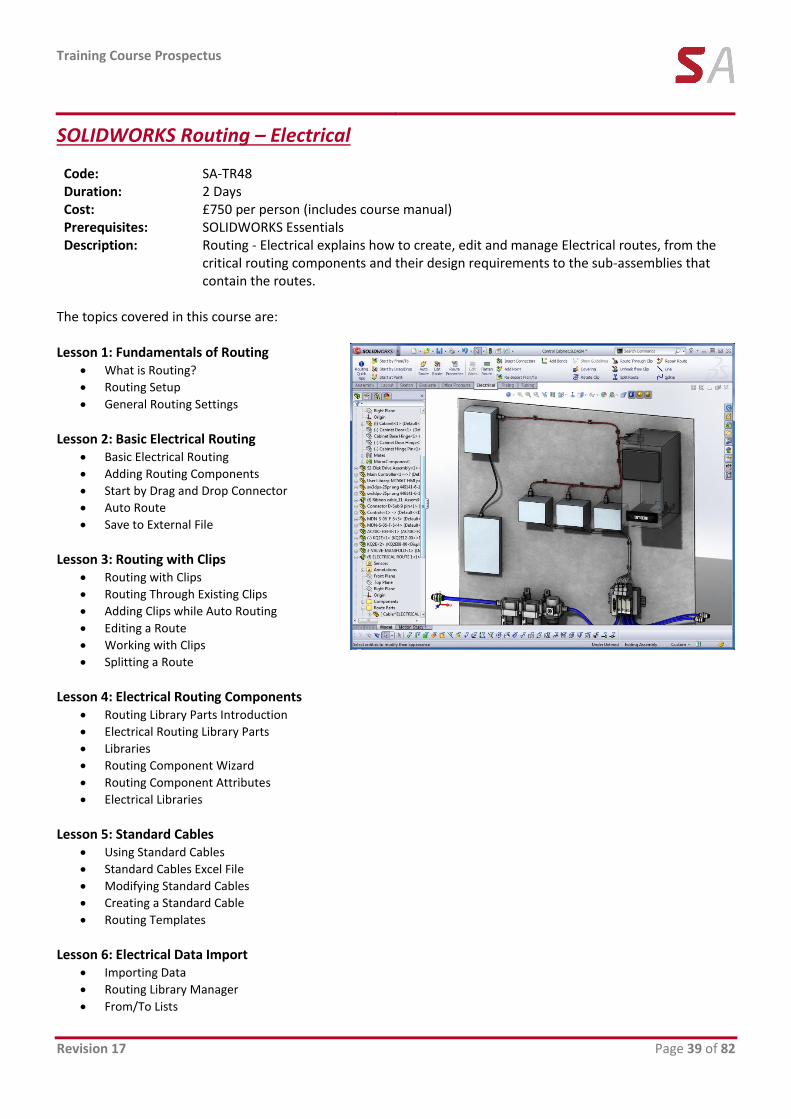
SOLIDWORKS Routing – Electrical
Code: SA-TR48 Duration: 2 Days Cost: £750 per person (includes course manual) Prerequisites: SOLIDWORKS Essentials Description: Routing - Electrical explains how to create, edit and manage Electrical routes, from the
critical routing components and their design requirements to the sub-assemblies that contain the routes.
The topics covered in this course are: Lesson 1: Fundamentals of Routing
What is Routing?
Routing Setup
General Routing Settings
Lesson 2: Basic Electrical Routing
Basic Electrical Routing
Adding Routing Components
Start by Drag and Drop Connector
Auto Route
Save to External File
Lesson 3: Routing with Clips
Routing with Clips
Routing Through Existing Clips
Adding Clips while Auto Routing
Editing a Route
Working with Clips
Splitting a Route
Lesson 4: Electrical Routing Components
Routing Library Parts Introduction
Electrical Routing Library Parts
Libraries
Routing Component Wizard
Routing Component Attributes
Electrical Libraries
Lesson 5: Standard Cables
Using Standard Cables
Standard Cables Excel File
Modifying Standard Cables
Creating a Standard Cable
Routing Templates
Lesson 6: Electrical Data Import
Importing Data
Routing Library Manager
From/To Lists
Training Course Prospectus
Page 40 of 82 Revision 17
Route Properties
Route Guidelines
Using Guidelines and Clips
Lesson 7: Electrical Drawings
Route Flattening and Detailing
Annotation Flattening
Flatten Route
Highlight Search
Manufacture Flattening
Lesson 8: Electrical Ribbon Cables
Electrical Ribbon Cables
Ribbon Cable Components
Auto Routing Ribbon Cables
Using Ribbon Cable Clips
Through Connectors
Ribbon Cable Libraries
Lesson 9: Electrical Conduits
Electrical Conduits
Rigid Conduit
Orthogonal Routing with Auto Route
Electrical Data in Conduits
Manual Sketch Routing
Flexible Electrical Conduit
Appendix A: Review Section
Review of Configurations
A Note About File References
Design Tables
Review of Top Down Design
Editing Options
Review of Design Library Task Pane
Review of 3D Sketching
Training Course Prospectus
Revision 17 Page 41 of 82
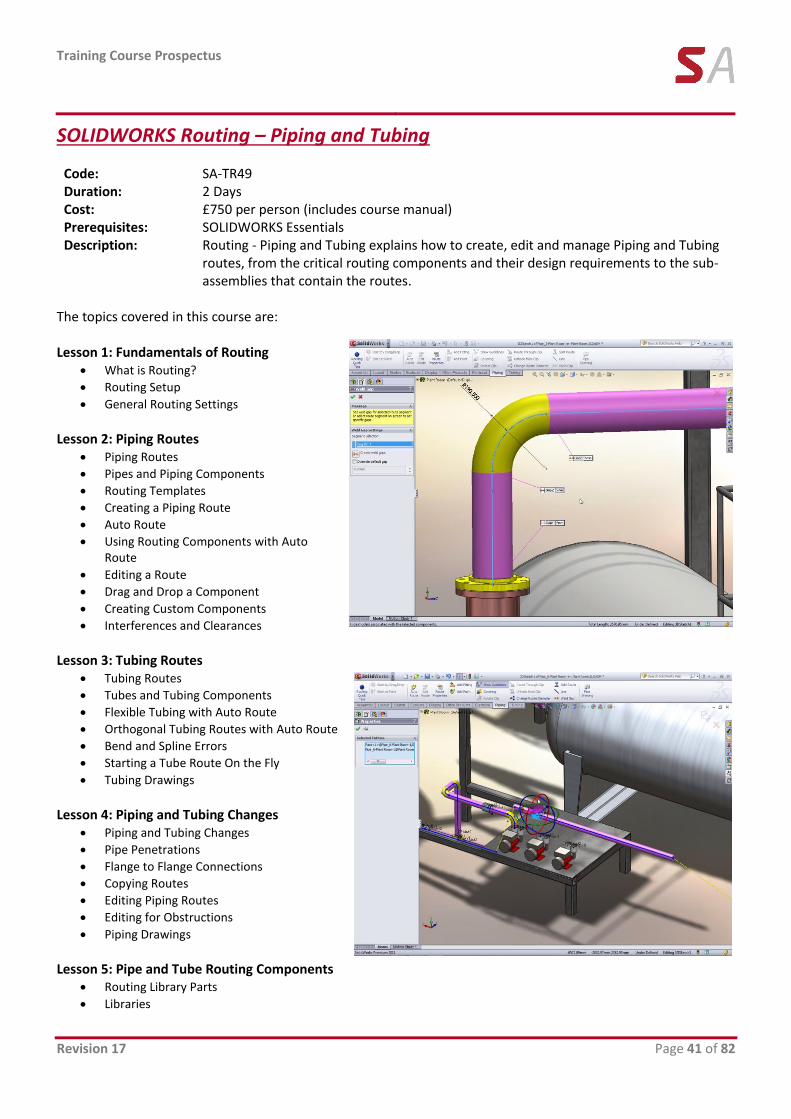
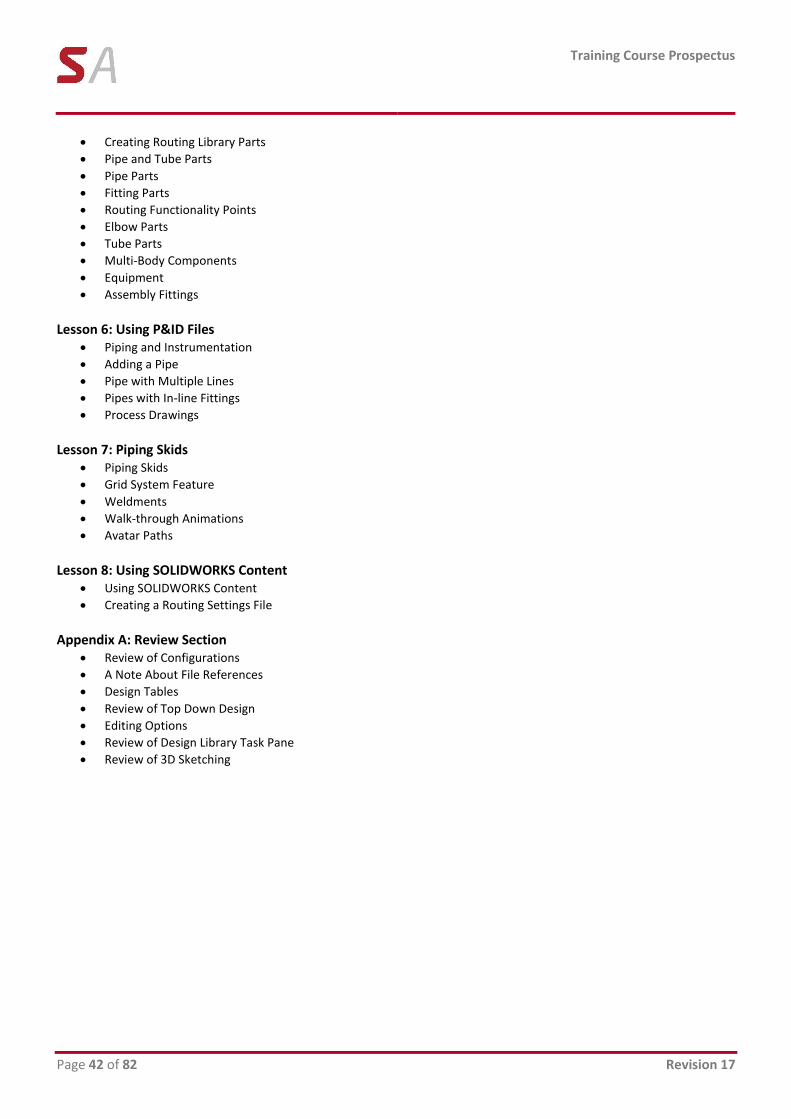
SOLIDWORKS Routing – Piping and Tubing
Code: SA-TR49 Duration: 2 Days Cost: £750 per person (includes course manual) Prerequisites: SOLIDWORKS Essentials Description: Routing - Piping and Tubing explains how to create, edit and manage Piping and Tubing
routes, from the critical routing components and their design requirements to the sub-assemblies that contain the routes.
The topics covered in this course are: Lesson 1: Fundamentals of Routing
What is Routing?
Routing Setup
General Routing Settings
Lesson 2: Piping Routes
Piping Routes
Pipes and Piping Components
Routing Templates
Creating a Piping Route
Auto Route
Using Routing Components with Auto Route
Editing a Route
Drag and Drop a Component
Creating Custom Components
Interferences and Clearances
Lesson 3: Tubing Routes
Tubing Routes
Tubes and Tubing Components
Flexible Tubing with Auto Route
Orthogonal Tubing Routes with Auto Route
Bend and Spline Errors
Starting a Tube Route On the Fly
Tubing Drawings
Lesson 4: Piping and Tubing Changes
Piping and Tubing Changes
Pipe Penetrations
Flange to Flange Connections
Copying Routes
Editing Piping Routes
Editing for Obstructions
Piping Drawings
Lesson 5: Pipe and Tube Routing Components
Routing Library Parts
Libraries
Training Course Prospectus
Page 42 of 82 Revision 17
Creating Routing Library Parts
Pipe and Tube Parts
Pipe Parts
Fitting Parts
Routing Functionality Points
Elbow Parts
Tube Parts
Multi-Body Components
Equipment
Assembly Fittings
Lesson 6: Using P&ID Files
Piping and Instrumentation
Adding a Pipe
Pipe with Multiple Lines
Pipes with In-line Fittings
Process Drawings
Lesson 7: Piping Skids
Piping Skids
Grid System Feature
Weldments
Walk-through Animations
Avatar Paths
Lesson 8: Using SOLIDWORKS Content
Using SOLIDWORKS Content
Creating a Routing Settings File
Appendix A: Review Section
Review of Configurations
A Note About File References
Design Tables
Review of Top Down Design
Editing Options
Review of Design Library Task Pane
Review of 3D Sketching
Training Course Prospectus
Revision 17 Page 43 of 82
SOLIDWORKS File Management
Code: SA-TR50 Duration: 1 Day Cost: £375 per person (includes course manual) Prerequisites: General experience with the SOLIDWORKS software. General experience with the
Windows operating system. Description: SOLIDWORKS File Management teaches you how to manage files within SOLIDWORKS.
This course should be taken before any of the SOLIDWORKS Enterprise PDM courses, and is also ideal for any SOLIDWORKS user not using SOLIDWORKS Enterprise PDM. It includes explanations of the SOLIDWORKS file structure, file references, file associativity, and how to manage a multi-user environment.
The topics covered in this course are:
Lesson 1: SOLIDWORKS File Structure Understanding SOLIDWORKS Files
SOLIDWORKS File Structure
Case Study: Reducing File Size
File Shadowing
Configuration Bodies
Case Study: External References
File References
File Reference Example
SOLIDWORKS File Conversion
Case Study: File Conversion
Opening Files
Case Study: RAM Resident
Reload
Case Study: Quick View
Case Study: Read-only
Lesson 2: Saving Files Saving Files
Case Study: Save Options
Editing References
Automatic File Backup
Case Study: Backup/Recover
File Properties
Property Tab Builder
Case Study: File Properties
Additional Data
Design Binder
Lesson 3: File References External Reference Search Order
Case Study: Searching for References
Recursive Searches
Changing References
Case Study: In-context Features
Locking and Breaking References
SOLIDWORKS Explorer
Case Study: SOLIDWORKS Explorer
Lesson 4: Shared Files Working in a Collaborative Environment
Production Files
Case Study: Sharing Files
Reload
Multiple In-context References To The Same Part
Case Study: Motor Mounting Bracket
Support Files
Case Study: Shared File Locations
SOLIDWORKS Add-Ins
Toolbox
Case Study: Toolbox Parts
PhotoWorks Files
Case Study: PhotoWorks Files
SOLIDWORKS Explorer For Revision Management
Case Study: Revision Management

Training Course Prospectus
Page 44 of 82 Revision 17
Training Course Prospectus
Revision 17 Page 45 of 82
SOLIDWORKS API Fundamentals
Code: SA-TR51 Duration: 3 Days Cost: £1125 per person (includes course manual) Prerequisites: SOLIDWORKS Essentials, Visual Basic programming Description: API Fundamentals teaches you how to use the SOLIDWORKS API (Application
Programming Interface) to automate and customize SOLIDWORKS. The topics covered in this course are: Lesson 1: Using the Macro Recorder
Macro Recording
Macro Toolbar
Understanding How Macro Code Works
Understanding How to Call Members on API Interfaces
Passing Parameters
Cleaning Up Code
Adding Forms to a Macro
Lesson 2: The API Object Model
SOLIDWORKS API Object Model
Application Objects
Case Study: Connecting to New Documents
Case Study: Connecting to Existing Documents
Lesson 3: Setting System Options and Document Properties
User Preferences - System Options
User Preferences - Document Properties
Locating the Correct APIs and Enumeration Values
UserPreference Tables For System Options, Document Properties, and Menu Items
Lesson 4: Automating Part Design
Case Study: Automation Tool for Parts
Lesson 5: Assembly Automation
Case Study: Automation Tool for Assemblies
Lesson 6: Drawing Automation
Case Study: Automating Drawing Creation
Lesson 7: Selection and Traversal Techniques
Case Study: Programming With a Selected Object
The SOLIDWORKS BREP Model
Case Study: Body and Face Traversal
Case Study: Feature Manager Traversal
Lesson 8: Adding Custom Properties and Attributes
Case Study: Custom Properties
Case Study: Configurations With Custom Properties
Case Study: File Summary Information
Training Course Prospectus
Page 46 of 82 Revision 17
Case Study: Document Attributes
The Attribute Objects
Case Study: Face Attributes
Lesson 9: The SOLIDWORKS API SDK
The API SDK
Case Study: Creating a VB.NET Add-In
Case Study: Creating a C# Add-In
Case Study: C++ Add-Ins
Choosing a Programming Language
Lesson 10: Customizing the SOLIDWORKS User Interface
Case Study: Customizing the UI With VB.NET
Understanding The Add-in Code
Property Pages
Property Page Groups and Controls
Removing Menus and Toolbars
Other Areas of Customization
Lesson 11: Notifications
Notifications
Notifications in VBA
Case Study: Simple Notification
Case Study: Using Notifications in .NET
Appendix
Macro Feature
Batch Conversion 1
Batch Conversion 2
Assembly Traversal
Custom Model View
Training Course Prospectus
Revision 17 Page 47 of 82
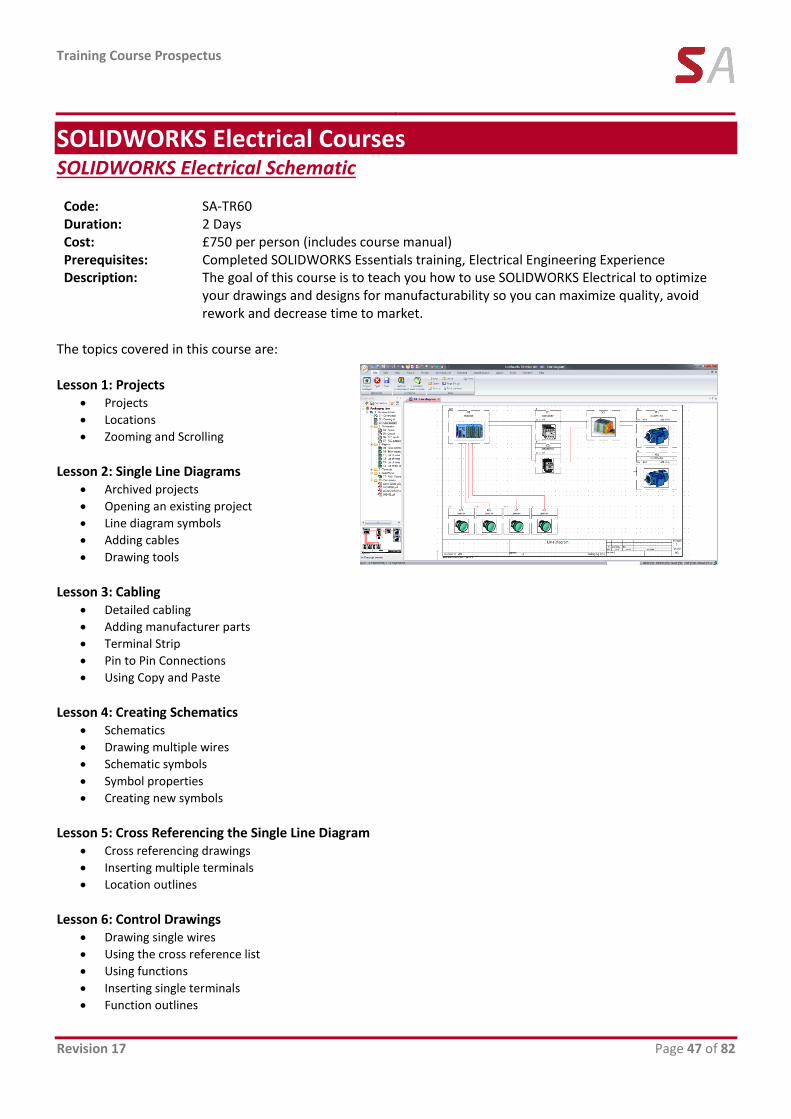
SOLIDWORKS Electrical Courses SOLIDWORKS Electrical Schematic
Code: SA-TR60 Duration: 2 Days Cost: £750 per person (includes course manual) Prerequisites: Completed SOLIDWORKS Essentials training, Electrical Engineering Experience Description: The goal of this course is to teach you how to use SOLIDWORKS Electrical to optimize
your drawings and designs for manufacturability so you can maximize quality, avoid rework and decrease time to market.
The topics covered in this course are: Lesson 1: Projects
Projects
Locations
Zooming and Scrolling
Lesson 2: Single Line Diagrams
Archived projects
Opening an existing project
Line diagram symbols
Adding cables
Drawing tools
Lesson 3: Cabling
Detailed cabling
Adding manufacturer parts
Terminal Strip
Pin to Pin Connections
Using Copy and Paste
Lesson 4: Creating Schematics
Schematics
Drawing multiple wires
Schematic symbols
Symbol properties
Creating new symbols
Lesson 5: Cross Referencing the Single Line Diagram
Cross referencing drawings
Inserting multiple terminals
Location outlines
Lesson 6: Control Drawings
Drawing single wires
Using the cross reference list
Using functions
Inserting single terminals
Function outlines
Training Course Prospectus
Page 48 of 82 Revision 17
Lesson 7: Managing Origin-Destination Arrows
Replacing wires
Origin-destination arrows
Lesson 8: Programmable Logic Controllers
Adding a new scheme
Adding a PLC mark
Inserting a PLC
Editing a PLC
Lesson 9: Macros
Creating macros
Using macros
Lesson 10: Editing the PLC Drawing
Associate cable cores
Adding a part manually
Assigning a part
Wire style manager
Numbering wires
Lesson 11: Reports
Using the report manager
Drawing terminal strips
Training Course Prospectus
Revision 17 Page 49 of 82
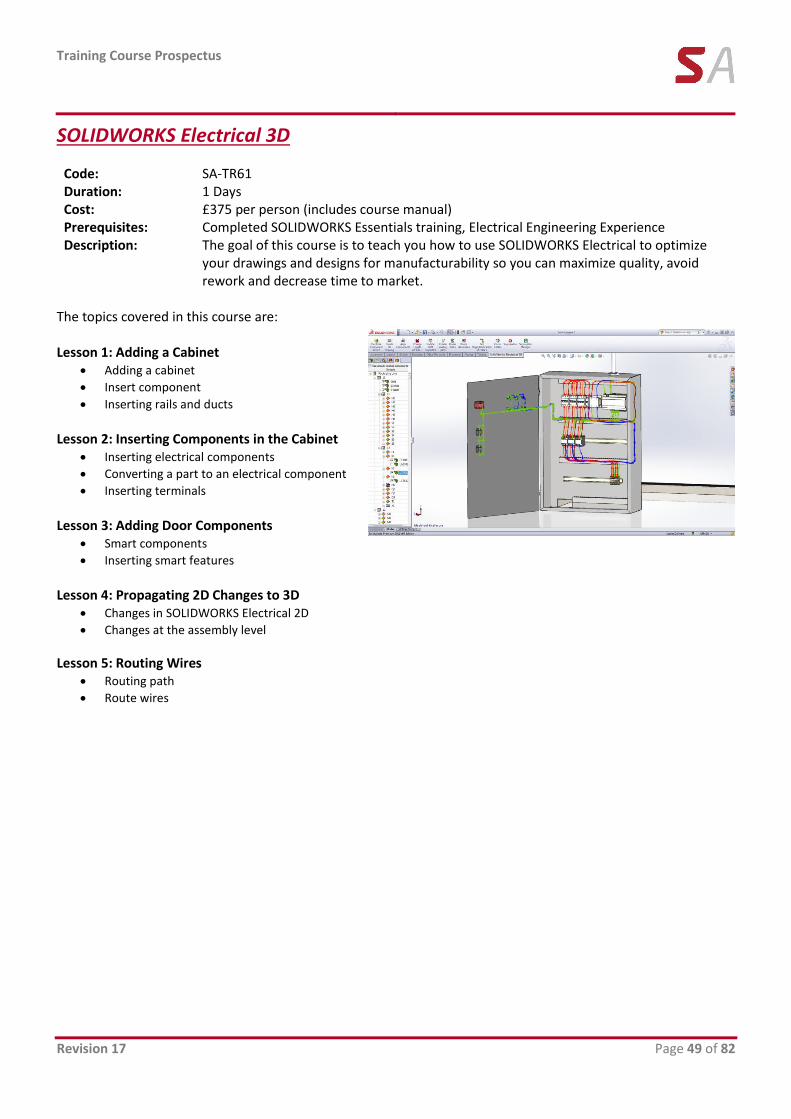
SOLIDWORKS Electrical 3D
Code: SA-TR61 Duration: 1 Days Cost: £375 per person (includes course manual) Prerequisites: Completed SOLIDWORKS Essentials training, Electrical Engineering Experience Description: The goal of this course is to teach you how to use SOLIDWORKS Electrical to optimize
your drawings and designs for manufacturability so you can maximize quality, avoid rework and decrease time to market.
The topics covered in this course are: Lesson 1: Adding a Cabinet
Adding a cabinet
Insert component
Inserting rails and ducts
Lesson 2: Inserting Components in the Cabinet
Inserting electrical components
Converting a part to an electrical component
Inserting terminals
Lesson 3: Adding Door Components
Smart components
Inserting smart features
Lesson 4: Propagating 2D Changes to 3D
Changes in SOLIDWORKS Electrical 2D
Changes at the assembly level
Lesson 5: Routing Wires Routing path
Route wires

Training Course Prospectus
Page 50 of 82 Revision 17
Training Course Prospectus
Revision 17 Page 51 of 82
SOLIDWORKS Simulation Courses
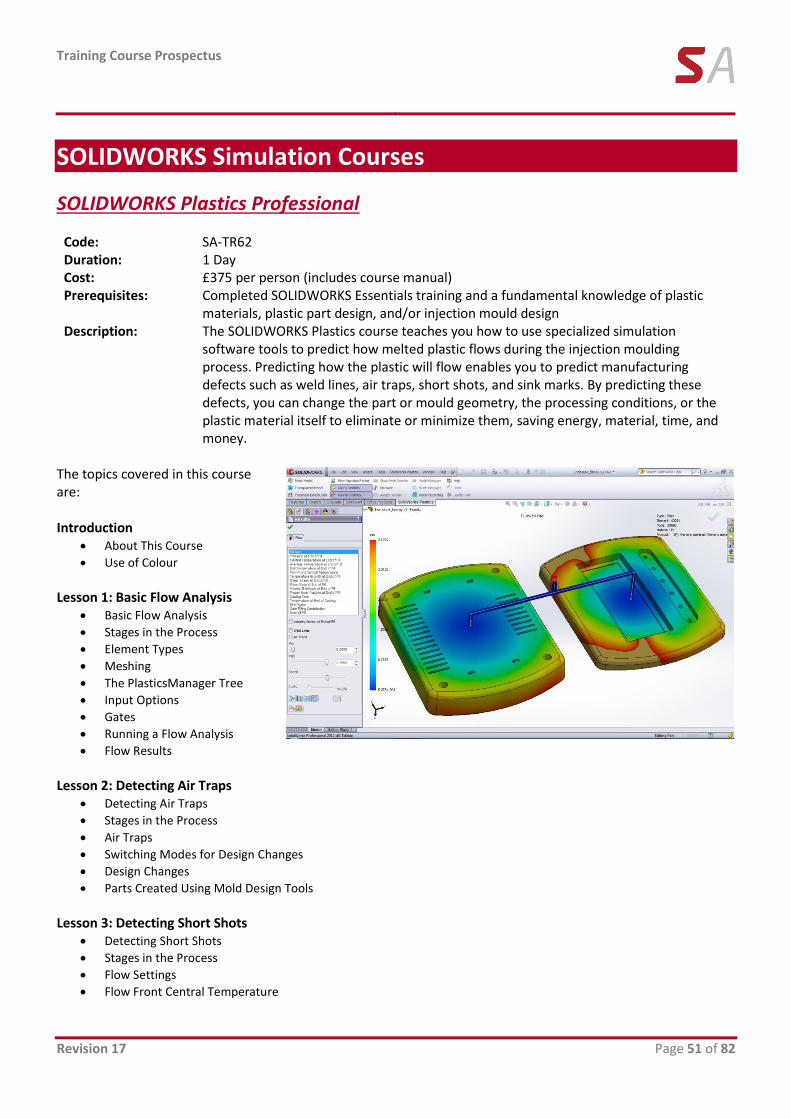
SOLIDWORKS Plastics Professional
Code: SA-TR62 Duration: 1 Day Cost: £375 per person (includes course manual) Prerequisites: Completed SOLIDWORKS Essentials training and a fundamental knowledge of plastic
materials, plastic part design, and/or injection mould design Description: The SOLIDWORKS Plastics course teaches you how to use specialized simulation
software tools to predict how melted plastic flows during the injection moulding process. Predicting how the plastic will flow enables you to predict manufacturing defects such as weld lines, air traps, short shots, and sink marks. By predicting these defects, you can change the part or mould geometry, the processing conditions, or the plastic material itself to eliminate or minimize them, saving energy, material, time, and money.
The topics covered in this course are: Introduction
About This Course
Use of Colour
Lesson 1: Basic Flow Analysis
Basic Flow Analysis
Stages in the Process
Element Types
Meshing
The PlasticsManager Tree
Input Options
Gates
Running a Flow Analysis
Flow Results
Lesson 2: Detecting Air Traps
Detecting Air Traps
Stages in the Process
Air Traps
Switching Modes for Design Changes
Design Changes
Parts Created Using Mold Design Tools
Lesson 3: Detecting Short Shots
Detecting Short Shots
Stages in the Process
Flow Settings
Flow Front Central Temperature

Training Course Prospectus
Page 52 of 82 Revision 17
Lesson 4: The Model Manager The Model Manager
Stages in the Process
Using the Model Manager
Copying Parts and Results
Batch Manager
Summary and Report
Training Course Prospectus
Revision 17 Page 53 of 82
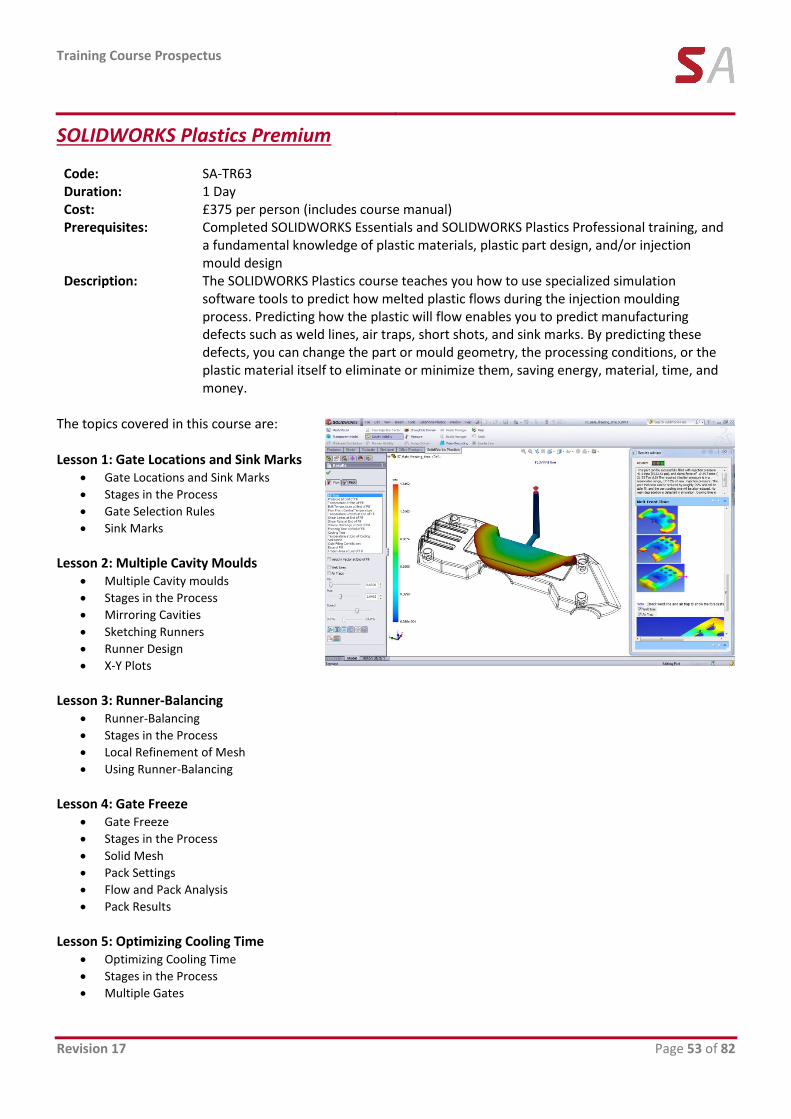
SOLIDWORKS Plastics Premium
Code: SA-TR63 Duration: 1 Day Cost: £375 per person (includes course manual) Prerequisites: Completed SOLIDWORKS Essentials and SOLIDWORKS Plastics Professional training, and
a fundamental knowledge of plastic materials, plastic part design, and/or injection mould design
Description: The SOLIDWORKS Plastics course teaches you how to use specialized simulation software tools to predict how melted plastic flows during the injection moulding process. Predicting how the plastic will flow enables you to predict manufacturing defects such as weld lines, air traps, short shots, and sink marks. By predicting these defects, you can change the part or mould geometry, the processing conditions, or the plastic material itself to eliminate or minimize them, saving energy, material, time, and money.
The topics covered in this course are: Lesson 1: Gate Locations and Sink Marks
Gate Locations and Sink Marks
Stages in the Process
Gate Selection Rules
Sink Marks
Lesson 2: Multiple Cavity Moulds
Multiple Cavity moulds
Stages in the Process
Mirroring Cavities
Sketching Runners
Runner Design
X-Y Plots
Lesson 3: Runner-Balancing
Runner-Balancing
Stages in the Process
Local Refinement of Mesh
Using Runner-Balancing
Lesson 4: Gate Freeze
Gate Freeze
Stages in the Process
Solid Mesh
Pack Settings
Flow and Pack Analysis
Pack Results
Lesson 5: Optimizing Cooling Time
Optimizing Cooling Time
Stages in the Process
Multiple Gates

Training Course Prospectus
Page 54 of 82 Revision 17

Training Course Prospectus
Revision 17 Page 55 of 82
Lesson 6: Using Inserts Using Inserts
Stages in the Process
Cavities and Inserts
Materials for Inserts
Lesson 7: Mesh Repairs
Mesh Repairs
Stages in the Process
Element Issues
Edit Mesh
Training Course Prospectus
Page 56 of 82 Revision 17
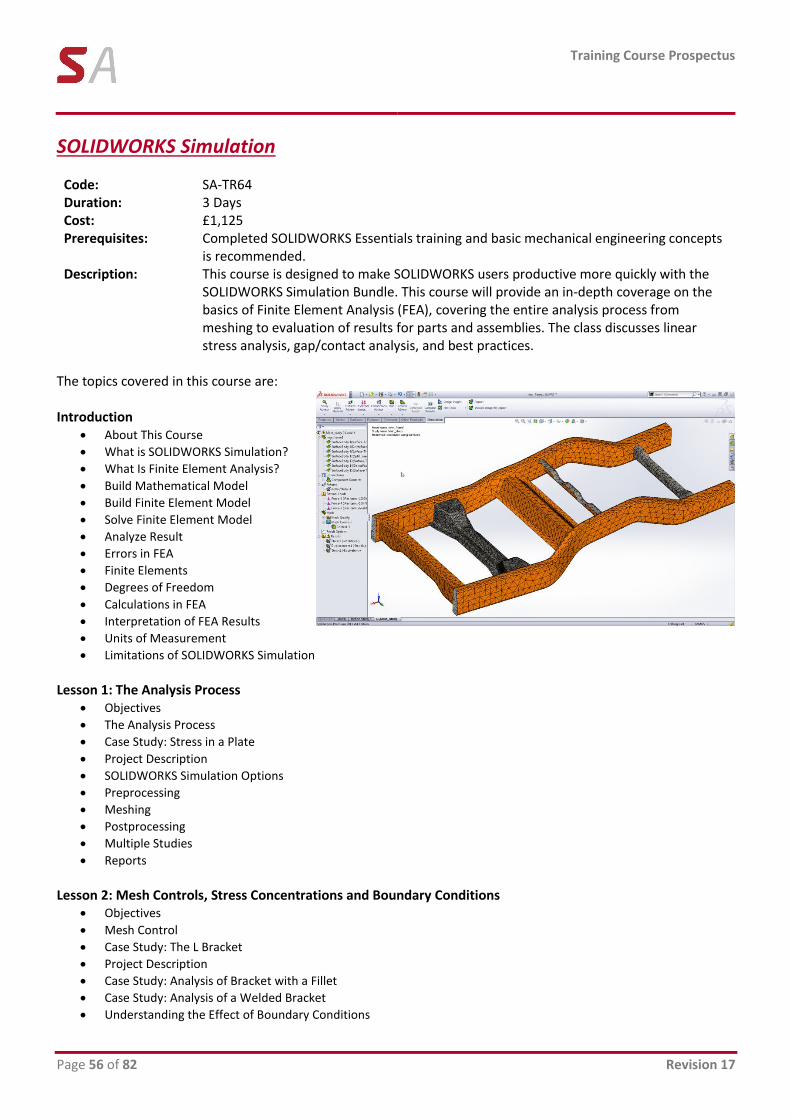
SOLIDWORKS Simulation
Code: SA-TR64 Duration: 3 Days Cost: £1,125 Prerequisites: Completed SOLIDWORKS Essentials training and basic mechanical engineering concepts
is recommended. Description: This course is designed to make SOLIDWORKS users productive more quickly with the
SOLIDWORKS Simulation Bundle. This course will provide an in-depth coverage on the basics of Finite Element Analysis (FEA), covering the entire analysis process from meshing to evaluation of results for parts and assemblies. The class discusses linear stress analysis, gap/contact analysis, and best practices.
The topics covered in this course are: Introduction
About This Course
What is SOLIDWORKS Simulation?
What Is Finite Element Analysis?
Build Mathematical Model
Build Finite Element Model
Solve Finite Element Model
Analyze Result
Errors in FEA
Finite Elements
Degrees of Freedom
Calculations in FEA
Interpretation of FEA Results
Units of Measurement
Limitations of SOLIDWORKS Simulation
Lesson 1: The Analysis Process
Objectives
The Analysis Process
Case Study: Stress in a Plate
Project Description
SOLIDWORKS Simulation Options
Preprocessing
Meshing
Postprocessing
Multiple Studies
Reports
Lesson 2: Mesh Controls, Stress Concentrations and Boundary Conditions
Objectives
Mesh Control
Case Study: The L Bracket
Project Description
Case Study: Analysis of Bracket with a Fillet
Case Study: Analysis of a Welded Bracket
Understanding the Effect of Boundary Conditions
Training Course Prospectus
Revision 17 Page 57 of 82
Lesson 3: Assembly Analysis with Contacts
Objectives
Contact Analysis
Case Study: Pliers with Global Contact
Pliers with Local Contact
Lesson 4: Symmetrical and Free Self-Equilibrated Assemblies
Objectives
Shrink Fit Parts
Case Study: Shrink Fit
Project Description
Analysis with Soft Springs
Lesson 5: Assembly Analysis with Connectors
Objectives
Connecting Components
Connectors
Case Study: Vise Grip Pliers
Lesson 6: Compatible/Incompatible Meshes
Objectives
Compatible / Incompatible Meshing
Case Study: Rotor
Lesson 7: Assembly Analysis Mesh Refinement
Objectives
Mesh Control in an Assembly
Case Study: Cardan Joint
Problem Statement
Part 1: Draft Quality Coarse Mesh Analysis
Part 2: High Quality Mesh Analysis
Lesson 8: Analysis of Thin Components
Objectives
Thin Components
Case Study: Pulley
Part 1: Mesh with Solid Elements
Part 2: Refined Solid Mesh
Solid vs. Shell
Creating Shell Elements
Part 3: Shell Elements - Mid-plane Surface
Results Comparison
Case Study: Joist Hanger
Lesson 9: Mixed Meshing Shells & Solids
Objectives
Mixed Meshing Solids and Shells
Case Study: Pressure Vessel
Lesson 10: Mixed Meshing Solids, Beams & Shells
Objectives
Training Course Prospectus
Page 58 of 82 Revision 17
Mixed Meshing
Case Study: Particle Separator
Lesson 11: Design Scenarios
Objectives
Design Study
Case Study: Suspension Design
Part 1: Multiple Load Cases
Part 2: Geometry Modification
Lesson 12: Thermal Stress Analysis
Objectives
Thermal Stress Analysis
Case Study: Bimetallic Strip
Examining Results in Local Coordinate Systems
Saving Model in its Deformed Shape
Lesson 13: Adaptive Meshing
Objectives
Adaptive Meshing
Case Study: Support Bracket
h-Adaptivity Study
p-Adaptivity Study
h vs. p Elements - Summary
Lesson 14: Large Displacement Analysis
Objectives
Small vs. Large Displacement Analysis
Case Study: Clamp
Part 1: Small Displacement Linear Analysis
Part 2: Large Displacement Nonlinear Analysis
Appendix A: Meshing, Solvers, and Tips & Tricks
Meshing Strategies
Geometry Preparation
Mesh Quality
Mesh Controls
Meshing Stages
Failure Diagnostics
Tips for Using Shell Elements
Hardware Considerations in Meshing
Solvers in SOLIDWORKS Simulation
Choosing a Solver
Appendix B: Customer Help and Assistance
Customer Help and Assistance

Training Course Prospectus
Revision 17 Page 59 of 82
Training Course Prospectus
Page 60 of 82 Revision 17
SOLIDWORKS Simulation Professional
Code: SA-TR65 Duration: 1 Day Cost: £375 per person (includes course manual) Prerequisites: Students must have attended the introductory SOLIDWORKS Simulation course (3 days)
or must have working knowledge of the SOLIDWORKS Simulation software. Knowledge of SOLIDWORKS and basic mechanical engineering concepts is recommended.
Description: This course is designed to make SOLIDWORKS Simulation users productive with the SOLIDWORKS Simulation Professional extension. This 1 day course will provide an in-depth coverage on the advanced topics in Finite Element Analysis (FEA) including heat transfer analysis, frequency analysis, fatigue, stability analysis based on the linear buckling concepts, 2D simulations (plane stress, strain and axisymmetry) and pressure vessel modulus. Example or parts and assemblies including those with various gap/contact conditions are reviewed. (1 day)
The topics covered in this course are: Lesson 1: Frequency Analysis of Parts
Objectives
Modal Analysis Basics
Case Study: The Tuning Fork
Project Description
Frequency Analysis With Supports
Frequency Analysis Without Supports
Frequency Analysis with Load
Lesson 2: Frequency Analysis of Assemblies
Case Study: The Engine Mount
Project Description
All Bonded Contact Conditions
Bonded and Allow Penetration Contacts
Lesson 3: Buckling Analysis
Buckling Analysis
Case Study: Particle Separator
Project Description
Lesson 4: Thermal Analysis
Thermal Analysis Basics
Case Study: Microchip Assembly
Project Description
Steady-State Thermal Analysis
Transient Thermal Analysis
Transient Analysis with Time Varying Load
Transient Thermal Analysis using a Thermostat
Training Course Prospectus
Revision 17 Page 61 of 82
Lesson 5: Thermal Analysis with Radiation Case Study: Spot Light Assembly
Project Description
Steady State Analysis
Lesson 6: Advanced Thermal Stress2D Simplification
Thermal Stress Analysis
Case Study: Metal Expansion Joint
Project Description
Thermal Analysis
Thermal Stress Analysis
3D model
Lesson 7: Fatigue Analysis
Fatigue
Stress-life (S-N) Based Fatigue
Case Study: Pressure Vessel
Thermal Study
Thermal Stress Study
Fatigue Terminology
Fatigue Study
Fatigue study with dead load
Lesson 8: Advanced Fatigue Analysis
Case Study: Suspension
Project Description
Fatigue Study
Lesson 9: Drop Test Analysis
Drop Test Analysis
Case Study: Camera
Project Description
Rigid Floor Drop Test
Elastic Floor Drop Test
Elasto-Plastic Material Model
Drop Test with Contact
Lesson 10: Optimization Analysis
Optimization Analysis
Case Study: Press Frame
Project Description
Static and Frequency Analyses
Optimization Analysis
Design Study
Lesson 11: Pressure Vessel Analysis
Case Study: Pressure Vessel
Project Description
Pressure Vessel Analysis
Manhole Nozzle Flange and Cover
Training Course Prospectus
Page 62 of 82 Revision 17
SOLIDWORKS PDM Courses
Using SOLIDWORKS PDM Professional Code: SA-TR52 Duration: 1 Day Cost: £375 per person Prerequisites: Basic experience with the SOLIDWORKS software, experience with the Windows™
operating system, and knowledge of SOLIDWORKS file structure and referencing. Description: The focus of this course is on the fundamental skills and concepts central to the
successful use of SOLIDWORKS PDM. The intended audience for this course is anyone who will manage files with SOLIDWORKS PDM.
The topics covered in this course are: Introduction
About This Course
Lesson 1: SOLIDWORKS PDM Concepts
The Fundamentals of PDM
What is SOLIDWORKS PDM?
SOLIDWORKS PDM Overview
SOLIDWORKS PDM Modules
SOLIDWORKS PDM Components
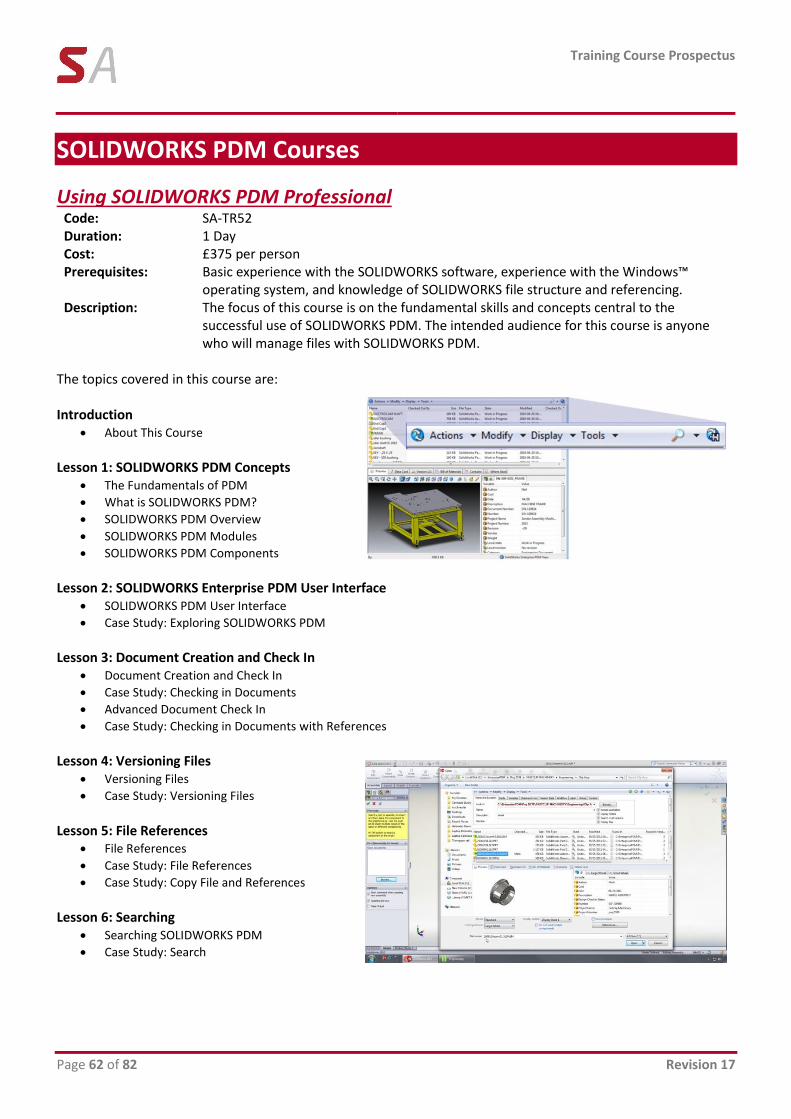
Lesson 2: SOLIDWORKS Enterprise PDM User Interface
SOLIDWORKS PDM User Interface
Case Study: Exploring SOLIDWORKS PDM
Lesson 3: Document Creation and Check In
Document Creation and Check In
Case Study: Checking in Documents
Advanced Document Check In
Case Study: Checking in Documents with References
Lesson 4: Versioning Files
Versioning Files
Case Study: Versioning Files
Lesson 5: File References
File References
Case Study: File References
Case Study: Copy File and References
Lesson 6: Searching
Searching SOLIDWORKS PDM
Case Study: Search
Training Course Prospectus
Revision 17 Page 63 of 82
Lesson 7: Workflow and Notification SOLIDWORKS PDM Workflow
Case Study: Workflow
Lesson 8: Managing Local Cache
Managing Local Cache
Lesson 9: Working in SOLIDWORKS
Versioning CAD Files
Case Study: Versioning Files
Appendix A: Working with Bill of Materials
Bill of Materials (BOM)
Case Study: Modify a Computed BOM
Case Study: Create and Modify a Named BOM
Training Course Prospectus
Page 64 of 82 Revision 17
Administering SOLIDWORKS PDM Professional Code: SA-TR54 Duration: 3 Days Cost: £1125 per person Prerequisites: Using SOLIDWORKS PDM course, basic experience with the SOLIDWORKS PDM
software, experience with the Windows™ operating system, and knowledge of SOLIDWORKS PDM file structure and referencing.
Description: The focus of this course is on the fundamental skills and concepts central to the successful use of SOLIDWORKS PDM. The intended audience for this course is anyone who will setup and/or administer SOLIDWORKS PDM.
The topics covered in this course are: Introduction
About This Course
Lesson 1: Installation Planning
Planning for SOLIDWORKS PDM
The Planning Process
Training Scenario
The Installation Process
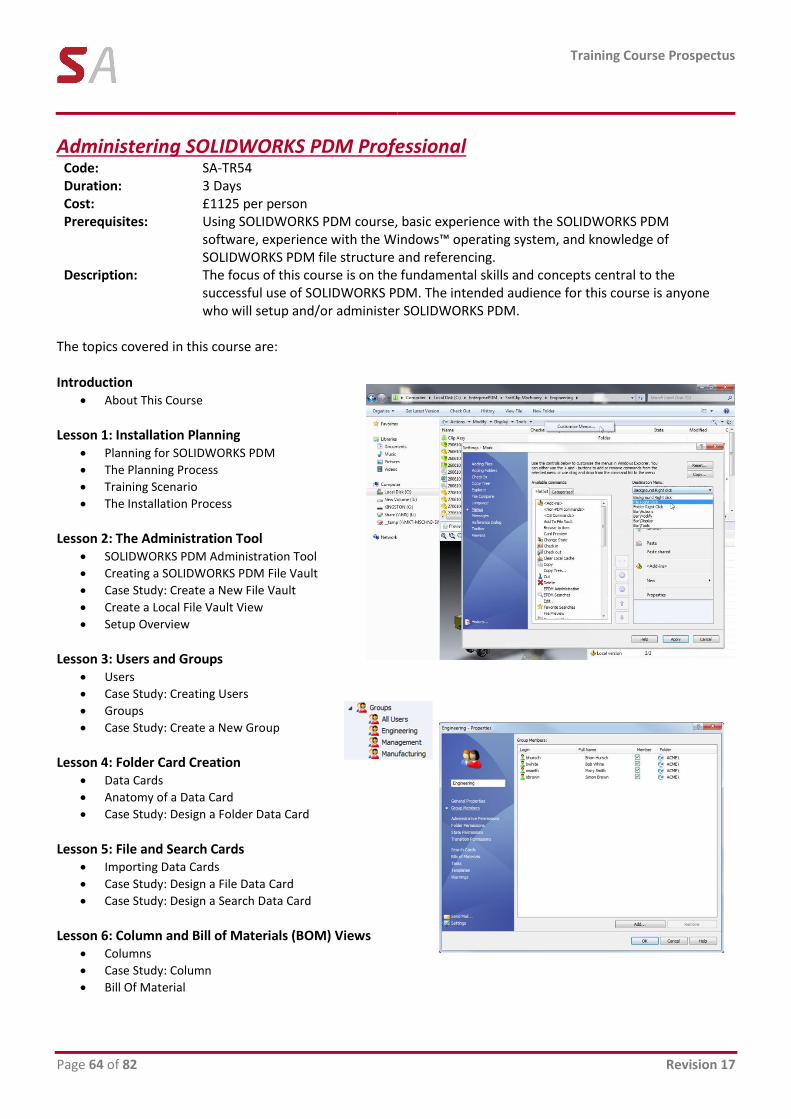
Lesson 2: The Administration Tool
SOLIDWORKS PDM Administration Tool
Creating a SOLIDWORKS PDM File Vault
Case Study: Create a New File Vault
Create a Local File Vault View
Setup Overview
Lesson 3: Users and Groups
Users
Case Study: Creating Users
Groups
Case Study: Create a New Group
Lesson 4: Folder Card Creation
Data Cards
Anatomy of a Data Card
Case Study: Design a Folder Data Card
Lesson 5: File and Search Cards
Importing Data Cards
Case Study: Design a File Data Card
Case Study: Design a Search Data Card
Lesson 6: Column and Bill of Materials (BOM) Views
Columns
Case Study: Column
Bill Of Material
Training Course Prospectus
Revision 17 Page 65 of 82
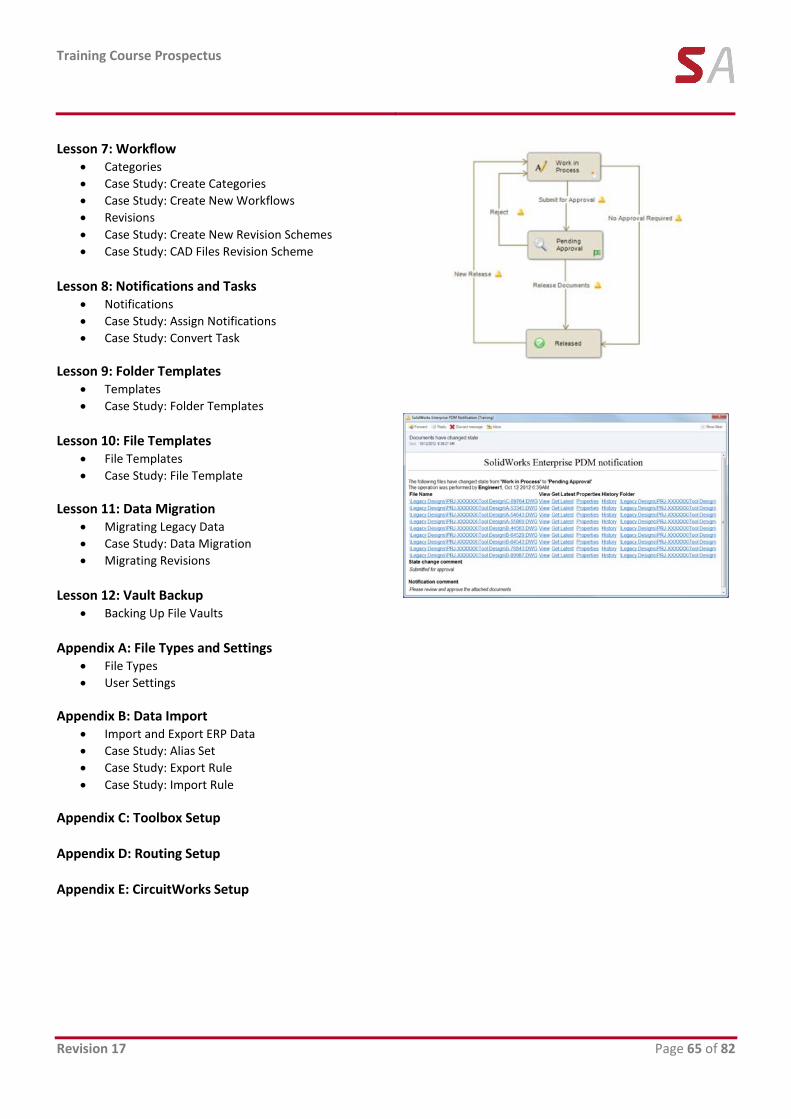
Lesson 7: Workflow
Categories
Case Study: Create Categories
Case Study: Create New Workflows
Revisions
Case Study: Create New Revision Schemes
Case Study: CAD Files Revision Scheme
Lesson 8: Notifications and Tasks
Notifications
Case Study: Assign Notifications
Case Study: Convert Task
Lesson 9: Folder Templates Templates
Case Study: Folder Templates
Lesson 10: File Templates
File Templates
Case Study: File Template
Lesson 11: Data Migration Migrating Legacy Data
Case Study: Data Migration
Migrating Revisions
Lesson 12: Vault Backup
Backing Up File Vaults
Appendix A: File Types and Settings
File Types
User Settings
Appendix B: Data Import Import and Export ERP Data
Case Study: Alias Set
Case Study: Export Rule
Case Study: Import Rule
Appendix C: Toolbox Setup Appendix D: Routing Setup Appendix E: CircuitWorks Setup

Training Course Prospectus
Page 66 of 82 Revision 17
Administering SOLIDWORKS PDM Standard Code: SA-TR58 Duration: 2 Days Cost: £750 per person Prerequisites: Using SOLIDWORKS PDM course, basic experience with the SOLIDWORKS PDM
software, experience with the Windows™ operating system, and knowledge of SOLIDWORKS PDM file structure and referencing.
Description: The focus of this course is on the fundamental skills and concepts central to the successful use of SOLIDWORKS PDM. The intended audience for this course is anyone who will setup and/or administer SOLIDWORKS PDM Standard.
The topics covered in this course are: Introduction
About This Course
Lesson 1: Installation Planning
Planning for SOLIDWORKS PDM
The Planning Process
Training Scenario
The Installation Process
Lesson 2: The Administration Tool
SOLIDWORKS PDM Administration Tool
Creating a SOLIDWORKS PDM File Vault
Case Study: Create a New File Vault
Create a Local File Vault View
Setup Overview
Lesson 3: Users and Groups
Users
Case Study: Creating Users
Groups
Case Study: Create a New Group
Lesson 4: Folder Card Creation
Data Cards
Anatomy of a Data Card
Case Study: Design a Folder Data Card
Lesson 5: File and Search Cards
Importing Data Cards
Case Study: Design a File Data Card
Case Study: Design a Search Data Card
Lesson 6: Column and Bill of Materials (BOM) Views
Columns
Case Study: Columns
Bill Of Material
Case Study: BOM
Training Course Prospectus
Revision 17 Page 67 of 82
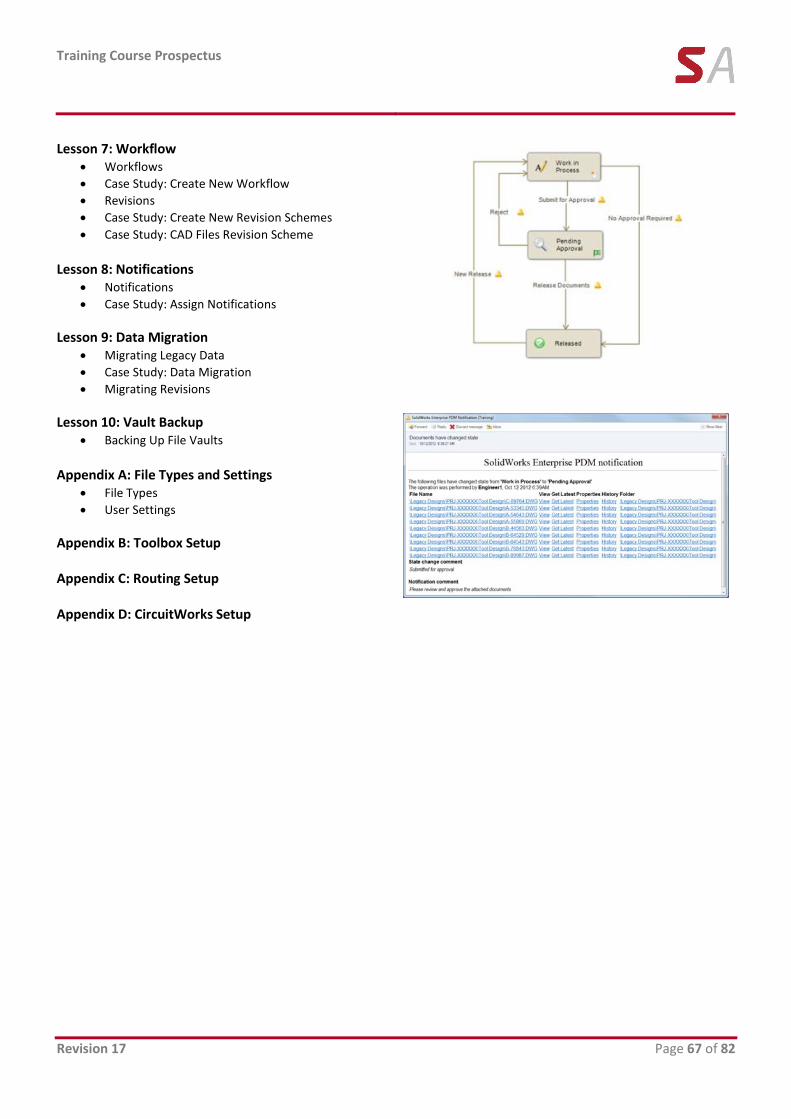
Lesson 7: Workflow
Workflows
Case Study: Create New Workflow
Revisions
Case Study: Create New Revision Schemes
Case Study: CAD Files Revision Scheme
Lesson 8: Notifications
Notifications
Case Study: Assign Notifications
Lesson 9: Data Migration Migrating Legacy Data
Case Study: Data Migration
Migrating Revisions
Lesson 10: Vault Backup Backing Up File Vaults
Appendix A: File Types and Settings
File Types
User Settings
Appendix B: Toolbox Setup Appendix C: Routing Setup Appendix D: CircuitWorks Setup
Training Course Prospectus
Page 68 of 82 Revision 17
SOLIDWORKS Workgroup PDM Courses
SOLIDWORKS Workgroup PDM Contributor Code: SA-TR55 Duration: 1 Day Cost: £375 per person Prerequisites: Basic experience with the SOLIDWORKS file structure and referencing, and the
Windows™ operating system. Description: The focus of this course is on the fundamental skills and concepts central to the
successful use of SOLIDWORKS Workgroup PDM. The intended audience is people who do not use SOLIDWORKS software, but still manage SOLIDWORKS files.
The topics covered in this course are: Introduction
About This Course
Windows®
Use of Colour
Lesson 1: PDM Concepts and File Management
The Four Pillars of PDM
What is the SOLIDWORKS Workgroup PDM Software?
SOLIDWORKS Workgroup PDM Overview
SOLIDWORKS Workgroup PDM Components
Basic Rules
SOLIDWORKS File Management
File References
File Reference Example
Opening Files
Saving Files
File Properties
External Reference Search Order
Lesson 2: SOLIDWORKS Explorer and SOLIDWORKS Workgroup PDM Add-In
SOLIDWORKS Workgroup PDM Contributor
Case Study: SOLIDWORKS Explorer
Renaming Components
SOLIDWORKS Workgroup PDM Add-In
Case Study: SOLIDWORKS Workgroup PDM Add-In
Lesson 3: Managing Files with SOLIDWORKS Workgroup PDM Add-In
Document Check In Process
Case Study: Check in Documents
Revision Scheme
Case Study: Change Project
Working on Vaulted Documents
Case Study: Working on Documents
Reporting
Searching
Searching for Documents

Training Course Prospectus
Revision 17 Page 69 of 82
Case Study: Windows Search
Searching for Documents in the Vault
Case Study: Searching the Vault
Case Study: Renaming Documents
Explain Access
Lesson 4: SOLIDWORKS Workgroup PDM Viewer
SOLIDWORKS Workgroup PDM Viewer
Case Study: Accessing the SOLIDWORKS Workgroup PDM Viewer
Training Course Prospectus
Page 70 of 82 Revision 17
SOLIDWORKS Workgroup PDM CAD Editor Code: SA-TR56 Duration: 1 Day Cost: £375 per person Prerequisites: Basic experience with the SOLIDWORKS file structure and referencing, and the
Windows™ operating system. Description: The focus of this course is on the fundamental skills and concepts central to the
successful use of SOLIDWORKS Workgroup PDM. The intended audience for this course is SOLIDWORKS users.
The topics covered in this course are: Introduction
About This Course
Windows®
Use of Colour
Lesson 1: PDM Concepts and File Management
The Four Pillars of PDM
What is the SOLIDWORKS Workgroup PDM Software?
SOLIDWORKS Workgroup PDM Overview
SOLIDWORKS Workgroup PDM Components
Basic Rules
SOLIDWORKS File Management
File References
File Reference Example
Opening Files
Saving Files
File Properties
External Reference Search Order
Lesson 2: Document Check In
SOLIDWORKS Workgroup PDM User Interface
Starting SOLIDWORKS Workgroup PDM
SOLIDWORKS User Interface
Getting Help
Setting up SOLIDWORKS Workgroup PDM
Users Accounts
Case Study: Checking In SOLIDWORKS Documents
User Options
Document Check In Process
Revision Scheme
Lifecycle
Checking in References
Logging In/Out
Creating Sub-projects
Reporting
Lesson 3: Accessing Documents
Working on Vaulted Documents
Case Study: Modify an assembly
Training Course Prospectus
Revision 17 Page 71 of 82
Non-SOLIDWORKS Documents
Lesson 4: SOLIDWORKS Workgroup PDM Environment
Searching for Documents
Case Study: Setting Up Windows Search
Searching for Documents in the Vault
Case Study: Advanced Search
Other SOLIDWORKS Workgroup PDM Activities
Reports
Custom Properties
Case Study: Adding Properties
Drawing Revisions
Case Study: Drawing Revisions
Collaboration
Case Study: Collaboration
Printing Drawings From The Vault
Case Study: Batch Print
Exporting SOLIDWORKS Workgroup PDM Files
Automated File Properties
Case Study: Custom Properties in Templates
Bulk Loading Files
Alternate Methods to Access the Vault
Case Study: Using SOLIDWORKS Explorer
Functional Differences
User Options
SOLIDWORKS Workgroup PDM Viewer
Case Study: Accessing the SOLIDWORKS Workgroup PDM Viewer
Software Updates
Lesson 5: Toolbox and Files that are Not Revision Managed
Toolbox Parts
Toolbox Case Studies
Case Study: Adding Toolbox Parts
Files That are Not Revision Managed
Case Study: Not Revision Managed Files
Case Study: The Toolbox Flag
Standard Parts
Drag and Drop
Case Study: Common Parts Project
Case Study: Design Library
Revision Bumping
Adding Notes
Case Study: Revision Bumping
Removing Files From the Vault
Explain Access
Case Study: Remove Files From The Vault
Managing Configuration Revisions
Case Study: Configuration Revisions
Training Course Prospectus
Page 72 of 82 Revision 17
Administering SOLIDWORKS Workgroup PDM Code: SA-TR57 Duration: 1 Day Cost: £375 per person Prerequisites: Basic experience with the SOLIDWORKS software and the Windows™ operating system,
and knowledge of SOLIDWORKS file structure and referencing. Description: The focus of this course is on the fundamental skills and concepts central to the
successful use of SOLIDWORKS Workgroup PDM. The intended audience for this course is vault administrators.
The topics covered in this course are: Introduction
About This Course
Windows
Use of Colour
Lesson 1: Planning for PDM
Planning for SOLIDWORKS Workgroup PDM
The Planning Process
Data Management Plan
Transition Plan
The VaultAdmin Tool
Lesson 2: SOLIDWORKS Workgroup PDM Setup
Administrator Topics
The Vault
Vault Backup
Vault Restoration
Case Study: Replace The Vault
VaultAdmin Tool
VaultAdmin Settings
User Accounts
Case Study: User Accounts
Case Study: Groups
Projects
Project Access
Project Settings
Case Study: Copy Project Settings
Revision Scheme
Lifecycles
Case Study: Create Lifecycles
Standard Libraries
Case Study: Common Parts
Case Study: Toolbox Parts
Vault Settings
Case Study: Global Settings
Custom Properties
Case Study: Adding Custom Properties
Search
Case Study: Index the Vault
Training Course Prospectus
Revision 17 Page 73 of 82
Revision Table
Case Study: Revision Table Properties
Triggers
Lesson 3: Maintaining the Vault
Maintaining The Vault
Case Study: Vault Backup
Case Study: Log Files
Tree Options
Maintaining User Accounts
Case Study: Modify Users
Case Study: Passwords
Regaining Disk Space
Case Study: Obsolete Folders
Archiving Files
Case Study: Archiving Files
Update Software
File Conversion
Case Study: Converting Files In The Vault
Lesson 4: Administration Tasks
Administrator Tasks
Mapping Custom Properties
Case Study: Property Mapping
Copy Project
Case Study: Copy Project
Bulk Loading Files
Case Study: Bulk Check In Files
Transferring Projects between Vaults
Case Study: Exporting Projects
Appendix
Best Practices
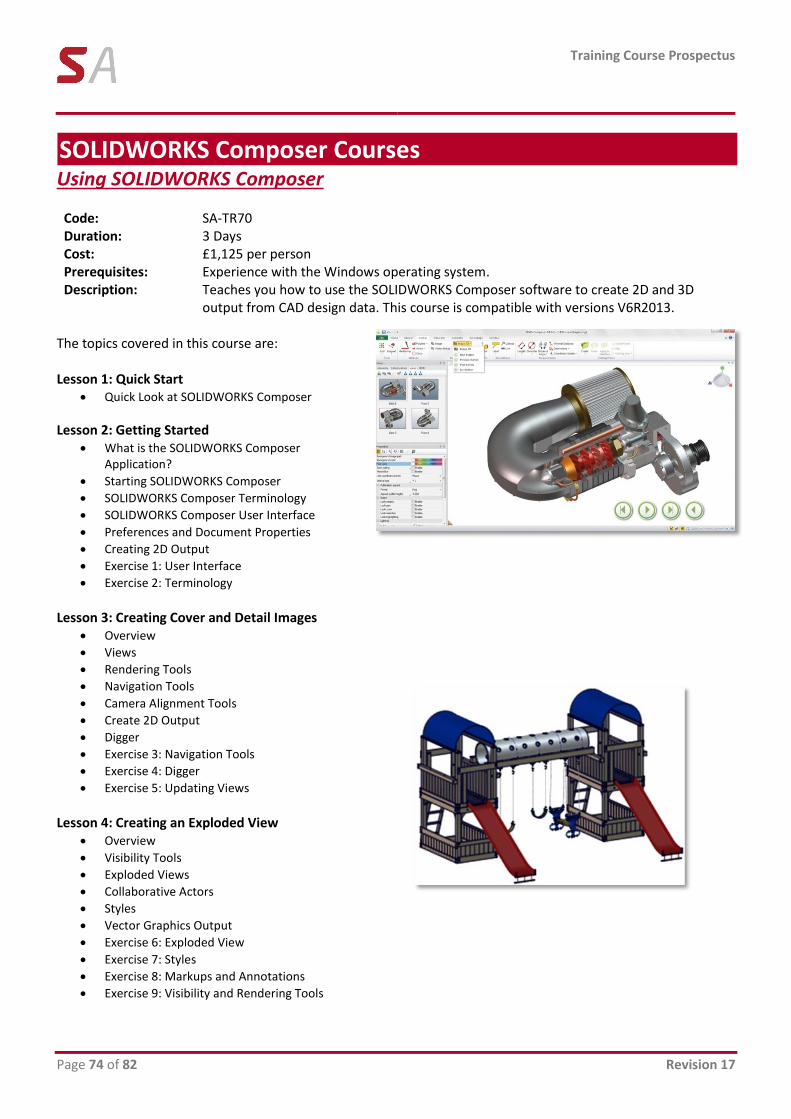
Training Course Prospectus
Page 74 of 82 Revision 17
SOLIDWORKS Composer Courses Using SOLIDWORKS Composer
Code: SA-TR70 Duration: 3 Days Cost: £1,125 per person Prerequisites: Experience with the Windows operating system. Description: Teaches you how to use the SOLIDWORKS Composer software to create 2D and 3D
output from CAD design data. This course is compatible with versions V6R2013. The topics covered in this course are: Lesson 1: Quick Start
Quick Look at SOLIDWORKS Composer
Lesson 2: Getting Started What is the SOLIDWORKS Composer
Application?
Starting SOLIDWORKS Composer
SOLIDWORKS Composer Terminology
SOLIDWORKS Composer User Interface
Preferences and Document Properties
Creating 2D Output
Exercise 1: User Interface
Exercise 2: Terminology
Lesson 3: Creating Cover and Detail Images
Overview
Views
Rendering Tools
Navigation Tools
Camera Alignment Tools
Create 2D Output
Digger
Exercise 3: Navigation Tools
Exercise 4: Digger
Exercise 5: Updating Views
Lesson 4: Creating an Exploded View
Overview
Visibility Tools
Exploded Views
Collaborative Actors
Styles
Vector Graphics Output
Exercise 6: Exploded View
Exercise 7: Styles
Exercise 8: Markups and Annotations
Exercise 9: Visibility and Rendering Tools
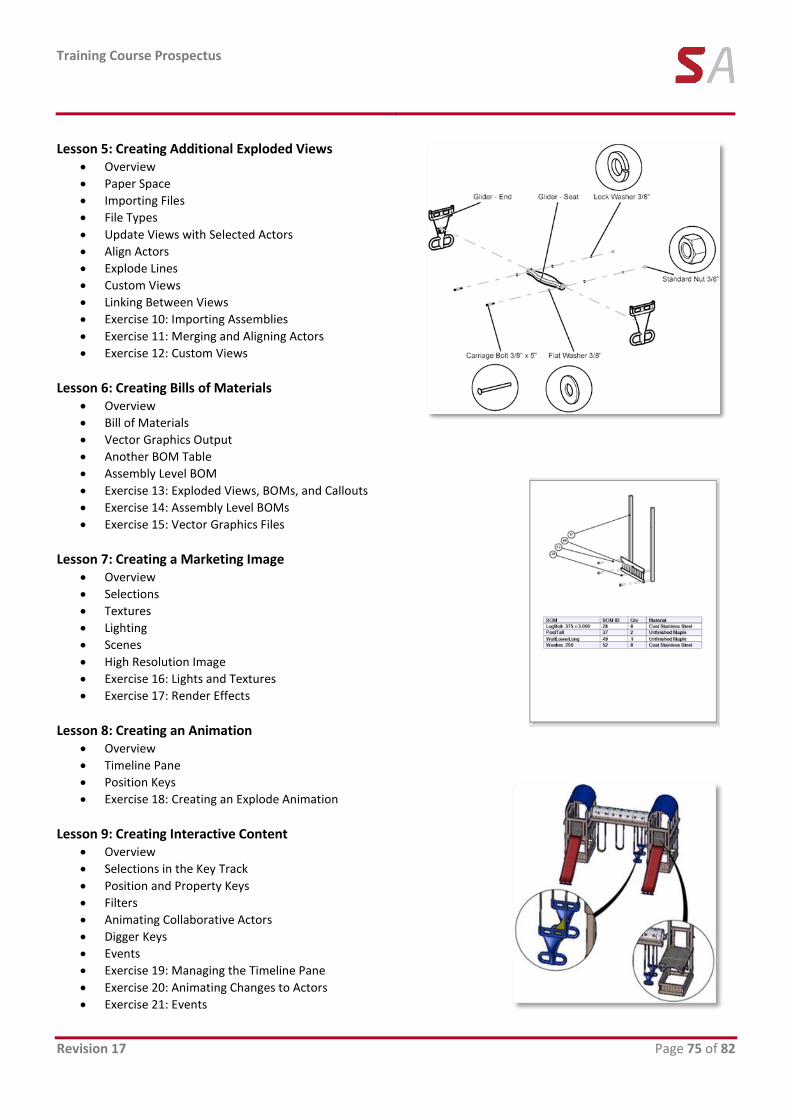
Training Course Prospectus
Revision 17 Page 75 of 82
Lesson 5: Creating Additional Exploded Views
Overview
Paper Space
Importing Files
File Types
Update Views with Selected Actors
Align Actors
Explode Lines
Custom Views
Linking Between Views
Exercise 10: Importing Assemblies
Exercise 11: Merging and Aligning Actors
Exercise 12: Custom Views
Lesson 6: Creating Bills of Materials
Overview
Bill of Materials
Vector Graphics Output
Another BOM Table
Assembly Level BOM
Exercise 13: Exploded Views, BOMs, and Callouts
Exercise 14: Assembly Level BOMs
Exercise 15: Vector Graphics Files
Lesson 7: Creating a Marketing Image
Overview
Selections
Textures
Lighting
Scenes
High Resolution Image
Exercise 16: Lights and Textures
Exercise 17: Render Effects
Lesson 8: Creating an Animation
Overview
Timeline Pane
Position Keys
Exercise 18: Creating an Explode Animation
Lesson 9: Creating Interactive Content
Overview
Selections in the Key Track
Position and Property Keys
Filters
Animating Collaborative Actors
Digger Keys
Events
Exercise 19: Managing the Timeline Pane
Exercise 20: Animating Changes to Actors
Exercise 21: Events
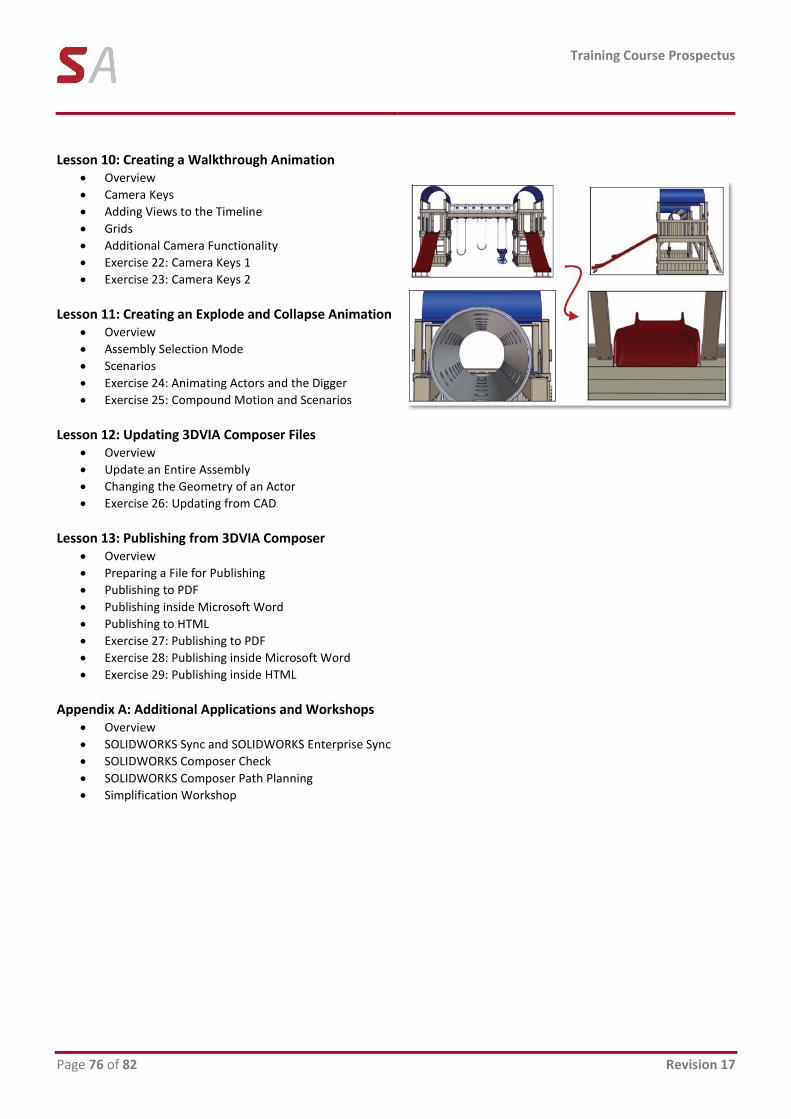
Training Course Prospectus
Page 76 of 82 Revision 17
Lesson 10: Creating a Walkthrough Animation
Overview
Camera Keys
Adding Views to the Timeline
Grids
Additional Camera Functionality
Exercise 22: Camera Keys 1
Exercise 23: Camera Keys 2
Lesson 11: Creating an Explode and Collapse Animation
Overview
Assembly Selection Mode
Scenarios
Exercise 24: Animating Actors and the Digger
Exercise 25: Compound Motion and Scenarios
Lesson 12: Updating 3DVIA Composer Files
Overview
Update an Entire Assembly
Changing the Geometry of an Actor
Exercise 26: Updating from CAD
Lesson 13: Publishing from 3DVIA Composer
Overview
Preparing a File for Publishing
Publishing to PDF
Publishing inside Microsoft Word
Publishing to HTML
Exercise 27: Publishing to PDF
Exercise 28: Publishing inside Microsoft Word
Exercise 29: Publishing inside HTML
Appendix A: Additional Applications and Workshops
Overview
SOLIDWORKS Sync and SOLIDWORKS Enterprise Sync
SOLIDWORKS Composer Check
SOLIDWORKS Composer Path Planning
Simplification Workshop

Training Course Prospectus
Revision 17 Page 77 of 82
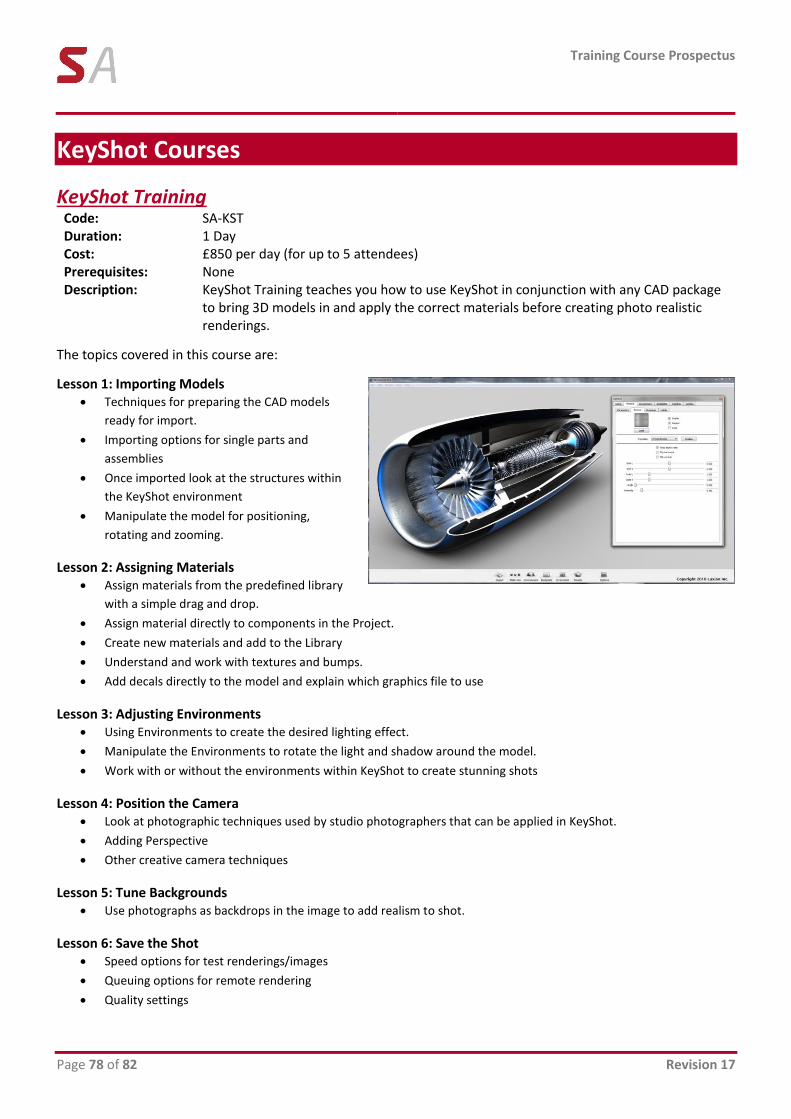
Training Course Prospectus
Page 78 of 82 Revision 17
KeyShot Courses
KeyShot Training Code: SA-KST Duration: 1 Day Cost: £850 per day (for up to 5 attendees) Prerequisites: None Description: KeyShot Training teaches you how to use KeyShot in conjunction with any CAD package
to bring 3D models in and apply the correct materials before creating photo realistic renderings.
The topics covered in this course are:
Lesson 1: Importing Models Techniques for preparing the CAD models
ready for import.
Importing options for single parts and
assemblies
Once imported look at the structures within
the KeyShot environment
Manipulate the model for positioning,
rotating and zooming.
Lesson 2: Assigning Materials Assign materials from the predefined library
with a simple drag and drop.
Assign material directly to components in the Project.
Create new materials and add to the Library
Understand and work with textures and bumps.
Add decals directly to the model and explain which graphics file to use
Lesson 3: Adjusting Environments Using Environments to create the desired lighting effect.
Manipulate the Environments to rotate the light and shadow around the model.
Work with or without the environments within KeyShot to create stunning shots
Lesson 4: Position the Camera Look at photographic techniques used by studio photographers that can be applied in KeyShot.
Adding Perspective
Other creative camera techniques
Lesson 5: Tune Backgrounds Use photographs as backdrops in the image to add realism to shot.
Lesson 6: Save the Shot Speed options for test renderings/images
Queuing options for remote rendering
Quality settings

Training Course Prospectus
Revision 17 Page 79 of 82
Training Course Prospectus
Page 80 of 82 Revision 17
Registration Procedure Choose the appropriate course, or courses, using the information provided in this prospectus. Telephone us on 0121 544 1400 to confirm the course availability. Once a date has been agreed, a place on the course will be provisionally booked for you. This will remain provisional until receipt of the Training Course Registration Form enclosed with this prospectus and a purchase order or cheque to confirm the booking.
Fees and Invoicing In order to confirm all provisional bookings, we will require either a purchase order, or alternatively, a cheque along with your Training Course Registration forms (enclosed with this prospectus). If you submit a purchase order, you will receive an invoice for the required sum and payment in full is due by return.
Terms and Conditions SOLID Applications Ltd reserve the right to cancel the enrolment of any delegate for whom payment has not been received one week prior to the start of the course. In such circumstances our standard cancellation terms will apply. SOLID Applications Ltd reserves the right to cancel a course:
Through any circumstance beyond its control
Through any circumstances deemed by SOLID Applications Ltd to affect its ability to provide training to the normal standard
If it does not attract the minimum number of delegates
In such circumstances, delegates will be given the maximum possible notice and offered enrolment on the next available course. Courses are scheduled on demand and the frequency of any course will reflect that demand.
Cancellation Terms When a confirmed booking has been accepted by SOLID Applications Ltd and it is subsequently cancelled or transferred to a later course at the request of the customer, SOLID Applications Ltd reserves the right to apply the charges set out below:
Where the request is received in writing Cancellation Transfer to later course
More than five weeks before commencement No charge No charge
Three or Four weeks before commencement 25% of fee No charge
One or Two weeks before commencement 100% of fee 50% of fee
Training Course Prospectus
Revision 17 Page 81 of 82
Training Course Registration Form
PLEASE COMPLETE THIS FORM IN BLOCK CAPITALS AND RETURN TO SOLID APPLICATIONS LTD BY FAX (0121 544 1600) OR EMAIL ([email protected])
Company: Contact:
Address: Position:
Department:
Tel. No.:
Postcode: E-mail:
Delegate Name (s)
Course Code/Title
Date and Location
Purchase Order Number *
Special dietary requirements?
YOUR PLACE CANNOT BE CONFIRMED UNTIL WE HAVE A PURCHASE ORDER. ONCE WE RECEIVE YOUR COMPLETED REGISTRATION FORM AND PURCHASE ORDER NUMBER, WE CAN SECURE YOUR BOOKING AND SEND CONFIRMATION AND JOINING INSTRUCTIONS.
*WE REGRET WE CANNOT ACCEPT ATTENDANCE ON ANY SOLID APPLICATIONS TRAINING COURSE WITHOUT A PURCHASE ORDER.
Purchase Order No(s):
Order Value:
Name:
Company:
Signature:
Date:

Training Course Prospectus
Page 82 of 82 Revision 17