assembly instructions and use and care manual - king · pdf fileassembly instructions and use...
TRANSCRIPT

Assembly InstructIonsAnd
use And cAre mAnuAl
ImProPer InstAllAtIon, AdJustment, AlterAtIon, serVIce, mAIntenAnce or use cAn cAuse InJury or ProPerty dAmAGe. reAd tHe InstAllAtIon,
oPerAtInG And mAIntenAnce InstructIons tHorouGHly beFore InstAllInG or serVIcInG tHe eQuIPment.
Metal Fusion, inc.712 St. George Avenue.
Jefferson, LA 70121If you have any problems or questions
call us toll Free at1-800-783-3885
7:30 A.M. to 3:30 P.M. CST • Monday through Friday(504) 736-0201
www.kingkooker.com
PortAble ProPAne FIre PIt
model/serIAl # __________
FAIlure to Follow tHese InstructIons And wArnInGs could result In FIre, exPlosIon, burn HAzArd or cArbon
monoxIde PoIsonInG wHIcH could cAuse ProPerty dAmAGe, PersonAl InJury or deAtH.
english

do not store or use gasoline or other flammable vapors and liquids in the vicinity of this or any other appliance.
An lP-cylinder not connected for use shall not be stored in the vicinity of this or any other appliance.
2
FAIlure to Follow tHese InstructIons And wArnInGs could result In FIre, exPlosIon, burn HAzArd or cArbon monoxIde PoIsonInG wHIcH could
cAuse ProPerty dAmAGe, PersonAl InJury or deAtH.
dAnGerIf you smell gas:
1. shut off gas to the appliance.
2. extinguish any open flame.
3. If odor continues, keep away from the appliance and immediately call your gas supplier or Fire department.
For outdoor use only.
cArbon monoxIde HAzArd
this appliance can produce carbon monoxide which has no odor.
using it in an enclosed space can kill you.
never use this appliance in an enclosed space such as a camper, tent, car or home.
dAnGer

3
1) this is an Attended appliance. do not leave this appliance unattended while the burner is lit. monitor the appliance when hot after use. Heated equipment can remain at high temperatures which can cause burns long after operation.
2) Keep children, pets and unauthorized persons away from the appliance at all times.
3) the use of alcohol, prescription or non-prescription drugs may impair your ability to properly assemble or safely operate this appliance. do not assemble or operate this appliance if using alcohol, prescription or non-prescription drugs.
4) this appliance is for outdoor use only. do not use in a building, garage, tent or any other enclosed area. do not use in or on a recreational vehicle or boat. neVer use this appliance as a heater.
5) do not locate this appliance under Any overhead construction. Keep a minimum clearance of 10 ft. (3.05m) from the sides, front and back of the appliance to Any construction. Keep the area clear of any combustible materials, gasoline and other flammable vapors and liquids. do not use on or under Any apartment or condo balcony or deck.
6) when operating, the appliance must be on a level, stable, noncombustible surface such as brick, concrete or dirt. not suitable are surfaces such as wood, asphalt or plastic which may burn, blister or melt.
7) check all fittings for leaks before each use. Keep the fuel supply hose away from any heated surfaces. only the lP hose/regulator assembly specified by metal Fusion, Inc. should be used with this appliance. this regulator is set for an outlet pressure of 0.5 PsI.
8) the burner should be inspected before each use. If the burner is damaged, it must be replaced before operating the appliance. only the burner specified by metal Fusion, Inc. should be used with this appliance.
9) do not obstruct flow of combustion air and/or ventilation air for fire pit.
10) when operating, have a type bc or Abc fire extinguisher readily available.
11) this appliance gets dangerously hot in use. do not move the appliance when in use. Allow the appliance to cool completely before moving or storing. Avoid bumping of or impact with the appliance to prevent contact with hot appliance.
12) AlwAys keep a safe distance from the appliance when in operation. AlwAys keep hair and clothing from coming into contact with the appliance while in use or still hot.
13) solid fuels, such as wood, charcoal and paper, should never be burned in this appliance.
reAd And understAnd beFore usInG tHIs ProductThroughout this manual the words appliance, burner and fire pit will be used
interchangeably to refer to the King Kooker® Outdoor Fire PIt.

4
14) In the event of rain, snow, hail, sleet or other forms of precipitation while in operation, turn off the appliance burners and gas supply. do not attempt to move the appliance. do not use this appliance if any part has been under water. Immediately call a qualified service technician to inspect the appliance and to replace any part of the control system and any gas control which has been under water.
15) see use and care section for lP Gas cylinder Information. A 20 pound (9 kg) cylinder should be used with this appliance. the lP-gas supply cylinder
used must have a protective collar and must be constructed and marked in accordance with the specifications for lP-gas cylinders of the u. s. department of transportation (dot) or the national standard of canada, can/csa-B339, cylinders, spheres and tubes for the transportation of Dangerous Goods. do not store a spare lP-gas cylinder under or near this appliance. never fill the cylinder beyond 80% full. For proper vapor withdrawal, the 20 lb. (9 kg) cylinder should be used in the proper upright position. cylinder must be turned off while not in use. Failure to follow these instructions and warnings could result in fire or explosion which could cause property damage, personal injury or death.
16) this appliance is not intended for commercial use.
17) use King Kooker® appliances only in accordance with state and local ordinances, or in the absence of local codes, with the national Fuel Gas code, ansiZ223.1/nFPa 54, storage and Handling of liquefied Petroleum Gases, ansi/nFPa 58 or csa B149.1, natural Gas and Propane installation code.
FAIlure to Follow tHese InstructIons And wArnInGs could result In FIre, exPlosIon, burn HAzArd or cArbon monoxIde PoIsonInG wHIcH
could cAuse ProPerty dAmAGe, PersonAl InJury or deAtH.
children and adults should be alerted to the hazards of high surface temperatures and flames and should stay away to avoid burns or clothing ignition.
young children should be carefully supervised when they are in the area of the appliance.
clothing or other flammable materials should not be hung from the appliance, or placed on or near the appliance.
Any guard or other protective device removed for servicing the appliance must be replaced prior to operating the appliance.
Installation and repair should be done by a qualified service person. the appliance should be inspected before use and at least annually by a qualified service person. more frequent cleaning may be required as necessary. It is imperative that control compartment, burners, and circulating air passageways of the appliance be kept clean.

reAd And understAnd All InstructIons beFore usInG your KInG KooKer® Product
tAble oF contentswarnings. . . . . . . . . . . . . . . . . . . . . . . . . . . . . . . . . . . . . . . . . . . . . . . . . . . . . . . . . . . . . . . . . . . . . . . . . . . . . . . . . . . . . . . . . . . . . . . . . . . . . . . . . . . . . . . . . . . . . . . 2-4
table of contents . . . . . . . . . . . . . . . . . . . . . . . . . . . . . . . . . . . . . . . . . . . . . . . . . . . . . . . . . . . . . . . . . . . . . . . . . . . . . . . . . . . . . . . . . . . . . . . . . . . . . . . . . . . . . . . . . . . . . . .5
warranty . . . . . . . . . . . . . . . . . . . . . . . . . . . . . . . . . . . . . . . . . . . . . . . . . . . . . . . . . . . . . . . . . . . . . . . . . . . . . . . . . . . . . . . . . . . . . . . . . . . . . . . . . . . . . . . . . . . . . . . . . . . . . . .6
owner’s registration . . . . . . . . . . . . . . . . . . . . . . . . . . . . . . . . . . . . . . . . . . . . . . . . . . . . . . . . . . . . . . . . . . . . . . . . . . . . . . . . . . . . . . . . . . . . . . . . . . . . . . . . . . . . . . . . . . 7-8
section I - King Kooker® Fire Pit Assembly . . . . . . . . . . . . . . . . . . . . . . . . . . . . . . . . . . . . . . . . . . . . . . . . . . . . . . . . . . . . . . . . . . . . . . . . . . . . . . . . . . . . . . . . . . . . . . . . . 9
Brass Fitting with Manual Valve Assembly Instructions . . . . . . . . . . . . . . . . . . . . . . . . . . . . . . . . . . . . . . . . . . . . . . . . . . . . . . . . . . . . . . . . . . . . . . . . . . . . . . . . . . . 10
Lava Rock Instructions . . . . . . . . . . . . . . . . . . . . . . . . . . . . . . . . . . . . . . . . . . . . . . . . . . . . . . . . . . . . . . . . . . . . . . . . . . . . . . . . . . . . . . . . . . . . . . . . . . . . . . . . . . . .10
Sandbag Filling Instructions . . . . . . . . . . . . . . . . . . . . . . . . . . . . . . . . . . . . . . . . . . . . . . . . . . . . . . . . . . . . . . . . . . . . . . . . . . . . . . . . . . . . . . . . . . . . . . . . . . . . . . . . 11
section II - use and care . . . . . . . . . . . . . . . . . . . . . . . . . . . . . . . . . . . . . . . . . . . . . . . . . . . . . . . . . . . . . . . . . . . . . . . . . . . . . . . . . . . . . . . . . . . . . . . . . . . . . . . . . . . . . . . .12
LP Gas Cylinder Information . . . . . . . . . . . . . . . . . . . . . . . . . . . . . . . . . . . . . . . . . . . . . . . . . . . . . . . . . . . . . . . . . . . . . . . . . . . . . . . . . . . . . . . . . . . . . . . . . . . . . . . . 12
Connection Instructions . . . . . . . . . . . . . . . . . . . . . . . . . . . . . . . . . . . . . . . . . . . . . . . . . . . . . . . . . . . . . . . . . . . . . . . . . . . . . . . . . . . . . . . . . . . . . . . . . . . . . . . . . . .13
Leak Test Instructions . . . . . . . . . . . . . . . . . . . . . . . . . . . . . . . . . . . . . . . . . . . . . . . . . . . . . . . . . . . . . . . . . . . . . . . . . . . . . . . . . . . . . . . . . . . . . . . . . . . . . . . . . . . . .13
Placement Instructions . . . . . . . . . . . . . . . . . . . . . . . . . . . . . . . . . . . . . . . . . . . . . . . . . . . . . . . . . . . . . . . . . . . . . . . . . . . . . . . . . . . . . . . . . . . . . . . . . . . . . . . . . . . .14
Lighting and Operating Instructions . . . . . . . . . . . . . . . . . . . . . . . . . . . . . . . . . . . . . . . . . . . . . . . . . . . . . . . . . . . . . . . . . . . . . . . . . . . . . . . . . . . . . . . . . . . . . . . . . . 15
Turning Off and Storing the Appliance after Use . . . . . . . . . . . . . . . . . . . . . . . . . . . . . . . . . . . . . . . . . . . . . . . . . . . . . . . . . . . . . . . . . . . . . . . . . . . . . . . . . . . . . . . . 16
Maintenance Instructions . . . . . . . . . . . . . . . . . . . . . . . . . . . . . . . . . . . . . . . . . . . . . . . . . . . . . . . . . . . . . . . . . . . . . . . . . . . . . . . . . . . . . . . . . . . . . . . . . . . . . . . . . . 16
section III - Frequently Asked Questions . . . . . . . . . . . . . . . . . . . . . . . . . . . . . . . . . . . . . . . . . . . . . . . . . . . . . . . . . . . . . . . . . . . . . . . . . . . . . . . . . . . 17
5

6
metAl FusIon, Inc.lImIted one-yeAr wArrAnty
wHAt tHIs wArrAnty coVersThis warranty covers all components of this appliance to be free from defects in materials and workmanship, with the exceptions stated below.
How lonG coVerAGe lAstsThis warranty runs for one year from the date of purchase. Please keep your receipt with this manual for future reference.
wHAt Is not coVeredThis warranty does not cover the following:
Incidental and consequential damages. This warranty does not cover incidental and consequential damages arising in any way out of the use of this appliance. The liability of Metal Fusion, Inc. is, in any event, limited to the amount of the original purchase price of this appliance, and remains in force only as long as the product remains in its original, as-built configuration. Some states do not allow the exclusion or limitation of incidental or consequential damages, so the above limitation or exclusion may not apply to you.
neglectful operation. This warranty does not cover any loss or damage arising in any way due to the negligent operation of this appliance.
altered, Repaired or Misused equipment. This warranty does not cover any loss or damage arising in any way out of the use of this appliance when it has been altered, repaired by persons other than Metal Fusion, Inc., or when it has been abused or misused, or when it has been used other than in accordance with the manufacturer’s operating instructions.
other assumed Responsibilities. Unless otherwise provided by law, this warranty does not cover any responsibility or liability arising in any way out of the use of this product where that responsibility or liability was purportedly assumed by any other person or agent.
Paint, Discoloration, and Rust. This warranty does not cover the paint on the appliance, as in a normal use of the appliance, the paint will be burned off. Nor does this warranty cover discoloration or rust to the appliance as these occurrences are part of the appliance’s normal wear and tear.
wHAt metAl FusIon, Inc. wIll doMetal Fusion, Inc. will repair or replace any appliance that proves to be defective in materials or workmanship. In the event repair is not possible or economically feasible, Metal Fusion, Inc. will replace your appliance with an identical or substantially equivalent appliance. Metal Fusion, Inc. will perform this service at no charge to you, except for the actual cost of shipping and handling the appliance or replacement parts.
How to Get serVIceIn the event you have a problem or malfunction with your appliance, call Metal Fusion, Inc. at (800) 783-3885.
How stAte lAw APPlIesThis warranty gives you specific rights, and you may have other rights which vary from state to state.
7
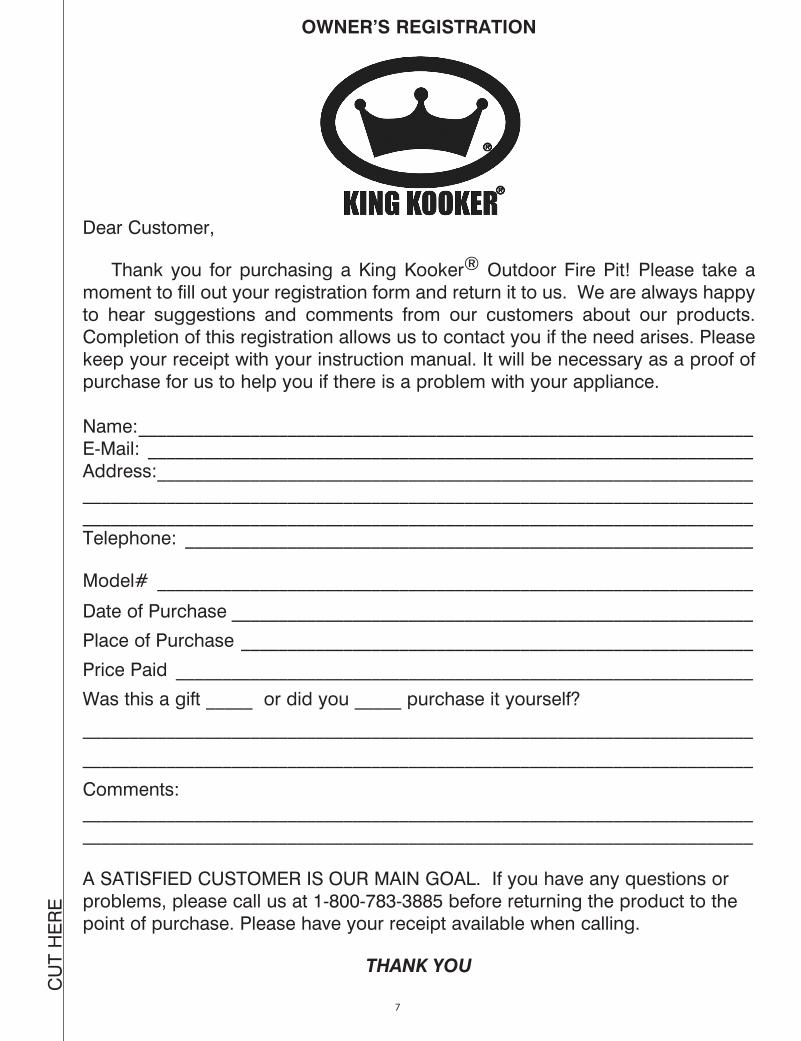
owner’s reGIstrAtIon
Dear Customer,
Thank you for purchasing a King Kooker® Outdoor Fire Pit! Please take a moment to fill out your registration form and return it to us. We are always happy to hear suggestions and comments from our customers about our products. Completion of this registration allows us to contact you if the need arises. Please keep your receipt with your instruction manual. It will be necessary as a proof of purchase for us to help you if there is a problem with your appliance.
Name: __________________________________________________________________E-Mail: _________________________________________________________________Address: ________________________________________________________________________________________________________________________________________________________________________________________________________________Telephone: _____________________________________________________________
Model# ________________________________________________________________
Date of Purchase ________________________________________________________
Place of Purchase _______________________________________________________
Price Paid ______________________________________________________________
Was this a gift _____ or did you _____ purchase it yourself?
________________________________________________________________________
________________________________________________________________________
Comments:________________________________________________________________________________________________________________________________________________
A SATISFIED CUSTOMER IS OUR MAIN GOAL. If you have any questions or problems, please call us at 1-800-783-3885 before returning the product to the point of purchase. Please have your receipt available when calling.
tHank you
CU
T H
ER
E

8
________________________________________________________________________
metAl FusIon, Inc.712 St. George Avenue
Jefferson, LA 70121
Place Stamp Here
FOLD
FOLD
TAPE HERE

tools reQuIred: torQue wrencH or AdJustAble wrencH, leAK testInG solutIon
1. Before assembling, check that all components are included in the shipping carton. Accessories may vary according to model. Check the list of accessories on your box. The following parts are considered essential and should be included in your package regardless of model number.
required Parts lists:Fire Pit Frame, Fire Pit bowl with installed burner, brass Fitting with manual Valve and lP
Hose and regulator, lava rock (20 lb.), sandbag If any of the above parts are missing, contact Metal Fusion, Inc. at 1-800-783-3885 between the
hours of 7:30 a.m. and 3:30 p.m. CST Monday through Friday for replacements.
2. Read assembly instructions, and understand sequence of assembly, before commencing to assemble your appliance.
3. Remove the fire pit bowl with installed burner from the fire pit frame. Remove and discard all protective packing materials. Re-insert the fire pit bowl with installed burner into the fire pit frame (the burner’s venturi tube should be inserted through the hole located on the side of the fire pit frame.) Use caution when removing and inserting the fire pit bowl with installed burner as the fire pit bowl and burner can be damaged if mishandled.
9
sectIon IFIre PIt Assembly
tHe use And cAre mAnuAl must be reAd And understoodbeFore usInG tHe APPlIAnce
Throughout this manual the words appliance, burner and fire pit will be used interchangeably to refer to the King Kooker® Outdoor Fire PIt.
FIre PIt FrAme
FIre PIt bowl
VenturI
burner

10
brAss FIttInG wItH mAnuAl VAlVe Assembly InstructIons
Locate the brass fitting with manual valve (with hose/regulator attached). Tighten the brass fitting’s threaded end (with orifice) into the venturi with a torque wrench, up to a torque of 95 to 105 lb./in. Alternatively, hand tighten securely and then, using a wrench, tighten an additional 1-1 1/2 turns. The manual valve handle should be positioned upright when installed. See below for pictures of correct assembly.
Check that the 3/8” female flare swivel end of the hose is fully tightened onto the brass fitting with an adjustable wrench. The hose to valve connection, as well as all other gas joints, must be tightened and leak tested (see Leak Test instructions on page 13) before using the appliance.
brass Fittingmanual Valve
Venturiorifice
lP Gas Hose
Carefully arrange the lava rock evenly on top of the burner and in the bowl. Do not pour or drop lava rocks onto the burner or bowl as damage could occur to burner ports or bowl.Placement of lava rocks may need to be adjusted to produce a more realistic looking flame. Arrange lava rocks as needed to produce a flame that extends upward and toward the center above the appliance. After operation of the appliance, AlwAys allow time for the lava rocks to cool completely before removing or adjusting lava rocks. neVer attempt to move lava rocks while the appliance is lit or still hot.
lAVA rocK InstructIons
3/8 FemaleFlare swivel

11
sAndbAG FIllInG InstructIonsLocate the sandbag provided with the appliance. Approximately 35 lbs. of sand (not included) is required to fill the sandbag. Follow the below steps to fill the sandbag with sand - 1. Locate the opening of the sandbag and fill with sand to just below the first set of strings provided on the outside of the sandbag (approximately 1/3 the length of the sandbag.) 2. Loop the strings around the sandbag and pull and tie the strings tightly to seal off the first third of the sandbag. 3. Continue to fill the sandbag to just below the second set of strings provided on the outside of the sandbag (approximately 2/3 the length of the sandbag.) 4. Loop the strings around the sandbag and pull and tie the strings tightly to seal off the next third of the sandbag. 5. Continue to fill the sandbag to just below the last set of strings provided on the outside of the sandbag. 6. Loop the strings around the sandbag and pull and tie the strings tightly to seal off the last third of the sandbag.
The filled sandbag must be placed around the base of the 20 lb. cylinder before operating your appliance. Wrap the filled sandbag around the base of the cylinder and tie the two ends of the sandbag together with the strings provided. Make sure the sandbag is properly placed around the base of the propane cylinder as shown in Figure 1 below before operating your appliance. Go to the Use and Care section for further instructions.
FAIlure to Follow tHese InstructIons And wArnInGs could result In FIre, exPlosIon, burn HAzArd or cArbon monoxIde PoIsonInG wHIcH could cAuse ProPerty dAmAGe, PersonAl InJury or deAtH.
sAndbAG
FIGure 1
sAndbAG
20 lb. lP GAs cylInder
FAIlure to InstAll tHe sAndbAG Around tHe bAse oF tHe cylInder cAn IncreAse tHe rIsK oF tHe cylInder tIPPInG. tHe sAndbAG must be FIlled And PlAced As Per tHe AboVe InstructIons beFore oPerAtInG your APPlIAnce.

reAd And understAnd beFore usInG tHIs APPlIAnce
12
sectIon IIuse And cAre
Throughout this manual the words appliance, burner and fire pit will be used interchangeably to refer to the King Kooker® Outdoor Fire PIt.
lP GAs cylInder InFormAtIonKing Kooker® Fire Pits are manufactured for use with 20lb. (9 kg) lP Gas cylinders. Important information to remember about LP Gas cylinders include:
1. Always read and follow the cylinder manufacturer’s instructions.
2. Make sure that the gas cylinder is not overfilled. The maximum weight of a properly filled 20 lb. (9 kg) LP gas cylinder is approximately 38 lbs (17 kg). Never fill the cylinder beyond 80% full. The cylinder must have a listed overfilling prevention device.
3. Make sure that the cylinder valve has the proper connection for a Type 1 appliance fitting.
4. Do not store a spare LP gas cylinder under or near this appliance.
5. Disconnect the cylinder from the appliance for storage.
6. Store the cylinder out of the reach of children.
7. Do not use or store the cylinder in a building, garage or enclosed area.
8. Always use a 20 lb. (9 kg) cylinder in the proper upright position for the proper vapor withdrawal. It should also be stored and transported in the upright position.
9. The cylinder must have a protective collar to protect the cylinder valve.
10. Place dust cap on cylinder valve outlet whenever the cylinder is not in use. Only install the type of dust cap on the cylinder valve outlet that is provided with the cylinder valve. Other types of caps or plugs may result in leakage of propane.
11. Cylinder must be turned OFF while not in use.
AlwAys reAd And Follow tHese And tHe cylInder mAnuFActurer’s InstructIons. FAIlure to Follow tHese InstructIons And wArnInGs could result In FIre, exPlosIon, burn
HAzArd or cArbon monoxIde PoIsonInG wHIcH could cAuse ProPerty dAmAGe, PersonAl InJury or deAtH.

connectIon InstructIons1. Check that your manual valve is set to not allow gas flow. The manual valve should be 90 degrees
to the line of gas flow. See below Figure 1. This is the OFF position.
2. Attach the regulator to the cylinder valve by turning the Type 1 fitting clockwise. Refer to the assembly diagram for the appliance below.
3. Perform the Leak Test:
4. Before lighting the appliance, check that the venturi tube is free of obstruction and that the orifice located on the valve is properly threaded into the venturi tube. Both situations must be corrected if necessary before lighting to prevent flashback.
13
leAK test Before lighting the appliance, a thorough leak test must be satisfactorily completed using a non-ammonia soapy water solution (50% non-ammonia soap and 50% water). This is to be applied with a small brush to all gas joints after the cylinder valve is opened (no more than 1/2 turn). If bubbles are seen, indicating a leak, turn off the cylinder and tighten the leaking connection until a further leak test shows no leaks. If tightening the connection does not stop the leak, call Metal Fusion, Inc. (800) 783-3885, for assistance.
neVer use Hose/reGulAtor Assembly IF leAKInG.
mAnuAl VAlVe(oFF PosItIon)
tyPe 1connectIon
non-AdJustAble Pressure reGulAtor
20 lb. lP GAs cylInder

14
20 lb. lP Gas cylinder
PlAcement InstructIons
(3.05m)(1.22 m)
1. For outdoor use only.2. Never operate this appliance within 10 ft. (3.05m) of any structure, combustible material or other gas cylinder. Never operate this appliance within 25 ft. (7.5m) of any flammable liquids or vapors.3. There must be no combustibles or roof overhead.4. The appliance must be on a level, stable, noncombustible surface such as brick, concrete or dirt. Not suitable are surfaces such as wood, asphalt or plastic which may burn, blister or melt.5. Keep 48” (1.22m) of space between the LP gas cylinder and the appliance as per Figure 1.6. The LP gas cylinder and appliance must be located so that any wind is blowing the heat of the appliance away from the propane cylinder.
* Models may vary from picture.
Keep forty-eight inches between the cylinder and the appliance. Placing the cylinder too close to the appliance could result in fire or explosion which could cause property damage, personal injury or death.
the hose connecting the appliance to the tank poses a trip hazard. do not step over the hose or walk between the cylinder and appliance. tripping could cause the appliance or cylinder to tip over, leading to fire or explosion which could cause property damage, personal injury or death.
wInd dIrectIon cleAroVerHeAd
Ground leVel
48 IncHes10 Feet
to neArest
combustIble(All directions)
cArbon monoxIde HAzArd
this appliance can produce carbon monoxide which has no odor.
using it in an enclosed space can kill you.
never use this appliance in an enclosed space such as a camper, tent, car or home.
dAnGer
FIGure 1
(3.05m)
10 Feetto
neArest combustIble(All directions)

15
lIGHtInG And oPerAtInG InstructIons
tHe APPlIAnce must not be lIt untIl tHe PrecedInG PlAcement InstructIons HAVe been comPletely Followed.
neVer Put HAnds or FAce dIrectly oVer burner wHIle lIGHtInG or wHIle tHe APPlIAnce Is lIt.
1. Check the appliance to make sure that it is set up as per the diagram (Figure 1).2. Make certain the manual valve is turned to the “OFF” position (Figure 2).3. Open the cylinder control valve by turning it counterclockwise as per the diagram (Figure 3).4. Place a lit multipurpose lighter above the burner. Turn the manual valve control toward the “ON” position until
ignition occurs. See Figure 4. When lighting the burner, if ignition does not occur in 3 to 5 seconds, turn the manual valve and cylinder control
off. Wait 5 minutes for gas to disperse. Repeat procedure.5. Check that the flame is blue near the burner ports and that the flames are emitted from every port in the burner
(Figure 5). The flame should be directed upward and toward the center above the appliance. A normal flame will be blue near the burner ports and then become yellow above the lava rocks as it extends upward. If there is a yellow flame being emitted from the ports, or if some ports have no flame, this indicates there may be an obstruction in the venturi tube or ports. Check the maintenance instructions on page 16 for more information regarding a yellow flame.
Adjustment of the lava rock placement may be necessary to produce a realistic looking flame that extends upward above the appliance. AlwAys allow time for the lava rocks to cool completely before removing or adjusting lava rocks. neVer attempt to move lava rocks while the appliance is lit or still hot.
6. Always monitor the flame while in operation. If at any point the flame is accidentally extinguished, immediately turn the manual valve and cylinder valve OFF. Wait 5 minutes for gas to disperse and relight the appliance according to the lighting instructions (#1 - #5) in this section.
FIGure 1
* Model may vary from picture.
FIGure 5
turn triangle handletoward on
(counterclockwise)
20 lb. lP Gas cylinder
FIGure 2
FIGure 3 FIGure 4
VAlVe(oFF)
VAlVe (on)

turnInG oFF And storInG tHe APPlIAnce AFter use
neVer moVe tHe APPlIAnce wHIle In use or stIll Hot.
1. After each use turn OFF the fire pit at the manual valve first, then at the gas cylinder valve. check to make sure there is no flame and all valves are off. Do not leave the appliance until it has cooled completely.
2. Disconnect the regulator from the cylinder by turning the Type 1 fitting counterclockwise until the regulator is separated from the tank.
3. Storage of this appliance indoors is permissable only if the cylinder is disconnected and removed from the appliance. Do not use or store cylinder in a building, garage or enclosed area. Read and follow all cylinder manufacturer’s instructions. The cylinder must be stored out of the reach of children at all times. Keep entire unit in area to avoid insects and contamination that can clog the venturi tube.
FAIlure to Follow tHese InstructIons And wArnInGs could result In FIre, exPlosIon, burn HAzArd or cArbon monoxIde PoIsonInG wHIcH could cAuse
ProPerty dAmAGe, PersonAl InJury or deAtH.
16
mAIntenAnce InstructIons
1. The area where the appliance will be used must be kept clear and free from combustible materials, gasoline and other flammable vapors and liquids. Before each use of the appliance inspect and remove any combustible items.
2. The flow of combustion and ventilation of air must not be obstructed. The appliance must be set in an open area with 10 ft. (3.05m) of space on all sides and no roof or overhang overhead. Check the location and placement of the appliance before each use.
3. Before each use of the appliance check the burner/venturi tube for insects, insect nests, and other obstructions. A clogged tube can lead to a fire beneath the appliance.
4. Follow all Lighting Instructions in the Use and Care Manual each time the appliance is used. Check the flame for proper color and appearance. The flame should be directed upward and toward the center above the appliance. A normal flame will be blue near the burner ports and then become yellow above the lava rocks as it extends upward. If a strong yellow flame is being emitted from the burner ports, this could indicate an obstruction in the burner/venturi tube.
If there is any obstruction or a yellow flame near the burner ports, turn off the appliance and allow time for it to cool. Disconnect the hose from the brass fitting. Remove the brass fitting from the venturi tube. Check the venturi tube with a flashlight to see if there is a blockage. If a blockage is present use a wire such as a coat hanger to slide into the venturi tube to remove the blockage. Assemble and light the appliance again as per the instruction manual. If this does not resolve the problem, please call Metal Fusion, Inc. at (800) 783-3885.
5. Always use the LP Hose/Regulator assembly supplied with the appliance. Before each use of the appliance check the LP Hose for evidence of abrasion, wear, cuts or leaks. If there is any damage to the hose, the hose/regulator assembly must be replaced prior to using the appliance. Contact Metal Fusion, Inc. at (800) 783-3885 for information regarding a replacement hose assembly. Only the LP Hose/Regulator assembly specified by Metal Fusion, Inc. should be used with the appliance.
6. The burner should be inspected before each use. If the burner is damaged, it must be replaced before operating the appliance. Only the burner specified by Metal Fusion, Inc. should be used with this appliance.
7. For purchase of any replacement parts which may have become damaged or lost, please contact Metal Fusion, Inc. at (800) 783-3885 between the hours of 7:30am-3:30pm (CST) Monday through Friday.
8. Cleaning of the appliance: Appliance and lP Hose/regulator: If neccessary, the appliance can be cleaned with mild soapy water on a rag and
towel dry. Do not immerse the burner unit or hose and regulator into water as this will cause rust. lava rocks: Remove from fire pit and spray off with garden hose. Allow to dry completely before returning to bowl.9. Do not use this appliance if any part has been under water. Immediately call a qualified service technician to inspect
the appliance and to replace any part of the control system and any gas control which has been under water.
17
sectIon IIIreAd And understAnd All InstructIons beFore
usInG your KInG KooKer® Product
FreQuently AsKed QuestIons And Answers 1. my appliance’s flame appearance is very weak. Answer: If the hose assembly has a Type 1 Connection (black/green knob), it is equipped with a
flow limiting device. This device is intended to limit the flow of gas should there be a leak between the regulator and the appliance. To achieve a positive gas seal, which will allow for maximum gas flow, the regulator control must be set to a completely OFF position before the cylinder valve is opened. A good tip to remember is “TANK IS FIRST ON, LAST OFF.”
The Problem Can Be Remedied in Two Ways:
A. 1. Turn the manual valve to the OFF position. Close the tank valve completely by turning it clockwise until it stops.
2. Check that the Type 1 Connection (black/green knob) is completely tightened to the tank valve.
3. Wait 5 seconds for the pressure to equalize and for the flow limiting device to reset. 4. Turn tank valve ON (counterclockwise.) 5. Turn the manual valve to an ON position. 6. Relight appliance following all lighting instructions contained in this manual. Check for
proper flame characteristics. or
B. 1. Turn the manual valve to the OFF position. Close the tank valve completely by turning it clockwise until it stops.
2. Remove Type 1 Connection (black/green knob) from the tank valve. The flow limiting device will now reset.
3. Re-attach Type 1 Connection (black/green knob) to the tank valve. Tighten completely. 4. Turn tank valve ON (counterclockwise.) 5. Turn the manual valve to an ON position. 6. Relight appliance following all lighting instructions contained in this manual. Check for
proper flame characteristics.
2. How long will the propane in my tank last? Answer: On average, a full tank will give you 7 to 8 hours of normal operation.
3. I have a new style tank and it won’t connect to my regulator. what do I do? Answer: The regulator supplied with this appliance has a Type 1 Connection which will attach to
the tank valve which has large threads on the valve outlet. These connect into the large plastic handnut (black or green). If your tank has a quick disconnect valve (plug in type) our regulators can not connect to this tank.
4. I have a brand new appliance and I cannot get the burner to light. what’s the problem? Answer: Make sure the tank has been filled with propane. Tanks purchased from the store shelf
are most often sold empty. If this does not solve the problem refer to Maintenance Instruction items #3 and #4, page 16. If you have questions please call Metal Fusion, Inc. at (800) 783-3885.
IF you HAVe A QuestIon we HAVe not Addressed In tHIs mAnuAl PleAse send us An e-mAIl At [email protected] or cAll 1-800-783-3885
between 7:30 A.m. And 3:30 P.m. cst mondAy tHrouGH FrIdAy.

notes
18

notes
19

KING GRILLERDINE®, KING KOOKER®, the KING KOOKER® logo, THE KING®, THE KING OF OUTDOOR COOKING®, MR. OUTDOORS®, and WATCHDOG OUTDOOR COOKER
SERIES® are trademarks of Metal Fusion, Inc., 712 St. George Avenue, Jefferson, LA 70121Rev. 01/2012-E
sAFety PrecAutIons
FAIlure to Follow tHese InstructIons And wArnInGs could result In FIre, exPlosIon, burn HAzArd or cArbon
monoxIde PoIsonInG wHIcH could cAuse ProPerty dAmAGe, PersonAl InJury or deAtH.
read and understand the entire Assembly Instructions and use and care manual before using this product. If you lose your manual and need a replacement, or have questions, please contact us at 1-800-783-3885 between the hours of 7:30 A.m. and 3:30 P.m. cst monday - Friday, or go to www.kingkooker.com
wArnInG: this product contains, and its use will create chemicals known to the state of california to cause cancer and birth defects (or other reproductive harm.)
use only outdoors! do not use on combustible surfaces.
do not use under any overhang or roof. Keep a minimum clearance of 10 ft. (3.05m) on all sides of the appliance.
AlwAys keep children, pets and any unauthorized persons away from appliance.
neVer leAVe APPlIAnce unAttended while in use or still hot.
neVer use this appliance in an enclosed space such as a camper, tent, car or home. this appliance can produce carbon monoxide which has no odor. using it in an enclosed space can kill you.
AlwAys keep hair and clothing from coming into contact with the appliance while in use or still hot.