how to photograph macros and closeups with a dslr zoom lens
TRANSCRIPT
How to photograph macros and closeups with a DSLR zoom lens
If you don't have a DSLR macro lens to photograph insects and flowers with, then the next best alternative is a zoom lens. There are many advantages to using a zoom lens for macros and closeups including:
You don't need to be close to the subject. This is important for timid insects that may be frightened off easily.
If your shooting flower macros / closeups, a zoom lens will allow you to fully fill the frame.
Using the smallest aperture your zoom lens allows, for example f/5.6 or lower, will blur the background nicely, isolating the main subject. Give this one a try with your digital camera set on aperture priority (mode dial on A) to see the nice background effects you can achieve.
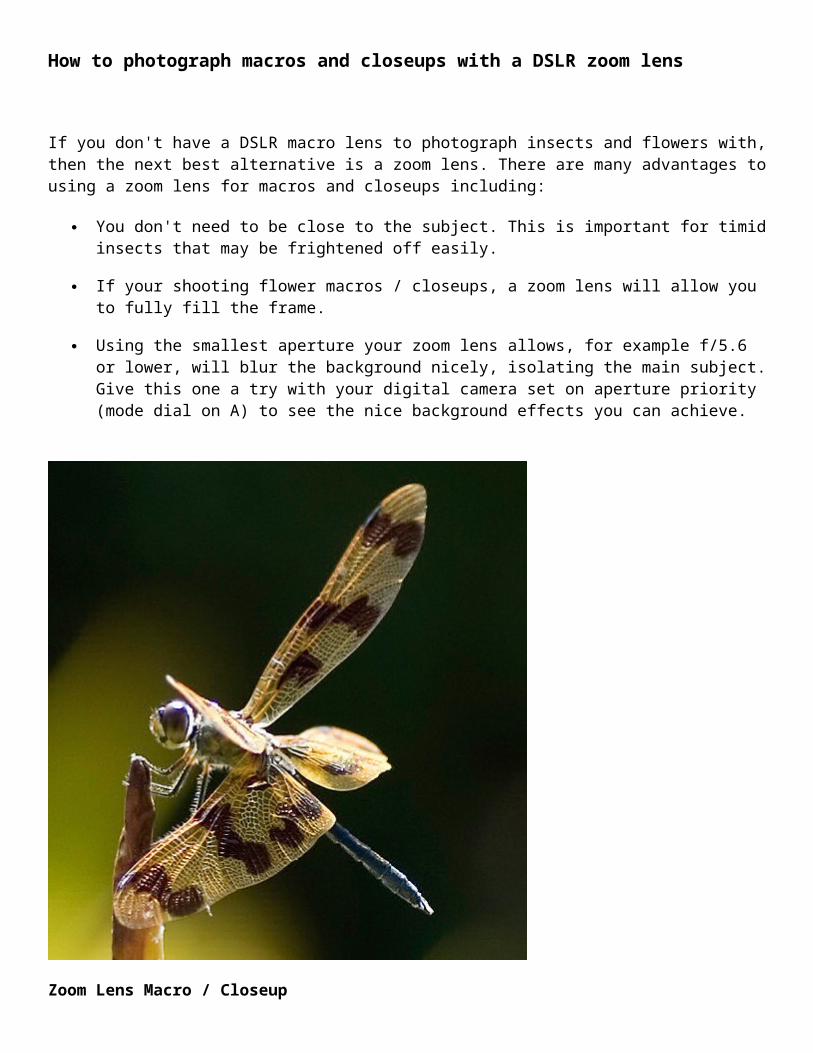
Zoom Lens Macro / Closeup
Digital SLR Camera: Nikon D40DSLR Lens: AF-S Nikkor 55-200mm 1:4-5.6 G ED Exposure: 0.003 sec (1/400)Aperture: f/4.2 Focal Length: 72 mm
ISO Speed: 200 Exposure Program: manual
How this macro was taken
This photograph of a dragonfly was taken with a Nikkor 55-200mm zoom lens. The aperture was kept to a low f number f/4.2, which resulted in a nicely blurred background. Thus leaving the main subject as the focal point of the image. Considering the zoom lens in this case wasn't fully zoomed out to it's fullest, the blured background effect is still seen.
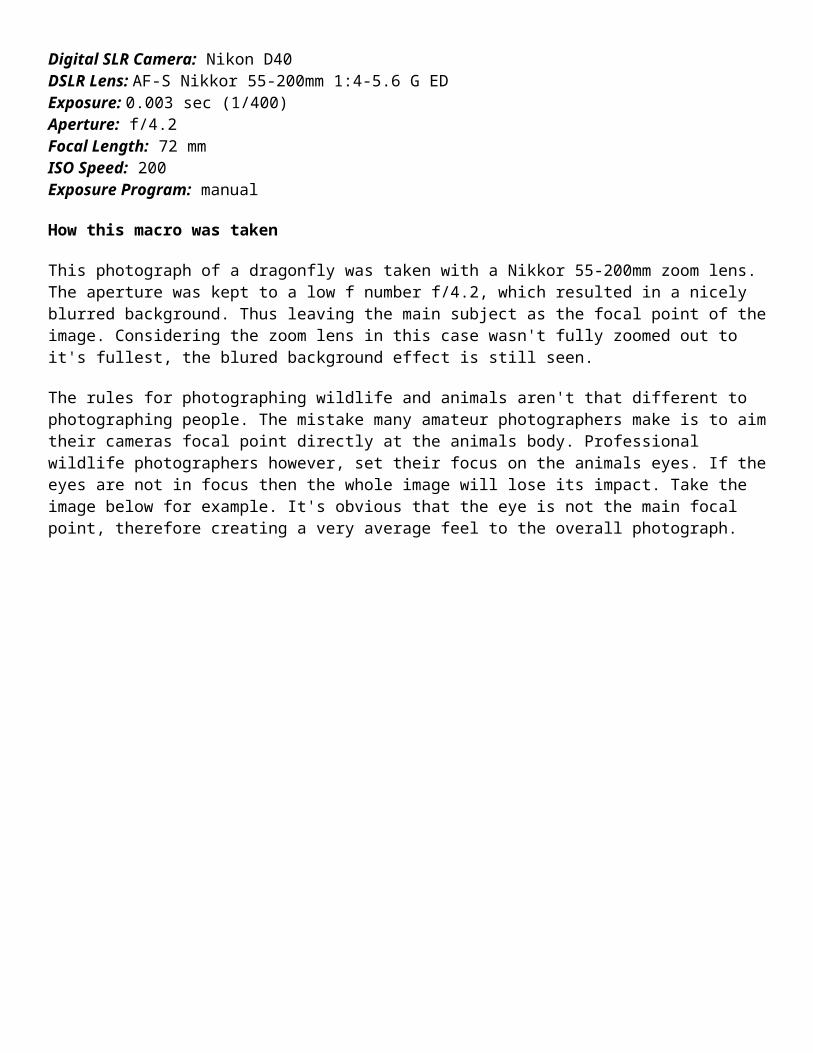
The rules for photographing wildlife and animals aren't that different to photographing people. The mistake many amateur photographers make is to aim their cameras focal point directly at the animals body. Professional wildlife photographers however, set their focus on the animals eyes. If the eyes are not in focus then the whole image will lose its impact. Take the image below for example. It's obvious that the eye is not the main focal point, therefore creating a very average feel to the overall photograph.
Now compare the first example with the image below of a wild bush turkey.

Wildlife
Digital SLR Camera: Canon EOS 400D / Rebel XTi DSLR Lens: Canon EF 70-300mm f/4-5.6 IS USMExposure: 0.013 sec (1/80)Aperture: f/6.3 Focal Length: 300 mm ISO Speed: 200 Exposure Program: manual
What makes this wildlife animal shot work
What gives this photograph more impact than the first example, is that the turkey's eye is the main focal point, making the eye very sharp. If I had aimed at the animals body, they eye would have had that unsharp glossy look to it, similar to the first example.
When photographing wildlife, more often than not, the animal will be on the move. It won't matter if the body is partly blurred, as long as the eyes are sharp as a tack. So next time you're out photographing animals, instead of pointing the camera's focal point at the body, aim it at the eyes instead. You're sure to notice a huge difference in the results.
How to use a telephoto zoom lens
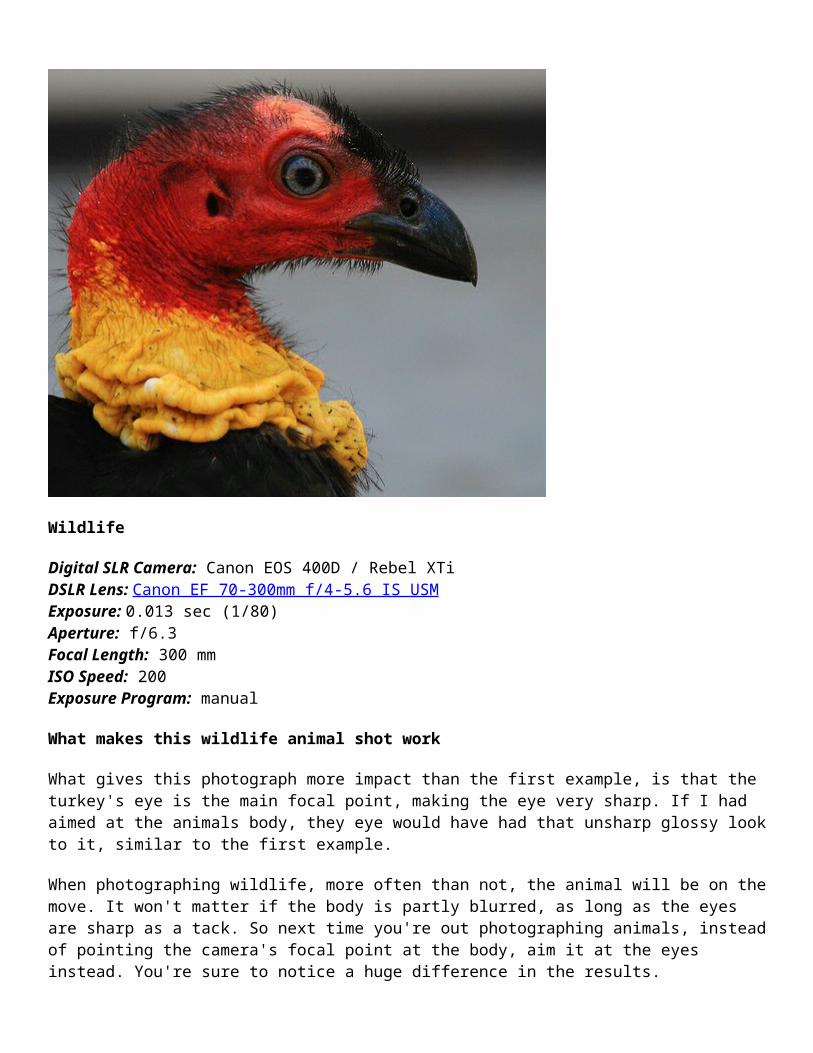
A telephoto zoom lens is my favorite piece of glass. Over the years I've photographed with Canon, Nikon and Sigma telephoto lenses and learned several useful tips for using them along the way. Before we let you in on the secrets of using these long lenses we'll first discuss a couple of basics.
Definition of a telephoto zoom lens
A normal focal length is known to be 50mm. That means when you shoot with a lens set at 50mm focal length, the subject will be photographed in size as you saw it in real life. If you zoom your lens out to 100mm focal length, the image will now be magnified X 2 so the subject appears much closer. Therefore the definition of a telephoto zoom lens is one that can be magnified higher than 50mm focal length.
When photographers hear the term telephoto they usually imagine a long lens between 70 and 500mm focal length or longer. Personally I've used 3 different brands and the technique for using them is basically the same.
What are telephoto zoom lenses used for?
Longer lenses are generally used for instances where you want to fill the frame with a subject that is far in distance and you wish it to appear much closer. Good examples would be sports or animal photography where you cannot be physically close to the subject. Or maybe it is possible but you'd rather not disturb the subject, choosing instead to photograph it naturally. This is particularly useful for street photography where you don't want the person to know they are being photographed until after the shot is taken.
Wide angle lenses verses telephoto zooms
Using a telephoto zoom will totally change the overall feel of the image. Especially when photographing subjects that are further in distance from you. Not only does it bring the main subject closer, but it also brings all the background elements closer as well.
For example, I live in a coastal town where I photograph boats anchored out at sea with islands in the background. If I use a wide angle landscape lens, the islands in the background seem much smaller and
insignificant than when I use my telephoto lens. For these types of shots I prefer to see layers. Hence, I'll use my telephoto zoom.
Tips for using telephoto lenses
All lenses require different techniques for photographers to grasp. Just because you know how to use one lens doesn't mean you can use the same technique on the next. As strange as it sounds, telephoto and macro lenses have a lot in common. Personally I treat them much the same way.
Aperture settings
1. The closer you are to the subject, the higher you need to increase your camera aperture setting. This is especially true for instances where you zoom the lens out to its longest focal length and fill the frame with subjects that are not flat.
For example, when I am at the zoo photographing animals with long noses or beaks and I zoom the lens out to its longest focal length, I set my camera aperture to f/8. This ensures the nearest facial part and the eyes are both in focus.
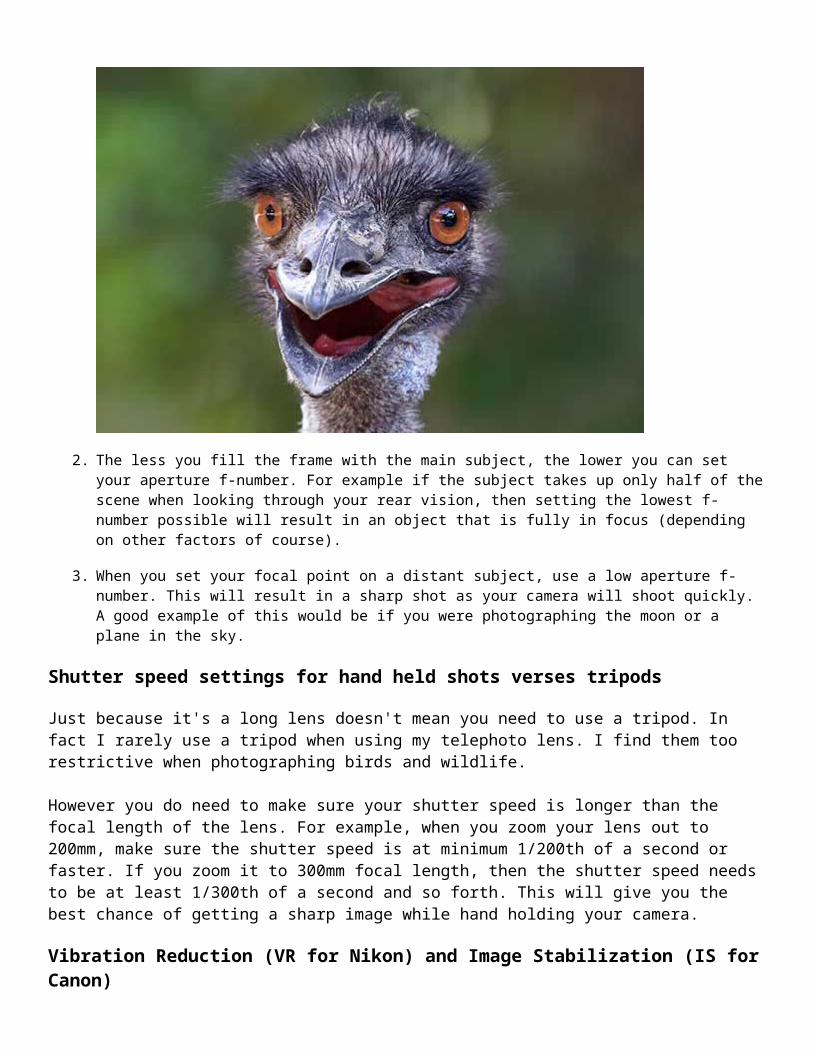
2. The less you fill the frame with the main subject, the lower you can set your aperture f-number. For example if the subject takes up only half of the scene when looking through your rear vision, then setting the lowest f-number possible will result in an object that is fully in focus (depending on other factors of course).
3. When you set your focal point on a distant subject, use a low aperture f-number. This will result in a sharp shot as your camera will shoot quickly. A good example of this would be if you were photographing the moon or a plane in the sky.
Shutter speed settings for hand held shots verses tripods
Just because it's a long lens doesn't mean you need to use a tripod. In fact I rarely use a tripod when using my telephoto lens. I find them too restrictive when photographing birds and wildlife.

However you do need to make sure your shutter speed is longer than the focal length of the lens. For example, when you zoom your lens out to 200mm, make sure the shutter speed is at minimum 1/200th of a second or faster. If you zoom it to 300mm focal length, then the shutter speed needs to be at least 1/300th of a second and so forth. This will give you the best chance of getting a sharp image while hand holding your camera.
Vibration Reduction (VR for Nikon) and Image Stabilization (IS for Canon)
If you are photographing long exposures or landscapes with a telephoto lens then it is best to use a tripod. If using a tripod, look on the side of your lens for letters VR (vibration reduction for Nikon) or IS (image stabilization for Canon) and turn them off.
The first time I used my Canon EF 70-200mm f/4L USM lens on a tripod, was to photograph beautiful night shots of the Opera House in Sydney. Looking at the images on my computer I saw they were all out of focus and appeared to have symptoms of camera shake. I later found that by keeping this switch turned on, VR / IS will look for camera vibration and when it doesn't find it, it keeps looking. Hence in itself causing camera shake. So I went out the next night with IS turned off and captured the image seen below.
Focus limit switch
Look on the side of your lens and check if it has a focus limit switch. You will recognise it because it will have a distance metering associated with it. For example my Canon lens has a switch on the side that says 1.8m -∞, as well as 6.5m-∞. If your lens doesn't have this switch then ignore this section.
The focus limit switch tells the camera where to focus within certain ranges in distance. For example, if you set the switch to 6.5m-∞ then the camera knows not to worry about focussing on anything closer than 6.5 meters. Knowing this information, your camera will shoot faster.
Why is this important to know? There has been many instances where I'll be trying to photograph a subject that is only a few meters from me and the lens keeps swimming in and out, not able to focus. I've fixed this problem
every time by setting the correct metering. ie I set 1.8m -∞ for subjects closer than 6.5 meters away, and set 6.5m-∞ for everything 6.5 meters or further in distance.
How to blur backgrounds
Blurring backgrounds is easier with a telephoto lens than it is with a wide angle lens. Set your camera aperture on f/8 or lower, zoom the lens out to its longest focal length, and get as close to the subject as possible while still being able to focus. You also need to ensure as much distance as possible between the subject and any background elements. You won't see any blur if the subject is against a brick wall.
Shooting macros with a long telephoto lens
Long telephoto zoom lenses are perfect for photographing macro subjects. They allow you to stand further away from the subject so not to scare it away. This has its obvious advantages when shooting timid subjects like dragonflies and insects.
What digital SLR camera lens do you need for bird photography?
This may be hard to swallow but the fact is, taking photographs of small wild animals such as birds for example, usually require an expensive camera lens. This was a mistake I did myself when I first started in digital SLR photography. One of the first lens I purchased was a 100-300mm telephoto zoom, thinking it would be great to photograph wild birds in their natural habitat. Wrong!
What is a 100-300mm telephoto zoom lens good for?
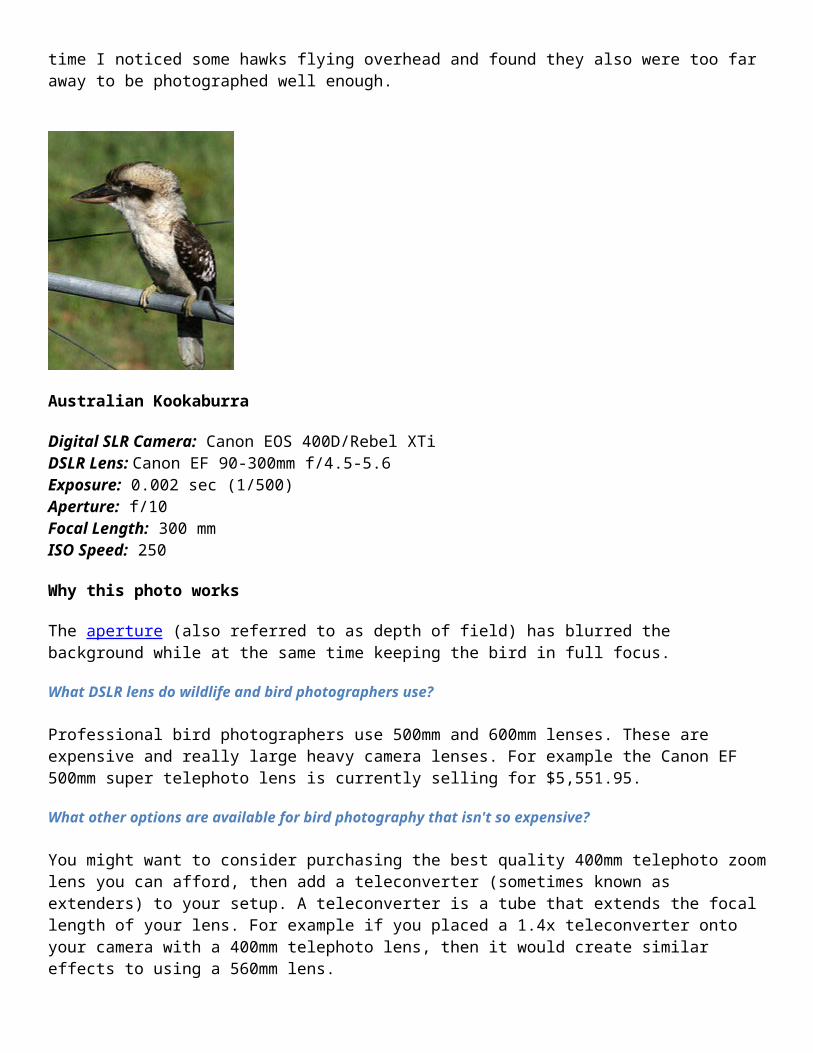
A normal telephoto lens will let you take nice photographs of tame birds that are in close proximity to your camera setup. For example I recently took a wonderful photograph of an Australian Kookaburra that was sitting on my backyard clothes line. The main point being, the Kookaburra was only about 3 metres away. I then walked down to my local botanical gardens to try and photograph some ducks further away on the other side of the pond and found I couldn't zoom in far enough to capture them clearly. Another time I noticed some hawks flying overhead and found they also were too far away to be photographed well enough.
Australian Kookaburra

Digital SLR Camera: Canon EOS 400D/Rebel XTiDSLR Lens: Canon EF 90-300mm f/4.5-5.6Exposure: 0.002 sec (1/500)Aperture: f/10 Focal Length: 300 mm ISO Speed: 250
Why this photo works
The aperture (also referred to as depth of field) has blurred the background while at the same time keeping the bird in full focus.
What DSLR lens do wildlife and bird photographers use?
Professional bird photographers use 500mm and 600mm lenses. These are expensive and really large heavy camera lenses. For example the Canon EF 500mm super telephoto lens is currently selling for $5,551.95.
What other options are available for bird photography that isn't so expensive?
You might want to consider purchasing the best quality 400mm telephoto zoom lens you can afford, then add a teleconverter (sometimes known as extenders) to your setup. A teleconverter is a tube that extends the focal length of your lens. For example if you placed a 1.4x teleconverter onto your camera with a 400mm telephoto lens, then it would create similar effects to using a 560mm lens.
What disadvantages are there when using teleconverters?
There are disadvantages to using teleconverters / extenders. Otherwise professional bird photographers would use them instead of buying expensive 600mm lenses.
1. Image quality isn't as sharp as it would be normally. This is especially true if you buy a cheap teleconverter. If you decide to go this way then I recommend purchasing a teleconverter specifically made for your camera brand for compatibility reasons. They cost a couple of hundred dollars extra, yet will give better quality than a no brand name.
2. Adding a teleconverter extender to a slow lens especially, may cause you to loose automatic focus. For obvious reasons this may be problematic for photographers who want to focus quickly on a moving bird. When photographing wildlife, you don't always have time to focus manually.
Comparison senario for lens requirements needed for bird photography
Senario 1: Purchase a high quality Canon EF 500mm super telephoto lens that is currently selling for $5,551.95.
Senario 2: If you own a Canon SLR digital camera, then you can purchase a high quality Canon EF 400mm f/5.6L USM Super Telephoto Lens and couple it with a Canon EF 1.4X II Telephoto Extender for $1378.95.
Or, you can be happy using a much cheaper 100-300mm telephoto zoom lens and photograph closer birds like the photograph below.

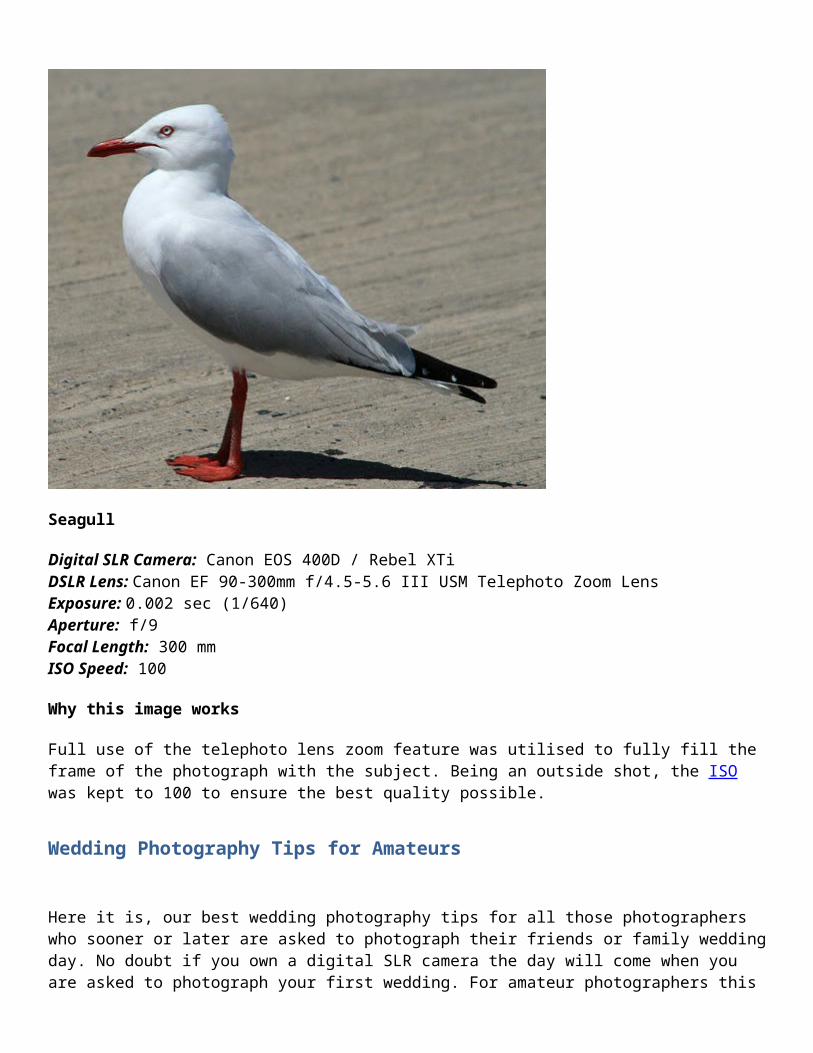
Seagull
Digital SLR Camera: Canon EOS 400D / Rebel XTi DSLR Lens: Canon EF 90-300mm f/4.5-5.6 III USM Telephoto Zoom LensExposure: 0.002 sec (1/640)Aperture: f/9 Focal Length: 300 mm ISO Speed: 100
Why this image works
Full use of the telephoto lens zoom feature was utilised to fully fill the frame of the photograph with the subject. Being an outside shot, the ISO was kept to 100 to ensure the best quality possible.
Wedding Photography Tips for Amateurs
Here it is, our best wedding photography tips for all those photographers who sooner or later are asked to photograph their friends or family wedding day. No doubt if you own a digital SLR camera the day will come when you are asked to photograph your first wedding. For amateur photographers this can be a daunting experience. However it need not be as frightening as you think.
So how do you go about photographing your first wedding? This is a question I've been asked many times through our Facebook page so I thought it time to write it down so amateurs can learn from my personal experience with wedding photography.
Camera Gear
The first step is to make sure you have the right equipment. Obviously it's going to be hard to photograph a wedding if you don't have suitable camera gear.
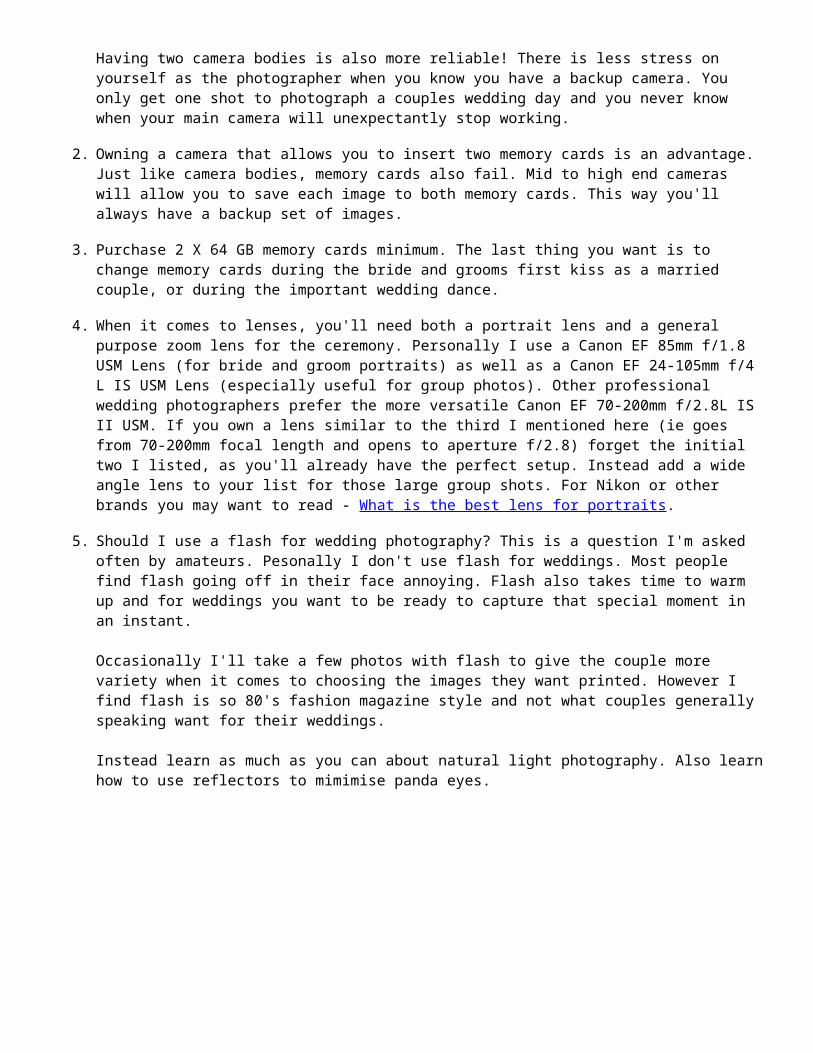
1. Wedding photography is easier with two camera bodies. If you don't have two camera bodies, I recommend asking a friend or family member if you can borrow one for the day. 99% of the time when photographing the actual ceremony I use two main lenses. Having a camera body for each lens saves time changing them constantly mid service.
Having two camera bodies is also more reliable! There is less stress on yourself as the photographer when you know you have a backup camera. You only get one shot to photograph a couples wedding day and you never know when your main camera will unexpectantly stop working.
2. Owning a camera that allows you to insert two memory cards is an advantage. Just like camera bodies, memory cards also fail. Mid to high end cameras will allow you to save each image to both memory cards. This way you'll always have a backup set of images.
3. Purchase 2 X 64 GB memory cards minimum. The last thing you want is to change memory cards during the bride and grooms first kiss as a married couple, or during the important wedding dance.
4. When it comes to lenses, you'll need both a portrait lens and a general purpose zoom lens for the ceremony. Personally I use a Canon EF 85mm f/1.8 USM Lens (for bride and groom portraits) as well as a Canon EF 24-
105mm f/4 L IS USM Lens (especially useful for group photos). Other professional wedding photographers prefer the more versatile Canon EF 70-200mm f/2.8L IS II USM. If you own a lens similar to the third I mentioned here (ie goes from 70-200mm focal length and opens to aperture f/2.8) forget the initial two I listed, as you'll already have the perfect setup. Instead add a wide angle lens to your list for those large group shots. For Nikon or other brands you may want to read - What is the best lens for portraits.
5. Should I use a flash for wedding photography? This is a question I'm asked often by amateurs. Pesonally I don't use flash for weddings. Most people find flash going off in their face annoying. Flash also takes time to warm up and for weddings you want to be ready to capture that special moment in an instant.
Occasionally I'll take a few photos with flash to give the couple more variety when it comes to choosing the images they want printed. However I find flash is so 80's fashion magazine style and not what couples generally speaking want for their weddings.
Instead learn as much as you can about natural light photography. Also learn how to use reflectors to mimimise panda eyes.
Important Preparation Tips
Now you are comfortable knowing you have the right camera gear for wedding photography, the next step is preparation. Here is a list of the most important steps you should take when preparing to photograph a wedding.
Organise a backup photographer that you would trust with your own wedding! I can't stress this enough. You can never foresee illness for yourself or immediate family members who may need you on the wedding date.
Sometimes things happen, plan for it ahead of time so the bride and groom aren't left scrambling at the last minute for a wedding photographer.
Ask the bride to send you examples of wedding photos that she likes. This will give you a good idea of the style she is most likely to want for her own wedding album.
Become familiar with photo editing software such as Photoshop. There is no such thing as a bride who wants unedited wedding photos. It can be something as simple as black and white conversions, to removing old injury scars on a brides arm.
Plan the time frame for the day well. For example, you can't be in the bridal preparation room until the last minute and think you'll be ready to capture beautiful photos of her arriving in the car at the same time. Also don't forget the groom. You need to set aside sufficient time to photograph both the bride and groom. Be clear in your mind what you are going to photograph, at what time and for how long.
Check the location out prior to the wedding day and take some test shots around the same time as the ceremony will take place. Talk to the person who is arranging the event and if possible ask that the bride and groom be positioned in favorable light during the ceremony.
Photography tips for the day of the wedding
Usually the first part of your job as a wedding photographer is the bridal change room. Don't go in and start shooting straight away. Instead I suggest spending the first fifteen minutes taking notice of any emotion or

tension in the room. The last thing you want is to stress the bride out more if she is already highly strung (it does happen).
During this time take notice of the people in the room. In my experience those who are in the bridal room are often the most important friends and relatives of the couple. You want to take plenty of photos of these people throughout the day.
Apart from the usual rings and dress shots, also photograph everything the bride and groom has spent good money on. For example if the brides shoes or grooms cufflinks are a brand name, photograph the item with the brand logo showing. At times like this, people spend money on branding they wouldn't necessarily buy otherwise. It is important to them so photograph it.
I always ask that the bride not be dressed before I enter the room. Or rather not be done up. Capturing the hands of the person helping her do up the back of her beautiful dress are always great shots. It's also when you get to photograph a lot of emotion between friends and family members.
Use layers in your photographs. When photographing the bride in the room make sure you have two or three of her bridal party standing behind her just out of focus so your photos have depth to them. They always end up favorite images.
Always get a couple of shots from different perspectives. For example go down to the street and capture her looking out of the room. Or photograph her reflection in a mirror for instance.
Special moments to capture for the groom is that nervous waiting prior to the brides arrival. Or the camaraderie between him and his mates.
If you have a second shooter, ask them to capture his first look at the bride as she gets out of the car. One person to capture the bride, the other to capture the groom. They are always great memory keepsakes and help to tell the story.
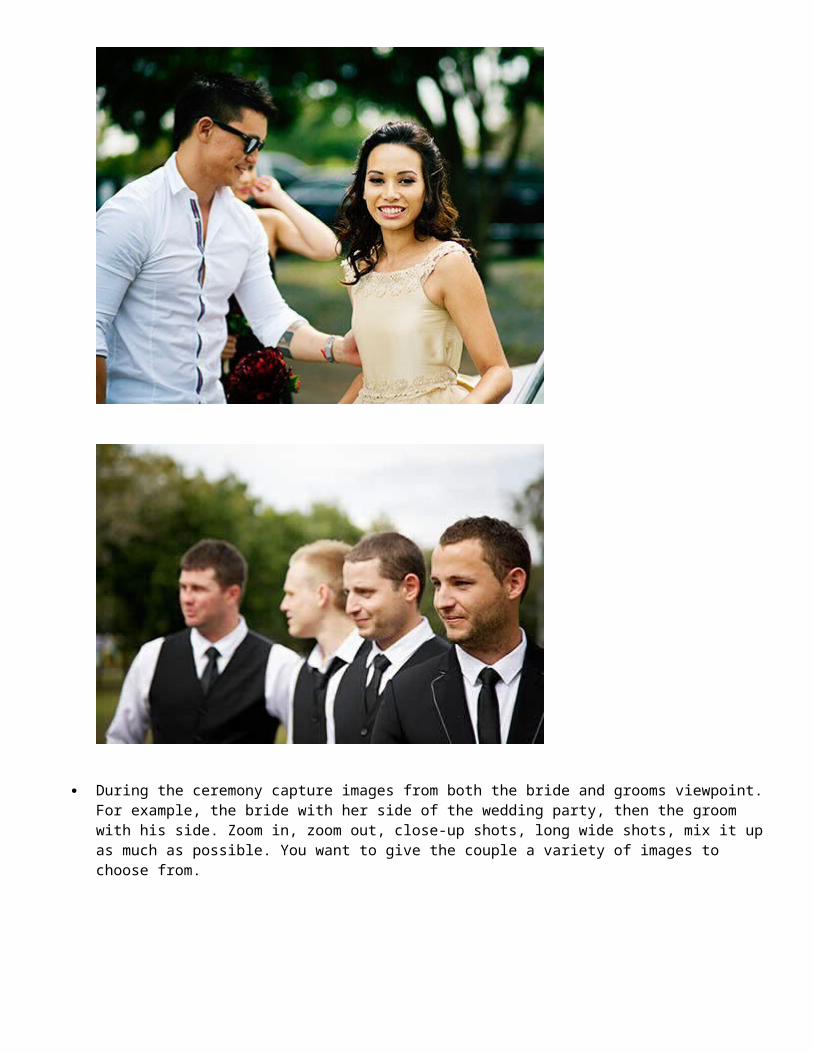
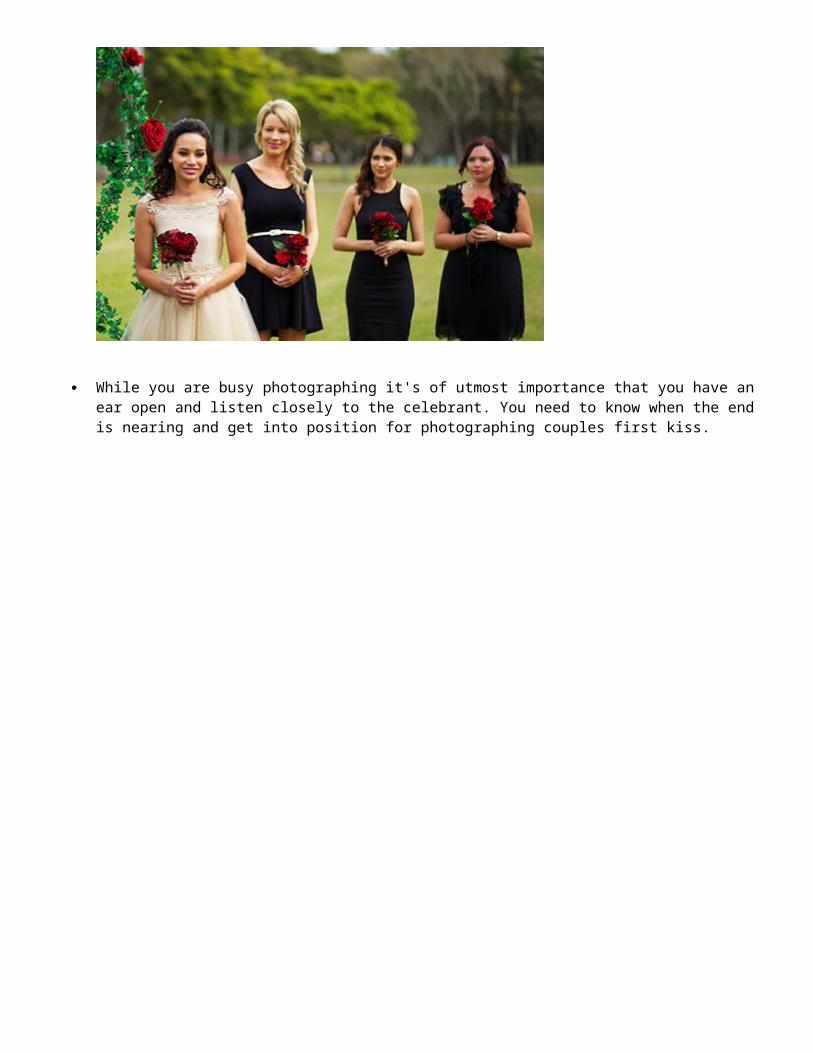
During the ceremony capture images from both the bride and grooms viewpoint. For example, the bride with her side of the wedding party, then the groom with his side. Zoom in, zoom out, close-up shots, long wide shots, mix it up as much as possible. You want to give the couple a variety of images to choose from.
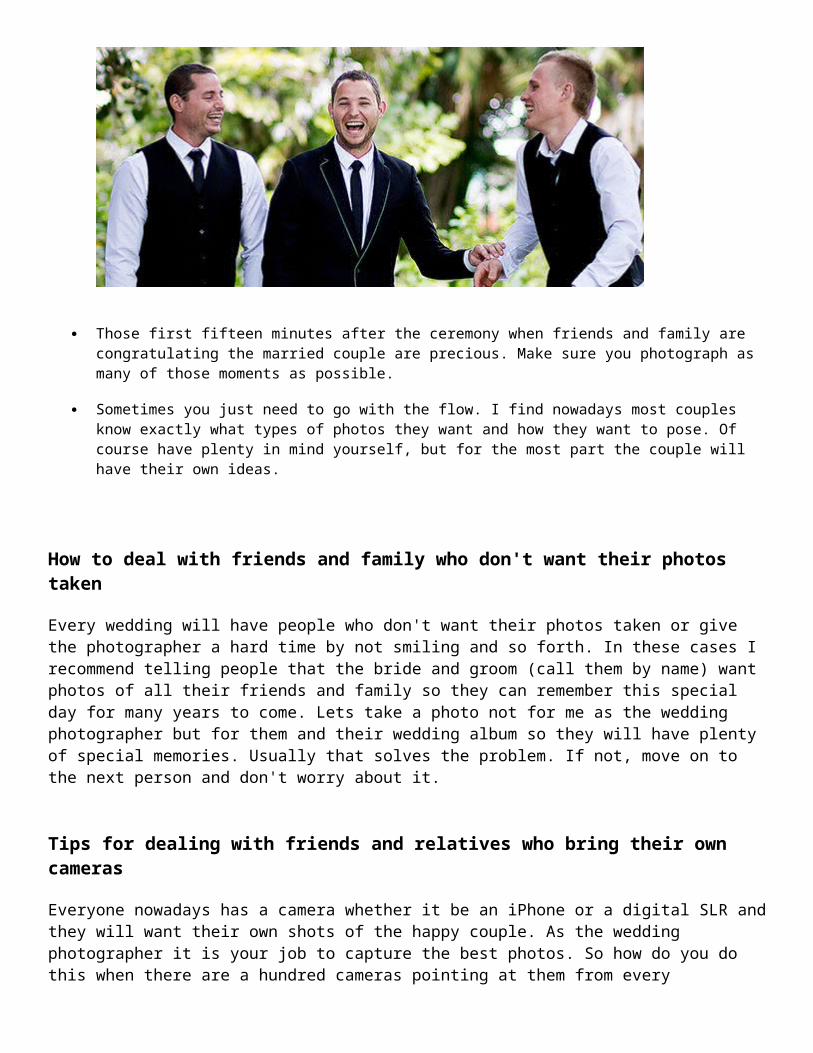
While you are busy photographing it's of utmost importance that you have an ear open and listen closely to the celebrant. You need to know when the end is nearing and get into position for photographing couples first kiss.
In my experience I find the person who gets the most emotion out of a bride and groom are those who are closest to them. I'll often have a small chat with the best man and maid of honor and ask that they help me to capture the best possible moments by keeping the emotion going as long as possible.
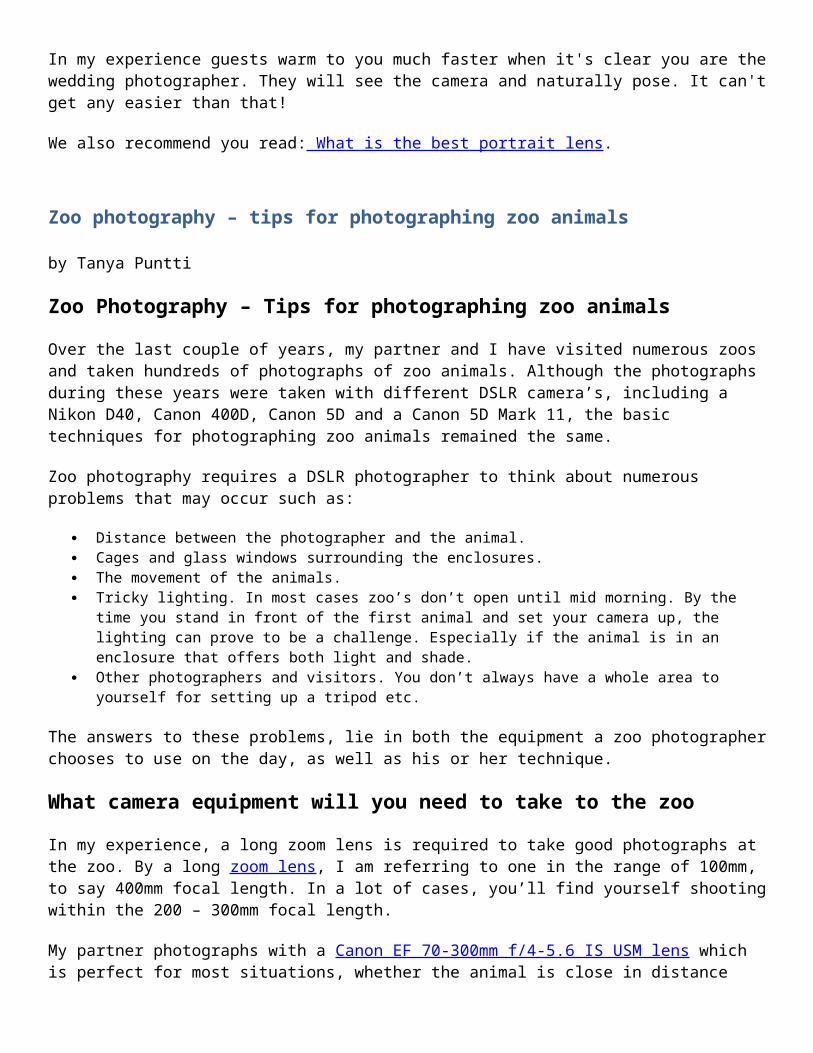
Those first fifteen minutes after the ceremony when friends and family are congratulating the married couple are precious. Make sure you photograph as many of those moments as possible.
Sometimes you just need to go with the flow. I find nowadays most couples know exactly what types of photos they want and how they want to pose. Of course have plenty in mind yourself, but for the most part the couple will have their own ideas.
How to deal with friends and family who don't want their photos taken
Every wedding will have people who don't want their photos taken or give the photographer a hard time by not smiling and so forth. In these cases I recommend telling people that the bride and groom (call them by name) want photos of all their friends and family so they can remember this special day for many years to come. Lets take a photo not for me as the wedding photographer but for them and their wedding album so they will have plenty of special memories. Usually that solves the problem. If not, move on to the next person and don't worry about it.
Tips for dealing with friends and relatives who bring their own cameras
Everyone nowadays has a camera whether it be an iPhone or a digital SLR and they will want their own shots of the happy couple. As the wedding photographer it is your job to capture the best photos. So how do you do this when there are a hundred cameras pointing at them from every direction. Personally I've never had trouble during the ceremony as people are usually sitting down or standing out the back. So I'm basing this advice on the after photos.
The last thing you want to do is stress the couple out by being a grumpy photographer who tells great aunt or grandma to put their camera away. Everyone has a camera nowadays, so deal with it. One way is by thinking and moving quickly. Move a couple into position take several shots yourself before everyone realises its done, then allow them to move in and take their photos. Move the couple again, quickly take several shots, then stand back and let everyone else take their photos. The normal photographer thinks slowly. While he or she is working out their camera settings you've already gotten the shot you need.
Another way that works quite well is to make a photography session of it. You could tell friends and family that you want everyone to get great shots, so you'll position the couple, test the lighting (ie get your shots in first) then turn around and say to them, yep that lighting is perfect go for it. Then stand back and let them get a few photos. The bottom line is, you've already taken the photographs you need of that specific pose. After the first couple of poses, friends and family are happy to stand back and let you take the first photos because they understand by now that they are also going to get their chance.
Now I hear you thinking hang on so why are couples going to buy my photos when all their family and friends have similar shots! When you take your photos, make sure you call the couple by name so they are both looking directly at you. During that time, you are the only photographer they are taking notice of. When family and friends move in there are usually a dozen or more of them, the wedding party are now looking in every direction. Yes, they will be good photos, but not the best ones :)
How should a wedding photographer dress?
How should a wedding photographer dress is another big question asked regularly. Personally I think there should be no doubt that you are the wedding photographer. I recommend dressing smart casual.
You need to look professional but not like you are part of the wedding guest list. For example, a nice pair of compfortable pants and a collared shirt (men and women). If weddings are something you plan on creating a living from, I recommend you purchase a couple of shirts with your business name on them and wear them instead.
In my experience guests warm to you much faster when it's clear you are the wedding photographer. They will see the camera and naturally pose. It can't get any easier than that!
We also recommend you read: What is the best portrait lens.
Zoo photography – tips for photographing zoo animals
by Tanya Puntti
Zoo Photography – Tips for photographing zoo animals
Over the last couple of years, my partner and I have visited numerous zoos and taken hundreds of photographs of zoo animals. Although the photographs during these years were taken with different DSLR camera’s, including a Nikon D40, Canon 400D, Canon 5D and a Canon 5D Mark 11, the basic techniques for photographing zoo animals remained the same.
Zoo photography requires a DSLR photographer to think about numerous problems that may occur such as:
Distance between the photographer and the animal. Cages and glass windows surrounding the enclosures. The movement of the animals. Tricky lighting. In most cases zoo’s don’t open until mid morning. By the time you stand in front of the first
animal and set your camera up, the lighting can prove to be a challenge. Especially if the animal is in an enclosure that offers both light and shade.
Other photographers and visitors. You don’t always have a whole area to yourself for setting up a tripod etc.
The answers to these problems, lie in both the equipment a zoo photographer chooses to use on the day, as well as his or her technique.
What camera equipment will you need to take to the zoo
In my experience, a long zoom lens is required to take good photographs at the zoo. By a long zoom lens, I am referring to one in the range of 100mm, to say 400mm focal length. In a lot of cases, you’ll find yourself shooting within the 200 – 300mm focal length.
My partner photographs with a Canon EF 70-300mm f/4-5.6 IS USM lens which is perfect for most situations, whether the animal is close in distance with 70mm being useful, or further away, with the 300mm range giving plenty of reach.
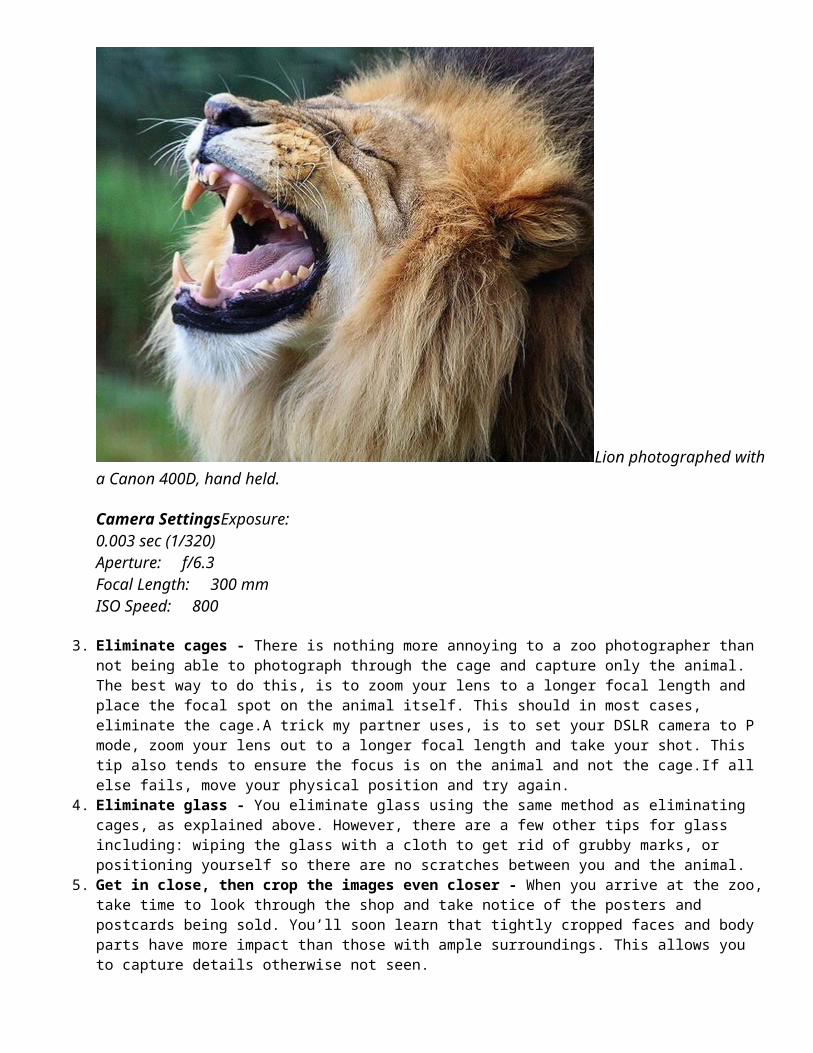
Monkey photographed with a Canon EOS 5D camera + Canon EF 70-300mm f/4-5.6 IS USM Lens.
A focal length of 300mm allowed me to get in nice and close for an ideal animal portrait, which was then cropped with Photoshop software, into a square for display purposes.
Camera Settings
Exposure: 0.004 sec (1/250)Aperture: f/5.6Focal Length: 300 mmISO Speed: 200
For comparison, the photograph of a giraffe below was taken with a focal length of 100mm to fit in both the animal and its surroundings.
Tripods or monopods?
Whether or not to use a tripod or monopod is often a grey area when it comes to zoo photography. Yes, it’s true that animals in darker enclosures may need a slower shutter speed to allow more light into the shot, therefore requiring extra stability. Personally in these cases, I prefer to increase the ISO to a higher number, for example 800.
Now those more experienced photographers would most likely argue that you could simply use a tripod instead of increasing the ISO.
This is why I don’t use tripods for zoo photography.
I recently visited Sydney Taronga Zoo where a photographer was rather upset at an infant who grabbed the leg of his tripod to collect his balance. It doesn’t matter what type of expensive setup you have, photographers won’t look good getting angry at infants and children who may accidentally bump into their equipment. This

same photographer also expected other zoo visitors to give him ample room so he could take his professional photo. Need I say more?
If you own a DSLR camera the equivalent of a Canon 5D or Nikon D300, there is no reason why you couldn’t up your ISO to 1200 and still get a good quality image.
If you own an entry level DSLR and can’t reasonably increase your ISO, or you feel like you need more stability, then I recommend using a monopod instead of a tripod. Monopods of course, taking up less floorspace, keeping other visitors in mind.
Silverback gorilla, photographed at Taronga Zoo in Sydney Australia, with a Canon 5D Mark 11 camera + Canon EF 100-400mm f/4.5-5.6 L IS USM Lens, no tripod.
Camera Settings
Exposure: 0.003 sec (1/320)Aperture: f/6.3Focal Length: 400 mmISO Speed: 1250
Lens Hoods
Lens hoods come in handy for times when you have no choice as to the angle from which to shoot. Often you may need to shoot into the sun. Lens hoods may be useful for stopping sun flares in these situations.
Zoo photography tips for beginners
Now for the technical side of zoo photography. Listed below are our top 10 tips for taking good photographs at the zoo.
1. Plan your day - As soon as you get to the zoo, grab yourself a map and plan out what animals you want to see and at what times. We have found the best times to see animals is just before feeding time, when they are most active.
2. Treat animals as moving subjects - With a lot of animals constantly on the move at feeding time, I like to keep my camera settings on shutter priority mode with a fast shutter. My partner on the other hand, keeps his camera on P mode, with continuous shooting also set. Another way to do this (for entry level DSLR’s) is to set it on sports mode. This will enable you to capture a burst of shots, one after another, never missing an opportunity.
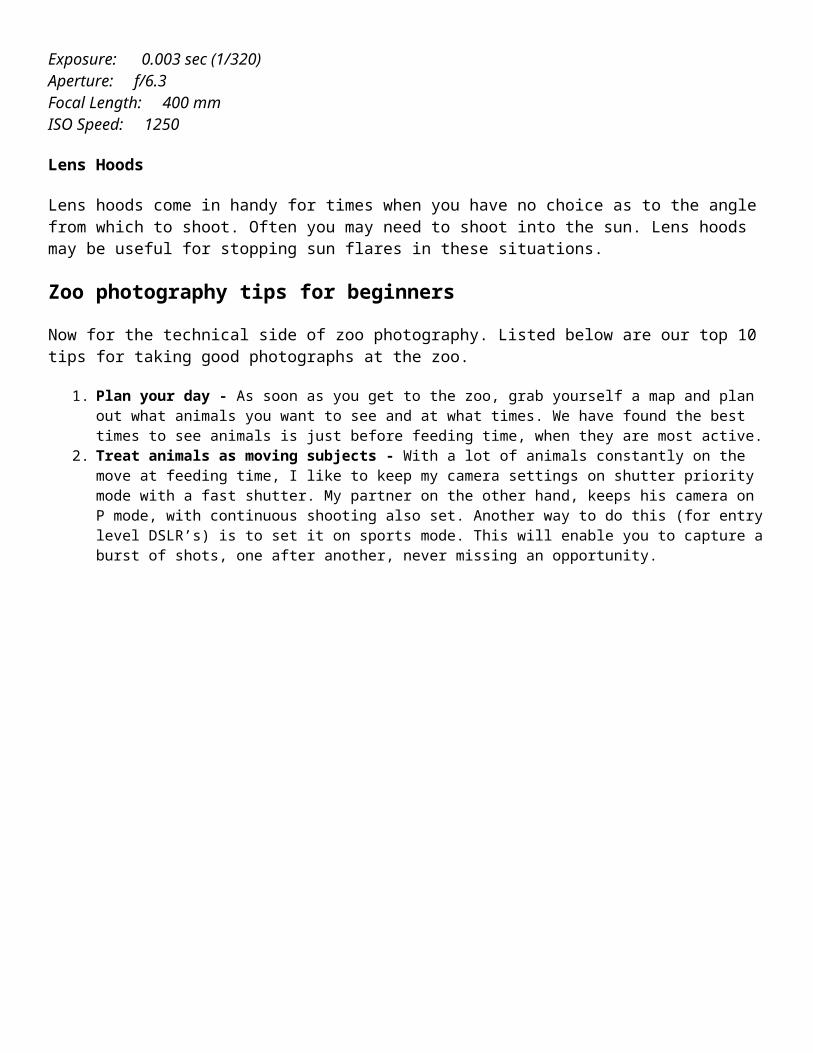
Lion photographed with a Canon 400D, hand held.
Camera SettingsExposure:0.003 sec (1/320)Aperture: f/6.3Focal Length: 300 mmISO Speed: 800
3. Eliminate cages - There is nothing more annoying to a zoo photographer than not being able to photograph through the cage and capture only the animal. The best way to do this, is to zoom your lens to a longer focal length and place the focal spot on the animal itself. This should in most cases, eliminate the cage.A trick my partner uses, is to set your DSLR camera to P mode, zoom your lens out to a longer focal length and take your shot. This tip also tends to ensure the focus is on the animal and not the cage.If all else fails, move your physical position and try again.

4. Eliminate glass - You eliminate glass using the same method as eliminating cages, as explained above. However, there are a few other tips for glass including: wiping the glass with a cloth to get rid of grubby marks, or positioning yourself so there are no scratches between you and the animal.
5. Get in close, then crop the images even closer - When you arrive at the zoo, take time to look through the shop and take notice of the posters and postcards being sold. You’ll soon learn that tightly cropped faces and body parts have more impact than those with ample surroundings. This allows you to capture details otherwise not seen.
Giraffe photographed at the National Zoo in Canberra, Australia.
Camera SettingsExposure: 0.004 sec (1/250)Aperture: f/7.1Focal Length: 400 mmISO Speed: 400
6. Focus on the eyes - As with all living subjects, if the eyes aren’t sharp, you lose the connection between the animal and the viewer.
7. Get down (or up) to the animals level where possible - Even if it means being on your knees or laying in the dirt Other times, you might need to stand on a seat. You’ll find your images have a lot more impact if you are at
eye level to the animal, within reason of course.8. Have patience - Give yourself ample time at each enclosure. My partner is very good at this. I can’t count the
number of times I’ve walked away from an animal, to find he then takes the perfect shot of it yawning, displaying its teeth in hunger, or capturing that unique expression.
A mandrill, photographed with a Canon 400D + 70 – 300mm zoom lens.
Camera SettingsExposure: 0.006 sec (1/160)Aperture: f/5.6Focal Length: 90 mmISO Speed: 400
9. Eliminate backgrounds where possible - Nothing is more distracting in a zoo photo than a fence in the background, or a feeding bucket. Where possible, always make the main focus on the animal. I often do this by repositioning myself so the distracting object isn’t in view, or using aperture mode (set to a small F number) to nicely smooth the background.
10. Photograph people and their enjoyment - The main reason to visit the zoo, should be to experience the enjoyment of viewing the different animals. Don’t forget to stand back and photograph that human enjoyment. At the end of the day when you look over your photographs, it will often be these images that bring a smile to your face.

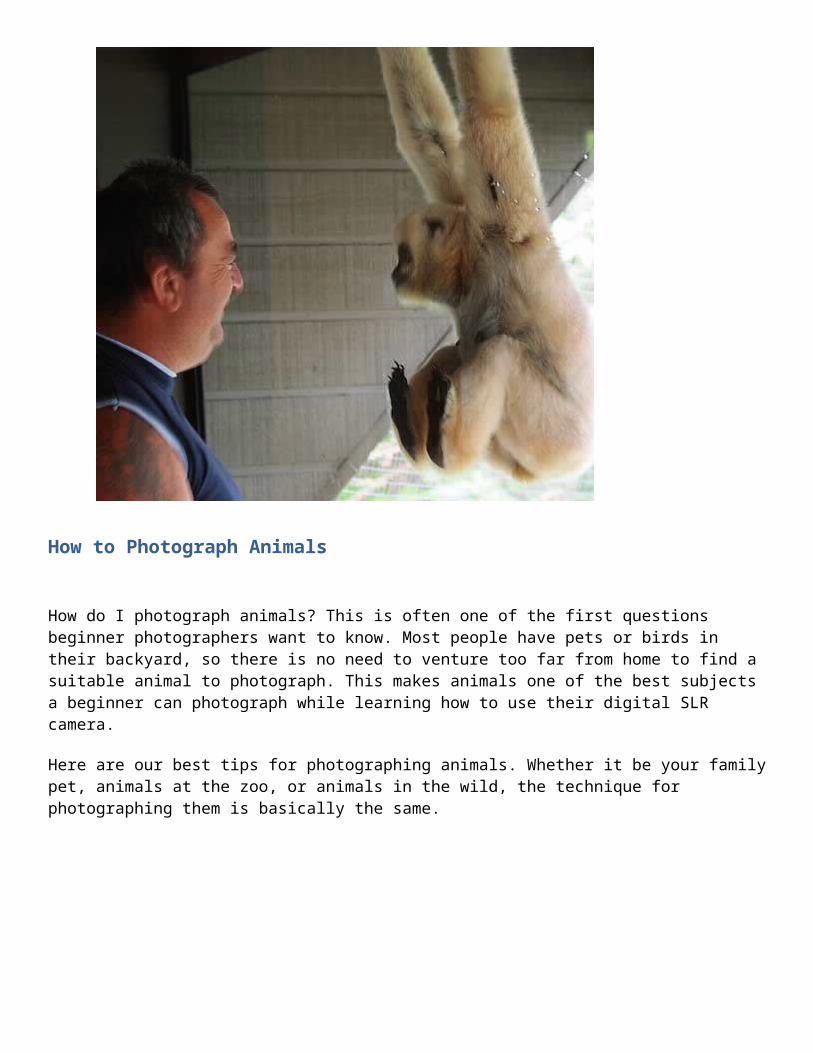
How to Photograph Animals
How do I photograph animals? This is often one of the first questions beginner photographers want to know. Most people have pets or birds in their backyard, so there is no need to venture too far from home to find a suitable animal to photograph. This makes animals one of the best subjects a beginner can photograph while learning how to use their digital SLR camera.
Here are our best tips for photographing animals. Whether it be your family pet, animals at the zoo, or animals in the wild, the technique for photographing them is basically the same.

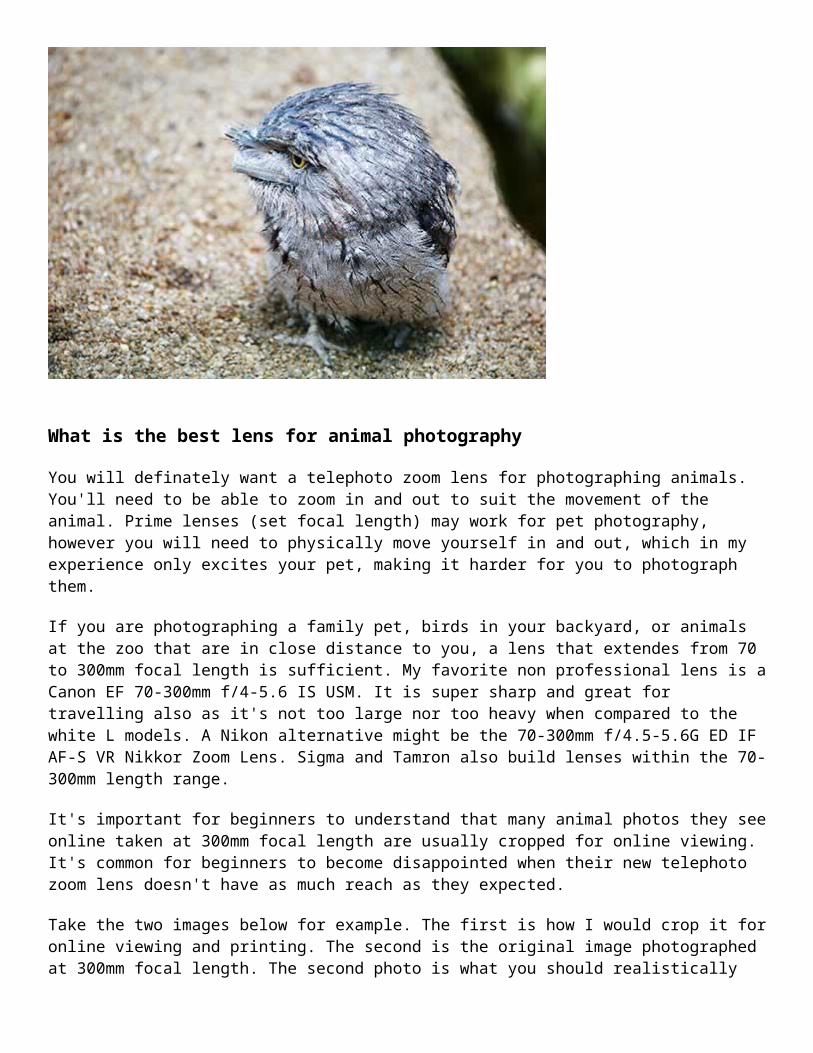
What is the best lens for animal photography
You will definately want a telephoto zoom lens for photographing animals. You'll need to be able to zoom in and out to suit the movement of the animal. Prime lenses (set focal length) may work for pet photography, however you will need to physically move yourself in and out, which in my experience only excites your pet, making it harder for you to photograph them.
If you are photographing a family pet, birds in your backyard, or animals at the zoo that are in close distance to you, a lens that extendes from 70 to 300mm focal length is sufficient. My favorite non professional lens is a Canon EF 70-300mm f/4-5.6 IS USM. It is super sharp and great for travelling also as it's not too large nor too heavy when compared to the white L models. A Nikon alternative might be the 70-300mm f/4.5-5.6G ED IF AF-S VR Nikkor Zoom Lens. Sigma and Tamron also build lenses within the 70-300mm length range.
It's important for beginners to understand that many animal photos they see online taken at 300mm focal length are usually cropped for online viewing. It's common for beginners to become disappointed when their new telephoto zoom lens doesn't have as much reach as they expected.
Take the two images below for example. The first is how I would crop it for online viewing and printing. The second is the original image photographed at 300mm focal length. The second photo is what you should realistically expect from a telephoto zoom lens if you are standing roughly 50 meters from the subject.

While I was perfectly happy with my 300mm focal length lens, I decided a few years back to upgrade it to a 400mm focal length. I found this more suitable for bird photography or zoo shots where the animal may be a further distance from you. When I crop images taken with a 400mm focal length, the cropped size is much larger with nicer detail.
When photographing animals I now use a Canon EF 100-400mm f/4.5-5.6L IS USM Telephoto Zoom Lens. While my partner loves his Sigma 150-500mm f/5-6.3 AF Telephoto Zoom, he still prefers the Canon EF 70-300mm f/4-5.6 lens for travelling. Purely because its smaller and lighter to carry.
Are extenders good for animal photography?
If you already own a shorter lens like a 200mm focal length, I definately recommend extenders. However it is important to understand that photos shot with extenders are never as sharp as those photographed without them.
Therefore if you are going to use extenders, I recommend purchasing professional lenses with matching brand extenders. This way you can be assured the extender was created specifically for a high quality lens.
When buying extenders for animal photography, you also want to make sure it is compatible with your lens autofocus system. Do your research. Don't automatically presume that if you own a Canon lens that a Canon extender will be fully compatible. I found this out the hard way myself years ago. The last thing you want is to be manually focussing on a moving animal.
Camera settings for animal photography
Personally I use two different camera settings when photographing animals. In short, if the animal is stationary choose Aperture Priority. If the animal is moving, choose Shutter Priority.
If the animal is non moving, as in your family pet sleeping or a bird perched in a tree, I recommend setting your camera to Aperture Priority. Aperture Priority is also my preference for photographing animals at the zoo. Rarely are zoo animals moving around quickly. Aperture Priority allows you to choose how much of the animal and its surroundings you want in sharp focus.
I set my Aperture to f/8 when using a focal length of 400mm. This ensures the animals whole face is in focus, from its nose or beak, back to its eyes. I find if I set a smaller f-number, more often than not I'll have either the nose / beak or eyes in focus, but not both. Personally I like both in focus when photographing animals.
When using a 300mm focal length lens, I set my Aperture to f/5.6. This usally has the same effect as f/8 on a 400mm focal length that I mentioned in the paragraph above.
If the animal you are photographing is moving, for example a pet dog running or a flying bird, then set your camera to Shutter Priority. Some beginner models may have a sports mode also which will work similar to Shutter Priority.
Shutter Priority allows you to choose the speed your camera will take each shot. For pets I recommend starting with 1/60th of a second shutter speed, take a few test shots, if your pet looks blurred try a faster speed until you
find the correct setting. For birds in flight and other such animals, I recommend starting with 1/1000th of a second shutter speed.
When photographing animals keep your camera ISO settings to no more than 400 for beginner models, or 800 for everyone else. This will ensure the animals eyes are nice and sharp. Sometimes if you set a camera ISO higher than these settings, the animals eye may seem hazy. Having said that, if you are photographing in low light situations you might need to increase the camera ISO higher than 800. Sometimes it's best to photograph a grainy shot than not to get it at all.
General tips for animal photography
Here are some general tips for animal photography apart from camera settings and lens choices already mentioned.
When photographing animals I always look at the background before the subject. As soon as you put your eye to the rear view finder, look past the main subject and at the background instead.
The background seen in any image can make or break how a viewer perceives the photo. In my experience, any photo has the potential to be great, if only the photographer took more notice of the background elements.
Background problems to look out for are trees, branches, wires, or any objects that may look as though they are cutting through the animals head or body. You want to try and avoid those sorts of objects in your backgrounds. It can be as easy as simply shifting your physical position. Instead of photograhing the animal head on, photograph it from the side.
Experiment with different Picture Styles (check camera manual). I find Neutral Picture Style is the best setting when photographing brown or earthy colored animals. If you shoot in RAW image format, you can always change this setting in post processing. This is often the best way to learn what Picture Style you personally like for each situation.
If you look at the two images below. The first was taken with Landscape Picture Style. I find this style often adds an unnatural reddish color to animals. The second one photographed with Neutral is more natural in colour.

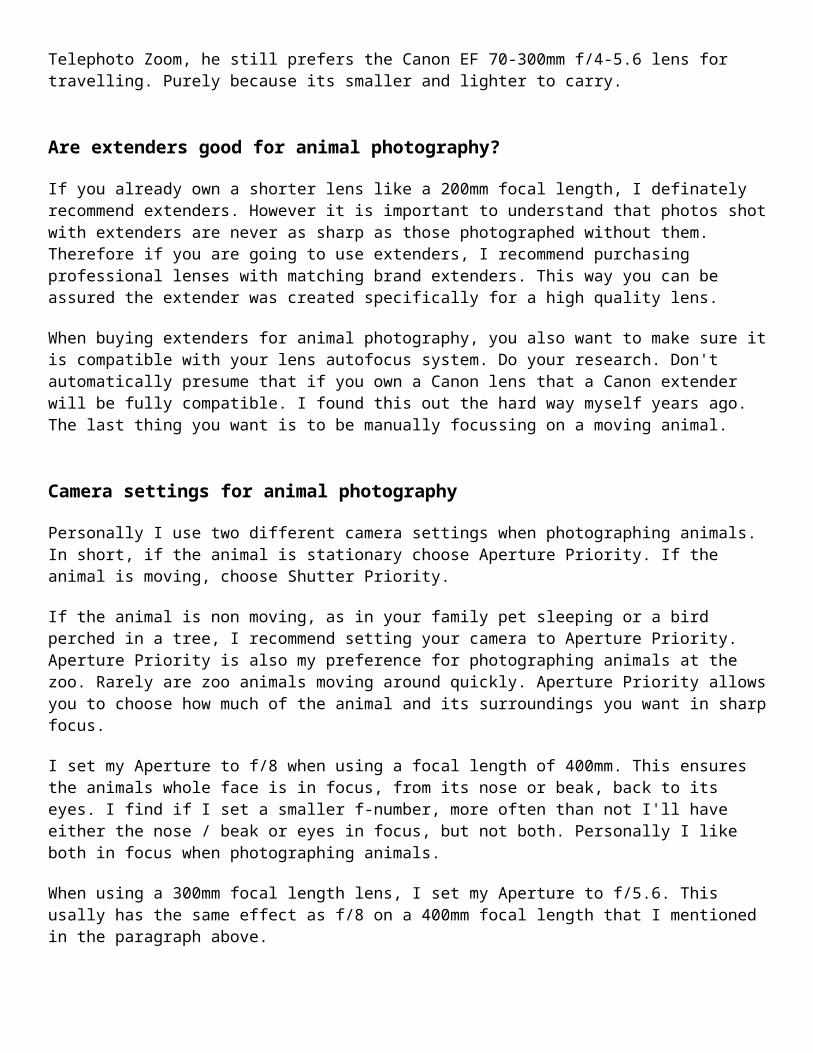
Experiment with different metering modes. Changing your cameras metering mode can result in more detail seen in the animals fur or feathers. I recommend reading another post I wrote earlier on Spot Metering where I go into this in more detail.
How to photograph your pet dog
Families love photos of their kids and pets, preferrably together. One of the best pieces of advice I was given by a professional pet photographer was to learn how to bark! Yes it will look silly, but chances are the child will naturally laugh and the dog will look inquisitively directly at you with its head tilted and one ear up in the air. It's a win win situation. Especially if you do it while you are shooting. You need to capture that exact moment the dog notices you barking.

For maximum impact get down on the animals level, no top of the head shots. Unforunately this means if you try the barking tip, also get ready to be bowled over by an excited family pet.
How to photograph animals at the zoo
My best tip for photographing animals at the zoo is to grab a brochure on what times each animal will be fed. Turn up 15 minutes prior and you'll find it's also the time zoo animals are most active. Captive animals are trained animals. They know what time of the day they are going to be fed.
Zoo animals are also a lot like humans. Once they have had their daily feed they like to curl up and sleep. This is not the best time to photograph animals at the zoo. 9/10 of my best zoo photos were taken in the morning when animals are at their most active.
The best zoo photos are those where the animal is looking directly at the camera. I've known zoo photographers to sit for days on the same animal until they get that perfect eye to eye contact shot.
I love photographing baby animals at the zoo. It's the best time to capture quirky awkward photos of animals. Photograph them close-up surrounded by family. Tightly cropped shots of baby animals framed by their parents are always great sellers on Microstock.
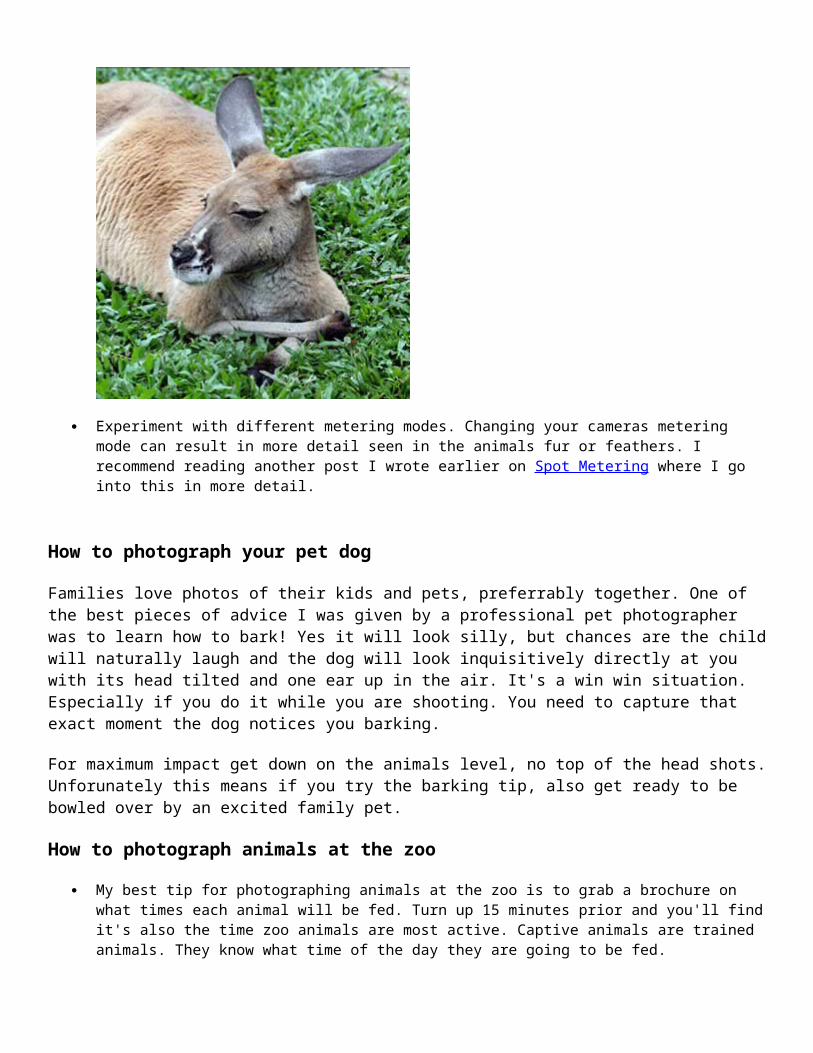
So there you have it, our best tips for animal photography. Listed below are other links you may be interested in reading.
Photographing fireworks
by Tanya Puntti
How to photograph Fireworks.
When photographing fireworks, always use a tripod and remote release. If your lens has Autofocus (AF) and Image Stabilisation (IS) / Vibration Reduction (VR), turn them off.
If possible, prefocus before the fireworks start. In other words, focus manually beforehand, take a few test shots and review them in your LCD screen. You won’t have time to do this once the light show has started!
Quick Tips
1. Set your camera to manual mode. This gives you full control over the ISO, Shutter Speed and Aperture.
2. Set a low ISO, for example 100. This will ensure no grainy images.
3. Pick a slow shutter speed of between 1 and 4 seconds. The slower the speed, the more you’ll capture in one frame, the longer the light trials.
4. Start with an Aperture of F/8.0. Beginners often presume they need a lower / faster aperture, however the opposite is true. This prevents overexposing the scenery.
Review the photographs after the first few shots. If the colours seem too white, change the Aperture to F/11 (up to F/16), and try again.
If on the other hand they are too dim, change the Aperture to F/5.6 or F/4.
Last tip for photographing fireworks
Try this: Set your SLR camera to bulb mode (check manual). This will allow you to leave the shutter open for as long as you hold down the shutter release (use a remote release).
When the fireworks start, press the shutter release to start the exposure. Hold the button down until the fireworks have burst into full colour, then release it!
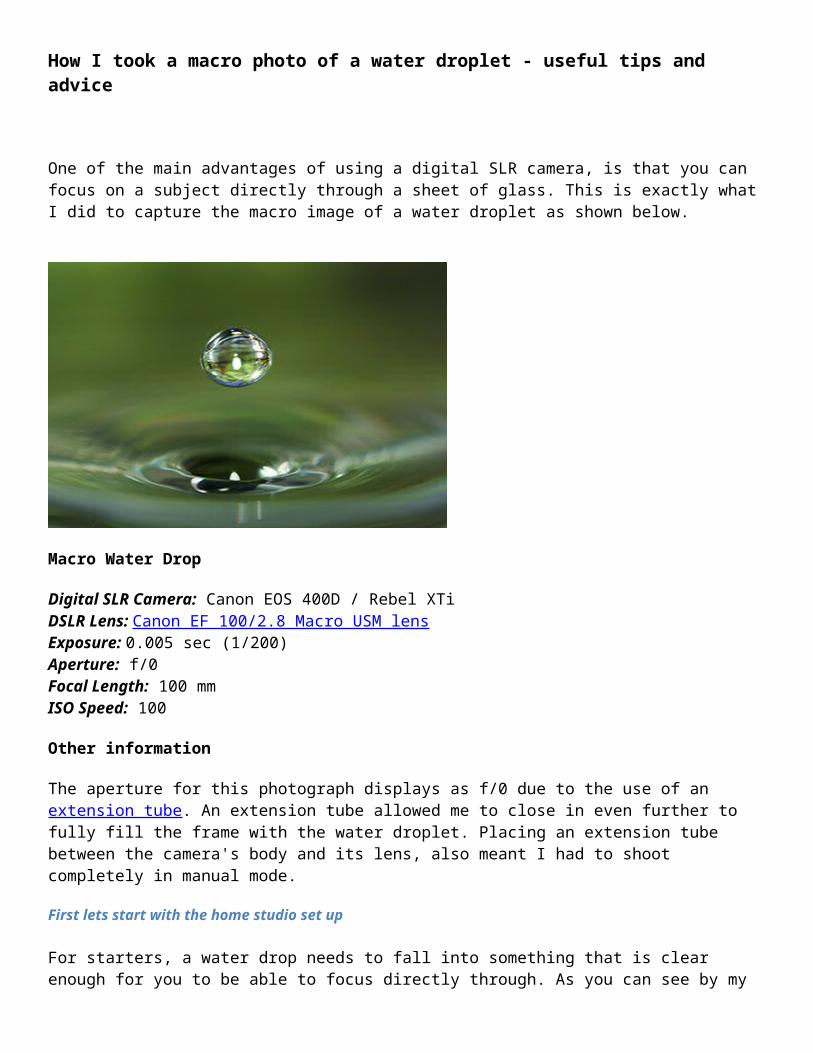
How I took a macro photo of a water droplet - useful tips and advice
One of the main advantages of using a digital SLR camera, is that you can focus on a subject directly through a sheet of glass. This is exactly what I did to capture the macro image of a water droplet as shown below.

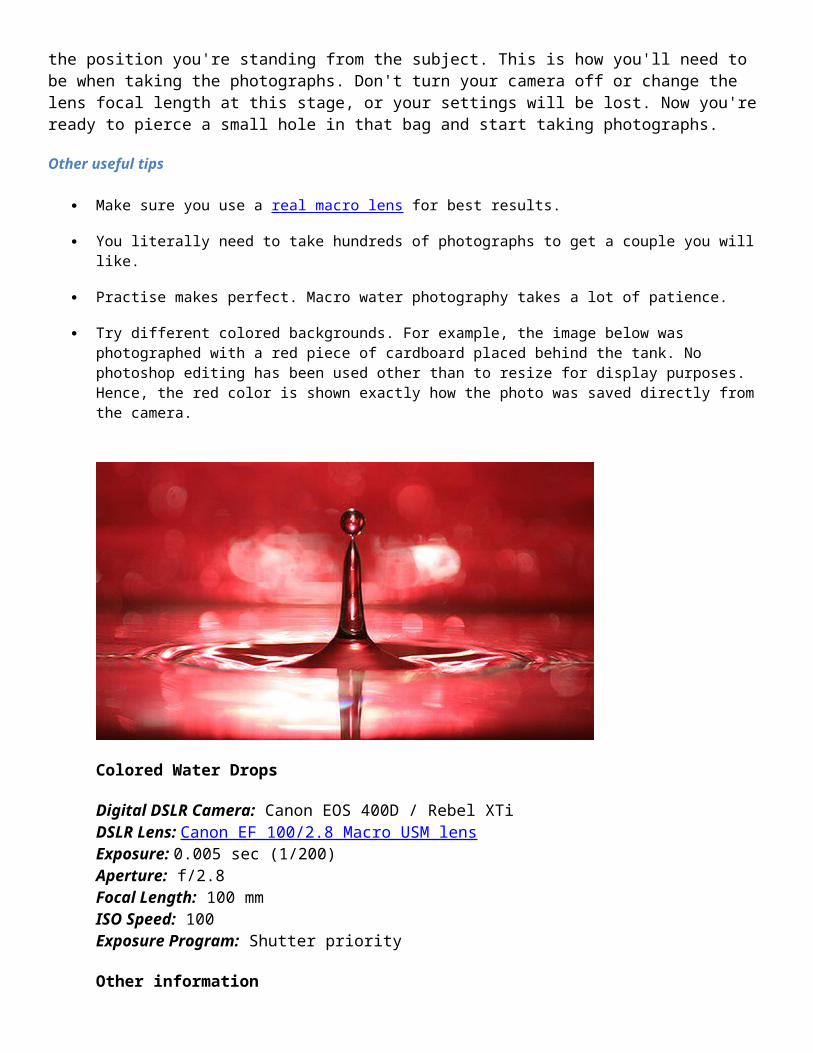
Macro Water Drop
Digital SLR Camera: Canon EOS 400D / Rebel XTi DSLR Lens: Canon EF 100/2.8 Macro USM lens Exposure: 0.005 sec (1/200)Aperture: f/0 Focal Length: 100 mm ISO Speed: 100
Other information
The aperture for this photograph displays as f/0 due to the use of an extension tube. An extension tube allowed me to close in even further to fully fill the frame with the water droplet. Placing an extension tube between the camera's body and its lens, also meant I had to shoot completely in manual mode.
First lets start with the home studio set up
For starters, a water drop needs to fall into something that is clear enough for you to be able to focus directly through. As you can see by my setup below, a fish tank was perfect for this. Next, I knew to have the best chance of capturing the drop, it had to roughly fall into the same area with each splash. Hence, I placed a bag with a small pin hole over the top of the tank. If your following along with this home studio setup, it's also important that you have good lighting and a nice cardboard background placed behind the tank for color.
The image below shows you how to set up a macro studio for capturing water splashes and drops.
As you can see in the image above, I did try to use a tripod at first. However I found this too limiting and decided later on to hand hold the camera instead.
Where exactly do you need to focus the DSLR lens?
When photographing water, it's best to set your digital SLR camera to either shutter priority or manual mode (if using an extension tube). You also need to turn off your lens AF (automatic focus). Instead, prefocus through the glass and onto the tip of a pencil, held approximately 1cm above the water in the same area you anticipate the droplet to fall. When you look through the view finder, you should see a red focal point, flashing somewhere around the pencil tip. As this happens, take notice of the position you're standing from the subject. This is how you'll need to be when taking the photographs. Don't turn your camera off or change the lens focal length at this stage, or your settings will be lost. Now you're ready to pierce a small hole in that bag and start taking photographs.
Other useful tips
Make sure you use a real macro lens for best results.
You literally need to take hundreds of photographs to get a couple you will like.
Practise makes perfect. Macro water photography takes a lot of patience.
Try different colored backgrounds. For example, the image below was photographed with a red piece of cardboard placed behind the tank. No photoshop editing has been used other than to resize for display purposes. Hence, the red color is shown exactly how the photo was saved directly from the camera.

Colored Water Drops
Digital DSLR Camera: Canon EOS 400D / Rebel XTi DSLR Lens: Canon EF 100/2.8 Macro USM lens Exposure: 0.005 sec (1/200)Aperture: f/2.8 Focal Length: 100 mm ISO Speed: 100 Exposure Program: Shutter priority
Other information
This time an extension tube was not used to take this photograph. Therefore eliminating the need for fully manual camera settings. Note, I still had to turn off AF (automatic focus) on the actual lens. Not all macro lens have this option so don't worry too much if you can't find AF on your lens.
The digital SLR camera was set to shutter priority with a speed of 0.005 sec (1/200). This enabled me to shoot fast enough to capture a moving droplet. To do this with such a small aperture, I used my cameras onboard flash. This ensured the photograph didnt turn out completely black.
Tips for photographing sunrises
by Tanya Puntti
How to photograph sunrises
Photographer and author Rick Sammon shares with you his best advice including 8 tips for photographing the perfect sunrise.
1. Know where the sun rises before you go out taking photographs. Once the sun starts to rise, you won’t want to waist any time repositioning your camera gear.

2. Know what time the sun is expected to rise in your particular area. Buying a copy of the local newspaper will tell you this.
3. Use a tripod, because you will need to set slow shutter speeds due to low light conditions. For example, 1/8th of a second or slower depending on the available light.
4. Underexposing your shot will result in richer, deeper colors and shades of reds, oranges and yellows.
5. If you want a small sun in your composition, use a wide angle lens. If you want a larger sun seen within your composition then use a telephoto zoom lens.
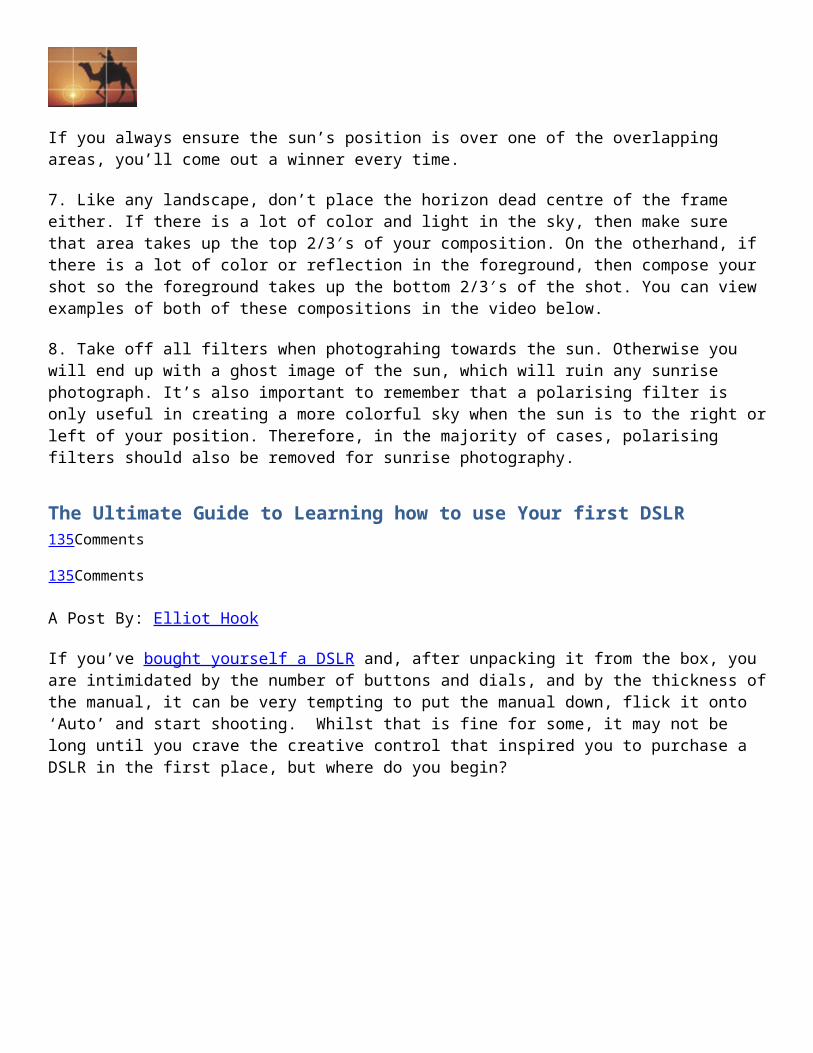
6. For composition purposes, don’t place the sun dead centre in the frame. Try and imagine a grid over your composition, like the one shown in the image below.
If you always ensure the sun’s position is over one of the overlapping areas, you’ll come out a winner every time.
7. Like any landscape, don’t place the horizon dead centre of the frame either. If there is a lot of color and light in the sky, then make sure that area takes up the top 2/3′s of your composition. On the otherhand, if there is a lot of color or reflection in the foreground, then compose your shot so the foreground takes up the bottom 2/3′s of the shot. You can view examples of both of these compositions in the video below.
8. Take off all filters when photograhing towards the sun. Otherwise you will end up with a ghost image of the sun, which will ruin any sunrise photograph. It’s also important to remember that a polarising filter is only useful in creating a more colorful sky when the sun is to the right or left of your position. Therefore, in the majority of cases, polarising filters should also be removed for sunrise photography.
The Ultimate Guide to Learning how to use Your first DSLR135Comments
135Comments
A Post By: Elliot Hook
If you’ve bought yourself a DSLR and, after unpacking it from the box, you are intimidated by the number of buttons and dials, and by the thickness of the manual, it can be very tempting to put the manual down, flick it onto ‘Auto’ and start shooting. Whilst that is fine for some, it may not be long until you crave the creative control that inspired you to purchase a DSLR in the first place, but where do you begin?
If you consider yourself a beginner who is unsure of how to make the most of your camera, this post is designed for you. It’s intended to be a brief, a one-stop shop to help you take your camera off auto, and take control of your DSLR. It isn’t intended to be a replacement for your camera manual, so will not explain every last setting in great depth, but will cover enough of the basics to get you in control of your camera, and give you the key topics to go back to your manual to read.

The topics covered in this post are:
1. Shooting modes
aperture priority shutter priority program manual
2. ISO
3. Completion of the ‘exposure triangle’
4. Metering
exposure compensation (+/-)
5. Focussing
focussing modes (AF-S/AF-C) focus points
6. File size/types
raw vs jpeg
7. White balance
Which should be more than enough to get you on your way. So let’s begin…
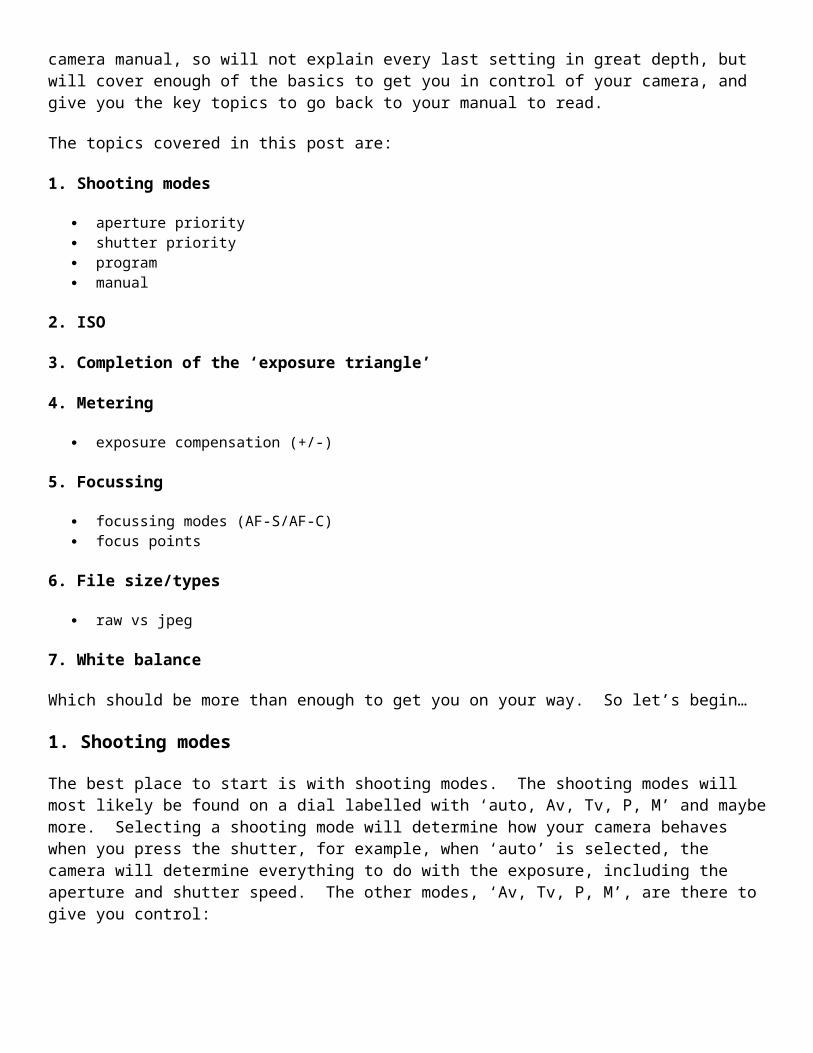
1. Shooting modes
The best place to start is with shooting modes. The shooting modes will most likely be found on a dial labelled with ‘auto, Av, Tv, P, M’ and maybe more. Selecting a shooting mode will determine how your camera behaves when you press the shutter, for example, when ‘auto’ is selected, the camera will determine everything to do with the exposure, including the aperture and shutter speed. The other modes, ‘Av, Tv, P, M’, are there to give you control:
Don’t worry if your mode dial looks a little different; different manufacturers use different abbreviations for the shooting modes. Your mode dial may have the letters ‘A, S, P, M’ (instead of Av, Tv, P, M), yet they all function in the same way. Below, I have given each abbreviation for the given mode.
Aperture Priority (Av or A)Aperture priority can be thought of as a ‘semi-automatic’ shooting mode. When this is selected, you as the photographer set the aperture and the camera will automatically select the shutter speed. So what is aperture and when would you want to control it?
The aperture is the size of the opening in the lens through which light is allowed to pass whenever the shutter is opened – the larger the aperture, the more light passes through.
The aperture is measured in ‘f-stops’ and is usually displayed using an ‘f-number’, e.g. f/2.0, f/2.8, f/4.0, f/5.6, f/8.0 etc, which is a ratio of focal length over diameter of the opening. Therefore, a larger aperture (a wider opening) has a smaller f-number (e.g. f/2.0) and smaller aperture (a narrower opening) has a larger f-number (e.g. f/22). Reducing the aperture by one whole f-stop, e.g. f/2.0 to f2/8 or f/5.6 to f/8.0, halves the amount of light entering the camera.
Aperture is one of the most important aspects of photography as it directly influences the depth of field – that is, the amount of an image that is in focus. A large depth of field (achieved by using a small aperture (large f-number)) would mean that a large distance within the scene is in focus, such as the foreground to the background of the landscape below.

An aperture of f/13 was used here to give a large depth of field, ensuring that the whole image, from the foreground grasses to the background mountains. was sharp
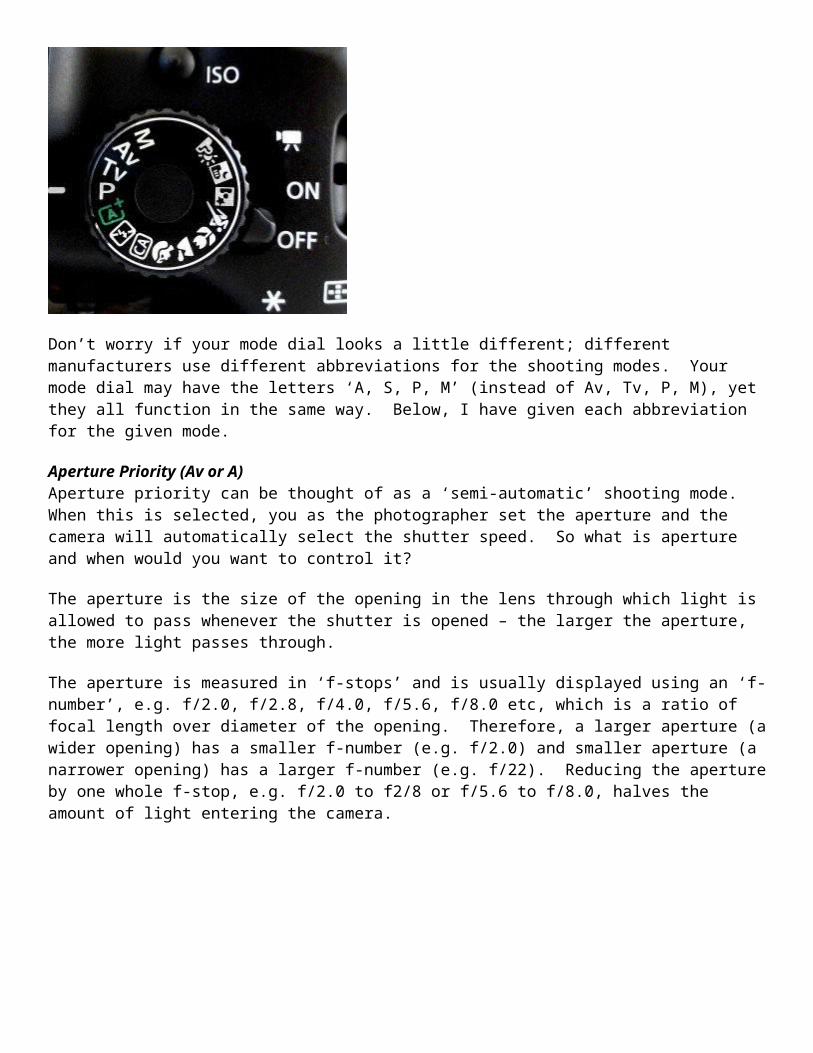
Whereas a shallow depth of field (achieved by using a large aperture (small f-number)) would produce an image where only the subject is in sharp focus, but the background is soft and out of focus. This is often used when shooting portraiture or wildlife, such as the image below, to isolate the subject from the background:
A large aperture of f/4.5 was used to capture this water vole, against a soft, out of focus background
So when using aperture priority, you can get complete control over your depth of field, whilst the camera takes care of the rest.
Shutter Priority (Tv or S)Similarly to aperture priority, this is another ‘semi-automatic’ shooting mode, though in this instance, you as the photographer set the shutter speed and the camera will take care of the aperture. The shutter speed, measured in seconds (or more often fractions of a second), is the amount of time the shutter stays open when taking a photograph. The longer the shutter stays open, the more light passes through to the sensor to be captured.
You would select a short shutter speed if you wanted to freeze a fast moving subject, such as shooting sports, action or wildlife, for example:

A very fast shutter speed of 1/4000th sec was used to freeze the motion of this grouse in flight
You would use a long shutter speed if you wanted to blur a moving subject, for example water rushing over a waterfall (slower shutter speeds will require you to put the camera on a tripod to ensure the camera is held steady whilst the shutter is open):
To capture the motion of the waves, and render the water with a soft, milky texture, a shutter speed of 6 seconds was used here
So whilst you worry about what shutter speed you need for a given photograph, the camera will determine the appropriate aperture required to give the correct exposure.
Aperture and shutter priority shooting modes may be semi-automatic, meaning that some may deride their use because they’re not fully manual, however they are incredibly useful modes to shoot in that can give you enough creative control to capture scenes as you envisage them.
Program (P)Program mode is almost a halfway house between the semi automatic modes of aperture/shutter priority and full manual control. In program mode, you are able to set either the aperture or shutter speed, and the camera will maintain the correct exposure by adjusting the other one accordingly, i.e. as you change the aperture, the shutter speed will automatically change, and vice versa. This gives you additional freedom that using either aperture priority or shutter priority cannot give without switching between shooting modes.
Manual (M)Manual mode is exactly what it sounds like, you are given full control over the exposure determination, setting both the aperture and shutter speed yourself. There will be an exposure indicator either within the viewfinder or on the screen that will tell you how under/over exposed the image will be, however, you are left to change the shutter speed and aperture yourself to ensure you achieve the correct exposure.
Practically Speaking: as a first step to taking your camera off ‘auto’, aperture priority and shutter priority modes offer two very simple ways to start to understand how the different setting impact your images and are a perfect starting place for learning how to use your camera more creatively.
2. ISO
ISO is a measure of how sensitive the sensor of your camera is to light. The term originated in film photography, where film of different sensitivities could be used depending on the shooting conditions, and it is no different in digital photography. The ISO sensitivity is represented numerically from ISO 100 (low sensitivity) up to ISO 6400 (high sensitivity) and beyond, and controls the amount of light required by the sensor to achieve a given exposure
At ‘low’ sensitivities, more light is required to achieve a given exposure compared to high sensitivities where less light is required to achieve the same exposure. To understand this, let’s look at two different situations:
Low ISO numbersIf shooting outside, on a bright sunny day there is a lot of available light that will hit the sensor during an exposure, meaning that the sensor does not need to be very sensitive in order to achieve a correct exposure. Therefore, you could use a low ISO number, such as ISO 100 or 200. This will give you images of the highest quality, with very little grain (or noise).
Taken at ISO 100, the image does not show signs of noise (even when looking at the 100% crop (right)
High ISO numbersIf shooting in low light conditions, such as inside a dark cathedral or museum for example, there is not much light available for your camera sensor. A high ISO number, such as ISO 3200, will increase the sensitivity of the sensor, effectively multiplying the small amount of available light to give you a correctly exposed image. This multiplication effect comes with a side effect of increased noise on the image, which looks like a fine grain, reducing the overall image quality. The noise will be most pronounced in the darker/shadow regions.
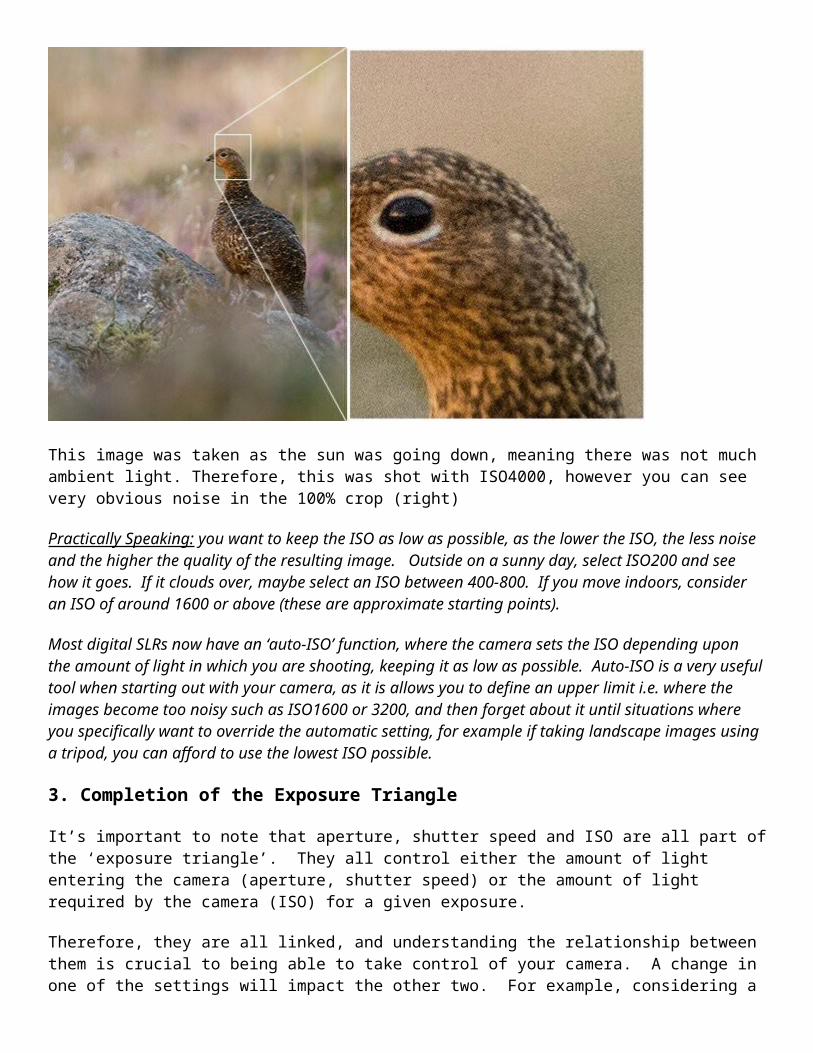
This image was taken as the sun was going down, meaning there was not much ambient light. Therefore, this was shot with ISO4000, however you can see very obvious noise in the 100% crop (right)
Practically Speaking: you want to keep the ISO as low as possible, as the lower the ISO, the less noise and the higher the quality of the resulting image. Outside on a sunny day, select ISO200 and see how it goes. If it clouds over, maybe select an ISO between 400-800. If you move indoors, consider an ISO of around 1600 or above (these are approximate starting points).
Most digital SLRs now have an ‘auto-ISO’ function, where the camera sets the ISO depending upon the amount of light in which you are shooting, keeping it as low as possible. Auto-ISO is a very useful tool when starting out with your camera, as it is allows you to define an upper limit i.e. where the images become too noisy such as ISO1600 or 3200, and then forget about it until situations where you specifically want to override the automatic setting, for example if taking landscape images using a tripod, you can afford to use the lowest ISO possible.
3. Completion of the Exposure Triangle
It’s important to note that aperture, shutter speed and ISO are all part of the ‘exposure triangle’. They all control either the amount of light entering the camera (aperture, shutter speed) or the amount of light required by the camera (ISO) for a given exposure.
Therefore, they are all linked, and understanding the relationship between them is crucial to being able to take control of your camera. A change in one of the settings will impact the other two. For example, considering a theoretical exposure of ISO400, f/8.0, 1/10th second. If you wanted to reduce the depth of field, and decided to use an aperture of f/4.0, you would be increasing the size of the aperture by two whole f/stops, therefore increasing the amount of light entering the camera by a factor of 4 (i.e. increasing by a factor of 2, twice). Therefore, to balance the exposure, you could do the following:
Situation 1: Reduce the shutter speed by a factor of 4, i.e. to 1/40th second. Situation 2: Reduce the ISO by a factor of 4, i.e. to ISO100
Situation 3: A combination of the above, shutter speed by a factor of 2 (to 1/20th second) AND reduce the ISO bv a factor of 2 (to ISO200).
Aperture, shutter speed and ISO are all facotrs that influence your exposure, and are all linked. It’s just a case of balancing the books!
They all have the net effect of reducing the amount of light by a factor of 4, countering the change in aperture. It’s just a case of understanding that they are all linked, and so changing one setting, will cause a change in another.
Using a combination of the semi-automatic shooting modes and auto-ISO would mean you won’t necessarily need to think about adjusting your exposure in such a way initially, however understanding the relationship that ISO or aperture has with shutter speed, and knowing the practical implications is a big step in mastering your DSLR .
4. Metering
Through out all of the above discussion, I have said that the camera calculates the exposure depending on the amount of available light, but what is it actually doing?
When taking a photograph, using any form of automatic exposure calculation (e.g. aperture priority mode, shutter priority mode, auto-ISO etc) the camera always tries to calculate an ‘average’ exposure. It will asses the entire scene, both light and dark areas, and determine the exposure so that all of the tones within the entire image average to 18% grey – called the ‘middle’ grey.
This is known as metering, and it is the reason that if you point your camera at a bright white scene, such as after it has snowed, and take a photograph the resulting image will always appear darker than you or I see it. Similarly, if you point your camera at a really dark scene, such as a low-lit room, and take a photograph the resulting image will always be brighter than you or I see it.
The scene is always being averaged by the camera and most of the time that results in the image appearing to be correctly exposed. However, you can control what areas of the scene are being assessed by the camera in order to influence the way in which the exposure is metered.
Generally, there are three metering modes that you can choose from:
Average - The camera will assess the tones across the entire image form corner to corner, and expose the scene to 18% grey from that assessment.
Centre-weighted – The camera weights the exposure reading for the area in the centre of the viewfinder that can total up to approximately 80% of the scene, ignoring the extreme corners of the image.
Spot metering – The camera will use a very small area of the scene, typically a small circle in the centre of the viewfinder that totals approximately 5% of the viewfinder area. It will make the assessment of dark/light tones in this area and expose the entire scene to 18% grey, from that assessment.
Practically speaking: when starting out with your camera, either average or centre weighted metering are a good starting point. They will both provide a fairly consistent measure of the exposure required and, if you select one mode and stick with it, you will soon begin to understand when a scene will be under exposed (i.e. too dark) or over exposed (i.e. to light) compared to how you see it with your own eyes.
But what can you do if a scene is under/over exposed? That is where exposure compensation comes in.
Exposure compensation
Generally found on a small +/- button near the shutter, this is one of the most useful functions to learn how to use. It allows you to either increase or decrease the cameras default meter reading to account for the actual brightness of a scene.
If a scene contains primarily bright tones and is being rendered too dark, for example, a bright white snow scene (that will typically be reduced to 18% grey by the default metering system), you can apply positive exposure compensation to let the camera know that the scene should be lighter than middle grey.
A spring lamb leaping in front of a snowy hillside. Left: Straight out of camera, with the snow caught as grey. Right: With +2 stops exposure compensation (added in post processing). The bright snowy background caused my camera to underexpose this scene by nearly two stops, which could have been corrected by exposure compensation in camera.
Conversely, if a scene contains primarily dark tones and is being rendered too light, for example, a dark night scene (that will typically be increased to 18% grey by the default metering system), you can apply negative exposure compensation to let the camera know that the scene should be darker than middle grey.
5. Focussing
Regardless of what shooting mode you are using, or what ISO you define, the chances are there will be a subject of your image that you want to have in focus. If that focus is not achieved, the image will not be what you wanted.

Autofocus modesDSLRs come with a range of autofocus modes, however, for simplicity, the two that are most important to understand are AF-S and AF-C
AF-S – autofocus-single. This is best used when taking photos of stationary subjects such as portraits of people, landscapes, buildings etc. When you half-press the shutter, the focus will be acquired and locked on that point for as long as you hold the button down. If you want to change to focus, you need to release the button, recompose and then re-half-press.
AF-C – autofocus-continuous. This is best used when taking photos of action or moving subjects such as sports and wildlife. When you half-press the shutter, focus will be acquired and locked on to a given subject. When that subject moves, the focus will adjust with it, refocusing all of the time until the photograph is taken.
(These modes are not to be confused with the AF/MF switches on the lens, where AF stands for autofocus and MF stands for manual focus. That switch is an override for if you want to manually focus your lens. If you want to make use of the autofocus modes discussed above, ensure the lens is set to AF).
Focus PointsBoth of those focus modes rely on what are known as focus points. When you look through the viewfinder, you should see a number of squares/dots overlaid across the screen. When you half-press the shutter, you should see one of these squares be highlighted in red. That is the active focus point, and it is that position within the frame that the camera is focussing on. A viewfinder with 9 focus points is shown below:
New DSLRs can come with over 50 focus points and the temptation is to leave it on fully automatic focus point selection, with the thinking that the camera will be able to select the correct focus point. However, only you know what you want to focus on, and there is no better way than ensuring the correct subject is in focus than by using one focus point, and placing that focus point over the subject.
If you select a single focus point, you should be able to change which point is active fairly easily either by using directional buttons one of the dials. If you select a focus point that is on your desired subject, you will ensure that the camera focuses where you want it to. After a small amount of practice, you will soon get into the habit of being able to change the focus point without taking the camera away form your eye.
Practically speaking: Initially, set your camera to use a single focus point (your camera manual should tell you how to do this). This way, you will be able to choose what you are focussing on, ensuring that the subject you want to capture is in focus. Once you are familiar with the basic focussing modes and focus point selection, you can then explore the more advanced modes that your camera may offer.
6. File Size/Types
You will have the option to be able to change the size of the images that your camera records, and in which file type. You want to set the file size to the largest possible (whether it is ‘large’ or ‘fine’ or ‘super fine’) to ensure that you are making the most of the mega pixels that you have just invested in.
You will also have the option of choosing whether to record the images as ‘raw’ or ‘jpeg’ file type. A raw file is uncompressed, and so contains a lot of image data that allows for a lot of flexibility during post-processing (i.e. on your computer) but also comes with additional complications such as the need to ‘process’ every file using dedicated editing software and a larger file size. A jpeg is a compressed file type, that is automatically processed by the camera. They will be ‘print ready’ straight out of the camera, and are much smaller files, meaning you can fit more images per memory card.
Practically speaking: When starting out with your camera, using jpeg is the most straight forward. It will enable you to get the best results whilst you learn the basics or your camera before complicating matters with post-processing of raw files.
7. White Balance
If shooting in jpeg, as recommended above, you will need to make sure you set your white balance before taking a picture. The white balance can significantly impact colour tone of your photographs. You may have noticed that sometimes your images have a blueish tone to them or, in others, everything looks very orange. This is to do with the white balance and, whilst you can make some adjustments to the image on your computer, it is much simpler if you get it right up-front.
Different light sources (such as the sun, light bulbs, fluorescent strips etc) emit light of different wavelengths, and therefore colours, which can be described by what is known as colour temperature. Light from a candle, or from the sun during sunrise/sunset, is very warm, and contains a lot of red/orange wavelengths; whereas light from a fluorescent strip is much cooler, containing a lot of blue wavelengths. This coloured light is reflected off of surfaces, but our brain in clever enough to recognise this and automatically counter the effect, meaning that we still see a white surface as a white surface. However, your camera is not that intelligent, and unless told otherwise, will record the orange or blue tones giving the colour cast to your images.

Left: The image captured using auto white balance has a heavy yellow tone from the artificial street lighting. Right: the same image, corrected for a ‘Tungsten’ white balance, giving the cooler tones on the stone work, and the bluer sky
As the colour temperature of different light sources is well known, there are a number of presets built into your camera that help to overcome the different colours of light in different situations – cooling the warm light, and warming the cool light – all in the cause of trying to capture the colours of the scene accurately. The ‘auto’ feature (auto WB or AWB) will attempt to predict the colour of the light by detecting the predominant colour of the scene and then countering it, however it may not necessarily make a correct decision, leaving you with inaccurate colours. Therefore it is best to set the colour balance before you take your image and just to make sure (note: the above image was a raw file giving me a lot of latitude for white balance correction. Jpeg files are not as susceptible to white balance adjustments, meaning the white balance correction needs to be made before the image is taken):
Daylight – To be used on clear sunny days. Bright sunlight, on a clear day is as near to neutral light that we generally get
Cloudy – To be used when shooting on a cloudy day. Adds warm tones to daylight images.
Shade – To be used if shooting in the shade, as shaded areas generally produce cooler, bluer images, so need warming up.
Tungsten – Used for shooting indoors, under incandescent light bulbs, or under street lights, to cool down the yellow tones.
Fluorescent – Compensates for the green/blue tones of fluorescent light strips when shooting indoors.
Flash – the flash will add a cool blue cast to the image, so used to add some warmth.

Practically speaking: avoid auto white balance and set the white balance manually. Generally, you will be able to look up at the sky and see what kind of day it is, and determine the colour balance required pretty easily. If you move indoors, just check the lighting that you are shooting under, and again select the appropriate white balance. It will soon become second nature to set it as you take your camera out of the bag.
Conclusion
So that is an overview of the settings you will encounter when you want to take the leap and take your camera off ‘Auto’. You don’t necessarily need to consider them all straight away, but exploring and understanding the effect of each setting will soon have you in complete control of your camera. The biggest step, that will give you the most noticeable difference in the feeling of control and direct influence on creative results, will be to start using the ‘aperture priority’ or ‘shutter priority’ shooting modes and once you are familiar with those, you can start thinking about exploring further. Soon enough, you will no longer think of your camera as a mysterious black box, but understand how to achieve the photographic results that you bought it for in the first place.
Read more from our Tips & Tutorials category.
Elliot Hook is a wildlife and landscape photographer based in Hertfordshire, UK. Elliot loves being outdoors with his camera, and is always looking to improve his own photography and share what he has learnt with others. Elliot also can be found at his website, on Twitter, Flickr and 500px.
If you enjoyed this article, you might also like...
Getting Creative with Aperture and Colour Start To See Photographically In Six Easy Steps How to Select the Perfect Nikon DSLR for Your Needs Setting The Mood By Adjusting Your White Balance The Basics of Using ND Grads to Improve Your Landscapes
Rule of Thirds125K
12.4K
356

89
468
59
0Comments
125K
12.4K
356
89
468
59
0Comments
A Post By: Darren Rowse

The Rule of Thirds is perhaps the most well known principle of photographic composition.
The “Rule of Thirds” one of the first things that budding digital photographers learn about in classes on photography and rightly so as it is the basis for well balanced and interesting shots.
I will say right up front however that rules are meant to be broken and ignoring this one doesn’t mean your images are necessarily unbalanced or uninteresting. However a wise person once told me that if you intend to break a rule you should always learn it first to make sure your breaking of it is all the more effective!
What is the Rule of Thirds?
The basic principle behind the rule of thirds is to imagine breaking an image down into thirds (both horizontally and vertically) so that you have 9 parts. As follows.
As you’re taking an image you would have done this in your mind through your viewfinder or in the LCD display that you use to frame your shot.
With this grid in mind the ‘rule of thirds’ now identifies four important parts of the image that you should consider placing points of interest in as you frame your image.
Not only this – but it also gives you four ‘lines’ that are also useful positions for elements in your photo.
The theory is that if you place points of interest in the intersections or along the lines that your photo becomes more balanced and will enable a viewer of the image to interact with it more naturally. Studies have shown that when viewing images that people’s eyes usually go to one of the intersection points most naturally rather than the center of the shot – using the rule of thirds works with this natural way of viewing an image rather than working against it.
In addition to the above picture of the bee where the bee’s eye becomes the point of focus here are some of examples:
Another Rule of Thirds Example
In this image I’ve purposely placed the head of my subject on one of the intersecting points – especially his eyes which are a natural point of focus for a portrait. His tie and flower also take up a secondary point of interest.
In this shot I’ve placed the subject along a whole line which means she is considerably off center and therefore creating an additional point of interest. Placing her right in the center of the frame could have resulted in an ‘awkward’ shot.
In a similar way a good technique for landscape shots is to position horizons along one of the horizontal lines also as I’ve done with the following shot (I’ll let you imagine the lines).

Using the Rule of Thirds comes naturally to some photographers but for many of us takes a little time and practice for it to become second nature.
In learning how to use the rule of thirds (and then to break it) the most important questions to be asking of yourself are:
What are the points of interest in this shot? Where am I intentionally placing them?
Once again – remember that breaking the rule can result in some striking shots – so once you’ve learnt it experiment with purposely breaking it to see what you discover.
Lastly – keep the rule of thirds in mind as you edit your photos later on. Post production editing tools today have good tools for cropping and reframing images so that they fit within the rules. Experiment with some of your old shots to see what impact it might have on your photos.
ISO Settings in Digital Photography0Comments
0Comments
A Post By: Darren Rowse
Grant (a reader of DPS) asks – ‘I’m confused about ISO. What is the best setting to choose? Should I always choose the lowest one?’
Thanks for the question Grant. Before I attempt to answer it let me give a quick definition of ISO:
What is ISO?
In traditional (film) photography ISO (or ASA) was the indication of how sensitive a film was to light. It was measured in numbers (you’ve probably seen them on films – 100, 200, 400, 800 etc). The lower the number the lower the sensitivity of the film and the finer the grain in the shots you’re taking.

In Digital Photography ISO measures the sensitivity of the image sensor. The same principles apply as in film photography – the lower the number the less sensitive your camera is to light and the finer the grain.
Higher ISO settings are generally used in darker situations to get faster shutter speeds. For example an indoor sports event when you want to freeze the action in lower light. However the higher the ISO you choose the noisier shots you will get. I’ll illustrate this below with two enlargements of shots that I just took – the one on the left is taken at 100 ISO and the one of the right at 3200 ISO (click to enlarge to see the full effect).
(you can see larger sized images of both shots here for the 100 ISO and here for the 3200 ISO)
100 ISO is generally accepted as ‘normal’ and will give you lovely crisp shots (little noise/grain).
Most people tend to keep their digital cameras in ‘Auto Mode’ where the camera selects the appropriate ISO setting depending upon the conditions you’re shooting in (it will try to keep it as low as possible) but most cameras also give you the opportunity to select your own ISO also.
When you do override your camera and choose a specific ISO you’ll notice that it impacts the aperture and shutter speed needed for a well exposed shot. For example – if you bumped your ISO up from 100 to 400 you’ll notice that you can shoot at higher shutter speeds and/or smaller apertures.
Questions to Ask When Choosing ISO
When choosing the ISO setting I generally ask myself the following four questions:
1. Light – Is the subject well lit?2. Grain – Do I want a grainy shot or one without noise?3. Tripod – Am I using a tripod?4. Moving Subject – Is my subject moving or stationary?
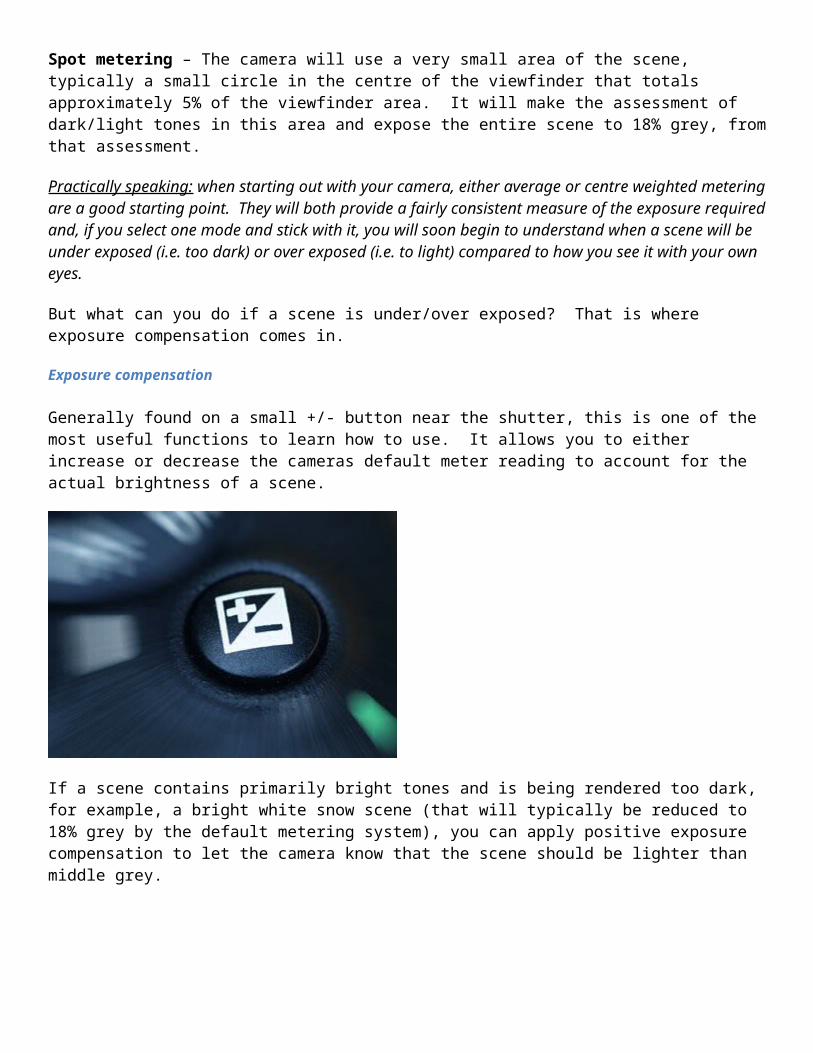
If there is plenty of light, I want little grain, I’m using a tripod and my subject is stationary I will generally use a pretty low ISO rating.
If it’s dark, I purposely want grain, I don’t have a tripod and/or my subject is moving I might consider increasing the ISO as it will enable me to shoot with a faster shutter speed and still expose the shot well.
Of course the trade off of this increase in ISO will be noisier shots.
Situations where you might need to push ISO to higher settings include:
Indoor Sports Events – where your subject is moving fast yet you may have limited light available. Concerts – also low in light and often ‘no-flash’ zones Art Galleries, Churches etc- many galleries have rules against using a flash and of course being indoors are not
well lit. Birthday Parties – blowing out the candles in a dark room can give you a nice moody shot which would be
ruined by a bright flash. Increasing the ISO can help capture the scene.
ISO is an important aspect of digital photography to have an understanding of if you want to gain more control of your digital camera. Experiment with different settings and how they impact your images today – particularly learn more about Aperture and Shutter Speed which with ISO are a part of the Exposure Triangle.
Enjoy this post? Subscribe to dPS to get a weekly newsletter with all our latest tutorials – it’s all completely free.
Photography Tips for Beginners
Feel like a beginner at photography? We’ve compiled our best tutorials for beginners here on our Photography Tips for Beginners page.