healthcare portal registration
TRANSCRIPT

1

Healthcare Portal Registration
2

Healthcare Portal Registration
3

• Registration for the Healthcare Portal is accessed from
the Provider Welcome Page
• The purple arrow shows where Trading Partners will
click to register to use the portal
4

• When you click Register Now, this screen will appear.
• On this screen, you must select the option that best
describes your role.
• Providers will click on Trading Partners.
• Billing agents and Clearinghouses click on Billing
Agent.
• Subordinate users will need to click on Delegate –
the new terminology.
• Delegates cannot register until the Trading Partner
registers. This will be described later in this guide.
5

TRADING PARTNER ROLE
• If Trading Partner is selected by a provider, the user
will be brought to this screen and will need to enter all
of this information.
• Users will enter their Trading Partner ID and the
Trading Partner name.
• Remember the name must match the name you
enrolled with originally.
• Tax ID must then be entered.
• ID type will be NPI for most Trading Partners, or
Medicaid ID for atypical providers who do not qualify
for an NPI.
• The ID number will then be entered on the Provider ID
line. If the provider has an NPI – the NPI must be put
6

here and not the Medicaid ID. That will error
back to you.
• Do not enter taxonomy
• Click continue
6
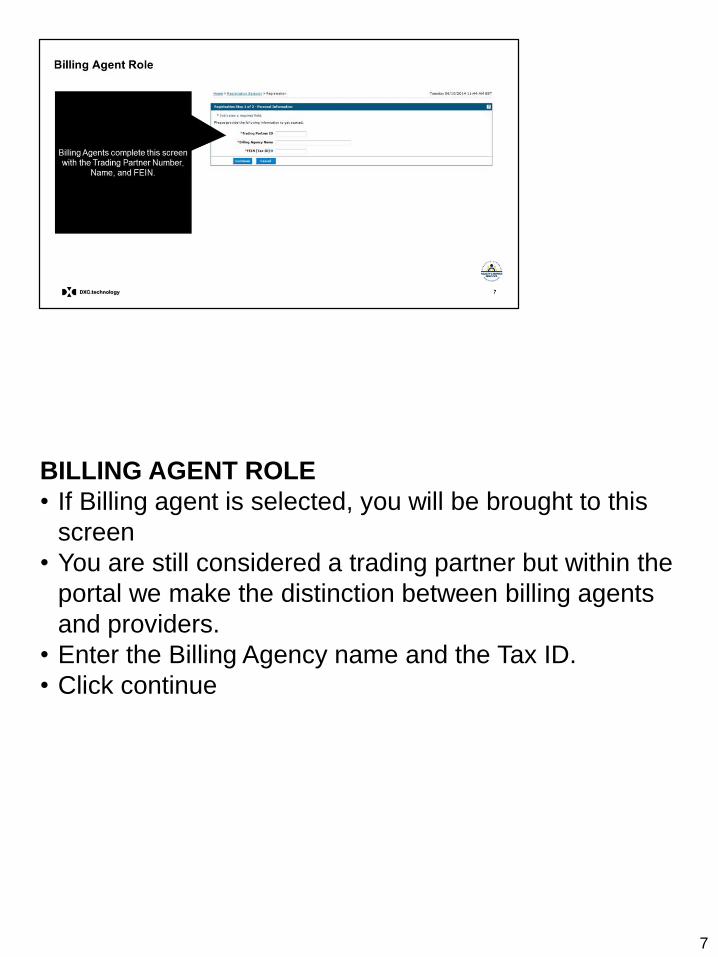
BILLING AGENT ROLE
• If Billing agent is selected, you will be brought to this
screen
• You are still considered a trading partner but within the
portal we make the distinction between billing agents
and providers.
• Enter the Billing Agency name and the Tax ID.
• Click continue
7

• Trading Partners and Billing Agents are both brought to this security screen.
• The first step is to select your user name. The user name should be your Trading Partner
number as before. If you click on the check availability box, it should return that it is available, since
you are the only one with that number. If you get an error that it is in use, be sure to verify that you
are using the correct Trading Partner number.
• Then you will choose a password, following guidelines on top of the page. (8 characters, minimum
of 1 number, 1 uppercase letter, 1 lower case, no special characters)
• The display name is how your user name will appear – You might want display name to be your
facility/company name, example: XXX Medical Associates, or XXX Medical Billing Co. or you can
use your trading partner number again.
• Complete the phone number, and email address fields
• Select a site key of your choice and a passphrase for security. The passphrase is not the password.
The passphrase is one more level of security. It should be something known to you….like
iloveicecream or describe your selected site key (ex. turtle) (20 character limit)
8

• Select two different challenge questions and enter the
answers.
• Read the user agreement and enter your name as an
electronic signature. The Provider ID (most cases
NPI) will be prepopulated.
• For billing agents, there will be no provider ID listed.
• When completed, the submit button will be enabled
and you click it to continue.
9

• If completed correctly, you will receive this
confirmation in a pop up box.
• It will be followed by this email. Click the link to
follow the verification instructions.
• This ensures that we have the correct email address
for contact information. Your registration is not
complete until you verify your email address.
10

Once you confirm the email address by following the
directions, you will get another email, shown above. You
should keep this email for reference to your user id and
password.
11

• Once registration is complete, return to the Portal
home page and log in, entering the user ID and hitting
Log In.
• Your password is entered on another screen.
12

• You will be brought to a security page.
• After answering the security question correctly you can
choose to register your computer.
• If you are on a private computer you will always
use to access the portal, you can select Register it
now. If you do, you will be brought to the
password page in the future, without answering a
security question.
• If you are on a public computer , do not register it.
You will be given a challenge question first when
you log in.
Reminder:
• If you are on the office computer that will often be
used, you will select the first option to register the
13

computer.
• If you are on a public computer that others may
use, and you want the challenge question to be
asked each time, you should click the second
option - This is a public computer. Do not
register it.
13

• When you are brought to the password page, you
should first identify that it is site key and passphrase
that you selected during registration.
• If they are both correct, enter the password and click
the Sign In button.
• If you forgot your password, you can click the Forgot
Password link.
14

• After entering your password, you will be brought to
the User’s Home Page. Some information has been
obscured for privacy.
• You will note the welcome message.(green arrow)
Notice in this example it says Welcome Thomas J
Anderson. That name was what the user selected as
the Display Name part of the security information.
• You can access important screens from your home
page: My Profile, Manage Accounts, and Trading
Partner profile.
• You will have the ability to update your own account
information (contact, challenge questions, site key,
token, password).
15

• By selecting My Profile, you will be brought to this
screen.
• On this screen you can edit your contact information,
preferences, challenge questions, and site key token
by using the edit buttons- see orange arrows
• You can also change your password using the Change
Password box on the bottom green arrow
16

• To change your password, you will need to enter your
current password first
• Then enter your new password
• Important note: your password may only be changed
once in one day, and you cannot choose a password
that was one of your last 6 passwords.
17

• One other very important function on this page is the
Add Role function.
• This is critical to be able to search claims and
eligibility.
• Click on the Add Role box. (shown in the enlarged
section)
18

• This function, Add Role, is how you add the function
to search claims and verify eligibility
• For you to be able to search claims and verify
eligibility, you must add that role, using the ID number
of an associated provider.
Ex. Dr Jones enrolls as a new trading partner. His
office manager then registers the Trading Partner
number to use the portal. In order to search claims or
verify eligibility, the office manager must now add the
search claims and eligibility role here by entering the
Trading Partner ID and then the Trading Partner’s tax
ID, Dr Jones NPI.
19

• To add this role, click Add role in the Role
section shown here with blue arrow. By
clicking the Add Role button, the Role panel will
be displayed.
• The Search Claims and Verify Eligibility role will
be in the Available Roles box.
• Enter the Trading Partner ID, Trading Partner
name and the tax ID (FEIN)
• Then enter the ID type (NPI or Medicaid ID for
atypical providers) and the Provider ID number
(taxonomy is optional)
• Click the submit button.
19

• After hitting submit – this will appear. (this image is just
a portion of the profile page, enlarged so you can see
the role has been added.)
• The original notation “Provider Trading Partners” will
be followed by “Search Claims and Verify Eligibility”
• For Billing Agents, “Provider Billing Agent” will be
followed by “Search Claims and Verify Eligibility”
20

• Also at the bottom of My Profile page, you may select
from 35 eligibility verification Service Type Codes to
customize your eligibility searches.
• Select the edit button to add the codes.
21

• Up to 6 entries can be made on your screen.
• Select the service types you want to use when
searching for eligibility. These codes will narrow the
information returned to the information you are
seeking.
• To enter more, select Show More Service Type Codes
to add more.
• Codes entered here will apply to all of your eligibility
verification searches.
22

• To manage your account, return to the User Home
Page and select Manage Account. (shown with the
purple arrow)
• You will need to add delegate users (previously called
subordinate users) who work on your behalf – to your
account.
• It is a two step process.
• Step one: Select the Add New Delegate tab.
• Enter their first and last name and date you are adding
them.
• Assign them a four digit pin number. (make a note of
this)
• Then select the functions that you want them to be
23

able to access
• To complete, click submit.
23

• The information will come back to you for review/edit.
• It will show the delegate being added, the pin number
and the functions you selected.
• You can edit, confirms or cancel the information.
24

• When you complete the process correctly, you will get
this confirmation pop up box with a delegate code,
shown by arrow. Make a note of this code.
• You will need to give the delegate both the pin and
the code to register themselves.
• You will also need to tell them the date that you added
them. They will need this to register.
• The delegate will be added to your delegate list shown
above.
• The delegate then goes back to the homepage, and
registers in the same way that the Trading Partner did.
(this will be explained on next few slides)
25

• Once a delegate user receives their PIN and Delegate
code, they must complete their registration.
• Delegates should go to the home page and click
Register Now
26

On the registration selector page, click Delegate
27

Delegates will be brought to this screen.
Enter all of the information INCLUDING the pin and
code that was given by the administrator.
They will use the date that the administrator added
them.
When completed, click continue.
28

• This will bring delegates to the security page where
they will select user name, password, site key,
passphrase and security questions.
• When delegates select their user name, they should
check availability by clicking the Check Availability
box.
• The pop up box will show if the name is available or
not. (see two boxes on top right)
• Once they complete all of the information and click
submit, they will get the confirmation to validate their
email address and registration will be complete.
• Important Note: Each delegate must have a unique
user name, and not a shared name with other
delegates. If the delegate needs to reset their
29

password, they need to use the “forgot
password” link.
29

• Once the delegate is registered, the Trading Partner is
able to change their status in the Manage Account
area, if needed.
• The Authorized user can change the status from active
to inactive and change which functions the delegate
can access. Delegates who leave their employment
should be changed to inactive immediately.
30

• The authorized user for the Trading Partner Account
will also manage the account profile.
• From the User home page, click on Trading Partner
Profile
• This page will allow the authorized user to update the
contact information.
• Trading Partner account holders who support multiple
providers under one NPI will have the ability to
associate additional providers to their account through
the add covered providers function.
31

• This screen is where Trading Partner will verify
information and make necessary changes.
• It lists contact information on the top, transaction sets,
and covered providers that were set up on enrollment.
• To change information, click edit, make changes and
then click save.
• If changes were accepted they get the confirmation
shown on the right.
32

• A covered provider is any provider that belongs to your
office, facility, or is part of your group under that
Trading Partner number.
• For new Trading Partners, the information listed when
you enrolled will be prepopulated here.
• But, if you need to add another covered provider you
would click add. (see the first image)
• Enter all the information and click save. ( see the
second image)
• Special Note for those providers using an outside
company for billing: If at some point you change billing
companies, you will need to instruct your original
billing agent to remove the 835 electronic admittance
advice and the 277 Unsolicited transaction associated
33

to your account, before your new company can
add them. These transactions can only be
associated to one entity.
33

If you should forget your user ID, select Forgot User ID
from home page and follow the instructions on the next
screens to retrieve your user ID.
34

• If you forget your password, you can receive a
temporary one.
• After entering your User ID and selecting “log in” you
will be brought to the password page.
• From the page asking for password, click Forgot
Password
35

• You will be asked one of your challenge questions.
• If you answer correctly, a temporary password will be
sent by email.
• When you log in with the temporary password, you will
be asked to change it to a password of your choice.
• Important note: You can only change password once
daily, and you can select a password that was one of
your last 6 passwords.
36

37

38